根德S700收音机中文说明书
調諧至一個無線電台 - Onkyo说明书

調諧至一個無線電台自動調諧1.按主機上的 TUNER 幾次以選擇"AM"或"FM"。
2.按 TUNING MODE ,使顯示螢幕上的"AUTO"指示燈亮起。
3.按TUNING 開始自動調諧。
找到一個電台後搜尋即自動停止。
調諧至某個無線電台時,顯示幕上的"TUNED "指示燈亮起。
調到一個 FM 無線電台時,"FM STEREO"指示燈亮起。
"TUNED "指示燈熄滅時,無聲音輸出。
FM 無線電台的訊號微弱時:無線電波信號可能較弱,這取決於其構建結構與周圍環境情況。
在此種情況下,請按照下一節"手動調諧"說明的程序,手動選擇所需的電台。
手動調諧1.按主機上的TUNER 幾次以選擇"AM"或"FM"。
AM/FM 接收詳情2.按 TUNING MODE,使顯示螢幕上的"AUTO"指示燈熄滅。
3.按 TUNING 選擇所需的無線電台。
每按一下按鈕,頻率改變 1 個步長。
按住按鈕時頻率會持續改變,鬆開後停止。
調台時注意顯示幕。
若要返回自動調諧:按主機上的 TUNING MODE。
本機自動調諧至一個無線電台。
這時通常應顯示"AUTO"。
直接調諧頻率用於直接輸入您要收聽的無線電台的頻率。
1.按遙控器上的 TUNER 幾次以選擇"AM"或"FM"。
2.按 D.TUN。
3.使用數字按鈕,在 8 秒內輸入無線電台的頻率。
例如,要輸入 87.5 (FM),請按 8、7、5 或 8、7、5、0。
如果輸入的數字錯誤,請按 D.TUN 並輸入正確值。
預設一個 AM/FM 無線電台可以記錄最多 40 個您最喜歡的 AM/FM 無線電台。
提前記錄無線電台讓您能夠直接調到喜歡的電台。
根德收音机使用说明书
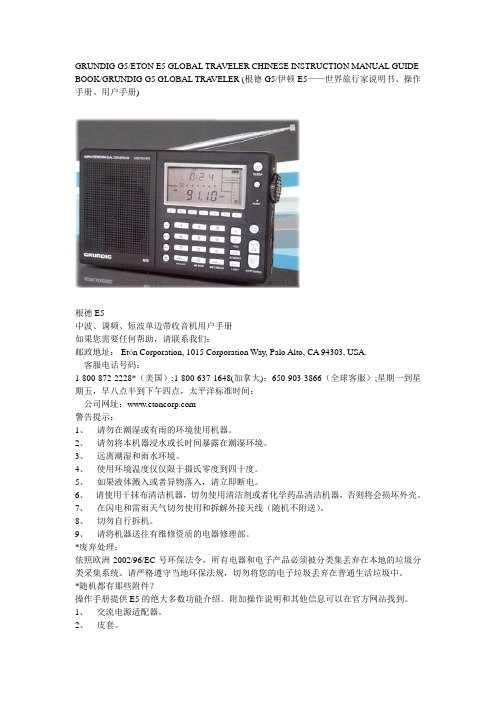
GRUNDIG G5/ETON E5 GLOBAL TRA VELER CHINESE INSTRUCTION MANUAL GUIDE BOOK/GRUNDIG G5 GLOBAL TRA VELER (根德G5/伊顿E5——世界旅行家说明书、操作手册、用户手册)根德E5中波、调频、短波单边带收音机用户手册如果您需要任何帮助,请联系我们:邮政地址: Etón Corporation, 1015 Corporation Way, Palo Alto, CA 94303, USA.客服电话号码:1-800-872-2228*(美国);1-800-637-1648(加拿大);650-903-3866(全球客服);星期一到星期五,早八点半到下午四点,太平洋标准时间:公司网址:警告提示:1、请勿在潮湿或有雨的环境使用机器。
2、请勿将本机器浸水或长时间暴露在潮湿环境。
3、远离潮湿和雨水环境。
4、使用环境温度仅仅限于摄氏零度到四十度。
5、如果液体溅入或者异物落入,请立即断电。
6、请使用干抹布清洁机器,切勿使用清洁剂或者化学药品清洁机器,否则将会损坏外壳。
7、在闪电和雷雨天气切勿使用和拆解外接天线(随机不附送)。
8、切勿自行拆机。
9、请将机器送往有维修资质的电器修理部。
*废弃处理:依照欧洲2002/96/EC号环保法令,所有电器和电子产品必须被分类集丢弃在本地的垃圾分类采集系统。
请严格遵守当地环保法规,切勿将您的电子垃圾丢弃在普通生活垃圾中。
*随机都有那些附件?操作手册提供E5的绝大多数功能介绍。
附加操作说明和其他信息可以在官方网站找到。
1、交流电源适配器。
2、皮套。
3、手挽带(和机身相连)。
4、用户手册。
电源使用四节五号碱性电池、锂电池或者镍氢电池。
或者使用交流电源适配器(随机附送)。
当开机时,在液晶屏幕右上角显示符号,指示正在使用电池或者使用电源适配器。
为了大可能的减少电池漏液事故,本机只限于使用高品质碱性电池、锂电池或者可充电镍氢电池。
Pioneer AVH-4200NEX 双层DVD播音收音机说明书

Application operation screenAV operation screenPhone menu screenAV operation keyThe AV operation screen appears.12 Displays the source list.Recalls equalizer curves.Refer to Using the equalizer on page 50 Selecting a sourceSource on the AV source selectionTouching an item on the list allows you to narrow down the options and proceed to the next operation.Appears when all characters are not displayed on the display area.If you touch the key, the rest are scrolled for display.Appears when items cannot be displayed on a single page.Drag the slider bar or the list to view any hidden items. Operating the time bar6Displays the characters that are entered.Moves the cursor to the right or left for a number of charac-ters equivalent to the number of touches.Enters the characters in the text box.Deletes the input text to the left of the cursor one letter at a time. Touching and holding the key deletes the letters to the left of the cursor in rapid succession.*6Switches to the preset dial screen.Refer to Using the preset dial lists on page 15 Switches to the phone book list.Refer to Calling a number in the phone book on page 15Recalls the preset channel stored to a key from memory.Stores the current broadcast frequency to a key.iTunes® tagging indicator andiTunes® tagging song status indicatorHOLDPerforms manual tuning.Performs seek tuning or non stop seek tuning.Releasing the key in a few seconds, skips to the nearest station from the current frequency.HOLDSkips files forwardor backward.*2Switches between playback and pause.Audio source screen 2Sets a repeat play range.: Repeats the current disc.: Repeats the current track.Video source screen 1Performs fast reverse orfast forward.Touch again to change play back thespeed.Stops playback.Sets a repeat play range.: Repeats all files.: Repeats the current chapter.: Repeats the current title.*6Resumes playback (Bookmark). This function is available for DVD-Video. You can memorize one point as a Bookmark for a disc (up to five discs).Skips files forwardor backward. Switches between playback and pause.*4Switches the current music information display.Sets a repeat play range.or : Repeats all files.: Repeats the current folder.or : Repeats the current file.Sets a repeat play range.: Repeats the current file.: Repeats the current folder. or: Repeats all files.Touch again to change the playback speed.Performs fast reverse or fast forward.*4Switches between Sets a repeat play range.: Repeats all files.: Repeats the current folder.Plays files in random order.Touch again to change the playback speed.Performs fast reverse or fast forward.*4Switches betweenAudio source screen 1Switches between playback and pause.Skips files forward or backward.Audio source screen 2Sets a repeat play range.: Repeats all in the selected list.: Repeats the current song or video.Video source screenPerforms fast reverse orfast forward.Apple Music Radio screenSwitches between playbackand pause.Skips tracks forward.Displays the pop-up menu forApple Music Radio.Displays the current source.Displays the menu screen.Press the button twice to hide the App control side bar.123 Touch to mute. Touch again to unmute.Sets whether to switch the sound mix function on or off. Left tab:The audio mix function is enabled (mix on) and the App volume is displayed.Right tab:The audio mix function is disabled (mix off).21Touch to mute. Touch again to unmute.21Touch to mute. Touch again to unmute.Skips tracks forward.Switches between playback Gives a “Thumbs Up” to the playing track.Adds information for the track currently playing to bookmarks.*2Skips files forward or backward.Plays files in random order. Playback screen 2Sets a repeat play range.Switches between playbackand pause.Selects a file from the list.Performs manual tuning.Selects a channel directly.*2Skips broadcasting channels.HOLDDisplays the preset channels.Select an item on the list("1" to "6") to switch to the preset channel.Skips files forward or backward.132Continues playing the current scanning song or channel.Skips to the previous/next song during TuneScan™ or to the previous/next channel during category scan.Cancels scan play.Using TuneMix™A High Speed HDMI® Cable (sold separately) is required forconnection.Refer to Using an HDMI input on page 64You can set the screen size for the video image.Refer to Changing the wide screen mode on page 55 CAUTIONFor safety reasons, video images cannot be viewed while yourSwitches between the video inputand the sound input.A Mini-jack AV cable (CD-RM10) (sold separately) is required for connection.Refer to External video component on page 63You can set the screen size for the video image.CAUTIONFor safety reasons, video images cannot be viewed while your vehicle is in motion. To view video images, stop in a safe place and apply the parking brake.Starting procedure (for AVSelects a track.Turns on or off the MIXTRAXoriginal visual display. Switches between playback and Sets to the original BPM (Beats Per Minute).Specifies the playback portion.: Plays back a middle portion.Displays the Parking Assist screen. Displays the Climate screen.Vehicle Information screen Climate screenParking Assist screenDisplaying the setting screen for iDatalinkFunctions and displays vary depending on the connected type of iDatalink adapter and the vehicle model.Display the “System” setting screen.。
自制FM八木天线及在东莞接收调频广播的情形
自制FM八木天线及在东莞接收调频广播的情形我在本坛潜水连年,受众大虾迫害甚深,“欲”火中烧,终于忍不住了,冒出头来四处寻觅毒源,去年11月窜到省会广州,一日之内购得两件毒品:根德的S700收音机和狮龙TD7010R收音头。
这两件毒物一起具有两大突出优势,音质好,接收性能优秀。
通过一番把玩,家中收音设备名分从头排位:S700侍奉在床头,狮龙收音头端坐于客厅,原有的德生PL230、道奇车机不是对手,都打入冷宫了,德生9700只能挂在浴室里供冲凉时解闷。
一、我的FM收音目标第一是高质量的音乐节目,音质要好,能解调出立体声,噪音要低。
我曾是一个HIFI发烧友,这一方面不能含糊。
晚上FM电台大体被老军医陈主任们霸占了,只有广东电台音乐台和东莞音乐台的节目可听,因此最好能收到香港电台第四台的节目(几年前我用道奇车机加上一副室外FM天线就能够收到,成天播出西乐和民乐,还有主持人缓和高雅的讲解伴随你进入悠扬优美的音乐世界)。
第二是遵循“兼听那么明”的祖训,香港各大电台的节目仍是要听的!这时能够不要立体声,有必然语音清楚度和低噪音就能够够了。
哦,对了,商台的“十八楼C座”还在播出吗?最后是无线电发烧友的普遍心愿,确实是FM远程接收。
一机在手,远远近近的调频电台尽收“耳”底,何等令人陶醉啊!二、DIY FM天线好马配好鞍,好机还需有副好天线,这是坛中大虾常常教诲咱们的。
小弟我住在东莞市区的花园新村一栋八层楼房的七楼,爬上楼顶只见四面楼房林立,商铺密集,远远近近还有很多高层建筑或已傲然屹立或正拔地而起,一些房顶上竖着各类发射天线,不知是小灵通仍是电话基地站,能够想见电磁污染严峻,接收环境复杂恶劣。
再加上珠三角一带FM电台多如牛毛,光有靓机,没有一副好天线,也是徒然。
市售20元左右的薄皮铝管FM天线,我曾用过两副,一年多就不堪风吹雨打,振子折弯变形了。
这次我决定自制一副。
我翻出《电视接收天线》和《自制高频甚高频天线手册》两本老书,增强了理论学习,明确了前进方向——五单元的半曲折合振子天线,还找到了调频发烧网站甘铭晓站长的FM天线设计图,使我免去了复杂的计算,在此表示深深的感激。
s700使用说明书(用户)

1概述 (7)1.1本说明书的用途 (7)1.2S700分析仪可以做什么 (7)1.2.1应用场合1.2.2应用限制1.3用户自己的责任 (8)1.3.1 一般责任1.3.2 测量有毒气体的特殊责任1.4S700分析仪用户指南 (9)1.4.1必须做什么?1.4.2可以做什么?1.4.3如果您希望了解操作功能1.5S700的特点 (11)1.5.1特点1.5.2分析模块1.5.3壳体类型1.5.4可选装置1.5.5用于UNOR和MULTOR模块的校准气室1.5.6横向灵敏度补偿1.5.7测量O2的分析模块1.5.8OXOR-P模块的横向灵敏度补偿1.5.9内部气路(流程图)1.5.10气接触部件材料1.5.11S720Ex / S721Ex的认证文件1.6用于涡轮发电机的特殊型号 (24)1.6.1 这种特殊型号的用途1.6.2 这种特殊型号的限制2安装 (25)2.1供货清单 (25)2.2安全说明 (25)2.3壳体安装 (27)2.3.1安装尺寸2.3.2安装位置和环境条件2.3.3壳体安装2.4样气连接 (29)2.4.1 正确的样气供给2.4.2 来自排放源的样气供给(举例)2.4.3 来自生产流程的样气供给(举例)2.4.4 通过NOx转化炉的样气供给2.4.5 样气接头2.4.6 样气气路连接2.4.7 不锈钢气路2.5 吹洗气连接(可选) (35)2.6校准气体供给 (35)2.6.1自动校准气体供给2.6.2装有样气制冷器的校准2.6.3H2O分析的特别说明2.7 打开和关闭壳体(不包括S700/S711) ............................ (36)2.7.1打开壳体前的安全措施2.7.2打开壳体2.7.3关闭壳体2.8 S720Ex/S721Ex电缆密封适配器的安装 (39)2.9电源连接 (39)2.9.1 电源连接的安全说明2.9.2 外接电源保险2.9.3改变需要的线性电压2.9.4连接电源电缆2.9.5 内部电源开关2.9.6 电气保险2.10信号连接 (44)2.10.1 端子连接2.10.2 信号电压输出2.10.3 允许最大负载和信号电缆参数2.10.4 信号连接的电感保护2.11测量值输出 (47)2.12模拟输入 (48)2.13开关输出 (48)2.13.1 开关功能2.13.2 电气功能2.13.3 接点连接(针式排列)2.14控制输入 (51)2.14.1 控制功能2.14.2 电气功能2.15本安型输出(可选) (51)2.16数字接口 (53)2.16.1 接口功能2.16.2 接口连接3启动 (55)3.1接通电源 (55)4 操作(一般说明) (57)4.1信号灯 (58)4.2状态信息 (58)4.3工作原理 (58)4.3.1 功能选择4.3.2菜单功能4.3.3键盘4.3.4 菜单层次5标准功能菜单 (61)5.1主菜单 (61)5.2测量显示 (61)5.2.1显示所有测量组分5.2.2显示所选测量组分5.2.3图表记录5.3状态显示 (64)5.3.1显示状态/故障信息5.3.2显示测量范围5.3.3显示测量值输出5.3.4显示报警极限值5.3.5显示仪器数据5.3.6显示漂移值5.4控制 (67)5.4.1 气泵开/关5.4.2确认报警5.4.3设定显示屏对比度5.4.4设定按键声音5.5校准 (69)5.6维修信号 (70)6校准 (71)6.1仪器校准介绍 (71)6.2校准气 (72)6.2.1程序设置校准气体6.2.2零点气(零点校准)6.2.3校准气(灵敏度校准)6.2.4单一校准气6.2.5校准气的正确供给6.3自动校准 (75)6.3.1自动校准设置显示6.3.2手动启动自动校准6.4.1校准气体供给方式6.4.2手动校准步骤6.4.3H2O的灵敏度校准6.5校准数据显示 (81)7专家功能菜单 (83)7.1进入专家功能菜单 (83)7.2时钟设置 (83)7.3测量值输出设置 (84)7.3.1选择取样点的特殊功能7.3.2选择测量组分7.3.3确定输出范围7.3.4显示输出范围7.3.5选择输出范围7.3.6活动零点设定/关闭某一测量值输出7.3.7校准过程中输出方式7.3.8取消某一测量值输出的设置7.4报警极限值 (87)7.5校准功能设置 (88)7.5.1不同的自动校准途径7.5.2自动校准前的准备7.5.3自动校准的确认7.5.4设置校准气体名义值7.5.5检查/设置校准气室名义值7.5.6设置漂移极限值7.5.7忽略外部校准信号7.5.8设置满度滞后时间7.5.9设置校准测量时间7.5.10设置校准期间横向灵敏度补偿7.6测量值显示 (93)7.6.1选择小数点位数7.6.2选择线段示意图范围7.6.3设置衰减(平均值计算)7.7取样点的选择 (94)7.7.1取样点选择器的功能7.7.2取样点选择器的注意事项7.7.3取样点选择器的确认7.8接口参数 (95)7.9 接口#1的通讯参数 (96)7.9.1设置ID字符7.9.2观察或忽略ID字符7.9.3设置与MARC 2000的连接7.9.4选择调制解调器的连接7.9.5调制解调器的控制7.10接口#2自动数据输出 (99)7.11设定和监测气体流量 (101)7.11.1 设定抽气泵的抽气量7.11.2 设定流量监测点7.12菜单语言选择 (101)7.13显示内部信号和设定值 (102)7.13.1 测量信号7.13.2 内部控制器的状态7.13.3 内部模拟信号显示7.13.4 内部供给电压7.13.5 内部模拟信号浏览7.13.6 桥臂调节7.13.7 线性化值7.13.8 输出仪器配置7.13.9 控制输入的状态7.13.10 软件版本7.14硬件测试 (106)7.15漂移置零 (107)7.16复位 (108)7.17基本校准 (108)7.17.1 基本校准的需要7.17.2 基本校准的基本步骤7.17.3 基本校准的要求7.17.4 基本校准步骤7.18程序下载 (112)8隐藏的专家功能菜单 (113)8.1进入隐藏的专家功能菜单 (113)8.2开关输出设置 (113)8.2.1功能原理8.2.2控制逻辑电路8.2.3安全准则8.2.4可选的开关功能8.2.5分配开关功能8.3控制输入设置 (115)8.3.1 可选的控制功能8.3.2 分配控制功能8.4 量程起始值附近的测量值消除 (116)8.5工作量程极限的报警 (116)8.6 存储仪器内设置 (117)8.7 数据传输 (118)9 M AR C2000软件远程控制 (119)9.1MARC2000远程控制的介绍 (119)9.2远程控制安装 (122)9.2.1电气连接9.2.2远程控制设置9.2.3PC机远程控制设置9.3开始和结束远程控制操作 (123)9.3.1开始远程控制9.3.2远程控制期间的状态信息9.3.3结束远程控制10维修 (125)10.1一般安全事项 (125)10.2维护计划 (125)10.3目检 (125)10.4测试电气信号 (126)10.5气密性检查 (126)10.6壳体清洁 (127)10.7 更换分析模块OXOR-E (127)11故障检查表 (129)11.1 如果S700 完全不工作 (129)11.2状态信息 (129)11.3如果测量值明显错误 (134)11.4如果测量值不稳定而你又不知道为什么 (134)12关机程序 (135)12.1避免冷凝的保护 (135)12.2关闭前的预防措施 (135)12.3关闭电源 (135)12.4注意事项 (136)13贮存和运输 (137)13.1正确存贮 (137)13.2正确运输 (137)13.3如果仪器需送回工厂修理 (137)适用范围本说明书适用于下列分析仪:- S710- S711- S715- S720Ex-S721ExS700 则包括了上述系列中的所有分析仪。
OpenSwim S700用户手册说明书

OPEN SWIM User GuideS700ContentsHOW IT WORKSEXTRA FEATURESCONTENTS REGULATORY AND LEGAL INFORMATIONCARE AND MAINTENANCEHEADPHONE CONTROLSIndicator flashes blue.*Audrey will say:“Welcome to Shokz”Turn off the headphones:Press and hold the Multifunction/Power Button until the LED Indicator flashes red.*Audrey will say:“Power off”Transferring Content TRANSFERRING CONTENT1. Connect OpenSwim to your computer.2. OpenSwim will become a hard drive named “OpenSwim”.Open “OpenSwim” on your computer.File3.Drag-and-drop audio files or folders into the “OpenSwim” hard drive.4.You may disconnect the USB Charging Cradle once file transfer is complete. The LED indicator will flash red and blue while OpenSwim organizes the files. The OpenSwim buttons are not functional temporally.* OpenSwim supports MP3, WAV, WMA, FLAC, AAC formats.(OpenSwim only supports WAV file in Linear PCM format.)TRANSFERRING CONTENT*Wearing your headphones the wrong way could causediscomfort. The transducers should rest in front of your ears.Pick up the headphones, bring them behind the back of the base of your neck,position the earhooks on your ears, then enjoy your music!HOW TO WEARpressing either the volume + or volume ‒ buttons.*Listening with headphones at high volume may affect your hearing and the audio will be distorted.*A “beep” will sound when the volume is at its max.Music Function Change EQ SettingPress and hold Mode Buttonfor 2 secondsPlay mode Click Mode Button on ce“Normal/Repeat/Shuf fle”Click Multifunction Bu tton once Play/pause musicPress and hold Volume+ for 2seconds while music is playingNext songPress and hold Volume— for 2seconds while music is playingPrevious songMUSIC FUNCTIONClick the volume + or volume - button while music is paused,Audrey will tell you the battery status:* "Battery high/Battery medium/Battery low/Charge me"EQ MODESSwimming Mode:For use while swimming General Mode:Balanced frequency for listening to musicOperate controls while music is playing How to switch EQ mode:Press and hold Mode button while music is playinguntil you hear a beep.*Audrey will say:“General mode/Swimming mode”SWITCHING EQ MODESCHANGING LANGUAGESYour headphones have four built-in languages: Chinese, English, Japanese and Korean.How to change the language:Press and hold both button volume + and volume - until you hear a beep.* Audrey will say:"中文/English/한국어/日本語"CHANGE THE FOLDER *It is recommended to use different folders to categorize music.Press and hold both Multifunction Button and volume - until you hear a beep.* Audrey will say:“Play Current Folder/Play All Folders”.*Press and hold Volume + and Multifunction Button for 2 seconds after you hear” Play Current Folder”. You will then hear, “Next folder”.Charging TipsThe headphones will automatically shut down when charging CHARGING TIPS1. Attach OpenSwim to the USB Charging Cradle. Make sure that Pogo Pins and Terminals are in contact.2. Connect the cradle to a computer or an adapter. The LED indicator will turn blue when charging is complete.· The MP3 player should be kept in a cool, dry place with ambient temperatures of 0-45°C. Using the headphones in extreme cold or heat may shorten the battery life.· If stored without use for an extended period of time, charge before use. · Clean the MP3 player with a dry, soft towel after use.· Dry the MP3 player before charging.Safety Warnings· The MP3 player might explode if the battery is improperly replaced. It shall only be replaced with a battery of the same type or of the equivalent performance.· Do not expose the MP3 player to sunlight, fire or similar high temperature.· Do not dissemble the MP3 player or subject the MP3 player to shock, squeeze and fire. Do not use the MP3 player if it swells up. Do not expose the MP3 player to high temperature.· If you use a power adapter, do purchase the supporting power adapter that is CCC certified and meets the standards and requirements.· Do not use the MP3 player when you are diving deeper than 2 meters.· The MP3 player might drop during intense exercises.· The MP3 player can be placed in fresh water, tap water, swimming pool, sea water, etc., but not be placed in soapy water, bath liquid, laundry detergent, high temperature or humidity.· The charging pole-piece in the MP3 player is with anti-corrosion treatment. However, as seawater is highly corrosive, you are recommended to clean the headset immediately when it is out of seawater.· Listening with this headset at high volume may affect your hearing and may lead to voice distortion.Note(1) OpenSwim only supports WAV file in Linear PCM format.(2) OpenSwim will power off after 1 hour of inactivity.(3) “Charge me“ prompt will occur at about 20 minutes of use time remaining.Design and specification are subject to change without notice. For the most up-to-date product information, please visit WARRANTYYour headphones are covered by a warranty.Visit our website at https:///pages/warranty-claim for details of the limited warranty.*Failure to register will not affect your limited warranty rights.TROUBLESHOOTINGIf you have any trouble or problems,please visit https:///pages/support-new for more support!If any part of your product is damaged or missing, do not use it.Contact authorized Shokz dealer or Shokz customer service.*Please note that the packaging envelope may vary depending onthe sales region.WHAT’S IN THE BOXOpenSwim headphones OpenSwim PackageOpenSwimBox USB Charging CradleOpenSwim Earplugs OpenSwim User Guide User Guide OpenSwim Legal StatementLegalREGULATORY AND LEGAL INFORMATIONManufacturerShenzhen Shokz Co., Ltd. Floors 1-4, Factory Building 26, Shancheng Industrial Park, Shixin Community, Langxin Community, Shiyan Street, Bao'an District, Shenzhen, Guangdong, ChinaTel: 400-6830-858 。
根德收音机使用说明书
GRUNDIG G5/ETON E5 GLOBAL TRA VELER CHINESE INSTRUCTION MANUAL GUIDE BOOK/GRUNDIG G5 GLOBAL TRA VELER (根德G5/伊顿E5——世界旅行家说明书、操作手册、用户手册)根德E5中波、调频、短波单边带收音机用户手册如果您需要任何帮助,请联系我们:邮政地址: Etón Corporation, 1015 Corporation Way, Palo Alto, CA 94303, USA.客服电话号码:1-800-872-2228*(美国);1-800-637-1648(加拿大);650-903-3866(全球客服);星期一到星期五,早八点半到下午四点,太平洋标准时间:公司网址:警告提示:1、请勿在潮湿或有雨的环境使用机器。
2、请勿将本机器浸水或长时间暴露在潮湿环境。
3、远离潮湿和雨水环境。
4、使用环境温度仅仅限于摄氏零度到四十度。
5、如果液体溅入或者异物落入,请立即断电。
6、请使用干抹布清洁机器,切勿使用清洁剂或者化学药品清洁机器,否则将会损坏外壳。
7、在闪电和雷雨天气切勿使用和拆解外接天线(随机不附送)。
8、切勿自行拆机。
9、请将机器送往有维修资质的电器修理部。
*废弃处理:依照欧洲2002/96/EC号环保法令,所有电器和电子产品必须被分类集丢弃在本地的垃圾分类采集系统。
请严格遵守当地环保法规,切勿将您的电子垃圾丢弃在普通生活垃圾中。
*随机都有那些附件?操作手册提供E5的绝大多数功能介绍。
附加操作说明和其他信息可以在官方网站找到。
1、交流电源适配器。
2、皮套。
3、手挽带(和机身相连)。
4、用户手册。
电源使用四节五号碱性电池、锂电池或者镍氢电池。
或者使用交流电源适配器(随机附送)。
当开机时,在液晶屏幕右上角显示符号,指示正在使用电池或者使用电源适配器。
为了大可能的减少电池漏液事故,本机只限于使用高品质碱性电池、锂电池或者可充电镍氢电池。
Sony 数字收音机手册说明书
Music System BT 產品說明恭喜您購買了 Music System BT 藍牙 CD 播放機!我們相信這是現今市場上難得一見的高音質 CD 播放機,透過藍牙無線技術您還可以將手機音樂無線傳輸到 Music System BT 上。
對於您迫切希望使用新收音機的心情,我們非常理解,但在開始使用之前,請務必仔細閱讀本說明書內容與安全說明;若有任何疑問,請隨時聯繫您的經銷商或 Tivoli Audio。
請保留本產品外箱與原廠包裝,以防您需要寄送;因為運送途中的損壞不屬於出廠保固的範圍中。
再次感謝您選擇 Tivoli Audio,希望 Music System BT 能為您帶來快樂愉悅的音樂體驗!5SNOOZE / MUTE 貪睡 / 靜音(機器上方):當鬧鐘響起時按下此按鈕可使鬧鐘靜音 7 分鐘,螢幕顯示倒數計時剩餘的貪睡時間。
旋轉音量旋鈕將取消貪睡模式。
在正常操作情況下按此按鈕可將正在播放的聲音靜音。
螢幕將顯示"Muted",再按一下可關閉靜音恢復正常播放。
6.7,8,9,0:除了 1-6 按鈕外,還可使用這些按鈕直接選擇 CD 曲目;輸入第一個數字後於兩秒內輸入第二位數字即可。
遙控器上 1-6 按鈕可切換喜好電台。
使用上 / 下箭頭按鈕可控制音量,左 / 右箭頭(CD 曲目)按鈕控制 FM / AM 調頻電台。
在近距離操作遙控器時螢幕可能出現閃跳,此為正常現象。
若遙控器需要更換電池請使用 3V 鋰電池 #CR2025,安裝時正極面向遙控器底部。
目錄按住 Music System BT 上的音量旋鈕,或按住遙控器上的 MENU 按鍵,進入主選單。
旋轉旋鈕並按下以變更目錄中的選項,或使用遙控器的☐❑按鍵與選擇鍵。
1.AUTO SCAN 自動掃描(AUX 與 藍牙目錄無此選項):按下選擇按鈕並使用☐❑箭頭與選擇鍵啟動或關閉自動掃描。
啟動後每次按下☐❑箭頭時就會自動搜尋可收聽電台。
關閉時☐❑按鈕可用於手動調頻。
Sony ICF-SW100收音机用户手册说明书
FEATURESContinuous Tuning permits reception of Cancel Button allows you to instantly more stations than ever before without change incorrect information keyed into any break on LW, MW or SW bands. the microprocessor.Fast response, Three Color LCD Band Select Buttons offer instantindicates station frequency in large easy- selection of any desired frequencyto- read numbers, including dual time, bandwidth on SW.Memory location, signal strength andbattery life. Tuning Speed Selector Switch permitsyou to tune stations at either a fast or Direct Access Keypad permits instant slow speed.tuning of any desired frequency from87.5 to 108MHz on the FM band and Adjustable Sleep Timer allowsfrom 150 to 29,999 KHz on the A M band. you to fall asleep to music or otherprogramming.Fifty-Four Memory Pre-sets offerinstant access to your favorite stations on Standby Mode turns on the radioLW,MW,FM and SW. automatically at a pre-set time either bybuzzer or radio program.Supplemental Tuning Controls allowfor maximum clarity of the selected Stereo Headphone Jack permitsfrequency. reception of FM multiplex stereo broad- casts.Dual Time Setting allows you to pre-setyour local time and UTC wORLD Time, or Folding Stand allows you to position the any two time zones with instant recall. radio either vertically or at an angle whilemaintaining stability.Scanning Circuit permits you to checkvarious frequencies on a certain band-width and lock on to it at random.CONTROL LOCATIONS1. T elescopic antenna 12. Meter Select Button2. Sleep Timer 13. Band Selectors3. Time Set 14. Numeric & Bandwidth Buttons4. Dual Time Button 15. Cancel Button5. Dual Time Set 16. Enter Command Button6. LCD Display 17. Memory Entry Button7. Power On/Off Button 18. External Antenna Jack8. Rotary Tuning Knob 19. DX/Local Switch [AM Sensitivity]9. Manual Tuning/Auto Scan Buttons [] 20. FM Stereo/Mono Mode Selector [V] A M Narrow/Wide Mode Selector 10. Standby Button 21. Stereo Headphone Jack23. 9K H z /10K H z S t e p S w i t c h24. H i g h /L o w To n e S w i t c h25. Vo l u m e C o n t r o l26. T u n i n g S p e e d C o n t r o l27. L o c k S w i t c h28. A l a r m S e t S e l e c t o r 29. F o l d i n g S t a n d30. B a c k -u p B a t t e r y C o m p a r t m e n t31. M a i n R a d i o B a t t e r y C o m p a r t m e n t2429CHOOSING A POWER SUPPLY You can operate the receiver using: Six A lkaline AA Batteries.Household A C [With optional A C adaptor] 12 Volt DC A utomobile Battery [With optional DC adaptor]USING BATTERIES 1. Press latch marked OPEN on bothbattery ompartment covers in hedirection of the arrow and lift off cover.2. Insert 4 AA batteries in the Radio compartment and 2AA batteries in the Back-up compartment. Be sure to position them as illustrated on the back of the radio, and on top of the lift-outribbons for easy removal.3. Replace both battery compartmentcovers over their respective compartments and press down until you hear it snap closedUSING HOUSE CURRENT [AC]The receive may be power by A Ccurrent using the AC adaptor (not included). Insert the small barrel shaped plug into thejack on the side of the radio marked DCIN 6V.Plug the other end of the adaptorinto a standard household outlet. WheneverAC is used, the batteries are automatically disconnected.PRELIMINARY SETTINGS SETTING THE CLOCKThe time is displayed in the 24 hour mode since most shortwave stations operate according to Greenwich Mean Time. Thisis the standard that is used throughout the world.SETTING DUAL TIMEA second time zone can be programmed into this unit such as your home time if you are traveling, or Greenwich Mean Time for instant access to short-wave broadcasts or the local time where ever you may be.BAND SELECTIONBAND FREQUENCY RANGE PROGRAM TYPE FM 87.5~108 Mhz Standard FMLW 150~519 Khz LongwaveMW 520~1710 KHz Standard AMSW 1.711~29.999 Mhz SW/13 Sub-BandsTUNING MODE ADJUSTING THE ANTENNA Locate the band you want to listen to in the following chart and adjust the antenna asYou may select any frequency using four different turning methods:Direct turningManual TuningScan TurningMemory TuningDIRECT TUNINGExample: To tune 100.70 Mhz on the FM band, follow this procedure:MANUAL TUNING16SCAN TUNINGUse scan tuning to quickly locate a station or to monitor several stations within a specific band.18MEMORY TUNINGYou may store up to eighteen different frequencies on the SW/FM bands and up to nine different frequencies on each of the other bands for instant selection of your favorite stations.Storing a FrequencyRECALLING A FREQUENCY20CLOCK RADIO OPERATION With this receiver you can fall asleep toyour favorite station by pressing the SLEEP button, or wake you to the morning news,or an alarm buzzer. Make the following settings with the POWER off!Setting the AlarmMISCELLANEOUS CONTROLSIn addition to standard tuning methods described previously, use the following controls for special operations.This switch adjusts the receiver's sensitivity.When you listen to a strong station and the signal is slightly distorted, set the switch to the LOCAL position for best reception. For normal or weak stations, set the switch to the DX position for maximum sensitivity.To reduce interference from adjacent stations, set this switch to the NARROW position and the interference will be suppressed. For maximum selectivity, leave the switch in the WIDE position.AM SENSITIVITY : DISTANCE/LOCAL SELECTTIVITY SWITCH AM: NARROW/WIDE SELECTIVITY SWITCHWhile not a control, you may consider using HEADPHONES to obtain the best audio clarity when listening to SW. Since many SW stations broadcast only marginal signals, using HEADPHONES will enable you to distinguish between the signal and the noise usually encountered at night. Be sure that the HEADPHONES terminate in a 1/8 inch plug, which is inserted into the HEADPHONE jack located on the left side of the radio, marked with the symbol .When the HEADPHONES are plugged in,the speaker is muted.Because the radio is capable of receiving FM multiplex stereo, the HEADPHONES should be stereo capable so that yourlistening enjoyment will be enhanced. When listening to stereo FM, be sure that the FM: STEREO/MONO switch is set to the STEREO position. This switch is located on the lift-hand side of the radio, just abovethe HEADPHONE jack.HEADPHONE USE23AM SENSDX LOCALUsing the LOCK switch preventsunauthorized operation of the radio and will also prevent the station you are listening to from being changed. When the LOCKthe POWER button ant TUNING controls are completely disabled. If the radio is on when the LOCK switch is moved to its upposition, you will not be able to turn it off. If the radio is off, with the LOCK not be able to turn it on. This will also prevent it from being turned on by accident, when packed in a suitcase or attache case. T o release the LOCK switch, simply move the switch down.To obtain optimum performance from this unit,especially when listening to SW an external antenna should be used to the EXTERNAL AN-TENNA A DAPTER and then plugged into the EXTERNAL ANTENNA jack located on the left side of the radio.Located on the right side of the unit, just beneath the ROTARY TUNING knob is a switch marked, MW STEP: 9K/10K. This switch selects the incremental frequency STEPS for the MW band, depending upon your geographic location. In the USA, 10K STEPS are used, so the switch should be set to its lowest position. In other parts of the world where they use 9K STEPS, move the switch to the uppermost position.LOCK SWITCH USEEXTERNAL ANTENNA USEMW STEP SELECTOR SWITCH24AM SENSDX LOCALEXT 9K 10KMW STEPCAR E AN D MAINTENANCE Thi s receiver is an exampl e of superior desig n and craftsmanship.The following suggestion swill help you care for the receiver so tha t you can enjoy it for yearsKeep theproduc t dry.If it doe s get wet,wipe it dry immediatel y.Liquids might containminerals that can corrod e the electronic circuits.Use and store the produc t only in normaltemperatur e environments.High tempera-ture s can shorten the lif e of electronic devices,damag e batteries,and distort or melt plastic parts.Handle the product gently and carefully. Dropping it can damag ecircuit board s and cases and can cause the product to work improperly.Keep the product away from dust and dirt, which can cause prematur e wear of parts.26Wipe theproductwitha dampened cloth occasionally to keep it looking new.Do not use harsh chemicals,cleaning solvents,or strong detergents to cleam to product.Use only fresh batteries of the recommend-ed size and type.Always remove old or weak batteries.They can leak chemicals that destroy electronic circuits.Modifying or tampering with the product's internal components can cause a malfunc-tion and might invalidate the product's warranty.SPECIFICATIONSSemi conductors: 1 LSI, 9 IC,8FET. 42 Transistors41 Diodes.Circuit:FM : HeterodyneAM (LW, MW, SW) Double-conversion heterodyne Frequency range:FM: 87.5-108 MHzLW: 150-519 KhzMW: 520-1710 KHzSW: 1.711~29.999 Mhzin which divided into 13 shortwave bands120M 2.300 - 2.495 MHz90M 3.200 - 3.400 MHz75M 3.900 - 4.000 MHz60M 4.750 - 5.060 MHz49M 5.900 - 6.200 MHz41M 7.100 - 7.350 MHz31M 9.400 - 9.990 MHz25M 11.600 - 12.100MHz21M 13.570 - 13.870MHz19M 15.100 - 15.800MHz16M 17.480 - 17.900MHz13M 21.450 - 21.750Mhz11M 25.600 - 26.100 MHz Antennas:LW/MW built-in Ferrite bar AntennaSW Telescopic Antenna or External Antenna (not included) FM Telescopic AntennaOutput: Nominal 440 mW at 10% T.H.D.Jacks: 1. DC jack for external power (6V)2. Headphone jack -3.5 for mini stereo headphones3. AM Ext. Ant. Jack.Power sources: 1. For Power when not playing radioUM 3 (AA size) battery x 2pcsfor memory/clock back-up (3V)2. For Power to play radio:1. UM 3 (AA size) battery 4pcs2. AC adaptor 6V/300 mA center negative Dimension: 196(L) x 125(H) x 36(T) mmWeight: 600 gAccessories: Stereo earphones, Carrying pouch.For those of you who would like to log yourfavorite stations, a convenient card is provided with yourreceiver which is simply inserted under the folding stand on the back of the radio. Please see illustration for complete detail.STATION LOG。
slhuabon收音机中文说明书
slhuabon收音机中文说明书
(一)插上电源适配器,并连接到收音机
(二)旋动功能开关,再旋TIME 或MINUTE 钮,分别可以设置时钟或闹钟时间
(三)功能开关旋到CLK 档位,按RADIO 键,开机并收听上次关机时电台
(四)按SOURCE 键,转换FM/DAB 功能
(五)在收音模式,长按UP/DOWN 键,向上或向下自动搜索电台并停台;短按UP/DOWN 键,向上或向下微调
(六)旋转hour/tuning,向上或向下微调电台频率,旋动minute/vol,可调节音量
(七)按info 键,查看电台相关信息
(八)按Menu 键,进入系统设置,配合UP/DOWN 键进行选择,按SEL 键确认
(九)按RAEPEAT/SELSET 键,确认存储搜到的电台
(十)按SLEEP 键,选择睡眠时间,对应图标显示
(十一)按SCAN 键,全频段自动搜台并存储签10 个电台
(十二)短按Preset,配合UP/DOWN,可以呼出预存电台
(十三)存台:长按UP/DOWN 搜索电台,停台后再长按Preset 键,配合UP/DOWN,找到存储位,按REPEAT/SELSET 即可(十四)闹铃响起,按AL ON/OFF 可关闭铃声
(十五)按RADIO 键,显示“standby”并关机。
- 1、下载文档前请自行甄别文档内容的完整性,平台不提供额外的编辑、内容补充、找答案等附加服务。
- 2、"仅部分预览"的文档,不可在线预览部分如存在完整性等问题,可反馈申请退款(可完整预览的文档不适用该条件!)。
- 3、如文档侵犯您的权益,请联系客服反馈,我们会尽快为您处理(人工客服工作时间:9:00-18:30)。
T811 ਝאױຏ㧄冕冢匴)UVOJOH*䝢冕冢ΔՈאױຏ㧄ऴ൷剽Ե咢䝢冕冢Ζ! ࣠ڕ咢ਢ LI[Δ䥉ऴ൷剽ԵΔࠏڕΚ! !
!!!!! 2!2!8!9!6!\GSFRVFODZ0n.CBOE^! ! ࠡխֱڶףਔ㢆ऱ\GSFRVFODZ0n.CBOE^ਢ૿ࣨՂऱԫ㠺厴Δ૿ٿՅ௫֗ਬ㠺厴ࢨ! ृਊ匴ຟش㪤Ẋֱऄ।قΖ!
!!!!ࡳ 21 䶣ڶژ㤋㠺咢Δร 2 㠺咢ਢ 22896Δร 3 㠺咢ਢ 22:76Ζ䶂ڇ! 冕נร 2 㠺咢Δ䥉剽ԵΚ! !!!!2!1!\NFNPSZ0GJMF^! ࡳ冕 נ21 䶣ऱร 3 㠺咢Δ䥉䬗具剽ԵΚ! !!!!2!1!\NFNPSZ0GJMF^! !!!!\NFNP0BG^! ࠡխ\NFNP0BG^شՊ㳪䮕ਬ㠺䶣ऱՀԫ㠺咢Ζڼ࣠ڕ㦍٦ਊԫ\ڻNFNP0BG^Δ! 䥉Ծ༛㩾ࠩร 2 咢Ζ! ! ! !!!!8/! ڕ۶֊䮨㡕֮ژٙ ! ! !!!!T811 ່ ڶאױڍ5 㠺㡕֮ژٙΖࡳݺ䣙㡘ร 2 㠺㡕֮ژٙ֊䮨ࠩร 3 㠺㡕! ֮ژٙΔ䥉䬗具剽ԵΚ! !!!!3!/!\NFNPSZ0GJMF^! ࣠ڕૹᄅ֊䮨ࠩร 2 㠺㡕֮ژٙΔ䥉剽ԵΚ! !!!!2!/!\NFNPSZ0GJMF^! ! ! !!!!9/!ڕ۶堚ೈԫ㠺䶣! ! !!!!堚ೈԫ㠺䶣რ࠺㷂堚ೈ具䶣խऱࢬ ڶ9 㠺咢Δࡳ堚ೈ 21 䶣Δ䥉! 剽ԵΚ! !!!!2!1!\NFNPSZ0GJMF^! !!!!|GSFF~! ! !
!!!!䶂ڇࡳ児ࡳ UJNF!JJ 䢠 33;67Δ䥉٣ਊ\UJNF!J0JJ^ࠌৠኟ䯲 قUJNF!JJΔ! ྥٿ剽ԵΚ! !!!!3!3!/!6!7!\UJNF!J0JJ^! !!!!ࣹრΚ剽Ե㦍吗㦍ڍڶאױẊڤΔࠏڕ剽Ե! !!!!741! !!!!1741! !!!!7/41! !!!!17/41! !!!!ຟ। ق7;41Ζ! ! !
ቤተ መጻሕፍቲ ባይዱ
!!!!ࡳݺ䣙բ伨ނભ㧺հଃऱԫ㠺咢 22896 شՂ૪ޡ啒 ࠩ࣋ژ21 䶣ऱร 2 㠺! 咢ۯᆜΔ䶂ڇژ䤖ԫ㠺咢 22:76 ࠩ 21 䶣ऱร 3 㠺咢ۯᆜΔ䥉൷Հװ剽! ԵΚ! !!!!!2!2!:!7!6!\GSFRVFODZ0n.CBOE^! !!!!!2!1!\TUPSF^! !!!!!\Tfbsdi!Tfmfdu?^! !!!!!\TUPSF^! !!!!!\DM^! ࠡխ\Tfbsdi!Tfmfdu?^।قਊ\=Tfbsdi!Tfmfdu?^㪤㠺厴ऱ׳䣱Ζਊ具厴ऱؐ䣱! אױ儻٠䰬)DVSTPS*ཛؐฝ㣅Δਊ具厴׳䣱אױ儻٠䰬ཛ׳ฝ㣅ΖՂ૪ޡ啒խਊ! 具厴׳䣱ԫڻ༉ਢނ٠䰬ฝ㣅ࠩ 9 㠺咢ऱร 3 㠺ۯᆜΔ٦ਊԫڻ༉ฝ㣅ࠩร 4 㠺!ۯ ᆜΖ࣠ڕ٠䰬ฝࠩऱਬ㠺ۯᆜ䯲ق..䰬兂Δ䥉।ق具ۯᆜ䢠़Ι࣠ڕਬ㠺ۯᆜ! 䯲ق+䰬兂Δ䥉।ق具ۯᆜբ伨ڶژԫ㠺咢Ζբ伨ڶژԫ㠺咢ऱۯᆜאױຏ㧄! Ղ૪ޡ啒ޏ㡹Ζ࣠ڕუނբ伨ڶژਬ㠺咢ऱۯᆜ堚ೈΔ䥉ڇאױ٠䰬ฝࠩ具! ۯᆜٿΔਊ\GSFF^厴ΖՂ૪ޡ啒խऱ\DM^厴ش䝢伬ژޔ䤖ױ㳪咢㣅܂Ζ! ! ! !!!!6/! ڕ۶䢠ԫ㠺䶣ದ! ټ ! !!!! ط9 㠺咢Ეګऱԫ㠺䶣ڶאױԫ㠺ڗټΖࡳݺ䣙䢠 21 䶣ದټΔ䥉! 21 䶣֟۟٣ڶژԫ㠺咢Δլ౨䢠़Ζ䶂ڇࡳ䢠،ದ ټCCDΔ䥉൷Հ! װ剽ԵΚ! !!!!2!1!\NFNPSZ0GJMF^! !!!!\B.[01.:^! !!!!\UVOJOH^! !!!!\Tfbsdi!Tfmfdu?^! !!!!\UVOJOH^! !!!!\Tfbsdi!Tfmfdu?^! !!!!\UVOJOH^! !!!!\B.[01.:^! ࠡխ冕冢匴\UVOJOH^ش䝢㳪䮕 ئڗB.[Ε䀀 ڗ1.: ࠡ֗א،ԫࠄฤ㢆Ζದټړհ!ٿ Δٿא剽Ե! !!!!2!1!\NFNPSZ0GJMF^! 㳪䮕具咢㦍Δৠኟ㢸䯲 قCCD ڗ㱐Ζ! ! ! !!!!7/!ڕ۶冕נԫ㠺ژ䤖ऱ咢 ! !
国外精品收音机专卖 旺旺ID :guanwg2008 需要的朋友请加我。长
期外!提收供音机根德各系列等国
店铺名称:“巴伐利亚
收!音!机!!”!!!!!!!!!!!!!!!!!!!!!Hsvoejh!Tbufmmju!811! ࠌش円ࣔ!
! !!!!!!!!!!!!!!!!!!!!!!!!!!!!!!!!!!!!!!!!!!!!!!兣ᖞΚੋػ㣴!!!!!!!!!!!!!!!!!!!!!!!!!!!!!!!!! !!!!!!!!!!!!!!!!!!!!!!!!!!!!!!!!!!!!!!!!!!!!!!㡌䨫 JEΚCmbdlXijuf! !!!!!!!!!!!!!!!!!!!!!!!!!!!!!!!!!!!!!!!!!!!!!!f.nbjm;!jdfnboA{kv/fev/do! !!!!!!!!!!!!!!!!!!!!!!!!!!!!!!!!!!!!!!!!!!!!!!t.nbjm;!௨ۂՕ䝤۫ᄻீ㡢儳ጩխ֨! ! ! !
!!!!\NFOV^!!!!!!!!!!!!!┛儶児ࡳ UJNFS!3Δڼ㦍ৠኟ䯲ق#PO!3#Δ༼ق剽Ե䬞㦍吗! !!!!3!2!/!4!6!\NFOV^!!!剽Ե䬞㦍吗Δڼ㦍ৠኟ䯲ق#TUBUJPO#Δ༼ق剽Ե䶣! !!!!3!\NFNPSZ0GJMF^!!!!㳪䮕բ咕ژऱ 3 䶣! !!!!\NFNP0BG^!!!!!!!!!!! !!!!\NFNP0BG^!!!!!!!!!!㳪䮕 3 䶣ऱร 4 咢! !!!!\NFOV^!!!!!!!!!!!!!┛儶Δڼ㦍ৠኟ䯲ق#PGG!3#Δ༼ق剽Ե䤤㦍吗! !!!!3!2!/!4!7!\NFOV^!!!ڼ㦍Δৠኟ䯲ق#UJNFS!3#Δ児ࡳ!ګݙ ! !!!!! !!!!5/!ڕ۶ᖿ0ᆃַࡳ㦍䬞0䤤פ౨! !!!!!
!!!!! ࣠ڕ咢ਢ NI[ ܶץڢ՛䀀㭠Δאױऴ൷剽ԵΔࠏڕΚ!
!!!!! 2!2!/!8!9!6!\GSFRVFODZ0n.CBOE^!!!!!
!!!!! ࣠ڕ咢ਢ NI[ ܀լܶ՛䀀㭠Δ䥉Ꮑף૿ٿڇԫ㠺՛䀀㭠ΔࠏڕΚ!
!!!!! :!1!/!\GSFRVFODZ0n.CBOE^!
Բ/!㦍匥ࡳ㦍ᒧ!
!
2/!ڕ۶児ࡳ㦍吗! ! !!!!T811 אױ児ࡳ㤋㠺㦍吗Δԫ㠺 UJNF!JΔԫ㠺 UJNF!JJΖࡳݺ䣙䶂ڇ!ނ UJNF!J 児ࡳ䢠 32;67Δ䥉٣儂ኘԫՀৠኟՂਢܡբ伨䯲 قUJNF!JΔ࣠ڕլਢ UJNF!J! ۖਢ UJNF!JJΔ䥉ਊԫՀ\UJNF!J0JJ^֊䮨ࠩ UJNF!JΔء࣠ڕ䝢༉բ伨䯲 قUJNF!J! ༉լਊ UJNF!JΖྥٿ剽ԵΚ! !!!!3!2!/!6!7!\UJNF!J0JJ^!
! !!!!ࣹრΚ! ွ :1NI[ 㪤Ẋ䀀ଖՂ՛Պ 211 ऱ咢Δڇ剽Ե㦍ԫࡳ૿ٿᇿ՛䀀㭠Δ!
ܡ䥉 :1 㢸ᇞ勋ګंऱं叿)xbwfmfohui!jo!nfufst!gps!TX*ΖֺڕΔ剽Ե! !!!!:!1!\GSFRVFODZ0n.CBOE^!
! 䥉ৠኟ༉㢸䯲!ق ! !!!!TX!4411/1!lI{!!:1n! ! ܛ㨕呄Ղઌ㣞Պ剽ԵԱ! !! ! !!!4411!\GSFRVFODZ0n.CBOE^! ࢨृ!!!!4/4!\GSFRVFODZ0n.CBOE^! ! ! !!!!4/!ڕ۶ژ䤖ԫ㠺䶣! ! !!!!٣冕冢ࠩਬ㠺咢Δྥٿਊ\GSFF^ 75 㠺䶣ۯᆜխୌԫ㠺ਢ़ऱΖࡳ! 21 䢠़Δ䥉൷Հװ剽ԵΚ! !!!!2!1!|TUPSF~! ࠡխ|TUPSF~।ق叿ਊ\TUPSF^㪤㠺厴ΔՀٵΖ࣠ڕհছ 21 䶣ۯᆜբ伨ڶژਬ㠺! 咢Δ䥉אՂ㣅܂㰒㢸شᄅ咢ཙ䮨㢛咢Δ㢛咢䀀⇕㤥ೈΖ؆ΔشՂ૪! ֱऄژ䤖ऱ䶣咢 ڇ࣋ژ9 㠺咢ۯᆜխऱଈۯΖ! ! ! !!!!5/!ڕ۶ژ䤖ԫ㠺ױ㳪咢 ! !
3/!䤤Պ䬞0䤤㦍吗! ! !!!!T811 אױ児ᆜ㤋㢑䬞0䤤㦍吗Δݺ䣙լނรԫ㢑䬞0䤤㦍吗㲯䢠! UJNFS!2ΔނรԲ㢑䬞0䤤㦍吗㲯䢠 UJNFS!3Ζ! !!!!ࡳ㤋㢑䬞0䤤㦍吗݁բ児ࡳΔᩉԫ䬞0䤤㦍吗ૹڶ㿆Δ䥉ਊאՀ! 䥉㢊Κ! !!!!)2*!䬞㦍吗䭇ਢ٣Պ䤤㦍吗! !!!!)3*!UJNFS!3 ٣Պ UJNFS!2! ! ! 4/!ڕ۶ࡳ㦍䬞0䤤! ! !!!!ࡳݺ䣙 ނUJNFS!2 児ࡳ䢠 32;41 䬞Δ32;51 䤤Δ䬞۞㣅ᐾ࣋ 2 䶣ऱ! ร 3 咢Δ䥉ޡ啒ڕՀΚ! !!!!\NFOV^! !!!!\Tfbsdi!Tfmfdu?^!!!ڼ㦍ৠኟ䯲ق#UJNFS!2#! !!!!\NFOV^!!!!!!!!!!!!!┛儶児ࡳ UJNFS!2Δڼ㦍ৠኟ䯲ق#PO!2#Δ༼ق剽Ե䬞㦍吗! !!!!3!2!/!4!1!\NFOV^!!!剽Ե䬞㦍吗Δڼ㦍ৠኟ䯲ق#TUBUJPO#Δ༼ق剽Ե䶣! !!!!2!\NFNPSZ0GJMF^!!!!㳪䮕բ咕ژऱ 2 䶣! !!!!\NFNP0BG^!!!!!!!!!!㳪䮕 2 䶣ऱร 3 咢Δ࣠ڕլਊڼ厴䥉㳪䮕 2 䶣ऱร 2 咢! !!!!\NFOV^!!!!!!!!!!!!!┛儶Δڼ㦍ৠኟ䯲ق#PGG!2#Δ༼ق剽Ե䤤㦍吗! !!!!3!2!/!5!1!\NFOV^!!!ڼ㦍Δৠኟ䯲ق#UJNFS!2#Δ児ࡳ!ګݙ !!!!ࡳݺ䣙 ނUJNFS!3 児ࡳ䢠 32;46 䬞Δ32;47 䤤Δ䬞۞㣅ᐾ࣋ 3 䶣ऱ! ร 4 咢Δ䥉ޡ啒ڕՀΚ! !!!!\NFOV^! !!!!\Tfbsdi!Tfmfdu?^!!!ڼ㦍ৠኟ䯲ق#UJNFS!2#! !!!!\Tfbsdi!Tfmfdu?^!!!ڼ㦍ৠኟ䯲ق#UJNFS!3#!