根德650收音机说明书
根德S700收音机中文说明书
T811 ਝאױຏ㧄冕冢匴)UVOJOH*䝢冕冢ΔՈאױຏ㧄ऴ൷剽Ե咢䝢冕冢Ζ! ࣠ڕ咢ਢ LI[Δ䥉ऴ൷剽ԵΔࠏڕΚ! !
!!!!! 2!2!8!9!6!\GSFRVFODZ0n.CBOE^! ! ࠡխֱڶףਔ㢆ऱ\GSFRVFODZ0n.CBOE^ਢ૿ࣨՂऱԫ㠺厴Δ૿ٿՅ௫֗ਬ㠺厴ࢨ! ृਊ匴ຟش㪤Ẋֱऄ।قΖ!
!!!!ࡳ 21 䶣ڶژ㤋㠺咢Δร 2 㠺咢ਢ 22896Δร 3 㠺咢ਢ 22:76Ζ䶂ڇ! 冕נร 2 㠺咢Δ䥉剽ԵΚ! !!!!2!1!\NFNPSZ0GJMF^! ࡳ冕 נ21 䶣ऱร 3 㠺咢Δ䥉䬗具剽ԵΚ! !!!!2!1!\NFNPSZ0GJMF^! !!!!\NFNP0BG^! ࠡխ\NFNP0BG^شՊ㳪䮕ਬ㠺䶣ऱՀԫ㠺咢Ζڼ࣠ڕ㦍٦ਊԫ\ڻNFNP0BG^Δ! 䥉Ծ༛㩾ࠩร 2 咢Ζ! ! ! !!!!8/! ڕ۶֊䮨㡕֮ژٙ ! ! !!!!T811 ່ ڶאױڍ5 㠺㡕֮ژٙΖࡳݺ䣙㡘ร 2 㠺㡕֮ژٙ֊䮨ࠩร 3 㠺㡕! ֮ژٙΔ䥉䬗具剽ԵΚ! !!!!3!/!\NFNPSZ0GJMF^! ࣠ڕૹᄅ֊䮨ࠩร 2 㠺㡕֮ژٙΔ䥉剽ԵΚ! !!!!2!/!\NFNPSZ0GJMF^! ! ! !!!!9/!ڕ۶堚ೈԫ㠺䶣! ! !!!!堚ೈԫ㠺䶣რ࠺㷂堚ೈ具䶣խऱࢬ ڶ9 㠺咢Δࡳ堚ೈ 21 䶣Δ䥉! 剽ԵΚ! !!!!2!1!\NFNPSZ0GJMF^! !!!!|GSFF~! ! !
!!!!䶂ڇࡳ児ࡳ UJNF!JJ 䢠 33;67Δ䥉٣ਊ\UJNF!J0JJ^ࠌৠኟ䯲 قUJNF!JJΔ! ྥٿ剽ԵΚ! !!!!3!3!/!6!7!\UJNF!J0JJ^! !!!!ࣹრΚ剽Ե㦍吗㦍ڍڶאױẊڤΔࠏڕ剽Ե! !!!!741! !!!!1741! !!!!7/41! !!!!17/41! !!!!ຟ। ق7;41Ζ! ! !
先锋 DEH-P4950MP CD接收机 说明书

使用说明书CD接收机DEH-P4950MP中文(简体)感谢惠购先锋产品。
请通读使用说明书以了解本型号的正确操作方法。
通读完毕之后,请妥善保存,以备日后参考。
开始使用之前关于本机4关于本说明书4敬请访问我公司网站4关于WMA4关于MP34关于AAC4iPod兼容性5防盗保护5–拆卸前面板5–安装前面板5遥控器的使用和保养5–安装电池5–使用遥控器5基本操作按钮功能6–主机6–遥控器6开启本机与选择播放源7调节音量7关闭本机7调谐器收听收音机8高级调谐器操作介绍8保存和调出广播频率8保存信号最强的广播频率9收听强信号9内置式CD播放机播放CD10内置式CD播放机高级操作介绍10重复播放10随机播放曲目10扫描CD的曲目11暂停CD播放11使用压缩和BMX11在当前碟片中以10首曲目为单位搜索11使用碟片标题功能11–输入碟片标题11–显示碟片标题12使用CD TEXT功能12–显示CD TEXT碟片上的文字信息12 WMA/MP3/AAC/WAV播放机播放WMA/MP3/AAC/WAV文件13内置式CD播放机(WMA/MP3/AAC/WAV)高级操作介绍14重复播放14随机播放曲目14扫描文件夹和曲目14暂停播放WMA/MP3/AAC/WAV14使用压缩和BMX15在当前文件夹中以10首曲目为单位搜索15显示WMA/MP3/AAC/WAV碟片上的文字信息15–播放WMA/MP3/AAC碟片时15–播放WAV碟片时15多碟CD播放机播放CD16多碟CD播放机高级操作介绍16重复播放16随机播放曲目17扫描CD和曲目17暂停CD播放17使用ITS播放列表17–用ITS编序创建播放列表17–播放ITS播放列表18–删除ITS播放列表中的曲目18–删除ITS播放列表中的CD18使用碟片标题功能18–输入碟片标题18–显示碟片标题19使用CD TEXT功能19–显示CD TEXT碟片上的文字信息19使用压缩和低音增强19Zhcn 2在iPod上播放歌曲在iPod上收听歌曲21浏览歌曲21显示iPod上的文字信息21高级iPod适配器操作的介绍22重复播放22按随机顺序播放歌曲(随机播放)22暂停播放歌曲22音频调节音频调节说明23使用平衡调节23使用均衡器23–调出均衡器曲线23–调节均衡器曲线24–微调均衡器曲线24调节响度24使用超低音扬声器输出24–调节超低音扬声器设定25使用高通滤波器25增强低音25前座音像增强器(F.I.E.)25调节音源级25其他功能调整初始设置27设置时钟27设置FM调谐间隔27设置AM调谐间隔27切换辅助设定27设定后置扬声器输出和超低音扬声器输出28开关时钟显示28使用AUX播放源28–关于辅助设备的连接方式28–选择AUX作为播放源28–设定AUX标题29附加信息内置式CD播放机错误信息的含义30碟片与播放机的使用指南30双面碟片30WMA、MP3、AAC和WAV文件31–层次示例31–压缩音频兼容性31规格32Zhcn3关于本机小心!请勿让本机接触液体。
德劲1123收音机说明书
德劲1123收音机说明书
DE1123包装盒中的物品有:DE1123主机、120V交流电转5V直流电的适配器、标准的USB转迷你USB连接线、3节650毫安时的7号镍氢电池、立体声耳塞、机套、手绳以及英汉双语使用说明书。
DE1123的尺寸约为3×5英寸,仅为0.5英寸薄。
此机很轻便,整机完成度也不错,不过,我的这台机器的后壳上有一点儿轻微的划痕。
外观看上去很漂亮,也很结实。
所有按键的手感都不错。
仅有的插口为立体声耳机插口和用以连接市电和电脑的迷你USB插口。
收音机使用方法:
首先需要产生电源。
然后按下启动键,打开声音以后需要收听频道选择想要听的频道即可。
TUNING是调谐钮,就是你找台的旋钮,MW是中波,SW是短波,FM是调频,MW、SW、FM应该是一个多位开关或是电子开关切换的。
2、你按下MW,收音机收中波,中波传送距离较远,比如中央广播电台、临省的广播电台都可收到,但音质不太好。
FM是调频广播,它的距离较近,但音质好,可传送立体声信号,比如你所在城市的都市调频、交通台、音乐台等等。
3、把收音机打到SW,拉出天线,最好接一个室外天线,可收听到短波,短波最远,可收听到国外电台。
、音乐台等等。
奥迪收音机使用说明书

表示方向的说明“左”、“右”、“前”、“后”都是指车辆的行驶 方向。
* 选装装备。
® ® 注册商标使用符号 ® 标出。
没有这个符号并不等于允许随意使用商标所用的文字和符号。
⇒
提示参阅本段中的“注意!”。如果这个提示带有页数,相应
的“注意”则不在本段中。
注意! 带有此符号的文本包含与您的安全相关的信息,并提醒您可能有 事故及受伤的危险。
引言 .......................................................... 39 调试 ......................................................... 40 启动电话运行模式 ..................................... 43 输入 PIN/PUK ........................................... 43 拨号 .......................................................... 44 接听 / 拒接通话 ......................................... 46 结束通话 .................................................... 46 其它设置 ................................................... 46
一般操作 ...............................................17
开启和关闭 ................................................ 17 操作原理 ................................................... 17 显示屏 ....................................................... 17 音量设置 ................................................... 21 音质设置 ................................................... 22 时钟设置 ................................................... 23
黑德克·RT650旋转工具说明书

Copyright Black & Decker2RT650_UK.PM513-11-2000, 11:033RT650_UK.PM513-11-2000, 11:234ROTARY TOOL RT650CONGRATULATIONS!You have chosen a Black & Decker tool. Our aim is to provide quality tools at an affordable price.We hope that you will enjoy using this tool formany years.EC DECLARATION OF CONFORMITY RT650Black & Decker declares that these products conform to:98/37/EC, 89/336/EEC, 73/23/EEC,EN 50144, EN 55014, EN 60555Level of sound pressure, measured according to EN 50144:RT650L pA (sound pressure)dB(A)66.8L WA (acoustic power)dB(A)79.9Always wear ear protection if the sound pressure exceeds 85 dB(A).Hand/arm weighted vibration value according to EN 50144:RT6501.4 m/s2Colin Wills Director of Engineering BDCI, 4/F, 2 Dai Wang Street Tai Po Industrial EstateTai Po NT, Hong Kong INTENDED USEYour Black & Decker rotary tool RT650 has been designed for the following applications using the appropriate accessories:-Drilling in wood, metal and plastics-Cutting wood, metal and plastics-Engraving and shaping wood, metal,plastics and fibreglass-Polishing metal, glass and stone-Grinding metal, glass and ceramics-Sharpening metal-Sanding wood and fibreglass-Removing rust and corrosion from metalThis tool is intended for consumer use only.SAFETY INSTRUCTIONSWarning symbolsThe following symbols are used in this manual:Denotes risk of personal injury, loss of lifeor damage to the tool in case of non-observance of the instructions in thismanual.Denotes risk of electric shock.Read the manual prior to operation.Know your toolx Warning! When using mains-poweredtools, basic safety precautions, includingthe following, should always be followedto reduce the risk of fire, electric shock,personal injury and material damage.x Read all of this manual carefully beforeoperating the tool.x Before operating the tool, make surethat you know how to switch the tool off in an emergency.x Retain this manual for future reference.E N G L I SHRT650_UK.PM513-11-2000, 15:105General 1.Keep work area clean Cluttered areas and benches can cause accidents.2.Consider work area environment Do not expose the tool to rain. Do not use the tool in damp or wet conditions. Keep the work area well lit. Do not use the tool where there is a risk of causing fire or explosion, e.g. in the presence of flammable liquids and gases.3.Keep children away Do not allow children, visitors or animals to come near the work area or to touch the tool or mains cable.4.Dress properly Do not wear loose clothing or jewellery, as these can be caught in moving parts. Preferably wear rubber gloves and non-slip footwear when working outdoors. Wear protective hair covering to keep long hair out of the way.5.Personal protection Always use safety glasses. Use a face or dust mask whenever the operations may produce dust or flying particles. Wear ear protection whenever the sound level seems uncomfortable.6.Guard against electric shock Prevent body contact with earthed or grounded surfaces (e.g. pipes, radiators,cookers and refrigerators). Electric safety can be further improved by using a high-sensitivity (30 mA/30 mS) residual current device (RCD).7.Do not overreach Keep proper footing and balance at all times.8.Stay alert Watch what you are doing. Use common sense.Do not operate the tool when you are tired.9.Secure workpiece Use clamps or a vice to hold the workpiece.It is safer and it frees both hands to operate the tool.10.Connect dust extraction equipment If devices are provided for the connection of dust extraction and collection facilities, ensure that these are connected and properly used.11.Remove keys and adjusting wrenches Always check that keys and adjusting wrenches are removed from the tool before operating the tool.12.Extension cablesBefore use, inspect the extension cable andreplace if damaged. When using the tooloutdoors, only use extension cables intendedfor outdoor use.e appropriate toolThe intended use is described in this instruction manual. Do not force small tools or attachments to do the job of a heavy-duty tool. The tool will do the job better and safer at the rate for whichit was intended. Do not force the tool.Warning! The use of any accessory orattachment or performance of any operation with this tool other than those recommendedin this instruction manual may present a risk ofpersonal injury.14.Check for damaged partsBefore use, carefully check the tool and mains cable for damage. Check for misalignment and seizure of moving parts, breakage of parts,damage to guards and switches and any otherconditions that may affect its operation.Ensure that the tool will operate properly and perform its intended function. Do not use the tool if any part is damaged or defective.Do not use the tool if the switch does not turn iton and off. Have any damaged or defective parts repaired or replaced by an authorised repair agent. Never attempt any repairs yourself.15.Unplug the toolUnplug the tool when it is not in use, beforechanging any parts of the tool, accessories orattachments and before servicing.16.Avoid unintentional startingDo not carry the tool with a finger on theon/off switch. Be sure that the tool is switchedoff when plugging in.17.Do not abuse cordNever carry the tool by its cord or pull it to disconnect from the socket. Keep the cordaway from heat, oil and sharp edges.18.Store idle toolsWhen not in use, tools should be stored in a dry,locked up or high place, out of reach of children.19.Maintain tools with careKeep cutting tools sharp and clean for better and safer performance. Follow the instructions for maintenance and changing accessories.RT650_UK.PM513-11-2000, 11:036Keep handles and switches dry, clean and free from oil and grease.20.Repairs This tool complies with relevant safety requirements. Repairs should only be carriedout by qualified persons using original spare parts; otherwise this may result in considerable danger to the user.Additional safety instructions for rotary tools Wear safety glasses or goggles whenoperating this tool.x Only use Black & Decker accessoriesrecommended for this tool.x Never use any worn, cracked or damagedaccessories.x Hold the tool away from your face whenswitching on.x Keep your fingers away from rotating accessories.x Be careful not to accidentally hit any foreign objects in the workpiece.x Be aware that accessories may be hot shortly after use.x If an accessory jams, switch the tool off and unplug it before attempting to free the accessory.x Clamp the workpiece whenever possible,especially when using cutting discs.x Wear a dust mask whenever sanding.x Thoroughly remove all dust after sanding.x Take special care when sanding paint which is possibly lead based or when sanding some woods (e.g. MDF) and metal which may produce toxic dust:-Wear a dust mask specifically designed for protection against lead paint dust and fumes and ensure that persons within or entering the work area are also protected.-Do not let children or pregnant women enter the work area.-Do not eat, drink or smoke in the work area.-Dispose of dust particles and any otherdebris safely.ELECTRICAL SAFETYThe electric motor has been designed for onevoltage only. Always check that the power supplycorresponds to the voltage on the rating plate.This tool is double insulated in accordance with EN 50144; therefore no earth wire is required.Mains plug replacement (U.K. & Ireland only)x Should your mains plug need replacing and you are competent to do this, proceed as instructed below. If you are in doubt, contact an authorised repair agent or a qualified electrician.x Disconnect the plug from the supply and remove the fuse from the plug.x Cut off the plug and dispose of it safely; a plug with bared copper conductors is dangerous if engaged in a live socket outlet.x Only fit 13 Amperes BS1363A approved plugs fitted with the correctly rated fuse (1).x The cable wire colours, or a letter, will be marked at the connection points of most good quality plugs. Attach the wires to their respective points in the plug (see above).Brown is for Live (L) (2), blue is for Neutral (N) (4).x Before replacing the top cover of the mains plug ensure that the cable restraint (3)is holding the outer sheath of the cable firmly and that the leads are correctly fixed at the terminal screws.x If the plug has a fuse cover, make sure that the fuse cover is fitted. Do not use the plug if thefuse cover is missing or damaged.Never use a light socket.E N G L I SHRT650_UK.PM513-11-2000, 11:037Using an extension cable Always use an approved extension cable suitable for the power input of this tool (see technical data). Before use, inspect the extension cable forsigns of damage, wear and ageing. Replace the extension cable if damaged or defective.When using a cable reel, always unwind the cable completely. Use of an extension cable not suitable for the power input of the tool or which is damaged or defective may result in a risk of fireand electric shock.CARTON CONTENTS The carton contains:1Rotary tool 1Wrench 1Accessories and application guide 1Instruction manual x Carefully unpack all parts.x Please note that additional items may be found in the carton, depending on the letter suffix following the catalogue number of yourtool.OVERVIEW (fig. A)1.On/off switch 2.Spindle lock 3.Speed control knob 4.Collet 5.Collet nut6.Spindle7.Suspension hookASSEMBLY Before assembly, make sure that the tool is switched off and unplugged.Fitting and removing accessories (fig. B)x Make sure that the tool is switched off and unplugged.x Activate the spindle lock (2) by setting it to position B as shown.x Slacken the collet nut (5) by turningcounterclockwise.x Insert the shaft of the accessory into the collet as far as it will go.x Securely tighten the collet nut.x Release the spindle lock (2) by setting it toposition A as shown.x Make sure that the collet size matches the shaft diameter.x Never tighten the collet nut without an accessory in the collet.x Tighten and loosen the collet by hand if possible. If necessary, use the supplied wrench to loosen the collet. Do not useany tools that could mark the finish orbreak the collet.Replacing collets (fig. C)This tool is supplied with a 3.2 mm collet.Different sizes are available as an accessory toaccomodate a wide range of accessories. To fit thecorrect collet for the accessory to be used:x Make sure that the tool is switched off and unplugged.x Activate the spindle lock (2) by setting it to position B as shown.x Remove the collet nut (5) by turningcounterclockwise.x Pull the collet off the spindle (6).x Place the new collet into the spindle.x Loosely screw the collet nut onto the spindle.x Release the spindle lock (2) by setting it toposition A as shown.USELet the tool work at its own pace.Do not overload.x If you are not sure about the correctspeed setting, start with a low speedsetting and gradually increase it untilyou find the optimum setting.x Where indicated, never exceed the speed rating of an accessory. The wire brush accessory must not be used above speed setting 3 (15,000 min -1).Variable speed control (fig. D)The variable speed control allows you to adapt the speed of the tool to the application.RT650_UK.PM513-11-2000, 11:038x Set the control knob (3) to the desired setting.At setting 1 the tool will operate at low speed,8,000 min -1. At setting 6 the tool will operate at the maximum speed, 27,000 min -1.The table below suggests settings for different applications.Application Setting Drilling holes 4-5Cutting metal 5-6Engraving metal 4-5Removing rust 1-2Sharpening 3-5Polishing 1-2Sanding wood 5-6Removing paint 3-5Switching on and off (fig. E)x To switch the tool on, slide the on/off switch (1)forward (position I ).x To switch the tool off, slide the on/off switch to the rear (position 0).Hints for optimum use x Always hold the tool securely as shown in fig. F. For precision work, hold the tool near the front.x Do not exert too much pressure on the tool.x Consult your retailer for more information onavailable accessories.MAINTENANCE Your Black & Decker tool has been designed to operate over a long period of time with a minimum of maintenance. Continuous satisfactory operation depends upon proper tool care andregular cleaning.Before performing any maintenance,switch off and unplug the tool.x Regularly clean the ventilation slots in your tool using a soft brush or dry cloth.x Regularly clean the motor housing using a damp cloth. Do not use any abrasive orsolvent-based cleaner.PROTECTING THE ENVIRONMENT Should you find one day that your tool needs replacement, or if it is of no furtheruse to you, think of the protection of theenvironment. Black & Decker repair agents will accept old Black & Decker tools andensure that they are disposed of in anenvironmentally safe way.Technical dataRT650Voltage V AC 230Power input W 90No-load speed min -18,000 - 27,000Weight kg$GUARANTEE (UK, SOUTH AFRICA,AUSTRALIA AND NEW ZEALAND ONLY)Should your Black & Decker product become defective due to faulty materials or workmanship,within 24 months from the date of purchase,we guarantee to either replace all defective partsor -at our discretion- to replace the unit free ofcharge, provided that:x The product is returned to us or one of our authorised repair agents with proof of purchase.x The product has not been used for trade,professional or hire purposes.x The product has not been subjected to misuse or neglect.x The product has not sustained any damagethrough foreign objects, substances or accidents.x Repairs have not been attempted by anyone other than our service staff or authorised repair agents.This guarantee is offered as an extra benefit anddoes not affect your statutory rights.AFTER SALES SERVICE(UK, SOUTH AFRICA, AUSTRALIA ANDNEW ZEALAND ONLY)Black & Decker offers a nationwide network of authorised repair agents. The use of other than genuine Black & Decker parts and accessories may reduce the performance of the tool and cause personal injury and material damage.E N G L I SHRT650_UK.PM513-11-2000, 11:039The terms and conditions of the warranty could alsobe rendered void.OUR AFTER SALES SERVICE POLICY(UK, AUSTRALIA AND NEW ZEALAND ONLY)Full details on our after-sales service are available on the Internet at .Alternatively, contact our Service and Information Centre at the address towards the back of this manual.It is our aim that all Black & Decker customers should be totally satisfied with theirBlack & Decker product and our after sales service.If any help or advice is needed, please contact your local Black & Decker repair agent.If your product needs repair, please take or send it to an authorised repair agent, providing proof ofpurchase if claiming a guarantee repair.OTHER DIY TOOLSBlack & Decker has a full range of tools that make DIY jobs easy. If you would like further information on the following products, please contact our Service and Information Centre (see the address page towards the end of this manual) or your local Black & Decker retailer.DrillsCordless screwdriversCordless drills/screwdriversSandersJigsawsCircular sawsMitre sawsAngle grindersPlanersRoutersCorded and cordless multi-purpose tools Paint strippersWorkbenchesWe also have a wide range of accessories for the above tools.Not all products are available in all countries.RT650_UK.PM513-11-2000, 11:0310RT650_UK.PM513-11-2000, 11:0311RT650_UK.PM513-11-2000, 11:031213RT650_UK.PM513-11-2000, 11:03AustraliaD E WALT Industrial Power Tool Company Tel. 03 9895 92007 Clarice RoadFax 03 9899 7465Box Hill, Victoria 3128New ZealandBlack & DeckerTel. 09 579 760081 Hugo Johnson DriveFax 09 579 8200Penrose, Auckland, New Zealand South AfricaBlack & Decker South Africa (Pty) Ltd Tel. (011) 653-1400Physical address:Fax (011) 653-1499146 Lechwe Street Corporate parkRandjiesfontein, Midrand Postal address:Postnet Suite 107, Private Bag X65Halfway House 1685United KingdomBlack & Decker Tel. 01753 511234210 Bath RoadFax 01753 551155Slough, Berkshire SL1 3YDHelpline 01753 574277RT650_UK.PM513-11-2000, 15:0614RT650_UK.PM513-11-2000, 11:0315GUARANTEE CARDPlease complete this section immediately after the purchase of your tool and send it to Black & Decker in your country. If you live in Australia or New Zealand, please register by using the alternative guarantee card supplied.¡RT650_UK.PM513-11-2000, 15:0616。
根德收音机使用说明书
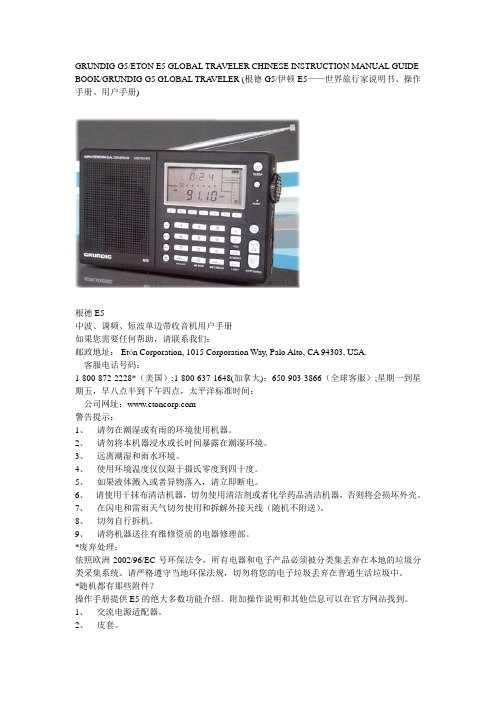
GRUNDIG G5/ETON E5 GLOBAL TRA VELER CHINESE INSTRUCTION MANUAL GUIDE BOOK/GRUNDIG G5 GLOBAL TRA VELER (根德G5/伊顿E5——世界旅行家说明书、操作手册、用户手册)根德E5中波、调频、短波单边带收音机用户手册如果您需要任何帮助,请联系我们:邮政地址: Etón Corporation, 1015 Corporation Way, Palo Alto, CA 94303, USA.客服电话号码:1-800-872-2228*(美国);1-800-637-1648(加拿大);650-903-3866(全球客服);星期一到星期五,早八点半到下午四点,太平洋标准时间:公司网址:警告提示:1、请勿在潮湿或有雨的环境使用机器。
2、请勿将本机器浸水或长时间暴露在潮湿环境。
3、远离潮湿和雨水环境。
4、使用环境温度仅仅限于摄氏零度到四十度。
5、如果液体溅入或者异物落入,请立即断电。
6、请使用干抹布清洁机器,切勿使用清洁剂或者化学药品清洁机器,否则将会损坏外壳。
7、在闪电和雷雨天气切勿使用和拆解外接天线(随机不附送)。
8、切勿自行拆机。
9、请将机器送往有维修资质的电器修理部。
*废弃处理:依照欧洲2002/96/EC号环保法令,所有电器和电子产品必须被分类集丢弃在本地的垃圾分类采集系统。
请严格遵守当地环保法规,切勿将您的电子垃圾丢弃在普通生活垃圾中。
*随机都有那些附件?操作手册提供E5的绝大多数功能介绍。
附加操作说明和其他信息可以在官方网站找到。
1、交流电源适配器。
2、皮套。
3、手挽带(和机身相连)。
4、用户手册。
电源使用四节五号碱性电池、锂电池或者镍氢电池。
或者使用交流电源适配器(随机附送)。
当开机时,在液晶屏幕右上角显示符号,指示正在使用电池或者使用电源适配器。
为了大可能的减少电池漏液事故,本机只限于使用高品质碱性电池、锂电池或者可充电镍氢电池。
森海塞尔 hd650 耳机 使用手册说明书
HD 650 BedienungsanleitungInstruction ManualNotice d‘emploiIstruzioni per l‘usoInstruction ManualHD 650With the HD 650, Sennheiser has followed the changes in the liste-ning habits of music-lovers and the way in which they experience sound. In spite of all purism and the highest demands on precise sound reproduction, a slight change in listening behaviour is detec-table. Today many music-lovers want to feel the sound more in-stead of plainly analysing it. The HD 650 now captivates your sen-ses where you used to be a mere observer. It allows total submersi-on into an ocean of music and lets you completely forget your sur-roundings.Come and enjoy this unique listening experience!Featuresy Top-of-the-range open, dynamic hi-fi stereo headphonesy Systems with narrow tolerances (± 1 dB), hand-picked in pairs y High-quality titanium silver finishy Specially developed acoustic silk for precise, uniform attenuation over the entire areay Detachable connecting cable made from highly conductive OFC copper, Kevlar-reinforced, with very low handling noisey Extremely lightweight aluminium voice coils ensure excellent transient responsey Exceptionally comfortable to wear due to elliptical design adapted to the shape of the earsy Can be directly connected to stationary hi-fi components of the highest quality, in particular SACD, DVD-A and CD players6The soundy Exceptionally natural, spatial and accurate soundy Suitable for all types of musicy Balanced, contoured bassy Real deep bass reproductiony Exceedingly authentic voice reproductiony Unobtrusive, natural strings and wind instrumentsy Pleasantly natural treblesy Silvery, clear cymbalsTechnical dataFrequency response16 – 30,000 Hz (-3 dB)10 – 39,500 Hz (-10 dB) Acoustic principle dynamic, "open-aire" Frequency curve diffuse-field loudnessequalizationNominal impedance300 ΩSound pressure level at 1 kHz103 dB (1 V rms)Long-term max. input power500 mW as per EN 60-268-7 THD ≤ 0.05 %Sound coupling to the ear circumauralHeadphone caliper pressure approx. 3.4 N ± 0.3 NWeight (without cable)260 gPlug 6.3 mm ∅ stereo jackAdapter 6.3 --> 3.5 mm ∅ stereo jack Connecting cable OFC signal cable, 3 m7AttentionHearing DamageAvoid using headphones with the volume turned up for an exten-ded period of time. Doing so can damage your hearing. It is advi-sable to keep the volume at a moderate level at all times. Replacing the ear cushionsThe earcushions have to be replaced from time to time for hygienic reasons. Ring earcushions with foam disk (1 pair, cat. no. 50635). Cleaning the headphonesTo clean the headphones, use a soft damp cloth. If necessary, the headphones can be cleaned with soapy water (use a mild cleanser such as washing-up liquid).Note:Never use solvent-containing cleansers!821Hinweise zur Benutzung / Instructions for use/Consignes d'utilisation / Istruzioni per l'utilizzo / Indicaciones para el uso / GebruiksaanwijzingHörer aufsetzen und einrichtenPut on the headphones and adjustthe headbandMettre les écuoteurs et ajusterl'arceau du casqueApplicare e preparere la cuffiaColocar y ajustar el cascoHoofdtelefoon opzetten en instellen22Polster wechselnReplacing the earpads Replacement des coussinetsd'oreilleSostuire i cuscinettiCambiar las almohadillasHet vervangen van de oorkussens Art. no. 50635Kabel wechselnHow to change the cables Changer les cablesSostuire i caviCambiar el cableHet vervangen van de kabel Art. no. 8859123KonformitätserklärungSennheiser electronic GmbH & Co. KG erklären, dass dieses Gerät die anwendbaren CE-Normen und Vorschriften erfüllt.ApprovalSennheiser electronic GmbH & Co. KG declare that this device is in compliance with the applicable CE standards and regulations. CertificationSennheiser electronic GmbH & Co. KG déclarons que cet appareil est en conformité avec les normes CE.CertificazioneSennheiser electronic GmbH & Co. KG diachiara che questo appa-recchio risponde alle normative e alle prescrizioni CE applicabili. AutorizacionSennheiser electronic GmbH & Co. KG declara que este aparato cumple las normas y directrices de la CE aplicables. VergunningSennheiser electronic GmbH & Co. KG verklaren, dat dit toestel voldoet aan de toepasselijke CE-normen en voorschriften.Diese Service-Nummer gilt nur für DeutschlandSennheiser electronic GmbH & Co. KG30900 Wedemark, GermanyPhone +49 (5130) 600 0Fax +49 (5130) 600 300Printed in Germany Publ. 10/03 92182/A02。
TECSUN收音机说明书
一、选择波段收音机开机后,您可以按调频/中波转换按键(15),选择调频或中波波段,按短波·米波段转换键(16)可选择短波波段,屏幕上会显示您按键后选择的波段。
在选择短波波段后,可用短波·米波段转换键 (16)选择不同的短波米波段,每按一下此键,则从当前米波段跳到下一个米波段的最低频率。
当利用短波·米波段转换键切换到短波米波段后,并在 3 秒钟内按上、下(9、10)调节键,可向上或向下选择短波米波段。
利用短波·米波段选择按键(16)切换到短波米波段时,显示屏右上方同时显示米波段数字,停止米波段切换操作 3 秒钟后,自动返回到时间显示状态。
这时,上、下键也从短波米波段选择切换状态返回到调整频率状态。
本机短波米波段频率扫描范围,比国际标准短波米波段范围稍宽。
二、搜索电台pl-550 有七种搜索电台的方法: 1.手动搜索电台;2.自动搜索电台;3.直接输入电台频率;4.调频/中波的自动存台(ats)功能; 5.直接输入2位存储地址数字,调出当前页面下的地址频率;6.进入搜索存储器状态,手动或自动搜索已存储的电台频率;7.用旋转式调谐钮调出已存储的电台。
(1)手动搜索【方法一】手动搜索电台:利用向上或向下调节键(9或10)或用旋转式调谐旋钮(28)搜索电台,搜索过程中,可按调台快慢键(8)选择快速或慢速调谐步进,各波段频率按下表规定的步长标准变化,直到找到电台为止。
手动调谐适合于:——搜索那些比较弱的电台信号;——搜索密集拥挤的强电台信号;——搜索那些频率不在米波段范围内的短波电台信号,而且可以从1711到 29999 khz 频率范围内逐点搜索电台信号。
旋转式频率微调旋钮的其它重要用途:当相邻的频率有很强电台,其声音隐隐约约地串入您正在收听的电台频率时,您可以利用旋转式调谐旋钮,把频率故意微调偏离正常收听的频率,以避开干扰,fm微调,mw和sw微调1-2khz。
【方法二】自动搜索电台:按住向上或向下调节键(9或10),直到显示频率自动变化即松手,当收到电台时会自动停止搜索。
Polycom SoundPoint IP 650用户手册说明书
BASIC PHONE FEATURES
PLACING A CALL Using the Handset: Pick up the handset and dial the number or dial the number first, and then pick up the handset. Using the Speakerphone: 1. With the handset on-hook, press:
1
REDIAL
Press the Redial soft key or Redial to redial the most recently dialed number.Biblioteka DO NOT DISTURB
Press
to prevent the phone
from ringing on incoming calls. A Do
Call forwarding is not available on shared lines.
If call forwarding is configured on the call server (invoked using * code dialing or from a PC-based application), then particulars and menu options may vary.
CALL FORWARDING To enable call forwarding: 1. Press the Forward soft key from the phone’s idle display or press Menu and select Features, and then Forward. 2. Select a Forwarding Type from Always, No Answer, and Busy. 3. For all types, enter a number to forward all future calls to. 4. For No Answer, enter the number of rings before forwarding. 5. Press the Enable soft key to confirm Call Forwarding. A moving arrow icon appears for that line to confirm Call Forwarding is enabled.
根德收音机使用说明书
GRUNDIG G5/ETON E5 GLOBAL TRA VELER CHINESE INSTRUCTION MANUAL GUIDE BOOK/GRUNDIG G5 GLOBAL TRA VELER (根德G5/伊顿E5——世界旅行家说明书、操作手册、用户手册)根德E5中波、调频、短波单边带收音机用户手册如果您需要任何帮助,请联系我们:邮政地址: Etón Corporation, 1015 Corporation Way, Palo Alto, CA 94303, USA.客服电话号码:1-800-872-2228*(美国);1-800-637-1648(加拿大);650-903-3866(全球客服);星期一到星期五,早八点半到下午四点,太平洋标准时间:公司网址:警告提示:1、请勿在潮湿或有雨的环境使用机器。
2、请勿将本机器浸水或长时间暴露在潮湿环境。
3、远离潮湿和雨水环境。
4、使用环境温度仅仅限于摄氏零度到四十度。
5、如果液体溅入或者异物落入,请立即断电。
6、请使用干抹布清洁机器,切勿使用清洁剂或者化学药品清洁机器,否则将会损坏外壳。
7、在闪电和雷雨天气切勿使用和拆解外接天线(随机不附送)。
8、切勿自行拆机。
9、请将机器送往有维修资质的电器修理部。
*废弃处理:依照欧洲2002/96/EC号环保法令,所有电器和电子产品必须被分类集丢弃在本地的垃圾分类采集系统。
请严格遵守当地环保法规,切勿将您的电子垃圾丢弃在普通生活垃圾中。
*随机都有那些附件?操作手册提供E5的绝大多数功能介绍。
附加操作说明和其他信息可以在官方网站找到。
1、交流电源适配器。
2、皮套。
3、手挽带(和机身相连)。
4、用户手册。
电源使用四节五号碱性电池、锂电池或者镍氢电池。
或者使用交流电源适配器(随机附送)。
当开机时,在液晶屏幕右上角显示符号,指示正在使用电池或者使用电源适配器。
为了大可能的减少电池漏液事故,本机只限于使用高品质碱性电池、锂电池或者可充电镍氢电池。