企鹅路由插件介绍
初级级别的WordPress插件使用指南
初级级别的WordPress插件使用指南WordPress是一款广泛应用于建立和管理网站的开源内容管理系统。
而其中的插件机制,则为用户提供了强大的扩展功能和个性化定制的能力。
本文将以初级级别的WordPress插件使用为主题,依次介绍插件的安装与管理、常用插件的功能与使用、插件设置与优化等内容。
一、插件的安装与管理WordPress提供了便捷的插件安装与管理功能,让用户能够轻松地搜索、安装和管理插件。
具体步骤如下:1.进入插件管理界面:在WordPress管理后台的侧边栏中,点击“插件”选项,进入插件管理界面。
2.搜索并安装插件:在插件管理界面的顶部搜索框中输入插件名称或关键字,点击“搜索插件”按钮,WordPress会列出相关插件供选择。
选择插件后,点击“安装”按钮进行安装。
3.激活插件:安装完成后,点击“插件”列表中的“激活”按钮,激活插件以启用其功能。
4.卸载插件:如需卸载插件,可以在插件列表中找到对应插件,然后点击“删除”按钮进行卸载。
二、常用插件的功能与使用WordPress拥有众多的插件,提供了各种不同的功能和特性。
下面是几个常用插件的功能与使用介绍。
1. Yoast SEO:这是一款用于搜索引擎优化(SEO)的插件。
它可以帮助用户进行网站关键词优化、标题和描述优化、生成Sitemap等。
安装并激活插件后,在每篇文章编辑页面的底部会出现SEO设置栏,用户可以根据插件的引导进行相应的优化设置。
2. Akismet:这是一款用于防止垃圾评论的插件。
一旦安装并激活插件,用户将不再需要担心垃圾评论的困扰。
插件会自动对评论进行过滤,将垃圾评论标记并移入垃圾箱。
3. Contact Form 7:这是一款用于创建联系表单的插件。
用户可以使用简单的标记语言来创建自定义表单,然后将其添加到页面或文章中。
插件还提供了表单提交的邮件通知功能。
4. WooCommerce:这是一款功能强大的电子商务插件。
2018年极路由web认证插件-word范文 (6页)

本文部分内容来自网络整理,本司不为其真实性负责,如有异议或侵权请及时联系,本司将立即删除!== 本文为word格式,下载后可方便编辑和修改! ==极路由web认证插件篇一:Wifi热点Web认证实施Wifi热点Web认证实施概述:针对一些小型商家或者小区等等单位,有实现无线覆盖共享的需求。
而他们的需求又有一点特殊:1、接入热点不需要密码2、接入热点之后打开浏览器输入任何网址都是转向到自己的欢迎页面。
这个达到宣传的目的。
3、在这个页面上顾客可以输入一个认证的用户和密码进行认证。
4、输入正确的认证后可以显示商家指定的自定义宣传页面,之后,用户可以自由使用Internet。
5、可以限制每个用户有一定的使用时间限制。
6、可以监控和控制每个用户的流量情况。
7、不希望架设自己的服务器,希望能通过只要插上路由就能实现需求。
因为服务器设备需要高昂的费用。
通过在网上查找的资料了解到,有许多小型的用户已经在使用现有的认证网关服务,如Wiwiz和wifiap两大服务机构。
其实我们要向客户提供的就是像Wiwiz和WifiAp那样(来自: : 极路由web认证插件 )的云端服务,也是我们往后需要开发的方向。
而我今天给大家讲的不是自己的云端服务,也不是为了宣传Wiwiz或者WifiAp,而通过利用他们提供的服务实现我的简单需求,从中体验到使用和实现的原理,启发我们需要研发的方向。
在这里,我们并没有对路由进行开发,因为路由的空间有限,它能实现的功能也很大限制。
我们只是利用路由的一个Nat地址转向功能。
而在这里我们的路由是要有一定的要求的,首先必须要支持刷DD-WRT固件的而且把它刷为DD-WRT的标准版,为什么要标准版呢,因为标准版里才有wifidog功能。
而wifidog的功能就是我们拿来定向到云端服务网关的。
可能大家还不知道哪些路由能支持刷DD-WRt,不知道买怎么样的路由,而自己买回来的路由不知道能不能刷,那固件又应该在哪里下载。
极路由插件如何远程离线下载搜狐视频
极路由插件如何远程离线下载搜狐视频
极路由插件中有一个对于爱视频的人来说最好的选择,那就是可以远程离线下载搜狐视频。
大家可以在搜狐视频手机客户端中,搜索选择你喜欢的片子,点击缓存,然后等到没事儿的时候就随便看啦,不用等待无聊的广告和缓慢的下载速度。
那让我们一起来看看怎么操作吧。
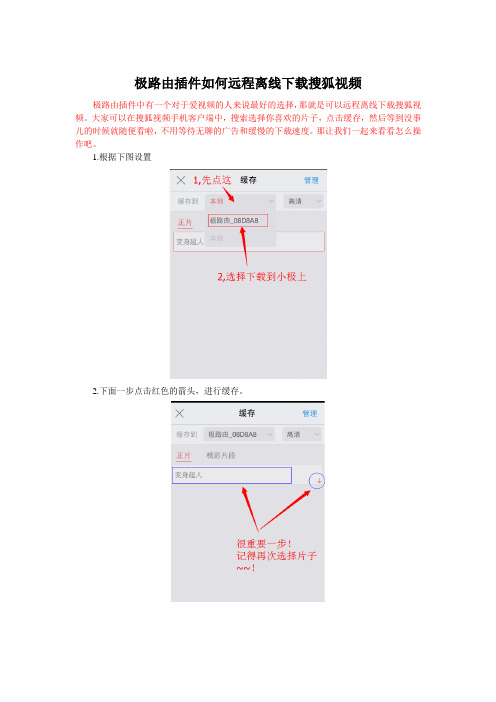
1.根据下图设置
2.下面一步点击红色的箭头,进行缓存。
3可以看到极路由下载工作的速度!
4.片子下完了,可以连接极路由直接播放,也可以将视频搬运到手机里播放,如下图:
5.看完片子后,可以选择删除影片,为极路由腾出存储空间
以上就是用极路由插件远程离线下载搜狐视频的方法,极路由的这款插件简直是不想看
广告星人的救星,好了,下面就让我们一起看视频去吧!。
adtailer插件用法

adtailer插件用法随着互联网的快速发展,广告已经成为了商业营销的重要手段之一。
而在网站运营中,如何更好地管理和优化广告成为了一个重要的问题。
adtailer插件的出现,为网站管理员提供了一个方便、高效的解决方案。
adtailer插件是一款专门为网站广告管理而设计的工具。
它可以帮助网站管理员更好地管理广告位、优化广告展示效果,提高广告收益。
下面,我们来详细介绍一下adtailer插件的用法。
首先,安装和配置adtailer插件。
在使用adtailer插件之前,我们需要先将其安装到网站的后台管理系统中。
一般来说,adtailer插件都会提供一个安装包,我们只需要将其上传到网站的插件目录中,然后在后台管理系统中进行安装即可。
安装完成后,我们还需要进行一些基本的配置,比如设置广告位的尺寸、位置等。
接下来,创建广告位。
在adtailer插件中,广告位是指网站上用于展示广告的特定位置。
通过创建广告位,我们可以更好地控制广告的展示效果。
在adtailer插件中,我们可以根据需要创建多个广告位,并为每个广告位设置不同的展示规则。
比如,我们可以设置某个广告位只在特定的页面上展示,或者只在特定的时间段内展示。
然后,添加广告内容。
在创建好广告位之后,我们就可以开始添加广告内容了。
adtailer插件支持多种广告类型,比如图片广告、文字广告、视频广告等。
我们只需要根据需要选择相应的广告类型,然后上传广告素材,设置广告链接和展示规则即可。
adtailer插件还提供了广告预览功能,可以帮助我们在添加广告内容之前预览广告的展示效果。
最后,优化广告展示效果。
adtailer插件提供了丰富的数据统计和分析功能,可以帮助我们了解广告的展示效果和用户的点击行为。
通过分析这些数据,我们可以及时调整广告的展示规则,优化广告的展示效果,提高广告的点击率和转化率。
此外,adtailer插件还支持A/B测试功能,可以帮助我们比较不同广告内容的效果,选择最佳的广告策略。
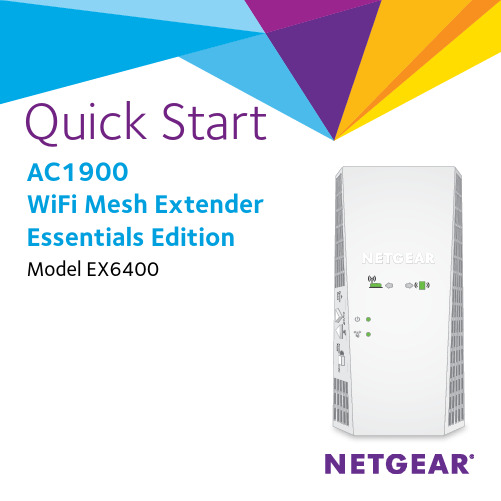
快速启动指南:NETGEAR AC1900 WiFi Mesh扩展器基本版(模型:EX6400)说明
LED DescriptionsNo arrow LEDs are lit. The extender is in a good location.Client Arrow LED blinks. Move the WiFi-enabled computer or mobiledevice closer to the extender.Router Arrow LED blinks. Move the extender closer to the router.Use the Extender in Extender ModeIn extender mode, the extender repeats the signals from an existing WiFi router or access point.Set the Access Point/Extender switch, place the extender, supply power, and connect it to your WiFi network.Set the Access Point/Extender SwitchAccess Point/Extenderswitch to Extender.Place the Extender and Supply Power1. Place your extender in the same room as your WiFi router.Proximity to the WiFi router is required only during the initial setup process.2. Plug the extender into an electrical outlet.Wait for the Power LED to light green. This might take up to 100 seconds. If the Power LED does not light, press the Power On/ Off button on the side of the extender.Connect to an Existing WiFi NetworkTo extend the range of your WiFi network, you must connect the extender to your existing WiFi network. You can do this in one of two ways:• Connect with WPS. For more information, see the following section.• Connect with the NETGEAR installation assistant. For more information, see Connect With the NETGEAR Installation Assistant on page 9.Connect With WPSWi-Fi Protected Setup (WPS) lets you join a secure WiFi network without selecting the network name and entering the password.Note: WPS does not support WEP network security. If you are using WEP security, follow the instructions in Connect With the NETGEAR Installation Assistant on page 9.1. Press the WPS button on the extender.The WPS LED blinks.2. Within two minutes, press the WPS button on your router or accesspoint.The WPS LED on the extender lights solid green, the Router Link LED lights, and the extender connects to your existing WiFi network.If the Router Link LED does not light, try again. If it still does not light, see Connect With the NETGEAR Installation Assistant on page 9.3. If your WiFi router supports the 5 GHz band, repeat Steps 1 and 2 to connect the extender to the 5 GHz band.Note: If your router supports the 5 GHz band, your extenderattempts to connect to the router’s 5 GHz band the first time you press the WPS button. If your extender did not connect to the router’s 5 GHz band the first time, repeat the WPS process.4. Unplug the extender and move it to a new location that is about halfway between your router and the area with a poor router WiFi signal.existing WiFi router network.5. Plug the extender into an electrical outlet and wait for thePower LEDto light green. 6. Use the Router Link LED to help you choose a spot where the extender-to-router connection is optimal.7. If the Router Link LED doesn’t light amber or green, plug the extender into an outlet closer to the router and try again.Keep moving the extender to outlets closer to the router until theRouter Link LED lights amber or green.8. Connect your WiFi-enabled computer or mobile device to the WiFinetwork.Note: Your extender uses the same WiFi network settings as yourrouter for its 2.4 GHz and 5 GHz extended networks.For example, if your extender connects to the router’s 2.4 GHz WiFi band, your extender uses your router’s 2.4 GHz WiFi settings for both its networks:• Router 2.4 GHz WiFi network name. MyWiFiExample• Router 5 GHz WiFi network name. MyWiFiExample-5G• Extended 2.4 GHz WiFi network name. MyWiFiExample• Extended 5 GHz WiFi network name. MyWiFiExampleIf your extender connects to the router’s 5 GHz WiFi band, yourextender uses your router’s 5 GHz WiFi settings for both its networks:• Router 2.4 GHz WiFi network name. MyWiFiExample• Router 5 GHz WiFi network name. MyWiFiExample-5G• Extended 2.4 GHz WiFi network name. MyWiFiExample-5G • Extended 5 GHz WiFi network name. MyWiFiExample-5GNote: Since your router and extended networks share the same WiFi network name, only one WiFi network name is broadcast. Connect With the NETGEAR Installation Assistant1. Connect your WiFi-enabled computer or mobile device to theextender using a wired Ethernet or WiFi connection:• To connect with a wired Ethernet connection, use an Ethernet cable to connect the Ethernet port on the extender to anEthernet port on your WiFi-enabled computer.• To connect with WiFi, on your WiFi-enabled computer or mobile device, open the WiFi connection manager and locate andconnect to the extender network called NETGEAR_EXT.After the connection with your WiFi-enabled computer or mobiledevice is established, the Client Link LED lights.2. Launch a web browser and visit .The NETGEAR installation assistant displays.3. Follow the prompts to connect your extender to your existing WiFinetwork.4. Unplug the extender and move it to a new location about halfwaybetween your router and the area with a poor WiFi signal.The location that you choose must be within the range of your5. Plug the extender into an electrical outlet and wait for thePower LED to light green.6. Use the Router Link LED to help you choose a spot where theextender-to-router connection is optimal.7. If the Router Link LED doesn’t light amber or green, plug the extenderinto an outlet closer to the router and try again.Keep moving the extender to outlets closer to the router until theRouter Link LED lights amber or green.Connect an Ethernet-Enabled Device After the extender is connected to your existing WiFi network, you can connect a wired device to the extender using an Ethernet cable. That device can then access your existing network through the WiFi connection.Use the Extender in Access Point Mode You can set up your extender as a WiFi access point. Tri-band WiFi is available when your extender is in access point mode.¾To use the extender in access point mode:1. Set the Access Point/Extender switch to Access Point2. Plug the extender into an electrical outlet.The Power LED lights green.If the Power LED does not light, press the Power button.3. Connect a computer or mobile device to the extender using a WiFi orEthernet connection:• WiFi. On your WiFi-enabled computer or mobile device, open the WiFi connection manager and locate and connect to the extendernetwork called NETGEAR_EXT.When your WiFi-enabled computer or mobile device is connectedto the extender, the Client LED lights.• Ethernet. Use an Ethernet cable to connect the Ethernet port on the extender to an Ethernet port on your computer.Note: If you want to use an Ethernet connection, you must dothis before you connect your extender to your modem router orrouter.4. Launch a web browser and visit .The NETGEAR installation assistant displays.5. Use an Ethernet cable to connect your router to an Ethernet port onthe extender.Note: Do not connect your extender directly to your DSL or cable modem. The extender does not function as a router. If your network includes a DHCP server, you can connect the extender to a switch or hub that is connected to the DHCP server.6. Return to the NETGEAR installation assistant and follow the promptsto finish setting up your extender as an access point.Log In to Access Extender SettingsAfter installation, you can log in to the extender to view or change the extender’s settings.¾To log in to the extender:1. Launch a web browser from a computer or mobile device that isconnected to your extender network.2. Log in to your extender:• If you did not enable the One WiFi Name feature, enter http://mywifiext.local in the address field of the browser.• If you enabled the One WiFi Name feature, enter one of the following URLs:-Windows-based computer. http://mywifiext orhttp://mywifiext.local-Mac computers, iOS devices, and Linux devices.http://mywifiext.local-Android devices. http://<extender’s IP address> (forexample, http://192.168.1.3)To find your extender’s IP address, do the following:a. Log in to your router.b. Find the page in your router web interface that lists thedevices connected to your router.c. Find your extender in the list and note your extender’s IPaddress.d. Enter your extender’s IP address in the address field ofyour web browser.A login page displays.3. Enter your admin email address and password and click the LOG INbutton.The Status page displays.Frequently Asked QuestionsYou can find more information about your product in the user manual, which is available at /support.The NETGEAR installation assistant keeps asking me for my network password (passphrase) or security key, and I am sure that I entered the correct password. What can I do?The extender is probably placed at the borderline of the range covered by the router or access point. For more information, see Place the Extender and Supply Power on page 5. If you are using WEP security, make sure that you are typing the network password in the correct field.Can I set up the extender in extender mode if I connect it to the router or access point with an Ethernet cable?No. The extender is designed to connect wirelessly to the router or access point if it is in extender mode. If the extender is in access point mode, you can connect it to the router or access point with an Ethernet connection. For more information about access point mode, see Use the Extender in Access Point Mode on page 11.I forgot my login email and password. What can I do?On the login page, click the Username & Password Help link to answer the security questions you set up during the initial setup.If you forgot the answers to your security questions, do the following to set up your login credentials again:1. Restore the extender to its factory default settings.2. Launch a web browser from a computer or mobile device that isconnected to your extender network.3. Log in to your extender:• If you did not enable the One WiFi Name feature, enter in the address field of the browser.• If you enabled the One WiFi Name feature, enter one of the following URLs:-Windows-based computer. http://mywifiext orhttp://mywifiext.local-Mac computers, iOS devices, and Linux devices.http://mywifiext.local-Android devices. http://<extender’s IP address> (forexample, http://192.168.1.3)A login page displays.4. Click the NEW EXTENDER SETUP button.When prompted, complete the fields on the page to set up your login credentials again.How do I restore the extender to its factory default settings?1. Use a sharp object such as a pen or straightened paper clip to pressand hold the Factory Reset button on the extender for at least five seconds until the Power LED blinks amber.2. Release the Factory Reset button and wait for the extender toreboot.The extender resets and returns to the factory default settings.I enabled a WiFi MAC filter, wireless access control, or access control list (ACL) on my router. What should I do when installing the extender?When a device connects through the extender to your router, the MAC address of the device shown on the router is translated to another MAC address. If your router’s MAC filter, wireless access control, or ACL is enabled, the device connects to the extender but cannot get an IP address from the extender and cannot access the Internet.To allow your device to receive an IP address from the extender and access the Internet, you must provide the translated MAC address to the router.1. Log in to your router and disable the MAC filter, wireless accesscontrol, or ACL.For more information about how to disable your router’s MAC filter, wireless access control, or ACL, see your router’s documentation. 2. Power on the extender and connect all of your devices to theextender network.3. Make sure that the Router Link LED remains lit.4. Log in to your extender:• If you did not enable the One WiFi Name feature, enter in the address field of the browser.• If you enabled the One WiFi Name feature, enter one of the following URLs:-Windows-based computer. http://mywifiext orhttp://mywifiext.local-Mac computers, iOS devices, and Linux devices.http://mywifiext.local-Android devices. http://<extender’s IP address> (for example, http://192.168.1.3)A login page displays.5. Select Settings > Connected Devices.The Connected Devices page displays the MAC addresses and virtual MAC addresses for the extender, wired devices, and WiFi devices that are connected to the extender.6. On the router, add the extender’s virtual MAC addresses and all thevirtual MAC addresses of the devices connected to the extender to your router’s MAC filter table.7. Enable the router’s MAC filter, wireless access control, or ACL.I am connected to NETGEAR_EXT and launched a browser. I can’t see the NETGEAR installation assistant. What can I do?Try these troubleshooting steps:• Make sure that your WiFi-enabled computer is set up to use DHCP (most are).• Make sure that the Client Link LED is green and that you are using a valid IP address.• Relaunch the web browser and type in the address field. Type your email and password and click the LOG INbutton.NETGEAR, Inc.350 East Plumeria DriveSan Jose, CA 95134, USA April 2018NETGEAR INTL LTD Building 3, University Technology CentreCurraheen Road, Cork, IrelandSupportThank you for purchasing this NETGEAR product. You can visit /support to register your product, get help, access the latest downloads and user manuals, and join our community. We recommend that you use only official NETGEAR support resources.Trademarks© NETGEAR, Inc., NETGEAR and the NETGEAR Logo are trademarks of NETGEAR, Inc. Any non-NETGEAR trademarks are used for reference purposes plianceFor the current EU Declaration of Conformity, visit /app/answers/detail/a_id/11621/.For regulatory compliance information, visit /about/regulatory/.See the regulatory compliance document before connecting the power supply.。
异速联 使用手册

异速联2014 标准版用户使用手册2014 年6 月15 日北京金万维科技有限公司产品部目录第一章系统简介................................................................................................................................................. - 3 -1. 1 关于E-SoonLink 系统......................................................................................................................... - 3 -1.2 E-SoonLink 网络拓扑图........................................................................................................................ - 4 -1.3 E-SoonLink 新功能简介........................................................................................................................ - 5 -第二章系统快速安装与使用............................................................................................................................. - 6 -2. 1 系统要求............................................................................................................................................... - 6 - 2.2 系统快速安装........................................................................................................................................ - 6 -2.2.1 服务端的安装............................................................................................................................ - 6 -2.2.2 客户端的安装说明................................................................................................................. - 17 -第三章系统安装详细配置说明....................................................................................................................... - 21 -3.1 后台管理程序登陆.............................................................................................................................. - 21 -3.1.1 用户管理.................................................................................................................................- 22 -3.1.2 组管理..................................................................................................................................... - 25 -3.1.3 发布程序................................................................................................................................. - 26 -3.1.4 发布文件夹............................................................................................................................. - 28 -3.1.5 发布网页链接......................................................................................................................... - 29 -3.1.6 发布桌面................................................................................................................................. - 30 -3.1.7 Web 服务管理.......................................................................................................................... - 31 -3.1.8 许可证配置管理..................................................................................................................... - 31 -3.1.9 安全配置................................................................................................................................. - 32 -3.1.10 在线监控............................................................................................................................... - 33 -3.1.11 集群配置............................................................................................................................... - 34 -3.1.12 支持的负载均衡策略........................................................................................................... - 41 -第四章客户端登陆使用E-SoonLink ............................................................................................................... - 42 -4.1 通过计算机终端访问........................................................................................................................... - 42 -4.1.1 通过浏览器访问(第一种方式)........................................................................................ - 42 -4.1.2 通过桌面快捷方式访问(第二种方式)............................................................................ - 44 -4.2 通过手机等移动终端访问................................................................................................................... - 49 -4.2.1 通过iPad/iPhone 访问......................................................................................................... - 49 -4.2.2 通过Windows Mobile 手机访问............................................................................................ - 53 -4.2.3 通过android 手机或平板访问.............................................................................................. - 55 -4.3 通过MAC 客户端访问........................................................................................................................ - 59 -第五章E-SoonLink 端口映射........................................................................................................................... - 65 -第六章动态域名(DDNS)解析..................................................................................................................... - 67 -产品部异速联2014 版用户使用手册第一章系统简介1. 1 关于E-SoonLink 系统产品简介E-SoonLink 将集中管理与远程接入完美地结合起来,使用金万维异速联可以方便、安全及时地接入到公司内部应用信息系统。
Quidway防火墙 Eudemon1000E 开局指导书V1[1].0-20091025-B1
![Quidway防火墙 Eudemon1000E 开局指导书V1[1].0-20091025-B1](https://img.taocdn.com/s3/m/63e6e80abb68a98271fefa1e.png)
资料编码产品名称Quidway自研以太网交换机使用对象华为工程师、合作工程师产品版本编写部门软件服务部-解决方案部资料版本V100R002Quidway防火墙 Eudemon1000E 开局指导书拟制:孙崧铭日期:2009-09-20审核:日期:审核:日期:批准:日期:华为技术有限公司版权所有侵权必究修订记录日期修订版本描述作者2009-10-25 V1.0 完成孙崧铭目录第1章Quidway Eudemon 1000E产品概述 (1)1.1 系统介绍 (1)1.2 组网介绍 (2)1.3 系统结构介绍 (2)第2章Quidway Eudemon 1000E的特点 (3)2.1 产品系列 (3)2.2 产品优点 (4)2.3 安全域概念介绍 (5)2.3.1 防火墙的域 (5)2.3.2 域间概念 (6)2.3.3 本地域 (6)2.4 防火墙工作模式 (7)2.4.1 防火墙工作模式概述 (7)2.4.2 路由模式 (7)2.4.3 透明模式 (8)2.4.4 混合模式 (9)2.5 访问控制策略和报文过滤 (9)2.5.1 访问控制策略的异同 (9)2.5.2 ACL加速查找 (9)2.5.3 报文过滤规则的应用 (10)2.5.4 防火墙缺省动作 (11)2.6 双机热备 (11)2.6.1 VRRP的应用 (12)2.6.2 传统VRRP在E1000E备份实现的不足 (13)2.6.3 VGMP备份组 (15)2.6.4 HRP备份 (15)2.6.5 VRRP、VGMP和HRP之间的协议层次关系 (15)2.7 NAT介绍 (16)2.7.1 NAT的应用 (16)2.7.2 NAT与VRRP绑定 (17)第3章Quidway Eudemon 1000E数据准备 (18)3.1 初始连接配置 (18)3.1.1 通过Console接口搭建 (18)3.1.2 通过Telnet方式搭建 (21)3.1.3 通过WEB方式接入设备 (23)3.2 设备启动 (24)3.2.1 设备上电 (24)3.2.2 设备启动过程 (25)3.3 版本配套 (28)3.3.1 查看当前的软件版本 (28)3.4 软件版本升级 (28)3.5 配置规划 (30)3.5.1 网络拓扑图 (30)3.5.2 系统名 (31)3.5.3 当地时区 (31)3.5.4 远程维护登录帐号/口令和Super密码 (31)3.5.5 区域、接口和IP地址规划 (32)3.5.6 路由规划 (32)3.5.7 访问策略规划 (32)3.5.8 双机热备规划 (33)3.5.9 链路可达性规划 (33)3.5.10会话快速备份规划 (34)3.5.11 NAT规划 (34)3.5.12 NAT与VRRP绑定 (34)第4章Quidway Eudemon 1000E 配置 (35)4.1 时间日期和时区配置 (35)4.2 系统名配置 (35)4.3 远程维护登录帐号/口令和Super密码配置 (36)4.3.1 远程维护登录帐号/口令配置 (36)4.3.2 Super密码配置 (36)4.4 区域、接口和IP地址配置 (37)4.4.1 数据配置步骤 (37)4.4.2 测试验证 (38)4.5 路由配置 (38)4.5.1 缺省路由配置 (38)4.5.2 静态路由配置 (38)4.5.3 动态路由OSPF配置 (39)4.5.4 测试验证 (39)4.6 访问策略控制配置 (39)4.6.1 需求说明 (39)4.6.2 数据配置 (40)4.6.3 测试验证 (41)4.7 双机热备配置 (41)4.7.1 VRRP/VGMP配置 (41)4.7.2 HRP配置 (41)4.7.3 测试验证 (42)4.8 链路可达性配置 (42)4.8.1 配置方法 (42)4.8.2 测试验证 (42)4.9 会话快速备份配置 (43)4.10 NAT配置 (43)4.10.1 配置地址池与VRRP绑定 (43)4.10.2 配置内部服务器与VRRP绑定 (44)4.10.3 验证测试 (44)第5章Quidway Eudemon 1000E基本维护 (44)5.1 查看软件版本信息 (44)5.2 系统配置文件维护 (44)5.3 查看单板、电源、风扇运行状况 (45)5.4 查看CPU占用率 (45)5.5 查看内存占用率 (45)5.6 查看接口流量 (45)5.7 查看接口、链路状态 (46)5.8 查看日志缓冲区信息 (46)5.9 查看路由表信息 (46)5.10 查看ARP映射表 (46)5.11 查看会话表信息 (46)5.12 收集系统诊断信息 (46)关键词:Quidway,防火墙,Eudemon1000E,开局指导书摘要:本文结合业务与软件产品线工程师开局需要对华为Quidway局域网交换机数据准备给出指导,并对其常见配置进行描述。
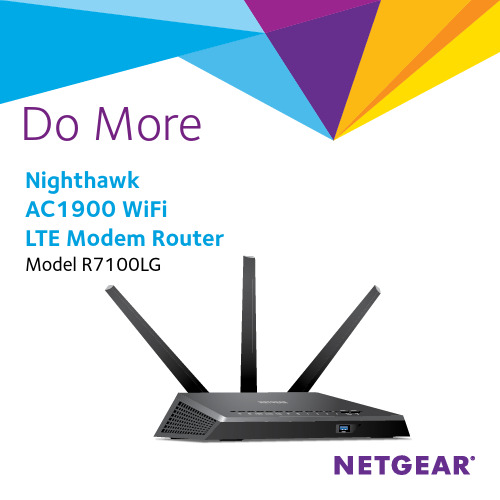
Nighthawk AC1900 WiFi LTE模式路由器R7100LG用户指南说明书
Do MoreWiFi Network Name and PasswordThe preassigned WiFi network name (SSID) and password (network key) are unique to your modem router, like a serial number. Because the modem router automatically uses WiFi security, you don’t need to set it up. The WiFi settings are on the label on the modem router.We recommend that you use the preassigned WiFi settings becauseyou can check the label if you forget them. You can also log in to the modem router to change these settings. If you do so, write down the new WiFi settings and store them in a safe place.You can write the WiFi settings from the label on your modem router in this space for easy reference. If you change the WiFi settings, write the new settings here for easy reference and store this booklet in a safe place.WiFi network name (SSID):Network key (password):Check the 3G/4G LED BehaviorThe 3G/4G LED on your modem router indicates your modem router’s mobile broadband signal strength.If your modem router is connected to a 4G network, the 3G/4G LED lights the following colors:If your modem router is connected to a 3G network, the 3G/4G LED lights the following colors:For information about the other LED behaviors, see the user manual, which is available online at .Connect Your Modem Router to a Modem You can connect your modem router to a cable or fiber modem. If you insert a micro SIM card into your modem router and you also connect a modem to the Internet port on the modem router, you can set up failover mode on your modem router. For more information, see Set Up Failover Mode on page 13.¾To connect your modem router to a modem and connect it to the Internet:1. Attach and position the antennas:2.a. Unplug your modem, remove and replace the backup battery if ituses one, and then plug the modem back in.b. Use the Ethernet cable to connect the modem to the yellowInternet port on the modem router.c. Connect the modem router to a power source.The modem router’s Power LED lights amber and then turns whitewhen the modem router is ready.3. Connect to the Internet:modem router.To connect with WiFi, do the following:a. Make sure that the modem router’s WiFi LED is lit.b. Find the modem router’s preassigned WiFi network name andpassword on the label on the modem router.c. Open the WiFi connection manager on a WiFi-enabled computeror mobile device, find the modem router’s WiFi network name,and use the modem router’s password to connect.d. Launch a web browser.If the NETGEAR installation assistant does not display, visit. If a login window opens, enter admin forthe user name and password for the password.e. Follow the NETGEAR installation assistant.The Internet LED lights when the modem router is connectedto the Internet.Join the WiFi NetworkYou can either use Wi-Fi Protected Setup (WPS) or select yourmodem router’s WiFi network and type its password.Join the WiFi Network Using WPSFor help with the WPS button on your WPS-enabled device, check the instructions or online help that came with that WPS-enabled device. Some older equipment cannot use WPS.¾To join the network using WPS:1. Press the WPS button on the modem router for three to five seconds.The WPS LED on the modem router blinks white.2. Within two minutes, on your WPS-enabled device, press its WPSbutton or click its onscreen WPS button.The WPS LED on the modem router lights solid white when theWPS-enabled device connects to your modem router.3. Repeat this process to add other WPS-enabled devices.Join the WiFi Network Using theModem Router’s WiFi SettingsUse the modem router’s WiFi network name and password to connect your WiFi-enabled computer or mobile device to the modem router’s network through WiFi. If you did not change the modem router’s WiFi network name and password, use the modem router’s preassigned WiFi network name and password, which are on the label on the modem router.¾To select your network and enter its password:1. On your WiFi-enabled computer or mobile device, open the WiFiconnection manager that manages your WiFi connections.The WiFi connection manager scans for WiFi networks in your area. 2. Find and select your modem router’s WiFi network name (SSID).The SSID is on the label on the modem router.3. Enter the modem router’s password (or your custom password if youchanged it).The password is on the label on the modem router.4. Repeat Step 1 through Step 3 to add other WiFi-enabled computer ormobile device.View or Change theModem Router SettingsAfter you use the NETGEAR installation assistant to set up themodem router, you can log in to the modem router to view or change its settings.Log In to the Modem Router¾To log in to the modem router:1. Connect a computer or mobile device to the modem router.You can connect using a wired connection or a WiFi connection:• To connect using a wired connection, use an Ethernet cable (not included) to connect an Ethernet port on your computer to anEthernet port on the modem router.• To connect using a WiFi connection, find the modem router’s preassigned WiFi network name and password on the label onthe modem router. Open the WiFi connection manager on yourWiFi-enabled computer or mobile device, find the modem router’sWiFi network name, and use the modem router’s password toconnect.2. Launch a web browser and visit .A login window opens.3. Enter admin for the user name and password for the password.The BASIC Home page displays.Change the WiFi Network Name and Password The router’s preset WiFi network name (SSID) and password are on the label on the router. If you want to change your router’s WiFi network name and password, log in to the modem router.¾To change the router’s WiFi network name and password: 1. Launch a web browser from a computer or mobile device that isconnected to the network and visit .A login window opens.2. Enter the modem router user name and password.The user name is admin and the default password is password. Use the default credentials if you did not change them.The BASIC Home page displays.3. Select Wireless.The Wireless Setup page displays.4. To change the WiFi network name (SSID), enter a new name in theName (SSID) field.5. To change the WiFi password, enter a new password in the Password(Network Key) field.6. Click the Apply button.Your settings are saved.Change the admin Password¾To change the admin password:1. Launch a web browser from a computer or mobile device that isconnected to the network and visit .A login window opens.2. Enter admin for the user name and password for the password.The BASIC Home page displays.3. Select ADVANCED > Administration > Set Password.The Set Password page displays.4. Type your old password and type the new password twice.5. To be able to recover the password, select the Enable PasswordRecovery check box.We recommend that you enable password recovery.6. Select two security questions and provide answers to them.7. Click the Apply button.Your settings are saved.Recover a Forgotten admin PasswordThe default password for the admin user name is password. If you changed the password and enabled the password recovery feature, you can retrieve this password.¾To retrieve a forgotten admin password:1. Launch a web browser from a computer or mobile device that isconnected to the network and visit .A login window opens.2. Click the Cancel button.If password recovery is enabled, you are prompted to enter the serial number of the modem router. The serial number is on the label on the modem router.3. Enter the serial number of the modem router.4. Click the Continue button.A page displays requesting the answers to your security questions.5. Enter the saved answers to your security questions.6. Click the Continue button.A page displays your recovered password.7. Click the Login again button.A login window opens.8. With your recovered password, log in to the modem router.Set Up Failover ModeIf you inserted a micro SIM card into your modem router and you also connected a modem to the Internet port on the modem router, you can set up failover mode on your modem router. Failover mode allows your modem router to switch to a mobile broadband connection if its Internet port connection fails. Note that the modem router’s Internet port is also referred to as a WAN Ethernet port.¾To set up failover mode:1. Connect a modem to the Internet port on your modem routerand insert a micro SIM card into the SIM slot on the back of themodem router.2. Set up your modem router’s WAN Ethernet connection:a. Launch a web browser from a computer or mobile device that isconnected to the network and visit .A login window opens.b. Enter the modem router user name and password.The user name is admin and the default password is password.Use the default credentials if you did not change them.The BASIC Home page displays.c. Select ADVANCED > Setup > Broadband Settings.The Broadband Settings page displays.d. In the Internet Connection Mode menu, select Always useEthernet connection to enable the Internet port’s (also referredto as a WAN Ethernet port) Internet connection only.e. Click the Apply button.Your settings are saved.f. Select ADVANCED > Setup > Internet Setup.The Internet Setup page displays.g. Specify your Internet connection settings.h. Click the Apply button.Your settings are saved.i. Test your modem router’s Internet connection to make sure thatyour modem router can connect to the Internet.3. Set up your modem router’s mobile broadband connection:a. Log back in to the modem router.The BASIC Home page displays.b. Select ADVANCED > Setup > Broadband Settings.The Broadband Settings page displays.c. In the Internet Connection Mode menu, select Always useMobile Broadband connection to enable the mobile broadbandconnection only.d. Click the Apply button.Your settings are saved.e. Select ADVANCED > Setup > Mobile Broadband Settings.The Mobile Broadband Settings page displays.f. Specify your mobile broadband connection settings.g. Click the Apply button.Your settings are saved.h. Test your modem router’s Internet connection to make sure thatyour modem router can connect to the Internet.4. Set the failover mode:a. Log back in to the modem router.The BASIC Home page displays.b. Select ADVANCED > Setup > Broadband Settings.The Broadband Settings page displays.c. In the Internet Connection Mode menu, select Use WANEthernet with mobile as back up in case of failure.The modem router will connect to the Internet using the WANEthernet connection. If the WAN Ethernet connection fails, themodem router will connect to the Internet using the mobilebroadband connection.d. Click the Apply button.Your settings are saved.If your modem router is connected to a mobile broadband network, you can log in to the modem router to check the status of the mobile broadband connection.¾To check the mobile broadband status:1. Launch a web browser from a computer or mobile device that isconnected to the network and visit .A login window opens.2. Enter the modem router user name and password.The user name is admin and the default password is password. Use the default credentials if you did not change them.The BASIC Home page displays.3. Click the ADVANCED tab.4. In the Internet Port pane, click the Connection Status button.The Mobile Broadband Status page displays.If your modem router is connected to a mobile broadband network, you can log in to the modem router and view the mobile broadband settings, such as the APN, PDP type, and network mode.¾To view the mobile broadband settings:1. Launch a web browser from a computer or mobile device that isconnected to the network and visit .A login window opens.2. Enter the modem router user name and password.The user name is admin and the default password is password. Use the default credentials if you did not change them.The BASIC Home page displays.3. Select ADVANCED > Setup > Mobile Broadband Settings.The Mobile Broadband Settings page displays.Access a USB Device on the Network ReadySHARE lets you access and share a USB storage device connected to the modem router’s USB ports. (If your USB device uses special drivers, it is not compatible.)¾To access the USB storage device from a Windows computer:1. Connect your USB storage device to a USB port on the modem router.We recommend that you use the blue USB 3.0 port on themodem router to get the best USB device access speed.When you connect the USB storage device to the modem router’s USB port, it might take up to two minutes before it is ready for sharing. By default, the USB storage device is available to all computers on your local area network (LAN).2. On a Windows computer that is connected to the network, selectStart > Run, enter \\readyshare in the dialog box, and click the OK button.A window displays the files and folders on the device.¾To access the USB storage device from a Mac:1. Connect your USB storage device to a USB port on the modem router.We recommend that you use the blue USB 3.0 port on themodem router to get the best USB device access speed.When you connect the USB storage device to the modem router’s USB port, it might take up to two minutes before it is ready for sharing. By default, the USB storage device is available to all computers on your local area network (LAN).2. On a Mac that is connected to the network, launch Finder and selectGo > Connect to Server.The Connect to server window opens.3. Enter the smb://readyshare in the Server Address field and clickthe Connect button.4. When prompted, select the Guest radio button.5. If you set up access control on the modem router and you allowedyour Mac to access the network, select the Registered Userradio button and enter admin for the name and password for thepassword.For more information about access control, see the user manual,which is available online at or through a link in the modem router’s user interface.6. Click the Connect button.A window displays the files and folders on the device.NETGEAR, Inc.350 East Plumeria DriveSan Jose, CA 95134, USA NETGEAR INTL LTD Building 3, University Technology CentreCurraheen Road, Cork, IrelandSupportThank you for purchasing this NETGEAR product. You can visit /support to register your product, get help, access the latest downloads and user manuals, and join our community. We recommend that you use only official NETGEAR support resources.Trademarks© NETGEAR, Inc., NETGEAR and the NETGEAR Logo are trademarks of NETGEAR, Inc. Any non-NETGEAR trademarks are used for reference purposes only.ComplianceFor the current EU Declaration of Conformity, visit /app/answers/detail/a_id/11621/.For regulatory compliance information, visit /about/regulatory/.See the regulatory compliance document before connecting the power supply.。
- 1、下载文档前请自行甄别文档内容的完整性,平台不提供额外的编辑、内容补充、找答案等附加服务。
- 2、"仅部分预览"的文档,不可在线预览部分如存在完整性等问题,可反馈申请退款(可完整预览的文档不适用该条件!)。
- 3、如文档侵犯您的权益,请联系客服反馈,我们会尽快为您处理(人工客服工作时间:9:00-18:30)。
一、什么是企鹅路由插件
在不影响您上网体验的情况下,将路由器内置企鹅路由插件并绑定QQ或微信帐号,将闲置上行带宽进行合理优化和利用,赚取积分收益的方式向您的绑定帐号进行兑换超值大礼包。
二、企鹅路由能获得哪些收益
1、将路由器绑定QQ或微信帐号获赠一个月好莱坞会员,院线新片免费看,一站看遍全世界。
2、每天保持路由器在线隔天获免腾讯视频广告特权,月省万秒看广告时间。
3、路由器在线上行流量赚取收益,带宽越大赚取积分越多。
积分换钻石后可换取好莱坞会员等超值礼包。
三、产品形态
1、入口:腾讯视频——个人中心——企鹅路由
2、查看收益
a)首次登录您的绑定帐号,获赠一个月腾讯视频好莱坞会员,海量院线新片、HBO
美剧、纪录片免费看。
b)每日上行您的路由器闲余流量,在企鹅路由管理界面可以查看您的路由积分收益情
况。
/u/routemanage/index.html
c)保持您的路由器在线22小时,隔天尊享腾讯视频全站观看影片无广告特权,月省
万秒看广告时间,远离广告无干扰。
3、兑换礼包
a)企鹅路由插件赚取积分后,每次登录将自动将您的路由积分兑换成钻石,积分与钻
石的兑换关系为:10:1。
b)使用钻石可兑换好莱坞会员等超值礼包。
带宽与赚积分对应关系
1、20M带宽用户,预计月赚取积分<=3000,2000积分即可兑换1个月好莱坞会员。
2、100M带宽用户,预计月赚取积分<= 7500,4500积分即可兑换3个月好莱坞会员。
注:1、上述收益数据仅作为理想状态下的预估参考,不作为任何个案的收益承诺。
2、具体上下行宽带数据请咨询当地网络服务提供应商。
3、赚取积分的数量与每户贡献宽带有直接关系,多贡献宽带,即可赚取多积分。