CRANE_2_workshop_K147001_arrangement_10_05_07
KSZ8795 Evaluation Board 用户指南说明书

KSZ8795-POE-EVAL Board(KSZ8795CLX+KSZ9031RNX)Demo Evaluation Board User’s GuideKSZ8795 Family Integrated 5-port Managed Switch with 4 10/100 Copper Ports and Port 5 Gigabit port Rev 1.0 January 2015Table of contents1.0 Introduction (4)2.0 Features (4)3.0 Evaluation Kit Contents (4)4.0 Hardware Description (5)4.1 Strap in Mode (6)4.2 Feature Setting Jumpers (7)4.3 SPI Mode (8)4.4 10/100 Ethernet Ports (8)4.4 10/100/1000 Gigabit Ports (8)4.5 LED indicators (9)5.0 Software Tools Description (10)5.1 Introducing Application Software Tools (10)5.2 Window Driver Installation First (10)5.3 Installation Application Software Tools (13)5.4 DOS SPI Tool (15)5.5 Window SPI Software Tool (16)5.6 LinkMD Software Tool (17)6.0 Reference Documents (19)7.0 Bill of Material (19)8.0 Schematics (19)List of Figures and TablesFigure 1 KSZ8795-POE-EVAL Board (5)Figure 2 KSZ8795-POE-EVAL Board Block Diagram (6)Table 1 General Setting Jumpers (7)Table 2 Power Setting Jumpers (7)Table 3 LED Modes (9)Revision History1.0 IntroductionThe KSZ8795 family is Micrel Operations new generation integrated 5-port switch with Gigabit up-link. The KSZ8795CLX is one of KSZ8795 family. KSZ8795CLX contains four MAC/PHYs for four copper ports and one GMAC5 interface with configurable GMII/RGMII/MII/RMII interfaces. The device had been designed with cost sensitive systems in mind but still offers a multitude of new features such as port based security ACL filtering, 802.1az EEE, LinkMD and so on. Also support port and tag based VLAN; QoS priority; SPI and MDC/MDIO interfaces for the registers access. The KSZ8795 family is an excellent choice in broadband gateway applications, integrated broadband router applications, industrial automatic, automotive, etc. fields and as a standalone switch. The KSZ8795-POE-EVAL board is designed to allow the user to experience Gigabit up-link with KSZ9031 Gigabit PHY to Gigabit port of any processor board directly, and can provide PoE PSE power to other four ports. Other rich feature set can be evaluated on this board. The evaluation board is highly configurable and easy to use.2.0 Features∙Micrel KSZ8795 Integrated 5-port 10/100 Managed Ethernet Switch∙ 4 RJ-45 Jacks for 10/100Base-T/TX Ethernet LAN with Corresponding Isolation Magnetics. ∙Auto MDI/MDIX on All Ports.∙Port 5 SW5-RGMII hook-up with a KSZ9031RNX GPHY and provide a Gigabit port.∙Easily set to different VDDIO of 3.3V, 2.5V and 1.8V by jumpers.∙ 1 USB Port Interface Configurable to Emulate an SPI Interface for all registers access by using Window GUI and DOS based software tools.∙ 2 LEDs per Port with 5 LED sets to indicate the Status and Activity for 4 fast Ethernet ports and1 Gigabit port.∙The board powered can be used by a 12V DC power supply.3.0 Evaluation Kit ContentsThe KSZ8795-POE-EVAL Evaluation kit includes the following:∙KSZ8795-POE-EVAL Evaluation Board Rev. 1.x∙KSZ8795-POE-EVAL Ev aluation Board User’s Guide Rev 1.x∙Micrel SPI Configuration Software tools∙KSZ8795-POE-EVAL Evaluation Board Schematics and BOM∙KSZ8795-POE-EVAL PCB file, Gerber file and IBIS model∙The software, reference schematics and other design information will be found in the Design Kit (Design Package) of the KSZ8795 Ethernet switch products on Micrel website.(Contact your Micrel FAE for the latest schematic).∙One 12V DC power supply.∙The USB cable is not included.4.0 Hardware DescriptionThe KSZ8795-POE-EVAL evaluation board is in a compact form factor and can sit on a bench near a computer with USB connector. There are two options for configuration: strap in mode; SPI mode and Strap-in mode that is easily done with on board jumper options. SPI mode is accomplished through a built in USB port interface. You can configure the KSZ8795 device on board by the USB port. Using Micrel SPI software and your PC, you can access the KSZ8795’s full feature set registers by the USB to SPI interface. The board also features RGMII to hook up a KSZ9031RNX as a Gigabit uplink for Gigabit port 5.The KSZ8795-POE-EVAL evaluation board is easy to use. There are programmable LED indicators for link and activity on all ports and a power LED. A manual reset button allows the user to reset the board without removing the power plug. A standard 12VDC power supply can be used by the power jack so that the user can supply power from any 110-240 Volt AC wall or bench socket.Figure 1 KSZ8795-POE-EVAL BoardFigure 2 KSZ8795-POE-EVAL Board Block Diagram4.1 Strap in ModeStrap in configuration mode is the quickest and easiest way to get started. In the default mode, the KSZ8795 acts as a stand-alone 4 port switch and one RGMII up-link. The user has to simply set the board’s configuration jumpers to the desired settings and apply power to the board. The user can also change jumper settings while power is applied to the board and press the convenient manual reset button for the new settings to take effect. Note that even if there is no external strap in values are set, internal pull up and pull down resistors will set the KSZ8795 default configuration. Section 4.1.1 covers each jumper on the board and describes its function.The KSZ8795 will start automatically after power up or reset.4.2 Feature Setting JumpersThe evaluation board provides jumpers to allow the user to easily set strap in configurations for the KSZ8795. Tables below describe the jumpers and their functions in the open or closed state.Table 1 General Setting JumpersTable 2 Power Setting Jumpers4.3 SPI ModeFrom SPI interface to the KSZ8795, use a USB to SPI converter that allows accessing all of the KSZ8795 features and registers. The user can easily access the SPI interface using a computer connected to the evaluation board’s USB port interface. Micrel provides a Windows GUI based program for the user to evaluate the KSZ8795’s full feature set. KSZ8795’s SP I interface will be able to access all static MAC table, the VLAN table, dynamic MAC address table, the MIB counters and all enhanced features.To prepare the KSZ8795CLXD-EVAL board for SPI mode configuration follow these steps:1. Copy the Micrel provided SPI interface software on your computer.2. KSZ8795-POE-EVAL board is fixed at SPI slave mode.3.Connect the computer’s USB port to the KSZ8795CLXD-EVAL board with a USB port cable.4.Connect the 12V DC power supply to J7 of the KSZ8795-POE-EVAL board.5.Open the Windows and navigate to the directory where the Window SPI file is stored. Click itsicon to invoke the software.6.Program the desired settings using the Micrel SPI interface software. See the softwareoperation description section for details.4.4 10/100 Ethernet PortsThere are five 10/100 Ethernet ports on the KSZ8795-POE-EVAL board. The ports J1, J2, J3 and J4 are the standard RJ45 connectors and using CAT-5 cables. Each port can be used as either an uplink or downlink. All ports support Auto-MDI/MDIX, so there is no need for cross over cables. J1 = RJ45 connector for port 1J2 = RJ45 connector for port 2J3 = RJ45 connector for port 3J4 = RJ45 connector for port 4JM1, JM2, JM3, JM4 and JS1, JS2, JS3, JS4 special connectors for Automotive used only.4.4 10/100/1000 Gigabit PortsThere is one KSZ9031RNX with 10/100/1000 Ethernet ports on the KSZ8795-POE-EVAL board. The ports RJ1 is the standard RJ45 connectors for port 5 and can connect to one Gigabit port of a processor platform by using CAT-5 cables. The port supports Auto-MDI/MDIX, so there is no need for the cross over cables.RJ1 = RJ45 connector for port 54.5 LED indicatorsEthernet Port LEDsThere are four columns of LED indicators on the board, one column for each of the four ports. The LED indicators are programmable to two different modes. You can program the LED mode through Register 11 bits [5:4]. The mode definitions are shown in Table below. There are two LEDs per port. The naming convention is “LEDx_y”, where “x” is the port number, and “y” is the number of the LED for that port.Table 3 LED ModesLED1_y are assigned to port 1LED2_y are assigned to port 2LED3_y are assigned to port 3LED4_y are assigned to port 4Gigabit Port LEDThe board also has a Gigabit port LED D3 to indicate the link-up speed for port 5.Green Color: 1G LinkRed Color: 100M LinkOrange Color: 10M LinkPower LEDThe board also has a power LED D7 for the 3.3V power supply. D7 LED indicates Power on and off.5.0 Software Tools Description5.1 Introducing Application Software ToolsThe Design Kit provides some software tools to support SPI access for all registers andMDC/MDIO access for MIIM registers. The installation file is located folders in the software tool directory within subdirectory of Window SPI_MDIO_Tools, this file name is MicrelSwitchPhyTool_x.xx.msi.5.2 Window Driver Installation FirstBefore use the Window based application software tool, the support drivers need to be installed to PC/Laptop first and this installation is just one times only. When connect one standard USB cable with type A and type B connectors between the evaluation board and PC computer first time, the Found New Hardware Wizard window will pop-up and then follow the instructions step by step as below.. Choose ‘No, not this time’ radio button and click the ‘Next’ button.Choose the ‘Install from a list or specific location (Advanced)’ radio button and click the ‘Next’ button.Click the ‘Include this location in the search’ check box, and use ‘Browse’ button to select the‘C:\MicrelEthernetChipConfig\D2XXDriver\CDM 2.02.04 WHQL Certified’ directory and click the ‘Next’ button. The window will install the drivers from this location.Click ‘Finish’ button. The Window will install another driver called ‘USB Serial Converter B’. After the drivers installed, Window Device Manager will show ‘USB Serial Converter A’ and ‘USB Serial Converter B’ as below figure. That means the installation successful.5.3 Installation Application Software ToolsIn the Design Kit, the installation file is located folders in the software tool directory within subdirectory of Window SPI_MDIO_Tools, this file name is MicrelSwitchPhyTool_x.xx.msi. Double click this file name, an installation Window will pop-up and then follow the instructions step by step as below.In this pop-up Window, this application software tools can be assigned to default Micrel directory in above window shown or is assigned to a specified folder what you want. Click ‘Next’ button, next Window will pop-up as below.Click ‘Next’ button to start the installation.Click ‘Close’ button to finish the installation. All application software tools are installed into the default Micrel directory or assigned directory in installation as below.5.4 DOS SPI ToolThis is a simple and powerful tool to access all register. The tool located in the default or assigned folder in the installation. There is an USBSPI.exe file which can be executed directly by clicking its icon. Before run the software tool, the SPI jumper setting should follows Table 5 in 4.3 SPI mode section and USB cable is plugged in both KSZ8795-POE-EVAL board and PC/Laptop. After click its icon, a DOS Window will pop up as follow:T ype a ‘help’ and press Enter, all commands will display as follows,For Read or Write registers, reg is the offset address of the register, value is Hex number.The ‘run file’ command can execute multiple commands by a script file, the script file is a .txt file which can be created by any edit tools.run xxxx.txt //will run the .txt script file.5.5 Window SPI Software ToolThis is a powerful tool to access all register. The tool located in the default or assigned folder in the installation. There is a MicrelSwitchConfigApp.exe file which can be executed directly by clicking its icon.Before run the software tool, the SPI jumper setting should follows Table 5 in 4.3 SPI mode section and USB cable should be plugged in both KSZ8795CLXD-EVAL board and PC/Laptop. After click its icon, a GUI Window will pop up as follow:The default is SPI interface to do switch configuration. From the device selection window to select any devices then press ‘Continue’ button or click ‘Continue’ button directly, the software tool can detect devices automatically. A control Window will be pop up as follow.All register can be read/ written in the window.The control Window includes all application registers, static MAC table, VLAN table, dynamic table and MIB counters that are supported by SPI. The software can save and open the configuration file as a back-up.5.6 LinkMD Software ToolThis is a simple and powerful tool to test Micrel LinkMD feature. The tool is in the installation folder. There is a LinkMDUSB.exe file which can be executed directly by clicking its icon.After click the icon of this executed file, a GUI Window will pop up as follow:Select one part and clik ‘Next’ button, using SPI interface and clik ‘Next’ button again, pop up a test windown as below:An example for CAT-5 cable diagnostic with open on port 1, just clic k ‘TEST’ button, a test result shows as below.The test result shows both MDIX mode for pair 3-6 and MDI mode for 1-2 pair. The detail LinkMD diagnostic testing configuration is described in the datasheet.6.0 Reference DocumentsKSZ8795CLX Data Sheets (Contact Micrel for Latest Datasheet), KSZ8795 Design Package includes all design information as a Design kit. The Design Kit will be found on Micrel website (Contact Micrel for the updates).7.0 Bill of MaterialPlease see the detail BOMs in the BOM folder of the hardware design package for theKSZ8795-POE-EVAL Boards.8.0 SchematicsPlease see the schematics of the evaluation board and reference design in the schematicsfolder of the hardware design package (Design kit) for the KSZ8795-POE-EVAL Board. Magnetics Vendors:See the datasheets for the recommendation.MICREL, INC. 1849 FORTUNE DRIVE SAN JOSE, CA 95131 USA TEL +1 (408) 944-0800 FAX +1 (408) 474-1000 WEB http:/ The information furnished by Micrel in this data sheet is believed to be accurate and reliable. However, no responsibility is assumed by Micrel for its use. Micrel reserves the right to change circuitry and specifications at any time without notification to thecustomer.Micrel Products are not designed or authorized for use as components in life support appliances, devices or systems where malfunction of a product can reasonably be expected to result in personal injury. Life support devices or systems are devices or systems that (a) are intended for surgical implant into the body or (b) support or sustain life, and whose failure to perform can be reasonably expected to result in a signi ficant injury to the user. A Purchaser’s use or sale of Micrel Products for use in life support appliances, devices or systems is a Purchaser’s own risk and Purchaser agrees to fully indemnify Micrel for any damagesresulting from such use or sale.© 2015 Micrel, Incorporated.。
conky配置文件分享

conky配置⽂件分享个⼈跑实验的时候希望看内存泄露,是否跑gpu等等,所以conky⼏乎是必不可少的插件。
在/home/yonghu/下建⽴.conkyrc⽂件wlp4s0和enp5s0f1分别改为⾃⼰电脑⽹卡设备编号ifconfig查看override由于本⼈电脑只能使⽤override所以⽆法融⼊背景,可以的话,可以尝试own_window_type如果own_window为yes 可以指定窗⼝样式为normal, desktop, dock或者override 默认为nomal desktop是指没有装饰置顶不显⽰在pager和taskbar上出现在所有workspace上的的特殊窗⼝ override指的是不在控制之下的窗⼝会忽略提⽰某些时候很有⽤# Conky settings #background yesupdate_interval 1cpu_avg_samples 2net_avg_samples 2override_utf8_locale yesdouble_buffer yesno_buffers yestext_buffer_size 2048#imlib_cache_size 0temperature_unit celsius# Window specifications #own_window yesown_window_transparent yesown_window_type dockown_window_class conky-semiown_window_hints undecorated,below,sticky,skip_taskbar,skip_pagerown_window_argb_visual trueown_window_transparent trueborder_inner_margin 0border_outer_margin 0minimum_size 520600maximum_width 520alignment top_rightgap_x 0gap_y 100# Graphics settings #draw_shades nodraw_outline nodraw_borders nodraw_graph_borders nodefault_color graydefault_shade_color reddefault_outline_color green# Text settings #use_xft yesoverride_utf8_locale yesxftfont Pf Tempesta Five:bold:size=6xftalpha 0.9uppercase notemperature_unit celsiusdefault_color 999999color0 d00420color1 d00420color2 d00420#color3 1994D1# Lua Load ##${voffset 750}lua_load ~/.conky/rings-v1.2.1.lua_dark#lua_draw_hook_pre ring_statslua_draw_hook_pre conky_mainTEXT${font Pf Tempesta Five:bold:size=6}${voffset 16}${goto 160}${color1}${acpitemp} °C${font Pf Tempesta Five:bold:size=6}${voffset -1}${goto 128}${color1}CPU 1 ${alignr 330}${color1}${cpu cpu0}%${font Pf Tempesta Five:bold:size=6}${voffset 4}${goto 128}${color1}CPU 2${alignr 330}${color1}${cpu cpu1}%${font Pf Tempesta Five:bold:size=6}${voffset 4}${goto 128}${color1}CPU 3${alignr 330}${color1}${cpu cpu2}%${font Pf Tempesta Five:bold:size=6}${voffset 2}${goto 128}${color1}CPU 4${alignr 330}${color1}${cpu cpu3}%${goto 50}${voffset 12}${font Pf Tempesta Five:bold:size=6}${color1}${top name 1}${alignr 306}${top cpu 1}%${goto 50}${font Pf Tempesta Five:bold:size=6}${color1}${top name 2}${alignr 306}${top cpu 2}%${goto 50}${font Pf Tempesta Five:bold:size=6}${color1}${top name 3}${alignr 306}${top cpu 3}%${font Birch Std:size=18}${color0}${goto 52}${voffset 8}CPU ${freq_g cpu0} Ghz${font Birch Std:size=18}${color0}${goto 400}${voffset 48}MEMORY${goto 320}${voffset -6}${font Pf Tempesta Five:bold:size=6}${color1}${top_mem name 1}${alignr 40}${top_mem mem 1}%${goto 320}${font Pf Tempesta Five:bold:size=6}${color1}${top_mem name 2}${alignr 40}${top_mem mem 2}%${goto 320}${font Pf Tempesta Five:bold:size=6}${color1}${top_mem name 3}${alignr 40}${top_mem mem 3}%${font Pf Tempesta Five:bold:size=6}${voffset 6}${goto 350}${color1}SWAP${alignr 30}${color1}${swap} / ${color1}${swapmax}${font Pf Tempesta Five:bold:size=6}${voffset 4}${goto 350}${color1}RAM ${alignr 30}${color1}${mem} / ${color1}${memmax}${font Pf Tempesta Five:bold:size=6}${goto 80}${voffset -68}Root${color1}${alignr 310}${fs_used /} / ${fs_size /}${font Pf Tempesta Five:bold:size=6}${goto 80}${voffset 2}Home${alignr 310}${color1}${fs_used /home} / ${fs_size /home}${font Pf Tempesta Five:bold:size=6}${goto 80}${voffset 1}Usr${alignr 310}${color1}${fs_used /usr} / ${fs_size /usr}${font Birch Std:size=18}${color0}${goto 102}${voffset 12}HARD DRIVE${font Birch Std:size=18}${color0}${voffset 30}${goto 330}INTERNET INFO# EDITION FINIR wlp4s0${if_existing /proc/net/route wlp4s0}${font Pf Tempesta Five:bold:size=6}${color1}${goto 320}${voffset -14}WiFi${goto 350}${color1}${wireless_essid wlp4s0 }${font Pf Tempesta Five:bold:size=6}${color1}${goto 300}${voffset 9}Up${goto ${font Pf Tempesta Five:bold:size=6}${goto 300}${color1}Down${goto 350}${color1}${totaldown wlp4s0 } / ${color1}${downspeed wlp4s0 }${font Pf Tempesta Five:bold:size=7}${goto 300}${voffset 2}Local IP${goto 370}${addr wlp4s0 }${font Pf Tempesta Five:bold:size=7}${goto 300}${voffset -1}${color2}Public IP:${alignr}${color1}${goto 370}${execi 1800 curl }${font WenQuanYi Micro Hei Std:size=10}${goto 80}${voffset -40}${color0}${time %Y %b %A %b %d }${font Birch Std:size=22}${goto 162}${color1}${voffset 0}${time %H}:${time %M}${font Birch Std:size=18}${color0}${goto 300}${voffset 22}BATTERIE:${battery_time}${font Birch Std:size=16}${color0}${goto 282}${voffset -2}${color1}${battery_percent}%# |--enp5s0f1${else}${if_existing /proc/net/route enp5s0f1}${font Pf Tempesta Five:bold:size=6}${color1}${goto 300}${voffset -6}Up${goto 350}${color1}${totalup enp5s0f1 } / ${color1}${upspeed enp5s0f1 }${font Pf Tempesta Five:bold:size=6}${goto 300}${color1}Down${goto 350}${color1}${totaldown enp5s0f1 } / ${color1}${downspeed enp5s0f1 }${font Pf Tempesta Five:bold:size=7}${goto 300}${voffset 2}Local IP${goto 370}${addr enp5s0f1 }${color2}Public IP:${alignr}${color1}${goto 370}${execi 1800 curl }${font WenQuanYi Micro Hei Std:size=10}${goto 80}${voffset -40}${color0}${time %Y %b %A %b %d }${font Birch Std:size=22}${goto 162}${color1}${voffset 0}${time %H}:${time %M}${font Birch Std:size=18}${color0}${goto 300}${voffset 26}BatteryTime:${battery_time}${font Birch Std:size=16}${color0}${goto 282}${voffset -2}${color1}${battery_percent}%${endif}${endif}#${font Pf Tempesta Five:bold:size=6}${goto 180}Uptime${color1}${alignr 100}${uptime_short}### 相应的conky-colors配置参数--nvidia 好像没有ATI的 ###${voffset 0}${font simhei:style=Bold:size=9}显卡 NVIDIA 英伟达 $stippled_hr${font}${color0}${voffset -4}${font Poky:size=17}N${font}${color}${voffset -8}GPU 温度 Temp:${alignr}${font Droid Sans:style=Bold:size=8}${color1} ${exec nvidia-settings -q GPUCoreTemp | grep Attribute | cut -d '' -f 6 | cut -c 1-2}${font}${color}°C GPU 时钟 Clock:${alignr}${font Droid Sans:style=Bold:size=8}${color1} ${exec nvidia-settings -q GPUCurrentClockFreqs -t}${font}${color}MHz显存容量 Video RAM:${alignr}${font Droid Sans:style=Bold:size=8}${color1} ${exec nvidia-settings -q VideoRam -t}${font}${color}KiB驱动版本 Driver Version:${alignr}${font Droid Sans:style=Bold:size=8}${color1} ${exec nvidia-settings -q NvidiaDriverVersion -t}${font}${color}${voffset 2}${font OpenLogos:size=16}u${font} ${color1}${font Anklepants:size=12}SYSTEM${font} ${hr 1}${color1}HOSTNAME: $alignr$nodenameKERNEL: $alignr$kernelUPTIME: $alignr$uptime。
ICAO Annex14

n Associates, Inc
International Federation of Helicopter Associations
IFHA
ICAO ‘Annex 14 Update’ Workshop – HAI HeliExpo 2010
HELIPORT/HELIDECK DESIGN
ICAO ‘ANNEX 14 UPDATE’
(ICAO Annex 14 Volume II –Heliports)
WORKSHOP
Dr John W. Leverton
IFHA Representative to ICAO Aerodrome Panel HAI Heliport Design Focal Point Vice President Infrastructure Development, AHS
*********************** FAA Advisory Circular (AC) 150-5390-2B (2004)
= AC-2B
ICAO ‘Annex 14 Update’ Workshop – HAI HeliExpo 2010
Leverton Associates, Inc
Leverton Associates, Inc
HELIPORT/HELIDECK DESIGN
ICAO ‘ANNEX 14 UPDATE’
(ICAO Annex 14 Volume II –Heliports)
WORKSHOP # 1
Dr John W. Leverton
IFHA Representative to ICAO Aerodrome Panel HAI Heliport Design Focal Point Vice President Infrastructure Development, AHS
AJA FS2 Installation and Operation Guide

AJA FS2 Installation and Operation Installation and Operation GuideB e c a u s e i t m a t t e r s .7/31/2012 Version: 1.1.0.0TrademarksAJA®, KONA®, Ki Pro®, KUMO®, and XENA® are registered trademarks of AJA Video, Inc. Io Express™,Io HD™ and Io™ are trademarks of AJA Video, Inc. Apple, the Apple logo, AppleShare, AppleTalk,FireWire, iPod, iPod Touch, Mac, and Macintosh are registered trademarks of Apple Computer, Inc.Final Cut Pro, QuickTime and the QuickTime Logo are trademarks of Apple Computer, Inc. All othertrademarks are the property of their respective holders.NoticeCopyright © 2012 AJA Video, Inc. All rights reserved. All information in this manual is subject tochange without notice. No part of the document may be reproduced or transmitted in any form,or by any means, electronic or mechanical, including photocopying or recording, without theexpress written permission of AJA Inc.FCC Emission InformationThis equipment has been tested and found to comply with the limits for a Class A digital device,pursuant to Part 15 of the FCC Rules. These limits are designed to provide reasonable protectionagainst harmful interference when the equipment is operated in a commercial environment. Thisequipment generates, uses and can radiate radio frequency energy and, if not installed and usedin accordance with the instruction manual, may cause harmful interference to radiocommunications. Operation of this equipment in a residential area is likely to cause harmfulinterference in which case the user will be required to correct the interference at his own expense.Changes or modifications not expressly approved by AJA Video can effect emission complianceand could void the user’s authority to operate this equipment.Contacting SupportTo contact AJA Video for sales or support, use any of the following methods:180 Litton Drive, Grass Valley, CA. 95945 USATelephone: +1.800.251.4224 or +1.530.274.2048Fax: +1.530.274.9442Web: SupportEmail:***************SalesEmail:*************1FS2 Installation and Operation Manual — Limited Warranty Limited WarrantyAJA Video warrants that this product will be free from defects in materials and workmanship for aperiod of five years from the date of purchase. If a product proves to be defective during thiswarranty period, AJA Video, at its option, will either repair the defective product without charge forparts and labor, or will provide a replacement in exchange for the defective product.In order to obtain service under this warranty, you the Customer, must notify AJA Video of the defectbefore the expiration of the warranty period and make suitable arrangements for the performanceof service. The Customer shall be responsible for packaging and shipping the defective product to adesignated service center nominated by AJA Video, with shipping charges prepaid. AJA Video shallpay for the return of the product to the Customer if the shipment is to a location within the countryin which the AJA Video service center is located. Customer shall be responsible for paying allshipping charges, insurance, duties, taxes, and any other charges for products returned to any otherlocations.This warranty shall not apply to any defect, failure or damage caused by improper use or improper orinadequate maintenance and care. AJA Video shall not be obligated to furnish service under thiswarranty a) to repair damage resulting from attempts by personnel other than AJA Videorepresentatives to install, repair or service the product, b) to repair damage resulting from improperuse or connection to incompatible equipment, c) to repair any damage or malfunction caused bythe use of non-AJA Video parts or supplies, or d) to service a product that has been modified orintegrated with other products when the effect of such a modification or integration increases thetime or difficulty of servicing the product.THIS WARRANTY IS GIVEN BY AJA VIDEO IN LIEU OF ANY OTHER WARRANTIES, EXPRESS OR IMPLIED.AJA VIDEO AND ITS VENDORS DISCLAIM ANY IMPLIED WARRANTIES OF MERCHANTABILITY ORFITNESS FOR A PARTICULAR PURPOSE. AJA VIDEO’S RESPONSIBILITY TO REPAIR OR REPLACEDEFECTIVE PRODUCTS IS THE WHOLE AND EXCLUSIVE REMEDY PROVIDED TO THE CUSTOMER FORANY INDIRECT, SPECIAL, INCIDENTAL OR CONSEQUENTIAL DAMAGES IRRESPECTIVE OF WHETHERAJA VIDEO OR THE VENDOR HAS ADVANCE NOTICE OF THE POSSIBILITY OF SUCH DAMAGES. Important Safety InformationHazard!This symbol, when used in the manual, indicates a serious health hazard with risk of injury ordeath.Warning!This symbol, when used in the manual, indicates a serious risk or threat to personal safety.Caution!This symbol, when used in the manual, indicates important safety and complianceinformation.Table of Contents ContentsAJA FS2 Installation and Operation Guide. . . . . . . . . . . . . . . . . . . . . . . . . . . . . . . . . .i Trademarks . . . . . . . . . . . . . . . . . . . . . . . . . . . . . . . . . . . . . . . . . . . . . . . . . . . . . . . . . . . . . . . . . . . . . . . . . . . . . . . ii Notice . . . . . . . . . . . . . . . . . . . . . . . . . . . . . . . . . . . . . . . . . . . . . . . . . . . . . . . . . . . . . . . . . . . . . . . . . . . . . . . . . . . . iiFCC Emission Information . . . . . . . . . . . . . . . . . . . . . . . . . . . . . . . . . . . . . . . . . . . . . . . . . . . . . . . . . . . . . . . . . ii Contacting Support . . . . . . . . . . . . . . . . . . . . . . . . . . . . . . . . . . . . . . . . . . . . . . . . . . . . . . . . . . . . . . . . . . . . . . . ii Limited Warranty. . . . . . . . . . . . . . . . . . . . . . . . . . . . . . . . . . . . . . . . . . . . . . . . . . . . . . . . . . . . . . . . . . . . . . . . . . iii Important Safety Information. . . . . . . . . . . . . . . . . . . . . . . . . . . . . . . . . . . . . . . . . . . . . . . . . . . . . . . . . . . . . . iii Contents. . . . . . . . . . . . . . . . . . . . . . . . . . . . . . . . . . . . . . . . . . . . . . . . . . . . . . . . . . . . . . . . . . . . . . . . . . . . . . . . . . vChapter 1:Introduction. . . . . . . . . . . . . . . . . . . . . . . . . . . . . . . . . . . . . . . . . . . . . . . . . . . . . . . . . . 1 Overview . . . . . . . . . . . . . . . . . . . . . . . . . . . . . . . . . . . . . . . . . . . . . . . . . . . . . . . . . . . . . . . . . . . . . . . . . . . . . . . . . 1 Video Features . . . . . . . . . . . . . . . . . . . . . . . . . . . . . . . . . . . . . . . . . . . . . . . . . . . . . . . . . . . . . . . . . . . . . . . . . 1 Available Video Formats. . . . . . . . . . . . . . . . . . . . . . . . . . . . . . . . . . . . . . . . . . . . . . . . . . . . . . . . . . . . . 2 Audio Features. . . . . . . . . . . . . . . . . . . . . . . . . . . . . . . . . . . . . . . . . . . . . . . . . . . . . . . . . . . . . . . . . . . . . . . . . 2Control and Other Features. . . . . . . . . . . . . . . . . . . . . . . . . . . . . . . . . . . . . . . . . . . . . . . . . . . . . . . . . . . . . 2Typical Applications. . . . . . . . . . . . . . . . . . . . . . . . . . . . . . . . . . . . . . . . . . . . . . . . . . . . . . . . . . . . . . . . . . . . 3FS2 Control . . . . . . . . . . . . . . . . . . . . . . . . . . . . . . . . . . . . . . . . . . . . . . . . . . . . . . . . . . . . . . . . . . . . . . . . . . . . . . . 4 Front Panel Control. . . . . . . . . . . . . . . . . . . . . . . . . . . . . . . . . . . . . . . . . . . . . . . . . . . . . . . . . . . . . . . . . . . . . 4Remote Web Browser Control. . . . . . . . . . . . . . . . . . . . . . . . . . . . . . . . . . . . . . . . . . . . . . . . . . . . . . . . . . . 4 SNMP Interface. . . . . . . . . . . . . . . . . . . . . . . . . . . . . . . . . . . . . . . . . . . . . . . . . . . . . . . . . . . . . . . . . . . . . . . . . . . . 4GPI Inputs and Outputs. . . . . . . . . . . . . . . . . . . . . . . . . . . . . . . . . . . . . . . . . . . . . . . . . . . . . . . . . . . . . . . . . . . . 5 Optional Remote Control Panel. . . . . . . . . . . . . . . . . . . . . . . . . . . . . . . . . . . . . . . . . . . . . . . . . . . . . . . . . . . . 5 Optional Fiber I/O. . . . . . . . . . . . . . . . . . . . . . . . . . . . . . . . . . . . . . . . . . . . . . . . . . . . . . . . . . . . . . . . . . . . . . . . . 5 Optional Dolby E Decoder and Encoder Cards. . . . . . . . . . . . . . . . . . . . . . . . . . . . . . . . . . . . . . . . . . . . . . 5 Technical Description . . . . . . . . . . . . . . . . . . . . . . . . . . . . . . . . . . . . . . . . . . . . . . . . . . . . . . . . . . . . . . . . . . . . . 6 Video Processors . . . . . . . . . . . . . . . . . . . . . . . . . . . . . . . . . . . . . . . . . . . . . . . . . . . . . . . . . . . . . . . . . . . . . . . 73G Support. . . . . . . . . . . . . . . . . . . . . . . . . . . . . . . . . . . . . . . . . . . . . . . . . . . . . . . . . . . . . . . . . . . . . . . . . . . . . 7Audio Processors. . . . . . . . . . . . . . . . . . . . . . . . . . . . . . . . . . . . . . . . . . . . . . . . . . . . . . . . . . . . . . . . . . . . . . . 8 What’s In The Box? . . . . . . . . . . . . . . . . . . . . . . . . . . . . . . . . . . . . . . . . . . . . . . . . . . . . . . . . . . . . . . . . . . . . . . . . 9In This Manual . . . . . . . . . . . . . . . . . . . . . . . . . . . . . . . . . . . . . . . . . . . . . . . . . . . . . . . . . . . . . . . . . . . . . . . . . . . 10Chapter 2:Controls, Indicators, and Connections . . . . . . . . . . . . . . . . . . . . . . . . . . . . . . . . . . .11 Control and Indicator Descriptions . . . . . . . . . . . . . . . . . . . . . . . . . . . . . . . . . . . . . . . . . . . . . . . . . . . . . . . 11 Front Panel Description . . . . . . . . . . . . . . . . . . . . . . . . . . . . . . . . . . . . . . . . . . . . . . . . . . . . . . . . . . . . . . . . . . 12 Alphanumeric Display. . . . . . . . . . . . . . . . . . . . . . . . . . . . . . . . . . . . . . . . . . . . . . . . . . . . . . . . . . . . . . . . . 12 Operational Summary. . . . . . . . . . . . . . . . . . . . . . . . . . . . . . . . . . . . . . . . . . . . . . . . . . . . . . . . . . . . . . 12 Pushbuttons. . . . . . . . . . . . . . . . . . . . . . . . . . . . . . . . . . . . . . . . . . . . . . . . . . . . . . . . . . . . . . . . . . . . . . . . . . 13 Control Knobs . . . . . . . . . . . . . . . . . . . . . . . . . . . . . . . . . . . . . . . . . . . . . . . . . . . . . . . . . . . . . . . . . . . . . . . . 15 LED Indicators . . . . . . . . . . . . . . . . . . . . . . . . . . . . . . . . . . . . . . . . . . . . . . . . . . . . . . . . . . . . . . . . . . . . . . . . 16 Incompatibility Alarms . . . . . . . . . . . . . . . . . . . . . . . . . . . . . . . . . . . . . . . . . . . . . . . . . . . . . . . . . . . . . . . . 17 Incompatible Video Formats. . . . . . . . . . . . . . . . . . . . . . . . . . . . . . . . . . . . . . . . . . . . . . . . . . . . . . . . 17 Example Reference and Video Incompatibility Alarms . . . . . . . . . . . . . . . . . . . . . . . . . . . . . . . 17 Rear Panel Description . . . . . . . . . . . . . . . . . . . . . . . . . . . . . . . . . . . . . . . . . . . . . . . . . . . . . . . . . . . . . . . . . . . 18 Connectors . . . . . . . . . . . . . . . . . . . . . . . . . . . . . . . . . . . . . . . . . . . . . . . . . . . . . . . . . . . . . . . . . . . . . . . . . . . 18 Connector Descriptions . . . . . . . . . . . . . . . . . . . . . . . . . . . . . . . . . . . . . . . . . . . . . . . . . . . . . . . . . . . . . . . . . . 19 AC Power Connectors . . . . . . . . . . . . . . . . . . . . . . . . . . . . . . . . . . . . . . . . . . . . . . . . . . . . . . . . . . . . . . 19 AES/EBU Digital Audio In and Out. . . . . . . . . . . . . . . . . . . . . . . . . . . . . . . . . . . . . . . . . . . . . . . . . . . 19 Balanced Analog Audio In and Out. . . . . . . . . . . . . . . . . . . . . . . . . . . . . . . . . . . . . . . . . . . . . . . . . . 19 RS-422 Port . . . . . . . . . . . . . . . . . . . . . . . . . . . . . . . . . . . . . . . . . . . . . . . . . . . . . . . . . . . . . . . . . . . . . . . . 19 GPI Inputs and Outputs. . . . . . . . . . . . . . . . . . . . . . . . . . . . . . . . . . . . . . . . . . . . . . . . . . . . . . . . . . . . . 19 LAN. . . . . . . . . . . . . . . . . . . . . . . . . . . . . . . . . . . . . . . . . . . . . . . . . . . . . . . . . . . . . . . . . . . . . . . . . . . . . . . . 19 SDI In and Out . . . . . . . . . . . . . . . . . . . . . . . . . . . . . . . . . . . . . . . . . . . . . . . . . . . . . . . . . . . . . . . . . . . . . 20 Optical Fiber In and Out . . . . . . . . . . . . . . . . . . . . . . . . . . . . . . . . . . . . . . . . . . . . . . . . . . . . . . . . . . . . 20 Component/Composite Analog Video In and Out . . . . . . . . . . . . . . . . . . . . . . . . . . . . . . . . . . . 20 HDMI In and Out . . . . . . . . . . . . . . . . . . . . . . . . . . . . . . . . . . . . . . . . . . . . . . . . . . . . . . . . . . . . . . . . . . . 20 Composite NTSC/PAL . . . . . . . . . . . . . . . . . . . . . . . . . . . . . . . . . . . . . . . . . . . . . . . . . . . . . . . . . . . . . . 20 Reference Video (looping) . . . . . . . . . . . . . . . . . . . . . . . . . . . . . . . . . . . . . . . . . . . . . . . . . . . . . . . . . . 20 About Inputs and Outputs. . . . . . . . . . . . . . . . . . . . . . . . . . . . . . . . . . . . . . . . . . . . . . . . . . . . . . . . . . . . . 21Chapter 3:Installation & Configuration . . . . . . . . . . . . . . . . . . . . . . . . . . . . . . . . . . . . . . . . . . . .23 Installation Overview. . . . . . . . . . . . . . . . . . . . . . . . . . . . . . . . . . . . . . . . . . . . . . . . . . . . . . . . . . . . . . . . . . . . . 23 Installation Summary. . . . . . . . . . . . . . . . . . . . . . . . . . . . . . . . . . . . . . . . . . . . . . . . . . . . . . . . . . . . . . . . . . 24 Unpacking. . . . . . . . . . . . . . . . . . . . . . . . . . . . . . . . . . . . . . . . . . . . . . . . . . . . . . . . . . . . . . . . . . . . . . . . . . . . . . . 25 Shipping Box Contents. . . . . . . . . . . . . . . . . . . . . . . . . . . . . . . . . . . . . . . . . . . . . . . . . . . . . . . . . . . . . . . . 25 Installing Optional Fiber Optic I/O Modules . . . . . . . . . . . . . . . . . . . . . . . . . . . . . . . . . . . . . . . . . . . . . . . 26 Installing Optional Cards . . . . . . . . . . . . . . . . . . . . . . . . . . . . . . . . . . . . . . . . . . . . . . . . . . . . . . . . . . . . . . . . . 26 Dolby Decoder Installation . . . . . . . . . . . . . . . . . . . . . . . . . . . . . . . . . . . . . . . . . . . . . . . . . . . . . . . . . 27 FS2 Chassis Installation. . . . . . . . . . . . . . . . . . . . . . . . . . . . . . . . . . . . . . . . . . . . . . . . . . . . . . . . . . . . . . . . . . . 27 Physical Requirements for Mounting the Chassis. . . . . . . . . . . . . . . . . . . . . . . . . . . . . . . . . . . . . . . 27 Chassis Dimensions . . . . . . . . . . . . . . . . . . . . . . . . . . . . . . . . . . . . . . . . . . . . . . . . . . . . . . . . . . . . . . . . 27 Cabling and Cooling Requirements . . . . . . . . . . . . . . . . . . . . . . . . . . . . . . . . . . . . . . . . . . . . . . . . . 27 Power Requirements. . . . . . . . . . . . . . . . . . . . . . . . . . . . . . . . . . . . . . . . . . . . . . . . . . . . . . . . . . . . . . . . . . 27 Network Connection. . . . . . . . . . . . . . . . . . . . . . . . . . . . . . . . . . . . . . . . . . . . . . . . . . . . . . . . . . . . . . . . . . . . . 291FS2 Installation and Operation Manual — ContentsNetwork Address . . . . . . . . . . . . . . . . . . . . . . . . . . . . . . . . . . . . . . . . . . . . . . . . . . . . . . . . . . . . . . . . . . . . . . . . 30Networking Using DHCP or Default Static IP . . . . . . . . . . . . . . . . . . . . . . . . . . . . . . . . . . . . . . . . . . . 30Networking the FS2 Using Your Own Static IP. . . . . . . . . . . . . . . . . . . . . . . . . . . . . . . . . . . . . . . . . . 30Using Ping to Test the Network Connection. . . . . . . . . . . . . . . . . . . . . . . . . . . . . . . . . . . . . . . . . . . . 32Mac Ping Procedure. . . . . . . . . . . . . . . . . . . . . . . . . . . . . . . . . . . . . . . . . . . . . . . . . . . . . . . . . . . . . . . . 32Windows PC Ping Procedure . . . . . . . . . . . . . . . . . . . . . . . . . . . . . . . . . . . . . . . . . . . . . . . . . . . . . . . 32Web Browser Control . . . . . . . . . . . . . . . . . . . . . . . . . . . . . . . . . . . . . . . . . . . . . . . . . . . . . . . . . . . . . . . . . . . . 32Software Update Installation . . . . . . . . . . . . . . . . . . . . . . . . . . . . . . . . . . . . . . . . . . . . . . . . . . . . . . . . . . . . . 33Download the Latest FS2 Software . . . . . . . . . . . . . . . . . . . . . . . . . . . . . . . . . . . . . . . . . . . . . . . . . . . . 33Unpack the Software. . . . . . . . . . . . . . . . . . . . . . . . . . . . . . . . . . . . . . . . . . . . . . . . . . . . . . . . . . . . . . . . . . 33Uploading and Installing the Software to the FS2 . . . . . . . . . . . . . . . . . . . . . . . . . . . . . . . . . . . . . . 33System Cabling. . . . . . . . . . . . . . . . . . . . . . . . . . . . . . . . . . . . . . . . . . . . . . . . . . . . . . . . . . . . . . . . . . . . . . . . . . 34System Video/Audio Cable Connections. . . . . . . . . . . . . . . . . . . . . . . . . . . . . . . . . . . . . . . . . . . . . . . 34GPI Connections . . . . . . . . . . . . . . . . . . . . . . . . . . . . . . . . . . . . . . . . . . . . . . . . . . . . . . . . . . . . . . . . . . . . . . 34FS2 Audio Level Choices—Pro or Consumer, US or EBU . . . . . . . . . . . . . . . . . . . . . . . . . . . . . . . . 35Chapter 4:Display Menus. . . . . . . . . . . . . . . . . . . . . . . . . . . . . . . . . . . . . . . . . . . . . . . . . . . . . . . .37Controlling the FS2 via Front Panel Display Menus. . . . . . . . . . . . . . . . . . . . . . . . . . . . . . . . . . . . . . . . 37Parameter Menus. . . . . . . . . . . . . . . . . . . . . . . . . . . . . . . . . . . . . . . . . . . . . . . . . . . . . . . . . . . . . . . . . . . . . 38Menu Group Buttons. . . . . . . . . . . . . . . . . . . . . . . . . . . . . . . . . . . . . . . . . . . . . . . . . . . . . . . . . . . . . . . . . . 39SELECT and ADJUST Knobs. . . . . . . . . . . . . . . . . . . . . . . . . . . . . . . . . . . . . . . . . . . . . . . . . . . . . . . . . . . . 39Menu Operation Examples. . . . . . . . . . . . . . . . . . . . . . . . . . . . . . . . . . . . . . . . . . . . . . . . . . . . . . . . . . . . . . . 40Status Pages. . . . . . . . . . . . . . . . . . . . . . . . . . . . . . . . . . . . . . . . . . . . . . . . . . . . . . . . . . . . . . . . . . . . . . . . . . 40Simple Menus: Config Format Alarm Filters . . . . . . . . . . . . . . . . . . . . . . . . . . . . . . . . . . . . . . . . . . . . 41Multiple Parameter Menus: Video 1 ProcAmp. . . . . . . . . . . . . . . . . . . . . . . . . . . . . . . . . . . . . . . . . . 42Multiple Field Parameters: IP Address. . . . . . . . . . . . . . . . . . . . . . . . . . . . . . . . . . . . . . . . . . . . . . . . . . 43STATUS Menu Group. . . . . . . . . . . . . . . . . . . . . . . . . . . . . . . . . . . . . . . . . . . . . . . . . . . . . . . . . . . . . . . . . . . . . 44S.1 I/O Status . . . . . . . . . . . . . . . . . . . . . . . . . . . . . . . . . . . . . . . . . . . . . . . . . . . . . . . . . . . . . . . . . . . . . . . . . 44S.2 Vid1 Format Status . . . . . . . . . . . . . . . . . . . . . . . . . . . . . . . . . . . . . . . . . . . . . . . . . . . . . . . . . . . . . . . . 44S.3 Vid1 Format Alarm Status. . . . . . . . . . . . . . . . . . . . . . . . . . . . . . . . . . . . . . . . . . . . . . . . . . . . . . . . . . 44S.4 Vid2 Format Status . . . . . . . . . . . . . . . . . . . . . . . . . . . . . . . . . . . . . . . . . . . . . . . . . . . . . . . . . . . . . . . . 45S.5 Vid 2 Format Alarm Status . . . . . . . . . . . . . . . . . . . . . . . . . . . . . . . . . . . . . . . . . . . . . . . . . . . . . . . . . 45S.6 Output Status . . . . . . . . . . . . . . . . . . . . . . . . . . . . . . . . . . . . . . . . . . . . . . . . . . . . . . . . . . . . . . . . . . . . . 45S.7 Power/Temp Alarm. . . . . . . . . . . . . . . . . . . . . . . . . . . . . . . . . . . . . . . . . . . . . . . . . . . . . . . . . . . . . . . . 45S.8 Caption Status. . . . . . . . . . . . . . . . . . . . . . . . . . . . . . . . . . . . . . . . . . . . . . . . . . . . . . . . . . . . . . . . . . . . . 46S.9 Dolby Status . . . . . . . . . . . . . . . . . . . . . . . . . . . . . . . . . . . . . . . . . . . . . . . . . . . . . . . . . . . . . . . . . . . . . . 46S.10 System Name . . . . . . . . . . . . . . . . . . . . . . . . . . . . . . . . . . . . . . . . . . . . . . . . . . . . . . . . . . . . . . . . . . . . 46REMOTE Menu Group. . . . . . . . . . . . . . . . . . . . . . . . . . . . . . . . . . . . . . . . . . . . . . . . . . . . . . . . . . . . . . . . . . . . 471 Remote Control. . . . . . . . . . . . . . . . . . . . . . . . . . . . . . . . . . . . . . . . . . . . . . . . . . . . . . . . . . . . . . . . . . . . . 471.1 Authentication . . . . . . . . . . . . . . . . . . . . . . . . . . . . . . . . . . . . . . . . . . . . . . . . . . . . . . . . . . . . . . . . . . . . 472.1–4 GPI IN 1–4 Response . . . . . . . . . . . . . . . . . . . . . . . . . . . . . . . . . . . . . . . . . . . . . . . . . . . . . . . . . . . . 483.1–4 GPI 1–4 OUT . . . . . . . . . . . . . . . . . . . . . . . . . . . . . . . . . . . . . . . . . . . . . . . . . . . . . . . . . . . . . . . . . . . . 49Interaction of Presets and GPIs . . . . . . . . . . . . . . . . . . . . . . . . . . . . . . . . . . . . . . . . . . . . . . . . . . . . . . . . 49Example of a Serial Recall. . . . . . . . . . . . . . . . . . . . . . . . . . . . . . . . . . . . . . . . . . . . . . . . . . . . . . . . . . . 49Example of an Unintended Recall. . . . . . . . . . . . . . . . . . . . . . . . . . . . . . . . . . . . . . . . . . . . . . . . . . . 49CONFIG Menu Group. . . . . . . . . . . . . . . . . . . . . . . . . . . . . . . . . . . . . . . . . . . . . . . . . . . . . . . . . . . . . . . . . . . . . 501 System Name . . . . . . . . . . . . . . . . . . . . . . . . . . . . . . . . . . . . . . . . . . . . . . . . . . . . . . . . . . . . . . . . . . . . . . . 502.1 IP Config . . . . . . . . . . . . . . . . . . . . . . . . . . . . . . . . . . . . . . . . . . . . . . . . . . . . . . . . . . . . . . . . . . . . . . . . . . 502.2 IP Address. . . . . . . . . . . . . . . . . . . . . . . . . . . . . . . . . . . . . . . . . . . . . . . . . . . . . . . . . . . . . . . . . . . . . . . . . 512.3 Subnet Mask . . . . . . . . . . . . . . . . . . . . . . . . . . . . . . . . . . . . . . . . . . . . . . . . . . . . . . . . . . . . . . . . . . . . . . 512.4 Default Gateway. . . . . . . . . . . . . . . . . . . . . . . . . . . . . . . . . . . . . . . . . . . . . . . . . . . . . . . . . . . . . . . . . . . 513 MAC Address (view only) . . . . . . . . . . . . . . . . . . . . . . . . . . . . . . . . . . . . . . . . . . . . . . . . . . . . . . . . . . . . 524.0 SNMP Enable . . . . . . . . . . . . . . . . . . . . . . . . . . . . . . . . . . . . . . . . . . . . . . . . . . . . . . . . . . . . . . . . . . . . . . 524.1 SNMP Trap Destination 1. . . . . . . . . . . . . . . . . . . . . . . . . . . . . . . . . . . . . . . . . . . . . . . . . . . . . . . . . . . 524.2 SNMP Trap Port 1. . . . . . . . . . . . . . . . . . . . . . . . . . . . . . . . . . . . . . . . . . . . . . . . . . . . . . . . . . . . . . . . . . 534.3 SNMP Trap Destination 2. . . . . . . . . . . . . . . . . . . . . . . . . . . . . . . . . . . . . . . . . . . . . . . . . . . . . . . . . . . 534.4 SNMP Trap Port 2. . . . . . . . . . . . . . . . . . . . . . . . . . . . . . . . . . . . . . . . . . . . . . . . . . . . . . . . . . . . . . . . . . 545 Power Supply Alarm. . . . . . . . . . . . . . . . . . . . . . . . . . . . . . . . . . . . . . . . . . . . . . . . . . . . . . . . . . . . . . . . . 546.1 Vid1 Format Alarm. . . . . . . . . . . . . . . . . . . . . . . . . . . . . . . . . . . . . . . . . . . . . . . . . . . . . . . . . . . . . . . . . 546.2 Vid2 Format Alarm. . . . . . . . . . . . . . . . . . . . . . . . . . . . . . . . . . . . . . . . . . . . . . . . . . . . . . . . . . . . . . . . . 557 Reference Alarm. . . . . . . . . . . . . . . . . . . . . . . . . . . . . . . . . . . . . . . . . . . . . . . . . . . . . . . . . . . . . . . . . . . . . 558 Hidden Menus . . . . . . . . . . . . . . . . . . . . . . . . . . . . . . . . . . . . . . . . . . . . . . . . . . . . . . . . . . . . . . . . . . . . . . 559 Display Intensity. . . . . . . . . . . . . . . . . . . . . . . . . . . . . . . . . . . . . . . . . . . . . . . . . . . . . . . . . . . . . . . . . . . . . 5510 Serial Number. . . . . . . . . . . . . . . . . . . . . . . . . . . . . . . . . . . . . . . . . . . . . . . . . . . . . . . . . . . . . . . . . . . . . . 5611 Software Version. . . . . . . . . . . . . . . . . . . . . . . . . . . . . . . . . . . . . . . . . . . . . . . . . . . . . . . . . . . . . . . . . . . 5612 Reboot . . . . . . . . . . . . . . . . . . . . . . . . . . . . . . . . . . . . . . . . . . . . . . . . . . . . . . . . . . . . . . . . . . . . . . . . . . . . 56 PRESET Menu Group . . . . . . . . . . . . . . . . . . . . . . . . . . . . . . . . . . . . . . . . . . . . . . . . . . . . . . . . . . . . . . . . . . . . . 571 Recall Preset . . . . . . . . . . . . . . . . . . . . . . . . . . . . . . . . . . . . . . . . . . . . . . . . . . . . . . . . . . . . . . . . . . . . . . . . 572 Store Preset . . . . . . . . . . . . . . . . . . . . . . . . . . . . . . . . . . . . . . . . . . . . . . . . . . . . . . . . . . . . . . . . . . . . . . . . . 57Interaction of Presets and GPIs. . . . . . . . . . . . . . . . . . . . . . . . . . . . . . . . . . . . . . . . . . . . . . . . . . . . . . . . . 57 SYSTEM Menu Group. . . . . . . . . . . . . . . . . . . . . . . . . . . . . . . . . . . . . . . . . . . . . . . . . . . . . . . . . . . . . . . . . . . . . 581 Component In Format. . . . . . . . . . . . . . . . . . . . . . . . . . . . . . . . . . . . . . . . . . . . . . . . . . . . . . . . . . . . . . . 582 Component Out Format . . . . . . . . . . . . . . . . . . . . . . . . . . . . . . . . . . . . . . . . . . . . . . . . . . . . . . . . . . . . . 583 Analog Audio Std . . . . . . . . . . . . . . . . . . . . . . . . . . . . . . . . . . . . . . . . . . . . . . . . . . . . . . . . . . . . . . . . . . . 584 SDI1 3G Detect. . . . . . . . . . . . . . . . . . . . . . . . . . . . . . . . . . . . . . . . . . . . . . . . . . . . . . . . . . . . . . . . . . . . . . 595 SDI2 Input Protect. . . . . . . . . . . . . . . . . . . . . . . . . . . . . . . . . . . . . . . . . . . . . . . . . . . . . . . . . . . . . . . . . . . 596 Fiber1 3G Detect . . . . . . . . . . . . . . . . . . . . . . . . . . . . . . . . . . . . . . . . . . . . . . . . . . . . . . . . . . . . . . . . . . . . 607 Fiber2 Input Protect . . . . . . . . . . . . . . . . . . . . . . . . . . . . . . . . . . . . . . . . . . . . . . . . . . . . . . . . . . . . . . . . . 618 Genlock Source . . . . . . . . . . . . . . . . . . . . . . . . . . . . . . . . . . . . . . . . . . . . . . . . . . . . . . . . . . . . . . . . . . . . . 619 Frame Rates. . . . . . . . . . . . . . . . . . . . . . . . . . . . . . . . . . . . . . . . . . . . . . . . . . . . . . . . . . . . . . . . . . . . . . . . . 6110 NTSC Standard. . . . . . . . . . . . . . . . . . . . . . . . . . . . . . . . . . . . . . . . . . . . . . . . . . . . . . . . . . . . . . . . . . . . . 6211 Composite Downconv. . . . . . . . . . . . . . . . . . . . . . . . . . . . . . . . . . . . . . . . . . . . . . . . . . . . . . . . . . . . . . 6212 HDMI RGB Range. . . . . . . . . . . . . . . . . . . . . . . . . . . . . . . . . . . . . . . . . . . . . . . . . . . . . . . . . . . . . . . . . . . 6214.0 AES/EBU SRC Mode. . . . . . . . . . . . . . . . . . . . . . . . . . . . . . . . . . . . . . . . . . . . . . . . . . . . . . . . . . . . . . . 6314.1–14.8 AES/EBU SRC. . . . . . . . . . . . . . . . . . . . . . . . . . . . . . . . . . . . . . . . . . . . . . . . . . . . . . . . . . . . . . . . 6315 Dolby Decoder Input. . . . . . . . . . . . . . . . . . . . . . . . . . . . . . . . . . . . . . . . . . . . . . . . . . . . . . . . . . . . . . . 6416 Dolby Decoder Mode. . . . . . . . . . . . . . . . . . . . . . . . . . . . . . . . . . . . . . . . . . . . . . . . . . . . . . . . . . . . . . . 6417 Dolby Decoder Aux Out . . . . . . . . . . . . . . . . . . . . . . . . . . . . . . . . . . . . . . . . . . . . . . . . . . . . . . . . . . . . 6518 Dolby Decoder Aux Mode . . . . . . . . . . . . . . . . . . . . . . . . . . . . . . . . . . . . . . . . . . . . . . . . . . . . . . . . . . 65。
SINAMICS S120 单轴和多轴驱动系统说明书

SIMOCRANE meets SINAMICSThe SINAMICS S120 offers the optimum system for each and every drive application – and all of the drives can be engineered, parameterized, commissioned and operated in a standard way.This system represents an entry-level solution for AC/AC single-axis drives and coordinated AC/DC drives for multi-axis applications, making it the perfect basis for simple and more sophisticated crane applications in all industrial sectors.Modular SolutionSINAMICS S120 includes single-axis (AC/AC drive system) as well as multi-axis (DC/AC drive system) configurations. Both systems have a modular design.The AC/AC drive system comprises a Control Unit (CU 310-2) and Power Module (PM) for the power range from 0.55 kW to 250 kW. The DC/AC drive system includes a Line Module, a Control Unit (CU320-2) and Motor Module for the power range from 1 kw to 800 kW. Active Line Modules return regenerative energy to the supply system. SIMOCRANE functions can be applied modularly on de-mand. SIMOCRANE Drive-Based Technology can be used with optional SIMOCRANE Drive-Based Sway Control. Integrated SafetyAs in SINAMICS, the crane smart features are supplemented by integrated safety functions. These support the simple implementation of innovative safety concepts which conform to standards. Safety functions are fully integrated in the control system preventing damage to crane, load and surrounding objects or people. All basic functions are license-free. The Safety Integrated Extended Functions require the optional license for each drive.Smart functionsLoad sag prevention, smart slow-down, fine manual positioning, adaptive speed to operate at peak performance are smart features of SIMOCRANE Drive-Based Technology. Sensorless sway control is an add-on highlight of SIMOCRANE Drive-Based Sway Control. All intelligence are embedded in SINAMICS drives.Simple startupVia Basic Operator Panel (BOP20) or even Web Browser, commissioning can be started by using the ‘Ready-to-Run’ solution without any engineering effort.In case of ‘Ready-to-Apply’, the crane functions are config-ured automatically by simply selecting the axis and the set value.The crane functions are integrated in the drive parameter-ization. The parameterization is individually adaptableusing the STARTER software or BOP20 or web browser. Cranes | SIMOCRANE in SINAMICS********************Applicationsupport:***********************************SIMOCRANE Drive-Based Crane Technology (DBT)SIMOCRANE in SINAMICS:Simple, flexible and fast commissioning/cranesSimple – low engineering effortThe drive-based functionality for crane applications is implemented in two software solutions: SIMOCRANE Drive-Based Technology and SIMOCRANE Drive-Based Sway Control.Both technologies are integrated in the SINAMICS drive system and provide the function blocks needed to control the motions of crane drives. By using pre-configured standard applications for hoist, trolley or gantry, the function blocks are easily integrated into the drive control, resulting in shorter engineering time and fewer commissioning costs.Using standard applications (“ready-to-run”) and simple adaptation (“ready-to-apply”) to start up a crane drive, only basic knowledge of the SINAMICS drive system is required. The software commissioning tool STARTER used by SINAMICS can be used unchanged.Fast – increase productivityLoad-dependent field weakening for hoist applications is a functionality integrated in SIMOCRANE Drive-Based Technology. Compared to operating at full load, this solution automatically increases the maximal speed for lifting and lowering as a function of the current load. With this functionality, a lift cycle with partial-load and no-load is even faster, increasing the cranes’ productivity.With SIMOCRANE Drive-Based Sway Control, the load sway is damped during trolley or gantry traveling. Without the load sway, a faster and easier traveling and positioning of the load is possible. The sway damping is integrated in the movement. No additional waiting time or additionaloperation for damping the load sway is necessary.SIMOCRANE in SINAMICS | CranesFor both single-axis and multi-axes solutionSIMOCRANE Drive-Based Technology V1.0 SP2 HF1Ordering number: 6GA7270-1AA20-0AA0SIMOCRANE Drive-Based Sway Control Manual mode Ordering number: 6GA7280-1AA10-0AB0Single-axis solutionMulti-axis solutionSIMOCRANE Drive-Based Sway ControlManual mode and Positioning Ordering number: 6GA7280-1AA20-0AB0SIMOCRANE Drive-Based Sway Control Manual mode Ordering number: 6SL3077-6AA00-2AB0SIMOCRANE Drive-Based Sway ControlManual mode and Positioning Ordering number: 6SL3077-6AA00-3AB0For hoist applications, an encoder is requested for safety reasons and for providing pendulum length to cross travel (trolley) and long travel (gantry).For sensorless sway control, no encoder is required in manual operation. Only for positioningoperation encoders are required fortrolley and gantry.For more information, refer to catalog D21.4 (Chapter 7).• Performance Manual Mode: n = 2740 RPM, ramp-up time = 2 s Pendelum length = 2.27 mResidual sway = 1 mm at standstill speed 20 RPM Residual sway = 0 mm at standstill speed 0 RPM • Crane ConfigurationConfiguration with 3 single-axis drives, controlled via onboard I/O of SINAMICS Control Unit (CU310-2)• Hoist, Trolley or GantryPre-configured application for hoist or trolley or gantry. Easy installation: the commissioning can start with low engineering effort• Power RangeThe SINAMICS AC/AC single-axis drives cover the power range from 0.55 kW to 250 kW• Drive-Based TechnologyProvides crane-specific functions: prevents load sag and uses adaptive speeds. Smart slow-down on all axis• Drive-Based Sway ControlCan damp sway in manual operation for trolley and gantryApplication: fast and easy control solution for single-axis control requirementsThe Ready-to-Apply solution is a standard application example with a mask for users to select the configu-ration of each required axis.After selection, the required files are generated automatically.PROFINET communication combines the field bus and Ethernet advan-tages. Configuration easily adaptable to be fine-tuned for enhancedproductivity.Application: comprehensive control solution for multi-axis control requirements• Crane Controlby PLC via PROFINET communication• Performance Positioning Mode v = 20 m/min, ramp up time = 3 Pendelum length = 7.9 mDistance = 7 m, time = 32.18 s, precision = 1mm Residual sway = 0.47mm• Crane ConfigurationSINAMICS S120 topology with multi-axis drives with regenerative Line Module, Motor Modules and Control Unit (CU320-2)• Power RangeSINAMICS DC/AC multi-axis cover the power range: 1.6 kW to 800 kW• CommunicationThe ProfiSafe telegram enables the SINAMICS integrated safety function by PROFINET communication• Drive-Based TechnologyCrane-specific motion control functions for hoist, short travel and long travel• Drive-Based Sway Controlis added to short travel and long travel for sway damping in manual and positioning modeFor more information, refer to catalogue D21.4.。
NVIDIA FX Composer 2 商品说明书

NVIDIA FX Composer 2
The World’s Most Advanced Shader Authoring Environment
All-New Extensible Plug-In Architecture User-Friendly Shader Authoring Shader Performance Analysis Deep Content Pipeline Integration
Vertex Attribute Packing
Advanced Scripting Support
Full Python scripting Access every aspect of FX Composer in scripts Automate any process Console for writing and running scripts Run scripts from the Windows command line (i.e., “FXComposer2.exe myscript.py” Customizable, scriptable toolbars
View data in tables or graphs
See shader throughput, register usage, instruction counts, and branching performance
Deep Content Pipeline Integration
Semantic and Annotation remapping
COLLADA format support and extras
Material Instance Scene Binding Material Instance Vertex Binding Skinning Support for rendering COMMON Profiles Vertex Stream Remapper Full-Scene Effects
后台管理说明书-CRANE(T7)

二.设置打开电源开关,机器发出滴滴的声音后显示登录界面输入用户名和密码,点击进入后台管理界面1、基本资料1.1菜品管理1.1.1菜品类别点击进入编程。
界面显示如下:点击添加或者编辑:注意:-选择该类是否是套餐只能是添加时候选择,不能再编辑-如果删除菜品类别,必须该类别下没有菜品如果是奶茶店连接标签打印机,则标签打印机插在串口1上(不要带电插拔)只需在厨打输出中选择”标签”就可以了1.1.2 菜品编程点击进入编程。
进入编程。
左边分类选择所属菜品大类再点击添加:1.1.3 套餐编辑:点击添加:-子PLU项数:指该套餐包含多少个菜品-可选套餐:如果该项不选择,则系统默认该套餐是固定套餐。
使用者在销售时无法选择包含的菜品编辑完该项就在下面选择包含的菜品明细-可以修改数量-可以选择包含的菜品是否有附加金额-可以对其中一部分包含的菜品固定,例如炸鸡套餐,炸鸡是不能选的是固定的,但是饮料是可选的(我们称之为固定+可选套餐)注:固定+可选套餐,我们再添加该菜品时要选择是可选套餐才行1.1.4口味编辑点击添加或者编辑:1.1.5配菜编辑和口味不同,配菜是要加金额的点击添加或者编辑:1.2人员管理点击,进入收款员编辑:点击添加或者编辑:-输入4位的数字密码1.3区域管理:1.3.1桌台:1.3.2厨打编辑:注:最多可以连接2部厨房打印机-打印机类型:5890(不带自动切纸刀的).58120(带自动切纸刀的,适于设置成单项打印的),3120(标签打印机,打印不干胶,适于奶茶店)-单项打印:一个菜一张单-类整单:一个类别一张单-间距行数:采用5890打印机后,不同型号的打印机出纸口的行距不同1.3.3时段编辑:例如设置成:早市,午市,晚市,下午茶,宵夜…..1.3.4付款编辑:1.3.4.1付款1.3.4.2折扣2、报表统计:点击要统计的报表点击下面的通过上面的快捷键选择要统计的周期:再按.显示统计内容再按选择打印内容,打印报表点击打印报表,点击把报表导出到U盘,导出为EXCEL格式3、辅助管理:3.1查看流水可以查询出每一笔销售单据点击选择流水单据的周期,按确认3.2清除流水正式开业使用前,要选择全部流水清除3.3数据备份将U盘插入上面的USB接口第一步:检查U盘第二步:选择要备份的内容第三步:开始备份显示进度到了100%,就完成了,可以退出3.4数据恢复方法同上,只是到了100%系统会自动退出关机,如果没有自动,就手动退出关机.4、系统管理:4.1票据头尾设置:添加或者选择一行编辑:4.2系统时间设置:4.3系统参数设置:4.3.1系统-机器号-屏保时间,设定N分钟不使用,自动进入屏保,以延缓屏幕使用寿命-舍入方法:由于打折金额出现零头的舍入方法-舍入位数:由于上面原因舍入后金额保留的位数-堂吃外卖:销售时默认的状态-堂吃外卖厨打:就是指厨房打印机是否区分该单堂吃还是外卖的-强制交班:设定为是,收款员前台销售下班后必须打印交班报表-小计倍高打印:先结账单中小计是否大一倍字体4.3.2打印-复制收据次数:销售后马上按小计键,自动复制刚刚的那笔-连续打印份数:无需按小计键,自动打印多张收据-收据间隔时间:连续打印多张需要中间有停顿,才可以手撕,通常设置1S -打印项数:收据打印所有数量和-打印ODER号,就是打印取菜号,通常用于快餐,客人自己取菜的形式4.3.3报表4.3.4外设-标签:标签打印机,用于奶茶店,咖啡店..-客显:顾客显示器,只要是LED8位的全可以,USB取电的4.3恢复出厂设置:在此进行初始化,一般不会做的,例如初始化,校验光标…4.3系统信息4.4系统升级如果需要功能升级,就插上U盘在此升级。
Native Instruments MASCHINE MIKRO MK3用户手册说明书
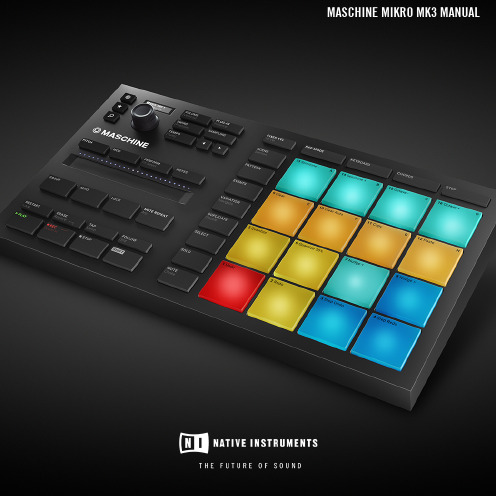
The information in this document is subject to change without notice and does not represent a commitment on the part of Native Instruments GmbH. The software described by this docu-ment is subject to a License Agreement and may not be copied to other media. No part of this publication may be copied, reproduced or otherwise transmitted or recorded, for any purpose, without prior written permission by Native Instruments GmbH, hereinafter referred to as Native Instruments.“Native Instruments”, “NI” and associated logos are (registered) trademarks of Native Instru-ments GmbH.ASIO, VST, HALion and Cubase are registered trademarks of Steinberg Media Technologies GmbH.All other product and company names are trademarks™ or registered® trademarks of their re-spective holders. Use of them does not imply any affiliation with or endorsement by them.Document authored by: David Gover and Nico Sidi.Software version: 2.8 (02/2019)Hardware version: MASCHINE MIKRO MK3Special thanks to the Beta Test Team, who were invaluable not just in tracking down bugs, but in making this a better product.NATIVE INSTRUMENTS GmbH Schlesische Str. 29-30D-10997 Berlin Germanywww.native-instruments.de NATIVE INSTRUMENTS North America, Inc. 6725 Sunset Boulevard5th FloorLos Angeles, CA 90028USANATIVE INSTRUMENTS K.K.YO Building 3FJingumae 6-7-15, Shibuya-ku, Tokyo 150-0001Japanwww.native-instruments.co.jp NATIVE INSTRUMENTS UK Limited 18 Phipp StreetLondon EC2A 4NUUKNATIVE INSTRUMENTS FRANCE SARL 113 Rue Saint-Maur75011 ParisFrance SHENZHEN NATIVE INSTRUMENTS COMPANY Limited 5F, Shenzhen Zimao Center111 Taizi Road, Nanshan District, Shenzhen, GuangdongChina© NATIVE INSTRUMENTS GmbH, 2019. All rights reserved.Table of Contents1Welcome to MASCHINE (23)1.1MASCHINE Documentation (24)1.2Document Conventions (25)1.3New Features in MASCHINE 2.8 (26)1.4New Features in MASCHINE 2.7.10 (28)1.5New Features in MASCHINE 2.7.8 (29)1.6New Features in MASCHINE 2.7.7 (29)1.7New Features in MASCHINE 2.7.4 (31)1.8New Features in MASCHINE 2.7.3 (33)2Quick Reference (35)2.1MASCHINE Project Overview (35)2.1.1Sound Content (35)2.1.2Arrangement (37)2.2MASCHINE Hardware Overview (40)2.2.1MASCHINE MIKRO Hardware Overview (40)2.2.1.1Browser Section (41)2.2.1.2Edit Section (42)2.2.1.3Performance Section (43)2.2.1.4Transport Section (45)2.2.1.5Pad Section (46)2.2.1.6Rear Panel (50)2.3MASCHINE Software Overview (51)2.3.1Header (52)2.3.2Browser (54)2.3.3Arranger (56)2.3.4Control Area (59)2.3.5Pattern Editor (60)3Basic Concepts (62)3.1Important Names and Concepts (62)3.2Adjusting the MASCHINE User Interface (65)3.2.1Adjusting the Size of the Interface (65)3.2.2Switching between Ideas View and Song View (66)3.2.3Showing/Hiding the Browser (67)3.2.4Showing/Hiding the Control Lane (67)3.3Common Operations (68)3.3.1Adjusting Volume, Swing, and Tempo (68)3.3.2Undo/Redo (71)3.3.3Focusing on a Group or a Sound (73)3.3.4Switching Between the Master, Group, and Sound Level (77)3.3.5Navigating Channel Properties, Plug-ins, and Parameter Pages in the Control Area.773.3.6Navigating the Software Using the Controller (82)3.3.7Using Two or More Hardware Controllers (82)3.3.8Loading a Recent Project from the Controller (84)3.4Native Kontrol Standard (85)3.5Stand-Alone and Plug-in Mode (86)3.5.1Differences between Stand-Alone and Plug-in Mode (86)3.5.2Switching Instances (88)3.6Preferences (88)3.6.1Preferences – General Page (89)3.6.2Preferences – Audio Page (93)3.6.3Preferences – MIDI Page (95)3.6.4Preferences – Default Page (97)3.6.5Preferences – Library Page (101)3.6.6Preferences – Plug-ins Page (109)3.6.7Preferences – Hardware Page (114)3.6.8Preferences – Colors Page (114)3.7Integrating MASCHINE into a MIDI Setup (117)3.7.1Connecting External MIDI Equipment (117)3.7.2Sync to External MIDI Clock (117)3.7.3Send MIDI Clock (118)3.7.4Using MIDI Mode (119)3.8Syncing MASCHINE using Ableton Link (120)3.8.1Connecting to a Network (121)3.8.2Joining and Leaving a Link Session (121)4Browser (123)4.1Browser Basics (123)4.1.1The MASCHINE Library (123)4.1.2Browsing the Library vs. Browsing Your Hard Disks (124)4.2Searching and Loading Files from the Library (125)4.2.1Overview of the Library Pane (125)4.2.2Selecting or Loading a Product and Selecting a Bank from the Browser (128)4.2.3Selecting a Product Category, a Product, a Bank, and a Sub-Bank (133)4.2.3.1Selecting a Product Category, a Product, a Bank, and a Sub-Bank on theController (137)4.2.4Selecting a File Type (137)4.2.5Choosing Between Factory and User Content (138)4.2.6Selecting Type and Character Tags (138)4.2.7Performing a Text Search (142)4.2.8Loading a File from the Result List (143)4.3Additional Browsing Tools (148)4.3.1Loading the Selected Files Automatically (148)4.3.2Auditioning Instrument Presets (149)4.3.3Auditioning Samples (150)4.3.4Loading Groups with Patterns (150)4.3.5Loading Groups with Routing (151)4.3.6Displaying File Information (151)4.4Using Favorites in the Browser (152)4.5Editing the Files’ Tags and Properties (155)4.5.1Attribute Editor Basics (155)4.5.2The Bank Page (157)4.5.3The Types and Characters Pages (157)4.5.4The Properties Page (160)4.6Loading and Importing Files from Your File System (161)4.6.1Overview of the FILES Pane (161)4.6.2Using Favorites (163)4.6.3Using the Location Bar (164)4.6.4Navigating to Recent Locations (165)4.6.5Using the Result List (166)4.6.6Importing Files to the MASCHINE Library (169)4.7Locating Missing Samples (171)4.8Using Quick Browse (173)5Managing Sounds, Groups, and Your Project (175)5.1Overview of the Sounds, Groups, and Master (175)5.1.1The Sound, Group, and Master Channels (176)5.1.2Similarities and Differences in Handling Sounds and Groups (177)5.1.3Selecting Multiple Sounds or Groups (178)5.2Managing Sounds (181)5.2.1Loading Sounds (183)5.2.2Pre-listening to Sounds (184)5.2.3Renaming Sound Slots (185)5.2.4Changing the Sound’s Color (186)5.2.5Saving Sounds (187)5.2.6Copying and Pasting Sounds (189)5.2.7Moving Sounds (192)5.2.8Resetting Sound Slots (193)5.3Managing Groups (194)5.3.1Creating Groups (196)5.3.2Loading Groups (197)5.3.3Renaming Groups (198)5.3.4Changing the Group’s Color (199)5.3.5Saving Groups (200)5.3.6Copying and Pasting Groups (202)5.3.7Reordering Groups (206)5.3.8Deleting Groups (207)5.4Exporting MASCHINE Objects and Audio (208)5.4.1Saving a Group with its Samples (208)5.4.2Saving a Project with its Samples (210)5.4.3Exporting Audio (212)5.5Importing Third-Party File Formats (218)5.5.1Loading REX Files into Sound Slots (218)5.5.2Importing MPC Programs to Groups (219)6Playing on the Controller (223)6.1Adjusting the Pads (223)6.1.1The Pad View in the Software (223)6.1.2Choosing a Pad Input Mode (225)6.1.3Adjusting the Base Key (226)6.2Adjusting the Key, Choke, and Link Parameters for Multiple Sounds (227)6.3Playing Tools (229)6.3.1Mute and Solo (229)6.3.2Choke All Notes (233)6.3.3Groove (233)6.3.4Level, Tempo, Tune, and Groove Shortcuts on Your Controller (235)6.3.5Tap Tempo (235)6.4Performance Features (236)6.4.1Overview of the Perform Features (236)6.4.2Selecting a Scale and Creating Chords (239)6.4.3Scale and Chord Parameters (240)6.4.4Creating Arpeggios and Repeated Notes (253)6.4.5Swing on Note Repeat / Arp Output (257)6.5Using Lock Snapshots (257)6.5.1Creating a Lock Snapshot (257)7Working with Plug-ins (259)7.1Plug-in Overview (259)7.1.1Plug-in Basics (259)7.1.2First Plug-in Slot of Sounds: Choosing the Sound’s Role (263)7.1.3Loading, Removing, and Replacing a Plug-in (264)7.1.4Adjusting the Plug-in Parameters (270)7.1.5Bypassing Plug-in Slots (270)7.1.6Using Side-Chain (272)7.1.7Moving Plug-ins (272)7.1.8Alternative: the Plug-in Strip (273)7.1.9Saving and Recalling Plug-in Presets (273)7.1.9.1Saving Plug-in Presets (274)7.1.9.2Recalling Plug-in Presets (275)7.1.9.3Removing a Default Plug-in Preset (276)7.2The Sampler Plug-in (277)7.2.1Page 1: Voice Settings / Engine (279)7.2.2Page 2: Pitch / Envelope (281)7.2.3Page 3: FX / Filter (283)7.2.4Page 4: Modulation (285)7.2.5Page 5: LFO (286)7.2.6Page 6: Velocity / Modwheel (288)7.3Using Native Instruments and External Plug-ins (289)7.3.1Opening/Closing Plug-in Windows (289)7.3.2Using the VST/AU Plug-in Parameters (292)7.3.3Setting Up Your Own Parameter Pages (293)7.3.4Using VST/AU Plug-in Presets (298)7.3.5Multiple-Output Plug-ins and Multitimbral Plug-ins (300)8Using the Audio Plug-in (302)8.1Loading a Loop into the Audio Plug-in (306)8.2Editing Audio in the Audio Plug-in (307)8.3Using Loop Mode (308)8.4Using Gate Mode (310)9Using the Drumsynths (312)9.1Drumsynths – General Handling (313)9.1.1Engines: Many Different Drums per Drumsynth (313)9.1.2Common Parameter Organization (313)9.1.3Shared Parameters (316)9.1.4Various Velocity Responses (316)9.1.5Pitch Range, Tuning, and MIDI Notes (316)9.2The Kicks (317)9.2.1Kick – Sub (319)9.2.2Kick – Tronic (321)9.2.3Kick – Dusty (324)9.2.4Kick – Grit (325)9.2.5Kick – Rasper (328)9.2.6Kick – Snappy (329)9.2.7Kick – Bold (331)9.2.8Kick – Maple (333)9.2.9Kick – Push (334)9.3The Snares (336)9.3.1Snare – Volt (338)9.3.2Snare – Bit (340)9.3.3Snare – Pow (342)9.3.4Snare – Sharp (343)9.3.5Snare – Airy (345)9.3.6Snare – Vintage (347)9.3.7Snare – Chrome (349)9.3.8Snare – Iron (351)9.3.9Snare – Clap (353)9.3.10Snare – Breaker (355)9.4The Hi-hats (357)9.4.1Hi-hat – Silver (358)9.4.2Hi-hat – Circuit (360)9.4.3Hi-hat – Memory (362)9.4.4Hi-hat – Hybrid (364)9.4.5Creating a Pattern with Closed and Open Hi-hats (366)9.5The Toms (367)9.5.1Tom – Tronic (369)9.5.2Tom – Fractal (371)9.5.3Tom – Floor (375)9.5.4Tom – High (377)9.6The Percussions (378)9.6.1Percussion – Fractal (380)9.6.2Percussion – Kettle (383)9.6.3Percussion – Shaker (385)9.7The Cymbals (389)9.7.1Cymbal – Crash (391)9.7.2Cymbal – Ride (393)10Using the Bass Synth (396)10.1Bass Synth – General Handling (397)10.1.1Parameter Organization (397)10.1.2Bass Synth Parameters (399)11Working with Patterns (401)11.1Pattern Basics (401)11.1.1Pattern Editor Overview (402)11.1.2Navigating the Event Area (404)11.1.3Following the Playback Position in the Pattern (406)11.1.4Jumping to Another Playback Position in the Pattern (407)11.1.5Group View and Keyboard View (408)11.1.6Adjusting the Arrange Grid and the Pattern Length (410)11.1.7Adjusting the Step Grid and the Nudge Grid (413)11.2Recording Patterns in Real Time (416)11.2.1Recording Your Patterns Live (417)11.2.2Using the Metronome (419)11.2.3Recording with Count-in (420)11.3Recording Patterns with the Step Sequencer (422)11.3.1Step Mode Basics (422)11.3.2Editing Events in Step Mode (424)11.4Editing Events (425)11.4.1Editing Events with the Mouse: an Overview (425)11.4.2Creating Events/Notes (428)11.4.3Selecting Events/Notes (429)11.4.4Editing Selected Events/Notes (431)11.4.5Deleting Events/Notes (434)11.4.6Cut, Copy, and Paste Events/Notes (436)11.4.7Quantizing Events/Notes (439)11.4.8Quantization While Playing (441)11.4.9Doubling a Pattern (442)11.4.10Adding Variation to Patterns (442)11.5Recording and Editing Modulation (443)11.5.1Which Parameters Are Modulatable? (444)11.5.2Recording Modulation (446)11.5.3Creating and Editing Modulation in the Control Lane (447)11.6Creating MIDI Tracks from Scratch in MASCHINE (452)11.7Managing Patterns (454)11.7.1The Pattern Manager and Pattern Mode (455)11.7.2Selecting Patterns and Pattern Banks (456)11.7.3Creating Patterns (459)11.7.4Deleting Patterns (460)11.7.5Creating and Deleting Pattern Banks (461)11.7.6Naming Patterns (463)11.7.7Changing the Pattern’s Color (465)11.7.8Duplicating, Copying, and Pasting Patterns (466)11.7.9Moving Patterns (469)11.8Importing/Exporting Audio and MIDI to/from Patterns (470)11.8.1Exporting Audio from Patterns (470)11.8.2Exporting MIDI from Patterns (472)11.8.3Importing MIDI to Patterns (474)12Audio Routing, Remote Control, and Macro Controls (483)12.1Audio Routing in MASCHINE (484)12.1.1Sending External Audio to Sounds (485)12.1.2Configuring the Main Output of Sounds and Groups (489)12.1.3Setting Up Auxiliary Outputs for Sounds and Groups (494)12.1.4Configuring the Master and Cue Outputs of MASCHINE (497)12.1.5Mono Audio Inputs (502)12.1.5.1Configuring External Inputs for Sounds in Mix View (503)12.2Using MIDI Control and Host Automation (506)12.2.1Triggering Sounds via MIDI Notes (507)12.2.2Triggering Scenes via MIDI (513)12.2.3Controlling Parameters via MIDI and Host Automation (514)12.2.4Selecting VST/AU Plug-in Presets via MIDI Program Change (522)12.2.5Sending MIDI from Sounds (523)12.3Creating Custom Sets of Parameters with the Macro Controls (527)12.3.1Macro Control Overview (527)12.3.2Assigning Macro Controls Using the Software (528)13Controlling Your Mix (535)13.1Mix View Basics (535)13.1.1Switching between Arrange View and Mix View (535)13.1.2Mix View Elements (536)13.2The Mixer (537)13.2.1Displaying Groups vs. Displaying Sounds (539)13.2.2Adjusting the Mixer Layout (541)13.2.3Selecting Channel Strips (542)13.2.4Managing Your Channels in the Mixer (543)13.2.5Adjusting Settings in the Channel Strips (545)13.2.6Using the Cue Bus (549)13.3The Plug-in Chain (551)13.4The Plug-in Strip (552)13.4.1The Plug-in Header (554)13.4.2Panels for Drumsynths and Internal Effects (556)13.4.3Panel for the Sampler (557)13.4.4Custom Panels for Native Instruments Plug-ins (560)13.4.5Undocking a Plug-in Panel (Native Instruments and External Plug-ins Only) (564)14Using Effects (567)14.1Applying Effects to a Sound, a Group or the Master (567)14.1.1Adding an Effect (567)14.1.2Other Operations on Effects (574)14.1.3Using the Side-Chain Input (575)14.2Applying Effects to External Audio (578)14.2.1Step 1: Configure MASCHINE Audio Inputs (578)14.2.2Step 2: Set up a Sound to Receive the External Input (579)14.2.3Step 3: Load an Effect to Process an Input (579)14.3Creating a Send Effect (580)14.3.1Step 1: Set Up a Sound or Group as Send Effect (581)14.3.2Step 2: Route Audio to the Send Effect (583)14.3.3 A Few Notes on Send Effects (583)14.4Creating Multi-Effects (584)15Effect Reference (587)15.1Dynamics (588)15.1.1Compressor (588)15.1.2Gate (591)15.1.3Transient Master (594)15.1.4Limiter (596)15.1.5Maximizer (600)15.2Filtering Effects (603)15.2.1EQ (603)15.2.2Filter (605)15.2.3Cabinet (609)15.3Modulation Effects (611)15.3.1Chorus (611)15.3.2Flanger (612)15.3.3FM (613)15.3.4Freq Shifter (615)15.3.5Phaser (616)15.4Spatial and Reverb Effects (617)15.4.1Ice (617)15.4.2Metaverb (619)15.4.3Reflex (620)15.4.4Reverb (Legacy) (621)15.4.5Reverb (623)15.4.5.1Reverb Room (623)15.4.5.2Reverb Hall (626)15.4.5.3Plate Reverb (629)15.5Delays (630)15.5.1Beat Delay (630)15.5.2Grain Delay (632)15.5.3Grain Stretch (634)15.5.4Resochord (636)15.6Distortion Effects (638)15.6.1Distortion (638)15.6.2Lofi (640)15.6.3Saturator (641)15.7Perform FX (645)15.7.1Filter (646)15.7.2Flanger (648)15.7.3Burst Echo (650)15.7.4Reso Echo (653)15.7.5Ring (656)15.7.6Stutter (658)15.7.7Tremolo (661)15.7.8Scratcher (664)16Working with the Arranger (667)16.1Arranger Basics (667)16.1.1Navigating Song View (670)16.1.2Following the Playback Position in Your Project (672)16.1.3Performing with Scenes and Sections using the Pads (673)16.2Using Ideas View (677)16.2.1Scene Overview (677)16.2.2Creating Scenes (679)16.2.3Assigning and Removing Patterns (679)16.2.4Selecting Scenes (682)16.2.5Deleting Scenes (684)16.2.6Creating and Deleting Scene Banks (685)16.2.7Clearing Scenes (685)16.2.8Duplicating Scenes (685)16.2.9Reordering Scenes (687)16.2.10Making Scenes Unique (688)16.2.11Appending Scenes to Arrangement (689)16.2.12Naming Scenes (689)16.2.13Changing the Color of a Scene (690)16.3Using Song View (692)16.3.1Section Management Overview (692)16.3.2Creating Sections (694)16.3.3Assigning a Scene to a Section (695)16.3.4Selecting Sections and Section Banks (696)16.3.5Reorganizing Sections (700)16.3.6Adjusting the Length of a Section (702)16.3.6.1Adjusting the Length of a Section Using the Software (703)16.3.6.2Adjusting the Length of a Section Using the Controller (705)16.3.7Clearing a Pattern in Song View (705)16.3.8Duplicating Sections (705)16.3.8.1Making Sections Unique (707)16.3.9Removing Sections (707)16.3.10Renaming Scenes (708)16.3.11Clearing Sections (710)16.3.12Creating and Deleting Section Banks (710)16.3.13Working with Patterns in Song view (710)16.3.13.1Creating a Pattern in Song View (711)16.3.13.2Selecting a Pattern in Song View (711)16.3.13.3Clearing a Pattern in Song View (711)16.3.13.4Renaming a Pattern in Song View (711)16.3.13.5Coloring a Pattern in Song View (712)16.3.13.6Removing a Pattern in Song View (712)16.3.13.7Duplicating a Pattern in Song View (712)16.3.14Enabling Auto Length (713)16.3.15Looping (714)16.3.15.1Setting the Loop Range in the Software (714)16.3.15.2Activating or Deactivating a Loop Using the Controller (715)16.4Playing with Sections (715)16.4.1Jumping to another Playback Position in Your Project (716)16.5Triggering Sections or Scenes via MIDI (717)16.6The Arrange Grid (719)16.7Quick Grid (720)17Sampling and Sample Mapping (722)17.1Opening the Sample Editor (722)17.2Recording Audio (724)17.2.1Opening the Record Page (724)17.2.2Selecting the Source and the Recording Mode (725)17.2.3Arming, Starting, and Stopping the Recording (729)17.2.5Checking Your Recordings (731)17.2.6Location and Name of Your Recorded Samples (734)17.3Editing a Sample (735)17.3.1Using the Edit Page (735)17.3.2Audio Editing Functions (739)17.4Slicing a Sample (743)17.4.1Opening the Slice Page (743)17.4.2Adjusting the Slicing Settings (744)17.4.3Manually Adjusting Your Slices (746)17.4.4Applying the Slicing (750)17.5Mapping Samples to Zones (754)17.5.1Opening the Zone Page (754)17.5.2Zone Page Overview (755)17.5.3Selecting and Managing Zones in the Zone List (756)17.5.4Selecting and Editing Zones in the Map View (761)17.5.5Editing Zones in the Sample View (765)17.5.6Adjusting the Zone Settings (767)17.5.7Adding Samples to the Sample Map (770)18Appendix: Tips for Playing Live (772)18.1Preparations (772)18.1.1Focus on the Hardware (772)18.1.2Customize the Pads of the Hardware (772)18.1.3Check Your CPU Power Before Playing (772)18.1.4Name and Color Your Groups, Patterns, Sounds and Scenes (773)18.1.5Consider Using a Limiter on Your Master (773)18.1.6Hook Up Your Other Gear and Sync It with MIDI Clock (773)18.1.7Improvise (773)18.2Basic Techniques (773)18.2.1Use Mute and Solo (773)18.2.2Create Variations of Your Drum Patterns in the Step Sequencer (774)18.2.3Use Note Repeat (774)18.2.4Set Up Your Own Multi-effect Groups and Automate Them (774)18.3Special Tricks (774)18.3.1Changing Pattern Length for Variation (774)18.3.2Using Loops to Cycle Through Samples (775)18.3.3Load Long Audio Files and Play with the Start Point (775)19Troubleshooting (776)19.1Knowledge Base (776)19.2Technical Support (776)19.3Registration Support (777)19.4User Forum (777)20Glossary (778)Index (786)1Welcome to MASCHINEThank you for buying MASCHINE!MASCHINE is a groove production studio that implements the familiar working style of classi-cal groove boxes along with the advantages of a computer based system. MASCHINE is ideal for making music live, as well as in the studio. It’s the hands-on aspect of a dedicated instru-ment, the MASCHINE hardware controller, united with the advanced editing features of the MASCHINE software.Creating beats is often not very intuitive with a computer, but using the MASCHINE hardware controller to do it makes it easy and fun. You can tap in freely with the pads or use Note Re-peat to jam along. Alternatively, build your beats using the step sequencer just as in classic drum machines.Patterns can be intuitively combined and rearranged on the fly to form larger ideas. You can try out several different versions of a song without ever having to stop the music.Since you can integrate it into any sequencer that supports VST, AU, or AAX plug-ins, you can reap the benefits in almost any software setup, or use it as a stand-alone application. You can sample your own material, slice loops and rearrange them easily.However, MASCHINE is a lot more than an ordinary groovebox or sampler: it comes with an inspiring 7-gigabyte library, and a sophisticated, yet easy to use tag-based Browser to give you instant access to the sounds you are looking for.What’s more, MASCHINE provides lots of options for manipulating your sounds via internal ef-fects and other sound-shaping possibilities. You can also control external MIDI hardware and 3rd-party software with the MASCHINE hardware controller, while customizing the functions of the pads, knobs and buttons according to your needs utilizing the included Controller Editor application. We hope you enjoy this fantastic instrument as much as we do. Now let’s get go-ing!—The MASCHINE team at Native Instruments.MASCHINE Documentation1.1MASCHINE DocumentationNative Instruments provide many information sources regarding MASCHINE. The main docu-ments should be read in the following sequence:1.MASCHINE MIKRO Quick Start Guide: This animated online guide provides a practical ap-proach to help you learn the basic of MASCHINE MIKRO. The guide is available from theNative Instruments website: https:///maschine-mikro-quick-start/2.MASCHINE Manual (this document): The MASCHINE Manual provides you with a compre-hensive description of all MASCHINE software and hardware features.Additional documentation sources provide you with details on more specific topics:►Online Support Videos: You can find a number of support videos on The Official Native In-struments Support Channel under the following URL: https:///NIsupport-EN. We recommend that you follow along with these instructions while the respective ap-plication is running on your computer.Other Online Resources:If you are experiencing problems related to your Native Instruments product that the supplied documentation does not cover, there are several ways of getting help:▪Knowledge Base▪User Forum▪Technical Support▪Registration SupportYou will find more information on these subjects in the chapter Troubleshooting.Document Conventions1.2Document ConventionsThis section introduces you to the signage and text highlighting used in this manual. This man-ual uses particular formatting to point out special facts and to warn you of potential issues.The icons introducing these notes let you see what kind of information is to be expected:This document uses particular formatting to point out special facts and to warn you of poten-tial issues. The icons introducing the following notes let you see what kind of information canbe expected:Furthermore, the following formatting is used:▪Text appearing in (drop-down) menus (such as Open…, Save as… etc.) in the software andpaths to locations on your hard disk or other storage devices is printed in italics.▪Text appearing elsewhere (labels of buttons, controls, text next to checkboxes etc.) in thesoftware is printed in blue. Whenever you see this formatting applied, you will find thesame text appearing somewhere on the screen.▪Text appearing on the displays of the controller is printed in light grey. Whenever you seethis formatting applied, you will find the same text on a controller display.▪Text appearing on labels of the hardware controller is printed in orange. Whenever you seethis formatting applied, you will find the same text on the controller.▪Important names and concepts are printed in bold.▪References to keys on your computer’s keyboard you’ll find put in square brackets (e.g.,“Press [Shift] + [Enter]”).►Single instructions are introduced by this play button type arrow.→Results of actions are introduced by this smaller arrow.Naming ConventionThroughout the documentation we will refer to MASCHINE controller (or just controller) as the hardware controller and MASCHINE software as the software installed on your computer.The term “effect” will sometimes be abbreviated as “FX” when referring to elements in the MA-SCHINE software and hardware. These terms have the same meaning.Button Combinations and Shortcuts on Your ControllerMost instructions will use the “+” sign to indicate buttons (or buttons and pads) that must be pressed simultaneously, starting with the button indicated first. E.g., an instruction such as:“Press SHIFT + PLAY”means:1.Press and hold SHIFT.2.While holding SHIFT, press PLAY and release it.3.Release SHIFT.1.3New Features in MASCHINE2.8The following new features have been added to MASCHINE: Integration▪Browse on , create your own collections of loops and one-shots and send them directly to the MASCHINE browser.Improvements to the Browser▪Samples are now cataloged in separate Loops and One-shots tabs in the Browser.▪Previews of loops selected in the Browser will be played in sync with the current project.When a loop is selected with Prehear turned on, it will begin playing immediately in-sync with the project if transport is running. If a loop preview starts part-way through the loop, the loop will play once more for its full length to ensure you get to hear the entire loop once in context with your project.▪Filters and product selections will be remembered when switching between content types and Factory/User Libraries in the Browser.▪Browser content synchronization between multiple running instances. When running multi-ple instances of MASCHINE, either as Standalone and/or as a plug-in, updates to the Li-brary will be synced across the instances. For example, if you delete a sample from your User Library in one instance, the sample will no longer be present in the other instances.Similarly, if you save a preset in one instance, that preset will then be available in the oth-er instances, too.▪Edits made to samples in the Factory Libraries will be saved to the Standard User Directo-ry.For more information on these new features, refer to the following chapter ↑4, Browser. Improvements to the MASCHINE MIKRO MK3 Controller▪You can now set sample Start and End points using the controller. For more information refer to ↑17.3.1, Using the Edit Page.Improved Support for A-Series Keyboards▪When Browsing with A-Series keyboards, you can now jump quickly to the results list by holding SHIFT and pushing right on the 4D Encoder.▪When Browsing with A-Series keyboards, you can fast scroll through the Browser results list by holding SHIFT and twisting the 4D Encoder.▪Mute and Solo Sounds and Groups from A-Series keyboards. Sounds are muted in TRACK mode while Groups are muted in IDEAS.。
- 1、下载文档前请自行甄别文档内容的完整性,平台不提供额外的编辑、内容补充、找答案等附加服务。
- 2、"仅部分预览"的文档,不可在线预览部分如存在完整性等问题,可反馈申请退款(可完整预览的文档不适用该条件!)。
- 3、如文档侵犯您的权益,请联系客服反馈,我们会尽快为您处理(人工客服工作时间:9:00-18:30)。
05.M …r .20075.70r r M Schutzvermerk nach DIN 34Weitergabe sowie Vervielf…ltigung dieser Unterlage, Verwertungund M itteilung ihres Inh altes ist nic t gestattet,soweit nic t ausdr licz ugestanden.uwiderh andlungen verp flicten zu Sadenersatzlle R ecte fr den F all einer P atenterteilungoder Gebrauc smuster-intragung vorbehalten.ION MADINGTDIN 34 :O T D UM , AG VI I T O A T US C UN O T C T , F WI UT E AUTOALT P O D Fb-Nr.-NO..-Nr..-NO .ro .-L r .-MNA rbe r N..rb..r..No rm ND.bt ..r.-S .-V .rs .NT -V ..NA -V .bn.-L r .-MNANa NAHWArs ri NDIC L G C 2C 6trt N1D A TE : 13. A p r i l 200A E : E A .0.3 1 0EE E T E T A A D T D 3 1AT 06.Feb.2007GOLIATH CRANE 600t DESIGNATION:=A 3300.0D SP AR EDOC ENTS 18AB=F0+E1H200.0=F0+E1H1gidn D 21200.0D D E1G11P 1OIST 1100.0D E1G12P 1OIST2100.0D E1C 1TR ANSP OR T NIT CONTR OL 00.0D E1G13P 1PRELIMINARYOIST 3100.0GANTR INGE EGDE1G41P 1200.0DE 103TR ANSP OR T NIT DE 1021200.0ANDE 103PO ANE AINS INV ER TER 2DE 102P2=C+E 1E 02AIN SW ITCDISTRIB TIONDE 101C TR ANSP OR T NIT TR ANSP OR T NIT1200.0DE 101P2=C +E 1E 03DISTRIB TIONDE 1013000.01200.0DE 121GANTR IX P200.0DE 1311PER TROLEY=C +E 1E 04400V1TR ANSP OR T NIT00.0DE 12CONTROL00.0DE 1111800.0OIST OW ER TROL EY DE 1321200.0AI C AN 500V=C +E1E011200.0D 0.0D A TE : 13. A p r i l 2006A E : E A .0.3 1 0EE E T E T A A D T D 3 132200.0COVEAM0111 VO AGMAS0212 VOAGMAS0313 VO AGMAS111 CU MAS212 CU M AS 313 CU M AS 00Vemergencsup1E 03011V11A 021V21A 031V31A=C+E1E03226.50000.0COVEAM0111 VO AGMAS0212 VO AGMAS0313 VOAGMAS111 CU MAS212 CU M AS 313 CU M AS 00V1E 02011V11A 1021V21A 031V31A226.500=C+E1E0200.0D A TE : 13. A p r i l 200A E : E A .0.3 1 0EE E T E T A A D T D 3 +E 1E 01/=F0+E1H1/1CO 86.500=C+E1E0482.500100x 801810111080802808180381088810x 808810DM A0811-K 818110110600.100x 80811830130181681130230283033031008111303080x 8010121110303111111311306311111*********118811301630018111180x 80161113016101231310111311811101318010010021180x 8010111120110311121011011221011101810010x 80100x 80100.D A TE : 13. A p r i l 2006A E : E A .0.3 10EE E T E T A A D T D 3 =C +E 1E 041+E 1H 2200.00+1H 160.060.060.060.060.012960.034100.00.0561510 =11 =12=13 =14=15 =16=17 =18=1 = = = =5 = =7 = =9 =60.0781860.01112161.1H1.2.1H .21.1K 1.2.1K .2F F .1H .2.1H .21N 100E 1R 1000.00.0131417.500+E1H1O H 1 H O H 1 L O H 2 H O H 2 L O U T L FT O U T R O L T L FT O L T RO G H FL FO O G H FL B O H 3 H O H 3 L O H 4 H O H4 LO FFE O FA R PA 2uf S tehen etzen egen O to ub508012080808080808080808080808080608080800000A10101D-SUNODI3560DI3560A113A11003-4D-SUNOA10101G010OpNOA1020AIDM 3460A114A1110100OpNOA103000OpNODM 3460A104A1120A31F1-900A 100S99110000TO DIZ20+1H 100008080.100.2A3SB .100021X31X31X 31X 31X 31X31X363.A4SB401gid nA1SBA2SB 00100.0D2-1ER TR OL EYOW ER TR OL EYINGEANDIXEGSP AR E ABEEELA18L GD A17L TA16L T OIST 4A15L T OIST 3A14L GD A13L TA12L T OIST 2A11L T OIST 1+N 30x10D A TE : 13. A p r i l 2006A E : E A .0.3 10EE E T E T A A D T D 3 +E1H1/1+M1/12200.00+1H 26.500+E1H2600.12310+1H 1.31.511101D A TE : 13. A p r i l 2006A E : E A .0.3 10EE E T E T A A D T D 3 600.0S1S6S2S9=F0S31NS4S8S5+M 1103.500380.0Ti 210123456789101112131N 12345689H7H8H9H1EM ERGENCY OF CRANE ON CRANE OF AS E-LIM IT GANTRYFIXLAM TES T AULT QIT RAIL CLAM RELEAS ECRANE S EW B ACK ARDCRANE SEWFORWARDCRANE S EW CENTRAL CRANE S EW F ORW ARD CRANE SEWBACKARDCRANE READD A TE : 13. A p r i l 2006A E : E A .0.3 10EE E T E T A A D T D 3 00000000000000000000000000000000000000000000002000.01000.01N204.5001+1000.0204.500+U 1000.0260.000.0D A TE : 13. A p r i l 2006A E : E A .0.3 1 0EE E T E T A A D T D 3 01235700000000000000000000000000000000000000000000002000.01E 10x0x0180x 800x0x0x 00x 0300122010010x 80002230110211230231002230T0300211121101131113000x 800V116011011.1011611.2012212112213800x 802162121.1216821.2E 110V2T1E 2200x 80112382122303183173163153143133123110316DC1G11+10ONE TRANSPORTATION UNIT00.0x00x 800x0x00x0x001T002T080x 8003T0T0T006T00T80T008T 3010T0000x 8011T0000012T 000600800800080800020080100000x 800000301.101.283180x 8000x 80A A A A 6A A A 3A 2A 1Sp A1SB00000000000000000000220x 80E 200.0u-&Nu 30x101AD A TE : 13. A p r i l 2006A E : E A .0.3 10EE E T E T A A D T D 3 600.0S1S7S5S4S1Ti2S1S11N+UTP1S8S6S3S1S1S1S1SPARES9S2+U 11038.5000.N = EM ERGENCY OF = P LAM TES T= LP FAU LT /Q IT = LP TROLLEY D RIV E TO HINGE LEG = LP TROLLEY D RIVE TO FIXLEG= P HOIS T D RIV E HOIS TING 6 = PHOIS T DRIVE LOWERING= LP P RES ELECTION HOIS T 1 = LP PRESELECTION HOIS T 2 = P HOOK TRAV ERS ING OUTSID E H20 = P HOOK TRAV ERS ING INS ID E H2 = P HOOK TRAV ERS ING OUTSID E H1 = P HOOKTRAVERSING INSIDE H1= P CRANE ON = P CRANE OF = (EY B ASE-LIMITS6 = LP SAREH1=L CRANE READD A TE : 13. A p r i l 2006A E : E A .0.3 10EE E T E T A A D T D 3 00000000000000000000000000000000000000000000001800.01000.01N28.5001000.028.500+L1000.0260.000.0D A TE : 13. A p r i l 200A E : E A .0.3 1 0EE E T E T A A D T D 3 000000000000000000000000000000000000000000001800.01E 10x0x010x0x0x 00x80x 803000020131200001023130032310380x 801213110V280x 8031128381080x 800V2T180x 8032432332232128DC1G1000010ONE TRANSPORTATION UNIT00.20x0x0x0x0x 80001T002T03T08T00T3000x 80006T031000000000080000x 8080080020800x 8080x 800Sp A1SBA A 6A A A 3A 2A 100000000000000000x 802230x 80E 200.0u-Au 30x101AD A TE : 13. A p r i l 200A E : E A .0.3 10EE E T E T A A D T D 3 600.0S9S7S5S4Ti2S11N+LTP1S8S6S3S1S1S1SPARES2+L 11038.5000.N = EM ERGENCY OF = P LAM TES T= LP FAU LT /Q IT = LP TROLLEY D RIV E TO HINGE LEG = LP TROLLEY D RIVE TO FIXLEG= P HOIS T D RIV E HOIS TING 6 = PHOIS T DRIVE LOWERING= LP P RES ELECTION HOIS T 3 = LP PRESELECTION HOIST 4= P CRANE ON 0 = P CRANE OF = (EY B ASE-LIMITS= LP SAREH1=L CRANE READD A TE : 13. A p r i l 2006A E : E A .0.3 10EE E T E T A A D T D 3 00000000000000000000000000000000000000000000001800.01000.028.5001+4100.028.500+S2E100.0260.000.0D A TE : 13. A p r i l 2006A E : E A .0.3 1 0EE E T E T A A D T D 3 0125700000000000000000000000000000000000000000000001800.01E 10x0x010x0x 00x 00x 080x 8030x 101230x 100x 101103680V00V2T01000100100DC0111101201G0201121+4100.0x 800x0x0x0x322011T2TE 11023T 2003T 621T 00x 8011021116T1T1122T113011T 210T00x 803011T12T6020000001000x 80080011012013202180x 801A 0A 0A 03A 02A 0100x 800000000000A 12230x 80E 200.u-Au 30x101AD A TE : 13. A p r i l 2006A E : E A .0.3 10EE E T E T A A D T D 3 0 1 3 5 7600.0S1S6S7S2S9S1=M11S3S11NTi 210S4S1S5S1+S 11008.600380.1234567891011121314151N 123456791011H11213H11EM ERGENCY OF CRANE ON CRANE OF AS E-LIM IT GANTRYHINGELAM TES T AULT QIT RAIL CLAM OPENRAIL CLAM CLOSED RIV E GANTRY F ORW ARD RIV E GANTRYBACKARDARECRANE READ TORM P IN OPENTORMPIN CLOSE HINGE LEG IN STORMLOCKPOSITIOND A TE : 13. A p r i l 2006A E : E A .0.3 10EE E T E T A A D T D 3 0 1 25 700000000000000000000000000000000000000000000001800.01000.028.5001E 4200.028.500+S1E200.0260.000.0D A TE : 13. A p r i l 200A E : E A .0.3 1 0EE E T E T A A D T D 3 000000000000000000000000000000000000000000001800.01E 10x0x010x0x 00x 00x 080x 8030x10T E T E 1230x100x 10120110381026030V00V2T01010000111000DC1100100121G02011221E4200.0x 800x0x0x0x231T1101112TE 13T 20112T 11321611T 00x 80226T31T2T 6T010T000x 800011T010012T00110122001302000210200x 8000018003080x 80A 06A 0A 0A 03A 02A 0100x 80000000000000A 12230x 80E 200.029.100u-Au 30x101AD A TE : 13. A p r i l 200A E : E A .0.3 10EE E T E T A A D T D 3 600.0S1S6S7S2S9S1=M2S3S1S81NTi210S4S1S5S1+S 1P 11008.600380.12345678910111213141516171N 1234567891011H11213H10H11EM ERGENCY OF CRANE ON CRANE OF AS E-LIM IT GANTRYHINGELAM TES T AULT QIT RAIL CLAM OPENRAIL CLAM CLOSED I =RIV E GANTRY FIXLEGII=RIVE GANTRYHINGE LEG RIV E GANTRY F ORW ARD RIV E GANTRYBACKARDARECRANE READ TORM P IN OPENTORMPIN CLOSE HINGE LEG IN S TORMLOCKP OSITIONIXLEG IN STORM LOCK POSITIOND A TE : 13. A p r i l 200A E : E A .0.3 10EE E T E T A A D T D 3 1800.01E 1HC O FFFOFA OFFS1E S1.500+C100.0=F1+CAE180x 80Op DC101A 101DM1G 01080x 8001002AO18011000012003AO1000080x 800001004DM008080x 800880x 8071180x 801 2E 1A 100.0D A TE : 13. A p r i l 200A E : E A .0.3 10EE E T E T A A D T D 3 550.044BU EROUNTEDINSIDEAL43ABCDEFGH35.0135.0235.0335.04GANTR DRIVESTR OL EY DRIVES05.055.0424541A1A2A3A4C1C2C3C4E1E2E3E4G1G2G3G4H1H2H3H4S1S2S3H5H6H7H9S10S1H1S1S1S1S16S1S1S1S20S2S2S2S2H2H26H2H2S2S30S3S3S4S1S4H4S4A01A02A03ER TROLLEY SELECTED LOWER TROLLEYSELECTED TROLLEY S REV ERSESPARE PLACE CRANE SK EW DANGEROUS CRANE SK EW ACCEPTABLECRANE SK EWCENTRALSPARE PLACE CRANE SK EW ED FORW ARD CRANE SK EW B ACK ARDCRANE SK EW F ORW ARD CRANE SK EWEDBACKARDHOOK 1 INNER LIM IT HOOK 1 OUTER LIMIT HOOK 2 INNER LIM IT HOOK2OUTER LIMITRAIL CLAM S ENGAGE RAIL CLAM S RELEASESTORM P IN CLOSE STORM PIN OPENLAM TEST AULT FAULTQITSW ITCH OV ER TO LOCAL CONTROL STATIONSP ARE IXEDLEG AT STORMLOCKPOSITION HINGED LEG AT STORM LOCKPOSITION ER TROLLEY AT STORM LOCK P OSITION LOWER TROLLEYAT STORM LOCKPOSITIONLOOD LIGHTS FIXEDLEGLOOD LIGHTS HINGED LEGLOOD LIGHTS CORNERS LOODLIGHTS CABINOOTP ED AL (OR W ARNING HORN)ASTER SW ITCHICROF ONERNEE OP ERATED P SHB TTON (OR M ICROF ON)I 3600 3600 3600LP LP LPL LLLL LP LP LP LP LP LP LP LP LP SL L L L S S S SHITE HITE HITERED ELLOW GREENHITE LACK LACK HITE HITE HITE HITE HITE HITE HITE HITE HITE LACK RED LACK LACK HITE HITE HITE HITED A TE : 13. A p r i l 200A E : E A .0.3 10EE E T E T A A D T D 3 550.055.0OISTDRIVES05.015.025.035.045.0ABCDEFGA1A2A3A4C1C2C3C4E1E2E3E4G1G2G3G4S1S2S3S4S5S6S7S8S9S10S1S1S1S1S1S16S1S1S20S2S2S2S2S2S26S2H2S2S1N S1A01A02HOIST 1 REV ERSE HOIST 2HOIST 1 REVERSE HOIST 3SPAREHOOK OPERATION P ARALLEL HOIST 1 SELECTED HOIST 2 SELECTED HOIST 3 SELECTEDAUHOIST 4 SELECTED NORMAL SPEEDSELECTED INCHING SP EEDSELECTEDOV ERRID E GANTRYSPARECRANE ON CRANE OF SP ARE SP ARE IND OW W IP ER LEF TIND OW W IP ER FRONTINDOWWIPER RIGHT IRELESS P HONE ASS E-LIM IT H1H2T ASS E-LIM IT H3H4LT ASS E-LIM IT GANTRY FIXLEGASS E-LIMIT GANTRYHINGE LEGSP ARE ASS INTERLOCK SP ARE EMERGENCYENDCHECKINGEM ERGENCY OF ASTER SWITCHI 3600 3600LP LP SS LP LP LP LP LP LP LP LP LP S S S S S S S LP S LSHITE HITEHITE HITE HITE HITE HITE HITEHITE GREEN RED LACK HITELACKHITEHITERED。