Inno Setup入门(2)—修改安装过程中的图片
innosetup教程(innosetup教程)

innosetup教程(innosetup教程)Inno setup uses the tutorial packaging tool 2007-06-28 09:43:27 to read the 383 comment 0: large and medium subscriptionsThis is a inno setup installation script for my VB6 software "master of Philharmonic disc management"The script that generated the installer - inno setup V5.19 finished version download address: click here to downloadInno Setup download, please search "Inno Setup" keyword, the Chinese people have finished this software, thanks to the finished Author: Teng ShengguangPlease install Inno Setup and proceed to the next step. copy this script into the built-in editor of the inno setup and, with minor modifications, become the installation script for your VB6 softwareApricot studio all rights reserved, Liu Fufeng, please keep the file intact when you reprint.Inno Setup is a free Windows installer production software.The first publication was in 1997, and Inno Setup today is more competitive in functional settings and stability than may have been in some commercial installation softwareIt is really free software, even as a commercial applicationThere is also a feature, compression rate is particularly high, especially for VB software, I install this package only after 3.7M, and other packaging tools 5M moreSetup is created in a compiled script, which is a ASCII code text file similar to the.INI file format. (it's not as complicated as you think!)Script files can generally be edited using the editor built in by the installer compiler program. After you've written the script, the next final step is to select the installer compilerCompile in". Once you have created it, you can run the installer that you compiled in your script.By default, this installer creates the output directory in the directory that contains the script file[Setup]This section contains the global settings for the installer and the uninstall program. Some hints are necessary for any installer you createdA necessary instruction to specify the title of the application you are installing. The version number is not included and is indicated with the AppVerName for the same purpose. AppName is always displayed during the installation, in the upper left corner of the installation screen, and in the setup wizardAppName= Philharmonic disc management masterThe required pointer value should be the same as (or similar to) the value of AppName, but it should also contain the version number of the programAppVerName= Philharmonic disc management master V3.31This is what is displayed in the "support" information in the add / Remove program control panel dialog box in Windows 2000/XP. These settings are optional and not valid in the earlier versions of WindowsAppPublisher=sinyosoftThis is what is displayed in the "support" information in the add / Remove program control panel dialog box in Windows 2000/XP. These settings are optional and not valid in the earlier versions of WindowsAppPublisherURL=AppSupportURL=AppUpdatesURL=This required pointer value is used to select the default directory name in the target location wizard surface, which is usually prefixed with a directory constant, and{pf}\SinyoCDManager will display: C:\ProgramFiles\SinyoCDManagerDefaultDirName={pf}\SinyoCDManagerThe value of this directive is the default start menu folder name used in the wizard's select Start menu folder page. If the instruction is blank or unspecified, it will use the default as its nameDefaultGroupName= Philharmonic disc management masterSpecifies the license agreement file name (optional), displayed in.Txt or.Rtf (rich text) format, before the user selects the program target directoryLicenseFile=F:\ data storage \ apricot soft studio installation package \ Philharmonic Audio CD management guru \Support\Application\License.txtSpecifies that the readme file name (optional) is used in.Txt or.Rtf (rich text) format and is displayed when the installation is completeInfoAfterFile=F:\ data storage \ apricot soft studio installation package \ Philharmonic Audio CD management master \Support\Application\, please read my.Txt firstThis is the compression method specified in the file, as well as the compression standardCompression=lzmaIf it is set to yes, solid compaction will be enabled. This willcause all files to be compressed at onceSolidCompression=yes[Tasks]This paragraph is for election only. It defines all the user - defined tasks during the installation of the installer. These tasks appear in the add - in wizard page in the options box and single optionsNote: the following entry contains a Chinese language ("create desktop shortcut" and "add shortcut"). You can translate into other languages if needed.Name: "desktopicon"; Description: "create desktop shortcut"; GroupDescription: "add shortcut": "Flags: checkedonce"Note: the following entry contains a Chinese language ("create a quick run column shortcut" and "add shortcut"). You can translate into other languages if needed.Name: "quicklaunchicon"; Description: "create a quick run column shortcut"; GroupDescription: "add shortcut": "Flags: checkedonce"[Files]This is the optional file segment that defines the installer's installation file to the user systemBecause this is a VB software, you must also include the relevant link libraries in addition to the files that are included in the software itselfThe following is the file of the software itself. Note: there is a subdirectory of "\Data" under the installation directorySource: "F:\ data storage \ apricot soft studio installation package \ Philharmonic music disc management master\Support\Application\CDManager.EXE"; DestDir: "{app}"; Flags: ignoreversionSource: "F:\ data storage \ apricot soft studio installation package \ Philharmonic music disc management master\Support\Application\Data\*"; DestDir: "{app}\Data"; Flags: ignoreversionSource: "F:\ data save \ apricot soft studio installation package \ Philharmonic music disc management master\Support\Application\, please read my.Txt"; DestDir: "{app}"; Flags: ignoreversionSource: "F:\ data storage \ apricot soft studio installation package \ Philharmonic music disc management master\Support\Application\CDManager.exe.manifest"; DestDir: "{app}"; Flags: ignoreversionSource: "F:\ data storage \ apricot soft studio installation package \ Philharmonic music disc management master\Support\Application\License.txt"; DestDir: "{app}"; Flags: ignoreversionSource: "F:\ data storage \ apricot soft studio installation package \ Philharmonic music disc management master\Support\Application\ Philharmonic audio video disc management master.Chm"; DestDir: "{app}"; Flags: ignoreversionSource: "F:\ data storage \ apricot soft studio installation package \ Philharmonic music disc management master\Support\Application\Data\*"; DestDir: "{app}"; Flags: ignoreversion recursesubdirsNote: do not use "Flags: ignoreversion" in any shared system file"The following is the VB6 RunTime, which has been rigorously tested and will guarantee the normal operation of VB6 software under the first edition of Windows98Source: "F:\ data save \ apricot soft studio installation package \Support\vb6RunTime\ASYCFILT.DLL"; DestDir: "{sys}"; CopyMode: alwaysskipifsameorolder;国旗:restartreplace共享文件;注意安。
INNO教程

大家下载过很多软件,有的是直接打包的绿色版,无需安装。
这类程序都比较小或者无需往注册表中写信息,大家都喜欢用,不过大多数软件都需要安装,在安装的过程执行程序所需要的活动,以及一些简单的向导操作。
今天教大家自己自作安装程序,无需懂编程就能制作一个像模像样的安装程序,不多说了先睹为快!事例图片:注:其他安装过程的图片就不贴了,是不是很酷。
本文以制作FastCopy安装包为例。
学习新知Inno Setup 是一款免费的安装制作工具,简洁而强大,支持pascal 脚本,既有适合新手的脚本向导,也有适合高手的的脚本编辑器。
一般用Inno Setup制作安装程序的流程是:操作向导→修改代码。
通过向导的方式是为了简便操作,可以省去编写大量代码实现,最后修改代码是为了使安装程序更具有人性化、实用性和强大操作。
操作流程一、利用向导生成代码Step1 运行INNO setup主程序Compil32.exe,启动“脚本向导”,“下一步”。
注意不要选择“创建一个新的空脚本文件”。
Step2 根据向导,添加软件版本信息,第一行为程序名称,第二行为含有版本号的程序名称:Step3 设置程序目录,即安装路径,应用程序默认目录是Program Files(在INNO脚本中表示为{pf}),可根据需要选择目录,如字体则安装在系统盘“Windows”目录下的“Fonts”文件夹中。
安装目录选择“自定义”,然后输入“\Program Files”为默认的(注意在目录名称前加“\”)Step4 设置应用程序文件,包括主程序文件及相关文件,INNO脚本向导中的INNO安装程序目录下“\FastCopy.exe”文件,通过“浏览”选择目标安装包的主程序,如这里的“FastCopy.exe”;紧接着添加其他相关程序,可以通过“添加目录”来操作,注意要包含子目录文件。
Step5 设置菜单名称及图标,默认使用程序名称作为开始菜单文件夹名称,当然可以根据需要修改。
inno setup的使用

inno setup的使用
Inno Setup是一款免费的安装程序制作工具,它可以帮助开发者快速创建安装程序,方便用户安装软件。
本文将介绍Inno Setup的使用方法。
我们需要下载Inno Setup并安装。
安装完成后,打开Inno Setup 并创建一个新的安装程序项目。
在项目设置中,我们可以设置安装程序的名称、版本号、安装目录等信息。
接下来,我们需要添加文件到安装程序中。
在文件夹视图中,选择需要添加的文件或文件夹,然后将它们拖放到Inno Setup的文件列表中。
我们可以设置文件的安装位置、是否需要覆盖已存在的文件等选项。
除了文件,我们还可以添加注册表项、快捷方式、环境变量等到安装程序中。
这些选项可以在Inno Setup的“任务”视图中进行设置。
在完成安装程序的设置后,我们可以进行编译并生成安装程序。
在编译过程中,Inno Setup会自动创建一个安装程序的脚本文件,我们可以在脚本文件中进行更加详细的设置。
生成的安装程序可以在Windows系统上运行,并按照我们设置的方式进行安装。
用户可以选择安装位置、创建快捷方式等选项。
总的来说,Inno Setup是一款非常方便易用的安装程序制作工具。
它可以帮助开发者快速创建安装程序,方便用户安装软件。
如果您需要制作安装程序,不妨试试Inno Setup。
Innosetup打包安装程序教程
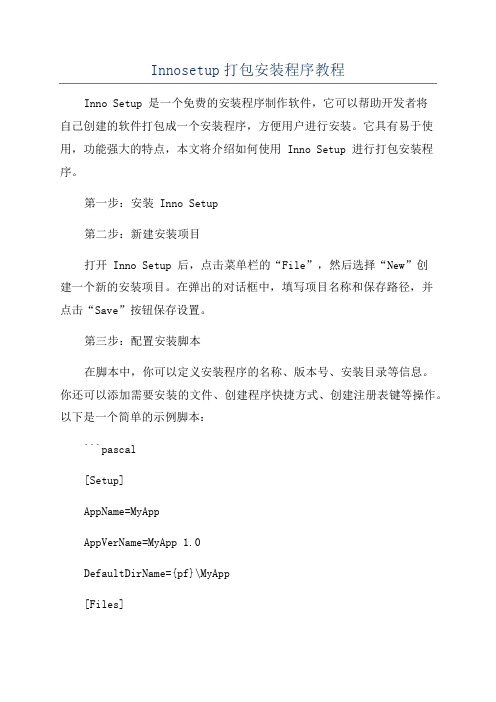
Innosetup打包安装程序教程Inno Setup 是一个免费的安装程序制作软件,它可以帮助开发者将自己创建的软件打包成一个安装程序,方便用户进行安装。
它具有易于使用,功能强大的特点,本文将介绍如何使用 Inno Setup 进行打包安装程序。
第一步:安装 Inno Setup第二步:新建安装项目打开 Inno Setup 后,点击菜单栏的“File”,然后选择“New”创建一个新的安装项目。
在弹出的对话框中,填写项目名称和保存路径,并点击“Save”按钮保存设置。
第三步:配置安装脚本在脚本中,你可以定义安装程序的名称、版本号、安装目录等信息。
你还可以添加需要安装的文件、创建程序快捷方式、创建注册表键等操作。
以下是一个简单的示例脚本:```pascal[Setup]AppName=MyAppAppVerName=MyApp 1.0DefaultDirName={pf}\MyApp[Files]Source: "MyApp.exe"; DestDir: "{app}"; Flags: ignoreversion [Icons]Name: "{group}\MyApp"; Filename: "{app}\MyApp.exe"```上述脚本中,[Setup] 部分定义了应用程序的名称、版本号和安装目录。
[Files] 部分指定需要安装的文件和目标目录。
[Icons] 部分创建了一个程序快捷方式。
你可以根据自己的需求修改脚本中的内容。
当你完成配置后,保存脚本文件。
第四步:编译安装程序编译完成后,你可以在保存路径中找到生成的安装程序。
你可以将它复制到其他计算机上运行,即可开始安装你的软件。
第五步:自定义安装界面(可选)除了基本配置之外,Inno Setup 还可以让你自定义安装界面。
你可以添加图片、自定义皮肤、自定义按钮等,以使安装程序更加美观和易于使用。
Inno Setup 使用说明
Inno Setup 使用说明特殊用途的标识有几个[Messages] 段的项实际上不是用于在屏幕上显示的,它们是用于在安装程序中指定所使用的字体和字型号的。
这些可选项中的每一个都有一个前导下划线字符(“_”)开始,请参阅Default.isl 文件头部的注释的使用方法示例。
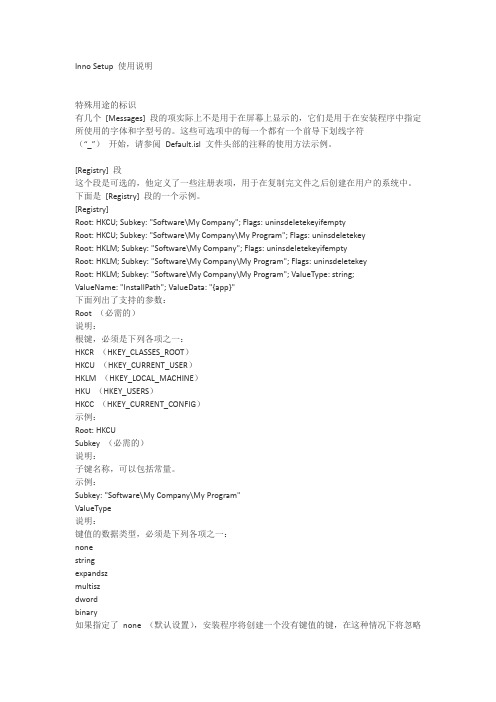
[Registry] 段这个段是可选的,他定义了一些注册表项,用于在复制完文件之后创建在用户的系统中。
下面是[Registry] 段的一个示例。
[Registry]Root: HKCU; Subkey: "Software\My Company"; Flags: uninsdeletekeyifemptyRoot: HKCU; Subkey: "Software\My Company\My Program"; Flags: uninsdeletekeyRoot: HKLM; Subkey: "Software\My Company"; Flags: uninsdeletekeyifemptyRoot: HKLM; Subkey: "Software\My Company\My Program"; Flags: uninsdeletekeyRoot: HKLM; Subkey: "Software\My Company\My Program"; ValueType: string; ValueName: "InstallPath"; ValueData: "{app}"下面列出了支持的参数:Root (必需的)说明:根键,必须是下列各项之一:HKCR (HKEY_CLASSES_ROOT)HKCU (HKEY_CURRENT_USER)HKLM (HKEY_LOCAL_MACHINE)HKU (HKEY_USERS)HKCC (HKEY_CURRENT_CONFIG)示例:Root: HKCUSubkey (必需的)说明:子键名称,可以包括常量。
InnoSetup进阶之事件函数(二)

InnoSetup进阶之事件函数(⼆)安装程序事件函数安装程序⽀持下列事件函数:function InitializeSetup(): Boolean;在安装程序初始化期间调⽤。
返回 False 以中⽌ Setup,否则返回 True。
procedure InitializeWizard();在启动时使⽤该事件函数来改变向导或向导页⾯。
你不能在它被触发时使⽤ InitializeSetup 事件函数,因为向导窗体尚不存在。
procedure DeinitializeSetup();仅在安装程序终⽌前调⽤。
注意这个函数在即使⽤户在任何内容安装之前退出安装程序时也会调⽤。
procedure CurStepChanged(CurStep: TSetupStep);你可以⽤这个事件函数执⾏你⾃⼰的预安装和安装后任务。
在实际安装开始之前⽤ CurStep=ssInstall 调⽤,或在实际安装完成之后⽤ CurStep=ssPostInstall 调⽤,或在安装程序终⽌之前和安装完成之后⽤CurStep=ssDone 调⽤。
procedure CurInstallProgressChanged(CurProgress, MaxProgress: Integer);在安装程序提取⽂件、创建快捷⽅式、创建 INI 条⽬和创建注册表项时,你可以使⽤该事件函数来监测进程。
function NextButtonClick(CurPageID: Integer): Boolean;当⽤户单击下⼀步按钮时调⽤。
如果你返回 True,向导将移到下⼀页⾯;如果返回 False,它仍保留在当前页⾯(⽤ CurPageID 指定)。
注意,该函数在静默安装时也会调⽤,即使没有下⼀步按钮让⽤户单击。
安装程序会模拟单击下⼀步按钮。
在静默安装中,如果你的 NextButtonClick 函数在安装之前返回 False,安装程序将⾃动退出。
InnoSetupCompiler中文使用教程

InnoSetupCompiler中⽂使⽤教程⼀、概要该⽂章主要解决,Inno Setup Compiler⼯具的使⽤问题。
如有什么建议欢迎提出,本⼈及时修改。
【如有任何疑惑可以加Q群:580749909】⼆、步骤 (3)中⽂安装配置⽂件 (4)该⼯具出现不能加载⽂件夹的情况。
附上解决⽅案基础步骤在⽹上可以搜索到,所以我就不做重复的⼯作了。
所以只是在前⽂档的基础上做了⼀些改进,⼤概就是本篇⽂章的意义所在。
我在这⾥做了⼀些改进,⾃⼰添加⼀个Chinese.isl。
写好之后添加到Inno Setup 5\Languages⽬录下。
界⾯中就多了⼀个Chinese选项。
⽂件内容怎么写?(⽂件内容也是来⾃⽹络,如果懒的写这个⽂件可以加Q群580749909,共享⽂件⾥有)代码如下:脚本代码【1】add file,选中解决⽅案bin⽬录下所有单个⽂件。
【2】add folder,这个就是添加⽂件夹的,但是但是但是添加了之后安装了完成查看了⼀下安装⽬录发现并不能出现⽂件夹,路径⾥少了⽂件夹名称导致路径不对程序⽆法运⾏。
所以还是要从代码⾥找问题。
add folder 只会给你⽣成【Source: "E:\YourPath\RunFolder\yourfloder1\*"; DestDir: "{app}"; Flags: ignoreversion recursesubdirs createallsubdirs】然⽽纵观整篇“编译⽂件.iss”代码,它只管给你copy⽂件过来,并没有给你创建你需要添加的那个⽂件夹。
所以它默认给你把所有⽂件都⽣成在了同级⽬录下了。
眉⽑胡⼦⼀把抓就⾮常难受。
这时候我们需要⼿动去修改iss⽂件添加创建⽂件夹的代码语法如下:注意:创建⽂件夹的语句要放在最上⾯执⾏,先有⽂件夹再copy⽂件到创建好的⽬录下。
[dirs]Name:"{app}\yourfloder1"Name:"{app}\yourfloder2"Name:"{app}\yourfloder3"这样⽣成了之后确实帮你创建了⽂件,但是⽂件还是挤在同级⽬录下,为什么?因为我们没有【Sourse】的路径这时候应该这样修改在注意: ‘*’号是代表改⽂件夹下所有⽂件。
Inno制作一个简单的安装程序
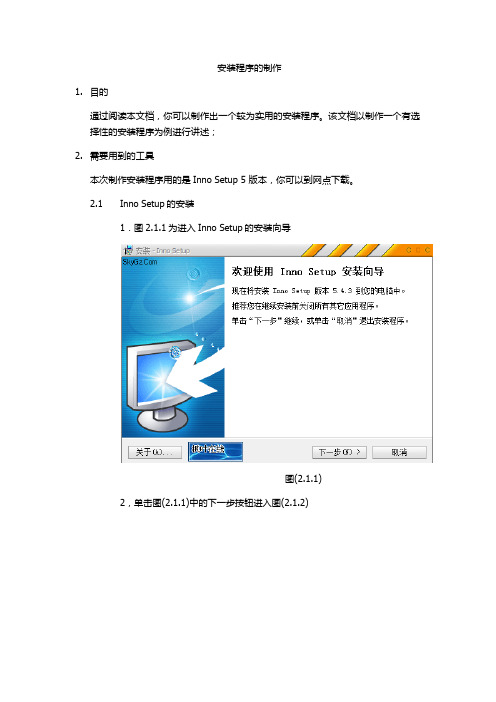
安装程序的制作1.目的通过阅读本文档,你可以制作出一个较为实用的安装程序。
该文档以制作一个有选择性的安装程序为例进行讲述;2.需要用到的工具本次制作安装程序用的是Inno Setup 5 版本,你可以到网点下载。
2.1Inno Setup的安装1.图2.1.1为进入Inno Setup的安装向导图(2.1.1)2,单击图(2.1.1)中的下一步按钮进入图(2.1.2)图(2.1.2)3.单击图(2.1.2)中的下一步按钮进入图(2.1.3)图(2.1.3)图(2.1.4)5.单击图(2.1.4)中的下一步按钮进入图(2.1.5)图(2.1.5)图(2.1.6)7.单击图(2.1.6)中的下一步按钮进入图(2.1.7)图(2.1.7)图(2.1.8)3.制作安装程序3.1这时候需要我们打开安装好的Inno Setup工具,开始写脚本程序。
脚本写完保存文件类型为.iss;脚本的编写是分脚本段来编写的,我们这个安装程序只用到如下几个脚本段,【Setup】,【Types】【Components】【Files】【Icons】1,【Setup】这个段包含用于安装程序和卸载程序的全局设置。
某些提示对于你创建的任何安装程序都是必需的。
2,【Types】这个段是可选的。
它用来定义安装程序向导在选择组件面时可供选择的所有安装类型。
如果你在[Components] 段定义了组件,但没有定义类型,在编译时将创建一个默认的安装类型设置。
3,【Components】这个段是可选的。
它定义安装程序向导的选择组件页中显示的所有组件,以便于用户定制安装类型。
光用它一个组件不会做任何事情: 它需要“链接”到其它安装条目。
4,【Files】这是定义安装程序安装文件到用户系统中的可选文件段。
5,【Icons】这个可选段定义所有创建在开始菜单和/或其它位置(比如桌面) 的快捷方式。
3.2下面我们来介绍一下以上五个段的具体应用【Setup】AppName=My Facebook //你所安装软件的名称如图(3.2.1)AppVersion=1.0 //你所安装软件的版本号图(3.2.1)DefaultDirName={pf}\My Facebook //安装目录默认为C:\ProgramFiles\My Facebook图(3.2.2)OutputDir=c:\Output //生成的安装文件所在目录图(3.2.1)【Types】Name: "exa"; Description: "example"; Flags: iscustom Name: "full"; Description: "Full installation"Name: "FBC"; Description: "FBClient"Name: "FBS"; Description: "FBServer"类型就在图(3.2.3)的下拉菜单中图(3.2.3)【Components】Name: "FBClient"; Description: "FBClient"; Types: FBC fullName: "FBServer"; Description: "FBServer"; Types: FBS full此脚本的功能是将图(3.2.3)中下拉菜单的内容与复选框对应,如图(3.2.4)中选择Full installation后FBClient、FBServer被选中图(3.2.4)【Files】Source: "FBClient.exe"; DestDir: "{app}"; Components: FBClient; Flags: isreadmeSource: "libmysql.dll"; DestDir: "{app}"; Components: FBClient Source: "FBClient.ini"; DestDir: "{app}"; Components: FBClient Source: "FBServer.exe"; DestDir: "{app}"; Components: FBServer; Flags: isreadmeSource: "libmysql.dll"; DestDir: "{app}"; Components: FBServer此脚本才是真正要加载的文件,你要保证这些文件和你的.iss保存在一个目录下,否则会找不到而报错;【Icons】Name: "{group}\FBClient"; Filename: "{app}\FBClient.exe"; Components: FBClientName: "{userdesktop}\FBClient"; Filename: "{app}\FBClient.exe"; Components: FBClient; Comment:"This is fbclient.exe"Name: "{group}\FBServer"; Filename: "{app}\FBServer.exe"; Components: FBServerName: "{userdesktop}\FBServer"; Filename: "{app}\FBServer.exe"; Components: FBServer; Comment:"This is fbclient.exe"此脚本是创建快捷方式以及放置的开始目录;4.你可以将上述代码copy到Inno Setup编译器适当的修改制作你的安装程序;。
- 1、下载文档前请自行甄别文档内容的完整性,平台不提供额外的编辑、内容补充、找答案等附加服务。
- 2、"仅部分预览"的文档,不可在线预览部分如存在完整性等问题,可反馈申请退款(可完整预览的文档不适用该条件!)。
- 3、如文档侵犯您的权益,请联系客服反馈,我们会尽快为您处理(人工客服工作时间:9:00-18:30)。
修改安装过程中的图片
一般编译之后,安装过程中出现在左边图片是是下图这个样子的:
其实也可以修改它,只需要在setup段中作一点稍微的修改,加一行代码即可:
[setup]
AppName=Test
AppVerName=TEST
DefaultDirName="E:\TEST"
AppVersion=1.0
WizardImageFile=dh.bmp
[files]
Source: "F:\desktop\ipmsg.exe"; DestDir: "{app}"
注意上面加粗的一行即是设置图片的代码,图片必须放在脚本文件相同的目录下,如果不是,需要提供完整的路径,并且必须是BMP的位图,手册上规定图片的最大尺寸是164x314 pixels,但是稍微超出似乎也没有什么问题。
效果如下:
另外一个图片的位置也说明一下,即安装过程中还会出现窗口右上方的小图片:
这个小图片对应的项是WizardSmallImageFile,该图片的最大尺寸是55x58 pixels,修改方法和上面类似,下面是修改后的效果:。