EDU_CAT_EN_SR1_AF_V5R16_toprint
win8 安装H3C iNode校园网客户端后,拨号连接无法使用,错误代码
/IP 版本6)。 经过这一步之后,又返回网络连接的窗口,但这个时候,那个 “卸载”按钮已经是可用的了。点这个“卸载”按钮来把TCP/I
P协议删除,然后重启一次机器。
4、重启后再照着第3步,重新安装一次TCP/IP协议便可。
5、再重启一次,这时应该可以了,可以
照着需要,设置一下IP地址
四、自动更新问题:
错误720,正常拨号的时候提示宽带连接错误720,常和 718同时出现。一般为电脑系统问题,也有可能是自动更 新后,TCP/IP协议出错。
解决方案:
一、建议将系统重新启动后再重新拨号上网:可拨多次,百分之九十都可以 解决。 二、如果还不可以,则删除宽带连接,重新建
立测试。
三、重装TCP/IP协议:
\inf\nettcpip.inf文件,找到: [MS_TCPIP.PrimaryInstall] Characteristics=0x
a0 <――――――把此处的0Xa0改为0x80 保存退出 3、打开本地连接的TCP/IP属性――-添加协议——从磁 盘——浏览找到刚刚
保存的nettcpip.inf(%winroot%\inf\nettcpip.inf)文件,然后 选择“TCP/IP协议”(不是选择那个TCP
1、打开“控制面板”-“添加删除程序”,勾选“显示更新”,将此两个补丁 卸载后重起
计算机试试Байду номын сангаасKB893066和KB890923 2、把“C:\WINDOWS\system32\drivers”目录下的“TCPI
P.SYS.ORIGINAL”文件改回“TCPIP.SYS”,然后重新启动系统 就行了,如果没有就到其他机子上拷一个过来。
完!感谢您的阅读和支持!谢谢!
修复联想网络同传功能
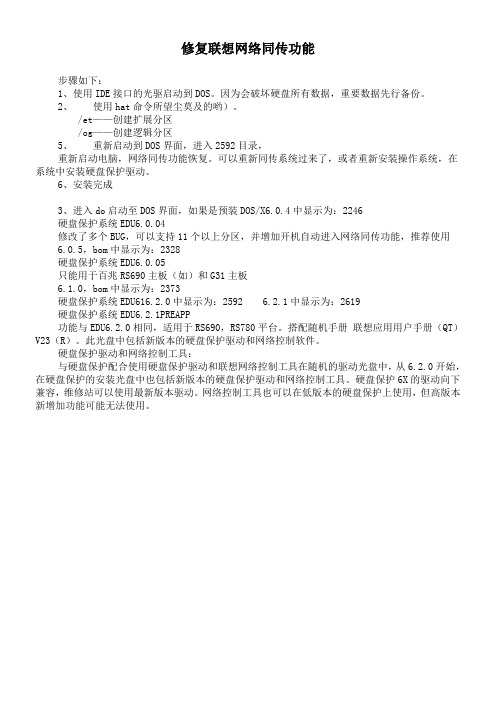
修复联想网络同传功能
步骤如下:
1、使用IDE接口的光驱启动到DOS。
因为会破坏硬盘所有数据,重要数据先行备份。
2、使用hat命令所望尘莫及的哟)。
/et——创建扩展分区
/og——创建逻辑分区
5、重新启动到DOS界面,进入2592目录,
重新启动电脑,网络同传功能恢复。
可以重新同传系统过来了,或者重新安装操作系统,在系统中安装硬盘保护驱动。
6、安装完成
3、进入do启动至DOS界面,如果是预装DOS/X6.0.4中显示为:2246
硬盘保护系统EDU6.0.04
修改了多个BUG,可以支持11个以上分区,并增加开机自动进入网络同传功能,推荐使用
6.0.5,bom中显示为:2328
硬盘保护系统EDU6.0.05
只能用于百兆RS690主板(如)和G31主板
6.1.0,bom中显示为:2373
硬盘保护系统EDU616.2.0中显示为:2592 6.2.1中显示为:2619
硬盘保护系统EDU6.2.1PREAPP
功能与EDU6.2.0相同,适用于RS690,RS780平台。
搭配随机手册联想应用用户手册(QT)V23(R)。
此光盘中包括新版本的硬盘保护驱动和网络控制软件。
硬盘保护驱动和网络控制工具:
与硬盘保护配合使用硬盘保护驱动和联想网络控制工具在随机的驱动光盘中,从6.2.0开始,在硬盘保护的安装光盘中也包括新版本的硬盘保护驱动和网络控制工具。
硬盘保护6X的驱动向下兼容,维修站可以使用最新版本驱动。
网络控制工具也可以在低版本的硬盘保护上使用,但高版本新增加功能可能无法使用。
linux基础教程课后习题答案

linux基础教程课后习题答案Linux基础教程课后习题答案Linux作为一种开源的操作系统,具有广泛的应用领域和强大的功能。
学习Linux的基础知识对于提升技能和扩展职业发展具有重要意义。
下面将为大家提供一些Linux基础教程课后习题的答案,希望能帮助大家更好地理解和掌握Linux操作系统。
一、命令行操作题1. 如何在Linux系统中查看当前所在目录的路径?答:使用pwd命令可以查看当前所在目录的路径。
2. 如何在Linux系统中创建一个名为"test"的文件夹?答:使用mkdir命令可以创建文件夹,具体命令为:mkdir test。
3. 如何在Linux系统中查看一个文件的内容?答:使用cat命令可以查看文件的内容,具体命令为:cat 文件名。
4. 如何在Linux系统中复制一个文件?答:使用cp命令可以复制文件,具体命令为:cp 源文件目标文件。
5. 如何在Linux系统中删除一个文件夹及其所有内容?答:使用rm命令可以删除文件夹及其所有内容,具体命令为:rm -r 文件夹名。
二、文件权限题1. 如何在Linux系统中查看一个文件的权限?答:使用ls命令可以查看文件的权限,具体命令为:ls -l 文件名。
2. 如何在Linux系统中修改一个文件的权限?答:使用chmod命令可以修改文件的权限,具体命令为:chmod 权限文件名。
3. 如何在Linux系统中将一个文件的所有者修改为"root"?答:使用chown命令可以修改文件的所有者,具体命令为:chown root 文件名。
4. 如何在Linux系统中将一个文件的所有组修改为"admin"?答:使用chgrp命令可以修改文件的所有组,具体命令为:chgrp admin 文件名。
三、进程管理题1. 如何在Linux系统中查看当前正在运行的进程?答:使用ps命令可以查看当前正在运行的进程,具体命令为:ps aux。
Red Hat Linux系统管理练习题参考答案

Red Hat Linux系统管理练习题参考答案1. 基本概念和命令Red Hat Linux是一种流行的操作系统,常用于服务器管理和系统维护。
本文将为您提供Red Hat Linux系统管理练习题的参考答案。
1.1 文件和目录管理在Red Hat Linux系统中,文件和目录管理是非常重要的一项任务。
以下是一些示例答案:- 创建名为"test"的目录:`mkdir test`- 切换到"test"目录:`cd test`- 在当前目录下创建一个名为"file.txt"的文件:`touch file.txt`- 在当前目录中列出所有文件和目录:`ls -a`- 删除名为"file.txt"的文件:`rm file.txt`- 删除名为"test"的目录:`rmdir test`1.2 用户和组管理在Red Hat Linux系统中,用户和组管理是管理访问权限和系统安全性的重要方面。
以下是一些示例答案:- 创建名为"user1"的用户:`useradd user1`- 设置"user1"的密码:`passwd user1`- 创建名为"group1"的组:`groupadd group1`- 将"user1"添加到"group1"组中:`usermod -a -G group1 user1`- 切换到"user1"用户:`su user1`- 列出系统上的所有用户:`cat /etc/passwd`- 列出系统上的所有组:`cat /etc/group`2. 网络配置和管理在Red Hat Linux系统中配置和管理网络是必不可少的。
以下是一些示例答案:2.1 IP地址和网络接口配置- 查看系统上的网络接口信息:`ip addr show`- 配置名为"eth0"的网络接口为静态IP:`nmcli con mod eth0ipv4.method manual ipv4.addresses "IP_ADDRESS/SUBNET_MASK" ipv4.gateway "GATEWAY_ADDRESS"`- 激活名为"eth0"的网络接口:`nmcli con up eth0`2.2 防火墙配置- 查看防火墙状态:`systemctl status firewalld`- 开启防火墙:`systemctl start firewalld`- 关闭防火墙:`systemctl stop firewalld`3. 系统监控和日志管理在Red Hat Linux系统中,监控系统资源和管理日志是确保系统稳定性和故障排除的重要环节。
2021年国开电大linux网络操作系统形考任务5答案

2021年国开电大linux网络操作系统形考任务5答案题目如为随机抽题请用CTRL+F来搜索试题形考任务5试题1基于xinetd的服务是非独立服务正确答案是:“错”。
试题2Red Hat Linux安装的安装过程中不需要语言选择、键盘选择、鼠标选择。
正确答案是:“错”。
试题3/boot目录是用来存放系统配置文件的正确答案是:“错”。
试题4rmdir命令可以删除非空目录正确答案是:“错”。
试题5Apache服务是一种web服务器正确答案是:“对”。
试题6/etc/passwd文件只记录用户信息,而/etc/shadow文件记录用户密码正确答案是:“对”。
试题7|more命令可以将系统输出分屏显示正确答案是:“对”。
试题8Linux系统可以使用ipconfig命令配置ip地址正确答案是:“错”。
试题9#rpm命令可以卸载、安装.rpm的软件包正确答案是:“对”。
试题10Linux系统的源代码是免费开放的正确答案是:“对”。
试题11系统的首进程init进程的进程号PID为正确答案是:1试题12关于Apache服务器的说法错误的是正确答案是:Apache的进程为名为http试题13使用哪个命令能够修改root账号的密码正确答案是:passwd root试题14以下哪个是删除非空目录HX的命令正确答案是:rm -r HX试题15Linux系统的超级用户是什么?正确答案是:root试题16有一个文件,所有用户都能够查看、执行,但不能修改那么这个文件的权限是正确答案是:777试题17下列那个是自由软件正确答案是:Linux试题18在RHEL6系统中,第二块sata硬盘中的第3个逻辑分区应该表示为正确答案是:/dev/sdb7试题19在linux环境下,要显示当前目录下扩展名为.txt的所有文件,可以使用以下()命令。
正确答案是:ls *.txt试题20Linux操作系统下,使用()命令进入指定目录正确答案是:cd。
Linux终端命令打印和打印机管理

Linux终端命令打印和打印机管理在Linux操作系统中,终端命令是管理和控制系统的重要工具。
其中,打印和打印机管理也是我们经常需要使用的功能。
本文将介绍一些常用的Linux终端命令,以及如何通过命令来管理和配置打印机。
一、打印命令1. lp命令:lp命令是Linux中用于打印文件的基本命令。
使用lp命令时,可以指定打印机、打印份数以及其他打印选项。
例如: lp -d printername filename这条命令将文件filename发送到名为printername的打印机进行打印。
2. lpr命令:lpr命令同样用于文件的打印,但与lp命令不同的是,lpr命令直接发送文件到默认打印机进行打印。
例如:lpr filename这条命令将文件filename发送到默认打印机进行打印。
3. lpq命令:lpq命令用于查看当前打印队列的状态。
通过lpq命令,我们可以了解到正在排队等待打印的文件以及它们的打印顺序。
例如: lpq这条命令将显示当前打印队列的状态。
4. lprm命令:lprm命令用于从打印队列中删除正在等待的文件。
例如:lprm jobnumber这条命令将从打印队列中删除指定编号的打印任务。
二、打印机管理1. lpadmin命令:lpadmin命令是Linux中用于管理打印机的命令。
通过lpadmin命令,我们可以添加、删除、配置和控制打印机。
例如: lpadmin -p printername -E -v device-uri这条命令将添加一个名为printername的打印机,并将其与设备连接。
2. lpoptions命令:lpoptions命令用于查看和配置打印机的选项。
通过lpoptions命令,我们可以设置打印机的默认设置、纸张大小、打印质量等。
例如:lpoptions -d printername这条命令将将printername设置为默认打印机。
3. lpc命令:lpc命令用于控制和管理打印机的状态。
联想EDU教育应用硬盘保护网络控制软件用户手册(QT)V3.5电子版

联想应用用户手册(QT)V3.5 目录服务分区特殊说明联想教育应用方案注意事项第1章联想教育应用方案功能简介总体安装说明第2章联想教育应用的首次部署安装前的准备第一次布署的简要步骤硬盘保护系统的安装与部署网络同传的使用第3章联想教育应用的日常维护与使用硬盘保护的管理员菜单网络同传第4章网络控制工具的使用概述功能特性安装与使用保护与同传图标显示列表资产管理应用设置本机操作常用操作电子教室高级版卸载第5章常见的问题与解答服务分区特殊说明硬盘保护,网络同传等教育应用所需的文件和相关数据保存在服务分区中,请不要删除此分区,否则将造成硬盘保护系统无法正常使用。
注意1. 您在安装Windows操作系统过程中,如果看到有已经存在的分区(即服务分区),请不要删除此分区。
2. 硬盘保护,网络同传等教育应用所需的文件和相关数据保存在服务分区中,如果服务分区被非联想维修人员所进行的操作删除或损坏,联想(北京)有限公司将不对由此而导致的任何损失承担责任,联想的服务及责任以联想产品随机文件所做出的服务承诺为准。
联想教育应用方案注意事项注:部分机型具有联想教育应用,请以实际机型为准。
1. 一个系统分区下最多可以归属20个数据分区,如果超过20个会弹出下图所示提示。
2. 硬盘每个分区的划分,请将容量控制在500MB到200GB之间。
3. 请您安装完操作系统、硬件驱动程序后立即安装“联想网络控制工具基础版”并重新启动计算机,然后再进行软件的安装,所有安装请在开放模式下进行。
4.该版本的联想教育应用方案只支持Win8 64位操作系统,且在GPT分区表下使用。
不支持Windows XP ,WindowsVista,Windows 7,Ubuntu 10.10等操作系统。
5.划分分区时,请务必先完成所有可启动分区的划分,然后再进行数据分区的划分。
第1章联想教育应用方案功能简介联想教育应用方案是专门为电子教室、网吧等公共机房环境设计开发的,包括硬盘分区管理、硬盘数据保护、CMOS参数保护、网络唤醒、IP分配、网络分组同传、智能同传、智能排程、断电同传以及机房网络管理控制等一系列重要功能,重点解决机房管理员如何快速方便地给机房中的所有计算机安装操作系统、驱动程序和应用软件的问题,以及解决如何快速清除计算机的前一个用户的操作,实现下一个用户使用同一台计算机初始用户环境的问题。
联想 CE01 系列交换机 命令参考手册

命令参考錯誤! 使用[常用] 索引標籤將标题 1 套用到您想要在此處顯示的文字。
联想CE01系列交换机命令参考-安全Copyright© 2017 Lenovo保留所有权利未得到联想的书面许可,任何单位和个人不得以任何方式或形式对本文档的部分内容或全部进行复制、摘录、备份、修改、传播、翻译成其他语言、将其全部或部分用于商业用途。
供货情况:产品,价格,规格和供货况可能发生变化,恕不另命令参考-安全本分册介绍安全命令参考相关内容,包括以下章节:1. AAA2. RADIUS3. TACACS+4. 802.1x5. Web认证配置命令6. SCC7. 全局IP+MAC绑定8. PASSWORD-POLICY9. 端口安全10. STORM-CONTROL11. SSH12. CPP13. DHCP Snooping14. DHCPv6 Snooping15. ARP Check16. DAI17. IP Source Guard18. IPv6 Source Guard19. 防网关ARP欺骗20. NFPP21. DOS保护1 AAA1.1 aaa accounting commands对登录到NAS上的用户所执行的命令活动进行记账,管理用户活动。
aaa accounting commands level{ default | list-name } start-stop method1 [ method2...]取消命令记账功能。
no aaa accounting commands level{ default | list-name }【参数说明】【缺省配置】记账功能关闭【命令模式】全局模式。
【缺省级别】14【使用指导】只有在用户通过了登录认证后,才会启用命令记账功能,如果用户登录时未进行认证或认证采用的方法为none,则不会进行命令记账。
启用记账功能后,在用户每次执行指定级别的命令后,将所执行的命令信息,发送给安全服务器。
- 1、下载文档前请自行甄别文档内容的完整性,平台不提供额外的编辑、内容补充、找答案等附加服务。
- 2、"仅部分预览"的文档,不可在线预览部分如存在完整性等问题,可反馈申请退款(可完整预览的文档不适用该条件!)。
- 3、如文档侵犯您的权益,请联系客服反馈,我们会尽快为您处理(人工客服工作时间:9:00-18:30)。
Structure Design Administration ExpertStudent Notes:CATIA TrainingFoilsStructure Design AdministrationCopyright DASSAULT SYSTEMESVersion 5 Release 16 November 2005 EDU-CAT-EN-SR1-AF-V5R161Copyright DASSAULT SYSTEMESStructure Design Administration ExpertCourse PresentationObjectives of the courseIn this course you will learn methods to administrate a SR1 project.Student Notes:Targeted audienceExperienced CATIA V5 users4 daysPrerequisitesCATIA V5 Fundamentals, SR1, PKT, KWA (Optional)Copyright DASSAULT SYSTEMESCopyright DASSAULT SYSTEMESStructure Design Administration ExpertPlanningDay 1MORNING EDU-CAT-E-SR1FF-V5R16 Chapter 1: Project Resource Management EDU-CAT-E-SR1FX-V5R16 Step 1: Creating a new Project EDU-CAT-E-SR1FF-V5R16 Chapter 2: Feature Dictionary Edition EDU-CAT-E-SR1FX-V5R16 Step 2:Adding New Attributes EDU-CAT-E-SR1FX-V5R16 Step 3: Modifying a Standard Section CatalogStudent Notes:Day 2EDU-CAT-E-SR1FF-V5R16 Chapter 3: Standard Section CatalogsDay 3EDU-CAT-E-SR1FF-V5R16 Chapter 4: Standard End-cut EDU-CAT-E-SR1FX-V5R16 Step 4: Creating a Standard End-Cut EDU-CAT-E-SR1FF-V5R16 Chapter 4: Contextual End-cut EDU-CAT-E-SR1FX-V5R16 Step 5: Creating a Contextual End-CutDay 4EDU-CAT-E-SR1FF-V5R16 Chapter 4: Standard Slot EDU-CAT-E-SR1FX-V5R16 Step 5: Creating a Standard Slot EDU-CAT-E-SR1FF-V5R16 Chapter 4: Small Assemblies EDU-CAT-E-SR1FX-V5R16 Step 5: Creating a T-ChockExercisesAFTERNOONExercisesCopyright DASSAULT SYSTEMESCopyright DASSAULT SYSTEMESStructure Design Administration ExpertTable of Contents1. Project Resource ManagementIntroducing the PRM Understanding the PRM Structure Discipline Resources Accessing the PRM Checking the PRMStudent Notes:p5p6 p7 p11 p12 p152. Feature DictionaryAbout the Feature Dictionary Starting the Feature Dictionary Editor Managing Attributes Discrete Values Managing ID Numberp16p17 p18 p19 p21 p223. Standard Section CatalogsManaging Parametric Sections Generating Resolved Parts Creating/Modifying Standard Section Catalogs p32Copyright DASSAULT SYSTEMESp24p25 p304. Detailing FeaturesDesign Rules and Recommendations End-Cuts Slots Small Assemblies Storing Detailing Features in a catalogp34p35 p38 p44 p47 p50Copyright DASSAULT SYSTEMESStructure Design Administration ExpertProject Resource ManagementThis task shows you how to manage project resources like catalogs and dictionaries. These changes can only be made at system administrator level.Student Notes:Introducing the PRM (the CNEXT Project) Understanding the PRM Structure Discipline Resources Checking the PRM in SR1Copyright DASSAULT SYSTEMESCopyright DASSAULT SYSTEMESStructure Design Administration ExpertIntroducing the PRM?Unlike other « Mechanical » Products (e.g. Part Design, Sheetmetal, …) SR1 resources are manage through the project resource management (PRM) file and call for a Project–based notion The project resource management (PRM) file identifies resources (such as Standard Section catalogs, Thickness table, etc.) to the application. the PRM file identifies each resource and its location (directory path). The PRM file organizes the resources by discipline and application, associating resources to specific applications. A sample file is provided with this application. The default location is ...\intel_a\startup\EquipmentAndSystems\ProjectData and the file is named Project.xml. You need to make a project resource management file for each project at your site. To view the project resource management file (Project.xml) in an internet browser, you need a specific file named Project.dtd. The default location is ...\intel_a\startup\reffiles\disciplines To edit the Project.xml file you need a text editor.Student Notes:Copyright DASSAULT SYSTEMESCopyright DASSAULT SYSTEMESStructure Design Administration ExpertUnderstanding the PRM (1/4)The resource management file is organized into several sections to make it easier to manage and utilize resources.Student Notes:Copyright DASSAULT SYSTEMESCopyright DASSAULT SYSTEMESStructure Design Administration ExpertUnderstanding the PRM (2/4)The Project box refers to the project for which the PRM file has been created, and will frequently be identified by the file name. In this case it is Project.xml.Student Notes:Project Resources: Any resources you place under the heading Project Resources can be used by all applications that are included in the file.Structure Discipline Resources: All resources placed under this discipline can be used by all the applications which are listed under it. Warning !Copyright DASSAULT SYSTEMESCopyright DASSAULT SYSTEMESStructure Design Administration ExpertUnderstanding the PRM (3/4)Structure Design Application: Any resource referred to at this level can only be used by that application.Student Notes:Must be commentedCopyright DASSAULT SYSTEMESCopyright DASSAULT SYSTEMESStructure Design Administration ExpertUnderstanding the PRM (4/4)PRM Key-words.Do not change the Resource Name, even if you replace a resource with a different one You can change the Description if you want to this is a brief explanation of the resource Some resources have the entry "Visible = yes". If you set the value to No then this resource cannot be used and will not be visible in the Tools - Project Management dialog box.Student Notes:The Type field refers to file type. If the Type field says Catia, it refers to a file type unique to Catia, such as .catalogFile EnoviaV5 SmarteamThe Location field usually gives the location of the resource. If this is a directory path then you can change the location, with an associated change in the PRM fileSome resources have the entry Access="RW" or "R". These refers to file permissions: read-write or readIf your resources do not reside in Enovia or Smarteam, enter File in the Driver field. Define the Location field using the provided aliases.it is preferable to enter absolute paths - including the drive letterCopyright DASSAULT SYSTEMESIf your resources are Smarteam-based, enter Smarteam in the Driver field. For Smarteam-based resources, all you need to enter in the Location field is the file name of the resource without the file extension. For instance, the catalog AISC_Resolved.catalog would be entered as Aisc_Resolved.Copyright DASSAULT SYSTEMESAbout the Feature Dictionary Starting the Feature Dictionary Editor Managing AttributesDiscrete ValuesManaging ID NumberStructure Design Administration ExpertDiscrete ValuesYou may want to specify an attribute 'Type' for shapes with a list of discrete values like beam, column, brace, etc. Discrete Values lists are stored, by default, in …\intel_a\startup\EquipmentAndSystems\DiscreteValues DiscreteValues is a resource manage by the PRM:Student Notes:<Resource Name="DiscreteValues" Description="Discrete Values Directory" Visible="yes"> <ID Type="Path" Driver="File" Location="E:\SERVER\DS\Setup\EquipmentAndSystems\DiscreteValues" Path="No Description" Access="R" /> </Resource>1Create a text file The name of the text file must reflect the name of the attribute it refers to.<Shift> <Enter> <Shift> <Enter> <Shift> <Enter> <Shift> <Enter>Copyright DASSAULT SYSTEMESCopyright DASSAULT SYSTEMESStructure Design Administration ExpertManaging ID Number (1/2)Every object that you create or part that you place, in your design document can be given a unique identifier. The default name is based on certain rules. A set of default rules is included with this application. ID Schema Resources : Give the system the path of the Structure Design ID Schema directory<!-- ID SCHEMA RESOURCES --> <Resource Name="StructureDesignIDSchema" Description="Structure Design ID Schema Directory" Visible="yes"> <ID Type="Path" Driver="File" Location="${Startup_Directory}\StructureDesign\DataDictionary" Path="No Description" Access="R" /> </Resource><?xml version="1.0" ?> <!DOCTYPE Doct (View Source for full doctype...)> - <Doct> <schema_ATT value="ShapeType" /> <schema_SEP value="_" /> <schema_CST value="Shape_" /> <schema_SeqNbr seq_IEND="999" seq_NMIN="3" seq_ISTART="1" /> </Doct>Student Notes:The numeral 1 after the file name is used for a reference part.ID Sequence Number Definition Directory : Give the system the path where to store the Sequence Number files<!---> <Resource Name="IDSequenceNumber" Description="ID Sequence Number Definition Directory" Visible="yes">I P Q W Y P ab bc b P b R ST R UV R T X R ` R U d U `R V c dCopyright DASSAULT SYSTEMES<ID Type="Path" Driver="File" Location="E:\SERVER\DS.DB\H2O\DesignData\ApplicationData\IDSequenceNumbers" Access="RW“ Path="No Description" /> </Resource>Copyright DASSAULT SYSTEMES`eStructure Design Administration ExpertManaging ID Number (2/2)This task shows you how to modify or define the object naming rules.1 In the specifications tree, double-click the class to which you want to modify the ID Number. 2 Click on the Define ID schema buttonStudent Notes:The Define ID Schema dialog box opens:You have two options In the ID usage field, Instance and Reference, and you usually have to define naming rules for each object using both options. The naming rules you define under the Instance option are used by the application when you are placing a part in a document. Select Yes or No for Sequence number. Yes or No cannot be selected if you have Reference as the ID usage. Minimum length refers to the number of digits in the numbering scheme. For instance, 3 means the number will show up as 001.Copyright DASSAULT SYSTEMES3Click on Define/Modify ID Schema button The Define/Modify ID Schema dialog box will display.Copyright DASSAULT SYSTEMESStructure Design Administration ExpertStandard Section CatalogYou will see how to generate grids by assigning the basic parameters needed to create the grid.Student Notes:Managing Parametric Sections Generating Resolved Parts Creating/Modifying Standard Section CatalogsCopyright DASSAULT SYSTEMESCopyright DASSAULT SYSTEMESStructure Design Administration ExpertManaging Parametric Sections (1/5)Section Part creation (1/2)Structure parts must have a parameter called "ProfileType". Each parametric part must refer to a design table. The design table must have a column called "PartNumber", which should have a value. This value is used to name the generated resolved part.1 Create a CATPartStudent Notes:2Create a Sketch By convention in XY Plane. 3 Rename the driving offsets of the sketchCopyright DASSAULT SYSTEMESCopyright DASSAULT SYSTEMESStructure Design Administration ExpertManaging Parametric Sections (2/5)Section Part creation (2/2)4 Create the Parameter call: ProfileType Value it: Beam. 5 Create a dimension table Give it the name of the final CATPart. It’s a Tabulated text file that reflect the parameters you create for your Sketch. It contains a column “PartNumber”.Student Notes:6Associate this dimension table to the CATPartCopyright DASSAULT SYSTEMES7Save the CATPartUse the following naming convention: catalogname_familyname.CATPart (e.g. EN_IPSpecial)Copyright DASSAULT SYSTEMESStructure Design Administration ExpertManaging Parametric Sections (3/5)Defining Anchor Points for Sections1 Edit the Sketched sectionStudent Notes:2create an appropriate construction point3Rename the point Use the prefix catStr, for example catStrOffsetTopCenter.4Save the CATPartCopyright DASSAULT SYSTEMESCopyright DASSAULT SYSTEMESStructure Design Administration ExpertManaging Parametric Sections (4/5)Naming Section Characteristics1 Click the Name Section Characteristics iconStudent Notes:2Specify the location of the folder containing user sketches3Select the sketch of interest in the Name box4Name sketch edges using the contextual menu Right-click a line and select the name from the list of pre-defined names in the contextual menu.Copyright DASSAULT SYSTEMES5Repeat to identify all sketch edges6Click OK when doneCopyright DASSAULT SYSTEMESStructure Design Administration ExpertManaging Parametric Sections (5/5)Default names for typical shapes.Typical I Shape Typical L ShapeStudent Notes:Typical T ShapeTypical U ShapeCopyright DASSAULT SYSTEMESCopyright DASSAULT SYSTEMESStructure Design Administration ExpertGenerating Resolved Parts (1/2)SR1 is only using “Resolved Standard Section Catalog”Student Notes:A .bat file is provided to ease the generation of all the resolved section, family by family1 Create a directory and place in it the parametric CATPart documents and associated design table documents. You MUST specify the first set of coordinates at step 6.2Create a directory in which output resolved CATPart documents will be placedCopyright DASSAULT SYSTEMES3Open a command prompt window and change to the directory ...intel_a\code\command.Copyright DASSAULT SYSTEMESDesign Rules and Recommendations End-CutsSlotsSmall AssembliesStoring Detailing Features in a catalogTypically, a Product containing 3 Shapes called:Store the end-cut template in the Detailing FeatureTypically, a Product containing:。