飞利浦7310说明书
wmt-7310+wmt-7310s+洗衣机+用户手册说明书

1 您的洗衣机
概况
8
1
2
3 7
6
4 5
1- 电源线 2- 顶部面板 3 - 控制面板 4 - 过滤器盖 5- 可调支腿
6- 装填门 7 - 洗涤剂分送屉 8- 排水软管
4 ZH
技术规格
型号 干衣物最大容量(kg) 高度(cm) 宽度(cm) 深度(cm) 净重(±4 kg) 电力输入(V/Hz) 总电流(A) 总功率(W) 甩干速度(最大 rpm)
該電器的包裝材料是可迴圈使用的。請出於環保的目的,配合迴圈利用,將 相應的包裝材料交到當地政府設立的回收站。本機器中確實含有大量可回收 的成分,並且有相應的指示標籤。儘量不要將這些可回收的包裝材料與其他 垃圾混合。本機器的回收標準符合歐盟的電器及電子垃圾回收指令2002/96/ EC。請聯繫當地政府或者經銷商,以找到就近的回收站。我們誠摯地感謝 您為環保而作出的努力!
目录
1您的洗衣机
4
概况............................................................... 4 技术规格...................................................... 5
2重要安全须知
6
一般安全...................................................... 6 指定使用...................................................... 6 儿童的安全.................................................. 6
置由客户负责准备工作。 B产品的安装和电力连接必须由经授权
剃须刀设备说明书

显示屏上的图标是什么意思? (图 B) - 主菜单
您可以按菜单按钮来切换菜单项。 长按即可启用或禁用某些功能。 图标 含义 此菜单以百分数的形式显示电池状态。
可以通过此菜单启用或禁用旅行锁。
可以通过此菜单禁用或重新启用光环反馈。
- 打开剃须刀电源
20 简体中文
按下开/关按钮启动剃须刀。
从此菜单项中,您可以取消配对剃须刀和 智能手机。 注意: 请确保您的智能手机配备了 Bluetooth® 4.2 或更高版本。
本剃须刀配备了 Bluetooth® 4.2 及更高版 本,可与该应用程序连接。 将剃须刀和智 能手机配对后,即使剃须刀已关闭,剃须 刀上的蓝牙也会自动打开。 这样方便在随 后同步剃须数据,因此您在剃须时无需随 身携带智能手机。 有关将剃须刀和智能手
主菜单(图 A) 关闭剃须刀时,您可通过按菜单按钮在四 个菜单功能之间进行切换。
电池剩余电量 该菜单项显示电池剩余电量。
22 简体中文压力网罩传感源自 该菜单项显示上次剃须的压力反馈。
动作控制传感器 该菜单项显示上次剃须的动作反馈。
旅行锁 蓝牙
从此菜单项中,您可以通过按住菜单按钮 3 秒钟来锁定和解锁剃须刀。 您在旅行 时,可以锁住剃须刀,以防止电源意外开 启。
简体中文 23
机配对的好处的信息,请参阅“将剃须刀 连接到应用程序的好处”。 注意: 您可以通过激活旅行锁来关闭剃须 刀上的蓝牙。
主菜单(图 B) 您可以按菜单按钮来切换菜单功能。
电池剩余电量 该菜单项显示电池剩余电量。
剃须后反馈 旅行锁
注意: 只有通过应用程序设置启用此功能 后,才会显示此菜单。
- 蓝牙 图标 含义
此图标显示剃须刀已与您的智能手机配对。
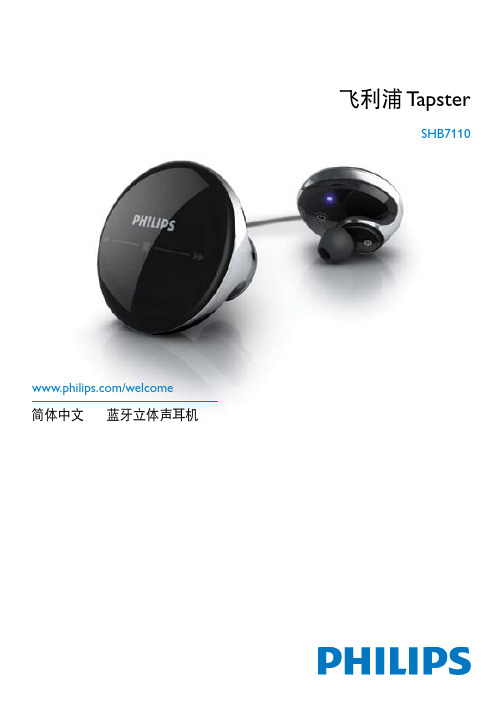
shb7110_使用说明
(即,不支持蓝牙立体声 (A2DP))用于 通话,与此同时连接一台蓝牙立体声设 备(支持蓝牙的 MP3 播放机、蓝牙音频 适配器等)用于收听音乐。必须首先将 手机与蓝牙耳机配对,然后关闭手机和 耳机,以配对蓝牙音频设备。
借助 SwitchStream 功能,您同时可以收听音 乐和监控来电。收听音乐期间,收到来电时 您将听到铃声,只需轻击耳塞即可切换至 通话。
将 USB 电缆插入电脑上通电的 USB 端口, 或插入带有 USB 接口的电源适配器,然后 将充电电缆连接到耳机充电插槽。
首次将飞利浦 Tapster 蓝牙立体声耳机连接并 用于手机之前,必须将其与手机配对。“配 对”操作将在手机和耳机之间建立一种独特 的加密连接。
配对只需执行一次,即在首次将耳机用于手 机或其它蓝牙设备之前。 • 仅当您需要将多台不同的蓝牙设备与耳机
3
2 重要信息
2.1 听力安全
危险 为避免听力受损,应限制以高音量使用耳机 的时间,并将音量设定在安全级别。音量越 大,安全聆听的时间就越短。
使用耳机时请确保遵循以下准则。 • 在合理时间内以合理音量收听。 • 听力适应后,注意不要持续地调高音量。 • 请勿将音量调得太高,从而无法听见周围
的声音。 • 耳机声压过大可导致听力受损。 • 在有潜在危险的情况下应谨慎使用或暂停
向前/向后滑动 轻击 按触(按住 1/2 秒) 双击 按触(按住 1/2 秒) 取出/塞入耳塞
通话时双击 轻击
按触(按住 1/2 秒)
14
简体中文
7.4 存放和携带耳机 该耳机附带有便携保护盒,用于存放耳机和 耳挂选件。将连接两个耳塞的线缆缠绕在电 缆存储槽中,以便整洁地存放耳机。
飞利浦 7000系列剃须刀 产品说明书
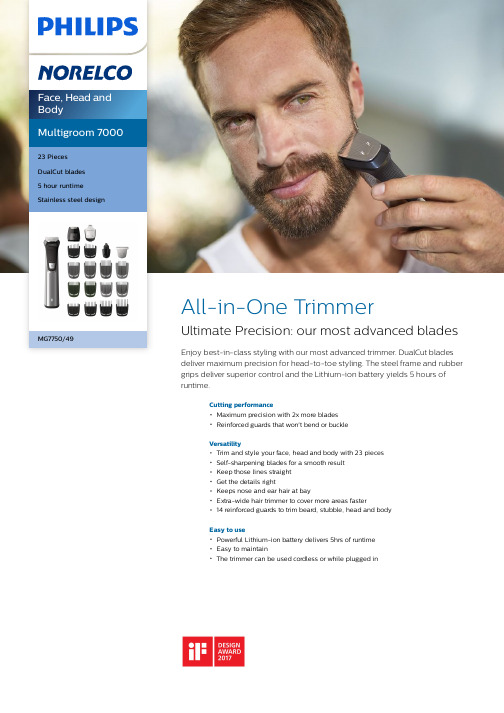
MG7750/49All-in-One TrimmerUltimate Precision: our most advanced blades Enjoy best-in-class styling with our most advanced trimmer. DualCut blades deliver maximum precision for head-to-toe styling. The steel frame and rubber grips deliver superior control and the Lithium-ion battery yields 5 hours of runtime.Cutting performanceMaximum precision with 2x more bladesReinforced guards that won't bend or buckleVersatilityTrim and style your face, head and body with 23 piecesSelf-sharpening blades for a smooth resultKeep those lines straightGet the details rightKeeps nose and ear hair at bayExtra-wide hair trimmer to cover more areas faster14 reinforced guards to trim beard, stubble, head and bodyEasy to usePowerful Lithium-ion battery delivers 5hrs of runtimeEasy to maintainThe trimmer can be used cordless or while plugged inHighlights23 pieces for face, head, body23 pieces for all your trimming needs: a metal trimmer, a foil shaver, a detail metal trimmer, a nose and ear trimmer, an extra-wide hair trimmer, 6 hair trimming guards, 3 beardtrimming guards, 2 stubble trimming guards, 2body trimming guards, an eyebrow trimming guard, a storage bag and a cleaning brush.DualCut technologyThis all-in-one hair trimmer features advanced DualCut Technology for maximum precision. It comes with double blades, and is designed to stay as sharp as day 1.5 hour runtimeOur most powerful Lithium-ion rechargeable battery delivers up to 5 hours of runtime per charge.Fully washable trimmerPhilips Multigroom and all of its attachments are fully washable, so simply rinse them under the faucet for easy cleaning.Reinforced guardsGet an even trim every time, with uniquereinforced cutting guards designed to prevent bending and buckling that’s common with impact.Cordless and corded useThe trimmer can conveniently be used cordless for 5 hours, or while plugged in for continual use.Premium stainless steel frameIt’s comfortable and easy to grip your styling trimmer, thanks to the stainless steel frame and rubber grip that improves control.Steel trimmerCreate clean, straight lines and evenly trim through the thickest hair thanks to themultipurpose trimmer's precise steel blades.These non-corrosive blades won't rust, and they self-sharpen to last longer.Foil shaverThe foil shaver quickly and comfortably shavesclean lines around your style.iF DESIGN AWARD 2017Multigroom series 7000iF DESIGN AWARD 2017SpecificationsCreate the look you wantNumber of attachments/guards: 5 attachments, 14 guardsStyling tools: Metal trimmer, Foil shaver, Detail metal trimmer, Nose & ear trimmer, Extra-wide hair trimmer, 3 beard trimming guards, 2 stubble trimming guards, 6 hair trimming guards, 2 body trimming guards, Eyebrow trimming guardBodygroom/Hairclipping/Facial: Long beard, Short beard, Stubble look, Sharp lines, Detailed styling, Goatee Cutting systemDualCut technology: An even and preciseresult, Cut in two directionsSelf-sharpening bladesReinforced trimming guards: Prevent bendingand bucklingAccessoriesMaintenance: Cleaning brushPouch: Storage pouchPowerBattery type: Lithium-ionRun time: 5 hoursCharging: 2 hours charge, 5 min quick chargeAutomatic voltage: 100-240 VEase of useCleaning: Fully washableOperation: Corded & Cordless useDisplay: Battery low indicator, ChargingindicatorMaintenance free: No oil neededDesignHandle: Stainless steel handle, No-slip rubbergripService5-year warranty© 2022 Koninklijke Philips N.V.All Rights reserved.Specifications are subject to change without notice. Trademarks are the property of Koninklijke Philips N.V. or their respective owners.Issue date 2022‑02‑02 Version: 15.4.1。
Philips 牙刷机产品说明书

FlexCare Platinum ConnectedEnglish 6简体中文 17繁體中文 26IntroductionCongratulations on your purchase and welcome to Philips! To fully benefit from the support that Philips offers, register your product at /welcome .Important safety informationRead this important information carefully before you use the appliance and save it for future reference.Danger-Keep the charger away from water. Do not place or store it over or near water contained in a bathtub, washbasin, sink etc. Do not immerse the charger in water or any other liquid. After cleaning,make sure the charger is completely dry before you connect it to the wall socket.Warning-The mains cord cannot be replaced. If the mains cord is damaged,discard the charger.-Always have the charger replaced with one of the original type in order to avoid a hazard.-Do not use the charger outdoors or near heated surfaces.-If the appliance is damaged in any way (brush head, toothbrush handle or charger), stop using it. This appliance contains no serviceable parts. If the appliance is damaged, contact theConsumer Care Center in your country (see chapter 'Warranty and support').Caution-Do not clean the brush head, the handle and/or the charger in the dishwasher.-If you have had oral or gum surgery in the previous 2 months,consult your dentist before you use the toothbrush.-Consult your dentist if excessive bleeding occurs after using this toothbrush or if bleeding continues to occur after 1 week ofuse.Also consult your dentist if you experience discomfort or pain when you use the Philips Sonicare.6English-The Philips Sonicare toothbrush complies with the safetystandards for electromagnetic devices. If you have a pacemaker or other implanted device, contact your physician or the device manufacturer of the implanted device prior to use.-If you have medical concerns, consult your doctor before you use the Philips Sonicare.-This product has only been designed for cleaning teeth, gums and tongue. Do not use it for any other purpose. Stop using theproduct and contact your doctor if you experience any discomfort or pain.-The Philips Sonicare toothbrush is a personal care device and is not intended for use on multiple patients in a dental practice or institution.-Stop using a brush head with crushed or bent bristles. Replace the brush head every 3 months or sooner if signs of wear appear.-Do not use other brush heads than the ones recommended by the manufacturer.-If your toothpaste contains peroxide, baking soda or bicarbonate (common in whitening toothpastes), thoroughly clean the brush head with soap and water after each use.This prevents possible cracking of the plastic.Electromagnetic fields (EMF)This Philips appliance complies with all applicable standards and regulations regarding exposure to electromagnetic fields.Your Philips Sonicare (Fig. 1)1Hygienic travel cap2Brush head with unique identifier3Handle4Sensors5Power on/off button6Bluetooth7Intensity level indicator8Intensity level button (+ and -)9Brushing modes7English10Mode button11Battery level indicator12Travel charger-Not shown: Travel caseNote: The content of the box may vary based on the model purchased.Preparing for useAttaching the brush head1Align the brush head so the bristles point in the same direction as the front of the handle (Fig. 2).2Firmly press the brush head down onto the metal shaft until it stops.Note: Philips Sonicare brush heads are imprinted with icons to easily identify your brush head (Fig. 4).Charging your Philips Sonicare1Put the plug of the charger in a wall socket.2Place the handle on the charger.The flashing light of the battery level indicator indicates that the toothbrush is charging (Fig. 5).Note: It takes at least 24 hours to fully charge the battery.Using the applianceBluetooth connectivityBefore you start the connectivity procedure, make sure your mobile device runs on Bluetooth 4.0 or higher.Note: For the latest information on device compatibility, please visit the App Store or Google Play.8EnglishConnecting your toothbrush1When used in connected mode, the Philips Sonicare app gives you the opportunity to receive real-time feedback on brushing, store and share brushing data with your dentist (if you so choose), and receive personalized coaching. If you wish to use the toothbrush in unconnected mode, the toothbrush will still function. To use the toothbrush in connected mode, please follow the instructions below.2Download the Philips Sonicare app from the Apple App Store or Google Play Store.3Confirm Bluetooth is switched on on your mobile device before you open the app. Check the settings on your mobile device to switch on Bluetooth.4To connect the toothbrush to the app, switch onthe toothbrush by pressing either the power on/off button or the brushing mode button. Make sure the toothbrush is not on the charger when you switch it on.5Open the Sonicare app.6Follow the Sonicare app instructions displayed on your mobile device. The app automatically connects with the toothbrush. If the toothbrush does not connect, follow the troubleshooting steps provided in the app.Note: For optimal data capture, keep your mobile device close during brushing.Brushing instructions1Wet the bristles and apply a small amount of toothpaste.2Place the toothbrush bristles against the teeth at a slight angle (45degrees), pressing firmly to make the bristles reach the gumline or slightly beneath the gumline (Fig. 6).Note: Keep the center of the brush in contact with the teeth at all times.3Press the power on/off button to turn on the Philips Sonicare.9English4Apply light pressure to maximize Philips Sonicare’s effectiveness and let the Philips Sonicare toothbrush do the brushing for you.Do not scrub.5Gently move the brush head slowly across the teeth in a small back and forth motion so the longer bristles reach between your teeth. Continue this motion throughout the brushing cycle.6To clean the inside surfaces of the front teeth, tilt the brush handle semi-upright and make several vertical overlapping brushing strokes on each tooth (Fig. 7).Note: To make sure you brush evenly throughout the mouth,divide your mouth into 6 sections using the BrushPacer feature (see chapter ‘Features’).7Follow the Sonicare app's brushing guidance combined with the BrushPacer and begin brushing in section 1 (upper right teeth) and brush for 20 seconds before you move to section 2 (upper front teeth). Continue doing this for section 3 till 6 to ensure even brushing in all 6 segments of the mouth (Fig. 8).Note: When using the White mode, two additional 20 second intervals can be used for polishing your front teeth.8The Philips Sonicare app helps to address any missed spots by guiding you to spend 20 seconds in the areas you missed during brushing.Your Philips Sonicare toothbrush is safe to use on:-Braces (brush heads wear out sooner when used on braces)-Dental restorations (fillings, crowns, veneers)Note: Ensure that braces or dental restorations are properly adhered and not compromised. If not, braces or dental restorations may be damaged when they come into contact with the brush head.Note: When the Philips Sonicare toothbrush is used in clinical studies,the handle should be fully charged and the Easy-start feature deactivated.Brushing modesNote: When the toothbrush is switched on, you cannot toggle between modes.10English1Prior to turning on the Sonicare, press the mode button to toggle between modes.-The selected brushing mode illuminates.-Once a brushing mode has been selected, it remains active until another brushing mode is selected.Clean modeStandard mode for superior teeth cleaning.White mode2 minutes of alternating between White and Massage, with an additional 40 seconds to polish your visible front teeth.Deep CleanProvides an invigorating of deep massage to deliver an exceptionally clean experience.Intensity levels per mode-Low: 1 LED indicator light.-Medium: 2 LED indicator lights.-High: 3 LED indicator lights.Note: to adjust the intensity level to the next higher or lower level, you can press the + button to increase intensity or the - button to decrease intensity at any time during the brushing cycle.Pressure SensorA change in vibration (and a slight change in sound) alerts you when you apply too much pressure while brushing. See chapter ‘Features’.Battery status (when handle is not on charger)- 1 yellow LED indicates a low charge.- 3 green LEDs indicate a full charge.Note: If you hear two sets of five beeps and the yellow LED of the battery level indicator flashes, your Sonicare will turn off until placed on the charger, where it will start to recharge.Note: Your Sonicare will not be able to run a brushing routine until it is fully recharged.Note:To keep the battery fully charged at all times, you may keep your Sonicare on the charger when not in use.11EnglishFeaturesPressure SensorThis Philips Sonicare model comes with the Pressure Sensor feature activated. The Pressure Sensor works in all 3 modes and at all 3intensity levels.Activating or deactivating the Pressure Sensor feature 1Attach the brush head to the handle.2Place the handle in the plugged-in charger.-To deactivate Pressure Sensor:Press and hold the power on/off and mode button for 2 seconds.You hear 1 beep to indicate that the Pressure Sensor feature has been deactivated.-To activate Pressure Sensor:Press and hold the power on/off and mode button for 2 seconds.You hear 2 beeps to indicate that the Pressure Sensor feature has been activated.BrushPacer-The BrushPacer is an interval timer that has a short beep and pause to remind you to brush the 6 sections of your mouth.Depending on the brushing mode or brushing routine you have selected, the BrushPacer beeps at different intervals during the brushing cycle. See the ‘Brushing instructions’ sections (Fig. 8).To deactivate or reactivate the BrushPacer feature:1Place the handle with a brush head attached in the plugged-in charger.2Press and hold the mode button until:a You hear 1 beep to indicate the BrushPacer has beendeactivated.b You hear 2 beeps to indicate the BrushPacer has beenactivated.12EnglishSmartimerThe Smartimer indicates that your brushing cycle is complete by automatically turning off the toothbrush at the end of the brushing cycle.Dental professionals recommend brushing no less than 2 minutes twice a day.Easy-startThis Philips Sonicare comes with the Easy-start deactivated.The Easy-start feature gently increases the power over the first 14brushings to help you get used to the brushing with the Philips Sonicare.Note: Each of the first 14 brushings must be at least 1 minute in length to properly advance through the Easy-start ramp-up cycle.Activating or deactivating the Easy-start feature1Attach the brush head to the handle.2Place the handle in the plugged-in charger.-To activate Easy-start:Press and hold the power on/off and mode button for 2 seconds.You hear 2 beeps to indicate that the Easy-start feature has been activated.-To deactivate Easy-start:Press and hold the power on/off and mode button for 2 seconds.You hear 1 beep to indicate that the Easy-start feature has been deactivated.Note: Using the Easy-start feature beyond the initial ramp-up period is not recommended and reduces Philips Sonicare effectiveness in removing plaque.Note: Each of the first 14 brushings must be at least 1 minute in length to properly move through the Easy-start ramp-up cycle.Cleaning13EnglishToothbrush handle1Remove the brush head and rinse the metal shaft area with warmBrush head1Rinse the brush head and bristles after each use (Fig. 10).2Remove the brush head from the handle and rinse the brush head connection with warm water at least once a week. Rinse the travel cap as often as needed.Charger1Unplug the charger before you clean it.2Wipe the surface of the charger with a damp cloth. Make sure you remove any toothpaste or other residue from the charger surfaces.StorageIf you are not going to use the product for a long time, unplug it, clean it (see chapter 'Cleaning') and store it in a cool and dry place away from direct sunlight.Replacement Brush head-Replace Philips Sonicare brush heads every 3 months to achieve optimal results.Note: The Sonicare App will tell you when it is time to replace your brush head. (See in-app Help section)-Use only Philips Sonicare replacement brush heads.Recycling-Do not throw away the product with the normal household waste at the end of its life, but hand it in at an official collection point for recycling. By doing this, you help to preserve the environment.14English-This product contains a built-in rechargeable battery which shall not be disposed of with normal household waste. Please take your product to an official collection point or a Philips service center to have a professional remove the rechargeable battery.-Follow your country’s rules for the separate collection of electrical and electronic products and rechargeable batteries. Correct disposal helps prevent negative consequences for theenvironment and human health.Removing the rechargeable battery(standard) screwdriver. Observe basic safety precautions when you follow the procedure outlined below. Be sure to protect your eyes,hands, fingers, and the surface on which you work.1To deplete the rechargeable battery of any charge, remove the handle from the charger, turn on the Philips Sonicare and let it run until it stops. Repeat this step until you can no longer switch on the Philips Sonicare.2Insert a screwdriver into the slot located at the bottom of thehandle and turn counterclockwise to release the bottom cap (Fig.11).3Hold the handle upside down and push down on the shaft to release the internal components of the handle (Fig. 12).4Insert the screwdriver under the circuit board, next to the battery connections, and twist to break the connections. Remove the circuit board and pry the battery from the plastic carrier (Fig. 13).The rechargeable battery can now be recycled and the rest of the product discarded appropriately.Warranty and supportIf you need information or support, please visit/support or read the international warranty leaflet.15EnglishWarranty restrictionsThe terms of the international warranty do not cover the following:-Brush heads.-Damage caused by use of unauthorized replacement parts.-Damage caused by misuse, abuse, neglect, alterations or unauthorized repair.-Normal wear and tear, including chips, scratches, abrasions,discoloration or fading.Hereby, Philips Consumer Lifestyle BV declares that the radio equipment type Bluetooth LE is in compliance with Directive 2014/53/EU.The full text of the EU declaration of conformity is available at the following internet address: /support16English简介感谢您的惠顾,欢迎光临飞利浦! 为了让您能充分享受飞利浦提供的支持,请在 /welcome 上注册您的产品。
飞利浦剃须刀中文说明书
2 在皮肤上涂上剃须泡沫或剃须啫喱。 3 在水龙头上冲洗一下剃须刀头部件,确保剃须刀头部件可以在您
的皮肤上顺畅滑动。 4 按一下开/关按钮以启动剃须刀。 5 将剃须刀头在您的皮肤上作迂回运动。
注意: 在水龙头下定期冲洗剃须刀,确保其能够继续在您的皮肤上 顺畅滑动。 6 剃须后,按一下开/关按钮关闭剃须刀电源并把脸擦干。 7 清洁剃须刀(见“清洁和保养”一章)。 注意: 确保冲洗干净剃须刀上的泡沫或剃须啫喱。
-- 用清洁刷里里外外清洁网罩。
110 简体中文
6 将剃须刀头重新放入剃须刀头部件。
确保剃须刀头凸起部位正好插入凹陷部位。
7 将固定架放回剃须刀头部件 (A),顺时针转动锁定装置 (B)。
8 将剃须刀头部件的凸缘插入剃须刀顶部的槽内。然后关闭剃须刀 头部件。
注意: 如果剃须刀头部件关闭不畅,请检查剃须刀头插入是否正 确,固定架是否被锁住。
-- AT899/AT896/AT894/AT892/AT891/AT890/AT811/AT790/ AT756/AT753/AT751/AT750:电池充满电时,充电指示灯将呈绿色 持续亮起。 注意: 大约 30 分钟后,充电指示灯熄灭以节省能源。
充电 1 将小插头插入剃须刀。 2 将电源适配器插入电源插座。 ,, 充电指示灯显示剃须刀的状态(见本章中的“充电指示”一节)。 在充电座上充电(仅限于 AT941/AT940) 1 将小插头插入充电座。 2 将电源适配器插入电源插座。 3 将剃须刀插接在充电座中。 ,, 充电指示灯显示剃须刀的状态(见本章中的“充电指示”一节)。
-- AT899/AT896/AT894/AT892/AT891/AT890/AT811/AT790/ AT756/AT753/AT751/AT750:当电池电量快要耗尽时 (仅剩 5 分钟或更少的剃须时间),充电指示灯开始呈橙色闪烁。 关闭剃须刀时,充电指示灯将呈橙色持续闪烁几秒钟。
飞利浦智能锁产品说明书.pdf_1718586013.7055526
目录1 重要信息02安全警告旧产品和旧电池的处理2 安装您的智能锁03产品清单安装立体装配图安装前须知安装步骤3 了解您的智能锁08外面板内面板4 设置您的智能锁09设置前需知进入管理模式修改管理密码添加用户删除用户系统设置扩展功能系统查询蓝牙设置5 使用您的智能锁15室外/室内开锁室外/室内上锁室内反锁机械钥匙应急开锁6 其他功能18室内感应开锁功能布防功能一键静音功能恢复出厂设置7 提示灯说明20门锁状态提示灯低电量提示灯布防提示灯静音状态提示灯室内反锁提示灯系统锁定提示灯开/关门【OPEN/CLOSE】键提示灯室内感应开锁功能提示灯8 故障排除23报警功能的种类与报警方式如何使用紧急电源如何更换电池9 材料声明表251 重要信息安全◆在使用智能锁前,请阅读并理解所有说明,因未遵守说明而造成的损坏不在保修范围内◆建议使用制造商指定的附件/配件◆仅使用本产品配置的碱性电池,或同样规格类型的电池◆请勿强行拆卸本产品,以免触发警报或损坏产品◆请勿用尖锐物品擦指纹采集器,否则可能造成永久性损坏◆请勿将产品暴露在漏水或溅水环境下◆请勿将产品接触腐蚀性物质,以免破坏外壳保护层◆请勿在执手上悬挂物件,以免影响门锁的正常使用◆清洁产品,请用软布擦拭◆请勿在设置操作时拆卸电池◆请您选择专业人员安装门锁,并按照本公司提供的安装标准进行操作,切勿私自拆装门锁,并保护好相关固封标志◆门锁安装调试合格后,请在第一时间内修改出厂设置的默认管理密码,并妥善保管好机械钥匙,不要轻易泄露密码信息◆门锁触发低电量报警后,请及时更换掉全部电池,并确保电池正负极安装正确警告◆不要将电池靠近火源,以免发生爆炸◆请勿使用不符合安全规定的应急电源给产品供电◆请勿用金属物将电池引线的两极连接短路,以免引起爆炸◆确保由飞利浦、飞利浦授权的服务中心或专业的维修人员进行更换◆请勿使用由其它制造商生产的,或未经飞利浦特别推荐的附件或部件,如果使用此类附件和部件,您的保修可能失效产品清单本产品清单仅供参考,一切以实物包装内容为准。
飞利浦7310说明书
飞利浦7310说明书注意事项只能使用产品随附的电源插头。
电源插头可将 100-240 伏的电压转换为 24 伏以下的安全低电压。
电源插头中含有一个变压器。
在自来水龙头下清洗剃须刀之前,务必拔掉其电源插头。
此产品符合国际认可的 IEC 安全标准,可放心在自来水龙头下清洗。
水洗设计不适合在淋浴时使用。
切勿将剃须刀浸入水中。
冲洗产品时,水可能从产品底部的插口漏出。
这是正常的,而且没有危险,因为所有的电子线路都密封在剃须刀内的一个密封内。
电磁场 (EMF)这款飞利浦产品符合关于电磁场 (EMF) 的相关标准。
如果正确使用并按照本用户手册中的说明进行操作,本产品是安全的。
充电开始充电之前确保产品电源已关闭。
充电需用时至少 8 小时。
您也可以不充电而将剃须刀插上电源后使用。
充电指示当开始为耗完电的剃须刀充电时,充电指示灯亮起。
电池已完全充满电池完全充满电时,充电指示灯开始闪烁。
当拔下剃须刀时,充电指示灯熄灭。
不接电源的剃须时间:充电后,剃须刀可在不接电源的情况下剃须最长达 35 分钟。
为产品充电当马达停转或转速开始下降时,为产品充电。
1 将产品插头插入剃须刀。
2 将电源插头插入壁装插座。
3 电池充满后,从壁装式插座中拔下电源插头,并从剃须刀上拔下产品插头。
剃须1 按一下开/关按钮打开剃须刀。
电源指示灯亮起即表示马达运转。
2 将剃须刀头在皮肤上快速移动,作直线和迂回动作。
在干爽的面部剃须效果最佳。
3 按一下开/关按钮关闭剃须刀电源。
电源指示灯熄灭。
4 清洁剃须刀(见“清洁和保养”一章)。
5 每次使用后,盖上剃须刀保护盖,以防剃须刀头受损。
修剪用于修剪鬓角和小胡子。
1 向下推动滑块,打开修发器。
当马达运转时,修发器便可以启动。
2 关闭修发器(可听到咔嗒声)。
清洁和保养为保证更好的剃须效果,剃须刀必须定期清洗。
注意:冲洗产品时,水可能从产品底部的插口漏出。
这是正常的,而且没有危险。
1 关闭剃须刀电源,从壁装式电源插座中拔下电源插头,并从剃须刀上拔下产品插头。
- 1、下载文档前请自行甄别文档内容的完整性,平台不提供额外的编辑、内容补充、找答案等附加服务。
- 2、"仅部分预览"的文档,不可在线预览部分如存在完整性等问题,可反馈申请退款(可完整预览的文档不适用该条件!)。
- 3、如文档侵犯您的权益,请联系客服反馈,我们会尽快为您处理(人工客服工作时间:9:00-18:30)。
飞利浦7310说明书
注意事项
只能使用产品随附的电源插头。
电源插头可将 100-240 伏的电压转换为 24 伏以下的安全低电压。
电源插头中含有一个变压器。
在自来水龙头下清洗剃须刀之前,务必拔掉其电源插头。
此产品符合国际认可的 IEC 安全标准,可放心在自
来水龙头下清洗。
水洗设计不适合在淋浴时使用。
切勿将剃须刀浸入水中。
冲洗产品时,水可能从产品底部
的插口漏出。
这是正常的,而且没有危险,因为所有的电子线路都密封在剃须刀内的一个密封内。
电磁场 (EMF)这款飞利浦产品符合关于电磁场 (EMF) 的相关标准。
如果正确使用并按照本用户手册中的说
明进行操作,本产品是安全的。
充电
开始充电之前确保产品电源已关闭。
充电需用时至少 8 小时。
您也可以不充电而将剃须刀插上电源后使用。
充电指示
当开始为耗完电的剃须刀充电时,充电指示灯亮起。
电池已完全充满电池完全充满电时,充电指示灯开始闪烁。
当拔下剃须刀时,充电指示灯熄灭。
不接电源的剃须时间:充电后,剃须刀可在不接电源的情况下剃须最长达 35 分钟。
为产品充电
当马达停转或转速开始下降时,为产品充电。
1 将产品插头插入剃须刀。
2 将电源插头插入壁装插座。
3 电池充满后,从壁装式插座中拔下电源插头,并从剃须刀上拔下产品插头。
剃须
1 按一下开/关按钮打开剃须刀。
电源指示灯亮起即表示马达运转。
2 将剃须刀头在皮肤上快速移动,作直线和迂回动作。
在干爽的面部剃须效果最佳。
3 按一下开/关按钮关闭剃须刀电源。
电源指示灯熄灭。
4 清洁剃须刀(见“清洁和保养”一章)。
5 每次使用后,盖上剃须刀保护盖,以防剃须刀头受损。
修剪
用于修剪鬓角和小胡子。
1 向下推动滑块,打开修发器。
当马达运转时,修发器便可以启动。
2 关闭修发器(可听到咔嗒声)。
清洁和保养
为保证更好的剃须效果,剃须刀必须定期清洗。
注意:冲洗产品时,水可能从产品底部的插口漏出。
这是正常的,而且没有危险。
1 关闭剃须刀电源,从壁装式电源插座中拔下电源插头,并从剃须刀上拔下产品插头。
2 按下释放按钮,打开剃须刀头部件。
3 在热水龙头下,冲洗剃须刀头部件和胡茬储藏室一段时间。
确保剃须刀头部件的内部和外部都要清洗。
4 关闭剃须刀头部件并甩掉多余的水份。
不要用毛巾或纸巾擦拭剃须刀头部件,因为这样可能会损坏剃须刀头。
5 再次打开剃须刀头部件,使它保持打开状态,让产品完全晾干。
除了冲洗方式外,您还可以使用随附的刷子清洁胡茬储藏室。
剃须刀头
1 打开剃须刀头部件,逆时针转动锁 (1),取下固定架 (2)。
2 用随附的刷子清洁刀片和网罩。
3 将剃须刀头放回剃须刀头部件。
将固定架放回剃须刀头部件,顺时针转动并锁住。
4 关闭剃须刀头部件。
修发器每次使用后都要清洁修发器。
1 关闭剃须刀电源,从壁装式电源插座中拔下电源插头,并从剃须刀上拔下产品插头。
2 用随附的刷子清洁修发器。
3 每六个月用一滴缝纫机油润滑修发器齿。
存放用保护盖盖好剃须刀,以防剃须刀刀头受损.
刀头更换。
附件
可选配以下附件:
HQ8500/HQ8000 电源插头。
HQ8 飞利浦剃须刀头。
HQ8010 车载充电线。
