经典教程httpClient4
HttpClient4.x手动释放底层HTTP连接
throwex;
}finally{
// 关闭输入流时将触发自动释放连接回连接管理器
try{instream.close();}catch(Exceptionignore){}
}
}
}finally{
// 当不再需要HttpClient实例时,关闭连接管理器以确保释放所有占用的系统资源
try{
HttpGethttpget=newHttpGet("");
System.out.println("executing request "+httpget.getURI());
// 执行HTTP请求
HttpResponseresponse=httpclient.execute(httpget);
HttpClient4.x手动释放底层HTTP连接
如非注明,本站文章均为原创,转载请注明出处。
本文地址:/post/421.html
对于HttpClient4.x来说,使用完后的HttpClient对象,需要显式地释放其使用的底层HTTP连接,否则将造成过高的资源占用。前一篇文章《HttpClient4.x进行Get/Post请求并使用ResponseHandler处理响应》演示了如何使用ResponseHandler处理GET/POST请求的响应结果并自动释放底层HTTP连接,如下这个例子演示了如何确保在手动处理HTTP响应的情况下释放底层的HTTP连接回连接管理器。
importorg.apache.http.client.HttpClient;
importorg.apache.http.client.methods.HttpGet;
importorg.apache.http.impl.client.DefaultHttpClient;
httpclient4.0.1-tutorial
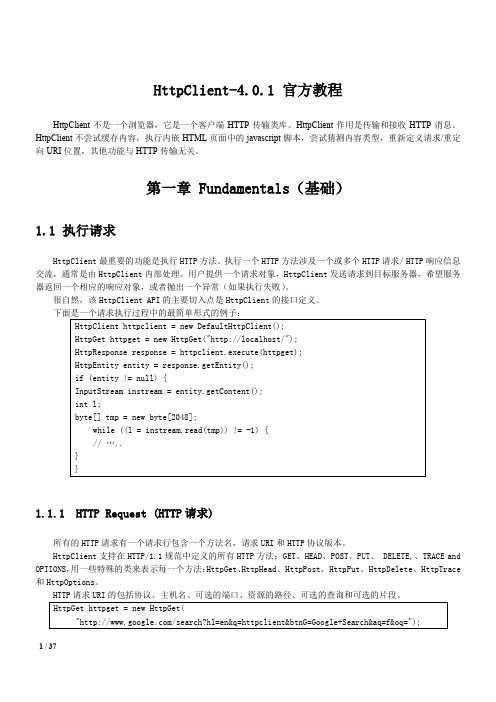
HttpClient-4.0.1 官方教程HttpClient不是一个浏览器,它是一个客户端HTTP传输类库。
HttpClient作用是传输和接收HTTP消息。
HttpClient不尝试缓存内容,执行内嵌HTML页面中的javascript脚本,尝试猜测内容类型,重新定义请求/重定向URI位置,其他功能与HTTP传输无关。
第一章 Fundamentals(基础)1.1 执行请求HttpClient最重要的功能是执行HTTP方法。
执行一个HTTP方法涉及一个或多个HTTP请求/ HTTP响应信息交流,通常是由HttpClient内部处理。
用户提供一个请求对象,HttpClient发送请求到目标服务器,希望服务器返回一个相应的响应对象,或者抛出一个异常(如果执行失败)。
很自然,该HttpClient API的主要切入点是HttpClient的接口定义。
1.1.1HTTP Request (HTTP请求)1.1.2HTTP Response (HTTP响应)HTTP Response消息是由服务器发送回客户端,客户端接收并解释的请求消息。
该消息的第一行由协议版本、1.1.3Working with message headers (处理头部消息)HTTP信息可以包含一系列头部描述消息的属性,例如:内容长度,内容类型等等。
HttpClient提供方法检最有效的方法来获得给定类型的所有头部信息是利用HeaderIterator接口。
输出:1.1.4HTTP entity (HTTP实体)HTTP消息能传输内容实体的请求或响应,在一些请求和响应中可以发现实体,因为它们是可选的。
HTTP规范定义了两个实体包装的方法:POST和PUT,响应通常附上内容实体。
HttpClient根据内容来源区分了三种不同类型的实体:●Streamed:内容是从流接收或产生的,特别是,这类实体是从HTTP响应中接收,流媒体通常是不可重复的。
HTTPClient用法

HttpClient的用法HTTP 协议可能是现在 Internet 上使用得最多、最重要的协议了,越来越多的 Java 应用程序需要直接通过HTTP 协议来访问网络资源。
Commons-httpclient项目就是专门设计来简化HTTP客户端与服务器进行各种通讯编程。
通过它可以让原来很头疼的事情现在轻松的解决,例如你不再管是HTTP或者HTTPS的通讯方式,告诉它你想使用HTTPS方式,剩下的事情交给 httpclient替你完成。
首先,我们必须安装好 HttpClient。
HttpClient 可以在/commons/httpclient/downloads.html下载.HttpClient 用到了 Apache Jakarta common 下的子项目 logging,你可以从这个地址/site/downloads /downloads_commons-logging.cgi下载到 common logging,从下载后的压缩包中取出 commons-logging.jar 加到 CLASSPATH 中.HttpClient 用到了 Apache Jakarta common 下的子项目 codec,你可以从这个地址/site/downloads /downloads_commons-codec.cgi 下载到最新的 common codec,从下载后的压缩包中取出 commons-codec-1.x.jar 加到 CLASSPATH 中1.读取网页(HTTP/HTTPS)内容下面是我们给出的一个简单的例子用来访问某个页面package http.demo;import java.io.IOException;import mons.httpclient.*;import mons.httpclient.methods.*;/*** 最简单的HTTP客户端,用来演示通过GET或者POST方式访问某个页面* @author Liudong*/public class SimpleClient {public static void main(String[] args) throws IOException{HttpClient client = new HttpClient();//设置代理服务器地址和端口//client.getHostConfiguration().setProxy("proxy_host_addr",proxy_port);//使用GET方法,如果服务器需要通过HTTPS连接,那只需要将下面URL中的http换成https HttpMethod method = new GetMethod("");//使用POST方法//HttpMethod method = new PostMethod("");client.executeMethod(method);//打印服务器返回的状态System.out.println(method.getStatusLine());//打印返回的信息System.out.println(method.getResponseBodyAsString());//释放连接method.releaseConnection();}}在这个例子中首先创建一个HTTP客户端(HttpClient)的实例,然后选择提交的方法是GET或者 POST,最后在HttpClient实例上执行提交的方法,最后从所选择的提交方法中读取服务器反馈回来的结果。
HttpClient入门

李腾飞学习笔记 HttpClient入门版本 1.0修订历史记录日期 版本 说明 作者 8/12/2010 1.0创建 李腾飞目录1.HttpClient概述 42.了解JDK中有关HTTP URL处理的API 42.1最简单的获取网页内容的示例 42.2URLConnection的基本用法 42.3HttpURLConnection的用法 43.使用HttpClient获取网页内容 63.1使用GET方式向后台递交请求 63.2自动获得响应的编码信息 73.3设置代理服务器,访问网站 73.4获得重定向之后的网址信息 93.5自动Cookie处理 10HttpClient入门1.HttpClient概述HttpClient是apache组织下面的一个用于处理HTTP请求和响应的开源工具。
它不是一个浏览器,也不处理客户端缓存等浏览器的功能。
它只是一个类库!它在JDK的基本类库基础上做了更好的封装! HttpClient目前(写作本文日期:2010年8月)最新版本是4.0.1,官方网址:/httpcomponents-client-4.0.1/index.htmlHttpClient项目依赖于HttpCore(处理核心的HTTP协议)、commons-codec(处理与编码有关的问题的项目)和commons-logging(处理与日志记录有关问题的项目)。
如果你希望能够通过HttpClient向服务器上传文件等与multipart编码类型有关的请求,以及其它复杂的MIME类型,那么,你需要另外一个依赖包:HttpMime(它是专门处理与MIME类型有关问题的项目),在下载的HttpClient包中(下载地址为:/downloads.cgi)已经包含了HttpMime。
在本文中,我们使用的HttpClient版本为:4.0.1GA开始使用HttpClient,我们加入了下列依赖包:httpclient-4.0.1.jarhttpcore-4.0.1.jarhttpmime-4.0.1.jar- 又依赖于mime4j(apache-mime4j-0.6.jar)commons-codec-1.4.jarcommons-logging-1.1.1.jarcommons-io-1.4.jar – 为了更方便处理与IO有关的需求【如果你下载的是包含依赖包的压缩包,那么上述依赖包(除commons-io-1.4.jar外)都已经在其中了!】2.了解JDK中有关HTTP URL处理的API因为HttpClient是对JDK中.*包下面的有关基础类库的封装,所以,我们有必要了解一下,这些基础类库的简单用法和概念。
HttpClient4.0.1请求特别慢的原因分析

HttpClient4.0.1请求特别慢的原因分析HttpClient 4.0.1 请求特别慢的原因分析问题描述昨天晚上碰到一个比较奇怪的问题,用HttpClient 4.0.1向一个服务器发送请求,非常慢,请求的时间超过2秒,但是采用HttpClient 3.1或者HttpClient4.1.2速度都非常快,请求的时间在2毫秒左右,非常奇怪,我采用的代码如下:01 public static void main(String[] args) throws Exception {02 HttpClient client = new DefaultHttpClient();03 HttpPost httppost = new HttpPost("");04 Map<String, Object> requestMap = new HashMap<String,Object>();05 requestMap.put("method", "get");06 requestMap.put("chunkName", "bbt_chunk");07 requestMap.put("key", "liushunnian1");08 String data =JSONObject.fromObject(requestMap).toString();09 StringEntity reqEntity = new StringEntity(data);10 httppost.setEntity(reqEntity);11 while (true) {12 long start = System.currentTimeMillis();13 HttpResponse response = client.execute(httppost);14 long end = System.currentTimeMillis();15 System.out.println("Time:" + (end - start) + "ms");16 HttpEntity entity = response.getEntity();17 BufferedReader reader = new BufferedReader(newInputStreamReader(entity.getContent(), "UTF-8"));18 System.out.println(reader.readLine());19 }20 }原因分析为了找出原因,我打开了HttpClient 的Debug 日志:1 System.setProperty("mons.logging.Log", "mons.logging.impl.SimpleLog");2 System.setProperty("mons.logging.simplelog.showdateti me", "true");3 System.setProperty(".ap ache.http", "debug");打出的部分日志如下:1 2011/10/20 14:01:12:329 CST [DEBUG] headers - >> POST /qstore HTTP/1.12 2011/10/20 14:01:12:329 CST [DEBUG] headers - >> Content-Length: 613 2011/10/20 14:01:12:329 CST [DEBUG] headers - >> Content-Type: text/plain; charset=ISO-8859-14 2011/10/20 14:01:12:329 CST [DEBUG] headers - >> Host: 10.20.150.29:80805 2011/10/20 14:01:12:329 CST [DEBUG] headers - >> Connection: Keep-Alive6 2011/10/20 14:01:12:329 CST [DEBUG] headers - >> User-Agent: Apache-HttpClient/4.1.2 (java 1.5)7 2011/10/20 14:01:12:329 CST [DEBUG] headers - >> Expect: 100-continue8 2011/10/20 14:01:14:331 CST [DEBUG] wire - >> "{"chunkName":"bbt_chunk","method":"get","key":"liushunnian1"}" 9 2011/10/20 14:01:14:333 CST [DEBUG] wire - << "HTTP/1.1 200 OK[\r][\n]"可以看到客户端与服务端数据交互的过程:1. HttpClient 首先向服务器端发送了一个头信息,并且期望返回一个100-Continue2. 过了大约两秒钟后,HttpClient 又向服务器发送了请求中请求体从上面的这个过程可以看出,HttpClient 向服务器端发送100-Continue 以后一直在等待服务端的返回,在等待超时之后才将请求体发送给服务器端,那么什么是100-Continue 呢?看看Http 规范里面的说明:The client SHOULD continue with its request. This interimresponse is used to inform the client that the initial part of the request has been received and has not yet been rejected by the server. The client SHOULD continue by sending the remainder of the request or, if the request has already been completed, ignore this response. The server MUST send a final response after the request has been completed. See section 8.2.3 for detailed discussion of the use and handling of this status code.也就是说当客户端要向服务器端发送大数据的时候,客户端可以先向服务器端发送一个请求,如果服务器端返回的是状态码100,那么客户端就可以继续把请求体的数据发送给服务器端。
ApacheHttpClient4使用教程

ApacheHttpClient4使⽤教程基于HttpClient 4.5.21. 执⾏GET请求CloseableHttpClient httpClient = HttpClients.custom().build();CloseableHttpResponse response = httpClient.execute(new HttpGet("https://"));System.out.println(EntityUtils.toString(response.getEntity()));2. 执⾏POST请求1. 提交form表单参数CloseableHttpClient httpClient = HttpClients.custom().build();HttpPost httpPost = new HttpPost("https://");List<NameValuePair> formParams = new ArrayList<NameValuePair>();//表单参数formParams.add(new BasicNameValuePair("name1", "value1"));formParams.add(new BasicNameValuePair("name2", "value2"));UrlEncodedFormEntity entity = new UrlEncodedFormEntity(formParams, "utf-8");httpPost.setEntity(entity);CloseableHttpResponse response = httpClient.execute(httpPost);System.out.println(EntityUtils.toString(response.getEntity()));2. 提交payload参数CloseableHttpClient httpClient = HttpClients.custom().build();HttpPost httpPost = new HttpPost("https://");StringEntity entity = new StringEntity("{\"id\": \"1\"}");httpPost.setEntity(entity);CloseableHttpResponse response = httpClient.execute(httpPost);System.out.println(EntityUtils.toString(response.getEntity()));3. post上传⽂件CloseableHttpClient httpClient = HttpClients.custom().build();HttpPost httpPost = new HttpPost("https://");MultipartEntityBuilder multipartEntityBuilder = MultipartEntityBuilder.create();//要上传的⽂件multipartEntityBuilder.addBinaryBody("file", new File("temp.txt"));httpPost.setEntity(multipartEntityBuilder.build());CloseableHttpResponse response = httpClient.execute(httpPost);System.out.println(EntityUtils.toString(response.getEntity()));4. post提交multipart/form-data类型参数CloseableHttpClient httpClient = HttpClients.custom().build();HttpPost httpPost = new HttpPost("https://");MultipartEntityBuilder multipartEntityBuilder = MultipartEntityBuilder.create();multipartEntityBuilder.addTextBody("username","wycm");multipartEntityBuilder.addTextBody("passowrd","123");//⽂件multipartEntityBuilder.addBinaryBody("file", new File("temp.txt"));httpPost.setEntity(multipartEntityBuilder.build());CloseableHttpResponse response = httpClient.execute(httpPost);System.out.println(EntityUtils.toString(response.getEntity()));3. 设置User-AgentCloseableHttpClient httpClient = HttpClients.custom().setUserAgent("Mozilla/5.0").build();CloseableHttpResponse response = httpClient.execute(new HttpGet("https://"));System.out.println(EntityUtils.toString(response.getEntity()));4. 设置重试处理器当请求超时, 会⾃动重试,最多3次HttpRequestRetryHandler retryHandler = (exception, executionCount, context) -> {if (executionCount >= 3) {return false;}if (exception instanceof InterruptedIOException) {return true;}if (exception instanceof UnknownHostException) {return true;}if (exception instanceof ConnectTimeoutException) {return true;}if (exception instanceof SSLException) {return true;}HttpClientContext clientContext = HttpClientContext.adapt(context);HttpRequest request = clientContext.getRequest();boolean idempotent = !(request instanceof HttpEntityEnclosingRequest);if (idempotent) {return true;}return false;};CloseableHttpClient httpClient = HttpClients.custom().setRetryHandler(retryHandler).build();httpClient.execute(new HttpGet("https://"));5. 重定向策略1. HttpClient默认情况会对302、307的GET和HEAD请求以及所有的303状态码做重定向处理2. 关闭⾃动重定向CloseableHttpClient httpClient = HttpClients.custom()//关闭httpclient重定向.disableRedirectHandling().build();3. POST⽀持302状态码重定向CloseableHttpClient httpClient = HttpClients.custom()//post 302⽀持重定向.setRedirectStrategy(new LaxRedirectStrategy()).build();CloseableHttpResponse response = httpClient.execute(new HttpPost("https://"));System.out.println(EntityUtils.toString(response.getEntity()));6. 定制cookie⽅式⼀:通过addHeader⽅式设置(不推荐这种⽅式)CloseableHttpClient httpClient = HttpClients.custom().build();HttpGet httpGet = new HttpGet("");httpGet.addHeader("Cookie", "name=value");httpClient.execute(httpGet);由于HttpClient默认会维护cookie状态。
HttpClient3、4基本用法
=======================HttpClient3 Get========================
GetMethod get = new GetMethod(url)
HttpMethodParams params = new HttpMethodParams();
httpclient.getParams().setParameter(E_EXPECT_CONTINUE, Boolean.FALSE);
httpclient.getParams().setParameter(CoreProtocolPNames.HTTP_CONTENT_CHARSET, charset == null ? CHARSET_GBK : charset);
//httpclient.setHttpRequestRetryHandler(requestRetryHandler);//请求重试Handler
//httpclient.setRedirectHandler();//重定向的处理(默认的DefaultRedirectHandler能够支持get,head自动重eout(5000);//http连接超时
cmp.setSoTimeout(5000);//读数据超时
client.getParams().setParameter(HttpMethodParams.HTTP_CONTENT_CHARSET, "UTF-8");//编码
//Map结构的参数转为NameValuePair列表
protected List<NameValuePair> getParamsList(Map<String, String> paramsMap) {
HttpClient入门教程学习
HttpClient ⼊门教程学习HttpClient 简介HttpClient 是基于HttpCore 的兼容的HTTP 代理实现。
它还为客户端认证,HTTP 状态管理和HTTP 连接管理提供可重⽤组件。
HttpComponents Client 是Commons HttpClient 3.x 的继任者和替代者。
强烈建议Commons HttpClient 的⽤户进⾏升级。
HttpClient HTTP Get 请求HttpClient HTTP Post 请求HTTP/1.1/*** httpClient Get 请求*/public static void main(String[] args) throws IOException {try (CloseableHttpClient httpclient = HttpClients.createDefault()) {//第⼀步 配置 Get 请求 UrlHttpGet httpget = new HttpGet("/get"); //第⼆步 创建⼀个⾃定义的 response handlerResponseHandler<String> responseHandler = new ResponseHandler<String>() {@Overridepublic String handleResponse(HttpResponse response) throws IOException {int status = response.getStatusLine().getStatusCode(); if (status >= 200 && status < 300) {HttpEntity entity = response.getEntity();return entity != null ? EntityUtils.toString(entity) : null;} else {throw new ClientProtocolException("Unexpected response status: " + status); } }};//第三步 执⾏请求 String responseBody = httpclient.execute(httpget, responseHandler);System.out.println("----------------------------------------");System.out.println(responseBody);}}/*** httpClient Post 请求 */public static void main(String[] args) throws IOException {try (CloseableHttpClient httpclient = HttpClients.createDefault()) {//第⼀步 配置 Post 请求 UrlHttpPost httpPost = new HttpPost("/post");// 装配post 请求参数List<BasicNameValuePair> list = new ArrayList<BasicNameValuePair>(); list.add(new BasicNameValuePair("age", "20")); //请求参数list.add(new BasicNameValuePair("name", "zhangsan")); //请求参数httpPost.setEntity(new StringEntity("Hello, World"));/*设置post 请求参数两个⽅式:具体参考UrlEncodedFormEntity 和StringEntity 区别*/httpPost.setEntity(new UrlEncodedFormEntity(list, "UTF-8")); //httpPost.setEntity(new StringEntity(list.toString(), "UTF-8")); //第⼆步 创建⼀个⾃定义的 response handlerResponseHandler<String> responseHandler = new ResponseHandler<String>() {@Overridepublic String handleResponse(HttpResponse response) throws IOException {int status = response.getStatusLine().getStatusCode();if (status >= 200 && status < 300) {HttpEntity entity = response.getEntity();return entity != null ? EntityUtils.toString(entity) : null;} else {throw new ClientProtocolException("Unexpected response status: " + status);}}};};//第三步执⾏请求String responseBody = httpclient.execute(httpPost, responseHandler);System.out.println("----------------------------------------");System.out.println(responseBody);}}HttpClient HTTP Put请求/*** httpClient Put 请求*/public static void main(String[] args) throws IOException {try (CloseableHttpClient httpclient = HttpClients.createDefault()) {//第⼀步配置 Post 请求 UrlHttpPut httpPut = new HttpPut("/put");//设置post请求参数httpPut.setEntity(new StringEntity("Hello, World"));//第⼆步创建⼀个⾃定义的 response handlerResponseHandler<String> responseHandler = new ResponseHandler<String>() {@Overridepublic String handleResponse(HttpResponse response) throws IOException {int status = response.getStatusLine().getStatusCode();if (status >= 200 && status < 300) {HttpEntity entity = response.getEntity();return entity != null ? EntityUtils.toString(entity) : null;} else {throw new ClientProtocolException("Unexpected response status: " + status); }}};String responseBody = httpclient.execute(httpPut, responseHandler);System.out.println("----------------------------------------");System.out.println(responseBody);}}HttpClient HTTP Delete请求/*** httpClient Delete 请求*/public static void main(String[] args) throws IOException {try (CloseableHttpClient httpclient = HttpClients.createDefault()) {//第⼀步配置 Delete 请求 UrlHttpDelete httpDelete = new HttpDelete("/delete");System.out.println("Executing request " + httpDelete.getRequestLine());//第⼆步创建⼀个⾃定义的 response handlerResponseHandler<String> responseHandler = new ResponseHandler<String>() {@Overridepublic String handleResponse(HttpResponse response) throws IOException {int status = response.getStatusLine().getStatusCode();if (status >= 200 && status < 300) {HttpEntity entity = response.getEntity();return entity != null ? EntityUtils.toString(entity) : null;} else {throw new ClientProtocolException("Unexpected response status: " + status); }}};String responseBody = httpclient.execute(httpDelete, responseHandler);System.out.println("----------------------------------------");System.out.println(responseBody);}}HttpClient⾃定义HTTP Header/*** HttpClient⾃定义HTTP头*/public static void main(String[] args)throws IOException {// 创建⾃定义 http headersList<Header> defaultHeaders = Arrays.asList(new BasicHeader("X-Default-Header", "default header httpclient"));// 设置⾃定义 http headersCloseableHttpClient httpclient = HttpClients.custom().setDefaultHeaders(defaultHeaders).build();try {// 配置超时时间RequestConfig requestConfig = RequestConfig.custom().setConnectTimeout(5000) //设置连接超时时间.setConnectionRequestTimeout(5000) // 设置请求超时时间.setSocketTimeout(5000).setRedirectsEnabled(true)//默认允许⾃动重定向.build();// 创建⾃定义 http headers on the http requestHttpUriRequest request = RequestBuilder.get().setUri("/headers").setHeader(HttpHeaders.CONTENT_TYPE, "application/json").setHeader(HttpHeaders.FROM, "https://").setHeader("X-Custom-Header", "custom header http request").setConfig(requestConfig).build();System.out.println("Executing request " + request.getRequestLine());// 创建⾃定义 response handlerResponseHandler<String> responseHandler = response -> {int status = response.getStatusLine().getStatusCode();if (status >= 200 && status < 300) {HttpEntity entity = response.getEntity();return entity != null ? EntityUtils.toString(entity) : null;} else {throw new ClientProtocolException("Unexpected response status: " + status); }};String responseBody = httpclient.execute(request, responseHandler);System.out.println("----------------------------------------");System.out.println(responseBody);} finally {httpclient.close();}}更详细HttpClient 学习。
HttpClient的基本使用
HttpClient的基本使用1. 引入HttpClient库:首先,需要将HttpClient库添加到项目的依赖中。
可以通过Maven或Gradle来添加依赖。
2. 创建HttpClient实例:接下来,需要创建一个HttpClient实例。
可以使用HttpClientBuilder类来构建实例。
````java```3. 创建Http请求:使用HttpGet、HttpPost等类来创建具体的Http请求对象。
可以设置请求的URL、请求头、请求体等信息。
````java```4. 执行Http请求:使用HttpClient实例来执行Http请求。
可以调用execute方法来发送请求,并获取响应对象。
````java```5. 处理Http响应:通过HttpResponse对象可以获取响应的状态码、响应头、响应体等信息。
````java```6. 释放资源:在完成所有的Http请求和响应处理后,需要释放相关的资源,如关闭HttpClient实例。
````java```除了基本的使用方法,HttpClient还提供了一些高级功能,例如:-设置请求超时时间:可以通过设置连接超时时间和读取超时时间来控制请求的超时行为。
````javaRequestConfig requestConfig = RequestConfig.custom.setConnectTimeout(5000) // 设置连接超时时间为5秒.setSocketTimeout(5000) // 设置读取超时时间为5秒.build(;```-设置请求头:可以通过设置请求头来发送特定的HTTP头部信息。
````java```- 发送POST请求:可以使用HttpPost类来发送POST请求,并设置请求体的内容。
````javaStringEntity requestEntity = new StringEntity("request body");```- Cookie管理:HttpClient可以自动处理和管理Cookie,可以通过CookieStore接口来获取和设置Cookie。
HttpClient4.0Http连接池技术简介
HttpClient4.0Http连接池技术简介HttpClient4.0 Http连接池技术简介连接池技术作为创建和管理连接的缓冲池技术,目前已广泛用于诸如数据库连接等长连接的维护和管理中,能够有效减少系统的响应时间,节省服务器资源开销。
其优势主要有两个:其一是减少创建连接的资源开销,其二是资源的访问控制。
连接池管理的对象是长连接,对于HTTP连接是否适用,我们需要首先回顾一下长连接和短连接。
所谓长连接是指客户端与服务器端一旦建立连接以后,可以进行多次数据传输而不需重新建立连接,而短连接则每次数据传输都需要客户端和服务器端建立一次连接。
长连接的优势在于省去了每次数据传输连接建立的时间开销,能够大幅度提高数据传输的速度,对于P2P应用十分适合,但是对于连接池技术作为创建和管理连接的缓冲池技术,目前已广泛用于诸如数据库连接等长连接的维护和管理中,能够有效减少系统的响应时间,节省服务器资源开销。
其优势主要有两个:其一是减少创建连接的资源开销,其二是资源的访问控制。
连接池管理的对象是长连接,对于HTTP连接是否适用,我们需要首先回顾一下长连接和短连接。
所谓长连接是指客户端与服务器端一旦建立连接以后,可以进行多次数据传输而不需重新建立连接,而短连接则每次数据传输都需要客户端和服务器端建立一次连接。
长连接的优势在于省去了每次数据传输连接建立的时间开销,能够大幅度提高数据传输的速度,对于P2P应用十分适合,但是对于诸如Web网站之类的B2C应用,并发请求量大,每一个用户又不需频繁的操作的场景下,维护大量的长连接对服务器无疑是一个巨大的考验。
而此时,短连接可能更加适用。
但是短连接每次数据传输都需要建立连接,我们知道HTTP协议的传输层协议是TCP协议,TCP连接的建立和释放分别需要进行3次握手和4次握手,频繁的建立连接即增加了时间开销,同时频繁的创建和销毁Socket同样是对服务器端资源的浪费。
所以对于需要频繁发送HTTP请求的应用,需要在客户端使用HTTP长连接。
- 1、下载文档前请自行甄别文档内容的完整性,平台不提供额外的编辑、内容补充、找答案等附加服务。
- 2、"仅部分预览"的文档,不可在线预览部分如存在完整性等问题,可反馈申请退款(可完整预览的文档不适用该条件!)。
- 3、如文档侵犯您的权益,请联系客服反馈,我们会尽快为您处理(人工客服工作时间:9:00-18:30)。
目录
HttpClient简介 (4)
1)百科名片: (4)
2)HttpClient 的范围 (4)
3)httpClient 特性 (4)
HttpClient基本功能的使用 (6)
a)环境准备 (6)
b)几个主要类解释 (6)
c)第一个程序 (6)
d)如何传递参数 (8)
e)模拟表单登录 (10)
f)HttpClient连接SSL (12)
1)生成KeyStore (12)
2)配置tomcat服务器支持SSL (13)
3)用浏览器访问你的应用 (15)
4)用httpClient访问https (15)
HttpClient简介
1)百科名片:
HTTP 协议可能是现在Internet 上使用得最多、最重要的协议了,越来越多的Java 应用程序需要直接通过HTTP 协议来访问网络资源。
虽然在JDK 的java net包中已经提供了访问HTTP 协议的基本功能,但是对于大部分应用程序来说,JDK 库本身提供的功能还不够丰富和灵活。
HttpClient 是Apache Jakarta Common 下的子项目,用来提供高效的、最新的、功能丰富的支持HTTP 协议的客户端编程工具包,并且它支持HTTP 协议最新的版本和建议。
HttpClient 已经应用在很多的项目中,比如Apache Jakarta 上很著名的另外两个开源项目Cactus 和HTMLUnit 都使用了HttpClient。
现在HttpClient最新版本为HttpClient 4.1.
2)HttpClient 的范围
•基于HttpCore的客户端HTTP运输实现库
•基于经典(阻塞)I/O
•内容无关
3)httpClient 特性
•基于标准,纯净的java语言.实现了Http1.0和Http1.1
•以可扩展的面向对象的结构实现了Http全部的方法(GET, POST, PUT, DELETE, HEAD, OPTIONS, and TRACE).
•支持HTTPS协议.
•通过Http代理建立透明的连接.
•利用CONNECT 方法通过Http代理建立隧道的https连接.
•Basic, Digest, NTLMv1, NTLMv2, NTLM2 Session, SNPNEGO/Kerberos 认证方案.
•插件式的自定义认证方案.
•便携可靠的套接字工厂使它更容易的使用第三方解决方案.
•连接管理器支持多线程应用.支持设置最大连接数,同时支持设置每个主机的最大连接数.发现并关闭过期的连接.
•Automatic Cookie handling for reading Set-Cookie: headers from the server and sending them back out in a Cookie: header when appropriate.
•插件式的自定义Cookie策略.
•Request output streams to avoid buffering any content body by streaming directly to the socket to the server.
•Response input streams to efficiently read the response body by streaming directly from the socket to the server.
•在http1.0和http1.1中利用KeepAlive保持持久连接.
•直接获取服务器发送的response code和headers.
•设置连接超时的能力.
•实验性的支持http1.1 response caching.
•源代码基于Apache License 可免费获取.
HttpClient基本功能的使用a)环境准备
•从apache下载httpClient;
•下载地址: /downloads.cgi;
•解压、将lib下的jar导入工程;
b)几个主要类解释
c)第一个程序
d)如何传递参数
e)模拟表单登录
f)HttpClient连接SSL
1)生成KeyStore
打开cmd,输入(jdk环境变量当然是配置好的):
keytool -genkey -alias tomcat -keyalg RSA –validity 60 -keystore D:\tomcat.keystore
cmd输出:
输入keystore密码:******
您的名字与姓氏是什么?
[Unknown]:localhost
您的组织单位名称是什么?
[Unknown]:it
您的组织名称是什么?
[Unknown]:dev
您所在的城市或区域名称是什么?
[Unknown]:bj
您所在的州或省份名称是什么?
[Unknown]:bj
该单位的两字母国家代码是什么
[Unknown]:CN
CN=localhost, OU= it, O= dev, L=bj, ST=bj, C=CN 正确吗?
[否]:Y
输入的主密码(如果和keystore 密码相同,按回车):*******
参数说明:
-genkey表示生成密钥
-validity指定证书有效期,这里是60天
-alias指定别名,这里是tomcat
-keyalg指定算法,这里是RSA
-keystore指定存储位置,这里是D:\ tomcat.keystore
使用的自定义密码为123456
Keytool 详细命令说明请参考百度百科;
*其中您的名字与姓氏是什么?localhost是网站的域名或者ip,根据实际情况填写。
否者会出现证书上的名称无效;
2)配置tomcat服务器支持SSL
将生成的tomcat.keystore文件,放到%TOMCAT_HOME%/conf目录中(其他也OK).
这样你的tomcat就支持https访问了;
属性说明(来源网上资源):
port:这个port属性(默认值是8443)是TCP/IP端口数码,Tomcat在其上监听安全连接。
你可以把它更改成任何你愿意要的数值(如默认的https通信,数目是443)。
不过,在许多操作系统中,要想在比1024小的端口数码上运行Tomcat,需要特殊的设置(它超出了这个文档资料的范围)。
redirectPort:如果你在这里更改端口数值,你还必须更改在non-SSL连接器上的redirectPort 这个属性特定的值。
这允许Tomcat自动地redirect那些试图访问有安全限制页面的用户,指明根据Servlet 2.4 Specification要求,SSL是必需的clientAuth:如果你想要Tomcat要求所有的SSL客户在使用这个socket时出示用户认证书,把这个值设定为true 。
如果你想要Tomcat要求出示用户认证书,但是如果没有认证书也可以,就把这个值设定为want 。
keystoreFile:如果你产生的keystore文件不在Tomcat期望的默认地方(一个叫
做.keystore 的文件在Tomcat运行的主目录),就添加这个属性。
你可以指定一个绝对路径名称,或者一个由$CATALINA_BASE环境变量而派生的相对路径名称。
keystorePass:如果你使用一个不同的keystore(以及认证书)密码,而不是Tomcat期望的密码(就是changeit),添加这个元素。
keystoreType:如果使用一个PKCS12 keystore的话,就添加这个element。
有效的值是JKS 和PKCS12
sslProtocol:要在这个socket上被使用的加密/解密协定。
如果你在使用Sun的JVM,我们不提倡更改这个值。
据报道,TLS协定的IBM's 1.4.1 实现与一些通用的浏览器不兼容。
如果是这样,就使用value SSL
ciphers:这个socket允许使用的由逗号分隔开的加密密码列单。
默认的情况下,任何可
用的密码都允许被使用。
algorithm:可用的X509算法。
默认是Sun的实现( SunX509 )。
对于IBM JVMs,你应该使用值IbmX509。
对于其他卖主,查阅JVM文档资料来找正确的值。
truststoreFile:用来验证用户认证书的TrustStore文件。
truststorePass:访问TrustStore的密码。
默认值就是keystorePass的值。
truststoreType:如果你在使用与KeyStore不同格式的TrustStore,添加这个元素。
合法的值是JKS和PKCS12
keyAlias:如果keystore 里面有多个key,你可以为用这个选项为加入的key 起一个名字。
如果没有指定名字,使用时keystore 内的第一个key 将会被使用
3)用浏览器访问你的应用
输入:https://localhost:8443/myDemo
你会发现:
你的应用已经处于SLL安全通道中了.
4)用httpClient访问https
到此,一个完整的httpClient 访问https的流程就走OK了;
注意:生成keyStore的jdk和myEclipse的jdk要一致.否则可能出现错误;。