实验二 android基本控件实验
实验2_Android用户界面程序设计

6学时
实验目的:
1. 2. 3. 4. 5. 6.
掌握Android常用界面控件的使用方法。 掌握控件响应函数的编写方法。 掌握各种界面布局的特点和使用方法。 掌握使用Intent进行组件通信的原理。 掌握使用Intent启动Activity的方法。 掌握Activity间数据传送的方法。
实验内容:
设计个人信息管理系统界面,要求如下。
③
设计程序主界面MainActivity,该界面上有一个 “登录”按钮、一个“注册”按钮、一个“查看” 按钮和一个用于显示登录状态的TextView,点击 “登录”按钮后打开一个普通对话框,该对话框上 面有输入用户名、密码和用户类型(管理员、普通 用户,Spinner) 的控件,在用户关闭这个对话框后, 将用户输入的信息递到MainActivity,如果用户名、 密码及类型正确,则MainActivity上的TextView显 示“某某用户已登录”,否则显示“用户名或密码 错误” 。
实验内容:
设计个人信息管理系统界面,要求如下。
⑤
点击主界面MainActivity上的 “查看”按钮,如果用户未登陆,则提 示用户登陆,否则根据登陆用户的类型分别显示以下内容:
I.
II.
如果是普通用户,则跳转到PersonInfoActivity页面。如果该用户已填写 过个人信息,则将填写的信息显示在相应控件上,用户可以对以上信息 修改,点击“确定”按钮后更新掉原信息;否则用户使用该页添加自己 的信息。 如果是管理员,则跳转到PensonsActivity页面,该页面含有一个自定义 列表控件显示所有用户的信息,其每个列表项包含姓名、性别、出生日 期、教育程度、电话、邮箱(见下图布局)。当点击某个列表项时,跳 转到该用户的PersonInfoActivity页面。但管理员不能修改其它用户的信 息,因此,此时该页面上的输入控件及按钮应为不可用状态。
安卓控件的操作实验报告

一、实验目的通过本次实验,掌握安卓常用控件的基本属性、方法和事件处理,熟悉这些控件在实际应用中的使用方法,提高对安卓界面设计的理解和应用能力。
二、实验环境1. 操作系统:Windows 102. 开发工具:Android Studio3.5.33. 手机型号:华为Mate 20三、实验内容本次实验主要涉及以下安卓常用控件:1. TextView2. EditText3. Button4. ImageView5. RadioButton6. CheckBox7. Spinner8. ListView四、实验步骤1. 创建一个新的Android项目,命名为“ControlOperation”。
2. 在布局文件activity_main.xml中添加以下控件:```xml<TextViewandroid:id="@+id/textView1"android:layout_width="wrap_content"android:layout_height="wrap_content" android:text="Hello World!"android:layout_marginTop="20dp" /><EditTextandroid:id="@+id/editText1"android:layout_width="match_parent"android:layout_height="wrap_content" android:hint="Enter your name" /><Buttonandroid:id="@+id/button1"android:layout_width="wrap_content"android:layout_height="wrap_content" android:text="Click Me!" /><ImageViewandroid:id="@+id/imageView1"android:layout_width="wrap_content"android:layout_height="wrap_content" android:src="@drawable/ic_launcher" /> <RadioButtonandroid:id="@+id/radioButton1"android:layout_width="wrap_content"android:layout_height="wrap_content" android:text="Male" /><CheckBoxandroid:id="@+id/checkbox1"android:layout_width="wrap_content"android:layout_height="wrap_content"android:text="Subscribe to newsletter" /><Spinnerandroid:id="@+id/spinner1"android:layout_width="wrap_content"android:layout_height="wrap_content"android:entries="@array/countries" /><ListViewandroid:id="@+id/listView1"android:layout_width="match_parent"android:layout_height="wrap_content" />```3. 在strings.xml文件中添加以下字符串资源:```xml<string name="app_name">Control Operation</string> <string name="enter_name">Enter your name</string> <string name="click_me">Click Me!</string><string-array name="countries"><item>China</item><item>USA</item><item>Japan</item></string-array>```4. 在MainActivity.java文件中添加以下代码:```javaimport android.os.Bundle;import android.view.View;import android.widget.ArrayAdapter;import android.widget.Button;import android.widget.EditText;import android.widget.ImageView;import android.widget.RadioButton;import android.widget.RadioGroup;import android.widget.ScrollView;import android.widget.TextView;import android.widget.CheckBox;import android.widget.Spinner;import android.widget.ListView;import android.widget.ArrayAdapter;import android.widget.Toast;import androidx.appcompat.app.AppCompatActivity; public class MainActivity extends AppCompatActivity { private TextView textView1;private EditText editText1;private Button button1;private ImageView imageView1;private RadioButton radioButton1;private CheckBox checkBox1;private Spinner spinner1;private ListView listView1;@Overrideprotected void onCreate(Bundle savedInstanceState) {super.onCreate(savedInstanceState);setContentView(yout.activity_main);textView1 = findViewById(R.id.textView1);editText1 = findViewById(R.id.editText1);button1 = findViewById(R.id.button1);imageView1 = findViewById(R.id.imageView1);radioButton1 = findViewById(R.id.radioButton1);checkBox1 = findViewById(R.id.checkbox1);spinner1 = findViewById(R.id.spinner1);listView1 = findViewById(R.id.listView1);ArrayAdapter<CharSequence> adapter =ArrayAdapter.createFromResource(this,R.array.countries, yout.simple_spinner_item);adapter.setDropDownViewResource(yout.simple_spinner_dropdown _item);spinner1.setAdapter(adapter);button1.setOnClickListener(new View.OnClickListener() {@Overridepublic void onClick(View v) {String name = editText1.getText().toString();Toast.makeText(MainActivity.this, "Hello " + name, Toast.LENGTH_SHORT).show();}});radioButton1.setOnClickListener(new View.OnClickListener() {@Overridepublic void onClick(View v) {Toast.makeText(MainActivity.this, "You selected Male", Toast.LENGTH_SHORT).show();}});checkBox1.setOnClickListener(new View.OnClickListener() {@Overridepublic void onClick(View v) {if (checkBox1.isChecked()) {Toast.makeText(MainActivity.this, "You subscribed to the newsletter", Toast.LENGTH_SHORT).show();} else {Toast.makeText(MainActivity.this, "You unsubscribed from the newsletter", Toast.LENGTH_SHORT).show();}}});}}```5. 运行程序,观察效果。
安卓实验报告

安卓实验报告Android是目前全球最为流行的操作系统之一,其强大的应用程序生态系统和广泛的设备兼容性使得安卓成为开发者和用户的首选。
本文将介绍我在安卓实验中进行的一系列任务和实验结果。
实验一:安装开发环境在进行安卓开发之前,我们首先需要安装必要的开发环境。
我使用的是Android Studio,这是谷歌官方提供的开发工具,具有强大的功能和友好的用户界面。
通过安装Android Studio,我成功搭建了安卓开发环境,并进行了一些基本的配置。
实验二:创建第一个安卓应用程序根据老师的指导,我按照步骤成功创建了我的第一个安卓应用程序。
我选择了一个简单的计算器应用程序作为开始,它可以实现基本的加法和减法功能。
通过这个实验,我学会了使用Android Studio的界面设计工具和编写基本的Java代码。
实验三:UI设计和布局在这个实验中,我学习了安卓应用程序的用户界面设计和布局。
我使用了安卓提供的各种布局方式,如线性布局、相对布局和帧布局等,来设计和展示应用程序的不同界面。
通过这个实验,我对安卓界面设计的原则和技巧有了更深入的理解。
实验四:应用程序调试与测试在开发过程中,调试和测试是非常重要的环节。
通过Android Studio提供的调试工具,我能够针对应用程序中的问题进行定位和修复。
我还学会了使用模拟器和真机进行应用程序的测试,以确保应用程序的功能和稳定性。
实验五:数据库操作在这个实验中,我学习了如何在安卓应用程序中使用数据库。
我使用了SQLite数据库来存储和管理应用程序的数据。
通过编写SQL语句,我能够进行数据的插入、查询、更新和删除等操作。
这为我今后的应用程序开发提供了非常有用的技能。
总结:。
《Android应用程序设计》实验报告 (2)
实验1 搭建开发环境与第1个Android程序【实验目的】1.熟悉Android开发环境的搭建2.掌握用Eclipse开发Android程序的流程【实验内容】一、搭建Android开发环境按照下面的步骤,完成Android环境的搭建。
1.1 JDK的安装及配置1.根据电脑的系统位数安装软件包里的JDK,安装目录设置为d:\jdk1.x。
(d为你的安装盘,可以设为任意盘;x为你安装的jdk版本)2. WIN7系统环境变量设置(1)环境变量设置一(2)环境变量设置二(3)环境变量设置三(4)环境变量设置四1)创建新的环境变量。
名:JA V A_HOME,值:x:\jdk1.72)修改系统变量Path,在path变量值前添加这段:%JA V A_HOME%\bin;3)修改系统变量classpath,值为:.;%JA V A_HOME%\lib\dt.jar;%JA V A_HOME%\lib\tools.jar;(5)环境变量设置五1)测试开发环境。
在开始->搜索程序和文件里输入cmd.exe,打开cmd。
输入cd c:\ 命令进入c盘根目录。
2)在c盘根目录下使用记事本编写源文件,并存为java文件。
public class MyApp {public static void main (String[] args) {System.out.println(“我能学好Java语言!”);} }3)使用javac命令编译程序,在cmd命令行输入:javac MyApp.java生成class类型文件。
4)使用java命令运行程序,在cmd命令行输入:java MyApp如果在命令行显示结果“我能学好Java语言!”,则JDK环境配置成功。
1.2 Android SDK的安装及配置1. 解压adt-bundle-windows-x86_64-20131030.zip文件,里面的SDK是免安装版。
Android应用开发I实验指导书

Android应⽤开发I实验指导书《Android应⽤开发I》实验指导书计算机科学与技术系⽬录实验⼀:第⼀个应⽤程序 0实验⼆:基本控件 (1)实验三:⾼级控件 (4)实验四:菜单和对话框 (7)实验五:数据存储 (8)实验六:后台处理与获取⽹络数据 (9)实验⼀:第⼀个应⽤程序【实验概述】搭建环境,并运⾏第⼀个应⽤程序。
实验类别:验证类。
学时:1学时。
组织形式:学⽣独⽴完成。
考核⽅式:随堂检查。
【实验⽬的】熟悉Android开发环境使⽤以及程序运⾏过程。
【实验环境】硬件环境:笔记本软件环境:Eclipse+SDK+JDK编程语⾔:Java【相关知识】⽆。
【实验内容】1. 安装环境:安装JDK,解压Eclipse,配置SDK路径。
2. 新建⼀个项⽬HelloWorld。
3.创建⼀个以学号命名的模拟器,然后运⾏该项⽬。
实验⼆:基本控件【实验概述】完成⼀个登录+注册的界⾯。
实验类别:验证类。
学时:4学时。
组织形式:学⽣独⽴完成。
考核⽅式:检查。
【实验⽬的】1.掌握基本控件的使⽤,例如EditText、TextView、Button、CheckBox等控件使⽤。
2. Intent跳转。
【实验环境】硬件环境:笔记本软件环境:Eclipse+SDK+JDK编程语⾔:Java【相关知识】界⾯布局、EditText、TextView、Button、CheckBox等控件使⽤。
【实验内容】实现类似下图的效果:界⾯布局根据⼤家喜好⾃⾏决定。
(下⾯只是参考)(1)新建项⽬。
(2)在项⽬的布局⽂件中,修改为以下内容。
登录布局(3)新建Activity类,并设置布局⽂件为register.xml。
内容如下:注册布局(4)在登录界⾯的【登录】按钮中增加页⾯跳转代码:(5)运⾏效果:实验三:⾼级控件【实验概述】Spinner/ListView/Fragment实验类别:验证类。
学时:4学时。
组织形式:学⽣独⽴完成。
考核⽅式:检查。
实验二 Android项目的开发及调试
实验二Android项目的开发及调试
一、实验目的
1、本实验主要学习和掌握 Android 基本应用开发。
2、熟练掌握用 Eclipse和 Android SDK 创建基本应用。
3、掌握Android开发的LogCat控制台调试方式。
二、实验内容
实验任务:创建一Android应用程序,包含两个Activity,具体的步骤如下:
1.创建一个Android应用(取名:MyMobileBBS_学号)
2、创建两个Activity:MyMobileBBSActivity、MainBordActivity
3、向项目中添加背景图片back_1.jpg。
4、修改main.xml,采用back_1.jpg作为背景图片
5、添加3个textview控件作为主版块标题,向字串资源文件(strings.xml)中添加主版块名称资源字串
6.修改mainfest.xml配置文件,将MainBordActivity作为启动Activity。
三、实验完成情况及总结
(实验报告要求有布局文件、资源文件和Activity的完整Java 代码,还要有运行时得到结果的手机画面截图,采用LogCat排查异常时须有相关控制台输出截图)
小结。
ex_02 实验二——Android程序UI设计
实验二Android程序UI界面设计【目的】Android程序设计基础。
熟悉各种UI控件并且进行UI设计。
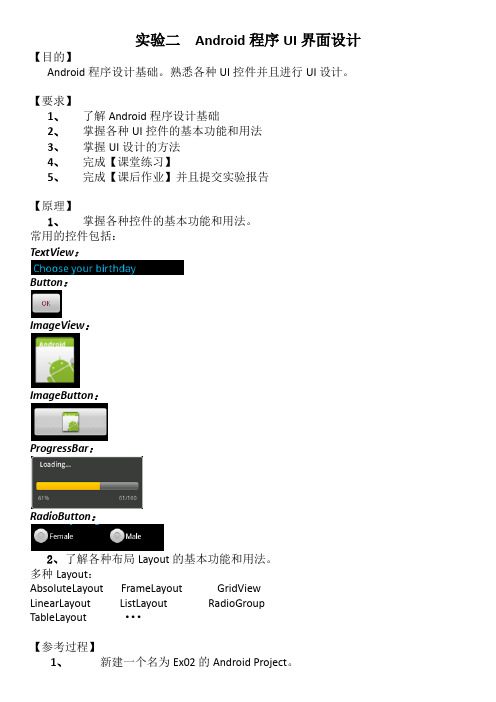
【要求】1、了解Android程序设计基础2、掌握各种UI控件的基本功能和用法3、掌握UI设计的方法4、完成【课堂练习】5、完成【课后作业】并且提交实验报告【原理】1、掌握各种控件的基本功能和用法。
常用的控件包括:TextView:Button:ImageView:ImageButton:ProgressBar:RadioButton:2、了解各种布局Layout的基本功能和用法。
多种Layout:AbsoluteLayoutFrameLayoutGridView LinearLayoutListLayoutRadioGroupTableLayout···【参考过程】1、新建一个名为Ex02的Android Project。
2、双击Layout->main.xml文件,即可切换到UI设计界面(默认布局为LinearLayout),增加所需控件,如:Button。
3、将Form Widgets中的Button拖入屏幕中,如图1所示。
图14、从Graphical Layout切换至main.xml,可以看见代码中已新增了Button的xml代码,如图2所示。
图25、修改控件的属性:方法一:单击Button,在窗口下方的properties一栏中修改对应的属性,如:background,text,size等。
(如果没有properties一栏出现,右击Button,打开“Show In”->“Properties”即可。
)图3方法二:直接在main.xml文件中修改。
如修改Button的文本内容,则输入android:text=”Yes, I do!”,如图4所示。
图4再次切换回Graphical Layout预览页面,则看到Button的文本内容已经被修改,如图5所示。
Android 实验二
Android 实验二一.实验目的使用线性布局、相对布局模拟微信界面(消息界面、设置界面)二.使用的设备和仪器计算机+Windows 10+Android studio三.实验内容及要求使用线性布局、相对布局模拟微信界面(消息界面、设置界面)四.实验步骤消息界面:1.程序代码:<RelativeLayout xmlns:android="/apk/res/android"xmlns:app="/apk/res-auto"xmlns:tools="/tools"android:layout_width="match_parent"android:layout_height="match_parent"tools:context=".MainActivity"><RelativeLayoutandroid:layout_width="match_parent"android:layout_height="wrap_content"><ImageViewandroid:layout_width="match_parent"android:layout_height="50dp"android:src="@drawable/top"></ImageView></RelativeLayout><ScrollViewandroid:layout_width="match_parent"android:layout_height="match_parent"><RelativeLayoutandroid:layout_width="match_parent"android:layout_height="match_parent"><RelativeLayoutandroid:layout_marginTop="50dp"android:id="@+id/top1"android:layout_width="match_parent"android:layout_height="50dp"><ImageViewandroid:layout_marginLeft="5dp"android:layout_centerVertical="true"android:layout_width="40dp"android:layout_height="40dp"android:src="@drawable/touxiang"></ImageView><TextViewandroid:layout_marginLeft="50dp"android:layout_marginTop="8dp"android:text="张三"android:layout_width="wrap_content"android:layout_height="wrap_content"></TextView> <TextViewandroid:layout_marginLeft="50dp"android:layout_marginTop="30dp"android:textSize="10dp"android:text="你好"android:layout_width="wrap_content"android:layout_height="wrap_content"></TextView> </RelativeLayout><RelativeLayoutandroid:id="@+id/top2"android:layout_below="@id/top1"android:layout_width="match_parent"android:layout_height="50dp"><ImageViewandroid:layout_marginLeft="5dp"android:layout_centerVertical="true"android:layout_width="40dp"android:layout_height="40dp"android:src="@drawable/touxiang"></ImageView><TextViewandroid:layout_marginLeft="50dp"android:layout_marginTop="8dp"android:text="张三"android:layout_width="wrap_content"android:layout_height="wrap_content"></TextView> <TextViewandroid:layout_marginLeft="50dp"android:layout_marginTop="30dp"android:textSize="10dp"android:text="你好"android:layout_width="wrap_content"android:layout_height="wrap_content"></TextView></RelativeLayout></RelativeLayout></ScrollView><RelativeLayoutandroid:layout_alignParentBottom="true"android:layout_width="match_parent"android:layout_height="wrap_content"><ImageViewandroid:layout_width="match_parent"android:layout_height="60dp"android:src="@drawable/bottom"></ImageView></RelativeLayout></RelativeLayout>2.运行结果:设置界面:1.程序代码:<ScrollView xmlns:android="/apk/res/android"xmlns:app="/apk/res-auto"xmlns:tools="/tools"android:layout_width="match_parent"android:layout_height="match_parent"><RelativeLayoutandroid:layout_width="match_parent"android:layout_height="match_parent"tools:context=".MainActivity"><RelativeLayoutandroid:background="#EDEAEA"android:id="@+id/top"android:layout_width="match_parent"android:layout_height="wrap_content"><ImageViewandroid:layout_width="wrap_content"android:layout_height="wrap_content"android:src="@drawable/yi"></ImageView><ImageViewandroid:layout_centerHorizontal="true"android:src="@drawable/er"android:layout_width="wrap_content"android:layout_height="wrap_content"></ImageView> <ImageViewandroid:layout_alignParentRight="true"android:src="@drawable/san"android:layout_width="wrap_content"android:layout_height="wrap_content"></ImageView> </RelativeLayout><RelativeLayoutandroid:background="#4CAF50"android:layout_below="@id/top"android:id="@+id/top2"android:layout_width="match_parent"android:layout_height="100dp"><ImageViewandroid:layout_marginTop="17dp"android:layout_marginLeft="100dp"android:id="@+id/si"android:src="@drawable/si"android:layout_width="wrap_content"android:layout_height="wrap_content"></ImageView> <TextViewandroid:layout_marginLeft="107dp"android:layout_below="@id/si"android:text="收付款"android:layout_width="wrap_content"android:layout_height="wrap_content"></TextView><ImageViewandroid:id="@+id/wu"android:layout_marginTop="17dp"android:layout_toRightOf="@id/si"android:layout_marginLeft="100dp"android:src="@drawable/wu"android:layout_width="wrap_content"android:layout_height="wrap_content"></ImageView> <TextViewandroid:layout_marginLeft="273dp"android:layout_below="@id/wu"android:text="钱包"android:layout_width="wrap_content"android:layout_height="wrap_content"></TextView></RelativeLayout><RelativeLayoutandroid:id="@+id/top3"android:layout_below="@id/top2"android:layout_width="match_parent"android:layout_height="120dp"><TextViewandroid:text="金融理财"android:layout_width="wrap_content"android:layout_height="wrap_content"></TextView> <ImageViewandroid:layout_marginLeft="15dp"android:layout_marginTop="25dp"android:id="@+id/liu"android:src="@drawable/liu"android:layout_width="50dp"android:layout_height="50dp"></ImageView><TextViewandroid:layout_marginLeft="5dp"android:layout_below="@id/liu"android:text="信用卡还款"android:layout_width="wrap_content"android:layout_height="wrap_content"></TextView> <ImageViewandroid:layout_toRightOf="@id/liu"android:id="@+id/qi"android:layout_width="50dp"android:layout_height="50dp"android:layout_marginLeft="50dp"android:layout_marginTop="25dp"android:src="@drawable/qi"></ImageView><TextViewandroid:layout_marginLeft="120dp"android:layout_below="@id/qi"android:text="理财通"android:layout_width="wrap_content"android:layout_height="wrap_content"></TextView> </RelativeLayout><RelativeLayoutandroid:id="@+id/top4"android:layout_below="@id/top3"android:layout_width="match_parent"android:layout_height="220dp"><TextViewandroid:text="生活服务"android:layout_width="wrap_content"android:layout_height="wrap_content"></TextView> <ImageViewandroid:layout_marginLeft="15dp"android:layout_marginTop="25dp"android:id="@+id/ba"android:src="@drawable/ba"android:layout_width="50dp"android:layout_height="50dp"></ImageView><TextViewandroid:layout_marginLeft="10dp"android:layout_below="@id/ba"android:text="手机充值"android:layout_width="wrap_content"android:layout_height="wrap_content"></TextView> <ImageViewandroid:layout_toRightOf="@id/ba"android:id="@+id/jiu"android:layout_width="50dp"android:layout_height="50dp"android:layout_marginLeft="50dp"android:layout_marginTop="25dp"android:src="@drawable/jiu"></ImageView><TextViewandroid:layout_marginLeft="110dp"android:layout_below="@id/jiu"android:text="生活缴费"android:layout_width="wrap_content"android:layout_height="wrap_content"></TextView></RelativeLayout></RelativeLayout></ScrollView>2.运行结果:五.实验总结通过这次实验,了解了线性布局和相对布局的区别,并学会了使用线性布局和相对布局做一些简单界面。
- 1、下载文档前请自行甄别文档内容的完整性,平台不提供额外的编辑、内容补充、找答案等附加服务。
- 2、"仅部分预览"的文档,不可在线预览部分如存在完整性等问题,可反馈申请退款(可完整预览的文档不适用该条件!)。
- 3、如文档侵犯您的权益,请联系客服反馈,我们会尽快为您处理(人工客服工作时间:9:00-18:30)。
实验二 android基本控件实验【目的】熟悉Android常用控件的基本操作,掌握它们的基本使用方法。
了解控件之间的构成关系,熟悉适配器的使用原理。
【要求】1、了解控件的继承关系;2、掌握适配器的使用;3、掌握信息提示的实现机制;4、实现基本界面。
【原理】1.控件类之间的关系android.view.View类(视图类)呈现了最基本的UI构造块。
View类是Android中的一个超类,几乎包含了所有的屏幕类型,主要负责绘制和事件处理。
Android中控件类的扩展结构如图所示。
View有众多的扩展者,它们大部分是在android.widget包中,这些继承者实际上就是Android 系统中的“控件”。
View实际上就是各个控件的基类,创建交互式的图形用户界面的基础。
View的直接继承者包括文本视图(TextView)、图像视图(ImageView)、进度条(ProgressBar)等。
它们各自又有众多的继承者。
每个控件除了继承父类功能之外,一般还具有自己的公有方法、保护方法、XML属性等。
在Android中使用各种控件的一般情况是在布局文件中可以实现UI的外观,然后在Java文件中实现对各种控件的控制动作。
控件类的名称也是它们在布局文件XML中使用的标签名称。
2.控件通用行为和属性View是Android中所有控件类的基类,因此View中一些内容是所有控件类都具有的通用行为和属性。
提示:由于Java语言不支持多重继承,因此Android控件不可能以基本功能的“排列组合”的方式实现。
在这种情况下,为了实现功能的复用,基类的功能往往做得较强,作为控件的祖先类,View所实现的功能也是最多的。
控件类经常在布局文件中使用,因此其可以使用XML属性(XMLAttributes),和Java代码经常具有对应关系。
View作为各种控件的基类,其XML属性所有控件通用,XML属性及其对应的方法如表1所示。
表1 View中的XML属性及其对应的方法其中,android:id表示控件的标识,通常需要在布局文件中指定这个属性。
View中与控件标识相关的几个方法如下所示:public int getId() // 获得控件的id(int类型)public void setId(int id) // 设置控件的id(int类型)public Object getTag() // 获得控件的tag(Object类型)public void setTag(Object tag) // 设置控件的tag(Object类型)对于一个控件,也就是View的继承者,整数类型id是其主要的标识。
其中,getId()可以获得控件的id,而setId()可以将一个整数设置为控件的id,但是这个方法并不常用。
View的id通常可以在布局文件中获得。
Object类型的标识tag是控件的一个扩展标识,由于使用了Object类型,它可以接受大部分的Java类型。
在一个View中根据id或者tag查找其孩子的方法如下所示:public final View findViewById(int id)public final View findViewWithTag(Object tag)findViewById()和findViewWithTag()的目的是返回这个View树中id和tag为某个数值的View 的句柄。
View树的含义是View及其所有的孩子。
值得注意的是,id不是控件的唯一标识,例如布局文件中id是可以重复的,在这种重复的情况下,findViewById()的结果不能确保找到唯一的控件。
提示:作为控件的标识的id和tag可以配合使用:当id有重复的时候,可以通过给控件设置不同的tag,对其进行区分。
可见性的问题,android:visibility在布局文件中有三个数值:visible(可见,默认),invisible (不可见),gone(去除)。
在Java代码中,setVisibility()能使用的枚举值与其对应,它们是:View.VISIBLE(0x0),View.INVISIBLE(0x4),View.GONE(0x8)。
3.数据适配器工作原理Adapter是视图与数据之间的桥梁,Adapter用来帮助填充视图中的数据,提供视图对数据的访问方式,通过它将数据填充到控件中,为在数据集里的每个数据项生成一个View。
常用Adapter包括ArrayAdapter, BaseAdapter, CursorAdapter, HeaderViewListAdapter, ListAdapter, ResourceCursorAdapter, SimpleAdapter, SimpleCursorAdapter, SpinnerAdapter, WrapperListAdapter。
各个AdapterView之间的继承关系如图:基类BaseAdapter有一个重要的方法:public abstract View getView (int position,View convertView,ViewGroup parent)参数Int position :该视图在适配器数据集中的位置View convertView :旧视图,也就已经滚出可视区的视图ViewGroup parent :当前视图最终会被附加到的父级视图这个方法被setAdapter(adapter)间接地调用。
getView 方法的作用是得到一个View,这个view显示数据项里指定位置的数据,可以手动创建一个view或者从一个XML layout 中解析获取。
当这个view被inflated,它的父view(如GridView,ListView等)将要使用默认的layout参数,除非你用inflate(int,android.view.ViewGroup,boolean)方法来指定一个根view 并防止附着在根上。
在Adapter中,所有数据项的视图是可以重用的,只是对可见视图将产生视图,对已经滚动出可见界面的视图,将重复使用,以减少资源损耗。
【过程】1.新建一个Android工程ControlTest;2.编写布局文件,实现布局效果,如图:【源代码】1、主界面布局文件main.xml<?xml version="1.0"encoding="utf-8"?><LinearLayout xmlns:android=""android:layout_width="fill_parent"android:layout_height="fill_parent"android:orientation="vertical"android:background="#ffffff"><LinearLayoutandroid:layout_width="fill_parent"android:layout_height="wrap_content"android:orientation="horizontal">"<TextViewandroid:layout_width="wrap_content"android:layout_height="wrap_content"android:paddingTop="10dp"android:paddingLeft="10dp"android:text="姓名:"android:textColor="#000000"android:textSize="15sp"/><EditTextandroid:textSize="15sp"android:background="@drawable/edit_text"android:id="@+id/editxt_name"android:layout_width="200dp"android:layout_height="wrap_content"android:layout_marginLeft="3dp"/></LinearLayout><LinearLayoutandroid:layout_width="fill_parent"android:layout_height="wrap_content"android:orientation="horizontal"><TextViewandroid:layout_width="wrap_content"android:layout_height="wrap_content"android:paddingTop="10dp"android:paddingLeft="10dp"android:text="学号:"android:textColor="#000000"android:textSize="15sp"/><EditTextandroid:background="@drawable/edit_text"android:textSize="15sp"android:id="@+id/editxt_id"android:layout_width="200dp"android:layout_height="wrap_content"android:layout_marginLeft="3dp"/></LinearLayout><LinearLayoutandroid:layout_width="fill_parent"android:orientation="horizontal"><TextViewandroid:layout_width="wrap_content"android:layout_height="wrap_content"android:paddingTop="10dp"android:paddingLeft="10dp"android:text="班级:"android:textColor="#000000"android:textSize="15sp"/><EditTextandroid:background="@drawable/edit_text"android:textSize="15sp"android:id="@+id/editxt_class"android:layout_width="200dp"android:layout_height="wrap_content"android:layout_marginLeft="3dp"/></LinearLayout><LinearLayoutandroid:layout_width="fill_parent"android:layout_height="wrap_content"android:orientation="horizontal"><TextViewandroid:layout_width="wrap_content"android:layout_height="wrap_content"android:paddingTop="10dp"android:paddingLeft="10dp"android:text="年级:"android:textColor="#000000"android:textSize="15sp"/><EditTextandroid:background="@drawable/edit_text"android:textSize="15sp"android:id="@+id/editxt_grade"android:layout_width="200dp"android:layout_height="wrap_content"android:layout_marginLeft="3dp"/></LinearLayout><LinearLayoutandroid:layout_width="fill_parent"android:orientation="horizontal">"<TextViewandroid:id="@+id/spinner_view"android:layout_width="wrap_content"android:layout_height="wrap_content"android:text="课程:"android:textSize="15sp"android:paddingTop="10dp"android:paddingLeft="10dp"android:textColor="#000000"/><Spinnerandroid:id="@+id/course_spinner"android:layout_width="wrap_content"android:layout_height="wrap_content"android:background="@drawable/spinner_default_holo_light"/></LinearLayout><Buttonandroid:layout_marginTop="15dp"android:id="@+id/but_sure"android:layout_width="300dp"android:layout_height="30dp"android:text="添加"android:layout_gravity="center"android:textSize="15sp"android:textColor="#ffffff"android:onClick="OnAddClick"android:background="#7b7979"/>"<ListViewandroid:paddingTop="20dp"android:id="@+id/course_listview"android:layout_width="fill_parent"android:layout_height="fill_parent"android:background="#ffffff"/></LinearLayout>2、Listview中的item布局文件:<?xml version="1.0"encoding="utf-8"?><LinearLayout xmlns:android=""android:layout_width="fill_parent"android:layout_height="match_parent"android:orientation="vertical"android:background="#ffffff"><LinearLayoutandroid:orientation="horizontal"android:layout_width="fill_parent"android:layout_height="wrap_content"><TextViewandroid:id="@+id/item_name"android:layout_width="0dp"android:layout_height="wrap_content"android:layout_weight="1"android:textColor="#000000"android:textSize="10sp"/><TextViewandroid:id="@+id/item_num"android:layout_width="0dp"android:layout_height="wrap_content"android:layout_weight="1"android:textColor="#000000"android:textSize="10sp"/><TextViewandroid:layout_width="0dp"android:layout_height="wrap_content"android:layout_weight="1"android:id="@+id/item_class"android:textSize="10sp"android:textColor="#000000"/><TextViewandroid:layout_width="0dp"android:layout_height="wrap_content"android:layout_weight="1"android:id="@+id/item_course"android:textSize="10sp"android:textColor="#000000"/><Buttonandroid:layout_width="0dp"android:layout_height="wrap_content"android:layout_weight="1"android:id="@+id/item_del"android:textSize="20sp"android:textColor="#000000"/>"</LinearLayout>"</LinearLayout>3、Spinner中的ourse_list.xml<?xml version="1.0"encoding="utf-8"?><resources><string-array name="course_list"><item>语文</item><item>数学</item><item>英语</item><item>物理</item><item>化学</item><item>生物</item></string-array></resources>4、edit_text样式的定义:<?xml version="1.0"encoding="utf-8"?><selector xmlns:android=""><item android:state_focused="true"android:drawable="@drawable/textfield_multiline_activated_holo_dark"/ ><itemandroid:drawable="@drawable/textfield_multiline_default_holo_light"/> </selector>5、spinner样式的定义:<?xml version="1.0"encoding="utf-8"?><selector xmlns:android=""><item android:state_focused="true"android:drawable="@drawable/spinner_default_holo_light"/> <item android:drawable="@drawable/spinner_disabled_holo_light"/> </selector>6、添加按钮的事件定义:public void OnAddClick(View v)//添加按钮事件{//将所输入的信息转换为字符串String name=mTextName.getText().toString();String id=mTextId.getText().toString();String classes=mSpinnerCourse.getSelectedItem().toString();String grade=mTextGrade.getText().toString();//将所输入的信息添加到mDataList中mDataList.add(new Item(id,name,grade,classes));//刷新listviewmListAdapter.notifyDataSetChanged();//创建toast提示添加成功toast=Toast.makeText(getApplicationContext(),"添加成功!", Toast.LENGTH_LONG);toast.setGravity(Gravity.CENTER, 0, 0);toast.show();}7、删除按钮的事件定义:mViewHolder.mDelButton//删除按钮事件.setOnClickListener(new View.OnClickListener() {@Overridepublic void onClick(View v) {mArrayitem.remove(id - 1);ItemAdapter.this.notifyDataSetChanged();//创建toast提示删除成功toast=Toast.makeText(mContext,"删除成功!", Toast.LENGTH_LONG);toast.setGravity(Gravity.CENTER, 0, 0);toast.show();}});8、Item类的定义:package com.example.classview;public class Item {public String course;public String id;public String grade;public String name;public Item(String id, String name, String grade,String course) { super();this.id = id; = name;this.grade = grade;this.course = course;}}五、实验结果及分析输入相应的信息后,点击添加按钮,界面如下图:单击删除按钮后界面显示为:六、实验心得本次实验目的是熟悉Android常用控件的基本操作,掌握它们的基本使用方法。