FileUpload控件上传图片并自动生成缩略图
jQueryFileUpload文件上传插件使用详解
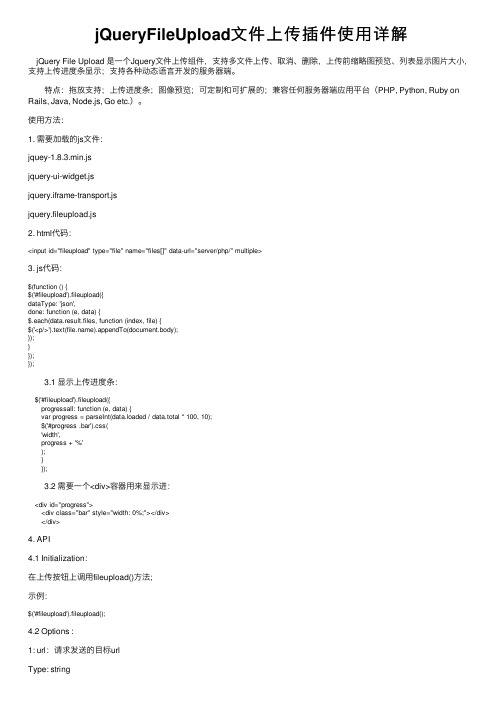
jQueryFileUpload⽂件上传插件使⽤详解 jQuery File Upload 是⼀个Jquery⽂件上传组件,⽀持多⽂件上传、取消、删除,上传前缩略图预览、列表显⽰图⽚⼤⼩,⽀持上传进度条显⽰;⽀持各种动态语⾔开发的服务器端。
特点:拖放⽀持;上传进度条;图像预览;可定制和可扩展的;兼容任何服务器端应⽤平台(PHP, Python, Ruby on Rails, Java, Node.js, Go etc.)。
使⽤⽅法:1. 需要加载的js⽂件:jquey-1.8.3.min.jsjquery-ui-widget.jsjquery.iframe-transport.jsjquery.fileupload.js2. html代码:<input id="fileupload" type="file" name="files[]" data-url="server/php/" multiple>3. js代码:$(function () {$('#fileupload').fileupload({dataType: 'json',done: function (e, data) {$.each(data.result.files, function (index, file) {$('<p/>').text().appendTo(document.body);});}});}); 3.1 显⽰上传进度条: $('#fileupload').fileupload({ progressall: function (e, data) { var progress = parseInt(data.loaded / data.total * 100, 10); $('#progress .bar').css( 'width', progress + '%' ); } }); 3.2 需要⼀个<div>容器⽤来显⽰进: <div id="progress"> <div class="bar" style="width: 0%;"></div> </div>4. API4.1 Initialization:在上传按钮上调⽤fileupload()⽅法;⽰例:$('#fileupload').fileupload();4.2 Options :1: url:请求发送的⽬标urlType: stringExample: '/path/to/upload/handler.json'2.Type: ⽂件上传HTTP请求⽅式,可以选择“POST”,“PUT”或者"PATCH",默认"POST"Type: stringExample: 'PUT'3. dataType:希望从服务器返回的数据类型,默认"json"Type: stringExample: 'json'4. autoUpload:默认情况下,只要⽤户点击了开始按钮被添加⾄组件的⽂件会⽴即上传。
推荐WordPress缩略图插件-设为特色图片

推荐WordPress缩略图插件-设为特色图片Flexible Upload这主要是一个wordpress图片上传增强辅助类插件。
提供更加灵活的上传方式,功能包括多文件上传,自动添加水印,自动改变裁切图片大小,为图片添加悬浮属性,Lightbox灯箱属性,自动生成缩略图等等。
Post Thumb RevisitedPost-Thumb Revisited 可以为文章自动创建和显示缩略图. 通过扫描文章中的图片,可以为每篇文章显示一个链接缩略图,可以在侧边栏显示最新文章或随机文章的图片列表。
Post Attached ImagePost Attached Image可以添加一个图片缩略图提示到文章摘要或文章列表中,然后添加大图片到单篇文章中。
比如适合用来做产品目录。
Thumbnail Viewer一个可以为图片生成类似Lightbox效果的插件,强调的是体积小巧,运行快速。
Flickr Thumbnails Photostream这个wordpress插件可以让你非常方便添加Flickr帐户中的图片缩略图到文章中。
Regenerate Thumbnails一个可以批量改变图片尺寸的Wordpress插件。
EasyPermGalsEasyPermGals可以自动添加图片GALLERY到文章中,并且如果启用了Lightbox效果,会自动实现。
Get Image自动获取文章中的一张图片做为缩略图,可自定义图片尺寸。
非常实用的一个Wordpress插件。
Excerpt Image Link自动查找摘要中的<IMG>标记,如果找到,则显示一张缩略图,并添加该文章的永久链接。
Power Thumbnail简单实用的Wordpress缩略图插件。
Power Thumbnail 可以从已经存在的附件系统里生成缩图图. 提供两种缩略图方案:标准重定义图片尺寸或是高级缩放。
My thumbshot基于Mythumbshot服务的Wordpress插件,可以让用户以缩略图的形式预览外部链接.PhotoJAR: Post ThumbnailPost thumbnailer能够从GALLERY中显示一张文章缩略图,-附加功能包含一个JS图片浏览脚本。
上传图片生成等比例缩略图

上传图⽚⽣成等⽐例缩略图ImageThumbnail.csusing System;using System.IO;using System.Drawing;using System.Drawing.Imaging;public class ImageThumbnail{public Image ResourceImage;private int ImageWidth;private int ImageHeight;public string ErrorMessage;public ImageThumbnail(string ImageFileName){ResourceImage = Image.FromFile(ImageFileName);ErrorMessage = "";}public bool ThumbnailCallback(){return false;}// ⽅法1,按⼤⼩public bool ReducedImage(int Width, int Height, string targetFilePath){try{Image ReducedImage;Image.GetThumbnailImageAbort callb = new Image.GetThumbnailImageAbort(ThumbnailCallback); ReducedImage = ResourceImage.GetThumbnailImage(Width, Height, callb, IntPtr.Zero);ReducedImage.Save(@targetFilePath, ImageFormat.Jpeg);ReducedImage.Dispose();return true;}catch (Exception e){ErrorMessage = e.Message;return false;}}// ⽅法2,按百分⽐缩⼩60% Percent为0.6 targetFilePath为⽬标路径public bool ReducedImage(double Percent, string targetFilePath){try{Image ReducedImage;Image.GetThumbnailImageAbort callb = new Image.GetThumbnailImageAbort(ThumbnailCallback); ImageWidth = Convert.ToInt32(ResourceImage.Width * Percent);ImageHeight = (ResourceImage.Height)*ImageWidth/ ResourceImage.Width;//等⽐例缩放ReducedImage = ResourceImage.GetThumbnailImage(ImageWidth, ImageHeight, callb, IntPtr.Zero); ReducedImage.Save(@targetFilePath, ImageFormat.Jpeg);ReducedImage.Dispose();return true;}catch (Exception e){ErrorMessage = e.Message;return false;}}}后台代码:using System;using System.Data;using System.Configuration;using System.Collections;using System.Web;using System.Web.Security;using System.Web.UI;using System.Web.UI.WebControls;using System.Web.UI.WebControls.WebParts;using System.Web.UI.HtmlControls;public partial class _Default : System.Web.UI.Page{protected void Page_Load(object sender, EventArgs e){}protected void bt_upload_Click(object sender, EventArgs e){try{if (FileUpload1.PostedFile.FileName == ""){this.lb_info.Text = "请选择⽂件!";}else{string filepath = FileUpload1.PostedFile.FileName;string filename = filepath.Substring(stIndexOf("\\") + 1);string serverpath1 = Server.MapPath("images/") + filename;string serverpath2 = Server.MapPath("images/") + System.DateTime.Now.ToString("yyy-MM-dd-hh-mm-ss") + Session.SessionID + filename;FileUpload1.PostedFile.SaveAs(serverpath1);ImageThumbnail img = new ImageThumbnail(filepath);img.ReducedImage(0.4, serverpath2);//0.4表⽰缩⼩40%this.lb_info.Text = "上传成功!";}}catch (Exception error){this.lb_info.Text = "上传发⽣错误!原因:" + error.ToString();}}}类 ImageThumbnail确实存在问题,⽣成缩略图都⽆法删除图⽚,报资源被占⽤,通过⽹上查资料显⽰要Dispose();,可这个类没有这个⽅法,于是⾃⼰加了⼀个类public void DisImage(){ResourceImage.Dispose();}还有⽂中在使⽤类的时候也存在问题ImageThumbnail img = new ImageThumbnail(filepath);应该引⽤的是服务器上的地址,也就是ImageThumbnail img = new ImageThumbnail(serverpath1);以下是⾃⼰的使⽤代码string FileName = FilesSave(FileUpload1, "../AdFile/");protected static string FilesSave(FileUpload hifile, string RelativePath){string filepath = hifile.PostedFile.FileName;string GetFileName = "";if (filepath != string.Empty){//if (IsAllowedExtension(hifile) == true)//{Random rand = new Random();string filename = System.DateTime.Now.ToString("yyyMMddhhmmss") + System.Web.HttpContext.Current.Session.SessionID + filepath.Substring(stIndexOf("."));string serverpath1 = System.Web.HttpContext.Current.Server.MapPath(RelativePath) + filename;string serverpath2 = System.Web.HttpContext.Current.Server.MapPath(RelativePath) + "b_" + filename;hifile.PostedFile.SaveAs(serverpath1);ImageThumbnail img = new ImageThumbnail(serverpath1);img.ReducedImage(0.4, serverpath2); //0.4表⽰缩⼩40%img.DisImage();GetFileName = "b_" + filename;//}}return GetFileName;}。
elementupload实现图片批量上传与预览(自定义上传)
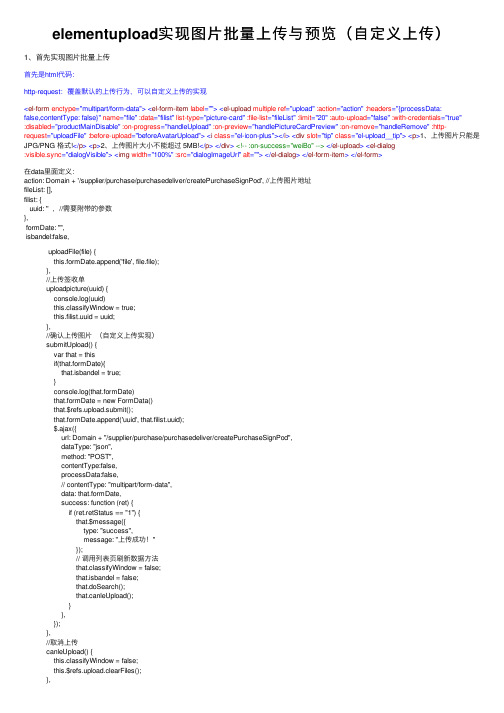
elementupload实现图⽚批量上传与预览(⾃定义上传)1、⾸先实现图⽚批量上传⾸先是html代码:http-request:覆盖默认的上传⾏为,可以⾃定义上传的实现<el-form enctype="multipart/form-data"><el-form-item label=""><el-upload multiple ref="upload" :action="action" :headers="{processData:false,contentType: false}" name="file" :data="filist" list-type="picture-card" :file-list="fileList" :limit="20" :auto-upload="false" :with-credentials="true":disabled="productMainDisable" :on-progress="handleUpload" :on-preview="handlePictureCardPreview" :on-remove="handleRemove" :http-request="uploadFile" :before-upload="beforeAvatarUpload"><i class="el-icon-plus"></i><div slot="tip" class="el-upload__tip"><p>1、上传图⽚只能是JPG/PNG 格式!</p><p>2、上传图⽚⼤⼩不能超过 5MB!</p></div><!-- :on-success="weiBo" --></el-upload><el-dialog:visible.sync="dialogVisible"><img width="100%" :src="dialogImageUrl" alt=""></el-dialog></el-form-item></el-form>在data⾥⾯定义:action: Domain + '/supplier/purchase/purchasedeliver/createPurchaseSignPod', //上传图⽚地址fileList: [],filist: {uuid: '' ,//需要附带的参数},formDate: "",isbandel:false, uploadFile(file) {this.formDate.append('file', file.file);},//上传签收单uploadpicture(uuid) {console.log(uuid)this.classifyWindow = true;this.filist.uuid = uuid;},//确认上传图⽚(⾃定义上传实现)submitUpload() {var that = thisif(that.formDate){that.isbandel = true;}console.log(that.formDate)that.formDate = new FormData()that.$refs.upload.submit();that.formDate.append('uuid', that.filist.uuid);$.ajax({url: Domain + "/supplier/purchase/purchasedeliver/createPurchaseSignPod",dataType: "json",method: "POST",contentType:false,processData:false,// contentType: "multipart/form-data",data: that.formDate,success: function (ret) {if (ret.retStatus == "1") {that.$message({type: "success",message: "上传成功!"});// 调⽤列表页刷新数据⽅法that.classifyWindow = false;that.isbandel = false;that.doSearch();that.canleUpload();}},});},//取消上传canleUpload() {this.classifyWindow = false;this.$refs.upload.clearFiles();},handleUpload: function (event, file, fileList) {this.productMainDisable = true;},//查看⼤图handlePictureCardPreview: function (file) {this.dialogImageUrl = file.url;this.dialogVisible = true;},// ⽂件删除操作handleRemove: function (file, fileList) {this.fileList = [];this.fileList = fileList;},//上传图⽚之前判断图⽚⼤⼩及格式beforeAvatarUpload(file) {console.log(file)const isJPG = file.type === 'image/jpeg';const isPNG = file.type === 'image/png';const isLt2M = file.size / 1024 / 1024 / 1024 < 5;this.beforeUpload = false;if (!isJPG && !isPNG) {this.beforeUpload = true;this.$message.error('上传图⽚只能是 JPG/PNG 格式!');}if (!isLt2M) {this.beforeUpload = true;this.$message.error('上传图⽚⼤⼩不能超过 5MB!');}return (isJPG || isPNG) && isLt2M;},// 此处已注释,如果⽤这个⽅法上传就会有⼏张图⽚调⽤⼏次接⼝ weiBo: function (response, file, fileList) {if (response.retStatus != '1') {this.$message({type: 'error',message: response.retMessage,});} else {this.$message({type: "success",message: "上传成功!"})}2、实现图⽚预览<ul class="imgbox m-listtable f-pdg-20-t"><li v-for="(item,uuid) in srcList" :key="uuid"><el-imagestyle="width: 100%;":src="item.signPodPath":preview-src-list="new_arr"></el-image></li></ul>srcList: [], //⽤来循环的new_arr:[],//⽤来预览的数组//获取图⽚getImglist(){var that = this$.ajax({url: 'xxx',dataType: "json",method: "POST",data: {"uuid": utils.getQueryString("uuid")},success: function (ret) {if (ret.retStatus == "1") {that.srcList = JSON.parse(ret.retData) var arr = []let result = []that.srcList.forEach(item => { arr = item.signPodPaththat.new_arr.push(arr)})console.log(that.new_arr)}}})}。
blueimp jquery-file-upload 事例

blueimp jquery-file-upload 事例Blueimp jQuery-File-Upload示例前言:Blueimp jQuery-File-Upload是一款强大的文件上传插件,通过它,我们可以方便地在网页中实现文件上传功能。
本文将介绍一些实际应用中的Blueimp jQuery-File-Upload事例,展示其使用方法和效果。
一、注册和上传文件在使用Blueimp jQuery-File-Upload之前,我们首先需要在网页中引入该插件的相关文件。
一般来说,我们需要引入jQuery库、必要的CSS样式和脚本文件。
接着,在网页中创建一个容器,用于显示上传文件的进度和结果。
然后,我们需要给该容器绑定一个点击事件,当用户点击该容器时,会触发文件选择框,用户可以选择本地的文件进行上传。
二、添加文件队列和文件预览在文件选择完成后,Blueimp jQuery-File-Upload会自动将选择的文件添加到上传队列中,并在页面上展示文件的预览效果。
我们可以通过修改相关配置来自定义文件队列的展示样式,如设置默认的缩略图、添加删除按钮等。
通过这样的操作,用户可以清晰地看到自己选择的文件是否正确,提高了用户的操作体验。
三、指定上传目标和执行上传接下来,我们需要指定文件上传的目标路径或后台处理文件的URL 地址,并且处理上传按钮的点击事件。
当用户点击上传按钮时,Blueimp jQuery-File-Upload会自动将文件上传至指定的目标,并在页面上实时显示上传进度。
此时,我们可以通过监听相关的事件来获取上传进度,如上传开始前、进度更新和上传成功等。
四、处理上传结果在文件上传完成后,我们可以获取上传成功的文件信息,并可以对上传结果进行一些后续处理。
比如,可以将上传成功的文件信息保存到数据库中,方便以后的查阅或操作。
此外,我们也可以自定义上传失败的处理方式,如提示用户重新上传或显示上传错误信息等。
asp.netfileupload控件上传图片并预览图片

fileupload控件上传图⽚并预览图⽚本⽂为⼤家分享了fileupload控件实现上传图⽚后并进⾏预览图⽚的功能,并对web.config进⾏了配置,先看⼀下最终效果:页⾯代码:<form id="form1" runat="server"><div><asp:FileUpload ID="FileUpload1" runat="server" /><asp:Button ID="Button1" runat="server" Text="上传" Width="54px" OnClick="Button1_Click" /><asp:Label ID="Label1" runat="server" Text="" Style="color: Red"></asp:Label><asp:Image runat="server" ID="Image1" Style="z-index: 102; left: 20px; position: absolute;top: 49px" Width="73px" /></div></form>后台代码:using System;using System.Data;using System.Configuration;using System.Web;using System.Web.Security;using System.Web.UI;using System.Web.UI.WebControls;using System.Web.UI.WebControls.WebParts;using System.Web.UI.HtmlControls;namespace Web.File{public partial class WebForm1 : System.Web.UI.Page{protected void Page_Load(object sender, EventArgs e){}#region ⽂件上传/// <summary>/// ⽂件上传/// </summary>protected void Button1_Click(object sender, EventArgs e){if (FileUpload1.FileName == ""){bel1.Text = "上传⽂件不能为空";return;}bool fileIsValid = false;//如果确认了上传⽂件,则判断⽂件类型是否符合要求if (this.FileUpload1.HasFile){//获取上传⽂件的后缀String fileExtension = System.IO.Path.GetExtension(this.FileUpload1.FileName).ToLower();String[] restrictExtension = { ".gif", ".jpg", ".bmp", ".png" };//判断⽂件类型是否符合要求for (int i = 0; i < restrictExtension.Length; i++){if (fileExtension == restrictExtension[i]){fileIsValid = true;}//如果⽂件类型符合要求,调⽤SaveAs⽅法实现上传,并显⽰相关信息if (fileIsValid == true){//上传⽂件是否⼤于10Mif (FileUpload1.PostedFile.ContentLength > (10 * 1024 * 1024)){bel1.Text = "上传⽂件过⼤";return;}try{this.Image1.ImageUrl = "~/File/" + FileUpload1.FileName;this.FileUpload1.SaveAs(Server.MapPath("~/File/") + FileUpload1.FileName);bel1.Text = "⽂件上传成功!";}catch{bel1.Text = "⽂件上传失败!";}finally{}}else{bel1.Text = "只能够上传后缀为.gif,.jpg,.bmp,.png的⽂件";}}}}#endregion}}Web.config 配置:<!--因为FileUpload 控件上传最⼤为4M,如果要上传更⼤⽂件,改下maxRequestLength的⼤⼩--><configuration><system.web><compilation debug="true" targetFramework="4.0" /><httpRuntime requestValidationMode="2.0" maxRequestLength="10485760" executionTimeout="3600" appRequestQueueLimit="10000"/></system.web></configuration>为⼤家附3个精彩的专题:亲,你可以在⾃⼰的项⽬中实现fileupload控件上传图⽚并进⾏预览图⽚的功能,这样⽹站更具有实⽤性,基本步骤就是这些,可能还有⼩编遗漏的地⽅,希望⼤家谅解。
JSP上传图片并生成缩略图

先看看三本例子使用了jspsmart组件进行上传,这里可以免费下载该组件下载解压后,将jar包复制到\WEB-INF\lib目录后重启服务器,jspsmart即可正常使用了1、uploadimage.jsp<%@ page contentType="text/html;charset=gb2312" language="java"import="java.io.*,java.awt.Image,java.awt.image.*,com.sun.image.codec.jpeg.*,java.sql.*,com.jspsmart.upload.*,java.util.*,cn.oof.database.*,cn.oof.house.*"%><%SmartUpload mySmartUpload =new SmartUpload();long file_size_max=4000000;String fileName2="",ext="",testvar="";String url="uploadfile/images/"; //应保证在根目录中有此目录的存在//初始化mySmartUpload.initialize(pageContext);//只允许上载此类文件try {mySmartUpload.setAllowedFilesList("jpg,gif");//上载文件mySmartUpload.upload();} catch (Exception e){%><SCRIPT language=javascript>alert("只允许上传.jpg和.gif类型图片文件");window.location=''''upfile.jsp'''';</script><%}try{com.jspsmart.upload.File myFile = mySmartUpload.getFiles().getFile(0);if (myFile.isMissing()){%><SCRIPT language=javascript>alert("请先选择要上传的文件");window.location=''''upfile.jsp'''';</script><%}else{//String myFileName=myFile.getFileName(); //取得上载的文件的文件名ext= myFile.getFileExt(); //取得后缀名int file_size=myFile.getSize(); //取得文件的大小String saveurl="";if(file_size<file_size_max){//更改文件名,取得当前上传时间的毫秒数值Calendar calendar = Calendar.getInstance();String filename = String.valueOf(calendar.getTimeInMillis());saveurl=request.getRealPath("/")+url;saveurl+=filename+"."+ext; //保存路径myFile.saveAs(saveurl,mySmartUpload.SAVE_PHYSICAL);//out.print(filename);//-----------------------上传完成,开始生成缩略图-------------------------java.io.File file = new java.io.File(saveurl); //读入刚才上传的文件String newurl=request.getRealPath("/")+url+filename+"_min."+ext; //新的缩略图保存地址Image src = javax.imageio.ImageIO.read(file); //构造Image对象float tagsize=200;int old_w=src.getWidth(null); //得到源图宽int old_h=src.getHeight(null);int new_w=0;int new_h=0; //得到源图长int tempsize;float tempdouble;if(old_w>old_h){tempdouble=old_w/tagsize;}else{tempdouble=old_h/tagsize;}new_w=Math.round(old_w/tempdouble);new_h=Math.round(old_h/tempdouble);//计算新图长宽BufferedImage tag = new BufferedImage(new_w,new_h,BufferedImage.TYPE_INT_RGB);tag.getGraphics().drawImage(src,0,0,new_w,new_h,null); //绘制缩小后的图FileOutputStream newimage=new FileOutputStream(newurl); //输出到文件流JPEGImageEncoder encoder = JPEGCodec.createJPEGEncoder(newimage);encoder.encode(tag); //近JPEG编码newimage.close();}else{out.print("<SCRIPT language=''''javascript''''>");out.print("alert(''''上传文件大小不能超过"+(file_size_max/1000)+"K'''');");out.print("window.location=''''upfile.jsp;''''");out.print("</SCRIPT>");}}}catch (Exception e){e.toString();}%>2 upload.htm<html><head><title>请选择上传的图片</title></head><body><table border="0" align="center" cellpadding="0" cellspacing="0"><tr><td height="45" align="center" valign="middle"><form action="uploadimage.jsp" method="post" enctype="multipart/form-data" name="form1">请选择上传的图片<input type="file" name="file"><input type="submit" name="Submit" value="上传"></form></td></tr></table></body></html>二也谈一下文件上传在这里看到很多讨论文件上传的文章,觉得各有利敝,有些只限于上传文件,而不能同时取得文本字段值,尤其是上传多个文件比较少,现本人做这个上传文件的类最多可支持上传255个文件,同时可取得文本字段值,请各位高手指正.文件上传类:MoqUploadBean.javapackage net.jspcn.tool;import java.io.*;import java.util.*;import javax.servlet.*;import javax.servlet.http.*;/**** Title: 文件上传类* Description: 既能对文件进行上传,又能取得输入框的值,最多可同时上传255个文件 * Copyright: Copyright (c) 2002* Company: Tekson* @author 莫琼* @version 1.0*/public class UploadBean {private String[] sourceFile = new String[255]; //源文件名private String[] suffix = new String[255]; //文件后缀名private String canSuffix = ".gif.jpg.jpeg.png"; //可上传的文件后缀名private String objectPath = "c:/"; //目标文件目录private String[] objectFileName = new String[255]; //目标文件名private ServletInputStream sis = null; //输入流private String[] description = new String[255]; //描述状态private long size = 100 * 1024; //限制大小private int count = 0; //已传输文件数目private byte[] b = new byte[4096]; //字节流存放数组private boolean successful = true;private Hashtable fields = new Hashtable();public UploadBean() {}//设置上传文件的后缀名public void setSuffix(String canSuffix) {this.canSuffix = canSuffix;}//设置文件保存路径public void setObjectPath(String objectPath) {this.objectPath = objectPath;}//设置文件保存路径public void setSize(long maxSize) {this.size = maxSize;}//文件上传处理程序public void setSourceFile(HttpServletRequest request) throws IOException { sis = request.getInputStream();int a = 0;int k = 0;String s = "";while ( (a = sis.readLine(b, 0, b.length)) != -1) {s = new String(b, 0, a);if ( (k = s.indexOf("filename="")) != -1) {// 取得文件数据s = s.substring(k + 10);k = s.indexOf(""");s = s.substring(0, k);sourceFile[count] = s;k = stIndexOf(".");suffix[count] = s.substring(k + 1);if (canTransfer(count)) {transferFile(count);}++count;} else if ( (k = s.indexOf("name="")) != -1) {// 普通表单输入元素,获取输入元素名字String fieldName = s.substring(k+6, s.length()-3);sis.readLine(b, 0, b.length);StringBuffer fieldValue = new StringBuffer(b.length);while ( (a = sis.readLine(b, 0, b.length)) != -1) {s = new String(b, 0, a-2);if ( (b[0] == 45) && (b[1] == 45) && (b[2] == 45) && (b[3] == 45) && (b[4] == 45)) { break;} else {fieldValue.append(s);}}fields.put(fieldName, fieldValue.toString()); }if (!successful)break;}}//取得表单元素值public String getFieldValue(String fieldName) { if (fields == null || fieldName == null) {return null;}return (String) fields.get(fieldName);}//取得上传文件数public int getCount() {return count;}//取得目标路径public String getObjectPath() {return objectPath;}//取得源文件名public String[] getSourceFile() {return sourceFile;}//取得目标文件名public String[] getObjectFileName() {return objectFileName;}//取得上传状态描述public String[] getDescription() {return description;}//判断上传文件的类型private boolean canTransfer(int i) {suffix[i] = suffix[i].toLowerCase();//这个是用来传图片的,各位可以把后缀名改掉或者不要这个条件 if (sourceFile[i].equals("") || (!(canSuffix.indexOf("."+suffix[i])>=0))) { description[i] = "ERR: File suffix is wrong.";return false;}else {return true;}//上传文件转换private void transferFile(int i) {String x = Long.toString(new java.util.Date().getTime());try {objectFileName[i] = x + "." + suffix[i];FileOutputStream out = new FileOutputStream(objectPath + objectFileName[i]);int a = 0;int k = 0;long hastransfered = 0; //标示已经传输的字节数String s = "";while ( (a = sis.readLine(b, 0, b.length)) != -1) {s = new String(b, 0, a);if ( (k = s.indexOf("Content-Type:")) != -1) {break;}}sis.readLine(b, 0, b.length);while ( (a = sis.readLine(b, 0, b.length)) != -1) {s = new String(b, 0, a);if ( (b[0] == 45) && (b[1] == 45) && (b[2] == 45) && (b[3] == 45) && (b[4] == 45)) { break;out.write(b, 0, a);hastransfered += a;if (hastransfered >= size) {description[count] = "ERR: The file " + sourceFile[count] + " is too large to transfer. The whole process is interrupted."; successful = false;break;}}if (successful) {description[count] = "Right: The file " + sourceFile[count] + " has been transfered successfully.";}out.close();if (!successful) {sis.close();File tmp = new File(objectPath + objectFileName[count]);tmp.delete();}}catch (IOException ioe) {description[i] = ioe.toString();}}public static void main(String[] args) {System.out.println("Test OK");}}文件上传调用:MoqUpload.jsp〈%@ page contentType="text/html; charset=GB2312" %>〈html>〈head>〈title>文件上载〈/title>〈/head>〈body>〈form action="MoqUploadSubmit.jsp" enctype="MULTIPART/FORM-DA TA" method="post"> 作者姓名:〈input type="text" name="Author" />〈br />公司名称:〈input type="text" name="Company" />〈br />文件描述:〈input type="text" name="Comment" />〈br />选择文件1:〈input type="file" name="filename1" />〈br />选择文件2:〈input type="file" name="filename2" />〈br />选择文件3:〈input type="file" name="filename3" />〈br />选择文件4:〈input type="file" name="filename4" />〈br />〈input type="submit" value="上载" />〈/form>〈/body>〈/html>文件上传提交:MoqUploadSubmit.jsp〈%@ page contentType="text/html;charset=gb2312"%>〈jsp:useBean id="fileBean" scope="page" class="net.moq.www.MoqUploadBean" /> 〈%fileBean.setObjectPath("D:Temp");fileBean.setSize(10000*1024);fileBean.setSuffix(".gif.jpg.png.jpge.html.htm");fileBean.setSourceFile(request);String [] saSourceFile = fileBean.getSourceFile();String [] saObjectFile = fileBean.getObjectFileName();String [] saDescription = fileBean.getDescription();int iCount = fileBean.getCount();String sObjectPath = fileBean.getObjectPath();for(int i=0;i〈iCount;i++) {out.println("〈br>源始文件:");out.println(saSourceFile[i]);out.println("〈br>目标文件:");out.println(sObjectPath+saObjectFile[i]);out.println("〈br>上传说明:");out.println(saDescription[i]);out.println("〈br>");}out.println("〈br>作者:" + fileBean.getFieldValue("Author"));out.println("〈br>公司:" + fileBean.getFieldValue("Company"));out.println("〈br>说明:" + fileBean.getFieldValue("Comment"));%>三jspSmartUpload上传下载全攻略一、安装篇jspSmartUpload是由网站开发的一个可免费使用的全功能的文件上传下载组件,适于嵌入执行上传下载操作的JSP文件中。
FileUpload文件上传控件

FileBytes
FileContent FileName
获取上传文件的字节数组
获取指向上传文件的Stream对象 获取上传文件在客户端的文件名称
HasFile
PostedFile
获取一个布尔值,用于表示FileUpload控件是否已经包含一个 文件
FileUpload文件上传控件
本讲大纲: 1、FileUpload控件的概述 2、使用FileUpload控件上传图片文件
FileUpload控件的概述
FileUpload控件的主要功能是向指定目录上传文件,该控件包括一个文 本和一个浏览按钮。用户可以在文本框中输入完整的文件路径,或者通 过按钮浏览并选择需要上传的文件。FileUpload控件不会自动上传文件, 必须设置相关的事件处理程序,并在程序中实现文件上传。
获取一个与上传文件相关的HttpPostedFile对象,使用该
- 1、下载文档前请自行甄别文档内容的完整性,平台不提供额外的编辑、内容补充、找答案等附加服务。
- 2、"仅部分预览"的文档,不可在线预览部分如存在完整性等问题,可反馈申请退款(可完整预览的文档不适用该条件!)。
- 3、如文档侵犯您的权益,请联系客服反馈,我们会尽快为您处理(人工客服工作时间:9:00-18:30)。
(double)toheight) { oh = originalImage.Height; ow = originalImage.Height * towidth / toheight; y = 0; x = (originalImage.Width - ow) / 2; } else { ow = originalImage.Width; oh = originalImage.Width * height / towidth; x = 0; y = (originalImage.Height - oh) / 2; } break; default: break; } //新建一个bmp图片 System.Drawing.Image bitmap = new System.Drawing.Bitmap(towidth, toheight); //新建一个画板 System.Drawing.Graphics g = System.Drawing.Graphics.FromImage(bitmap); //设置高质量插值法 g.InterpolationMode = System.Drawing.Drawing2D.InterpolationMode.High; //设置高质量,低速度呈现平滑程度 g.SmoothingMode = System.Drawing.Drawing2D.SmoothingMode.HighQuality; //清空画布并以透明背景色填充 g.Clear(System.Drawing.Color.Transparent); //在指定位置并且按指定大小绘制原图片的指定部分 g.DrawImage(originalImage, new System.Drawing.Rectangle(0, 0, towidth, toheight), new System.Drawing.Rectangle(x, y, ow, oh), System.Drawing.GraphicsUnit.Pixel); try {
} } /// <summary> /// 生成缩略图 /// </summary> /// <param name="originalImagePath">源图路径(物理路 径)</param> /// <param name="thumbnailPath">缩略图路径(物理路 径)</param> /// <param name="width">缩略图宽度</param> /// <param name="height">缩略图高度</param> /// <param name="mode">生成缩略图的方式</param> public static void MakeThumbnail(string originalImagePath, string thumbnailPath, int width, int height, string mode) { System.Drawing.Image originalImage = System.Drawing.Image.FromFile(originalImagePath); int towidth = width; int toheight = height; int x = 0; int y = 0; int ow = originalImage.Width; int oh = originalImage.Height; switch (mode) { case "HW"://指定高宽缩放(可能变形) break; case "W"://指定宽,高按比例 toheight = originalImage.Height * width / originalImage.Width; break; case "H"://指定高,宽按比例 towidth = originalImage.Width * height / originalImage.Height; break; case "Cut"://指定高宽裁减(不变形) if ((double)originalImage.Width / (double)originalImage.Height > (double)towidth /
using System; using System.Data; using System.Configuration; using System.Collections; using System.Web; using System.Web.Security; using System.Web.UI; using System.Web.UI.WebControls; using System.Web.UI.WebControls.WebParts; using System.Web.UI.HtmlControls; using System.IO; public partial class upfile_upfile : System.Web.UI.Page { protected void Page_Load(object sender, EventArgs e) { } protected void Button1_Click(object sender, EventArgs e) { if (FileUpload1.HasFile) { string fileContentType = FileUpload1.PostedFile.ContentType; if (fileContentType == "image/bmp" || fileContentType == "image/gif" || fileContentType == "image/pjpeg") { string name = FileUpload1.PostedFile.FileName; // 客户端文件路径 FileInfo file = new FileInfo(name); string fileName = ; // 文件名称 string fileName_s = "s_" + ; // 缩略图文件名称 string fileName_sy = "sy_" + ; // 水印图文件名称(文字) string fileName_syp = "syp_" + ; // 水印图文件名称(图片) string webFilePath = Server.MapPath("file/" + fileName); // 服务器端文件路径 string webFilePath_s = Server.MapPath("file/" + fileName_s); // 服务器端缩略图路径 string webFilePath_sy =
//以jpg格式保存缩略图 bitmap.Save(thumbnailPath, System.Drawing.Imaging.ImageFormat.Jpeg); } catch (System.Exception e) { throw e; } finally { originalImage.Dispose(); bitmap.Dispose(); g.Dispose(); } } /// <summary> /// 在图片上增加文字水印 /// </summary> /// <param name="Path">原服务器图片路径</param> /// <param name="Path_sy">生成的带文字水印的图片路径</param> protected void AddShuiYinWord(string Path, string Path_sy) { string addText = "测试水印"; System.Drawing.Image image = System.Drawing.Image.FromFile(Path); System.Drawing.Graphics g = System.Drawing.Graphics.FromImage(image); g.DrawImage(image, 0, 0, image.Width, image.Height); System.Drawing.Font f = new System.Drawing.Font("Verdana", 16); System.Drawing.Brush b = new System.Drawing.SolidBrush(System.Drawing.Color.Blue); g.DrawString(addText, f, b, 15, 15); g.Dispose(); image.Save(Path_sy); image.Dispose(); } /**//// <summary>
Server.MapPath("file/" + fileName_sy); // 服务器端带水印图路 径(文字) string webFilePath_syp = Server.MapPath("file/" + fileName_syp); // 服务器端带水印图 路径(图片) string webFilePath_sypf = Server.MapPath("file/shuiyin.jpg"); // 服务器端水印图路径(图 片) if (!File.Exists(webFilePath)) { try { FileUpload1.SaveAs(webFilePath); // 使用 SaveAs 方法保存文件 AddShuiYinWord(webFilePath, webFilePath_sy); AddShuiYinPic(webFilePath, webFilePath_syp, webFilePath_sypf); MakeThumbnail(webFilePath, webFilePath_s, 130, 130, "Cut"); // 生成缩略图方法 Label1.Text = "提示:文件“" + fileName + "”成功上传,并生成“" + fileName_s + "”缩略图, 文件类型为:" + FileUpload1.PostedFile.ContentType + ",文件 大小为:" + FileUpload1.PostedFile.ContentLength + "B"; } catch (Exception ex) { Label1.Text = "提示:文件上传失败,失败原因:" + ex.Message; } } else { Label1.Text = "提示:文件已经存在,请重命名后上传"; } } else { Label1.Text = "提示:文件类型不符"; }