oracle 12c安装步骤说明
oracle12c安装、启动、卸载图文教程
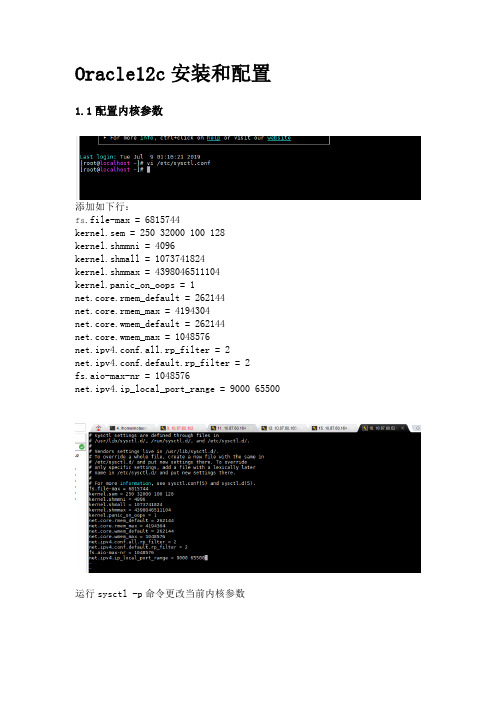
Oracle12c安装和配置1.1配置内核参数添加如下行:fs.file-max = 6815744kernel.sem = 250 32000 100 128kernel.shmmni = 4096kernel.shmall = 1073741824kernel.shmmax = 4398046511104kernel.panic_on_oops = 1net.core.rmem_default = 262144net.core.rmem_max = 4194304net.core.wmem_default = 262144net.core.wmem_max = 1048576net.ipv4.conf.all.rp_filter = 2net.ipv4.conf.default.rp_filter = 2fs.aio-max-nr = 1048576net.ipv4.ip_local_port_range = 9000 65500 运行sysctl -p命令更改当前内核参数1.2限制oracle用户资源使用vi /etc/security/limits.conf添加如下行:oracle soft nofile 1024oracle hard nofile 65536 oracle soft nproc 16384 oracle hard nproc 16384 oracle soft stack 10240 oracle hard stack 32768 oracle hard memlock 134217728 oracle soft memlock 1342177281.3安装依赖软件包yum install binutils -yyum install compat-libcap1 -yyum install compat-libstdc++-33 -yyum install compat-libstdc++-33.i686 -y yum install glibc -yyum install glibc.i686 -yyum install glibc-devel -yyum install glibc-devel.i686 -yyum install ksh -yyum install libaio -yyum install libaio.i686 -yyum install libaio-devel -yyum install libaio-devel.i686 -yyum install libX11 -yyum install libX11.i686 -yyum install libXau -yyum install libXau.i686 -yyum install libXi -yyum install libXi.i686 -yyum install libXtst -yyum install libXtst.i686 -yyum install libgcc -yyum install libgcc.i686 -yyum install libstdc++ -yyum install libstdc++.i686 -yyum install libstdc++-devel -yyum install libstdc++-devel.i686 -y yum install libxcb -yyum install libxcb.i686 -yyum install make -yyum install nfs-utils -yyum install net-tools -yyum install smartmontools -yyum install sysstat -yyum install unixODBC -yyum install unixODBC-devel -y1.4创建新组和新用户groupadd -g 54321 oinstallgroupadd -g 54322 dbagroupadd -g 54323 operuseradd -u 54321 -g oinstall -G dba,oper oracle2附加设置2.1为oracle用户设置密码2.2修改设置SELINUXvi /etc/selinux/config## 将`SELINUX`修改为permissiveSELINUX=permissivesetenforce Permissive2.3确保禁用防火墙systemctl stop firewalldsystemctl disable firewalld2.4创建Oracle安装目录mkdir -p /usr/local/products/oracle12cchown -R oracle:oinstall /usr/localchmod -R 775 /usr/local/2.5配置Oracle环境变量并验证切换到新添加的oracle用户名下,在oracle用户下配置环境变量su oraclevi .bash_profileexport TMP=/tmpexport TMPDIR=$TMPexport ORACLE_HOSTNAME=DEV-ORACLE-12C-164export ORACLE_UNQNAME=orclexport ORACLE_BASE=/usr/local/productsexport ORACLE_HOME=$ORACLE_BASE/oracle12cexport ORACLE_SID=orclexport PATH=/usr/sbin:/usr/local/bin:$PATHexport PATH=$ORACLE_HOME/bin:$PATHexport LD_LIBRARY_PATH=$ORACLE_HOME/lib:/lib:/usr/lib export CLASSPATH=$ORACLE_HOME/jlib:$ORACLE_HOME/rdbms/jlib使配置立即生效source .bash_profileecho $ORACLE_HOME/usr/local/products/oracle12c3 Oracle安装3.1上传解压将下载的linuxx64_12201_database.zip上传到Linux系统/home/oracle目录下解压unzip linuxx64_12201_database.zip如果没有unzip要先安装yum install zip unzip3.2修改响应文件压缩包解压完成后得到名为database的文件夹,其中包含安装文件。
Oracle12cforLinux7.1安装文档

Oracle 12c for Linux 7.1安装手册2015年8月7日文档属性目录1.硬件要求31.1 存要求31.2 硬盘要求32.软件要求42.1 系统环境42.2 安装依赖软件包42.2.1安装软件42.2.2安装方法42.2.3配置本地YUM52.3 系统配置52.3.1创建用户与用户组52.3.2创建安装目录62.3.3 DISABLE SELINUX62.3.4修改系统核参数62.3.5设置用户限制72.3.6配置环境变量73.安装数据库83.1 解压安装文件83.2 开始安装84.配置数据库监听195.测试数据库241.硬件要求1.1 存要求Oracle 12c对系统存要求:最小:1G推荐:跟服务器存一样大1.2 硬盘要求Oracle 12c要求至少有10G的磁盘空间用来安装数据库,请使用df –h检查磁盘空间大小推荐:/ 1T或更大。
/boot 500Mswap 存一样大/home 剩下空间95%。
留5%备用2.软件要求2.1 系统环境◆操作系统:Oracle Linux 7.1◆Oracle版本:Oracle 12c2.2 安装依赖软件包2.2.1安装软件安装依赖软件包原则是尽量多装,否则在安装数据库时会报丢失软件包:binutils-2.17.50.0.6compat-libstdc++-33-3.2.3gcc-4.1.2gcc-c++-4.1.2glibc-2.5-58glibc-devel-2.5-58kshlibaio-0.3.106libaio-devel-0.3.106libgcc-4.1.2libstdc++-4.1.2libstdc++-devel 4.1.2libXext-1.0.1libXtst-1.0.1libX11-1.0.3libXau-1.0.1libXi-1.0.1make-3.81sysstat-7.0.2compat-libcap1*compat-libstdc++libaio-devex*2.2.2安装方法可采用rpm安装或者yum安装,本文档采用yum本地安装,配置本地yum源请参考如下 yum –y install 软件包名,因为后面要有图形化界面,所以yum –y install x*,将相关的包都装上。
Centos7Oracle12C超详细安装
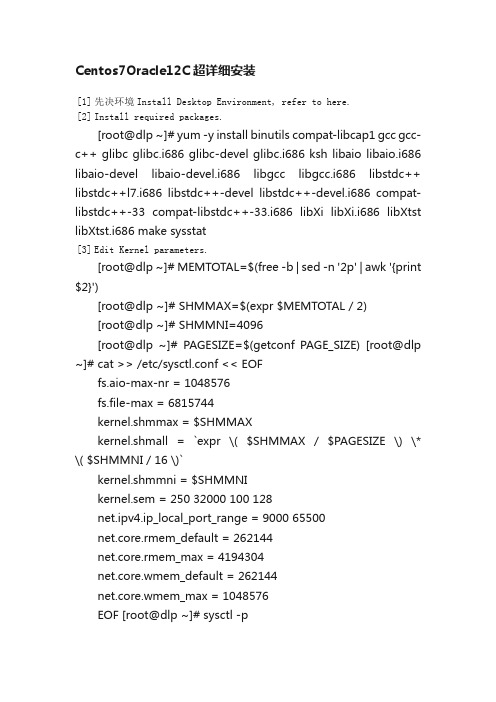
Centos7Oracle12C超详细安装[1] 先决环境Install Desktop Environment, refer to here.[2] Install required packages.[root@dlp ~]# yum -y install binutils compat-libcap1 gcc gcc-c++ glibc glibc.i686 glibc-devel glibc.i686 ksh libaio libaio.i686 libaio-devel libaio-devel.i686 libgcc libgcc.i686 libstdc++ libstdc++l7.i686 libstdc++-devel libstdc++-devel.i686 compat-libstdc++-33 compat-libstdc++-33.i686 libXi libXi.i686 libXtst libXtst.i686 make sysstat[3] Edit Kernel parameters.[root@dlp ~]# MEMTOTAL=$(free -b | sed -n '2p' | awk '{print $2}')[root@dlp ~]# SHMMAX=$(expr $MEMTOTAL / 2)[root@dlp ~]# SHMMNI=4096[root@dlp ~]# PAGESIZE=$(getconf PAGE_SIZE) [root@dlp ~]# cat >> /etc/sysctl.conf << EOFfs.aio-max-nr = 1048576fs.file-max = 6815744kernel.shmmax = $SHMMAXkernel.shmall = `expr \( $SHMMAX / $PAGESIZE \) \* \( $SHMMNI / 16 \)`kernel.shmmni = $SHMMNIkernel.sem = 250 32000 100 128net.ipv4.ip_local_port_range = 9000 65500net.core.rmem_default = 262144net.core.rmem_max = 4194304net.core.wmem_default = 262144net.core.wmem_max = 1048576EOF [root@dlp ~]# sysctl -pfs.aio-max-nr = 1048576 fs.file-max = 6815744 kernel.shmmax = 6274715648 kernel.shmall = 392169728 kernel.shmmni = 4096kernel.sem = 250 32000 100 128net.ipv4.ip_local_port_range = 9000 65500 net.core.rmem_default = 262144 net.core.rmem_max = 4194304 net.core.wmem_default = 262144 net.core.wmem_max = 1048576[4] Create user and groups for Oracle Database service.[root@dlp ~]# i=54321; for group in oinstall dba backupdba oper dgdba kmdba; dogroupadd -g $i $group; i=`expr $i + 1` done [root@dlp~]#useradd-u1200-goinstall-Gdba,oper,backupdba,dgdba,kmdba -d /home/oracle oracle[root@dlp ~]# passwd oracle Changing password for user oracle. New password: Retype new password:passwd: all authentication tokens updated successfully. [root@dlp ~]# mkdir -p /u01/app/oracle [root@dlp ~]# chown -R oracle:oinstall /u01/app [root@dlp ~]# chmod -R 775 /u01[root@dlp ~]# vi /etc/pam.d/login # near line 14: add1 2 session required pam_selinux.so open session required pam_namespace.so1 s ession required pam_limits.so1 2 3 session optional pam_keyinit.so force revoke session include system-auth -session optional pam_ck_connector.so[root@dlp ~]# vi /etc/security/limits.conf # add to the end1 2 3 4 5 6 oracle softnproc 2047 oracle hard nproc 16384 oracle soft nofile 1024 oracle hard nofile 65536 oracle soft stack 10240 oraclehardstack 32768[5]图形化安装Oracle 12C Login with the user "oracle" and set environment variables.dlp login: oracle Password:[oracle@dlp ~]$ vi ~/.bash_profile # add to the end umask 022export ORACLE_BASE=/u01/app/oracle # create a temporary directory for installation[oracle@dlp ~]$ mkdir tmp[1]Login and work with oracle admin user which you create in pre-requirements settings.[2] Download Oracle Databse 12c for Linux and upload on your server. ?/technology/software/products/database/index.html [3] After uploading Oracle files, move to a tmp directory and run an Installer like follows.[oracle@dlp ~]$ cd tmp [oracle@dlp tmp]$ unzip linuxamd64_12102_database_1of2.zip [oracle@dlptmp]$unziplinuxamd64_12102_database_2of2.zip[oracle@dlp tmp]$ ./database/runInstaller[4] Oracle Installer starts like follows. First, Set your email address and password for receiving some infomation from Oracle likesecurity issues and so on.[5] On this example, Select "Install database software only".[6] On this example, Select "Single Instance Database ***".[7] Select your language.[8] Select which edition you install.[9]Specify the base directory and files for Oracle. On this example, keep default and proceed to next.[10]Specify the installed directory. On this example, keep default and proceed to next.[11]Specify the priviledged group. On this example, keep default and proceed to next.[12] Pre-requirements are checked. If some settings are not configuredfor recomendations, notification is displayed likefollows.Confirm them again.[13]The summary is shown for configuration. Click "Install" if it's OK all.[14] Installation starts.[15]Following screen is shown, then open a terminal and execute follwong commands with the root user.[root@dlp ~]# /u01/app/oraInventory/orainstRoot.sh1 2 Changing permissions of /u01/app/oraInventory. Adding read,write permissions for group.3 4 5 6 7Removing read,write,execute permissions for world. Changing groupname of /u01/app/oraInventory to oinstall. The execution of the script is complete. [root@dlp ~]# [root@dlp~]#/u01/app/oracle/product/12.1.0/dbhome_1/root.sh12345Performing root user operation. The following environment variables are set as: ORACLE_OWNER= oracle ORACLE_HOME= /u01/app/oracle/product/12.1.0/dbhome_1 Enter the full pathname of the local bin directory: [/usr/local/bin]: # Enter12 3 4 5 6 7 8 9 10Copying dbhome to /usr/local/bin ... Copying oraenv to /usr/local/bin ... Copying coraenv to /usr/local/bin ... Creating /etc/oratab file...Entries will be added to the /etc/oratab file as needed by Database Configuration Assistant when a database is created Finished running generic part of root script.Now product-specific root actions will be performed.[16] Installation completed. Click "Close" button.[17] Set Environment variables for Oracle user.[oracle@dlp ~]$ vi ~/.bash_profile # add to the end exportORACLE_HOME=/u01/app/oracle/product/12.1.0/dbhome_1exportPATH=$PATH:$ORACLE_HOME/bin[oracle@dlp~]$ source ~/.bash_profile[oracle@dlp ~]$ rm -rf tmp创建监听Create Oracle Net Listener that is the network service onOracle.[1]Login with the oracle admin user and input a command "netca" like follows.[oracle@dlp ~]$ netca[2] Check a box "Listener Configuration" and go next.[3] Go next.[4] Set Listner's name. Input any one you like.[5] This example goes next with keeping default "TCP".[6] Set a port. This example goes next with keeping default.[7]If you'd like to create more Listeners, Answer "Yes". This example selects "No".[8] Configuration completed.[9]After creating Listener, tnslsnr listens on the port you configured like follows.[oracle@dlp ~]$ ss -napt123456789StateRecv-QSend-QLocalAddress:Port Peer Address:Port LISTEN 0 128 *:22 *:* LISTEN 0 128 127.0.0.1:631 *:* LISTEN 0 100 127.0.0.1:25 *:* ESTAB 0 52 10.0.0.30:22 10.0.0.5:50113 LISTEN 0 128 :::1521 :::* users:(("tnslsnr",3988,9)) LISTEN 0 128 :::22 :::* LISTEN 0 128 ::1:631 :::*LISTEN 0 100 ::1:25 :::* [oracle@dlp ~]$ tnsping localhost 12TNS Ping Utility for Linux: Version 12.1.0.2.0 - Productionon 04-JUL-2015 01:03:0734567891 0 Copyright (c) 1997, 2014, Oracle. All rights reserved. Used parameter files:Used HOSTNAME adapter to resolve the alias Attempting to contact(DESCRIPTION=(CONNECT_DATA=(SERVICE_NAME=))(ADD RESS=(PROTOCOL=TCP)(HOST=127.0.0.1)(PORT=1521)))OK (0 msec)创建数据库 Create a Database.[1] Login with the oracle admin user and input acommand "dbca" like follows.[oracle@dlp ~]$ dbc[2] Select "Create Database" and go next.[3] On this example, select "Advanced Mode" and go next.[4] This example selects "General Purpose ***" and go next.[5]Set Grobal Database name and SID like follows. Input any one you like.[6] This example goes next with keeping default.[7] Set passwords. Please set a password for a user for security.[8] Configure Listener. On this example, keep default and go next.[9]Configure Storage settings. On this example, keep default and go next.[10]Configure sample schema and scripts. If you'd like to add them, Set them.[11] Configure memory settings. After setting, go to next tab.[12] Specify max processes.[13] Set Character setting.[14] Select a connection mode. If your server does not have many clients, Select Dedicated server mode. If your server has manyclients, Select Shared server mode.[15] Go next.[16] Configuration completed. Click "Finish" button to finish.[17] Database creation starts.[18] After completing to create a database, Click "Close" to finish.[19] Add Database SID to the environment variables.[oracle@dlp ~]$ vi /etc/oratab # change like followsdlp:/u01/app/oracle/product/12.1.0/dbhome_1: Y [oracle@dlp ~]$ vi ~/.bash_profile # add to the endexport ORACLE_SID=dlpTo access to the Enterprise Manager, it's possible to manage Database on Web GUI.[1] After creating database, database service is running and it'spossible to access to Enterprise Manager, too. Access to the URL which was displayed when database creation finished, then Login form is shown and it's possible to login with a database user.[2] Just logined. It's possible to manage Database on here.Create Systemd file for Oracle Database services.[1] Login as root user and create Systemd files.[root@dlp ~]# vi /etc/sysconfig/dlp.oracledb # create new : define environment variablesORACLE_BASE=/u01/app/oracleORACLE_HOME=/u01/app/oracle/product/12.1.0/dbhome_1ORACLE_SID=dlp # configure listener service[root@dlp~]#vi/usr/lib/systemd/system/*******************#thisis an example, modify for free12 3 4 5 6 7 8 9 10 11 12 13[Unit]Description=oracle net listener After=network.target [Service] Type=forkingEnvironmentFile=/etc/sysconfig/dlp.oracledbExecStart=/u01/app/oracle/product/12.1.0/dbhome_1/bin/lsnrctl start ExecStop=/u01/app/oracle/product/12.1.0/dbhome_1/bin/lsnrctl stop User=oracle [Install] WantedBy=multi-user.target # configure database service[root@dlp~]#vi/usr/lib/systemd/system/********************#this is an example, modify for free1 2 3 4 5 6 7 8 9 10 11 12 13 [Unit]Description=oracle net listenerAfter=network.target lsnrctl.service [Service] Type=forkingEnvironmentFile=/etc/sysconfig/dlp.oracledbExecStart=/u01/app/oracle/product/12.1.0/dbhome_1/bin/dbstart /u01/app/oracle/product/12.1.0/dbhome_1ExecStop=/u01/app/oracle/product/12.1.0/dbhome_1/bin/dbshut /u01/app/oracle/product/12.1.0/dbhome_1 User=oracle [Install] WantedBy=multi-user.target[root@dlp ~]# systemctl daemon-reload[root@dlp ~]# systemctl enable dlp@lsnrctl dlp@oracledb。
Oracle12c在Win10上的安装配置实践

Oracle12c在Win10上的安装配置实践1、环境操作系统:Win10专业版(64位)数据库:Oracle 12c Release 2(Version 12.2.0.1.0,64位)2、下载Oracle12c3、安装3.1、右键以管理员⾝份运⾏setup.exe3.2、配置安全更新在安装界⾯⾥,取消勾选“我希望通过My Oracle Support接收安全更新”,点击下⼀步。
提⽰出现尚未提供电⼦邮件地址,选择是。
3.3、安装选项选择“创建和配置数据库”(默认),点击下⼀步。
3.4、系统类选择“桌⾯类”(默认),如果是安装到服务器上,请选择“服务器类”,点击下⼀步。
3.5、Oracle主⽬录⽤户使⽤虚拟账户:⽤于 Oracle 数据库单实例安装的 Oracle 主⽬录⽤户。
使⽤现有windows⽤户:如果选择该项,则需要指定没有管理权限的⽤户。
创建新Windows⽤户:创建⼀个新⽤户,输⼊⽤户名和密码,这个新建的⽤户没有Windows登录权限。
使⽤Windows内置账户:微软在开Windows时预先为⽤户设置的能够登录系统的账户。
此处本⼈选择虚拟账户,也是oracle的官⽅建议之⼀。
注意:如果选择第⼆项,创建的⽤户名和已有的不能发⽣冲突,否则后⾯的安装会报错!3.6、典型安装设置oracle安装位置,字符集选择AL32UTF8或者ZHS16GBK,设置密码,如果密码过于简单会报警告,忽略即可,点击下⼀步。
注意:字符集AL32UTF8,sqlplus会存在乱码问题,需要配置TNS环境变量。
本⽂后⾯有字符集如何更改相关内容。
图省事的话建议此处选择ZHS16GBK字符集。
3.7、先决条件检查3.8、概要3.93.104、测试Oracle是否安装成功两种⽅式4.1、SQL Plus4.2、em5、相关问题5.1、PLSQL Developer⽆法连接64位Oracle数据库5.1.1、PLSQL数据库选项为空如图所⽰:原因在于:PLSQL不可以直接连接64位Oracle数据库,只能连接32位的。
oracle12c安装教程linux

oracle12c安装教程linux一、安装环境准备1、操作系统:Oracle 12c 支持的操作系统:(1)Linux x86-64 (Red Hat Enterprise Linux 5、6、7、Oracle Linux 5、6、7、Suse Linux Enterprise Server 11 SP2)(2)Solaris x86-64 (Solaris 11.2)(3)AIX 7.12、硬件环境:(1)CPU:双核或更多(2)内存:2GB以上(3)硬盘:至少有4GB的空闲空间二、安装步骤1、下载安装文件从官网下载Oracle 12c的安装文件,本文以linux x86-64为例,安装文件名为linuxx64_12201_database.zip。
2、解压安装文件将下载的安装文件解压到指定的安装目录,本文以/opt/oracle/product/12.2/dbhome_1为例,解压后的文件如下:[oracle@localhost ~]$ ls -l /opt/oracle/product/12.2/dbhome_1total 20drwxr-xr-x 4 oracle oinstall 4096 Apr 24 17:43 cdrom-rwxr-xr-x 1 oracle oinstall 1219 Apr 24 17:43 .ouidrwxr-xr-x 2 oracle oinstall 4096 Apr 24 17:43 installdrwxr-xr-x 2 oracle oinstall 4096 Apr 24 17:43 response-rwxr-xr-x 1 oracle oinstall 735 Apr 24 17:43 runInstaller3、添加用户为了安装Oracle 12c,需要添加一个用户,本文以oracle为例:[oracle@localhost ~]$ groupadd oinstall[oracle@localhost ~]$ groupadd dba[oracle@localhost ~]$ useradd -g oinstall -G dba oracle[oracle@localhost ~]$ passwd oracle4、设置环境变量为了方便使用,需要设置环境变量,本文以oracle为例:[oracle@localhost ~]$ vi .bash_profile# Oracle Settingsexport ORACLE_HOME=/opt/oracle/product/12.2/dbhome_1 export ORACLE_SID=orclexport ORACLE_BASE=/opt/oracleexport ORACLE_TERM=xtermexport PATH=$ORACLE_HOME/bin:$PATHexport LD_LIBRARY_PATH=$ORACLE_HOME/lib:/lib:/usr/lib exportCLASSPATH=$ORACLE_HOME/jlib:$ORACLE_HOME/rdbms /jlib5、安装Oracle 12c使用root用户登录,进入安装目录,执行安装程序:[oracle@localhost ~]$ su - root[root@localhost ~]。
linux安装Oracle 12C
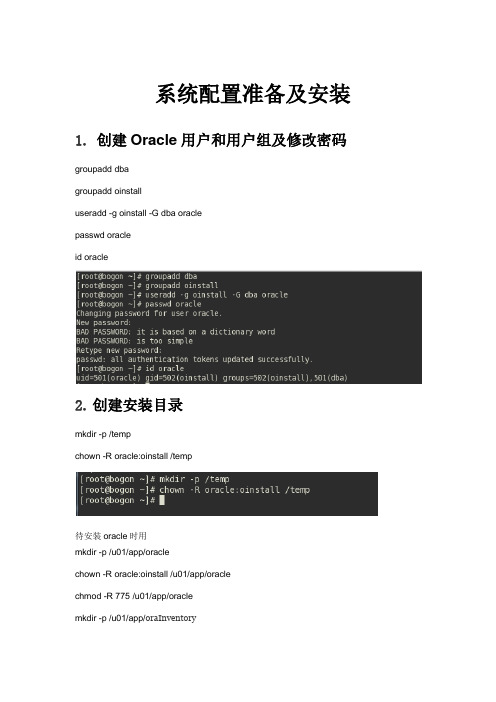
系统配置准备及安装1.创建Oracle用户和用户组及修改密码groupadd dbagroupadd oinstalluseradd -g oinstall -G dba oraclepasswd oracleid oracle2.创建安装目录mkdir -p /tempchown -R oracle:oinstall /temp待安装oracle时用mkdir -p /u01/app/oraclechown -R oracle:oinstall /u01/app/oraclechmod -R 775 /u01/app/oraclemkdir -p /u01/app/oraInventorychown -R oracle:oinstall /u01/app/oraInventorychmod -R 775 /u01/app/oraInventory3.把RPM和oracle包拷入到temp文件夹下4.安装RPM包:按此顺序安装;rpm -ivh为安装rpm文件命令,后面的是包名。
rpm -ivh zlib-1.2.3-27.el6.x86_64.rpmrpm -ivh zlib-devel-1.2.3-27.el6.x86_64.rpmrpm -ivh binutils-2.20.51.0.2-5.28.el6.x86_64.rpmrpm -ivh binutils-devel-2.20.51.0.2-5.28.el6.x86_64.rpmrpm -ivh compat-libcap1-1.10-1.x86_64.rpmrpm -ivh compat-libstdc++-33-3.2.3-69.el6.x86_64.rpmrpm -ivh elfutils-libelf-0.152-1.el6.x86_64.rpmrpm -ivh elfutils-libelf-devel-0.152-1.el6.x86_64.rpmrpm -ivh glibc-2.12-1.47.el6.x86_64.rpmrpm -ivh glibc-common-2.12-1.47.el6.x86_64.rpmrpm -ivh ksh-20100621-12.el6.x86_64.rpmrpm -ivh libaio-0.3.107-10.el6.x86_64.rpmrpm -ivh libaio-devel-0.3.107-10.el6.x86_64.rpmrpm -ivh libgcc-4.4.5-6.el6.x86_64.rpmrpm -ivh libgomp-4.4.6-3.el6.x86_64.rpmrpm -ivh libgxim-0.3.3-3.1.el6.x86_64.rpmrpm -ivh libmpcdec-1.2.6-6.1.el6.x86_64.rpmrpm -ivh libstdc++-4.4.6-3.el6.x86_64.rpmrpm -ivh libstdc++-devel-4.4.6-3.el6.x86_64.rpmrpm -ivh make-3.81-19.el6.x86_64.rpmrpm -ivh sysstat-9.0.4-18.el6.x86_64.rpmrpm -ivh unixODBC-2.2.14-11.el6.x86_64.rpmrpm -ivh unixODBC-devel-2.2.14-11.el6.x86_64.rpm rpm -ivh kernel-headers-2.6.32-220.el6.x86_64.rpm rpm -ivh glibc-headers-2.12-1.47.el6.x86_64.rpmrpm -ivh glibc-devel-2.12-1.47.el6.x86_64.rpmrpm -ivh ppl-0.10.2-11.el6.x86_64.rpmrpm -ivh cloog-ppl-0.15.7-1.2.el6.x86_64.rpmrpm -ivh mpfr-2.4.1-6.el6.x86_64.rpmrpm -ivh cpp-4.4.6-3.el6.x86_64.rpmrpm -ivh gcc-4.4.6-3.el6.x86_64.rpmrpm -ivh gcc-c++-4.4.6-3.el6.x86_64.rpm5.设置用户限制改内核参考vi /etc/sysctl.conf,添加如下内容fs.aio-max-nr = 1048576fs.file-max = 6815744kernel.shmall = 2097152kernel.shmmax = 536870912kernel.shmmni = 4096kernel.sem = 250 32000 100 128net.ipv4.ip_local_port_range = 9000 65500net.core.rmem_default = 262144net.core.rmem_max = 4194304net.core.wmem_default = 262144net.core.wmem_max = 1048586参数生效命令: /sbin/sysctl -p4:修改用户限制:vi /etc/security/limits.conf 添加如下信息oracle soft nproc 2047oracle hard nproc 16384oracle soft nofile 1024oracle soft stack 10240oracle hard stack 102406.解压安装镜像文件切换到oracle用户:su - oracle解压oracle文件:unzip是解压命令解压之后到解压文件夹下找到runInstaller运行 ./runIstaller 到界面安装7.界面安装密码设置:随自己,如果不符合oracle的密码要求下一步时提示点击Yes就可以了运行这两个sh文件,运行后点击OK完成安装8.配置环境变量编辑修改主目录下vi .bash_profileexport ORACLE_HOME=/u01/app/oracle/product/12.1.0/dbhome_1 export ORACLE_SID=orclexport PATH=$ORACLE_HOME/bin:$PATH使配置生效source .bash_profile修改如下:重启防火墙等服务,/etc/init.d/iptables restart10.修改配置文件(为了方便外部plsql访问数据库)把两个文件里边的host =localhost 改为host = ip地址*启动监听:lsnrctl start 查看监听:lsnrctl status 停止监听:lsnrctl stop 12.完成进入登录界面修改orcle配置文件CBD容器:orcl,PDB容器:pdborclPDBORCL =(DESCRIPTION =(ADDRESS = (PROTOCOL = TCP)(HOST = 192.168.1.157)(PORT = 1521)) (CONNECT_DATA =(SERVER = DEDICATED)(SERVICE_NAME = PDBORCL)))ORCL =(DESCRIPTION =(ADDRESS = (PROTOCOL = TCP)(HOST = 192.168.1.157)(PORT = 1521)) (CONNECT_DATA =(SERVER = DEDICATED)(SERVICE_NAME = ORCL)))。
Linux下安装Oracle12C详解

Linux下安装Oracle12C详解Linux下安装Oracle12C详解本例操作系统版本:CentOS 7.8、数据库版本:Oracle 12c(12.201)安装步骤如下分解:主机信息hostname: ol7-122.localdomainhosts: 10.0.0.10 ol7-122.localdomain ol7-1221.关闭防⽕墙,禁⽌防⽕墙开机⾃启# 关闭防⽕墙systemctl stop firewalld.service# 禁⽌防⽕墙开机启动systemctl disable firewalld.service# 查看防⽕墙状态systemctl status firewalld.service2.关闭selinux# 编辑⽂件vi /etc/selinux/config# 修改内容SELINUX=disabled3.yum安装必要安装包使⽤ yum 批量安装依赖包,若执⾏⼀遍失败则继续执⾏第⼆遍(多次执⾏不会出现其他问题)yum install binutils -yyum install compat-libcap1 -yyum install compat-libstdc++-33 -yyum install compat-libstdc++-33.i686 -yyum install glibc -yyum install glibc.i686 -yyum install glibc-devel -yyum install glibc-devel.i686 -yyum install ksh -yyum install libaio -yyum install libaio.i686 -yyum install libaio-devel -yyum install libaio-devel.i686 -yyum install libX11 -yyum install libX11.i686 -yyum install libXau -yyum install libXau.i686 -yyum install libXi -yyum install libXi.i686 -yyum install libXtst -yyum install libXtst.i686 -yyum install libgcc -yyum install libgcc.i686 -yyum install libstdc++ -yyum install libstdc++.i686 -yyum install libstdc++-devel -yyum install libstdc++-devel.i686 -yyum install libxcb -yyum install libxcb.i686 -yyum install make -yyum install nfs-utils -yyum install net-tools -yyum install smartmontools -yyum install sysstat -yyum install unixODBC -yyum install unixODBC-devel -y检查是否安装成功(31个安装包)rpm -q binutils compat-libcap1 compat-libstdc++-33gcc gcc-c++ glibc glibc-devel ksh libaio libaio-devel libgcc libstdc++ libstdc++-devel libXi libXtst make sysstat unixODBC unixODBC-devel4.创建 swap详见⽂章:5.创建 oracle 分区(可选)如果你操作系统原有分区都合适,这步可以忽略# 查看硬盘及分区信息(启动Disk开头的就是硬盘,Device开头的就是分区)fdisk -l# 创建分区(/dev/sdb 是硬盘,是你需要创建分区的硬盘,创建分区后会⽣成 /dev/sdb1,如果本来有sdb1,则会出现sdb2)fdisk /dev/sdb# 格式化新创建的分区mkfs.xfs /dev/sdb1# 将分区添加到 /etc/fstab ⽂件中,使之开机⾃动挂载(编辑保存 fstab ⽂件后不会⽴即⽣效)vim /etc/fstab/dev/sdb1 /u01 xfs defaults 006.创建 oracle data ⽬录(同第5步可选)# 创建⽬录mkdir /u01# 重新加载⽂件 /etc/fstab 所有内容。
Win10安装oracle12c...

Windows 10 64bit上安装Oracle Database 12c,出现以下错误:
解决方法:
第一步:控制面板>所有控制面板项>管理工具>服务>SERVER 启动
第二步:控制面板>所有控制面板项>管理工具>计算机管理>系统工具>共享文件夹>共享右键单击“共享”>新建共享>
点击“下一步”>
单击“浏览”>
选择"本地磁盘(C:)">确定
单击“下一步”;
“共享名”输入"C$" >"下一步" ;
对权限进行相应的选择(选择第二项或第三项)。单击“完成”;
单击“完成”;
重新运行安装程序。OK!