英文思科linksysWRT系列无线路由器设置
Linksys WRT3200ACM MU-MIMO Gigabit Wi-Fi 路由器用户指南说明
User GuideWRT3200ACM MU-MIMOGigabit Wi-Fi RouterContentsProduct Overview (3)Front view (3)Back view (5)Avoid Overheating (7)Wall-Mounting Placement (7)Setting Up: Basics (10)Where to find more help (10)How to install your router (10)How to Use Linksys Smart Wi-Fi (13)How to connect to Linksys Smart Wi-Fi (13)Network Map (14)Guest Access (14)Parental Controls (15)Media Prioritization (15)Speed Test (16)External Storage (16)Connectivity (17)Troubleshooting (17)Wireless (18)Security (18)Troubleshooting (19)Your router was not successfully set up (19)Your Internet cable is not plugged in message (19)Cannot access your router message (20)After setup (22)Specifications (24)Linksys WRT3200ACM (24)Environmental (24)Product Overview Front viewFront panel(1) Power indicator—(White) The icon LED is solid white while the router is powered on. It will blink when the router goes through its self-diagnostic mode during every boot-up.(2) Internet Indicator—(White/Amber) The Internet LED is solid white when connected to the Internet. It blinks white while the router works to establish a connection. A solid amber LED indicates the connection is down due to configuration issues. Amber blinking indicates that the connection is down due to hardware issues.(3) 2.4 GHz Indicator—(White) The Wireless LED is solid white when one or more clients are connected to the 2.4 GHz network. If the LED is blinking white, the router is sending or receiving data over the 2.4 GHz network.(4) 5 GHz Indicator—(White) The Wireless LED is solid white when one or more clients are connected to the 5GHz network. If the LED is blinking white, the router is sending or receiving data over the 5 GHz network.(5) eSATA Indicator—(White) When off, the USB/eSATA port is off or a USB device is connected. The LED is solid white when an eSATA device is connected. A blinking white LED indicates activity through the eSATA port.(6) USB1 Indicator—(White) When off, the USB /eSATA port is off or an eSATA device is connected. The LED is solid white when a USB device is connected. A blinking white LED indicates activity on the port.(7) USB2 Primary Indicator—(White) When off, the USB 3.0 port is off. The LED is solid white when a USB device is connected. A blinking white indicates activity on the port.(8) USB2 Secondary Indicator—(White) When off, a USB 1.0 or USB 2.0 device is connected. A solid white LED indicates a USB 3.0 device is connected.(9) ETHERNET 1 through 4 (Primary)—(White) These numbered LEDs correspond with the numbered ports on the router’s back panel. If the white LED is solid, the router is connected to a device through that port. A flashing white LED indicates network activity over that port.(10) ETHERNET 1 through 4 (Secondary)—(White) If the white LED is off, the router is successfully connected to a device through that port at 10/100 Mbps. A solid white LED indicates that the router is successfully connected to a device at 1000 Mbps.(11) WPS Indicator—(White/Amber) The LED blinks slowly for up to two minutes during Wi-Fi Protected Setup. It will be solid white for five seconds to indicate a successful connection. The LED blinks amber if the Wi-Fi Protected Setup process fails. Make sure the client device supports Wi-Fi Protected Setup. Wait until the LED is off, and then try again. The router supports one session at a time.Back view(1) Adjustable antennas—This router ships with four adjustable external antennas that should be connected to the router before powering it on. To connect the antennas, twist the antenna connector clockwise onto the antenna port on the router.Note—For best performance, position the side antennas vertically as shown in the picture on the left.(2) Wi-Fi Protected Setup™ button—Press to configure wireless security on Wi-Fi Protected Setup-enabled network devices.(3) Ethernet ports—Connect Ethernet cables to these blue gigabit (10/100/1000) ports, and to wired devices on your network.Note—For best performance, use CAT5e or higher rated cables on the Ethernet ports.(4) Internet port—Connect an Ethernet cable to this yellow gigabit (10/100/1000) port, and to a broadband Internet cable/DSL or fiber modem.Note—For best performance, use CAT5e or higher rated cables on the Internet port.(5) USB 3.0 port—Connect and share a USB drive on your network or on the Internet.(6) USB 2.0/eSATA combo port—Connect and share a USB or eSATA drive on your network or on the Internet. You can also connect a USB printer and share it across your network.(7) Reset button—Press and hold for 10 seconds (until the power LED starts flashing) to reset the router to factory settings. You can also restore the factory settings using Linksys Smart Wi-Fi on the Internet or mobile app.(8) Power port—Connect the included AC power adapter.(9) Power button (EU models only)—Press to turn on the router.Avoid OverheatingWall-Mounting PlacementThe router has wall-mount slots on the bottom of each foot for flexibility in mounting the router on the wall. The distance between the slots on the short side is 104 mm. The distance between the slots on the longer side is 210 mm. Two screws are needed to mount the router.Note—Linksys is not responsible for damages incurred by unsecured wall-mounting hardware. Mounting Instructions1.Determine where you want to mount the router and which side you should use to mount it.Make sure that the wall you use is smooth, flat, dry, and sturdy. Make sure the location is within reach of an electrical outlet.2.Before drilling holes, choose the template (short side or long side) that fits yourinstallation. Drill the holes using the correct template.3.Insert a screw into each hole and leave 4 mm of its head exposed.4.Position the router so the wall-mount slots line up with the two screws.5.Place the wall-mount slots over the screws and slide the router down until the screws fitsnugly into the wall-mount slots.Wall-Mounting TemplatePrint this page at 100% size.Place on the wall with desired router position and mark screw locations.Setting Up: BasicsWhere to find more helpIn addition to this user guide, you can find help at these locations:•/support/WRT3200ACM (documentation, downloads, FAQs, technical support, live chat, forums)•Linksys Smart Wi-Fi help (connect to Linksys Smart Wi-Fi, then click Help at the top of the screen)Note—Licenses and notices for third party software used in this product may be viewed on/en-us/license. Please contact /en-us/gplcodecenter for questions or GPL source code requests.How to install your router1.If replacing an existing router, disconnect that router first.2.Turn the antennas so they are positioned straight up and plug in your router to a powersource. European versions: press the power switch to | (on).3.Connect the Internet cable from your modem to the yellow Internet port on your router.Wait until the indicator light on your router is solid.4.Connect to the secure wireless name shown in the Quick Start Guide that came with yourrouter. (You can change the network name and password later.) If you need helpconnecting to the network refer to your device documentation on the provided CD.Note—You will not have Internet access until router setup is complete.5.Open a web browser to launch the Linksys Smart Wi-Fi Router setup instructions. If youdon’t see the instructions, type in the address bar.At the end of setup, follow the on-screen instructions to set up your Linksys Smart Wi-Fi account. Use Linksys Smart Wi-Fi to configure your router from any computer with an Internet connection. Manage your router’s settings:•Change your router’s name and password•Set up guest access•Configure parental controls•Connect devices to your network•Test your Internet connection speedNote—As part of Linksys Smart Wi-Fi account setup, you will be sent a verification e-mail. From your home network, click the link in the email to associate your router with the Linksys Smart Wi-Fi account.Tip—Print the next page, then record your router and account settings in the table as a reference. Store your notes in a safe place.2.4 GHz Network NameNetwork Password 5 GHz Network NameNetwork Password Router Password Guest Network NameGuest Network Password Linksys Smart Wi-Fi UsernameLinksys Smart Wi-Fi PasswordHow to Use Linksys Smart Wi-FiYou can configure your router from anywhere in the world by using Linksys Smart Wi-Fi, but you can also configure your router directly from your home network. Linksys Smart Wi-Fi may be available for your mobile device, as well. See your device’s app store for information.How to connect to Linksys Smart Wi-FiTo connect to Linksys Smart Wi-Fi:1.Open your computer’s web browser.2.Go to and log in to your account.If you can’t remember your password, click Forgot your password? and follow the on-screen instructions to recover it.Network MapLets you display and manage all network devices connected to your router. You can view devices on your main network and your guest network, or display information about each device.Guest AccessLets you configure and monitor a network that guests can use without accessing all of your network resources.Parental ControlsLets you block web sites and set Internet access times.Media PrioritizationLets you set which devices and applications have top priority for your network traffic.Speed TestLets you test your network’s Internet connection speed.External StorageLets you access an attached USB drive (not included) and set up file sharing, a media server, and FTP access.ConnectivityLets you configure basic and advanced network settings.TroubleshootingLets you diagnose problems with your router and check the status of the network.WirelessLets you configure your router’s wireless network. You can change the security mode, password, MAC filtering, and connect devices using Wi-Fi Protected Setup™.SecurityLets you configure your router’s wireless security. You can set up the firewall, VPN settings, and make custom settings for applications and games.TroubleshootingYou can find more help from our award-winning customer support at/support/WRT3200ACM.Your router was not successfully set upIf Linksys Smart Wi-Fi did not complete the setup, you can try the following:•Press and hold the Reset button on your router with a paperclip or pin until the LED starts blinking (about 10 seconds). Install the router again.•Temporarily disable your computer’s firewall (see the security software’s instructions for help). Install the router again.•If you have another computer, use that computer to install the router again. Your Internet cable is not plugged in messageIf you get a “Your Internet cable is not plugged in” message when trying to set up your router, follow these troubleshooting steps.•Make sure that an Ethernet or Internet cable (or a cable like the one supplied with your router) is securely connected to the yellow Internet port on the back of the router and to the appropriate port on your modem. This port on the modem is usually labeled Ethernet, but may be named Internet or WAN.•Make sure that your modem is connected to power and is turned on. If it has a power switch, make sure that it is set to the ON or l (as opposed to O) position.•If your Internet service is cable, verify that the cable modem’s CABLE port is connected to the coaxial cable provided by your ISP.•If your Internet service is DSL, make sure that the DSL phone line is connected to the modem’s DSL port.•If your computer was previously connected to your modem with a USB cable, disconnect the USB cable.•Install the router again.Cannot access your router messageTo access your router, you must be connected to your own network. If you currently have wireless Internet access, the problem may be that you have accidentally connected to a different wireless network.To fix the problem on Windows computers, do the following*:1.On your Windows desktop, click on the wireless icon in the system tray. A list of availablenetworks will appear.2.Click your own network name. Click Connect. In the example below, the computer wasconnected to another wireless network named wraith_5GHz. The wireless network name of the Linksys WRT3200ACM router, Damaged_Beez2.4 in this example, is shown selected.3.If you are prompted to enter a network key, type your password (Security Key) into theNetwork key and Confirm network key fields. Click Connect.4.Your computer connects to the network, and you should now be able to access the router. *Depending on your version of Windows, there could be some differences in wording or icons in these steps.To fix the problem on Mac computers, do the following:1.In the menu bar across the top of the screen, click the Wi-Fi icon. A list of wireless networkswill appear. Linksys Smart Wi-Fi has automatically assigned your network a name.2.In the example below, the computer was connected to another wireless network namedwraith_5GHz. The wireless network name of the Linksys WRT3200ACM router,Damaged_Beez2.4 in this example, is shown selected.3.Click the wireless network name of your Linksys WRT3200ACM router(Damaged_Beez2.4 in the example).4.Type your wireless network password (Security Key) into the Password field. Click OK. After setupThe Internet appears to be unavailableIf the Internet has difficulty communicating with your router, the problem may appear as a “Cannot find [Internet address]” message in your Web browser. If you know that the Internet address is correct, and if you’ve tried several valid Internet addresses with the same result, the message could mean that there’s a problem with your ISP or modem communicating with your router.Try the following:•Make sure that the network and power cables are securely connected.•Make sure that the power outlet that your router is connected to has power.•Reboot your router.•Contact your ISP and ask about outages in your area.The most common method of troubleshooting your router is to turn it off, then back on again. Your router can then reload its custom settings, and other devices (such as the modem) will be able to rediscover the router and communicate with it. This process is called rebooting.To reboot your router using the power cord, do the following:1.Disconnect the power cord from the router and the modem.2.Wait 10 seconds, and reconnect the power cord to the modem. Make sure it has power.3.Wait until the modem’s online indicator has stopped blinking (about two minutes). Reconnectthe power cord to the router.4.Wait until the power indicator stops blinking. Wait two minutes before trying to connect tothe Internet from a computer.To reboot your router using Linksys Smart Wi-Fi, do the following:1.Log in to Linksys Smart Wi-Fi. (See “How to connect to Linksys Smart Wi-Fi” on page 13.)2.Under Router Settings, click Troubleshooting.3.Click the Diagnostics tab.4.Under Reboot, click Reboot.5.Click Yes. The router will reboot. While the router is rebooting, all connected devices willlose their Internet connection, and will automatically reconnect when the router is ready again.Linksys Smart Wi-Fi does not open in your web browserThe latest versions of Google Chrome TM, Firefox®, Safari® (for Mac® and iPad®), Microsoft Edge, and Internet Explorer® version 8 and newer work with Linksys Smart Wi-Fi.SpecificationsLinksys WRT3200ACMModel Name Linksys MU-MIMO Gigabit Wi-Fi Router Description Dual-Band AC Router with Gigabit and 2×USB Model Number WRT3200ACMSwitch Port Speed 10/100/1000 Mbps (Gigabit Ethernet)Radio Frequency 2.4 GHz and 5 GHz# of Antennas 4 external adjustable antennasPorts Power, USB 3.0, Combo USB 2.0/eSATA,Internet, Ethernet (1-4), RP-SMA (4)Buttons Reset, Wi-Fi Protected Setup, PowerFront Panel Indicators Power, Internet, 2.4 GHz, 5 GHz, eSATA, USB1,USB2, Ethernet (1-4), Wi-Fi Protected Setup, UPnP SupportedSecurity Features WPA2, RADIUSSecurity Key Bits Up to 128-bit encryptionStorage File System Support FAT, NTFS, and HFS+Browser Support Latest versions of Google Chrome TM, Firefox®,Safari® (for Mac® and iPad®), Microsoft Edge,Internet Explorer® version 8 and newer EnvironmentalDimensions 9.68” x 7.64” x 2.05” (without antennas)(246 x 194 x 52 mm)Unit Weight 31 oz. (883 g)Power 12V, 3.0ACertifications FCC, IC, CE, Wi-Fi a/g/n/ac, Windows 7, Windows8, DLNAOperating Temperature 32 to 104°F (0 to 40°C)Storage Temperature -4 to 140°F (-20 to 60°C)Operating Humidity 10% to 80% relative humidity, non-condensing Storage Humidity 5% to 90% non-condensingNotes:For regulatory, warranty, and safety information, see the CD that came with your router or go to /support/WRT3200ACM.Specifications are subject to change without notice.Maximum performance derived from IEEE Standard 802.11 specifications. Actual performance can vary, including lower wireless network capacity, data throughput rate, range and coverage. Performance depends on many factors, conditions and variables, including distance from the access point, volume of network traffic, building materials and construction, operating system used, mix of wireless products used, interference and other adverse conditions.BELKIN, LINKSYS and many product names and logos are trademarks of the Belkin group of companies. Third-party trademarks mentioned are the property of their respective owners. Licenses and notices for third party software used in this product may be viewed here:/en-us/license. Please contact /en-us/gplcodecenter for questions or GPL source code requests.© 2016 Belkin International, Inc. and/or its affiliates. All rights reserved.LNKPG-00391 Rev. A00。
linksys 设置
Linksys设置Linksys是一家知名的网络设备制造商,提供了一系列的路由器和交换机产品。
在本文档中,我们将详细介绍如何设置Linksys路由器。
硬件准备在开始设置Linksys路由器之前,我们需要准备以下硬件:1.Linksys路由器2.电源适配器3.电脑或者智能手机4.网线确保所有硬件都已准备好,并按照以下步骤进行设置。
步骤一:连接路由器1.将Linksys路由器的电源适配器插入电源插座,并连接到路由器的电源端口。
2.使用一个网线连接路由器的WAN(广域网络)端口与您的宽带调制解调器(例如:光纤调制解调器,DSL调制解调器)相连。
3.使用另一根网线将您的电脑或智能手机的网络接口与路由器的任意一个LAN(局域网)端口连接。
步骤二:访问路由器设置页面1.打开您的浏览器,并在地址栏中输入路由器的默认网关IP地址。
通常情况下,Linksys路由器的默认网关地址是192.168.1.1。
如果不确定路由器的默认网关地址,可以在路由器的用户手册中查找。
2.按下回车键后,您将被重定向到Linksys路由器的登录页面。
步骤三:登录到路由器1.在登录页面中,输入您的用户名和密码。
默认情况下,Linksys路由器的用户名为空,密码为admin(注意区分大小写)。
如果您曾经更改过这些登录凭据,请输入相应的用户名和密码。
2.点击登录按钮,您将被登录到Linksys路由器的设置界面。
步骤四:配置无线网络1.在路由器设置界面中,找到Wireless(无线)选项,并点击进入无线设置页面。
2.在无线设置页面中,您可以更改无线网络的名称(也被称为SSID)和密码。
确保选择一个安全的密码,以防止未经授权的访问您的网络。
3.选择适当的加密协议,如WPA2-Personal,以确保您的无线网络的安全性。
4.保存您的无线网络设置,并将设置应用到路由器上。
步骤五:配置网络连接1.在路由器设置界面中,找到Internet(互联网)选项,并点击进入互联网设置页面。
LINKSYS无线路由简单配置(全程图解)
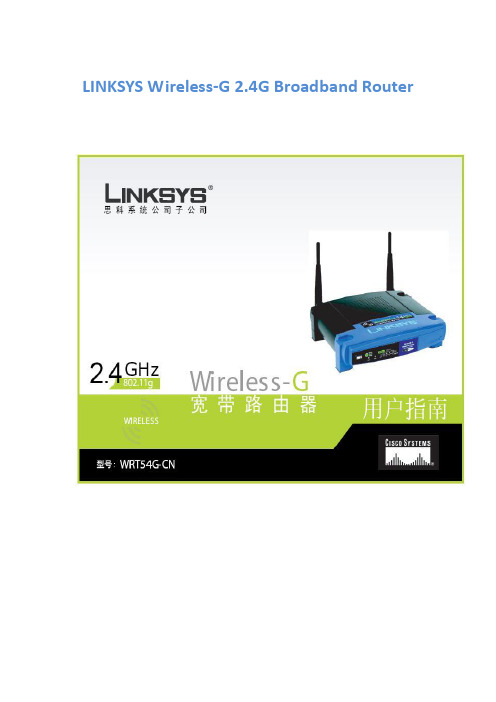
LINKSYS Wireless-G 2.4G Broadband Router
1.复位键:复位键(Reset)有两种方式可以对路由器的出厂默认设置进行复位。
可以按住复位键5 秒(如下图)
2.按下图连接网络硬件(下图是使用ADSL连接方式):
3.如图使用网线连接计算机:
4.将交流电源适配器连接到路由器的电源端口,将另一端连接到电源插座上。
只使用专门为路由器配备的电源适配器(如图)
5.如欲接入到另一台路由器的基于网页的工具,打开IE 或是网景浏览器,在“地址”栏输入另一台路由器的默认IP 地址192.168.1.1 。
之后按回车键。
认密码为admin)。
之后,单击“确定”键。
无线--基本无线设置
备注:修改完必须保存配置
8.无线加密
无线—无线安全
备注:修改完必须保存配置
9.配置保存后,使用无线你会发现又一个命名为BYD的无线信号。
思科路由器怎么设置Linksys无线路由器设置方法详细图解
思科路由器怎么设置Linksys⽆线路由器设置⽅法详细图解思科路由器⼤家也习惯叫为Linksys路由器,是国内⽤户使⽤很多的路由器品牌。
那么思科路由器怎么设置?很多初次使⽤思科路由器⽤户,难免对路由器线路连接安装与设置充满迷惑,下⾯⼩编为⼤家演⽰⼀下,刚买的Linksys⽆线路由器如何设置,下⾯是详细的图⽂教程,⼩⽩也可以轻松学会。
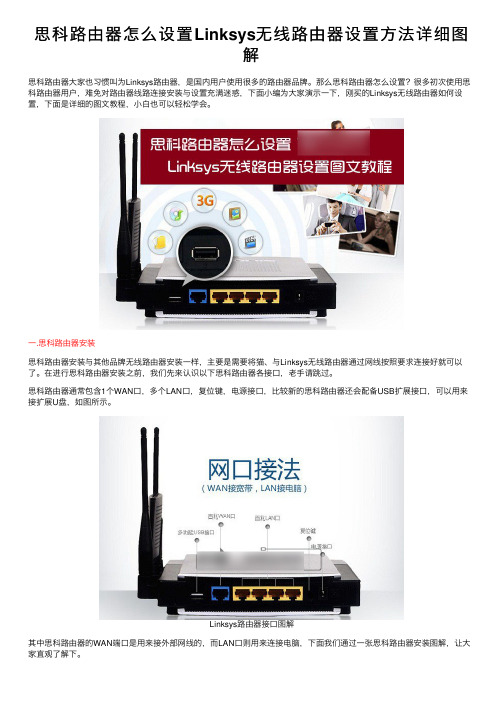
⼀.思科路由器安装思科路由器安装与其他品牌⽆线路由器安装⼀样,主要是需要将猫、与Linksys⽆线路由器通过⽹线按照要求连接好就可以了。
在进⾏思科路由器安装之前,我们先来认识以下思科路由器各接⼝,⽼⼿请跳过。
思科路由器通常包含1个WAN⼝,多个LAN⼝,复位键,电源接⼝,⽐较新的思科路由器还会配备USB扩展接⼝,可以⽤来接扩展U盘,如图所⽰。
Linksys路由器接⼝图解其中思科路由器的WAN端⼝是⽤来接外部⽹线的,⽽LAN⼝则⽤来连接电脑,下⾯我们通过⼀张思科路由器安装图解,让⼤家直观了解下。
思科路由器安装图解如图,如果是带有猫的ADSL拨号上⽹⽤户,外部⽹线先插⼊猫,然后另外接⼝⽤⽹线与思科路由器WAN⼝连接,LAN⼝⽤⽹线与电脑连接。
另外如果是光纤或者⼩区宽带,没有猫设备,则外部⽹线直接插⼊思科路由器的WAN⼝即可,其它相同。
⼆、Linksys⽆线路由器设置图⽂教程第⼀步:将思科路由器安装好后,开启各设备电源,打开电脑,之后在电脑中打开浏览器,然后输⼊思科路由器默认登陆地址192.168.1.1,输⼊完按Enter(回车)键打开,之后会弹出思科路由器登陆界⾯。
Linksys路由器登陆新Linksys⽆线路由器设默认登陆⽤户名和密码都是⼩写的admin,输⼊完后,点击底部的“确定”就可以进⼊思科⽆线路由器设置了。
第⼆步:进⼊Linksys⽆线路由器设置界⾯后,⾸先看到的是因特⽹基本设置界⾯,这⾥就可以直接对路由器设置了,在PPPOE设置界⾯下,输⼊⽹络商提供的上⽹账号和密码,完成后点击底部的“保存设置”,如下图所⽰。
linksys无线路由器如何设置上网linksys无线路由器上网设置图文教程
linksys无线路由器如何设置上网linksys无线路由器上网设置图文教程可能很朋友对linksys无线路由器如何设置上网还不是很了解,下面PINCAI了linksys无线路由器上网设置图文教程,希望能够帮助到大家。
一、Linksys路由器Linksys的出厂隐含设置,登录名和密码都是admin,Linksys的AP常见有WAP54G、LinksysWAP11,只有无线台功能没有ADSL拨号DHCP等功能。
二、无线路由器连线上网设置(1)作为无线路由用适用于一般家庭和只有一个无线路由的环境,接法是原来ADSL猫—无线路由接到WAN口—电脑首先,进入无线路由的管理页面s://192.168.1.1,无线路由自动拨号上网,在管理界面的WAN设定中设定ADSL拨号,这样就OK了;想改为手动拨号上网,将WAN设定连接PPPOE那里改为固定IP如192.168.1.2,最后在你的电脑上增加一个ADSL拨号连接。
(2)作为无线交换机用适用于一般公司或只有多个路由或在原有网络上扩展一个无线发射交换机的环境操作方法:1、用一根网线连接你的电脑到无线路由的LAN口然后进入路由器的WEB页面(默认为s://192.168.1.1)2、将原有网线接到LINKSYS无线交换机的LAN口。
3、DHCP功能可以禁用,以免跟原有网络上的DHCP冲突。
4、须要设定无线路由的SSID和路由器名称,那么你的路由器就基本正常运行了。
三、无线路由安全设定下面可以设定选择一种方法或两种方法一起设定1、通过安全密码访问设定上面在路由设定后,在手提电脑的无线连接管理里面设定使用WEP,然后输入KEY1就行了。
2、通过MAC地址过滤Linksys无线路由器跟一般路由器设置方法基本相同,大家可根据本文介绍具体操作即可。
下面是图文版:1、登录路由器。
地址:在IE地址栏内输入192.168.1.1用户名/密码:admin2、设置PPPOE拨号模式。
Linksys WRT54G2 无线G宽带路由器产品说明书
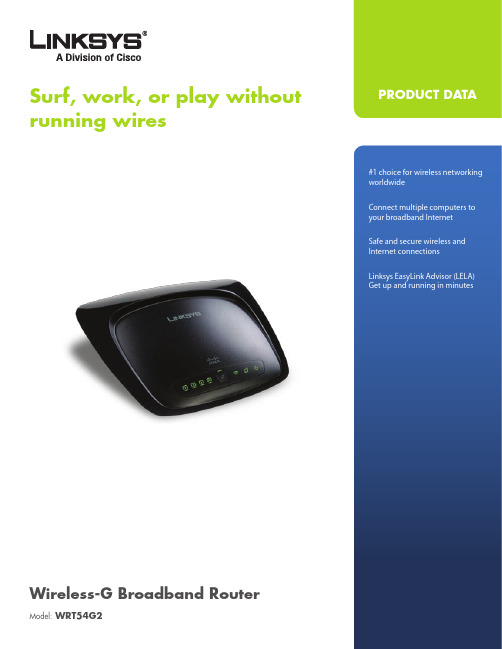
Surf, work, or play withoutrunning wiresGet up and running in minutesWireless-G Broadband RouterModel: WRT54G2The Linksys Wireless-G Broadband Router is really three devices in one box. First, there’s the Wireless Access Point, which lets you connect both screaming fast Wireless-G (802.11g at 54Mbps) and Wireless-B (802.11b at 11Mbps) devices to the network. There’s also a built-in 4-port full-duplex 10/100 Switch to connect your wired-Ethernet devices together. Connect four PCs directly, or attach more hubs and switches to create as big a network as you need. Finally, the Router function ties itall together and lets your whole network share a high-speed cable or DSL Internet connection.Once your computers are connected to the Router and the Internet, they can communicate with each other too, sharing resources and files. All your computers can print on a shared printer connected anywhere in the house. And your computers can share all kinds of files—music, digital pictures, and documents. Keep all your digital music on one computer, and listen to it anywhere in the house. Organize all of your family’s digital pictures in one place, to simplify finding the ones you want, and easing backup to CD-R. Utilize extra free space on one computer when another’s hard drive starts to fill up.The new Wi-Fi Protected Setup feature makes it easy to configure your wireless devices. Just push the button on the Router and on your other Wi-Fi Protected Setup-enabled wireless device to automatically create a WPA2 connection that protects your data and privacy with up to 256-bit industrial-strength encryption. The Router can serve as a DHCP Server, has a powerful SPI firewall to protect your PCs against intruders and most known Internet attacks, supports VPN pass-through, and can be configured to filter internal users’ access to the Internet. Advanced configuration is a snap with the web browser-based interface.With the Linksys Wireless-G Broadband Router at the center of your home or office network, you can share a high-speed Internet connection, files, printers, and multi-player games with flexibility, speed, security and simplicity!The maximum performance for wireless is derived from IEEE Standard 802.11 specifications. Actual performance can vary, including lower wireless network capacity, data throughput rate, range and coverage. Performance depends on many factors, conditions and variables, including distance from the access point, volume of network traffic, building materials and construction, operating system used, mix of wireless products used, interference and other adverse conditions.Check the product package and contents for specific features supported. Specifications are subject to change without notice. Linksys is a registered trademark or trademark of Cisco Systems, Inc. and/or its affiliates in the U.S. and certain other countries. Copyright © 2008 Cisco Systems, Inc. All rights reserved. Other brands and product names are trademarks orregistered trademarks of their respective holders.8013110NC-AI Model: WRT54G2Specifications Model WRT54G2Standards IEEE 802.3, IEEE 802.3u, IEEE 802.11g, IEEE 802.11b Ports Internet: One 10/100 RJ-45 Port LAN: Four 10/100 RJ-45 Switched Ports One Power Port Buttons One Reset Button One WPS Button LEDs Power, Wireless, LAN (1-4), Internet, Wi-Fi Protected Setup (WPS)Cabling Type CAT5Number of Antennas 2 Internal Antennas Detachable (y/n) No RF Power (EIRP) in dBm 18 dBm UPnP able/cert Yes Security Features Stateful Packet Inspection (SPI) Firewall, Internet Policy Security Key Bits Wi-Fi Protected Access™ 2 (WPA2), WEP, Wireless MAC Filtering Environmental Dimensions 7.99" x 1.38" x 6.3" (203 x 35 x 160 mm)Weight 9.88 oz (0.28 kg)Power External, 12V DC, 0.5A Certification FCC, UL, CE, Wi-Fi (802.11b, 802.11g), WPA2, WMM Operating Temp. 32 to 104°F (0 to 40°C)Storage Temp. -4 to 140°F (-20 to 60°C)Operating Humidity 10 to 85%, Noncondensing Storage Humidity 5 to 90%, Noncondensing Package Contents Wireless-G Broadband Router • Setup CD-ROM • User Guide on CD-ROM • Power Adapter • Network Cable • Minimum Requirements Internet Explorer 6.0 or Firefox 1.0 or higher for Web-based Configuration • CD-ROM Drive • Windows XP or Vista • Network Adapter or Wireless Network Adapter •。
思科LinksysWRT54GV454M无线路由器中文设置
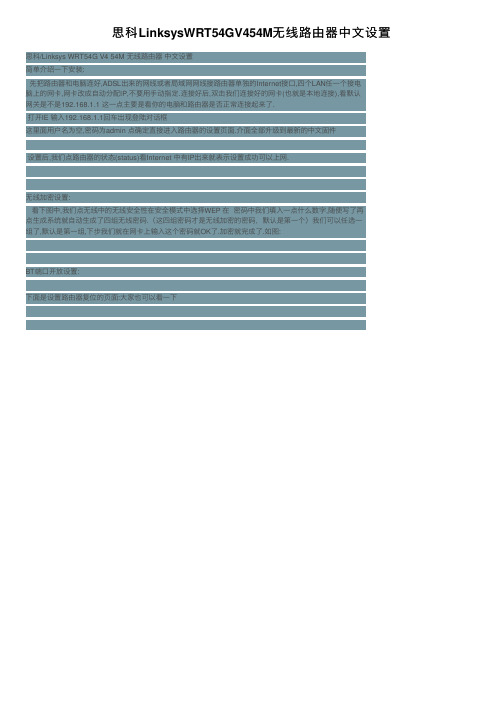
思科LinksysWRT54GV454M⽆线路由器中⽂设置
思科/Linksys WRT54G V4 54M ⽆线路由器中⽂设置
简单介绍⼀下安装:
先把路由器和电脑连好,ADSL出来的⽹线或者局域⽹⽹线接路由器单独的Internet接⼝,四个LAN任⼀个接电
脑上的⽹卡,⽹卡改成⾃动分配IP,不要⽤⼿动指定.连接好后,双击我们连接好的⽹卡(也就是本地连接),看默认
⽹关是不是192.168.1.1 这⼀点主要是看你的电脑和路由器是否正常连接起来了.
打开IE 输⼊192.168.1.1回车出现登陆对话框
这⾥⾯⽤户名为空,密码为admin 点确定直接进⼊路由器的设置页⾯.介⾯全部升级到最新的中⽂固件
设置后,我们点路由器的状态(status)看Internet 中有IP出来就表⽰设置成功可以上⽹.
⽆线加密设置:
看下图中,我们点⽆线中的⽆线安全性在安全模式中选择WEP 在密码中我们填⼊⼀点什么数字,随便写了再
点⽣成系统就⾃动⽣成了四组⽆线密码.(这四组密码才是⽆线加密的密码,默认是第⼀个)我们可以任选⼀
组了,默认是第⼀组,下步我们就在⽹卡上输⼊这个密码就OK了.加密就完成了.如图:
BT端⼝开放设置:
下⾯是设置路由器复位的页⾯:⼤家也可以看⼀下。
LINKSYS WRT54G-CN宽带路由器 说明书
版本与商标规格如有变化,恕不另行通知。
Linksys为思科系统有限公司与/或其在美国以及其它国家子公司的注册商标或商标。
思科系统有限公司保留所有版权。
其它的品牌以及产品名称为其各自持有者的商标或注册商标。
警告:本产品中含有包括铅在内的化学物质,据加利福尼亚州所了解,这些物质可能会引起癌症、生育缺陷或是其它的生殖疾病。
所以,处理过本产品之后要洗手。
怎样使用本手册本用户手册说明可以使与Wireless-G宽带路由器的组网更加容易。
在阅读本用户手册的时候,要注意以下方面内容:本校验标记意思是说有利害关系,在使用本Wireless-G路由器的时候要加以特别的注意。
本感叹号意思是警告,意味着可能对你的财产或Wireless-G路由器本身造成损害。
本问号意思是在使用本Wireless-G路由器的时候提醒你注意某些方面的事情。
除了这些符号以外,也有对技术术语的定义,其形式如下:词汇:定义。
同时,每一幅图(图表、屏幕截图或其他图象)都配有数字与描述,其形式如下:图0-1:样本图形描述对图的编号与描述在“图目录”一节中也有所表述。
WRT54G-CN_V3.1-UG-50211NC JL目录第一章:简介 1致辞 1本《用户手册》的内容 2第二章:规划你的无线网络 4 网络拓扑 4 特定与基础模式 4 网络结构 4 第三章:了解Wireless-G宽带路由器 6 后面板 6前面板7第四章:连接Wireless-G宽带路由器 8 概述8连接宽带调制解调器的硬件安装 8连接到另一台路由器的硬件安装 10第五章:安装Wireless-G宽带路由器 12 概述12使用安装向导 12 使用SECUREEASYSETUP来配置笔记本 29第六章:配置Wireless-G宽带路由器 32 概述32设置页面—基本设置 33 设置页面—DDNS 37 设置页面—MAC地址拷贝 38设置页面—高级路由 39 无线页面—基本无线设置 40无线页面—无线安全 41 无线页面—无线MAC过滤器 43无线页面—高级无线设置 44安全页面—防火墙 46 安全页面—VPN通过 46访问限制页面—互联网访问 47应用与游戏页面—端口范围转发 49应用与游戏页面—端口触发 50应用与游戏页面—DMZ 51应用与游戏页面—QOS(服务质量) 51网管页面—管理 53 网管页面—日志 53 网管页面—诊断 54 管理页面—出厂缺省配置 55网管页面—固件升级 55网管页面—配置管理 55状态页面—路由器 56 状态页面—本地网络 57状态页面—无线 58附录A:排除故障 59 常见问题与解决方案 59常见问题(FAQ) 67附录B:无线安全 74 无线网络面临安全威胁 74安全预防 74 附录C:固件升级 77附录D:Windows帮助 78附录E:为以太网适配器配置MAC地址以及IP地址 7998或ME说明 79WINDOWS2000或XP说明 79WINDOWS用于路由器的基于网页的工具 80附录F:术语表 81 附录G:规格88附录H:保修信息 90附录I:法规91附录J:联系信息 93图目录图3-1:路由器的后面板 6图3-2:路由器的前面板 7图4-1:进行互联网连接 8图4-2:连接网络设备 9图4-3:连接电源 9 图4-4:连接到另一台路由器图示 10图4-5:连接另一台路由器 10图4-6:连接网络设备 11图4-7:连接电源 11 图5-1:安装向导的欢迎界面—语言选择页面 12图5-2:安装向导的欢迎界面—开始向导页面 12图5-3:安装向导的许可协议界面 13图5-4:安装向导的从个人电脑断开调制解调器界面 13图5-5:安装向导的连接调制解调器到路由器上的界面 14图5-6:安装向导的连接网线到电脑上的界面 14图5-7:安装向导的连接网线到路由器上的界面 15图5-8:安装向导的给路由器上电的界面 15图5-9:安装向导的检查路由器状态界面 16图5-10:安装向导的配置网线或DHCP设置界面 16图5-11:安装向导的配置DSL(PPPoE)设置界面 17图5-12:安装向导的高级互联网设置-静态IP界面 17图5-13:安装向导的高级互联网设置-PPTP界面 18图5-14:安装向导的保持活动/根据要求进行连接(PPTP续)界面 18图5-15:安装向导的高级互联网设置-L2TP界面 19图5-16:安装向导的高级互联网设置-Tlstra界面 20图5-17:安装向导的设置路由器密码界面 21图5-18:安装向导的配置无线设置界面 21图5-19:安装向导的SecureEasySetup界面 22图5-20: SecureEasySetup标识 22图5-21:附加信息—硬件按钮 22图5-22:附加信息—软件按钮 22图5-23:安装向导的配置无线设置界面 23图5-24:安装向导的确认新设置界面 23图5-25:安装向导的安全冲浪界面 24图5-26:安装向导的恭喜界面 24图5-27:安装向导的配置无线设置界面 25图5-28:安装向导的无线设置界面 25图5-29:安装向导的无线安全—WPA-PSK界面 26图5-30:安装向导的无线安全-WEP(64比特)界面 27图5-31:安装向导的确定新设置界面 27图5-32:安装向导的诺顿界面 28图5-33:安装向导的恭喜界面 28图5-34:安装向导的欢迎-开始向导界面 29图5-35:SecureEasySetup欢迎界面 29图5-36:配置无线设置的第一个界面 30图5-37:配置无线设置的第二个界面 30图5-38:你的无线设置界面 31图6-1:密码界面 32 图6-2:设置页面—基本设置 33图6-3:DHCP连接类型 33图6-4:静态IP连接类型 33图6-5:PPPoE连接类型 34图6-6:PPTP连接类型 34图6-7:心跳信号连接类型 35图6-8:可选设置 35 图6-9:路由器IP 36 图6-10:网络地址服务器设置 36图6-11:时间设置 36 图6-12:设置页面--DDNS 37图6-13:设置页面—MAC地址拷贝 38图6-14:设置页面—高级路由(网关) 39图6-15:设置页面—高级路由(路由器) 39图6-16:设置页面—基本无线设置 40图6-17:无线页面—无线安全(WPA预共享密钥) 41图6-18:无线页面—无线安全(WPA RADIUS) 41图6-19:无线页面—无线安全(RADIUS) 42图6-20:无线页面—无线安全(WEP) 42图6-21:无线页面—无线MAC过滤器 43图6-22:MAC地址过滤器列表 43图6-23:无线页面—高级无线设置 44图6-24:安全页面—防火墙 46图6-25:安全页面—VPN通过 46图6-26:访问控制页面—互联网访问 47图6-27:互联网策略总结 47图6-28:电脑清单 47 图6-29:端口业务 48 图6-30:访问限制页面—入向业务 48图6-31:应用与游戏页面—端口范围转发 49图6-32:应用与游戏页面—端口触发 50图6-33:应用与游戏页面—DMZ 51图6-34:应用与游戏页面—QOS 51图6-35:网管页面—管理 53图6-36:网管页面—日志 53图6-37:网管页面—诊断 54图6-38:网管页面—PING测试 54图6-39:跟踪路径测试 54图6-40:网管页面—出厂缺省设置 55图6-41:网管页面—固件升级 55图6-42:网管页面—配置管理 55图6-43:状态页面—路由器 56图6-44:状态页面—本地网络 57图6-45:DHCP客户端表 57图6-46:状态页面—无线 58图C-1:升级固件 77 图E-1:IP配置界面 79 图E-2:MAC地址/适配器地 79图E-3:MAC地址/物理地址 79图E-4:MAC过滤 80 图E-5:MAC地址拷贝 80第一章:简介致辞谢谢你选用Linksys Wireless-G宽带路由器。
- 1、下载文档前请自行甄别文档内容的完整性,平台不提供额外的编辑、内容补充、找答案等附加服务。
- 2、"仅部分预览"的文档,不可在线预览部分如存在完整性等问题,可反馈申请退款(可完整预览的文档不适用该条件!)。
- 3、如文档侵犯您的权益,请联系客服反馈,我们会尽快为您处理(人工客服工作时间:9:00-18:30)。
进入的IP 为192.168.1.1 用户名为空,密码为admin,大家可以参照本店以下的详细说明设置.因一大部份买家对英文不是很了解.在这儿我作一个简单的说明希望大家都能到手就能按我下面的操作说明一次搞掂.本品有一键加密功能,在面板上一按就可以加密,因一键加密只针对LINKSYS 带一键加密的无线网卡,所以实用性不大。
进入时在IE 里面输入192.168.1.1 回车,在弹出来的对话框中要求输入用户各和密码:用户名空密码为 admin.
进入如下图设置页面.点Setup.在Basic setup中我们看下面ineernet connection Type连接类型号选我们上网的类型,ADSL 上网用户占多,请选PPPOE 在出来的用户名(uers name)和密码(password)中填入我们上网拨号用的ADSL 用户名和密码,点下面的保存(Save settings)设置就OK!
设置后,我们点路由器的状态(status)看Internet中有IP出来就表示设置成功可以上网.
以下设置是参考WRT54GS的,方法一样
无线加密设置:
看下图中,我们点wireless 中的wireless security 在security mode 选择WEP 在 passphrase 中我们填入一点什么数字,随便写了
再点Generate系统就自动生成了四组无线密码.我们可以任选一组了,默认是第一组,下步我们就在网卡上输入这个密码就OK了.加密就完成了.如图:
BT端口开放设置:
不少朋友离不开这东西,下载BT、EMULE、迅雷的时候,当下
载流量增大,下载需要设置端口,映射的端口自己做,不要偷懒,一般多线程软件上都可以查到相应的端口号,有的是两个有的是四个,注意TCP 还是UDP 还有相应下载的电脑上的这个网卡的IP不要搞错,手动开放端口的方法比打开UPNP 和开放DMZ主机都要好.本店主使用的是超级旋风下载,就以这个为例给大家说明一下设置:
首先打开软件点开具里面的设置找软件的端口,超级旋风有四个端口如下图:
再双击你要下载使用的网卡点支持找IP:
端口和IP 找出来后,我们打开路由器页面到如下位置:应用&游戏里面选第一个子菜单端口范围前转如下图的方法填对刚找出来的四个端口注意TCP还是UDP 一定不要搞错.IP 也填好打上勾就OK!
保存设置就行了.迅雷或新版BT软件会提示更改TCP/IP最大连接数为256或者更高,请不要修改得太大,本店没有做太多的尝试,结合其它买家的实际经验,改为100,路由器相对工作比较正常。
加密对无线有一定的影响,关闭无线加密方式,采用MAC地址绑定认证对使用无线路由器更为有利,也不怕别人破解,具体方法大家自己在网上搜一下.我们也不能讲太多
下面是设置路由器复位的页面:大家也可以看一下。