mysql--linux安装文档
mysql 5.6安装
1.1.1安装MySQL5.6文件下载:10.45.15.23 tnms/Tnms@2018/home/tnms/mysql-5.6.12-linux-glibc2.5-x86_64.tar --安装包/home/tnms/f --配置文件a) 准备工作创建mysql用户[root@centos /]# useradd -s /sbin/nologin -M mysql文件上传opt路径下解压文件[root@centos opt]# gunzip mysql-5.6.37-linux-glibc2.12-x86_64.tar.gz [root@centos opt]# tar -xvf mysql-5.6.37-linux-glibc2.12-x86_64.tar重命名为mysql[root@centos opt]# mv mysql-5.6.37-linux-glibc2.12-x86_64 mysql b) 文件配置f文件复制[root@centos opt]# cp /opt/mysql/support-files/f /etc/f •编辑/etc/f#二进制安装,默认配置文件在/etc/f[root@centos opt]# vi /etc/f清空f里面内容,将以下内容粘贴进去[client]port = 3306socket = /opt/mysql/mysql.sock[mysql]#这个配置段设置启动MySQL服务的条件;在这种情况下,no-auto-rehash确保这个服务启动得比较快。
no-auto-rehashport=3306default-character-set=utf8[mysqld]character-set-server = utf8user = mysqlport = 3306socket = /opt/mysql/mysql.sockbasedir = /opt/mysqldatadir = /opt/mysql/dataopen_files_limit = 10240server_id = 10back_log = 600#在MYSQL暂时停止响应新请求之前,短时间内的多少个请求可以被存在堆栈中。
linuxCentOS6.5yum安装mysql5.6
linuxCentOS6.5yum安装mysql5.6本⽂为⼤家分享了linux yum安装mysql5.6简单过程,供⼤家参考,具体内容如下1.新开的云服务器,需要检测系统是否⾃带安装mysql# yum list installed | grep mysql2.如果发现有系统⾃带mysql,果断这么⼲# yum -y remove mysql-libs.x86_643.随便在你存放⽂件的⽬录下执⾏,这⾥解释⼀下,由于这个mysql的yum源服务器在国外,所以下载速度会⽐较慢,还好mysql5.6只有79M⼤,⽽mysql5.7就有182M了,所以这是我不想安装mysql5.7的原因# wget /mysql-community-release-el6-5.noarch.rpm4.接着执⾏这句,解释⼀下,这个rpm还不是mysql的安装⽂件,只是两个yum源⽂件,执⾏后,在/etc/yum.repos.d/ 这个⽬录下多出mysql-community-source.repo和mysql-community.repo# rpm -ivh mysql-community-release-el6-5.noarch.rpm5.这个时候,可以⽤yum repolist mysql这个命令查看⼀下是否已经有mysql可安装⽂件#yum repolist all | grep mysql6.安装mysql 服务器命令(⼀路yes):# yum install mysql-community-server7.安装成功后# service mysqld start8.由于mysql刚刚安装完的时候,mysql的root⽤户的密码默认是空的,所以我们需要及时⽤mysql的root⽤户登录(第⼀次回车键,不⽤输⼊密码),并修改密码# mysql -u root# use mysql;# update user set password=PASSWORD("这⾥输⼊root⽤户密码") where User='root';# flush privileges;9.查看mysql是否⾃启动,并且设置开启⾃启动命令# chkconfig --list | grep mysqld# chkconfig mysqld on10.mysql安全设置(系统会⼀路问你⼏个问题,看不懂复制之后翻译,基本上⼀路yes):# mysql_secure_installation以上就是本⽂的全部内容,希望对⼤家的学习有所帮助,也希望⼤家多多⽀持。
如何在Linux系统中安装数据库

如何在Linux系统中安装数据库在Linux系统中,安装数据库是一项重要且常见的任务。
数据库是用于存储、管理和访问数据的软件系统,它在各种应用领域中都扮演着关键角色。
本文将介绍如何在Linux系统中安装数据库,并提供适当的步骤和指导。
一、选择适合的数据库在开始安装之前,我们需要选择适合我们需求的数据库。
常见的Linux数据库包括MySQL、PostgreSQL和MongoDB等。
根据具体情况,选择最适合您项目需求的数据库软件。
二、安装依赖在安装数据库之前,我们需要确保系统中已经安装了一些必要的依赖项。
这些依赖项通常包括C/C++编译器、开发工具包以及其他必要的库文件。
您可以通过系统包管理器来安装这些依赖项。
以下是一些常见的依赖项的安装命令示例:对于Debian/Ubuntu系统:```sudo apt-get updatesudo apt-get install build-essential```对于CentOS/Fedora系统:sudo yum updatesudo yum groupinstall "Development Tools"```三、下载和安装数据库软件一旦我们安装好了依赖项,我们可以开始下载和安装数据库软件。
在此我们以MySQL为例,介绍如何在Linux系统中安装。
1. 首先,我们需要访问MySQL的官方网站,下载适用于Linux系统的MySQL安装包。
您可以在MySQL官方网站的下载页面找到适合您系统的安装包。
2. 下载完成后,将安装包移动到指定目录。
我们可以使用以下命令来解压和移动文件:```tar -zxvf mysql-VERSION.tar.gzsudo mv mysql-VERSION /usr/local/mysql```请注意将"VERSION"替换为您下载的文件的实际版本号。
3. 接下来,我们需要创建MySQL的相关用户和组,以及设置权限。
Linux下安装及配置MySQL详细过程(自己实践总结)
Red Hat Linux下安装及配置MySQL的详细教程大致思路如下:1.下载所需的安装包(Linux下用wget下载,笔者在window下下载的,用XSHELL命令RZ上传到Linux中)2.安装MySQL3.创建新用户并授权安装及配置的详细步骤如下:第一步:检测系统版本信息Linux命令: cat /proc/versionLinux version 2.6.32-220.el6.i686 (mockbuild@) (gcc version 4.4.5 20110214 (Red Hat 4.4.5-6) (GCC) ) #1 SMP Wed Nov 9 08:02:18 EST 2011当前Linux版本为RedHat 4.4.5-6(为内核版本)Linux命令:cat /etc/issueRed Hat Enterprise Linux Server release 6.2 (Santiago)Kernel \r on an \mLinux命令: uname -a 或getconf LONG_BITLinux localhost.localdomain 2.6.32-220.el6.i686 #1 SMP Wed Nov 9 08:02:18 EST 2011 i686 i686 i386 GNU/Linux可以看到当前系统为32位的(而64位系统会有x64字符串显示出来)。
第二步:根据Linux系统的环境,下载mysql Community Server官方下载地址: /downloads/mysql/可以选择【Linux-Generic】,下载对应的RMP包.由于当前系统为redhat(64位),所以直接选择Oracle &Red Hat Linux 4 & 5。
Mysql安装包有很多,作用也不同,大多数情况下只需要安装MySQL-Server和MySQL-Client,其它包根据需要安装.32位的下载下面的两个安装包文件:MySQL-server-5.6.11-2.linux_glibc2.5.i386.rpmMySQL-client-5.6.11-2.linux_glibc2.5.i386.rpm(而64位下载下面两个安装包文件:MySQL-server-5.6.11-2.linux_glibc2.5.x86_64.rpmMySQL-client-5.6.11-2.linux_glibc2.5.x86_64.rpm)第三步: 安装MySQL安装顺序: 先安装服务器,然后再安装客户端。
mysql-5.6.30-linux-glibc2.5-x86_64.tar.gz 安装

mysql-5.6.30-linux-glibc2.5-x86_64.tar.gz 安装mysql-5.6.30-linux-glibc2.5-x86_64.tar.gz下载系统版本:[vb]view plain copyprint?1.[mysql@localhost scripts]$ uname -a2.Linux localhost.localdomain 2.6.32-358.el6.x86_64 #1 SMP Fri Feb 22 00:31:26UTC 2013 x86_64 x86_64 x86_64 GNU/Linux解压:[vb]view plain copyprint?1.[root@localhost mysql]# tar -zxf mysql-5.6.30-linux-glibc2.5-x86_64.tar.gz -C /usr/local/创建mysql用户:[vb]view plain copyprint?1.[root@localhost mysql]# useradd mysql设置mysql用户密码:[vb]view plain copyprint?1.[root@localhost mysql]# echo '123456'|passwd --stdin mysql设置权限:[vb]view plain copyprint?1.[root@localhost mysql]# cd /usr/local[vb]view plain copyprint?1.[root@localhost local]# chown -R mysql:mysql mysql/切换到mysql用户[vb]view plain copyprint?1.[root@localhost local]# su - mysql[vb]view plain copyprint?1.[mysql@localhost ~]$ cd /usr/local/mysql/scripts/安装:[vb]view plain copyprint?1.[mysql@localhost scripts]$ /usr/local/mysql/scripts/mysql_install_db--user=mysql --basedir=/usr/local/mysql --datadir=/usr/local/mysql/data &输出信息:[vb]view plain copyprint?1.[mysql@localhost scripts]$ /usr/local/mysql/scripts/mysql_install_db--user=mysql --basedir=/usr/local/mysql --datadir=/usr/local/mysql/data &2.Installing MySQL system tables...2016-04-17 07:41:40 0 [Warning] TIMESTAMP with implicit DEFAULT value is deprecated. Please use --explicit_defaults_for _timestamp server option (see documentation for more details).3.2016-04-17 07:41:40 0 [Note] /usr/local/mysql/bin/mysqld (mysqld 5.6.30) starting as process 3394 ...4.2016-04-17 07:41:40 3394 [Warning] Buffered warning: Changed limits: max_open_files: 1024 (requested 5000)5.6.2016-04-17 07:41:40 3394 [Warning] Buffered warning: Changed limits: table_open_cache: 431 (requested 2000)7.8.2016-04-17 07:41:40 3394 [Note] InnoDB: Using atomics to ref count buffer pool pages9.2016-04-17 07:41:40 3394 [Note] InnoDB: The InnoDB memory heap is disabled10.2016-04-17 07:41:40 3394 [Note] InnoDB: Mutexes and rw_locks use GCC atomicbuiltins11.2016-04-17 07:41:40 3394 [Note] InnoDB: Memory barrier is not used12.2016-04-17 07:41:40 3394 [Note] InnoDB: Compressed tables use zlib 1.2.313.2016-04-17 07:41:40 3394 [Note] InnoDB: Using Linux native AIO14.2016-04-17 07:41:40 3394 [Note] InnoDB: Using CPU crc32 instructions15.2016-04-17 07:41:40 3394 [Note] InnoDB: Initializing buffer pool, size = 128.0M16.2016-04-17 07:41:40 3394 [Note] InnoDB: Completed initialization of buffer pool17.2016-04-17 07:41:41 3394 [Note] InnoDB: The first specified data file ./ibdata1 did not exist: a new database to be created!18.2016-04-17 07:41:41 3394 [Note] InnoDB: Setting file ./ibdata1 size to 12 MB19.2016-04-17 07:41:41 3394 [Note] InnoDB: Database physically writes the filefull: wait...20.2016-04-17 07:41:41 3394 [Note] InnoDB: Setting log file ./ib_logfile101 size to 48 MB21.2016-04-17 07:41:42 3394 [Note] InnoDB: Setting log file ./ib_logfile1 sizeto 48 MB22.2016-04-17 07:41:44 3394 [Note] InnoDB: Renaming log file ./ib_logfile101 to./ib_logfile023.2016-04-17 07:41:44 3394 [Warning] InnoDB: New log files created, LSN=4578124.2016-04-17 07:41:44 3394 [Note] InnoDB: Doublewrite buffer not found: creating new25.2016-04-17 07:41:44 3394 [Note] InnoDB: Doublewrite buffer created26.2016-04-17 07:41:44 3394 [Note] InnoDB: 128 rollback segment(s) are active.27.2016-04-17 07:41:44 3394 [Warning] InnoDB: Creating foreign key constraint system tables.28.2016-04-17 07:41:44 3394 [Note] InnoDB: Foreign key constraint system tablescreated29.2016-04-17 07:41:44 3394 [Note] InnoDB: Creating tablespace and datafile system tables.30.2016-04-17 07:41:44 3394 [Note] InnoDB: Tablespace and datafile system tables created.31.2016-04-17 07:41:44 3394 [Note] InnoDB: Waiting for purge to start32.2016-04-17 07:41:44 3394 [Note] InnoDB: 5.6.30 started; log sequence number33.2016-04-17 07:41:45 3394 [Note] Binlog end34.2016-04-17 07:41:45 3394 [Note] InnoDB: FTS optimize thread exiting.35.2016-04-17 07:41:45 3394 [Note] InnoDB: Starting shutdown...36.2016-04-17 07:41:46 3394 [Note] InnoDB: Shutdown completed; log sequence number 162597737.OK38.39.Filling help tables...2016-04-17 07:41:46 0 [Warning] TIMESTAMP with implicit DEFAULT value is deprecated. Please use --explicit_defaults_for_timestamp server option (see documentation for more details).40.2016-04-17 07:41:46 0 [Note] /usr/local/mysql/bin/mysqld (mysqld 5.6.30) starting as process 3417 ...41.2016-04-17 07:41:46 3417 [Warning] Buffered warning: Changed limits: max_open_files: 1024 (requested 5000)43.2016-04-17 07:41:46 3417 [Warning] Buffered warning: Changed limits: table_open_cache: 431 (requested 2000)44.45.2016-04-17 07:41:46 3417 [Note] InnoDB: Using atomics to ref count buffer pool pages46.2016-04-17 07:41:46 3417 [Note] InnoDB: The InnoDB memory heap is disabled47.2016-04-17 07:41:46 3417 [Note] InnoDB: Mutexes and rw_locks use GCC atomicbuiltins48.2016-04-17 07:41:46 3417 [Note] InnoDB: Memory barrier is not used49.2016-04-17 07:41:46 3417 [Note] InnoDB: Compressed tables use zlib 1.2.350.2016-04-17 07:41:46 3417 [Note] InnoDB: Using Linux native AIO51.2016-04-17 07:41:46 3417 [Note] InnoDB: Using CPU crc32 instructions52.2016-04-17 07:41:46 3417 [Note] InnoDB: Initializing buffer pool, size = 128.0M53.2016-04-17 07:41:46 3417 [Note] InnoDB: Completed initialization of buffer pool54.2016-04-17 07:41:46 3417 [Note] InnoDB: Highest supported file format is Barracuda.55.2016-04-17 07:41:46 3417 [Note] InnoDB: 128 rollback segment(s) are active.56.2016-04-17 07:41:46 3417 [Note] InnoDB: Waiting for purge to start57.2016-04-17 07:41:46 3417 [Note] InnoDB: 5.6.30 started; log sequence number162597758.2016-04-17 07:41:46 3417 [Note] Binlog end59.2016-04-17 07:41:46 3417 [Note] InnoDB: FTS optimize thread exiting.60.2016-04-17 07:41:46 3417 [Note] InnoDB: Starting shutdown...61.2016-04-17 07:41:48 3417 [Note] InnoDB: Shutdown completed; log sequence number 162598762.OK63.64.To start mysqld at boot time you have to copy65.support-files/mysql.server to the right place for your system66.67.PLEASE REMEMBER TO SET A PASSWORD FOR THE MySQL root USER !68.To do so, start the server, then issue the following commands:69.70. /usr/local/mysql/bin/mysqladmin -u root password 'new-password'71. /usr/local/mysql/bin/mysqladmin -u root -h localhost.localdomain password'new-password'72.73.Alternatively you can run:74.75. /usr/local/mysql/bin/mysql_secure_installation77.which will also give you the option of removing the test78.databases and anonymous user created by default. This is79.strongly recommended for production servers.80.81.See the manual for more instructions.82.83.You can start the MySQL daemon with:84.85. cd . ; /usr/local/mysql/bin/mysqld_safe &86.87.You can test the MySQL daemon with mysql-test-run.pl88.89. cd mysql-test ; perl mysql-test-run.pl90.91.Please report any problems at /92.93.The latest information about MySQL is available on the web at94.95. 96.97.Support MySQL by buying support/licenses at 98.99.New default config file was created as /usr/local/mysql/f and100.will be used by default by the server when you start it.101.You may edit this file to change server settings102.103.WARNING: Default config file /etc/f exists on the system104.This file will be read by default by the MySQL server105.If you do not want to use this, either remove it, or use the106.--defaults-file argument to mysqld_safe when starting the server这里可能会报错:scripts/mysql_install_db: /usr/bin/perl: bad interpreter: No such file or directory。
linux下mysql的安装卸载和qt-x11的mysql驱动编译
linux下mysql的安装和编译Qt--X11的mysql驱动一、前期准备:本文用redhat Enterprise 5来介绍:1.由于redhat Enterprise 5 中自带一个mysql的版本,如果在安装linux前未选择mysql的安装此步就可跳过,因为我当时安装了现在将其卸载,步骤如下:a. 查找已安装的myslq 版本:#rpm -qa | grep mysql(注意大小写,如果mysql 不行就换MySQL)在屏幕上将显示已安装的mysql包名如:mysql-5.0.22-2.1.0.1 ;b. 将搜索出的包名卸载:#rpm -e --nodeps mysql-5.0.22-2.1.0.1(nodeps表示强制删除)c. 再次查找该包名,如果没有结果输出则表明已将该版本的mysql卸载了;2. 准备安装资源,如下:a. perl-DBI-1.5.2-1.fc6.i386.rpm(该包为是安装mysql的依赖,没它mysql安装不起,查看是否安装,如果安装了就不需要了,可以通过#rpm -qa | grep perl*查看是否已经安装,该包在linux系统盘上可以找到,以下提供该包下载)b.MySQL-server-community-5.1.51-1.rhel5.i386.rpm和MySQL-client-community-5.1.51-1.rhel5.i386.rpm 和MySQL-devel-community-5.1.51-1.rhel5.i386.rpm(此包主要用于编译linux下的Qt--x11的mysql驱动)(可以从/downloads/mysql/5.1.html下载相应linux相应的版本)c. 准备好相应的安装包传到linux系统/home上;3. 开始安装:a. 先安装perl-DBI-1.5.2-1.fc6.i386.rpm可以通过#rpm -qa | grep perl*查看是否已经安装,如果安装了就不需要安装,我的是已经安装好的。
mysql-5.7.13-linux-glibc2.5-x86_64.tar.gz安装文档
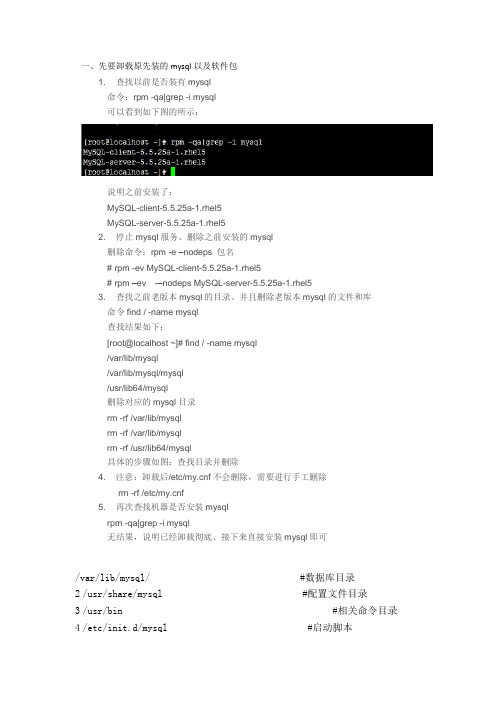
一、先要卸载原先装的mysql以及软件包1. 查找以前是否装有mysql命令:rpm -qa|grep -i mysql可以看到如下图的所示:说明之前安装了:MySQL-client-5.5.25a-1.rhel5MySQL-server-5.5.25a-1.rhel52. 停止mysql服务、删除之前安装的mysql删除命令:rpm -e –nodeps包名# rpm -ev MySQL-client-5.5.25a-1.rhel5# rpm –ev-–nodeps MySQL-server-5.5.25a-1.rhel53. 查找之前老版本mysql的目录、并且删除老版本mysql的文件和库命令find / -name mysql查找结果如下:[root@localhost ~]# find / -name mysql/var/lib/mysql/var/lib/mysql/mysql/usr/lib64/mysql删除对应的mysql目录rm -rf /var/lib/mysqlrm -rf /var/lib/mysqlrm -rf /usr/lib64/mysql具体的步骤如图:查找目录并删除4. 注意:卸载后/etc/f不会删除,需要进行手工删除rm -rf /etc/f5. 再次查找机器是否安装mysqlrpm -qa|grep -i mysql无结果,说明已经卸载彻底、接下来直接安装mysql即可/var/lib/mysql/ #数据库目录2 /usr/share/mysql #配置文件目录3 /usr/bin #相关命令目录4 /etc/init.d/mysql #启动脚本二、安装mysql数据库(所用的版本为mysql-5.7.13-linux-glibc2.5-x86_64.tar.gz)1.创建mysql用户和用户组A:用root用户登录系统,在root用户主目录下创建mysql用户和用户组2.拷贝mysql包a)切换用户,进入刚创建的mysql用户主目录,b)将mysql-5.7.13-linux-glibc2.5-x86_64.tar.gz拷贝到mysql用户的主目录下。
mysql(4)-linux环境centos7安装mysql8.0.19详细安装步骤
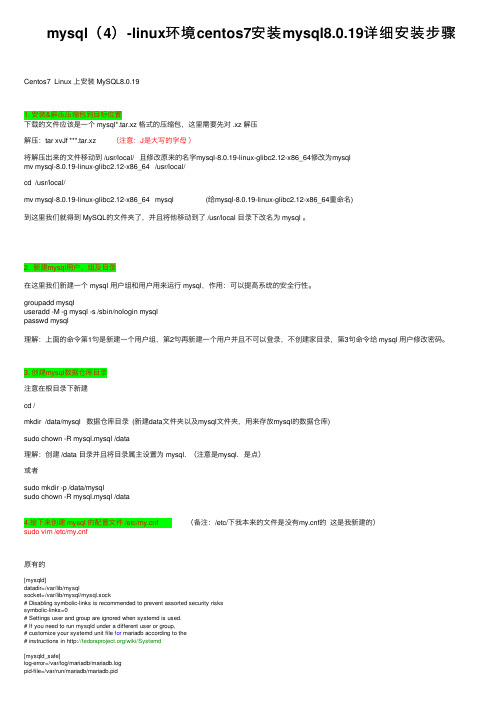
mysql(4)-linux环境centos7安装mysql8.0.19详细安装步骤Centos7 Linux 上安装 MySQL8.0.191. 安装&解压压缩包到⽬标位置下载的⽂件应该是⼀个 mysql*.tar.xz 格式的压缩包,这⾥需要先对 .xz 解压解压:tar xvJf ***.tar.xz (注意:J是⼤写的字母)将解压出来的⽂件移动到 /usr/local/ 且修改原来的名字mysql-8.0.19-linux-glibc2.12-x86_64修改为mysqlmv mysql-8.0.19-linux-glibc2.12-x86_64 /usr/local/cd /usr/local/mv mysql-8.0.19-linux-glibc2.12-x86_64 mysql (给mysql-8.0.19-linux-glibc2.12-x86_64重命名)到这⾥我们就得到 MySQL的⽂件夹了,并且将他移动到了 /usr/local ⽬录下改名为 mysql 。
2. 新建mysql⽤户、组及⽬录在这⾥我们新建⼀个 mysql ⽤户组和⽤户⽤来运⾏ mysql,作⽤:可以提⾼系统的安全⾏性。
groupadd mysqluseradd -M -g mysql -s /sbin/nologin mysqlpasswd mysql理解:上⾯的命令第1句是新建⼀个⽤户组,第2句再新建⼀个⽤户并且不可以登录,不创建家⽬录,第3句命令给 mysql ⽤户修改密码。
3. 创建mysql数据仓库⽬录注意在根⽬录下新建cd /mkdir /data/mysql 数据仓库⽬录 (新建data⽂件夹以及mysql⽂件夹,⽤来存放mysql的数据仓库)sudo chown -R mysql.mysql /data理解:创建 /data ⽬录并且将⽬录属主设置为 mysql. (注意是mysql. 是点)或者sudo mkdir -p /data/mysqlsudo chown -R mysql.mysql /data4.接下来创建 mysql 的配置⽂件 /etc/f (备注:/etc/下我本来的⽂件是没有f的这是我新建的)sudo vim /etc/f原有的[mysqld]datadir=/var/lib/mysqlsocket=/var/lib/mysql/mysql.sock# Disabling symbolic-links is recommended to prevent assorted security riskssymbolic-links=0# Settings user and group are ignored when systemd is used.# If you need to run mysqld under a different user or group,# customize your systemd unit file for mariadb according to the# instructions in /wiki/Systemd[mysqld_safe]log-error=/var/log/mariadb/mariadb.logpid-file=/var/run/mariadb/mariadb.pid## include all files from the config directory#!includedir /etc/f.d1 # MySQL 配置⽂件,2 #参考:/zhangxinqi/21784073 # https:///lyq863987322/p/8074749.html替换成以下内容:# 数据库⽬录 /data/mysql[client]port=3306# mysql socket ⽂件存放地址socket=/tmp/mysql.sock# 默认字符集default-character-set=utf8[mysqld]server-id=1# 端⼝port=3306# 运⾏⽤户user=mysql# 最⼤连接max_connections=200socket=/tmp/mysql.sock# mysql 安装⽬录(解压后⽂件的⽬录)basedir=/usr/local/mysql# 数据⽬录(这⾥放在我们新建的 /data/mysql 下)datadir=/data/mysqlpid-file=/data/mysql/mysql.pidinit-connect='SET NAMES utf8'character-set-server=utf8# 数据库引擎default-storage-engine=INNODBlog_error=/data/mysql/mysql-error.logslow_query_log_file=/data/mysql/mysql-slow.log# 跳过验证密码(想跳过验证密码就放开即不注释不想跳过即会输⼊密码,那就注释掉)#skip-grant-tables[mysqldump]quickmax_allowed_packet=16MEOF到这⾥配置⽂件就建好了,上⾯是我⾃⼰的配置,在 mysql 启动的时候就会⾃动读取这个配置⽂件。
- 1、下载文档前请自行甄别文档内容的完整性,平台不提供额外的编辑、内容补充、找答案等附加服务。
- 2、"仅部分预览"的文档,不可在线预览部分如存在完整性等问题,可反馈申请退款(可完整预览的文档不适用该条件!)。
- 3、如文档侵犯您的权益,请联系客服反馈,我们会尽快为您处理(人工客服工作时间:9:00-18:30)。
1首先查看是否已经装有mysql命令:rpm –qa|grep –i mysql如果有的话,用命令卸载(删除)命令:rpm –e --nodeps 包名2.上传安装文件MySQL-client-5.5.8-1.rhel5.i386.rpmMySQL-server-5.5.8-1.rhel4.i386.rpm运行命令安装:rpm –ivh MySQL-server-5.5.8-1.rhel4.i386.rpm成功界面:[root@localhost liuhaisheng]# rpm -ivhMySQL-server-5.5.8-1.rhel4.i386.rpmPreparing...########################################### [100%]1:MySQL-server########################################### [100%]PLEASE REMEMBER TO SET A PASSWORD FOR THE MySQL root USER !To do so, start the server, then issue the following commands:/usr/bin/mysqladmin -u root password 'new-password'/usr/bin/mysqladmin -u root -h localhost.localdomain password 'new-password'Alternatively you can run:/usr/bin/mysql_secure_installationwhich will also give you the option of removing the test databases and anonymous user created by default. This is strongly recommended for production servers.See the manual for more instructions.Please report any problems with the /usr/bin/mysqlbug script!3.安装客户端[root@localhost liuhaisheng]# rpm -ivhMySQL-client-5.5.8-1.rhel5.i386.rpmPreparing...########################################### [100%]1:MySQL-client########################################### [100%][root@localhost liuhaisheng]#4 检查安装是否成功[root@localhost liuhaisheng]# MySQLbash: MySQL: command not found[root@localhost liuhaisheng]# mysqlERROR 2002 (HY000): Can't connect to local MySQL server through socket '/var/lib/mysql/mysql.sock' (2)[root@localhost liuhaisheng]# cd ..[root@localhost /]# cd ..[root@localhost /]# chown -R mysql:mysql /var/lib/mysql[root@localhost /]# /etc/init.d/mysqld startbash: /etc/init.d/mysqld: 没有那个文件或目录[root@localhost /]# /etc/init.d/mysql startStarting MySQL.. [确定] [root@localhost /]# cd /usr/bin[root@localhost bin]# mysqladmin -uroot password '123456'[root@localhost bin]# mysqladmin -u root password '521125'增加了密码后的登录格式如下:MySQL -u root -pEnter password: (输入密码)其中-u后跟的是用户名,-p要求输入密码,回车后在输入密码处输入密码。
注意:这个MySQL文件在/usr/bin目录下,与后面讲的启动文件/etc/init.d/MySQL不是一个文件。
[root@localhost bin]# mysql -uroot -pEnter password:Welcome to the MySQL monitor. Commands end with ; or \g.Your MySQL connection id is 3Server version: 5.5.8 MySQL Community Server (GPL)Copyright (c) 2000, 2010, Oracle and/or its affiliates. All rights reserved.Oracle is a registered trademark of Oracle Corporation and/or its affiliates. Other names may be trademarks of their respective owners.Type 'help;' or '\h' for help. Type '\c' to clear the current input statement.mysql>5 mysql的卸载linux下MySQL卸载方法一.源码安装的卸载方法:到源码目录,如果可以运行make uninstall就可以卸载。
如果没有,就直接删除。
如果是./configure --prefix指定了目录用 rm -rf 目录名删除-------------------------------------------------------------[root@localhost ~]# cd /usr/local/src/mysql-5.1.45[root@localhost mysql-5.1.45]# make uninstall[root@localhost mysql-5.1.45]# cd ..[root@localhost src]# rm -rf mysql-5.1.45[root@localhost src]# cd ..[root@localhost local]# lsbin etc games include lib libexec mysql sbin share src web[root@localhost local]# rm -rf mysql/[root@localhost local]# lsbin etc games include lib libexec sbin share src web[root@localhost local]#-------------------------------------------------------------二.rpm方式安装的卸载方法:查看是否安装mysql的命令rpm -qa | grep mysql然后逐个使用 rpm -e mysq-* 卸载如果出现error: Failed dependencies:libmysqlclient.so.10 is needed by (installed)libdbi-dbd-mysql-0.6.5-10.RHEL4.1.i386libmysqlclient.so.10 is needed by (installed)MySQL-python-1.0.0-1.RHEL4.1.i386libmysqlclient.so.10 is needed by (installed)MyODBC-2.50.39-21.RHEL4.1.i386libmysqlclient.so.10 is needed by (installed) qt-MySQL-3.3.3-9.3.i386 mysqlclient10 is needed by (installed)MySQL-python-1.0.0-1.RHEL4.1.i386mysqlclient10 = 3.23.58-4.RHEL4.1 is needed by (installed) mysqlclient10-devel-3.23.58-4.RHEL4.1.i386时,使用 --nodeps 参数,如:rpm -e mysqlclient10-devel-3.23.58-4.RHEL4.1 --nodepsrpm -e mysqlclient10-3.23.58-4.RHEL4.1 --nodeps网络其他记录:本人未验证启动MySQL/etc/init.d/MySQL start 或service MySQL start停止MySQL/etc/init.d/MySQL stop 或service MySQL stop到此,MySQL服务就安装配置完成。
安装MySQL客户端rpm -ivh MySQL-client-4.0.14-0.i386.rpmMySQL安装好后目录结构如下:工具程序在/usr/bin目录中---ls /usr/bin/MySQL*服务器程序/usr/sbin/MySQLd数据目录/var/lib/MySQL默认情况下MySQL将错误日志文件、二进制日志文件及进程文件写在/var/lib/MySQL目录中,如localhost.err、localhost.pid、localhost-bin.001等要改变这些情况可以修改/etc/f文件如将日志文件写在/var/log目录中,可以在f文件中加入下面两行:[MySQLd_safe]err-log = /var/log/MySQLd.log有个实用程序/usr/bin/MySQL_install_db,该程序可以用来初始化MySQL数据库,即创建/var/l og/MySQL目录,及创建MySQL数据库(MySQL授权表等信息)及test数据库(空库),如果不小心删除了/var/log/MySQL目录可以通过该程序来初始化.卸载MySQLrpm -qa|grep -i MySQLrpm -ev MySQL-server-4.0.14-0 MySQL-client-4.0.14-0卸载后/var/lib/MySQL中的数据及/etc/f不会删除,如果确定没用后就手工删除rm -f /etc/frm -rf /var/lib/MySQLMySQL 1130错误解决方法:通过MySQL-Front或MySQL administrator连接MySQL的时候发生的这个错误ERROR 1130: Host ***.***.***.*** is not allowed to connect to this MySQL server说明所连接的用户帐号没有远程连接的权限,只能在本机(localhost)登录。
