ywstar APP-2500A智能汽车编程充电电源使用说明书简体20161210修改
雨星充电车 rainstar 产品说明与比较说明书

OUTRAS MARCAS
• As peças não são intercambiáveis
• Todas as partes são soldadas na própria máquina
• Apenas as pontas das lanças são galvanizadas
BAUER IRRIGATION - RAINSTAR
• Chassi com Viga I galvanizado à fogo
• Mesa giratória de 270 graus galvanizada
• OPÇÃO DE GIRO
• MANUAL • MECÂNICO • HIDRÁULICO
OUTRAS MARCAS
• Rodado com pneus recauchutados
• Um dente para cada 2 elos da corrente
OUTRAS MARCAS
• Redutor com 2 marchas(menor controle da lâmina de irrigação)
• Sistema de cremalheira assentada sobre pinhão (dentes desgastam com peso)
BAUER IRRIGATION - RAINSTAR
• Redutor em óleo com 4 marchas
• Sensor de velocidade no redutor
• Acionamento por corrente, pinhão e cremalheira segmentada
CARRETÉIS DE IRRIGAÇÃO RAINSTAR X OUTROS
电动汽车充电电源说明书

电动汽车充电电源说明书技术说明书石家庄通合电子目录第一章概述 (2)1.1 前言 (2)1.2模块要紧特点 (2)1.3模块爱护功能 (2)1.4技术指标 (3)第二章模块构成 (7)2.1模块工作原理 (7)2.2模块外形尺寸及固定孔尺寸 (7)2.3输入输出接线端子说明 (8)2.4操作说明 (9)2.5实物成效图 (12)第三章使用环境 (12)第一章概述1.1 前言我公司研制开发的TH系列电源模块,采纳世界领先的〝谐振电压型双环操纵的谐振开关电源技术〞,具有体积小、重量轻、效率高、高可靠等优点。
1.2模块要紧特点●可适用于三相四线制输入方式。
●采纳功率因数校正技术,对电网污染小。
●采纳自主均流技术,可实现多台电源冗余并联,扩大输出功率。
●自带风机,强制风冷。
具有过温关机功能。
●具有电池防反接功能。
1.3模块爱护功能输出过压爱护:输出电压过高对用电设备会造成灾难性事故,为杜绝此类情形发生,我公司的高频模块内有过压爱护电路,显现过压后模块自动锁死,相应模块故障指示灯亮,故障模块自动退出工作而不阻碍整个系统正常运行。
输出限流爱护:每个模块的输出功率受到限制,输出电流不能无限增大,因此每个模块输出电流最大限制为额定输出电流,假如超负荷,模块自动调低输出电压以爱护模块。
短路爱护:本模块采纳回缩下垂限流方式,模块输出特性如图1-1,输出短路时模块在瞬时把输出电压拉低到零,限制短路电流在额定输出电流的15%以下,现在模块输出功率专门小〔几十瓦〕,以达到爱护模块和用电设备的目的。
模块可长期工作在短路状态,可不能损坏,排除故障后模块可自动复原工作。
图1-1 整流模块输出特性模块并联爱护:每个模块内部均有并联爱护电路,绝对保证故障模块自动退出系统,而不阻碍其它正常模块工作。
模块并机输出示意图如图1-2所示。
过流爱护:过流爱护要紧爱护大功率变流器件,在变流的每一个周期,假如通过电流超过器件承担电流,关闭功率器件,达到爱护功率器件的目的。
ywstar 2D多功能测电笔使用说明书

使用说明书---- V2.01 描述1.1此电笔为便携专业的测量仪器,具有美观的液晶显示器。
1.2转换开关单手操作便于测量。
适用广大的汽车维修工厂、学校、科研单位。
1.3电笔具有自动关机功能。
1.4传感器模拟:模拟霍尔、光电、电磁式传感器。
如曲轴位置、凸轮轴位置、车速、轮速等。
1.5执行器驱动:驱动点火线圈、独立式点火线圈、点火模块、喷油嘴、两线怠速阀、碳罐电磁阀、压缩机电磁阀、调压电磁阀、里程表、转速表、鼓风机调速模块、音响功放等1.6直流电压测量:电压档0-40V 电压试灯档6-18V1.7线路通断测量1.8常规试灯:6-18V1.9 LED试灯:0-40V1.10电源极性判断:0-40V1.11二极管极性判断1.12充电性能判断:12V 24V机动车辆1.13照明1.14线路虚电测量:6-18V机动车辆1.15方波测量:0-40V2安全信息2.1使用本电笔时应特别注意,不当的使用可能会造成电击或损坏仪表,在使用中应遵循通常的安全操作规程以及完全使用本手册规定的安全措施。
2.2必须使用原配8.4V锂电池充电器,充电时远离易燃易爆物品。
充电器绿色指示灯亮起,表示充电已满,应及时停止充电。
2.3为充分利用本电笔的功能和确保安全操作,请仔细阅读使用说明。
3准备3.1使用电笔时,用户必须遵守安全规则。
---通用的防电击保护。
---防止误用电笔档位。
---正确的充电操作。
3.2接收到电笔后,检查是否在运输中损坏。
3.3在恶劣环境下保存、装运后,检查并确认是否损坏。
3.4在测量电压之前,应确定电压极性与电笔极性一致。
3.5在测试点火系统时候,必须注意保持人体与点火高压部分距离,以防高压电击。
4 使用4.1使用时,必须用正确功能以及档位。
4.2不要超过个档位的量程。
4.3在测量电压时,不要高于40V。
4.4在线路通断、信号输出时,不要连接电压源。
4.5不要带电测量通断。
4.6在电压测量、信号驱动时,地线均需要接负极。
维德 锂电智能充电机使用说明书
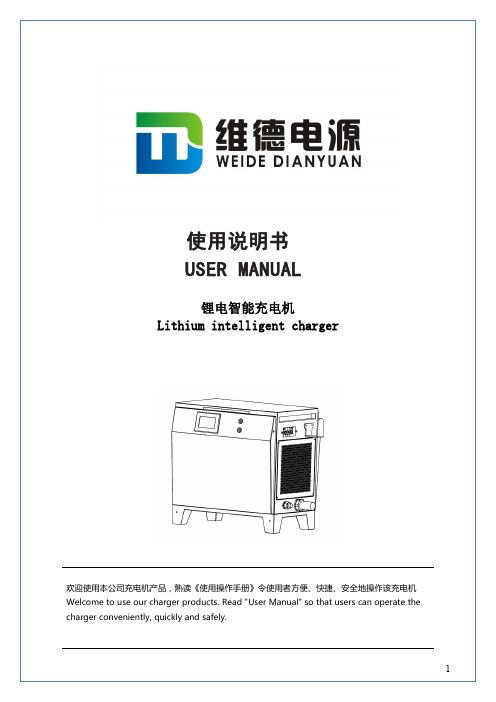
使用说明书USER MANUAL锂电智能充电机Lithium intelligent charger欢迎使用本公司充电机产品,熟读《使用操作手册》令使用者方便、快捷、安全地操作该充电机Welcome to use our charger products.Read"User Manual"so that users can operate the charger conveniently,quickly and safely.◆注意事项Attention说明书提供安装、参数、故障诊断与日常维护相关注意事项,为了确保正确地安装与操作本充电机,请在装机之前,详细阅读说明书,妥善保存并交由机器的使用者。
Instructions provide installation,parameters,trouble shooting and routine maintenance related matters needing attention.In order to ensure the correct installation and operation of this charger,please read the instructions carefully before installation,and properly save and hand it to the user of the machine.◆特别声明Special notice◇禁止对说明书内容的全部或部份进行未经授权的转换或复制。
Unauthorized conversion or reproduction of all or any part of the contents of this manual is prohibited.◇说明书中包含的内容若有改变不另行通知。
The contents of this manual are subject to change without notice.◇如发现说明书有任何错误或遗漏,请与制造商或经销商联系。
Morningstar 25A 40A MPPT 太阳能充电器- 快速入门指南说明书

Scan QR Code to go directly to the ProStar MPPT Installation Manual and warranty information online.
Warning: Shock Hazard This unit is not provided with a GFDI device. This charge controller must be used with an external GFDI device as required by the Article 690 of the National Electrical Code for the installation location.
PC MeterBus Adapter (MSC)
1
ProStar MPPT™ Charge Controller
Caution: Equipment Damage
Do not expose the ProStar CC to weather. Locate in a dry, protected area to prevent equipment damage. Ensure the minimum clearance requirements are followed to provide adequate ventilation and prevent the unit from overheating.
Ferrite Chokes
Mounting Template
*A Menu Map is also included with metered versions, but is not shown in this guide.
车载无线充电器说明书
Thank you for purchasing and using this product!In order to bring you a better ex erience, read this manual and also lease refer to your mobile hone or your electronic product manualPlease read this o eration instruction carefully and kee it ro erly before using this roduct.Product Specifications Product Name Automatic Car Mount Wireless Charger ModelCTEZ59 Size ::s 118x83x67)mmNet Weight 叮37gIn utSV::: 2A / 9V::: 2AOut ut10W Max) 妇irgl心ction氏沺m=6-8)m mA lication Model Com atible with iPhone, Samsung, LG,Moto etc.Automatic car mount wireless charger x1, Package IncludesMiao-USS中arging cable xl,Airvent dp xl,Suction cu holder x1, M anual book x 1 The arameters above are denved from the laboratory of ANDOBIL, The actual arameter would be different Because of roducts and other factorsProduct Overviewp ,uc otg r A 乡o心g ps 勺InstructionsHow to use the air vent clip1. Unsc面the fixed nut and choose thea;, vent c1;p, set the ball ;n the fixed nut . Fasten the nut ;nto the spher;cal,:1 top and ush the nut fordbly ;nto theround hole at the back of the veh;cle bracket.2. Rotate dod切ise to tighten the nut.then如s able toad丿ust the angle of the automatic car mount劝闭ess cha勺er.3. Fix the automabc car mount wireless charger on the suitable lace of outlet The"'a"'two gears ,n the cli , left or nght can be selected, 几IS recommended that the如ck wind回choose one·I ",thin choose two· 江4. p为the Micro-tJS charg四a,b团叩the区哼,呴寸忒e.Pull down the LED bracket and the area of height adjustment appears.Cust可沺"'can adjust the height of the LED bracket acco吐ng to the sizes of their mobile hones.5 Put the mc心le hone in the bracket to trigger switch The arm kx:k automat四lly cla飞themob l e如e,anda北m乖alf,,starts the wireless charging. At the same tim�the LED bracket lights u . 什there is no res ond with the arm lock ta the u er haW of the hone6. After use, short ress any on the邓de edg e, the arm lock如政hes automa归ly.You can take out your hone from the mount easily as shown in the icture.How to use the suction cup holder''t. Unscrew the fixed nut and choose thesuction cup心氓The,e has a connectk>n ball on the di , m ake tho ball go th心gh the fixed nut ay attention that the screw thread must be toward to the groove. Push the connection ball mto the groove2. Adjust the angle to suit for your line of sight, then rotate clockwise to tighten the fixed nut com letelyse 抓u w『and You g re p he m w da ss a lah g 什一e w ”th 5dan Id to Cle ho ss 3the gla 』4. Budde the mobile hone mount to tre long ole, and rotate the adjusting knob to fix the mobile phone base twist the s in button at the long bar to draw or ull the long rod buckle the base of long ole and lock the buckle of fasten the sucke『勹t 立尸-』沁\二I 、『尸t ''"f 卢�k 穸S.Plug归M;oo-USB中匆屯志叩妇区1nterface.Pulldc,,,ntheLED如et 印the area of h e,ghtadjustment芩rs.Cu叩mers can ad」ust the he;ght of the LED bracket a coord;ng to the sizes of如r moblle phones6. Put the mobile hone in the bracket to 四ge『switch.The arrn杠k automatia,lly dampsthemobilep比杠氓rdau.,,认starts the wireless cha屯ing.At the same bme, t he LED bracket lights u . �there is no 『es ond with the arm lock, ta the u er half of the hone7 After use, s hort r,ss any on the s,de edg�the arm lock st,e灿己au缸m妇V You can扫ke out your hone f『om the mount easily as shown in the 如"'The LED bracket corl'esponds to the phone modelLED BRACKET SCALEPHONE MODEL47"iPhone 8s o ·iPhone X / GALAXY SB / GALAXY S9 5 5" 旧8plus/ GALAXY S8+ / GALAXY S9+ 6 3" Note BThe LED light display status of wireless charger CHARGING STATUS LED LIGHT DISPLAY STATUS Power onThe red indicator light is bright for 3 seconds and then goes out. Standby The indicator light goes out.Cha『gingThe blue lig b h r ti , breathes to be bright d d a a r r k k fo un r t 1 il s, cy g h i t n fo g a r [[1s t , h b e r t ig im h et ) until Mobile hone full W t s h e h e co e b n n l d u t s h e e a n p g d h h o t t h n ;e e , n ;a , g lw f o u e a ll s y o s o f -u o e tn lect fo r r ;c 2;t 0 y, of electricity Abnormal FODThe red lig 1 ht flashes 10 times:d fe o t r e e c ;g t;n on o )bjectt li h g e h1t s for s, extinguishes fo『1s and n goes outBuilt-in battery withW so h u e n n d w u i ll in g ro o m n p t t he ch a h r o g n ing , th a e nd be th e elow voltagemotor will not start.,&, Notes1. Please install the car holder in the good cond巾on before drivingnavigation and do not o erate and ad」ust the bracket during driving2. The automatic car mount sup ort 4-6 5 inches of mainstream model mobile phone, wireless charging will need to mobile hone have the function.3. The mobile phone c ase with metal on the back will lead to the failure of w,rele艾啦ing funct i on and the ossib,hty of damage to the vehicle su port. Please check ca响lly before use.4. Please turn on car vent cond巾on fan)when m hot day or long time use, it'll hel you to cool down the wireless car cha『ger and s eed up charging s eed5. Low ower, lease turn off the screen and charge your hone for 10minutes Then o en you『map,it can avoid lose power very quickly6. Not toys for fun, lease keep it away from children7. If you choose the suction c驴holder,flease clean u the sulface before using to ensure its a sorption i the cu holder is not used for a long t,me.8. If you choose the suction cup holder, please do not stick the bracket to the dashboard or windshield for a long time,ft°u can reinstall the bracket before using it for the next time. A er take off the car holder, lease use lastic wra to rotect the suction cu holde「9. If you choose the suction cu holder, please do not affix to curved surfaces, lush fabrics, or bu�r SU『faces.Do not install the car mount on a lace that will mf uence the o eration of airbag and driving10. We do not recommend to a�ly the suction cu on leather, wallor filmed glass surfaces as t e suction cu is designed with strong viscosity and attraction�Q CER oHS 三Warranty CardCustomer Name Phone Number Product Name: Date of Purchase: Address: Notes Email: su ***************SI旧凶归l砬obit Tatu ""YYCo, Ltd.Andobil is the trademark registe呡I in U5 and othe『countries.All rights 『eserved.MADE IN CHINABDate20180806FCC StatementAutomatic Car Mount Wireless ChargerUser ManualThis device complies with part 15 and part 18 of the FCC Rules. Operation is Subject To the following two conditions:(1) This device may not cause harmful interference, and (2) this devicemustaccept any interference received, including interference that may cause undesired operation. Changes or modifications not explicitly approved by the partyresponsible for compliance could void the user's authority tooperate this equipment.Note: this equipment has been tested and found to comply with the limits for a Class B digital device, pursuant to part 15 and part 18 of the FCC Rules.These limits are designed to provide reasonable protection against harmful interference in a residential installation. This equipment generates, usesand canradiate radio frequency energy and, if not installed and used in accordance with the instructions, may cause harmful interference to radio communications.However, there is no guarantee that interference will not occur in a particularinstallation. If this equipment does cause harmful interference toradio or television reception, which can be determined by turning the equipment off and on, the user is encouraged totry to correct the interference by one or more of the following measures:--- Reorient or relocate the receiving antenna--- Increase the separation between the equipment and receiver.--- Connect the equipment into an outlet on a circuit different from that to which the receiver is connected.--- Consult the dealer or an experienced radio/TV technician for help.Theequipment complies with FCC radiation exposure limits set forth for an uncontrolled environment. During the operation of device a distance of 15 cm surrounding the device and 20 cm above the top surface of the device must be respected.VMPI0009AThis device complies with Part 18 of the FCC Rules. This equipmentgenerates uses and can radiate radio frequency energy and, if not installed and used in accordance with the instructions, may cause harmful interference to radio communications. If this equipment does cause harmful interference to radio or television reception, which can be determined by turning theequipment off and on, the user is encouraged to try to correct the interference by one or more of the following measures:- Increase the separation between the equipment and any other radio device.- Connect the equipment into an outlet on a circuit different from that to which the receiver is connected.。
华响车载充电器说明书。

华响车载充电器说明书。
车载充电器的使用方法是:
将车内点烟器取下,并把车载充电器插入点烟器接口处,当听到“哒”的一声响,说明车载充电器已经安装到位,此时车载充电器的电源指示灯点亮,当需要充电时只需要将手机数据线的USB插头插入车载充电器的USB接口即可。
车载充电器是为了方便用车载电源随时随地为数码产品充电的配件,也是常规用于汽车电瓶供电的设备。
车载充电器大量使用在各种便携式、手持式设备的锂电池充电领域。
车载充电器的使用说明:
1、使用汽车电源,选择对应的充电器接头连接在电子设备充电端口上,将另一端的USB插头连接在车载充电器上,再插入汽车点烟器插座内。
2、使用电脑等带有USB插座的电源,选择对应的充电器接头连接在电子设备充电器端口上,将另一端的USB插头连接在电脑,笔记本等USB接口上。
3、本充电器能为支持USB充电的任何MP3和MP4进行充电。
万鹏 太阳能充电控制器用户手册说明书

司 the output 万鹏科技.有ju限tas公 V. Quality Assurance
武汉 ww green LED to indicate the battery SOC and charging state. http://w 3.The controller have one load control button, It can be used to turn on or turn off the load and the
There may be other charge connected to the battery.
USB power supply with the load output in parallel,when the load output due to short-circuit or overcurrent and other reason to protect, the USB power will stop
Failure cause The battery reverse-connected or battery voltage is too low.
Solar panel reverse polarity
Solution Check the polarity of the battery to the controller cable, check the voltage of the battery Check the polarity of solar
武h汉ttp://www4
司 Info LED
meanings
万鹏科技.有ju限tas公 Green
The load is in the normal state of supply
- 1、下载文档前请自行甄别文档内容的完整性,平台不提供额外的编辑、内容补充、找答案等附加服务。
- 2、"仅部分预览"的文档,不可在线预览部分如存在完整性等问题,可反馈申请退款(可完整预览的文档不适用该条件!)。
- 3、如文档侵犯您的权益,请联系客服反馈,我们会尽快为您处理(人工客服工作时间:9:00-18:30)。
YWSTAR智能编程充电电源说明书Automotive Power Processor Instruction ManualAPP-2500A使用说明◆ 简介随着汽车电子技术的发展,越来越多的电子控制模块被安装在汽车上使用。
同时整车厂为了功能升级和零部件更换匹配的需要都允许对电子模块进行软件在线编程升级,但是软件编程升序需要整车有稳定且较高的电压,有些软件编程升级过程还会持续很长的时间。
这就需要一个稳定可靠的编程供电电源。
我们基于“造中国最好的编程电源”的理念,设计了这款编程电源。
本产品适合12V 汽车软件编程使用,通过模式切换也可以作为充电机给电池充电或作为汽车维修调试时的供电设备,同时新版本的电源还增加了辅助启动功能。
本电源集充电、供电、编程、辅助启动于一体。
产品具有过压过流保护、掉电报警、断路报警、断路保护、极性反接保护、高温报警等功能,显示屏有电流、电压、温度等工作状态信息和故障信息的提示,可靠稳定方便易用。
◆ 面板功能说明:1◆技术参数:输出额定电流:0-150A额定最大功率:2500W纹波与噪音:150mVp-p充电电池参数:DC12V 铅酸7-350AH输入额定输入电压:AC220V (±20%)频率范围:40-60HZ功率因子:0.95效率:>85%保护特性过载:额定输出功率的100-110%过压:>15.5V工作温度:-20 - +70℃安规:UL60950,TUV EN60950-1耐压:I/P-O/P:3KVAC I/P-FG:1.5KVAC绝缘阻抗:I/P-O/P,I/P-FG:100M Ohms、500VDC/25°/70%RH电池兼容:符合EN55022,EN61000车辆编程前,关闭车上用电设备,检查各设备电线是否连接可靠,在编车辆不得无故操作电器相关部件,不得随意发动车辆,确保编程环境可靠。
◆操作说明:1. 将220V输入电源线插入电源插座,开关上红色灯亮起表示220V输入正常。
2. 将红色电缆插入正极插座,黑色电缆插入负极插座,顺时针旋转使其锁住。
3. 将正负极夹子分别连接蓄电池的正负极。
4. 打开电源开关,此时编程电源显示屏亮起。
5. 编程电源自检,若自检不正常,则发出警告,且不能输出。
6. 自检结束,显示设备信息。
7. 电源进入工作状态,按动模式键可选择需要的工作模式。
长按模式2键可实现中英文菜单转换。
a)编程模式1:在车辆编程时,可选择该模式,保持稳定电压14.5V输出。
b)编程模式2:在车辆编程时,可选择该模式,保持稳定电压14.8V输出。
c)标准充电模式:在对蓄电池常规充电时选择该模式,设备自动调节充电电压和充电电流。
充电完成后,设备发出提示。
d)快速充电模式:在对蓄电池快速充电时选择该模式。
设备自动调节充电电压和充电电流。
充电完成后,设备发出提示。
e) AGM充电模式:对AGM电池充电选择该模式,设备自动调节充电电压和充电电流。
充电完成后,设备发出提示。
f) 维修供电模式:在车辆维修时,输出13.8V保证车上用电设备正常工作,且电瓶不会馈电。
g) 辅助启动模式:该模式下允许作为辅助启动电源启动发动机。
8. 在需要暂停输出时,可按暂停键停止输出,再次按暂停键恢复。
◆报警及故障排除:过温保护,请检查负载,在整机断电一分钟后重启:当电源内部温度超过额定最高温度后,电源自动关机保护,请检查负载是否正常,通风口是否被挡住等。
过流保护,请检查负载,在整机断电一分钟后重启:当负载电流过大,超过额定最大电流时,电源自动开机保护,请检查负载或关闭车上大功率用电设备,整机断电后再重启。
非法操作,关闭车上用电器,熄火发动机,整机断电一分钟后重启:当发生电源短路等非法操作情况时,电源自动关闭保护。
充电结束:当电池充满时,充电机液晶屏提示电池充满,30分钟后,编程电源转入浮充并将充电电压调整到13.8V,同时蜂鸣器每2 分钟提示一次。
检查连接:在标志充电、快速充电、AGM充电模式下,如果电源检测到和蓄3电池的连接突然开,电源就会发出报警。
温度过高:当电源内部温度过高时,发出这个报警信号,请检查负载是否过大通风口是否被堵住。
电压过高:当外接电池非12V铅酸电池时报警。
风扇故障:散热风扇不能正常工作,需返厂维修。
电池错误:在电源启动自检时,如果连接的电池非12V电池或电池已经断格顺坏,电源将发出电池错误提示,请检查电池。
请检查负载:当电流过大时提示,如果提示持续较长时间,请检查电瓶是否正常、车上大功率用电器是否开启。
预充电中禁止编程:在编程模式下,如果车辆因电池严重馈电或车上电器未关闭,电源自动调出电压,此时应等待预充电结束或者关闭电器后才能开始编程。
特别提示:请遵守通用的安全用电规范。
必须使用带接地线的供电插座。
机内有高压,非专业人士请勿打开,以免电击!本电源只适合12V铅酸电池使用!4InstructionsabstractWith the development of vehicle electric technique, more and more electrical control model were used in automobile. In many case, the automobile factory have to update software online and matching replacement parts in after market.A stable and reliable programming power must used in this situation.“Build the best programming power”,based on this idea we designed the product. It’s a programming power for 12V battery system. The power can also be used as a charger or power supply if you Change the work mode bypress the MODE button on the panel. Work mode: normal charge mode, fast charge mode,AGM charge mode, power supply, programming mode, auxiliary start mode.With over-voltage over-current protection, short circuit protection, reversed polarity protection, high temperature alarm and failure alarm. Status and other information are displayed on the LCD, such as current, voltage, temperature etc..Front Panel:5◆Technical parameters:OutputRated current:0-150ARated power(max):2500WRipple & noise:150mVp-pBattery parameters:DC12V Lead 7-350AHInputVoltage range:AC220V (±20%)Frequency range :40-60HZPower factor:0.95Efficiency :>85%protective featureOverload:100-110% of rated powerOvervoltage:>15.5VTemperature:-20 - +70℃Safety standards:UL60950,TUV EN60950-1Withstand voltage:I/P-O/P: 3KVAC I/P-FG:1.5KVACIsolation resistance:I/P-O/P,I/P-FG:100M Ohms、500VDC/25°/70%RHEMI:EN55022,EN61000Shutdown electric equipment on the vehicle before programming, checkconnection .Don’t start the engine, don’t operate the electric equipmentwhen programming.◆Operating instructions:1. Plug the power cord into the 220V socket. The redindicator on the main switch will be turn on if 220V input is normal。
2. Red clip connected to the battery positive, black batteryclamp connect negative. Turning in clockwise direction to lock the quick connector.3.Turn on the main switch, and wait self-test end. The powercan’t start if self-test error.64. After starting, press the MODE button to select theappropriate working mode. Press the MODE button for 3s toswitch language between English and Chinese.Prog1 mode: output 14.5VProg2 mode: output 14.8VAuto charge mode: appr.20AFast charge mode: appr.40AAGM charge mode: charge for AGM batteryMaintain mode: output 13.8VAuxiliary Start mode: max 150A, max 14.5v5. Press pause button to stop output, pause the button againto recover◆Alarm and solution:Over temperature, check load, shutdown and restart 1min later:If the temperature is too high, the output has been shutdown. Checkthe air flue and the load.Over current, check load, shutdown and restart 1min later:The power output has been shut down, please check the battery,check the high power electric device, and restart the powerIllegal operation, shut down electric equipment, stop engine, shutdownand restart 1min later:Illegal operation, self protection. Check load.Attention: The power can’t be used as the starting power.Charge end:In charge mode, if the battery is full, the LCD will display “chargeend”.Check connection:In the charge mode, if the connection between power and battery islost, he power will display the tips.Over temperature:If the temperature is too high, the tips will display on the LCD. Checkthe air flue and the load.Over voltage:7Please check the battery, 12V lead battery only!Fan error:Fan error, need maintain, and contact your local dealer.Battery error:Please check the battery, 12V lead battery only! Make sure thebattery is Ok.Check load:If the current is more than 80A, please check the battery and theHigh power electric device on the vehicle。