黄金梅利号纸模制作说明详解(附图)
六角大王纸艺大师简易教程

六角大王纸艺大师简易教程六角大王/纸艺大师3D建模入门实务应用课程六角大王/纸艺大师3D建模入门实务应用课程壹、認識六角大王......................................... 错误!未定义书签。
1.13D基本概念................................. 错误!未定义书签。
1.2 介面操作...................................... 错误!未定义书签。
1.3 工作視窗...................................... 错误!未定义书签。
1.4 主工具列...................................... 错误!未定义书签。
1.5 角度設定視窗.................................. 错误!未定义书签。
1.6 光源設定視窗.................................. 错误!未定义书签。
1.7 數值設定視窗.................................. 错误!未定义书签。
1.8鍵盤視窗...................................... 错误!未定义书签。
1.9 層視窗........................................ 错误!未定义书签。
1.10圖庫視窗..................................... 错误!未定义书签。
貳、各種建模指令介紹..................................... 错误!未定义书签。
2.1 L型煙囪模型製作 .............................. 错误!未定义书签。
2.2管狀杯的製作.................................. 错误!未定义书签。
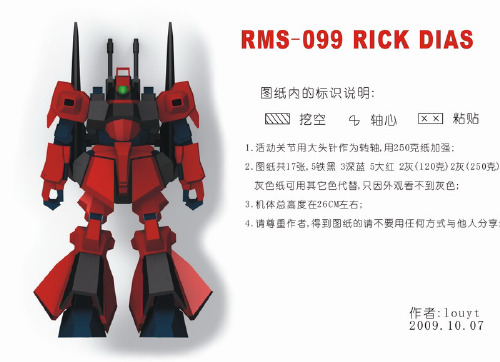
机体装备道具纸模未整理RMS-099利克迪亚斯高达纸模型图纸RMS-099 Rick Dias
D DAB D DASAS | | /!! | x /!! | /!/ x / x / A7-R X \\x \\\\\\\\ \ x \\\\\ XX IX\\ \ \ \ \x \ \ \ \ \\x \ A7-L x// /x //!!/ !!V ^ /!!/ /RMS-099 RICK DIAS II I X I / X X X I I IxX X X X X 尸BBX B S 店I X I X X X X X X X BB /J 和口.,,,.B14 '-1、-.1/"l'Y,"I I .I I X X X ®,、尽广�B13 飞伶I � B14x令I B6 I手BlOBlOBlO X B 2 X X X 11B x x 归三三三归三二言犀二二三』x x x Bll -61B 61B x二二X X BVBV1JBVIX "I)沁夕lX XC8X XX X XXX C8X(¢?C;5�]勹二二C16卢@X X xC4e管@X懿''6'� X 停XX X X C3-R X X X X X X X X X ` 暑X Xc,C2-LX X / 心C2-R'\,. X XC12 勹X X C14 X XD2厂*D2丿8尸�/'二D4x二D9 二:二D9勹丿DII]"二D4[丿/丿X XESX XXx xxx E2XX ElOX X E9 �u I E9�U EB ,、-�X X ^ _J t\/J X IElli ElOI I X II X X w 二EB I □X X X XXX二F l /二F l啪88 @F17 @)F17Z 卢勹勹团匡F3•>二<•F18F13厂F14�F14二n��,.三/F2F13 "�F BF//三二荨RMS-099 RICK DIAS =� 气`G16 G17XG4 X r:-:-..·1刁尺..口妇尽\哪^\ / I 1r Ix I I I l 「I X I II -~ -I」l I X I I -~ -I」l I X □二GB 丿G9)GB \ ) GB G15G15 G13 XXXX XX( ) ( ) X X X X X XG16 G17 G18 ( 嗡霪G13RMS-099 RICK DIAS 勹比例1:75共17张第8张全高25CM 颜色:灰蓝编号:H 二I H 2 勹7I 三`I 仅` H2 H l �气?屯上1寸寸H13 H13 Hl ``I \ X X /I I'\.. X X X " / X 尸/ X X 上屯I X 寸寸生1X I X Hl H14HB H8XXxx I H3X X二二了三二三/压H6RMS-099 RICK DIAS言昙�M I: 卢I :;�I勹6115-R115—L三』XxX XIl@13。
纸模入门教程

:纸模型是什么?新人入门,首先要对纸模型有基本的了解。
纸模型,顾名思义是用纸制作的模型。
但是纸模型又不同于折纸、纸雕等形式,纸模型的基本形式同小时候做手工差不多,就是把一张张印刷或打印在卡纸(比普通纸厚一些的纸)上的平面模型零件剪切下来,然后粘接成立体的模型…二:如何获得纸模型?纸模型同其他模型一样,有很多正版货可以买。
由于纸模型是一页页的纸张,因此正版纸模型(也就是经常说的商业版、商模)都是以杂志出版物的形式发售的。
由于目前在国内、至少在大陆还没有正规的纸模出版商和销售商,可购买的正版纸模型就都是国外产品,并且需要特殊的渠道,不大容易买到。
这个还不是新人需要考虑的问题。
新人制作一般建议采用网上可下载的免费图纸自行打印制作。
网上有很多免费的图纸可供下载,不过有的是有时间限制的,过期就没了。
下载后,用相应的软件打开图纸文档,用打印机打印在卡纸上,就可以制作了… 网上常见的纸模型图纸文档使用的文件格式一般为PDF、PDF、JPG 等。
PDF需要用ADOBE READER等软件打开,PDO需要用纸艺大师等软件打开,JPG格式的就不用赘述了… 三:如何制作纸模型?制作纸模型是很简单的,只要把图纸上的零件剪切下来,根据说明书的制作步骤,把零件粘贴在一起就可以了…四:制作纸模型需要哪些工具?制作纸模型,剪切、粘贴的工具是必不可少的… 剪切需要的工具有剪刀和刀。
具体刀的分类有美工刀、笔刀等很多种,这里不一一列举。
新人入门可以先采用剪刀,因为剪刀一般家庭都有,无需另行购买,另外小时候我们做手工,大部分用的是剪刀,也比较熟悉。
等到制作一两个作品后,对纸模型有了一定的概念,可以考虑使用刀具… 粘贴需要用胶。
大家容易获得的胶是胶水或者胶棒(固体胶)还有双面胶等。
这里推荐大家使用手工或者木工白胶。
普通胶水水性太强,会泡烂纸模;固体胶普通的黏性不够,好的又太贵。
手工白胶文具店和美术用品的地方可能都有。
总之,不影响美观就好… 其他可能需要的工具包括:镊子、垫板、特种刀具、打磨工具、上色颜料等。
简单手工立体战船制作方法100种

简单手工立体战船制作方法100种简体中文:手工制作立体战船是一项有趣的活动,可以锻炼孩子的动手能力和创造力。
本文将介绍100种简单的手工制作立体战船的方法,帮助孩子们在家中玩耍和学习。
1.纸杯船:用纸杯创造一个简单的战船,可以加上彩色纸装饰。
2.纸板船:将纸板切割成合适的形状,组装成一个战船。
3.纸皮船:将牛奶盒剪开,修整成船的外形,用彩色纸装饰。
4.薄木材船:用薄木片制作船的外壳,再加上船桅和帆。
5.泡沫板船:将泡沫板剪成战船形状,并进行彩色涂饰。
6.塑料瓶船:用塑料瓶制作船的外形,可以发挥创意进行装饰。
7.纸皮杯船:将纸皮杯剪成合适形状,组装成战船。
8.纸上船:在纸上绘制一艘战船,并进行剪裁和折叠。
9.纸张折船:用彩色纸折叠出一个战船的形状。
10.饼干船:用饼干和小棍搭建一个简易的战船。
11.蜡笔船:用彩色蜡笔熔化后浇入船模的模具中制作船壳。
12.棉花船:将棉花团塑成船形,再进行彩色涂饰。
13.塑料袋船:将塑料袋剪成合适形状,组装成船的外形。
14.纸板盒船:用纸板盒剪裁合适的形状,进行组装。
15.编织船:用彩色线编织出船的外形。
16.食物盒船:利用废弃的食物盒组装成一个战船。
17.玻璃瓶船:用清洗干净的玻璃瓶制作一个战船。
18.瓦楞纸盒船:用瓦楞纸盒剪成适合的形状,进行装配。
19.吸管船:利用吸管拼接出船的形状,并进行彩色涂饰。
20.轮胎船:用废弃的轮胎切割出船体形状,再进行彩色涂装。
21.塑料盖船:利用废弃的塑料盖子搭建一个战船。
22.幼儿园纸板封船:利用幼儿园的纸板封制作一个小战船。
23.餐巾纸船:利用餐巾纸折叠出战船的形状。
24.矿泉水瓶船:清洁的矿泉水瓶可以用来制作一艘小船。
25.胶带船:用彩色胶带搭建一个简易战船。
26.纸板纸盒船:利用纸板纸盒剪裁出船体的形状,进行彩绘。
27.随手找到的材料制作船:可以用任何在家中找到的材料进行创意组合。
28.塑料碗船:利用废弃的塑料碗修整出战船的形状。
折出海王三叉戟的方法教程
折出海王三叉戟的方法教程折叠海王三叉戟的方法如下:
1. 准备一张正方形的纸张,边长大约为20-25cm。
2. 将纸张对角线折叠,然后展开。
3. 将纸张沿着中心线竖直折叠,然后展开。
4. 将纸张沿着中心线水平折叠,然后展开。
5. 将纸张的四个角分别向中心点折叠,然后展开。
6. 将纸张的四个边沿着中心线折叠,然后展开。
7. 将纸张的四个角折向中心点,然后展开。
8. 将纸张的四个角沿着中心线折叠,然后展开。
9. 将纸张的四个角向外翻折,然后展开。
10. 将纸张的四个角向内翻折,然后展开。
11. 将纸张的四个角沿着中心线向内折叠,然后展开。
12. 将纸张的四个角沿着中心线向外折叠,然后展开。
13. 将纸张的四个角沿着中心线向内折叠,然后展开。
14. 最后,将纸张的四个角沿着中心线向外折叠,三叉戟就完成了。
希望这个教程能帮助到您。
泰坦尼克号简易纸模型图纸二
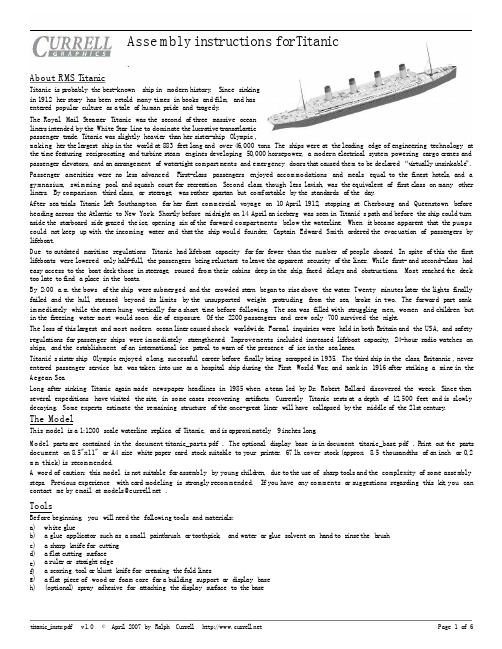
Asse m bly inst ruct ions forT i tan icAbout R MS T i tan i cTi tanic i s p robably the bes t-known sh ip in modern hi s tory. S ince s ink ingin 1912 her s to ry has been re to ld many t imes in books and f i lm, and hasente red popula r cul tu re a s a t a le o f human pr ide and t r agedy.The Royal Mai l S teamer T i tan ic was the second o f th ree mass ive oceanl ine rs in tended by the White S ta r L ine to domina te the lucra t ive t ransa t lan t icpassenger t r ade. T i tan ic was s l ight ly heav ie r than her s i s te r-ship Olympic,making he r the la rges t sh ip in the wor ld a t 883f ee t long and over 46,000tons. The sh ips were a t the lead ing edge of engineer ing t echnology a t the t ime fea tur ing rec ip roca t ing and tu rbine s t eam engines develop ing 50,000 horsepower,a modern e lec t r i ca l sys tem power ing cargo c ra nes and passenger e l eva tors,and an ar rangement o f wate r t igh t compar tments and emergency doors tha t caused them to be dec la red“v i r tua l ly uns inkable”. Passenger ameni t i es were no l es s advanced. F i r s t-c la ss passengers enjoyed accom modat ions and mea ls equa l to the f ines t ho te l s,and a gymnasium,swim ming poo l and squash cour t fo r r ec rea t ion. Second c las s,though le ss lav ish, was the equiva len t o f f i r s t c l ass on many o ther l ine rs. By compar ison th i rd c l ass, o r s t ee rage, was ra ther spar t an but comfor tab le by the s tandards o f the day.After sea t r ia l s T i tan ic l e f t Southampton fo r he r f i r s t com merc ia l voyage on 10 Apri l 1912,s topping a t Cherbourg and Queens town be fore head ing across the At lant i c to New York. Shor t ly before midn igh t on 14 Apr i l an iceberg was seen in T i tanic’s pa th and before the sh ip could turn as ide the s ta rboard s ide g razed the ice, opening s ix o f the fo rward compartments be low the water l ine. When i t became apparen t tha t th e pumps could no t keep up wi th the incoming wa ter and tha t the sh ip would founder, Capta in Edward Smith o rdered the evacuat ion o f passengers by l i f eboat.Due to outda ted mar i t ime r egula t ions T i tan ic had l i feboa t capac i ty fo r fa r f ewer than the number o f people aboard.In sp i te o f th i s the f i r s t l i f eboat s were lowered only ha l f-ful l,the passengers be ing re luctan t to l eave the apparen t secur i ty o f the l iner. While f i r s t- and second-c l ass had easy access to the boat deck those in s t eerage,roused f rom thei r cabins deep in the sh ip,f aced de lays and obs t ruct ions. Most r eached t he deck too la te to f ind a p l ace in the boat s.By 2:00 a.m.the bows o f the ship were submerged and the c rowded s t e rn began to r i se above the wa ter. Twenty minutes l a te r the l ight s f ina l ly fa i l ed and the hul l,s t r essed beyond i t s l imi ts by the unsuppor ted weigh t p ro t ruding f rom the sea, b roke in two. The fo rward par t sank im media te ly whi le the s te rn hung ve r t i ca l ly fo r a shor t t ime before fo l lowing. The sea was f i l l ed with s t rugg l ing men, women and ch i l dren but in the f r eez ing wate r mos t would soon d ie o f exposure. Of the 2200 passenger s and c rew on ly 700 survived the n igh t.The loss o f th i s l a rges t and most modern ocean l ine r caused shock wor ldwide. Formal inqu i r ies were he ld in both Br i ta in and the USA, and sa fe ty regula t ions fo r passenger sh ips were im media te ly s t r eng thened.Improvements inc luded inc reased l i f eboat capac i ty, 24-hour r adio wat ches on sh ips,and the es t abl i shment o f an in te rnat ional i ce pa t ro l to warn of the presence o f i ce in the sea lanes.Ti tanic’s s i s t e r sh ip Olympic en joyed a long,success ful ca reer be fore f ina l ly be ing sc rapped in 1935. The th i rd sh ip in the c l ass, Br i tanni c, never ente red passenger se rv ice bu t was t aken in to use a s a hospi t a l sh ip dur ing the F i r s t Wor ld War,and sank in 1916 a f te r s t r ik ing a mine in the Aegean Sea.Long af t e r s inking T i tan ic again made newspaper head l ines in 1985 when a team led by Dr. Rober t Ba l la rd d i scovered the wreck. S i nce then severa l exped i t ions have v is i t ed the s i t e,in some cases recover ing a r t i f ac t s. Cur ren t ly T i tan ic r es t s a t a dep th o f 12,500fee t and i s s lowly decay ing. Some exper t s e s t imate the r emaining s t ruc tu re o f the once-grea t l ine r wi l l have co l lapsed by the middle o f the 21s t century.The ModelThis model i s a 1:1200sca le wa ter l ine r ep l ica o f T i tan ic, and i s approx imate ly 9inches long.M odel par t s a re con ta ined in the document t i tanic_parts.pdf. The op t iona l d i splay base i s in document t i tan ic_base.pdf. P r in t ou t t he par t s document on 8.5"x11" o r A4 s i ze whi t e paper card s tock su i tab le to your p r in te r. 67lb.cover s tock(approx. 8.5thousand ths o f an inch o r 0,2 m m th ick)i s r ecom mended.A word of cau t ion:th i s model i s not su i t able fo r assembly by young chi ld ren, due to the use of sharp too ls and the complexi ty o f some assembly s teps. Prev ious exper i ence wi th ca rd model ing i s s t rongly recom mended.I f you have any com ments o r sugges t ions regard ing th i s k i t,you can contac t me by emai l a t model s@curre l l.ne t.Too lsBefore beg inning, you wi l l need the fo l lowing too ls and mater ia l s:a) b) c) d) e) f)whi te g luea glue appl i ca tor such as a smal l pa in tbrush o r toothp ick, and wate r o r g lue so lvent on hand to r inse theb rush a sharp kni fe fo r cut t inga f la t cu t t ing su r facea rule r o r s t r a igh t edgea scor ing too l o rb lun t kn i fe forc reas ing the fo ld l inesa f la t p iece of wood or foam core fo r a bu i ld ing suppor t o r d i sp lay base(op t iona l)spray adhes ive fo r a t tach ing the d i sp lay su r face to the baseg)h)t i t an i c_i n s t r.pd f v1.0© Apr i l2007by Ra lph Cur r e l l h t tp://ww w.cur r e l l.ne t Page1o f6Hintsa) b) c) d) e)Selec t a we l l -l i t , comfor tab le work a rea tha t wi l l r emain und is tu rbed when you a re not the re . Keep your hands and too ls c lean when work ing , to avo id ge t t ing g lue on vi s ib le par t s o f the model . I t ’s ea s ie r to s tay organ ized i f you only cu t out those par t s you need for each s tep . M ake sure your kni fe i s sharp . When cu t t ing s t r a igh t l ines , u se a s t r a igh t -edge . Study the d iagrams ca refu l ly , and a lways te s t -f i t the pa r t s before apply ing g lue .Asse m blyPortAft (Stern)Forward(Bow)StarboardIn these ins t ruc t ions , the t e rms fo rward (bow) and a f t (s t e rn) r e fer to the f ron t and rear ends of the ship . Por t and s t a rboard r e fe r to the le f t and r ight s ides . Scor ing o f pa r t s i s ind ica ted by th in b lack l ines ou ts ide the pa r t ’s ou t l ine , and by dashed or shaded l ines on the par t ’s su r face . For smal l pa r t s such as the deckhouses and c ranes i t i s r ecom mended tha t ou ts ide corners (‘mounta in ’ fo lds ) a re scored b y gen t ly scr ib ing t he score l ine wi th a kn i fe re sul t ing in a sharp corner when fo lded . Score par t s be fore cu t t ing them out . In the d iagrams , subassembl ies a re ident i f i ed by a number wi th in a c i rc le (e .g . ), cor responding to the s tep in which i t was assembled . Step 1: Lamina te the la t e ra l fo rmers to heavy ca rd s tock , such tha t the combined th i ckness i s abou t 1m m or 0.04 inches . Cut ou t the formers af te r lamina t ing . Assemble the l eng thwise fo rmer (s tep 2) t aking ca re to on ly g lue the cent ra l (b lue shaded) a rea and a l lowing the f l a ps a t the bot tom to fo ld ou tward . Cu t the upper p rof i l e a f t e r g lu ing and fold as shown in the d iagrams . Assemble the in t e rna l s t ruc ture by g l uing the la t e ra l fo rmers in to s lo t s in the leng thwise fo rmer (s tep 3). Some p ieces must be o r ien ted such tha t the p r in ted s ide f aces a f t ; these a re l abe l led as such . At tach the we l l deck s t i f feners (s tep 4) in to the appropr ia t e s lo t s . At th i s s tage the model should be a t t ached to e i ther a temporary work base (s tep 5) o r to the opt ional d i sp lay base (s tep 6). Th is p revent s the f rame f rom warping dur ing subsequen t s teps . I f us ing a t emporary base , app ly on ly a smal l amount o f g lue so the sh ip may be la t e r d etached eas i ly . At tach the fo recas t l e and poop decks to the f r ame (s tep 7). The fo rward t ip o f the fo recas t l e wi l l p ro t rude s l ight ly beyond the f ron t o f the f rame.The shap ing and a t tach ing o f the hu l l su r faces a re some what cha l leng ing . Dry-f i t t ing and ca refu l a t t ent ion to the d rawings wi l l he lp . At t ach the connec t ing s t r ips to the main and s t e rn sec t ions o f the s t a rboard hul l sur face (s tep 8). To avo id gaps , bend the par t s as c lose ly as poss ib le to match the contour o f the f rame before g lu ing the s te rn sec t ion to the main sec t ion . Repea t for the por t hul l pa r t s and g lue por t and s t arboard toge ther a t the rudder on ly (s tep 9). S l ide the hul l p ieces a round the f rame f rom the s t e rn , such tha t the rudder i s pos i t ioned undernea th t he s te rn overhang (s tep 10). The rear edge of the hu l l p l a t ing shou ld a l ign wi th the cen t re o f the r earmost la t e ra l fo rmer . Beginn ing a t the s t ern and working fo rward , g lue the hul l sur face to the f r ame. The wel l deck cu tout s on the top o f the hu l l should match the fo re and a f t bulkheads o f the well decks . F inal ly , jo in the por t and s t a rboard su r faces where they meet a t the bow. Form the coun te r p la t ing in to shape (s tep 11) and a t t ach over the s t e rn f ramework . I f you a re us ing a temporary work base , the sh ip may be de tached now. Fold and a t tach the decks and bulkheads jus t beh ind the fo rward we l l deck (s tep 12) and in f ront o f the a f t wel l deck (s tep 13). The a f t promenade deck B48 has a somewhat complex shape and requi res p rec i se scor ing and ca re ful fo ld ing . At tach the boat deck (s tep 14) so tha t the top of the longi tud ina l fo rmers p rot rude th rough the ho les in the deck . Steps 15 through 20 show the as sembly o f the va r ious deckhouses to the boat deck , beg inn ing a f t and work ing fo rward . Severa l o f these requi re care fu l fo ld ing , so c lose a t ten t ion to the d rawings i s recom mended. Blue loca t ing marks a re pr in ted on the boa t deck indica t ing the pos i t ion o f the deckhouses .Bend the wheelhouse bu lwark B14 to shape (s tep 21) and a t t ach to the f ront o f the boa t deck , add ing the wing roofs B13. Bu i ld and a t tach the off ice rs quar te r s and whee lhouse to the boa t deck (s tep 22) such tha t the f ron t o f the wheelhouse abu ts the f ron t f ace of the bu lwark added in the p rev ious s t ep . I t may be necessa ry to t r im s l igh t ly the rea r edge o f pa r t B51 to ach ieve a snug f i t aga inst the deckhouse a f t . At t ach the promenade deck s ides (s tep 23), wi th the r a i sed bulwarks p rot rud ing above the boa t deck and the f ron t edge nes t ed beneath the br id ge wing overhangs a s shown in the d iagram. A typ ica l e l ec t r ic c rane as sembly i s shown in s tep 24. At t ach the c ranes and cargo ha tches as shown in the d iagram (s tep 25). Fold and a t t ach the dock ing b r idge to the s t e rn (s tep 26). The forward ca rgo ha tch , b reakwater and anchor c rane a re added in s tep 27. Step 28 shows a typica l funne l a ssembly . Note tha t the funnel s a re no t iden t ica l in s ize . A l e t t e r i s p r in ted on the connec t ing s t r ip , cor responding with the le t te r a t the funnel ’s loca t ion on the deckhouse roof . Also , the funne l cap for the a f t funne l i s d i f fe r en t f rom the o ther th ree f unnel s . Attach the funne ls (s tep 29) wi th the seam fac ing the s t e rn , so tha t the funne ls s lope af t s l ight ly . Build and a t t ach the compass p l a t form (s tep 30). For g rea ter r ea l i sm you may rep lace the bo t tom suppor t B42 with four l egs made f rom wire . A t emplate fo r shap ing the two mast s i s shown on the par t s shee t . Too thp icks whi t t l ed o r sanded to s i ze , o r s t re t ched p l as t i c sprue , a re recom mended fo r these par t s . Bu i ld and a t t ach the c row ’s nes t and inse r t the mast s in to the ho les in the deck (s tep 31). The base of th e mas ts shou ld res t in no tches cu t in to the in t e rna l fo rmer . I f des i r ed , shrouds (suppor t ing cab les fo r the mast s ) can be made f rom f ine wi re o r ny l on l ine . Attach the upper ends o f the shrouds to the mast and the lower ends to the ou ter edge o f the we l l deck . Const ruct the l i f eboa ts as shown (s tep 32). There a re th ree s izes o f l i feboa t , a t tached to the upper decks as indica ted in the d iagram.t i t an i c_i n s t r .pd f v1.0 © Apr i l 2007 by Ra lph Cur r e l l h t tp ://ww w.cur r e l l .ne t Page 2 o f 61La minate la tera l formers toheavycardstock2LengthwiseformerA20Glueonly inarea ind icatedbyblueshading(o ther areaswi l l fo ldou tward).C ut formerlayout f ro mpartssheet 'A '. C o m binedth icknessshouldbe approx imate ly1m m or0.04inches.C utupperpro f i leands lotsa f terglu ing.ABCNOPDEFGHIJKLMAft ForwardBo w a ndsternf lapsfo ldouthor izontal l y . C entref laps fo ld outwardasshown.3Latera l formers4W el ldeck st i f feners5O pt ional temporarybase(So me partso mit ted forc lar i ty .) A17facesfwdE Tokeepthef ra mefro m w arp ingat tachtoaf la tp ieceofwood orplast ic .Useon lyas mal l a m ou ntofg luesothe basecanbelater A5A4 af tdetached.Bo wfwdA3A2 A18DA1Su ggestedglu ingpoints indicatedby 'x '.CC2af tA BAaf tAt tachre main ingformersA6-A16 in thesa me m ann er .Stern6O pt ionald isp laybase7Forecast leandpoopdeckO p enholeformast .Thebasesurface is inf i le t i tan ic_base.pd f .At tachtoaf la tp ieceofwood, plast i cor foa mcore.Bo wB62Stern8Starboardhul lsur faceA19(inkeds idefac ingdo wn)9Joinportandstarboardhul lsur faces A21,26-28Asse m bleas mir ror A23+A24(inkeds idefac ingdo wn)imageofs tarboardhu l l .A23A24A25U pperf lapbendsoutwardtowards ternToped gel inesupwi thb lack/whi te de m arkat iononhul l .Glueatrudderon ly .R e m aindero fhu l lspreadsto cover fra me.Be ndsur faceparts tom atchf ra mesha peatstern.8t i t an i c_i n s t r .pd f v1.0 © Apr i l 2007 by Ra lph Cur r e l l h t tp ://ww w.cur r e l l .ne tPage 3 o f 610 Attachhul lsur facetof rameopenslotaf tW el ldeckcu tou tshoulda l ignwi th foreandaf tbu lkheadsof thewel ldeck.Be ging lu ingat thesternand work forward.Al ignrearedgeofhu l lp la tewi ththecent reof therearmost la tera l former.Joinhul lp la teswheretheym eetatbow.Posit ionrudderunderoverhangingcounter.Stern Bo w11 Counter 12 Forwardbr idgeandpromenadedecksA22B12B1113 Aftbr idgeandpromenadedecks B48Scoreandfo ldasshown.(Unders idev iew)Foldf laps tocrea tewal lsB58O p enholeformast.14 Boatdeck 15 SecondclassentranceB38 B15 B36 B35B37B39Foldtodoubleth icknessandcuttoshape16 S m okeroo mandfunneldeckhouse 17 Tankroo mandskyl ightsB50 B41dB40B40 FwdopenslotB49B34(Unders ide)Foldf lapsassho wntocreatewal lst i t an i c_i n s t r.pd f v1.0© Apr i l2007by Ra lph Cur r e l l h t tp://ww w.cur r e l l.ne t Page4o f618 No.3funneldeckhouse19 LoungeroofB76Foldtodoubleth ickness andcuttoshapeFwdccB80Scoreand fo ldasshown.B79(inkeds ideshow nfac ingdo wn) Scoreand fo ldasshownB7720 No.2funneldeckhouseandskyl ight21 W heelhousebulwarksB65 B14Scoreandshapeassho wnB67 Frontands idesofB14at tachtoedgeofboatdeckasshow n.B68bB13B66B64(inkeds ideshow nfac ingdo wn) Scoreand fo ldasshown22 Off icers 'quar tersand wheelhouse23 Pro m enadesidesB60B52Foldtodoubleth ickness andcuttoshapeB17aB61Theseed gesare f lushwiththetopof theboatdeck .B51B16Tr imrearedge i fnecessaryto achieveasnugf i t .24 Elect r iccranes25 Locat ionofcranesandcargohatchesB74B59+B72 B63+B70B59+B28H atchesB6,7,8,9,10 Foldtot r ip le th ickness andcuttoshape.24B10 B9 B8B7 B6At tachtoblue locat ing marks ondeck.B59(inkeds ideshow n facingdown)B59+B75B59+B73 B63+B71 B59+B29t i t an i c_i n s t r .pd f v1.0 © Apr i l 2007 by Ra lph Cur r e l l h t tp ://ww w.cur r e l l .ne tPage 5 o f 626 Dockingbr idge 27 Forecast ledeta i ls28 No.1funnelB2aaB78Scoreand fo ldasshown.B20B21Inkedsur face B3B4B19Lineup wi th funne lsea mB46B18sho wnfacingdownB5B18,B19and B 46fo ld todouble th ickness andcuttoshapeAt tachto locat ing m arksondeck.At tachtoblue locat ing marks ondeck.funne l sea m29 AttachfunnelsB22-25,B46Funnelsea ms faceaf t2830 Co mpasspla t formB26,27,30,31,46O pt ional ly ,rep laceB42with suppor t legs mad efrom wire.B43 B42B32,33,44,45,47N o.4funne lcapAt tachto loungeroo fbe tween funne ls3and4.sea mLetterpr in tedonfunne lconnect ingst r ip correspondsto let terondeckhouseroof .31 M astsandcrow'snestCreate mastsus ingtoothp icksorst retchedInser tmasts in toholes indeck plast i csprueus ingthete mplateonthepar ts sheet fors ize.Mastsareround incross- sect ionandco loureddarkbrown. (baseofmastrests innotch in in ternal former).Mastss lopeto reara tsa mea ngleasfunne ls (approx .9°f romver t ica l). Shrouds(i fused)maybe m ade f ro mf inewireorny lonl ine.At tachlowerendsofshroudsto outeredgeofwel ldeck .B53O pt ionalshrouds (suppor tcab les)Bo wSternD eckleve laf tforward32 Li feboatsB81 B54+B5525ftcut terontopofco l laps ible27ftcol laps ib le30ft l i feboat27foot col laps ib le l i feboat(4boats)69B56+B5730foot l i feboat (14boats)25footcu t ter (2boats)t i t an i c_i n s t r .pd f v1.0 © Apr i l 2007 by Ra lph Cur r e l l h t tp ://ww w.cur r e l l .ne t Page 6 o f 6。
美妙天堂卡片制作方法

美妙天堂卡片制作方法
美妙天堂卡片的制作方法如下:
1. 准备材料:彩纸、剪刀、胶水、彩色铅笔、亮片、细绳、纸板等。
2. 决定卡片的尺寸:根据自己的需求和创意,决定卡片的大小。
3. 折叠卡片:将彩纸对折,确保边缘对齐,然后将边缘用手指按平,使卡片的中心对称。
4. 设计卡片的主题和图案:使用彩色铅笔或其他绘画工具,在卡片的外部设计出美妙天堂的主题和图案。
5. 剪裁图案:使用剪刀,将卡片上需要剪裁的图案细致地剪下来,可以参考一些美妙天堂的形象,如天使、彩虹等。
6. 装饰卡片:使用胶水,将一些亮片、细绳、纸板等装饰物粘贴在卡片上,增加层次感和立体感。
7. 编写祝福语:在卡片内部,使用彩色铅笔或者美工笔,用心编写祝福语,可以表达对他人的祝福和关怀。
8. 完成和封装:仔细检查卡片的整体效果和质量,确保卡片完整无缺,然后将卡片折叠好,并用丝带或纸封装起来,以保护卡片。
以上是美妙天堂卡片的制作方法。
通过自己的创意和心思,可以创作出个性化、精美的美妙天堂卡片,送给亲朋好友,表达自己的祝福和关怀。
川崎玫瑰折法图解之欧阳歌谷创编

折纸川崎玫瑰折法图解欧阳歌谷(2021.02.01)美国电视剧《越狱》中,Michael送给Sara的纸玫瑰即是川崎玫瑰。
取一张正方形的纸。
横向对折,折好的每边再对折,再对折1次,纸上留下横向的折痕共7道。
纵向对折,折好的每边再对折,再对折1次,纸上留下纵向的折痕共7道。
展开纸,对角折。
打开以后,留下折痕如下。
四边角折起。
沿一条对角线对折。
找到对角线上方最近的那条由横向、纵向折痕交叉点连成的线,向上折起。
另一个对角线也同上一个步骤,折一条折痕。
打开如上图,然后再沿对角线(图示的红色线)折起。
折起后如下图。
按这条红色线(最下面的小方块的对角线)位置折起。
再将纸展开。
展开后如下图。
找到红线标识的小方块。
将纸翻转。
将4条对角线捏起,下图是俯视看到的效果。
将折纸向内对折,对折的同时将顶部的四方形沿其对角线向下压折。
将折纸折成这样,上下的纸必须向相反的方向折去。
把折纸压平,如下图。
根据红线将左上方的折纸向下折。
再把后面的半边从后面撑开,就形成上面的样子了。
然后折纸的下方翻出就可以看到上面的图了。
要注意折完后看上去像风车就对了!按照红色的线指示,分别向下折叠。
按红线将折纸向下翻出。
完成一边后的效果。
这是侧照。
四边都完成后的样子。
折纸翻过来的样子。
按红线所示向后折出两个小三角。
完成一个角后的效果。
按红线所示将小三角向右上折去。
折好一个角后的效果。
再来按红线所示向左边折去。
这是折好后四只脚的其中一个近照。
四边都折好的样子。
按红线所示将折纸对折再向后折。
四个方向都折好后的样子。
四个方向都折好后的侧图。
从花的上方看。
这是花的下方。
接着将其中一只脚向内折。
第二只脚。
第三只脚。
第四只脚。
将四片花瓣轻轻向外拉,露出花芯。
轻轻按压花瓣的边缘,令花瓣的外端产生一定的弧度,好像是真的花瓣那样。
为了让花看起来更漂亮,可以多试试不同的纸,因为纸张太厚或太薄都会影响花折好后的样子。
花的最后一个步骤就是将花瓣做适当的修饰,令它们看上去更自然和漂亮。
- 1、下载文档前请自行甄别文档内容的完整性,平台不提供额外的编辑、内容补充、找答案等附加服务。
- 2、"仅部分预览"的文档,不可在线预览部分如存在完整性等问题,可反馈申请退款(可完整预览的文档不适用该条件!)。
- 3、如文档侵犯您的权益,请联系客服反馈,我们会尽快为您处理(人工客服工作时间:9:00-18:30)。
紙模型-黃金梅利號製作說明書
2〃(1)
6〃(3)
編號3的圖裁下之後按照左圖先折好。
記得中間空白圓圈要挖掉。
11〃(8)將黏好的編號8黏在船尾的部分如左圖。
16〃(15)
編號15將兩端露出來的部分覆蓋掉。
21〃(17、18)
編號17和編號18相黏如左圖,最上面保持活動不要黏死。
26〃(23~26)
編號23~26是兩個高低不同的樓梯,把其中一邊扶手的部分內折黏好,樓梯面如圖折好。
31〃(27)
編號27黏在這。
36〃
將黏好的29、30、31黏在船尾。
41〃(37、38)
將編號38多出來的部分向內捲曲。
48〃(45)
編號45黏接成環錐狀,如左。
52〃(47~50)
將編號47、48背對背黏結。
編號49、50背對背相互錯開黏接,如圖。
56〃(53~55)
將編號53捲黏成柱狀,並將54及55黏在兩端。
59〃(60~64)
編號60~62的作法如同步驟56,將編號63
背黏接黏在編號60上,再將編號60的缺口處黏在編號
63〃(70、71)
將70的兩個零件背對背黏好,編號71夾住如圖。
67〃
將船錨的繩索另一端沾上一點白膠插入小孔裡。
71〃
將圖中編號76下緣多出來的黏接尖端用剪刀剪掉。
76〃(80、81)
編號81黏在編號80的空白處上。
81〃(84)
在垂直邊中間黏上84。
86〃
橘子樹的部分以一個橫排為一棵樹,前兩個背對背黏好,後兩個也是背對背黏好,中間的黑線部分裁掉
90〃潘多拉纸盒SHOP57883750。