思科交换机简单配置共33页文档
cisco交换机配置简单教程
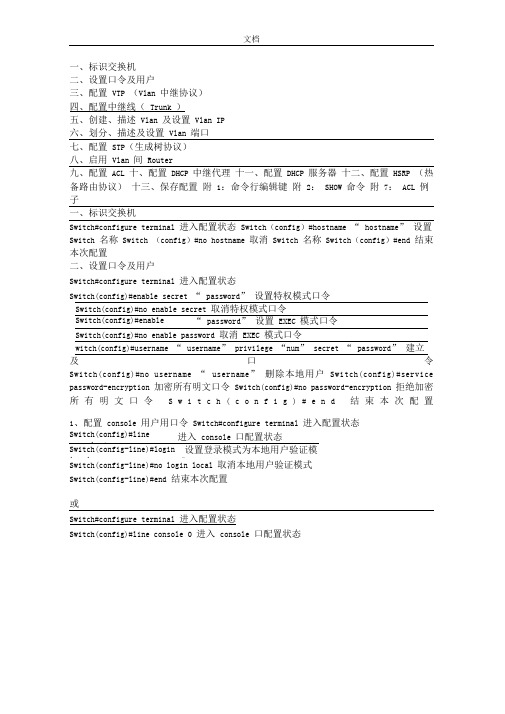
文档一、标识交换机二、设置口令及用户三、配置VTP (Vlan 中继协议)四、配置中继线(Trunk )五、创建、描述Vlan 及设置Vlan IP六、划分、描述及设置Vlan 端口七、配置STP(生成树协议)八、启用Vlan 间Router九、配置ACL 十、配置DHCP 中继代理十一、配置DHCP 服务器十二、配置HSRP (热备路由协议)十三、保存配置附1:命令行编辑键附2:SHOW 命令附7:ACL 例子一、标识交换机Switch#configure terminal 进入配置状态Switch(config)#hostname “ hostname” 设置Switch 名称Switch (config)#no hostname 取消Switch 名称Switch(config)#end 结束本次配置二、设置口令及用户Switch#configure terminal 进入配置状态Switch(config)#enable secret “ password” 设置特权模式口令及口令Switch(config)#no username “ username” 删除本地用户Switch(config)#service password-encryption 加密所有明文口令Switch(config)#no password-encryption 拒绝加密所有明文口令S w i t c h(c o n f i g)#e n d结束本次配置1、配置console 用户用口令Switch#configure terminal 进入配置状态Switch(config)#line console 0 进入console 口配置状态Switch(config-line)#login local 设置登录模式为本地用户验证模式Switch(config-line)#no login local 取消本地用户验证模式Switch(config-line)#end 结束本次配置或Switch#configure terminal 进入配置状态Switch(config)#line console 0 进入console 口配置状态文档Switch(config-line)#login 设置登录模式为线性登录模式Switch(config-line)#password “ password” 设置线性登录模式口令Switch(config-line)#no login 取消线性登录模式Switch(config-line)#end 结束本次配置2、配置tenlnet(vty) 用户及口令Switch#configure terminal 进入配置状态Switch(config)#line vty 0 15 进入vty 配置状态Switch(config-line)#login local 设置登录模式为本地用户验证模式Switch(config-line)#no login local 取消本地用户验证模式三、配置VTP (Vlan 中继协议)Switch#vlan database 进入vlan 数据库配置状态Switch(vlan)#vtp domain “ domainname” 设置vtp 域Switch(vlan)#vtp server|client| transparent 设置模式Switch(vlan)#vtp password “ password” 设置vtpSwitch(vlan)#no vtp password 取消vtp 口令Switch(vlan)#exit 退出vlan 数据库配置状态Switch(config)#interface range “ interface mod/port -port ” 进入端口组配置状态Switch(config-if-range)#switchport trunk encapsulation dot1q|isl| negotiate 设置干道封装模式Switch(config-if-range)#switchport mode trunk 设置端口为干道模式Switch(config-if-range)#no shutdown 启用端口Switch(config-if-range)#end 结束本次配置五、创建、描述Vlan 及设置Vlan IPSwitch#vlan database 进入vlan 数据库配置状态文档Switch(vlan)#vlan “ vlan-num ” name “ vlan-name” 建立vlan 及名称Switch(vlan)#no vlan “ vlan-num ” 删除vlanSwitch(vlan)#exit 退出vlan 数据库配置状态Switch(config-if)#description “ description ” 描述vlanSwitch(config-if)#no description 取消描述Switch(config-if)#ip address “ ip-address subnet-mask” 设置vlan 网关的ip 地址Switch(config-if)#no shutdown 启用vlanSwitch(config-if)#end 结束本次配置六、划分、描述及设置Vlan 端口Switch#configure terminal 进入配置状态Switch(config)#interface “ interface mod/port ” 进入端口配置状态Switch(config-if)#switchport mode access 设置端口为访问模式Switch(config-if)#switchport access vlan “ vlan-num ” 设置端口所属VlanSwitch(config-if)#no shutdown 启用端口Switch(config-if)#end 结束本次配置或Switch#configure terminal 进入配置状态Switch(config)#interface range “ interface mod/port -port ” 进入端口组配置状态Switch(config-if-range)#description “ description ” 描述端口Switch(config-if-range)#speed auto|100|10 设置端口速率模式Switch(config-if-range)#duplex auto|full|half 设置端口双工模式Switch(config-if-range)#switchport mode access 设置端口为访问模式Switch(config-if-range)#switchport access vlan “ vlan-num ” 设置端口所属Vlan Switch(config-if-range)#no shutdown 启用端口Switch(config-if-range)#end 结束本次配置七、配置STP(生成树协议)Switch#configure terminal 进入配置状态Switch(config)#spanning-tree portfast default 设置所有访问端口为快速模式Switch(config)#no spanning-tree portfast default 取消所有访问端口为快速模式Switch(config)#spanning-tree uplinkfast 设置上行端口为快速模式Switch(config)#no spanning-tree uplinkfast 取消上行端口为快速模式Switch(config)#end 结束本次配置或Switch#configure terminal 进入配置状态Switch(config)#interface “ interfacemod/port ” 进入端口配置状态Switch(config-if)#spanning-tree portfast 设置端口为快速模式文档Switch(config-if)#no shutdown 启用端口Switch(config-if)#end 结束本次配置或Switch#configure terminal 进入配置状态Switch(config)#interface range “ interface mod/port -port ” 进入端口组配置状态Switch(config-if-range)# spanning-tree portfast 设置端口为快速模式Switch(config-if-range)#no shutdown 启用端口Switch(config-if-range)#end 结束本次配置八、启用 Vlan 间 RouterSwitch#configure terminal 进入配置状态Switch(config)#ip routing 启用 ip 路由Switch(config)#ip route “ Destination-prefix Destination-prefix-mask Forwarding-router 's-address ” Switch(config)#end 结束本次配置九、配置 ACLSwitch#configure terminal 进入配置状态Switch(config)#interface vlan “ vlan-num ” 进入 vlan 配置状态 Switch(config-if)#ip access-group “ acl-num ” in|out 应用 acl 到 vlan Switch(config-if)#end 结束本次配置 Switch#configure terminal 进入配置状态Switch(config)#line vty 0 15 进入 vty 配置状态Switch(config-line)#access-class “ acl-num ” in|out 应用 acl 到 vtySwitch(config-if)#end 结束本次配置例:Switch(config)#access-list 101 deny ip host 192.168.2.11 host 192.168.10.21 Switch(config)#access-list 102 deny ip host 192.168.2.13 192.168.10.0 0.0.0.255 Switch(config)#access-list 103 deny ip 192.168.2.0 0.0.0.255 192.168.10.0 0.0.0.255 Switch(config)# access-list 104 deny ip 192.168.2.0 0.0.0.255 host 192.168.10.25十、配置 DHCP 中继代理Switch#configure terminal 进入配置状态Switch(config)#service dhcp 启用 dhcp 服务Switch(config)#ip dhcp relay information option 启用 dhcp 代理服务Switch(config)#interface vlan “ vlan-num ” 进入 vlan 配置状态Switch(config-if)#ip helper-address “ ip-address ” 启用 dhcp 代理服务器 ip 地Switch(config-if)#end 结束本次配置文档十一、配置 DHCP 服务器Switch#configure terminal进入配置状态Switch (config)#ip dhcp pool “ Pool-name ” 设置 dhcp 地址池名称Switch (dhcp-config)#network “ Network-num Network-mask ” 设置 dhcp 地址池 ip 围 Switch (dhcp-config)# dns-server “ ip-address ” 为客户机分配 DNS 服务器 ip 地址 Switch (dhcp-config)#netbios-name-server “ ip-address ” 为客户机分配 WINS 服务器 ip 地址Switch#configure terminal 进入配置状态Switch(config)#service dhcp 启用dhcp 服务wyz(config)#ip dhcp excluded-address “ Low-ip-address High-ip-address ” 设置保留ip 地址Switch(config-if)#end 结束本次配置十二、配置HSRP (热备路由协议)Switch#configure terminal 进入配置状态Switch(config)#interface vlan “ vlan-num ” 进入vlan 配置状态Switch(config-if)#ip address “ ip-address subnet-mask” 设置vlan 物理ip 地址Switch(config-if)#standby “ group-num ” ip “virtual-ip-address ” 设置vlan 虚拟ip 地址Switch(config-if)#standby priority “ Priority-value ” 设置路由器优先等级Switch(config-if)#standby preempt 设置hsrp 抢占功能Switch(config-if)#standby timers “ Hello-interval-in-seconds Hold-time-in-seconds ”设置hello 信息Switch(config-if)#end 结束本次配置十三、保存配置Switch#write memory或Switch#copy running-config startup-config 附1:命令行编辑键TAB 补全命令?查看可用命令Ctrl + P 粘贴历史命令Ctrl + E 将光标移至命令末尾Ctrl + F 将光标向前移动Ctrl + B 将光标向后移动Ctrl + Z 返回#命令模式Ctrl + U Clear Line and Put in BufferCtrl + W Delete Word Backwards and Put in Buffer文档Ctrl + Y Paste Buffer ContentsCtrl + X Clear Line to the Left and Put in BufferCtrl + T Flip Last 2 CharactersCtrl + J ReturnCtrl + L Refresh LineCtrl + I Refresh Line and Goto EndCtrl + K Delete everything on the Right of cursorCtrl + V Allows to type control characterCtrl + M ReturnCtrl + H Backspace Character to the LeftCtrl + R 刷新行附2:SHOW 命令Switch#show version 显示版本信息Switch #show arp | include “ ip-address” 显示ip 地址对应的mac 地址信息Switch#show mac-address-table 显示mac 地址信息Switch#show mac-address-table | include “ mac-address” 格式:xxxx.xxxx.xxxx.xxxx Switch #show mac-address-table dynamic address “ mac-address” 显示mac 地址对应的端口信息Switch#show mac-address-table dynamic interface “ interface mod/port ” 显示端口对应的mac 地址信息Switch#show tech-support 显示技术支持信息Switch#show interfaces 显示接口信息Switch#show vlan 显示vlan 信息Switch#show startup-config 显示启用配置文件Switch#show running-config 显示运行配置文件Switch#show ip route 显示ip 路由状态Switch#clear counters interface “ interface mod/port ” 清除端口计数器Switch(config)#default interface “ interface mod/port ” 恢复端口出厂设置Switch#clear interface “ interface mod/port ” 重置端口的硬件逻辑keyada#show cdp neighbors “ interface mod/port ” detail 附7:ACL 例子VLAN1 需实现以下效果:1、VLAN1 主机192.168.1.240 可以访问所有网段;2、VLAN1 其余主机可以访问除VLAN2 、VLAN3 及VLAN4 外所有网段。
cisco交换机配置实例教程.doc
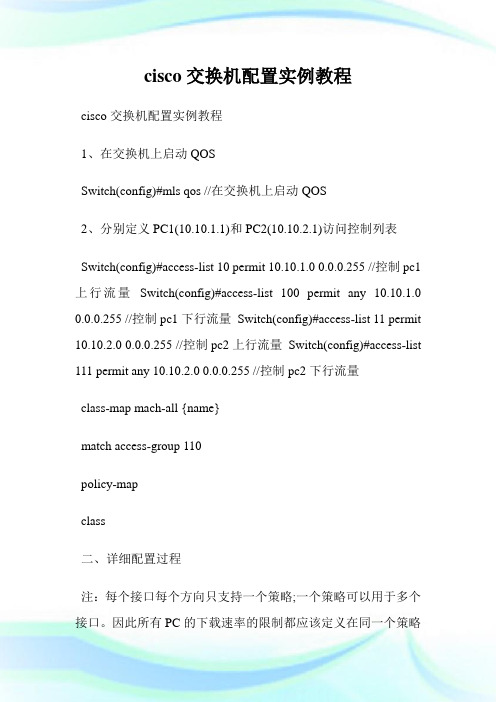
cisco交换机配置实例教程cisco交换机配置实例教程1、在交换机上启动QOSSwitch(config)#mls qos //在交换机上启动QOS2、分别定义PC1(10.10.1.1)和PC2(10.10.2.1)访问控制列表Switch(config)#access-list 10 permit 10.10.1.0 0.0.0.255 //控制pc1上行流量Switch(config)#access-list 100 permit any 10.10.1.0 0.0.0.255 //控制pc1下行流量Switch(config)#access-list 11 permit 10.10.2.0 0.0.0.255 //控制pc2上行流量Switch(config)#access-list 111 permit any 10.10.2.0 0.0.0.255 //控制pc2下行流量class-map mach-all {name}match access-group 110policy-mapclass二、详细配置过程注:每个接口每个方向只支持一个策略;一个策略可以用于多个接口。
因此所有PC的下载速率的限制都应该定义在同一个策略(在本例子当中为policy-map user-down),而PC不同速率的区分是在Class-map 分别定义。
1、在交换机上启动QOSSwitch(config)#mls qos //在交换机上启动QOS2、分别定义PC1(10.10.1.1)和PC2(10.10.2.1)访问控制列表Switch(config)#access-list 10 permit 10.10.1.0 0.0.0.255 //控制pc1上行流量Switch(config)#access-list 100 permit any 10.10.1.0 0.0.0.255 //控制pc1下行流量Switch(config)#access-list 11 permit 10.10.2.0 0.0.0.255 //控制pc2上行流量Switch(config)#access-list 111 permit any 10.10.2.0 0.0.0.255 //控制pc2下行流量3、定义类,并和上面定义的访问控制列表绑定Switch(config)# class-map user1-up //定义PC1上行的类,并绑定访问列表10Switch(config-cmap)# match access-group 10Switch(config-cmap)# exitSwitch(config)# class-map user2-upSwitch(config-cmap)# match access-group 11 //定义PC2上行的类,并绑定访问列表10Switch(config-cmap)# exitSwitch(config)# class-map user1-downSwitch(config-cmap)# match access-group 100 //定义PC1下行的类,并绑定访问列表100Switch(config-cmap)# exitSwitch(config)# class-map user2-downSwitch(config-cmap)# match access-group 111 //定义PC2下行的类,并绑定访问列表111Switch(config-cmap)# exit4、定义策略,把上面定义的类绑定到该策略Switch(config)# policy-map user1-up //定义PC1上行的速率为1MSwitch(config-pmap)# class user1-upSwitch(config-pmap-c)# trust dscpSwitch(config-pmap-c)# police 1024000 1024000 exceed-action dropSwitch(config)# policy-map user2-up //定义PC2上行的速率为2MSwitch(config-pmap)# class user2-upSwitch(config-pmap-c)# trust dscpSwitch(config-pmap-c)# police 2048000 1024000 exceed-action dropSwitch(config)# policy-map user-downSwitch(config-pmap)# class user1-downSwitch(config-pmap-c)# trust dscpSwitch(config-pmap-c)# police 1024000 1024000 exceed-action dropSwitch(config-pmap-c)# exitSwitch(config-pmap)# class user2-downSwitch(config-pmap-c)# trust dscpSwitch(config-pmap-c)# police 2048000 1024000 exceed-action dropSwitch(config-pmap-c)# exit5、在接口上运用策略Switch(config)# interface f0/1Switch(config-if)# service-policy input user1-upSwitch(config)# interface f0/2Switch(config-if)# service-policy input user2-upSwitch(config)# interface g0/1Switch(config-if)# service-policy input user-down看了cisco交换机配置实例教程还想看:1.思科交换机基本配置实例讲解2.CISCO交换机配置操作学习教程3.思科交换机配置教程详解4.cisco交换机qos配置实例教程5.思科路由器、交换机的基本管理教程6.Cisco 2960交换机的基础安装配置教程Cisco交换机入门配置的方法Cisco交换机入门配置的方法:机型:Cisco 3750想对交换机警醒配置。
cisco交换机配置文档

Catalyst Switches That Support SPAN, RSPAN, and ERSPAN
Catalyst Switches SPAN Support
Catalyst Express
500 Series
Yes
Catalyst
Yes
6500/6000 Series
• What is SPAN and how do you configure it? • What are the different features available (especially multiple, simultaneous SPAN sessions), and what
software level is necessary in order to run them? • Does SPAN affect switch performance?
SPAN Session is Always Used With an FWSM in the Catalyst 6500 Chassis Can a SPAN and an RSPAN Session Have the Same ID Within the Same Switch? Can an RSPAN Session Work Across Different VTP Domains? Can an RSPAN Session Work Across WAN or Different Networks? Can a RSPAN Source Session and the Destination Session Exist on the Same Catalyst Switch? Network Analyzer/Security Device Connected to SPAN Destination Port is Not Reachable NetPro Discussion Forums − Featured Conversations Related Information
思科交换机基本配置手册

17. 在基于IOS的交换机上修改STP时钟:
switch(config)# spanning-tree [vlan vlan-list] hello-time seconds
switch(vlan)# exit
switch# configure teriminal
switch(config)# interface interface module/number
switch(config-if)# switchport mode access
switch(config-if)# switchport access vlan vlan-num
switch(vlan)# vtp domain domain-name
在基于CLI的交换机上配置VTP管理域:
switch(enable) set vtp [domain domain-name]
11.在基于IOS的交换机上配置VTP 模式:
switch# vlan database
22. 用show vtp domain 显示管理域的VTP参数.
23. 用show vtp statistics显示管理域的VTP参数.
24. 在Catalyst交换机上定义TrBRF的命令如下:
switch(enable) set vlan vlan-name [name name] type trbrf bridge bridge-num[stp {ieee|ibm}]
4.在基于IOS的交换机上启用和浏览CDP信息:
思科Cisco交换机配置手册配置教程
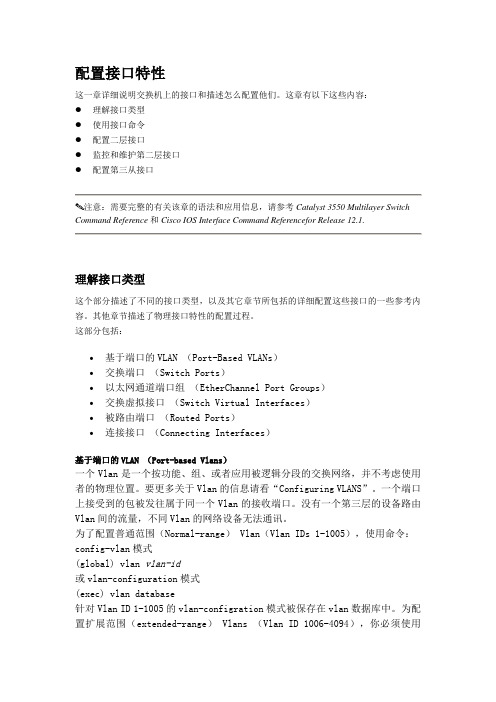
配置接口特性这一章详细说明交换机上的接口和描述怎么配置他们。
这章有以下这些内容:●理解接口类型●使用接口命令●配置二层接口●监控和维护第二层接口●配置第三从接口注意:需要完整的有关该章的语法和应用信息,请参考Catalyst 3550 Multilayer Switch Command Reference和Cisco IOS Interface Command Referencefor Release 12.1.理解接口类型这个部分描述了不同的接口类型,以及其它章节所包括的详细配置这些接口的一些参考内容。
其他章节描述了物理接口特性的配置过程。
这部分包括:•基于端口的VLAN (Port-Based VLANs)•交换端口(Switch Ports)•以太网通道端口组(EtherChannel Port Groups)•交换虚拟接口(Switch Virtual Interfaces)•被路由端口(Routed Ports)•连接接口(Connecting Interfaces)基于端口的VLAN (Port-based Vlans)一个Vlan是一个按功能、组、或者应用被逻辑分段的交换网络,并不考虑使用者的物理位置。
要更多关于Vlan的信息请看“Configuring VLANS”。
一个端口上接受到的包被发往属于同一个Vlan的接收端口。
没有一个第三层的设备路由Vlan间的流量,不同Vlan的网络设备无法通讯。
为了配置普通范围(Normal-range) Vlan(Vlan IDs 1-1005),使用命令:config-vlan模式(global) vlan vlan-id或vlan-configuration模式(exec) vlan database针对Vlan ID 1-1005的vlan-configration模式被保存在vlan数据库中。
为配置扩展范围(extended-range) Vlans (Vlan ID 1006-4094),你必须使用config-vlan模式,并把VTP的模式设为transparent透明模式。
(完整word版)思科交换机配置命令大全

(完整word版)思科交换机配置命令大全思科交换机配置命令大全switch> 用户模式1:进入特权模式enableswitch> enableswitch#2:进入全局配置模式configure terminalswitch> enableswitch#configure terminalswitch(conf)#3:交换机命名hostname aptech2950 以aptech2950为例switch> enableswitch#configure terminalswitch(conf)#hostname aptch-2950aptech2950(conf)#4:配置使能口令enable password cisco 以cisco为例switch> enableswitch#configure terminalswitch(conf)#hostname aptch2950aptech2950(conf)# enable password cisco5:配置使能密码enable secret ciscolab 以cicsolab为例switch> enableswitch#configure terminalswitch(conf)#hostname aptch2950aptech2950(conf)# enable secret ciscolab6:设置虚拟局域网vlan 1 interface vlan 1switch> enableswitch#configure terminalswitch(conf)#hostname aptch2950aptech2950(conf)# interface vlan 1aptech2950(conf-if)#ip address 192.168.1.1 255.255.255.0 配置交换机端口ip和子网掩码aptech2950(conf-if)#no shut 是配置处于运行中aptech2950(conf-if)#exitaptech2950(conf)#ip default-gateway 192.168.254 设置网关地址7:进入交换机某一端口interface fastehernet 0/17 以17端口为例switch> enableswitch#configure terminalswitch(conf)#hostname aptch2950aptech2950(conf)# interface fastehernet 0/17aptech2950(conf-if)#8:查看命令showswitch> enableswitch# show version 察看系统中的所有版本信息show interface vlan 1 查看交换机有关ip 协议的配置信息show running-configure 查看交换机当前起作用的配置信息show interface fastethernet 0/1 察看交换机1接口具体配置和统计信息show mac-address-table 查看mac地址表show mac-address-table aging-time 查看mac地址表自动老化时间9:交换机恢复出厂默认恢复命令switch> enableswitch# erase startup-configureswitch# reload10:双工模式设置switch> enableswitch#c onfigure terminalswitch2950(conf)#hostname aptch-2950aptech2950(conf)# interface fastehernet 0/17 以17端口为例aptech2950(conf-if)#duplex full/half/auto 有full , half, auto 三个可选项11:cdp相关命令switch> enableswitch# show cdp 查看设备的cdp全局配置信息show cdp interface fastethernet 0/17 查看17端口的cdp配置信息show cdp traffic 查看有关cdp包的统计信息show cdp nerghbors 列出与设备相连的cisco设备12:csico2950的密码恢复拔下交换机电源线。
Cisco思科光纤交换机配置说明.doc
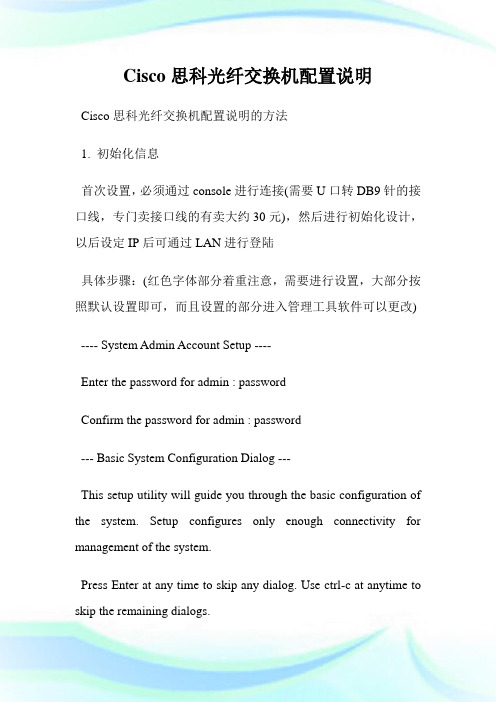
Cisco思科光纤交换机配置说明Cisco思科光纤交换机配置说明的方法1. 初始化信息首次设置,必须通过console进行连接(需要U口转DB9针的接口线,专门卖接口线的有卖大约30元),然后进行初始化设计,以后设定IP后可通过LAN进行登陆具体步骤:(红色字体部分着重注意,需要进行设置,大部分按照默认设置即可,而且设置的部分进入管理工具软件可以更改) ---- System Admin Account Setup ----Enter the password for admin : passwordConfirm the password for admin : password--- Basic System Configuration Dialog ---This setup utility will guide you through the basic configuration of the system. Setup configures only enough connectivity for management of the system.Press Enter at any time to skip any dialog. Use ctrl-c at anytime to skip the remaining dialogs.Would you like to enter the basic configuration dialog (yes/no): y Create another login account (yes/no) [n]:Configure read-only SNMP community string (yes/no) [n]: Configure read-write SNMP community string (yes/no) [n]:Enter the switch name: Pxx-MDS-x (where xx is your pod number and x is the switch number; for example:P01-MDS-1)Continue with Out-of-band (mgmt0) management configuration? (yes/no) [y]:Mgmt0 IPv4 address : 10.0.x.y (where x is your pod number and y is 5 for MDS-1 and 3 for MDS-2)(客户)0.16Mgmt0 IPv4 netmask : 255.255.255.0Configure the default gateway? (yes/no) [y]:IPv4 address of the default gateway : 10.0.x.254 (where x is your pod number)Configure advanced IP options? (yes/no) [n]:Enable the telnet service? (yes/no) [y]:Enable the ssh service? (yes/no) [n]:Configure the ntp server? (yes/no) [n]:Configure default switchport interface state (shut/noshut) [shut]: (注意一下)noshutConfigure default switchport trunk mode (on/off/auto) [on]:Configure default zone policy (permit/deny) [deny]:Enable full zoneset distribution (yes/no) [n]:NOTE:初始设定的配置对新的VSAN起作用,即原始VSAN1无这些配置解决办法:1 zone default-zone permit VSAN2 新建NEW VSAN2 将port转移VSAN2里面。
思科交换机的基本配置
思科交换机的基本配置思科交换机的基本配置H3C每年将销售额的15%以上用于研发投入,在中国的北京、杭州和深圳设有研发机构,在北京和杭州设有可靠性试验室以及产品鉴定测试中心。
下面店铺整理一些思科交换机的基本配置,希望大家认真阅读!CISCO交换机基本配置:Console端口连接用户模式hostname# ;特权模式hostname(config)# ;全局配置模式hostname(config-if)# ;交换机口令设置:switch>enable ;进入特权模式switch#config terminal ;进入全局配置模式switch(config)#hostname csico ;设置交换机的主机名switch(config)#enable secret csico1 ;设置特权加密口令switch(config)#enable password csico8 ;设置特权非密口令switch(config)#line console 0 ;进入控制台口switch(config-line)#line vty 0 4 ;进入虚拟终端switch(config-line)#login ;虚拟终端允许登录switch(config-line)#password csico6 ;设置虚拟终端登录口令csico6switch#exit ;返回命令交换机VLAN创建,删除,端口属性的设置,配置trunk端口,将某端口加入vlan中,配置VTP:switch#vlan database ;进入VLAN设置switch(vlan)#vlan 2 ;建VLAN 2switch(vlan)#vlan 3 name vlan3 ;建VLAN 3并命名为vlan3switch(vlan)#no vlan 2 ;删vlan 2switch(config)#int f0/1 ;进入端口1switch(config)#speed ? 查看speed命令的子命令switch(config)#speed 100 设置该端口速率为100mb/s (10/auto)switch(config)#duplex ? 查看duplex的子命令switch(config)#duplex full 设置该端口为全双工(auto/half)switch(config)#description TO_PC1 这是该端口描述为TO_PC1 switch(config-if)#switchport access vlan 2 ;当前端口加入vlan 2switch(config-if)#switchport mode trunk ;设置为trunk模式(access模式)switch(config-if)#switchport trunk allowed vlan 1,2 ;设置允许的vlanswitch(config-if)#switchport trunk encap dot1q ;设置vlan 中继switch(config)#vtp domain vtpserver ;设置vtp域名相同switch(config)#vtp password ;设置发vtp密码switch(config)#vtp server ;设置vtp服务器模式switch(config)#vtp client ;设置vtp客户机模式交换机设置IP地址,默认网关,域名,域名服务器,配置和查看MAC地址表:switch(config)#interface vlan 1 ;进入vlan 1switch(config-if)#ip address 192.168.1.1 255.255.255.0 ;设置IP地址switch(config)#ip default-gateway 192.168.1.6 ;设置默认网关switch(config)#ip domain-name 设置域名switch(config)#ip name-server 192.168.1.18 设置域名服务器switch(config)#mac-address-table? 查看mac-address-table 的子命令switch(config)#mac-address-table aging-time 100 设置超时时间为100msswitch(config)#mac-address-table permanent 0000.0c01.bbcc f0/3 加入永久地址在f0/3端口switch(config)#mac-address-table restricted static 0000.0c02.bbcc f0/6 f0/7 加入静态地址目标端口f0/6源端口f0/7 switch(config)#endswitch#show mac-address-table 查看整个MAC地址表switch#clear mac-address-table restricted static 清除限制性静态地址交换机显示命令:switch#write ;保存配置信息switch#show vtp ;查看vtp配置信息switch#show run ;查看当前配置信息switch#show vlan ;查看vlan配置信息switch#show interface ;查看端口信息switch#show int f0/0 ;查看指定端口信息switch#show int f0/0 status;查看指定端口状态switch#dir flash: ;查看闪存Cisco路由器配置命令大全网络2010-06-26 06:43:44 阅读657 评论0 字号:大中小订阅 .(1)模式转换命令用户模式----特权模式,使用命令"enable"特权模式----全局配置模式,使用命令"config t"全局配置模式----接口模式,使用命令"interface+接口类型+接口号"全局配置模式----线控模式,使用命令"line+接口类型+接口号"注:用户模式:查看初始化的信息.特权模式:查看所有信息、调试、保存配置信息全局模式:配置所有信息、针对整个路由器或交换机的所有接口接口模式:针对某一个接口的配置线控模式:对路由器进行控制的接口配置(2)配置命令show running config 显示所有的配置show versin 显示版本号和寄存器值shut down 关闭接口no shutdown 打开接口ip add +ip地址配置IP地址secondary+IP地址为接口配置第二个IP地址show interface+接口类型+接口号查看接口管理性show controllers interface 查看接口是否有DCE电缆show history 查看历史记录show terminal 查看终端记录大小hostname+主机名配置路由器或交换机的标识config memory 修改保存在NVRAM中的启动配置exec timeout 0 0 设置控制台会话超时为0service password-encryptin 手工加密所有密码enable password +密码配置明文密码ena sec +密码配置密文密码line vty 0 4/15 进入telnet接口password +密码配置telnet密码line aux 0 进入AUX接口password +密码配置密码line con 0 进入CON接口password +密码配置密码bandwidth+数字配置带宽no ip address 删除已配置的IP地址show startup config 查看NVRAM中的配置信息copy run-config atartup config 保存信息到NVRAM write 保存信息到NVRAMerase startup-config 清除NVRAM中的配置信息show ip interface brief 查看接口的谪要信息banner motd # +信息 + # 配置路由器或交换机的描素信息description+信息配置接口听描素信息vlan database 进入VLAN数据库模式vlan +vlan号+ 名称创建VLANswitchport access vlan +vlan号为VLAN为配接口interface vlan +vlan号进入VLAN接口模式ip add +ip地址为VLAN配置管理IP地址vtp+service/tracsparent/client 配置SW的VTP工作模式vtp +domain+域名配置SW的VTP域名vtp +password +密码配置SW的密码switchport mode trunk 启用中继no vlan +vlan号删除VLANshow spamming-tree vlan +vlan号查看VLA怕生成树议2. 路由器配置命令ip route+非直连网段+子网掩码+下一跳地址配置静态/默认路由show ip route 查看路由表show protocols 显示出所有的被动路由协议和接口上哪些协议被设置show ip protocols 显示了被配置在路由器上的路由选择协议,同时给出了在路由选择协议中使用的定时器等信息router rip 激活RIP协议network +直连网段发布直连网段interface lookback 0 激活逻辑接口passive-interface +接口类型+接口号配置接口为被动模式debug ip +协议动态查看路由更新信息undebug all 关闭所有DEBUG信息router eigrp +as号激活EIGRP路由协议network +网段+子网掩码发布直连网段show ip eigrp neighbors 查看邻居表show ip eigrp topology 查看拓扑表show ip eigrp traffic 查看发送包数量router ospf +process-ID 激活OSPF协议network+直连网段+area+区域号发布直连网段show ip ospf 显示OSPF的进程号和ROUTER-IDencapsulation+封装格式更改封装格式no ip admain-lookup 关闭路由器的域名查找ip routing 在三层交换机上启用路由功能show user 查看SW的在线用户clear line +线路号清除线路3. 三层交换机配置命令配置一组二层端口configure terminal 进入配置状态nterface range {port-range} 进入组配置状态配置三层端口configure terminal 进入配置状态interface {{fastethernet | gigabitethernet} interface-id} | {vlan vlan-id} | {port-channel port-channel-number} 进入端口配置状态no switchport 把物理端口变成三层口ip address ip_address subnet_mask 配置IP地址和掩码no shutdown 激活端口例:Switch(config)# interface gigabitethernet0/2Switch(config-if)# no switchportSwitch(config-if)# ip address 192.20.135.21 255.255.255.0Switch(config-if)# no shutdown配置VLANconfigure terminal 进入配置状态vlan vlan-id 输入一个VLAN号, 然后进入vlan配态,可以输入一个新的VLAN号或旧的来进行修改。
- 1、下载文档前请自行甄别文档内容的完整性,平台不提供额外的编辑、内容补充、找答案等附加服务。
- 2、"仅部分预览"的文档,不可在线预览部分如存在完整性等问题,可反馈申请退款(可完整预览的文档不适用该条件!)。
- 3、如文档侵犯您的权益,请联系客服反馈,我们会尽快为您处理(人工客服工作时间:9:00-18:30)。
39、没有不老的誓言,没有不变的承 诺,踏 上旅途 ,义无 反顾。 40、对时间的价值没有没有深切认识 的人, 决不会 坚韧勤 勉。
61、奢侈是舒适的,否则就不是奢侈 。——CocoCha nel 62、少而好学,如日出之阳;壮而好学 ,如日 中之光 ;志而 好学, 如炳烛 之光。 ——刘 向 63、三军可夺帅也,匹夫不可夺志也。 ——孔 丘 64、人生就是学校。在那里,与其说好 的教师 是幸福 ,不如 说好的 教师是 不幸。 ——海 贝尔 65、接受挑战,就可以享受胜利的喜悦 。——杰纳勒 尔·乔治·S·巴顿
