ModalPopupExtender_控件属性、功能、实例演示和使用方式详解
a-modal getcontainer用法
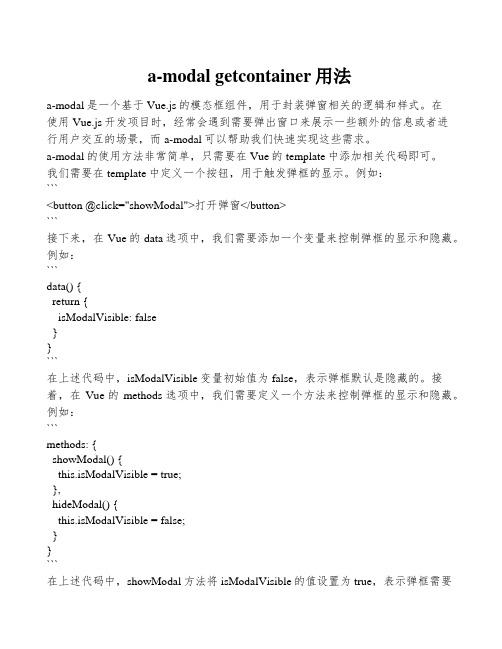
a-modal getcontainer用法a-modal是一个基于Vue.js的模态框组件,用于封装弹窗相关的逻辑和样式。
在使用Vue.js开发项目时,经常会遇到需要弹出窗口来展示一些额外的信息或者进行用户交互的场景,而a-modal可以帮助我们快速实现这些需求。
a-modal的使用方法非常简单,只需要在Vue的template中添加相关代码即可。
我们需要在template中定义一个按钮,用于触发弹框的显示。
例如:```<button @click="showModal">打开弹窗</button>```接下来,在Vue的data选项中,我们需要添加一个变量来控制弹框的显示和隐藏。
例如:```data() {return {isModalVisible: false}}```在上述代码中,isModalVisible变量初始值为false,表示弹框默认是隐藏的。
接着,在Vue的methods选项中,我们需要定义一个方法来控制弹框的显示和隐藏。
例如:```methods: {showModal() {this.isModalVisible = true;},hideModal() {this.isModalVisible = false;}}```在上述代码中,showModal方法将isModalVisible的值设置为true,表示弹框需要显示出来;而hideModal方法则将isModalVisible的值设置为false,表示弹框需要隐藏起来。
最后一步,我们需要在template中使用a-modal组件,并绑定相关的属性和事件。
例如:```<a-modal v-model="isModalVisible" @close="hideModal"><!-- 弹框的内容 --></a-modal>```在上述代码中,v-model指令将isModalVisible变量和a-modal组件进行了双向绑定,这样当isModalVisible值改变时,a-modal组件的显示状态也会相应改变。
modlapopup显示时如何传递参数?

modlapopup显⽰时如何传递参数?ModalPopupExtender Example for Editing Rows in a GridView (Master/Detail Scenario)The web application I am currently working on is a data-centric, internal facing application targeted at the knowledge workers within our enterprise. A majority of the pages are our core 'search' pages that contain a GridView and a number of input elements for entering search criteria. Each row in our GridViews contain a hyperlink to a supporting 'details' page that has additional information for the selected row -usually contained in a DetailsView. Our standard for implementing this has been to render the values for the GridViews primary key column as a hyperlink that takes the user to the details page passing the PK through the query string. This all works fine and our users seem to be OK with this type of naviagation. But when I was recently doing some work with the ModalPopupExtender, I was curious if we could improve this flow by keeping the user on the main search page by moving the DetailsView to the ModalPopupExtender. See the screen shot below or the for an example.|I did a few google searches, and sure enough there were some people doing this ( and ). I took a similiar approach to the second article, but with a few minor tweaks. I uploaded a of these pages so you can check out the behavior (I kept the styling to a minimum as usual). The code for this example is straight-forward except for the following 3 items:1. The ModalPopupExtender requires the TargetControlID property to be set. Because of this I created a hidden button so this error doesn't occur. For this example, we don't need to set a control to trigger the popup because we are always explicitly calling Show() on the popup when the Details button is clicked).2. The DetailsView for the selected row is contained in an updatepanel with the UpdateMode set to Conditional. This is done because we want to make sure that the control is only updated from the Details button click handler and not when the Customers GridView is sorted or paged through3. We are explicitly calling Show on the ModalPopup to display the DetailsView from the 'Details' button click event. This is the only action that triggers the ModalPopup from being made visibleAlso, I didn't actually implement an update because I don'y want my northwind database getting messed up. Hopefully this will get you enough of a start that implementing the update will not be a huge problem.Here is the markup for the page, Enjoy!<%@ Page Language="C#" %><%@ Register Assembly="AjaxControlToolkit" Namespace="AjaxControlToolkit" TagPrefix="ajaxToolkit" %>< runat="server">///////////////protected void BtnViewDetails_Click(object sender, EventArgs e){// get the gridviewrow from the sender so we can get the datakey we needButton btnDetails = sender as Button;GridViewRow row = (GridViewRow)btnDetails.NamingContainer;// extract the customerid from the row whose details button originated the postback.// grab the customerid and feed it to the customer details datasource// finally, rebind the detailviewthis.sqldsCustomerDetails.SelectParameters.Clear();this.sqldsCustomerDetails.SelectParameters.Add("customerid", Convert.ToString(this.gvCustomers.DataKeys[row.RowIndex].Value));this.dvCustomerDetail.DataSource = this.sqldsCustomerDetails;this.dvCustomerDetail.DataBind();// update the contents in the detail panelthis.updPnlCustomerDetail.Update();// show the modal popupthis.mdlPopup.Show();}Example of using a ModalPopupExtender to edit the indivdual rows of a GridView.To test out the functionality, click the Details button of any of the rows and watch what happens.这⾥的核⼼思想是⼿动控制modalpopup的显⽰,然后它的属性TargetControlID设置成⼀个不现实的button的id。
关于wpf中popup中的一些用法的总结

在WPF(Windows Presentation Foundation)中,Popup控件是一个用于显示弹出窗口的控件。
Popup 控件本身是一个不可见的元素,只有在向Popup中添加内容(如文本框、按钮等)后,它才可见。
Popup 控件在UI中的使用非常灵活,可以用来实现各种自定义的弹出效果。
以下是关于WPF中Popup控件的一些常用属性和用法的总结:1.IsOpen属性:这是一个布尔值,用于指示Popup控件是否显示。
当设置为true时,Popup控件将显示;当设置为false时,Popup控件将隐藏。
2.StaysOpen属性:这也是一个布尔值,用于指示在Popup控件失去焦点时是否关闭Popup控件的显示。
如果设置为true,Popup控件将保持打开状态,即使它失去了焦点;如果设置为false,Popup 控件在失去焦点时将自动关闭。
3.PopupAnimation属性:这个属性用于设置Popup控件显示时的动画效果。
它只有在AllowsTransparency属性设置为true时才有用。
例如,可以设置为"Fade"表示Popup控件以渐入的方式显示。
4.PlacementTarget属性:这个属性用于设置Popup控件停靠的位置。
它通常绑定到一个控件上,表示Popup控件将相对于该控件进行定位。
例如,可以设置为一个CheckBox控件,这样Popup控件就会出现在该CheckBox控件的旁边。
5.Placement属性:这个属性用于指定Popup控件的定位方式。
它是一个枚举值,可以选择不同的定位方式,如RelativeTo、Absolute、Bottom、Top等。
6.PlacementRectangle属性:这个属性用于设置一个矩形,Popup控件在显示时将相对于此矩形进行定位。
这个矩形的位置也相对于PlacementTarget属性所设定的控件。
7.HorizontalOffset和VerticalOffset属性:这两个属性用于指定Popup控件在水平方向和垂直方向上的偏移量。
magnific popup用法
magnific popup用法Magnific Popup 是一个流行的轻量级弹出层(lightbox)插件,它能够帮助网站开发者以一种简单而优雅的方式实现各种弹出层的功能。
本文将介绍Magnific Popup 的详细用法,包括安装、配置和使用。
一、安装安装Magnific Popup 非常简单。
你可以选择下载源文件并手动引入到你的项目中,或者通过包管理工具如NPM 或Yarn 安装。
下面是通过NPM 安装的示例:npm install magnific-popup save安装完成后,你就可以在项目中使用Magnific Popup 了。
二、配置在开始使用Magnific Popup 之前,你需要对其进行一些配置。
通过JavaScript 代码,你可以将Magnific Popup 应用到你想要的HTML 元素上。
下面是一些常见的配置选项:1. 类选择器你需要指定一个类选择器来标识你想要将Magnific Popup 应用的元素。
例如,你可以通过以下代码将Magnific Popup 应用到带有"lightbox" 类的元素上:javascript('.lightbox').magnificPopup();2. 设置类型Magnific Popup 支持多种类型的弹出层,包括图片、视频和Ajax 页面等。
你可以通过以下代码设置你想要的类型:javascript('.lightbox').magnificPopup({type: 'image' 图片});3. 其他配置选项你还可以通过配置选项进一步自定义Magnific Popup 的行为,如动画、主题、尺寸等。
以下是一些常用的配置选项:javascript('.lightbox').magnificPopup({ type: 'image',mainClass: 'mfp-fade', 动画效果gallery:{enabled:true 启用图片集},image: {titleSrc: 'data-title' 图片标题来源},callbacks: {open: function() {打开时的回调函数},close: function() {关闭时的回调函数}}});三、使用一旦你完成了配置,就可以开始使用Magnific Popup 了。
magnificpopup参数
magnificpopup参数一、概述1.Magnific Popup简介Magnific Popup是一款轻量级的弹出窗插件,适用于各种网站和应用程序。
它具有丰富的配置选项和良好的用户体验,可以轻松创建各种类型的弹出窗口,如模态窗口、通知窗口等。
2.文章结构本文将详细介绍Magnific Popup插件的使用方法,包括基本参数的设置、高级功能的实现以及常见问题的解决。
接下来,让我们开始深入了解magnificpopup参数吧!二、magnificpopup参数详解1.基本参数(1)container:设置弹出窗口的容器。
(2)title:设置弹出窗口的标题。
(3)content:设置弹出窗口的内容。
(4)closeBtn:设置是否显示关闭按钮。
(5)closeOnClick:设置是否点击容器关闭弹出窗口。
(6)closeOnPopupClick:设置是否点击弹出窗口内部内容关闭弹出窗口。
(7)closeOnEscape:设置是否使用ESC键关闭弹出窗口。
(8)autoClose:设置弹出窗口自动关闭的时间。
(9)className:设置弹出窗口的CSS类名。
(10)contentType:设置弹出窗口内容类型,可选值为"html"、"markdown"、"text"等。
(11)overrideYaml:设置是否使用YAML文件定义弹出窗口内容。
(12)initBtn:设置初始化时的按钮状态。
(13)keyboard:设置是否允许使用键盘操作(如上下左右键移动焦点)。
(14)position:设置弹出窗口的位置,可选值为"top"、"bottom"、"left"、"right"等。
(15)size:设置弹出窗口的大小,如"width: 300px; height: 200px;"。
微信小程序
微信⼩程序 modal弹框组件详解
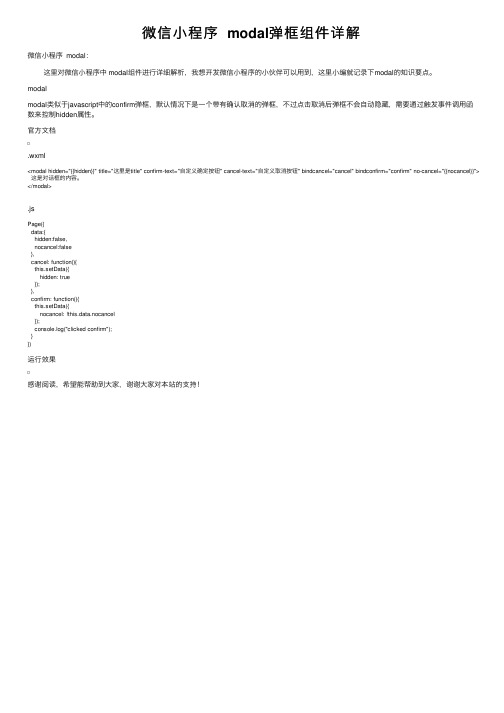
微信⼩程序 modal:
这⾥对微信⼩程序中 modal组件进⾏详细解析,我想开发微信⼩程序的⼩伙伴可以⽤到,这⾥⼩编就记录下modal的知识要点。
modal
modal类似于javascript中的confirm弹框,默认情况下是⼀个带有确认取消的弹框,不过点击取消后弹框不会⾃动隐藏,需要通过触发事件调⽤函数来控制hidden属性。
官⽅⽂档
.wxml
<modal hidden="{{hidden}}" title="这⾥是title" confirm-text="⾃定义确定按钮" cancel-text="⾃定义取消按钮" bindcancel="cancel" bindconfirm="confirm" no-cancel="{{nocancel}}">这是对话框的内容。
</modal>
.js
Page({
data:{
hidden:false,
nocancel:false
},
cancel: function(){
this.setData({
hidden: true
});
},
confirm: function(){
this.setData({
nocancel: !this.data.nocancel
});
console.log("clicked confirm");
}
})
运⾏效果
感谢阅读,希望能帮助到⼤家,谢谢⼤家对本站的⽀持!。
showModalDialog和showModelessDialog方法使用详解
showModalDialog() 和showModelessDialog()方法使用详解Javascript有许多内建的方法来产生对话框,如:window.alert(),window.confirm(),window.prompt().等。
然而IE提供更多的方法支持对话框。
如:showModalDialog() (IE 4+ 支持)showModelessDialog() (IE 5+ 支持)window.showModalDialog()方法用来创建一个显示HTML内容的模态对话框,由于是对话框,因此它并没有一般用window.open()打开的窗口的所有属性。
window.showModelessDialog()方法用来创建一个显示HTML内容的非模态对话框。
当我们用showModelessDialog()打开窗口时,不必用window.close()去关闭它,当以非模态方式[IE5]打开时,打开对话框的窗口仍可以进行其他的操作,即对话框不总是最上面的焦点,当打开它的窗口URL改变时,它自动关闭。
而模态[IE4]方式的对话框始终有焦点(焦点不可移走,直到它关闭)。
模态对话框和打开它的窗口相联系,因此我们打开另外的窗口时,他们的链接关系依然保存,并且隐藏在活动窗口的下面。
使用方法如下:vReturnValue = window.showModalDialog(sURL [, vArguments] [, sFeatures]) vReturnValue = window.showModelessDialog(sURL [, vArguments] [, sFeatures])参数说明:sURL必选参数,类型:字符串。
用来指定对话框要显示的文档的URL。
vArguments可选参数,类型:变体。
用来向对话框传递参数。
传递的参数类型不限,包括数组等。
对话框通过window.dialogArguments来取得传递进来的参数。
vuemodal用法
vuemodal用法Vue.js是一种流行的用于构建用户界面的JavaScript框架。
它具有简洁的语法和响应式的数据绑定,使得开发者能够更高效地构建交互式的网页应用程序。
Vue Modal是Vue.js提供的一个组件,用于实现模态框(Modal)功能,即弹出窗口。
Vue Modal提供了一种简单且灵活的方式来创建和管理模态框。
它允许开发者通过传入不同的属性和事件来定制模态框的外观和行为。
下面我们将介绍一些常用的Vue Modal用法,以帮助你在Vue.js项目中使用模态框。
首先,要使用Vue Modal,我们需要在Vue.js项目中引入相应的库。
可以通过下载Vue Modal的压缩包文件,然后在HTML文件中引入相应的js和css文件,或者使用npm安装Vue Modal并在代码中引入。
一旦Vue Modal被引入,我们就可以在Vue实例中轻松地创建一个模态框。
通常,我们会在需要弹出模态框的组件中定义一个data属性来控制模态框是否显示。
例如,我们可以添加一个名为"showModal"的布尔值属性,并将其初始值设置为false。
接下来,我们需要为触发显示模态框的按钮或链接添加一个点击事件处理函数。
在该函数中,我们将"showModal"属性设置为true,从而实现显示模态框的效果。
同时,我们还可以在模态框的打开时执行其他自定义的操作,如加载数据或执行动画效果。
在模态框的组件中,我们可以使用Vue Modal提供的模板语法和指令来定义模态框的内容和样式。
例如,可以使用v-if指令根据"showModal"属性的值来决定是否显示模态框。
我们还可以通过添加样式类或内联样式来定制模态框的外观。
此外,Vue Modal还提供了一些有用的事件,用于在模态框的打开、关闭或提交等操作发生时执行相应的操作。
例如,我们可以使用v-on指令监听模态框的关闭按钮点击事件,并在事件处理函数中将"showModal"属性设置为false,实现关闭模态框的效果。
- 1、下载文档前请自行甄别文档内容的完整性,平台不提供额外的编辑、内容补充、找答案等附加服务。
- 2、"仅部分预览"的文档,不可在线预览部分如存在完整性等问题,可反馈申请退款(可完整预览的文档不适用该条件!)。
- 3、如文档侵犯您的权益,请联系客服反馈,我们会尽快为您处理(人工客服工作时间:9:00-18:30)。
ModalPopupExtender控件属性、功能、实例演示和使用方式详解↘ModalPopupExtender控件功能描述 (1)↘ModalPopupExtender控件属性描述 (1)↘ModalPopupExtender功能演示实例 (1)↘客户端使用方式 (2)↘服务器端使用方式 (4)↘ModalPopupExtender控件功能描述以模式窗口的方式弹出客户或服务器控件,以突出显示! 弹出的一般是DIV或PANEL.↘ModalPopupExtender控件属性描述TargetControlID : 控制是否弹出的控件的ID.PopupDragHandleControlID : 允许拖拽的控件的ID.PopupControlID: 指定要弹出的控件的ID.BackgroundCssClass: 指定弹出控件后其它内容的样式.DropShadow: 弹出的控件是否有阴影效果.OkControlID: 确认按钮的ID.OnOkScript : 单击[确认]按钮时要执行的脚本方法CancelControlID :取消按钮的ID.OnCancelScript : 单击[取消]按钮时要执行的脚本方法.X,Y :指定弹出层的位置.RepositionMode : 指示当页面窗口调整大小或滚动时,弹出层是否要进行位置移动.↘ModalPopupExtender功能演示实例页面代码代码<style type="text/css">.modalBackground {background-color:Gray;filter:alpha(opacity=50);opacity:0.5;};.modalPopup{background-color:White;opacity:0;}</style>...<div><asp:Button runat="server" ID="btnViewMore" Text="More" /><asp:Panel ID="pnlViewCustomer" runat="server" CssClass= "modalPopup" style="display:none;"><div style="margin:10px"><h1>The service is not available in <span id="Country"></span>.</h1><asp:Button runat="server" ID="viewBox_OK" Text="OK" /></div></asp:Panel><ajaxToolkit:ModalPopupExtender ID="ModalPopupExtender2" runat="server" TargetControlID="btnViewMore" Drag ="true"PopupDragHandleControlID="pnlViewCustomer"PopupControlID="pnlViewCustomer"BackgroundCssClass="modalBackground"DropShadow="false"OkControlID="viewBox_OK"></ajaxToolkit:ModalPopupExtender></div>例如,半透明阴影遮罩要为ModalPopupExtender添加半透明阴影,就像官方网站上的案例一样,需要定义一个CSS类,并指派到BackgroundCssClass属性上半透明背景css可以如下:<style type="text/css">.modalBackground{position: absolute;z-index: 100;top: 0px;left: 0px;background-color: #000;filter: alpha(opacity=60);-moz-opacity: 0.6;opacity: 0.6;}</style>ModalPopupExtender控件主要有两种使用方式:客户端使用方式和服务器端使用方式。
客户端使用方式客户端使用方式又可以分为两种A.直接设置OKControlID的方式ModalPopupExtender控件在使用时必须要设置TargetControlID和PopupControlID这两个属性,我的理解是,对于ExtenderControl而言TargetControlID属性必须指定,否则就不知道在哪个DOM元素上附加客户端行为了。
PopupControlID表示要弹出的仿模式窗口的DOM元素,常见的是Panel控件,这个如果不指定,也没有意义。
有时,在执行上下文中可能要在确认这个模式窗口时,执行一些脚本,则可以设置OnOKScript属性,指明确认时要执行的脚本函数。
B.获取一个ModalPopupBehavior实例的方式。
如果页面上放置了ModalPopupExtender控件则可以用$find方法得到一个ModalPopupBehavior实例,这样就可以调用ModalPopupBehavior实例的任何方法了,如hide、show等,此时客户端的行为可以完全自己控制了。
这种情况下ModalPopupExtender控件必须要设置BehaviorID属性,否则无法用$find方法来获取ModalPopupBehavior实例。
有时,我们会感觉直接调用ModalPopupBehavior实例的方法比较麻烦,可以给ModalPopupBehavior实例添加一些事件,以方便我们添加一些自定义控制,如下图,我们在编辑一个文本框的内容时,在模式窗弹出之后,同时让CheckBox选中文本框中的值,这是需要一个OnAfterShown事件。
有时在点击确认时,需要验证录入数据的正确性,需要一个OnBeforeOK事件,如果验证不能通过就取消提交。
要实现这样的功能我们需要给ModalPopupExtender控件添加相应属性,我们以OnBeforeOK事件为例说明具体步骤:第一步,给ModalPopupExtender控件添加OnBeforeOK属性///<summary>///确认之前发生的事件///</summary>[DefaultValue("")][ExtenderControlEvent][ClientPropertyName("beforeOK")]public string OnBeforeOK{get { return GetPropertyValue("OnBeforeOK", string.Empty); }set { SetPropertyValue("OnBeforeOK", value); }}这里要注意ExtenderControlEvent Attribute的使用。
第二步,给ModalPopupBehavior添加相应方法,来订阅、取消相应事件,及触发事件的方法。
add_beforeOK: function(handler) {this.get_events().addHandler('beforeOK', handler);},remove_beforeOK: function(handler) {this.get_events().removeHandler('beforeOK', handler);},raiseBeforeOK: function(eventArgs) {var handler = this.get_events().getHandler('beforeOK');if (handler) {handler(this, eventArgs);}},第三步,修改相应方法的代码,触发事件_onOk: function(e) {var element = $get(this._OkControlID);if (element && !element.disabled) {var eventArgs = new Sys.CancelEventArgs();this.raiseBeforeOK(eventArgs);if (!eventArgs.get_cancel()) {if (this.hide() && this._OnOkScript) {window.setTimeout(this._OnOkScript, 0);}e.preventDefault();return false;}}},这里修改了_onOk方法,也可以根据情况修改其他方法。
第四步,使用ModalPopupExtender控件时,为OnBeforeOK属性赋值,此属性为一个脚本函数。
这个函数中,我们可以执行args.set_cancel(true);从而阻止hide方法和OnOkScript脚本的执行。
客户端使用的方式可以任意发挥,OnOKScript属性挂接的函数完全可以使用.WebRequest发起异步请求,获取服务器端的信息。
服务器端使用方式这种方式与传统的服务器控件的使用方式相同,就是直接调用ModalPopupExtender控件的Show()方法和Hide()方法来控制模式窗口的现实与隐藏,其实也是通过在客户端生成这样一句脚本来实现的:(function() {var fn = function() {AjaxControlToolkit.ModalPopupBehavior.invokeViaServer('programmaticModalPopupBehavior', true);Sys.Application.remove_load(fn);};Sys.Application.add_load(fn);})();在服务器端调用ModalPopupExtender控件的Show()方法或Hide()方法有个缺点,就是会引起回发,用户体验不好。