windchill开发基础CreateTable
Windchill基础操作手册
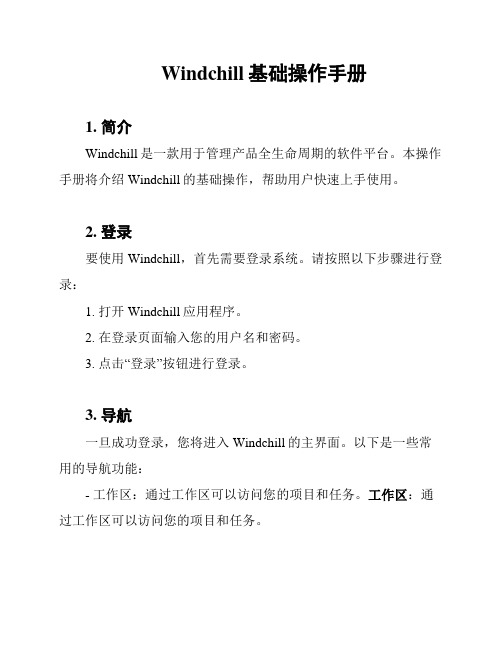
Windchill基础操作手册1. 简介Windchill是一款用于管理产品全生命周期的软件平台。
本操作手册将介绍Windchill的基础操作,帮助用户快速上手使用。
2. 登录要使用Windchill,首先需要登录系统。
请按照以下步骤进行登录:1. 打开Windchill应用程序。
2. 在登录页面输入您的用户名和密码。
3. 点击“登录”按钮进行登录。
3. 导航一旦成功登录,您将进入Windchill的主界面。
以下是一些常用的导航功能:- 工作区:通过工作区可以访问您的项目和任务。
工作区:通过工作区可以访问您的项目和任务。
- 文档:在文档选项卡中,您可以浏览和管理系统中的文档和文件。
文档:在文档选项卡中,您可以浏览和管理系统中的文档和文件。
- 搜索:使用搜索功能可以快速找到您需要的文档或信息。
搜索:使用搜索功能可以快速找到您需要的文档或信息。
4. 创建和编辑文档创建和编辑文档是Windchill的一项重要功能。
以下是创建和编辑文档的步骤:1. 在适当的位置导航到您想创建或编辑文档的文件夹。
2. 点击“创建”按钮,并选择“文档”选项。
3. 输入文档的名称和描述信息。
4. 点击“保存”按钮以创建文档。
5. 单击所创建的文档,即可打开并编辑文档内容。
5. 文档版本控制Windchill提供了版本控制功能,以便跟踪和管理文档的变更历史。
以下是一些版本控制的常用操作:- 查看版本历史:在文档页面中,您可以找到文档的版本历史记录,并查看每个版本的详细信息。
查看版本历史:在文档页面中,您可以找到文档的版本历史记录,并查看每个版本的详细信息。
- 回滚到先前版本:如果需要恢复到之前的文档版本,可以选择相应的版本并进行回滚操作。
回滚到先前版本:如果需要恢复到之前的文档版本,可以选择相应的版本并进行回滚操作。
- 审批和发布版本:在文档完成编辑后,可以提交给其他用户审批,并发布新版本。
审批和发布版本:在文档完成编辑后,可以提交给其他用户审批,并发布新版本。
windchill开发简单入门
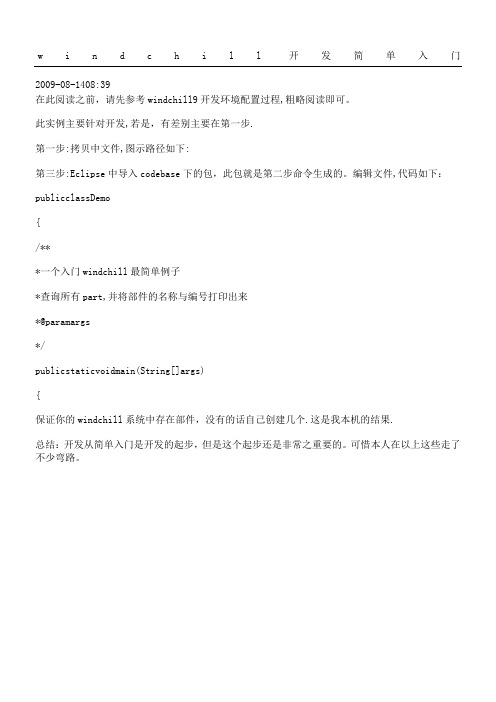
w i n d c h i l l开发简单入门
2009-08-1408:39
在此阅读之前,请先参考windchill9开发环境配置过程,粗略阅读即可。
此实例主要针对开发,若是,有差别主要在第一步.
第一步:拷贝中文件,图示路径如下:
第三步:Eclipse中导入codebase下的包,此包就是第二步命令生成的。
编辑文件,代码如下:publicclassDemo
{
/**
*一个入门windchill最简单例子
*查询所有part,并将部件的名称与编号打印出来
*@paramargs
*/
publicstaticvoidmain(String[]args)
{
保证你的windchill系统中存在部件,没有的话自己创建几个.这是我本机的结果.
总结:开发从简单入门是开发的起步,但是这个起步还是非常之重要的。
可惜本人在以上这些走了不少弯路。
Windchill常用命令和客制化

Windchill 常用命令和客制化windchill wt.load.util.CSV2XML -input -output -root d:\moduleswindchill markets.CSV2XML -input -output -rootwindchill wt.load.util.CSV2XML -root e:\windchill wt.load.LoadFromFile -u[user name] -p[password] -d d:\modules\users.xml -CONT_PATH /Container=Software/wt.pdmlink.PDMLinkProduct= windchill wt.load.LoadFromFile -u[user name] -p[password] -d d:\modules\users.xml -CONT_PATH /Container=Software/wt.inf.library.WTLibrary=windchill wt.load.LoadFromFile -u wcadmin -p wcadmin -d e:\LoadDoc.xml -CONT_PATH /Container=ptc/wt.pdmlink.PDMLinkProduct=路由器_P1windchill wt.load.LoadFromFile -u wcadmin -p wcadmin -d E:\WMDocumentReview.xml -CONT_PATH /Container=ptcwindchill com.ptc.windchill.partslink.AdminApp -reloadenumCustomizeant -f MakeJar.xmlResourceBuild wt.project.RoleRB trueenumVerify <fully_qualified_EnumClassname>[<language>][<country>][<variant>]例如:enumVerify wt.lifecycle.State fr CAjava wt.util.resource.ResourceBundleUtil wt.part.partModelRBxconfmanager -p用命令导入ldif:windchill engine.util.LDAPImport -dir E:\PTC\Windchill_8.0 -ldiffileE:\PTC\IE_JDBCAdapter\jdbc.ldif将Windchill的核心class文件打包为jar文件命令:makejar.bat 或者 Windchill wt.tools.boot.MakeJar jar=wt.jarconfig=wt.jar.config 或者 Windchill wt.tools.boot.MakeJar jar=wt.jar处理多字节:在wt.properties最后添加wt.db.maxBytesPerChar=3wt.db.encoding=UTF8或者<Property name="wt.db.maxBytesPerChar" overridable="true"targetFile="codebase/wt.properties" value="3"/>JavaGen.sh registry false false true false falseJavaGen registry false false true false false产生CAD代理工作服务: i486_nt\obj\WorkDaemon.exe -InstallD:\Eclipse\eclipse.exe -vm D:\j2sdk1.4.2_06\jre\bin\javaw -vmargs -Xms256M -Xmx512M Attribute Type Logical ID Belong To Catalog------------------------------------------------------------------------------------------------------Extended Type String RootLocalID String persistInfo.objectIdentifier RoothelperName String SearchableNumber String number PartOracle 命令导出命令(全量导出):exp system/system@wind file=f:\wind.dmp full=y statistics=noneexp system/system@wind file=f:\wind.dmp owner=(PDM1,PDM2) statistics=none exp pdm8/pdm8@wind tables=(table1,table2)(增量导出):exp system/system@wind file=f:\wind.dmp inctype=incremental导入命令:imp system/system@wind file=f:\wind.dmp full=y ignore=yimp system/system@wind file=f:\wind(PDMLink).dmp fromuser=PDMLinktouser=PDMLink ignore=yimp system/system@wind file=f:\wind(PDMLink).dmp fromuser=PDM1 touser=PDM2 rows=y indexes=y显示当前连接用户:show user查看数据库的表空间:select * from dba_tablespaces;显示常用的系统文件的视图:v$database,v$datafile,v$logfile,v$controlfile,v$parameter快速清空一个大表:truncate table table_name;查询数据库实例:select * from v$instance;将查询的结果导入到文本文件中:SQL>spool c:\abcd.txt;SQL>select * from table;SQL>spool off;修改字段大小:alter table table_name modify (field_name varchar2(100));修改表名:alter table old_table_name rename to new_table_name;找数据库表的主键字段的名称:select * from user_constraints where constraint_type='P' and table_name='TABLE_NAME';如果导出时出现942的错误,那是进行升级后没有执行:SQL>conn / as sysdba;SQL>%Oracle_home%\rdbms\admin\catexp.sql;删除用户下的所有对象:set linesize 50set pagesize 500spool drop_object.sqlselect 'drop '||object_type||' '||object_name||';' from user_objects;spool off@drop_object.sql;Oracle监听器启动:lsnrctl startOracle监听器停止:lsnrctl stopOracle实例启动:使用sysdba身份登录,输入:startupOracle实例停止:使用sysdba身份登录,输入:shutdown创建远程连接:create database link pdmlink_wind connect to pdm_migration identified by migchangeme using 'fan-10'(pdmlink_wind连接名称、pdm_migration用户名、migchangeme密码、fan-10连接字符串)使用链接:select * from wtpart@pdmlink_windselect a.CLASSNAMEA2A2,a.IDA2A2,b.CLASSNAMEA2A2,b.IDA2A2 where wtpart a,pdmlink_wind.wtpart b where a.IDA2A2=b.IDA2A2;改变使用者口令:alter user pdm identified by pdm;停止OEM:oemctl stop oms sysman/passwd比较表结构:SELECT COUNT(*) FROM(SELECT CNAME||COLTYPE||WIDTH FROM COL@PDJ WHERE TNAME='WTPART'MINUSSELECT CNAME||COLTYPE||WIDTH FROM COL WHERE TNAME='WTPART');我们在建立一个基于原来某个表的结构的时候,就用这个:CREATE TABLE T_NAME AS SELECT * FROM V_TABLE WHERE 1=2执行Oracle数据库碎片整理工具:在生产环境、测试环境中,请定期执行下面的sql,将其中的“pdm7”替换成为实际的数据库用户名,注意在执行该语句的时候一定要将Windchill先停止:execute dbms_stats.gather_schema_stats(ownname => 'pdm7', cascade=>true);该sql的用途是用来整理数据库的碎片程序,从而可以显著提高数据库的存取性能,在各个环境中建议每隔1-2个月执行一次,该语句可以在我们的WCPerfTuningGuide.pdf文档中找到修改游标的最大打开数:在两个文件中可以修改游标的打开数:"SPfile+例程名.ora" 和 "Init+例程名.ora";其中"SPfile+例程名.ora"的优先于"Init+例程名.ora"。
windchill系统学习之--开发流程
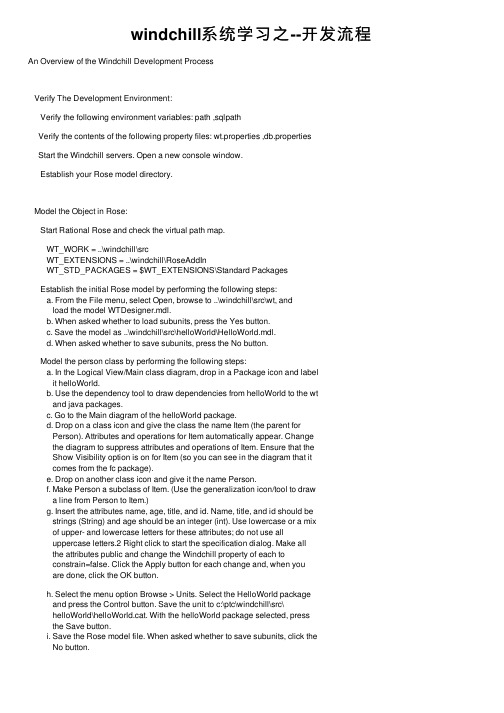
windchill系统学习之--开发流程An Overview of the Windchill Development ProcessVerify The Development Environment:Verify the following environment variables: path ,sqlpathVerify the contents of the following property files: wt.properties ,db.propertiesStart the Windchill servers. Open a new console window.Establish your Rose model directory.Model the Object in Rose:Start Rational Rose and check the virtual path map.WT_WORK = ..\windchill\srcWT_EXTENSIONS = ..\windchill\RoseAddInWT_STD_PACKAGES = $WT_EXTENSIONS\Standard PackagesEstablish the initial Rose model by performing the following steps:a. From the File menu, select Open, browse to ..\windchill\src\wt, andload the model WTDesigner.mdl.b. When asked whether to load subunits, press the Yes button.c. Save the model as ..\windchill\src\helloWorld\HelloWorld.mdl.d. When asked whether to save subunits, press the No button.Model the person class by performing the following steps:a. In the Logical View/Main class diagram, drop in a Package icon and labelit helloWorld.b. Use the dependency tool to draw dependencies from helloWorld to the wtand java packages.c. Go to the Main diagram of the helloWorld package.d. Drop on a class icon and give the class the name Item (the parent forPerson). Attributes and operations for Item automatically appear. Changethe diagram to suppress attributes and operations of Item. Ensure that theShow Visibility option is on for Item (so you can see in the diagram that itcomes from the fc package).e. Drop on another class icon and give it the name Person.f. Make Person a subclass of Item. (Use the generalization icon/tool to drawa line from Person to Item.)g. Insert the attributes name, age, title, and id. Name, title, and id should bestrings (String) and age should be an integer (int). Use lowercase or a mixof upper- and lowercase letters for these attributes; do not use alluppercase letters.2 Right click to start the specification dialog. Make allthe attributes public and change the Windchill property of each toconstrain=false. Click the Apply button for each change and, when youare done, click the OK button.h. Select the menu option Browse > Units. Select the HelloWorld packageand press the Control button. Save the unit to c:\ptc\windchill\src\helloWorld\helloWorld.cat. With the helloWorld package selected, pressthe Save button.i. Save the Rose model file. When asked whether to save subunits, click theNo button.Generate Java Classes From Rose:Go to the parent package of the Person class (by selecting the LogicalView/Main diagram from the class browser, then selecting the helloWorld package).From the Tools menu, select Windchill > System Generation.From the popup window, select Java Source Code, WT Introspector Support, and Database Support, then click the OK button.Create Database Tables:Initialize the Object:Design the GUI Layout:Code the GUI:Run the Applet in Mozilla or Internet Explorer:。
create table oracle语句
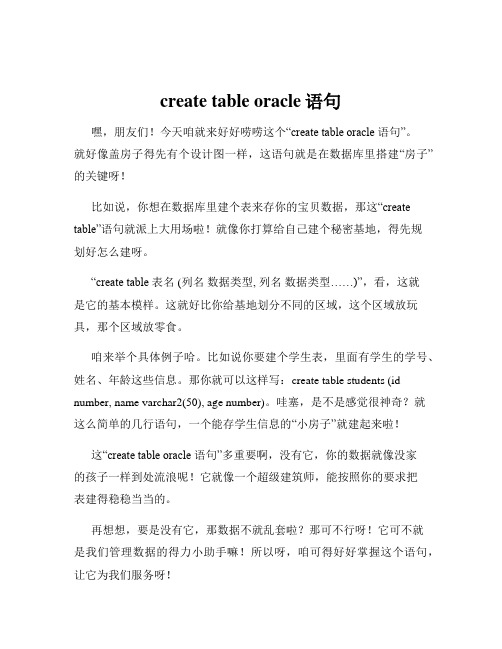
create table oracle语句
嘿,朋友们!今天咱就来好好唠唠这个“create table oracle 语句”。
就好像盖房子得先有个设计图一样,这语句就是在数据库里搭建“房子”的关键呀!
比如说,你想在数据库里建个表来存你的宝贝数据,那这“create table”语句就派上大用场啦!就像你打算给自己建个秘密基地,得先规
划好怎么建呀。
“create table 表名 (列名数据类型, 列名数据类型……)”,看,这就
是它的基本模样。
这就好比你给基地划分不同的区域,这个区域放玩具,那个区域放零食。
咱来举个具体例子哈。
比如说你要建个学生表,里面有学生的学号、姓名、年龄这些信息。
那你就可以这样写:create table students (id number, name varchar2(50), age number)。
哇塞,是不是感觉很神奇?就
这么简单的几行语句,一个能存学生信息的“小房子”就建起来啦!
这“create table oracle 语句”多重要啊,没有它,你的数据就像没家
的孩子一样到处流浪呢!它就像一个超级建筑师,能按照你的要求把
表建得稳稳当当的。
再想想,要是没有它,那数据不就乱套啦?那可不行呀!它可不就
是我们管理数据的得力小助手嘛!所以呀,咱可得好好掌握这个语句,让它为我们服务呀!
我的观点就是,“create table oracle 语句”真的是数据库世界里超级重要的存在呀,我们必须得好好学它、用它!。
create table语法
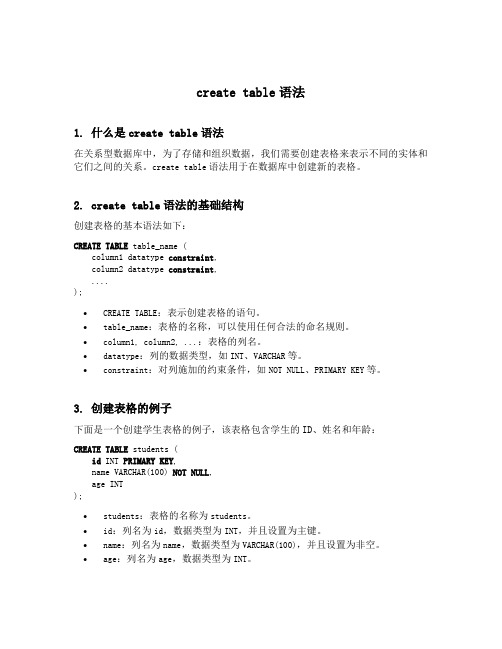
create table语法1. 什么是create table语法在关系型数据库中,为了存储和组织数据,我们需要创建表格来表示不同的实体和它们之间的关系。
create table语法用于在数据库中创建新的表格。
2. create table语法的基础结构创建表格的基本语法如下:CREATE TABLE table_name (column1 datatype constraint,column2 datatype constraint,....);•CREATE TABLE:表示创建表格的语句。
•table_name:表格的名称,可以使用任何合法的命名规则。
•column1, column2, ...:表格的列名。
•datatype:列的数据类型,如INT、VARCHAR等。
•constraint:对列施加的约束条件,如NOT NULL、PRIMARY KEY等。
3. 创建表格的例子下面是一个创建学生表格的例子,该表格包含学生的ID、姓名和年龄:CREATE TABLE students (id INT PRIMARY KEY,name VARCHAR(100) NOT NULL,age INT);•students:表格的名称为students。
•id:列名为id,数据类型为INT,并且设置为主键。
•name:列名为name,数据类型为VARCHAR(100),并且设置为非空。
•age:列名为age,数据类型为INT。
4. 列的数据类型在创建表格时,需要为每个列指定合适的数据类型。
常见的数据类型有:•INT:整数类型,用于存储整数值。
•VARCHAR(n):可变长度字符串类型,用于存储最多n个字符的字符串。
•CHAR(n):固定长度字符串类型,用于存储恰好n个字符的字符串。
•FLOAT:浮点数类型,用于存储小数值。
•DATE:日期类型,用于存储日期值。
•TIME:时间类型,用于存储时间值。
5. 列的约束条件在创建表格时,可以为每个列设置约束条件,以确保数据的完整性和一致性。
create table 语句
create table 语句在关系型数据库管理系统中,创建表格是最基本的操作之一,也是最常用的操作之一。
通过使用“create table 语句”,我们可以创建一张新的数据库表。
下面将会分步骤详细说明使用“create table 语句”来创建一个新的表格。
第一步:创建数据库在SQL Server中,我们需要先创建数据库。
在SQL Server Management Studio(SSMS)中,我们可以使用如下的步骤创建一个新的数据库:1.打开SSMS,连接到你的数据库服务器。
2.找到“Object Explorer”窗口,右键点击“Databases”,选择“New Database”。
3.输入数据库的名称和保存路径。
4.点击“OK”。
第二步:确定表的结构在创建表操作之前,我们需要确定新的表格应该包含哪些字段。
这些字段可以是数字、文本、日期、时间等等类型的数据。
我们也需要规定每个字段的限制条件。
例如,在创建学生表时我们需要考虑学生的姓名、年龄、学号、性别等信息。
以下是我们可以使用的一些常用数据类型:1. INT:用于存储整数。
2. VARCHAR:用于存储文本。
3. DATE:用于存储日期。
4. TIME:用于存储时间。
第三步:使用“create table”语句创建表格使用“create table”语句来创建新表格的语法如下:create table table_name (column1 datatype constraint,column2 datatype constraint,...);在括号中,我们可以使用多个字段,每个字段之间使用逗号隔开。
每个字段都应该有其对应的数据类型和约束条件。
例如,我们可以使用以下代码段来创建一个名为“student”的表格:create table student (id INT PRIMARY KEY,name VARCHAR(50),age INT,gender VARCHAR(10),grade VARCHAR(10));其中,“id”列是主键列,用于标识每个学生的唯一ID。
sqlite 的 create table
一、介绍sqliteSQLite是一个轻量级的数据库引擎,它在许多嵌入式系统和移动设备上得到广泛应用。
由于其简单易用的特点,它也常被用于开发小型应用程序和原型。
SQLite不需要一个单独的服务器进程,它允许直接在存储设备上访问数据库文件。
这篇文章将重点介绍SQLite中创建数据表的操作。
二、创建数据表的语法在SQLite中,创建数据表的语法如下:```sqlCREATE TABLE table_name (column1 datatype,column2 datatype,column3 datatype,...);```其中,`CREATE TABLE`是关键字,`table_name`是要创建的数据表的名称,`column1`、`column2`等是表中的列名,`datatype`是列的数据类型。
每个列的定义之间需要使用逗号分隔,最后的定义语句不需要使用逗号。
下面我们将通过一个具体的例子来演示如何在SQLite中创建一个数据表。
三、示例假设我们要创建一个名为`employees`的数据表,包括`id`、`name`、`age`和`salary`四个字段,那么我们可以通过以下SQL语句来实现:```sqlCREATE TABLE employees (id INTEGER PRIMARY KEY,name TEXT,age INTEGER,salary REAL);```在这个例子中,我们创建了一个名为`employees`的数据表,包括了`id`、`name`、`age`和`salary`四个字段。
其中,`id`字段的数据类型为`INTEGER`,并且指定了`PRIMARY KEY`,表示这是主键;`name`字段的数据类型为`TEXT`;`age`字段的数据类型为`INTEGER`;`salary`字段的数据类型为`REAL`。
通过这个例子,我们可以清晰地看到如何使用`CREATE TABLE`语句在SQLite中创建数据表。
windchill常用类及基本操作
查询文档: QuerySpec querySpec = new QuerySpec(WTDocument.class); WhereExpression where = new SearchCondition(WTDocument.class, , SearchCondition.EQUAL, name); QueryResult result = PersistenceHelper.manager.find((StatementSpec) querySpec); 更新文档: WTDocumentMaster docmaster = (WTDocumentMaster) doc.getMaster(); WTDocumentMasterIdentity docmasteridentity = (WTDocumentMasterIdentity) docmaster .getIdentificationObject(); docmasteridentity.setName(newDocName); docmaster = (WTDocumentMaster) IdentityHelper.service .changeIdentity(docmaster, docmasteridentity);
文档的生命周期:
文档的生命周期:
得到对象的大、小版本: 其中wt.enterprise.RevisionControlled 是WTDoucment父类
查询对象的笔记本:
创建笔记本
图档、文档
文档之间的关联关系 文档结构:wt.doc.WTDocumentUsageLink 相关文档(参考文档): wt.doc.WTDocumentDependencyLink
Windchill常用开发大全(整理).pptx
– 进入到 Oracle SQL*Plus路径,执行命令:
– 操作完成之后,即可使用EleadDocs对象了!
模型扩展(续)
模型扩展(续)
完整的例子说明
– 在windchill/src/目录下建立一个helloWorld目录,在 windchill/codebase/目录下也建立一个helloWorld目录
(除非使用了系统原有的Protected Method,这种用法要尽量避免).
设计规范
设计规范之建模
– 仅对持久化对象建模
只有数据需要保存到数据库中的持久化业务对象才允许进行建模。其 余的操作类(例如:Processor、Delegate、Helper类等) 不被允许进行建模。
– 模型命名规则
对象的名称、属性名称、方法名称应该满足命名规则,同Java编码规 范的类命名、变量命名和方法命名。 例如: 类名 TRApplyDoc 属性名trPhase 方法名getFormData 说明:历史的模型如果要更改将要做数据迁移。因此只要求对新建立 的模型,历史模型不做要求。
– 工作流中的表达式,具体实现,都写在WfUtil中,只在工作流中调用WfUtil中的方法。 WfUtil中的方法注释中,需要说明该段代码,将在那些workflow中被调用。
– 系统OOTB配置部分通过XML配置文件交付。方便新系统可以直接通过LoadFileSet导入配 置。
– 系统内部值,例如IBA,全部由英文字母和数字组成,不能包含特殊字符。 – 禁止反编译系统OOTB的Class文件,然后在此基础上修改做客制,导致系统无法升级。 – 需要对出厂文件(HTML template等)修改时,需要保存原出厂文件的备份在
- 1、下载文档前请自行甄别文档内容的完整性,平台不提供额外的编辑、内容补充、找答案等附加服务。
- 2、"仅部分预览"的文档,不可在线预览部分如存在完整性等问题,可反馈申请退款(可完整预览的文档不适用该条件!)。
- 3、如文档侵犯您的权益,请联系客服反馈,我们会尽快为您处理(人工客服工作时间:9:00-18:30)。
package com.ptc;
import java.rmi.RemoteException;
import java.util.Iterator;
import java.util.Vector;
import wt.fc.ObjectReference;
import wt.fc.PersistenceHelper;
import wt.fc.QueryResult;
import wt.fc.ReferenceFactory;
import wt.fc.collections.WTCollection;
import wt.fc.collections.WTHashSet;
import wt.maturity.MaturityHelper;
import wt.maturity.PromotionNotice;
import wt.method.RemoteAccess;
import wt.part.WTPart;
import wt.query.QuerySpec;
import wt.query.SearchCondition;
import wt.util.WTException;
import wt.util.WTRuntimeException;
import mon.QueryException;
public class CreateTable implements RemoteAccess {
public static void main(String[] args) throws WTRuntimeException,WTException, RemoteException{
wt.method.RemoteMethodServer server = wt.method.RemoteMethodServer.getDefault();
server.setUserName("wcadmin");
server.setPassword("wcadmin");
QueryResult part = CreateTable.getWTPart();
System.out.println("=="+part.size());
}
public static WTPart getWTPart1() throws WTException {
String folderPath = "/GOLF_CART/Design";
String partName = "GC000001";
QuerySpec qs;
WTPart part = null;
try {
qs = new QuerySpec(WTPart.class);
QueryResult qr = null;
qs.appendWhere(new SearchCondition(WTPart.class,WTPart.NUMBER, SearchCondition.EQUAL, partName, false));
qr = PersistenceHelper.manager.find(qs);
part = (WTPart) qr.nextElement();
//findRelatedPromotion(doc);
} catch (QueryException e) {
// TODO Auto-generated catch block
//e.printStackTrace();
} catch (WTException e) {
// TODO Auto-generated catch block
//e.printStackTrace();
}
return part;
}
@SuppressWarnings("deprecation")
public static QueryResult getWTPart() throws WTException {
String[] partName ={"GC000002","GC000020","GC000004","GC000005"};
QuerySpec qs;
QueryResult qr = null;
WTPart part = null;
try {
qs = new QuerySpec(WTPart.class);
SearchCondition sc = new SearchCondition(WTPart.class,WTPart.NUMBER, partName, false);
qs.appendSearchCondition(sc);
qr = PersistenceHelper.manager.find(qs);
} catch (QueryException e) {
e.printStackTrace();
} catch (WTException e) {
e.printStackTrace();
}
return qr;
}
/**
* 查找關聯的推進流程
*
* @param epm
* 圖檔對象
* @return 推進對象
*/
public static Vector findRelatedPromotion(WTPart epm) {
Vector vector = new Vector();
WTHashSet set = new WTHashSet();
set.add(epm);
WTCollection collection;
try {
collection = MaturityHelper.service.getPromotionNotices(set);
Iterator iterator = collection.iterator();
while (iterator.hasNext()) {
ObjectReference objRef = (ObjectReference) iterator.next();
PromotionNotice pn = (PromotionNotice) objRef.getObject();
vector.add(pn);
System.out.println("==34==" + pn);
}
} catch (WTException e) {
e.printStackTrace();
}
return vector;
}
public static WTPart test() throws WTRuntimeException, WTException { WTPart part = (WTPart) new ReferenceFactory().getReference(
"VR:wt.part.WTPart:8261").getObject();
return part;
}
}。