ibatis配置文件详解
ibatis快速入门(仅需两天)绝对经典,值得收藏
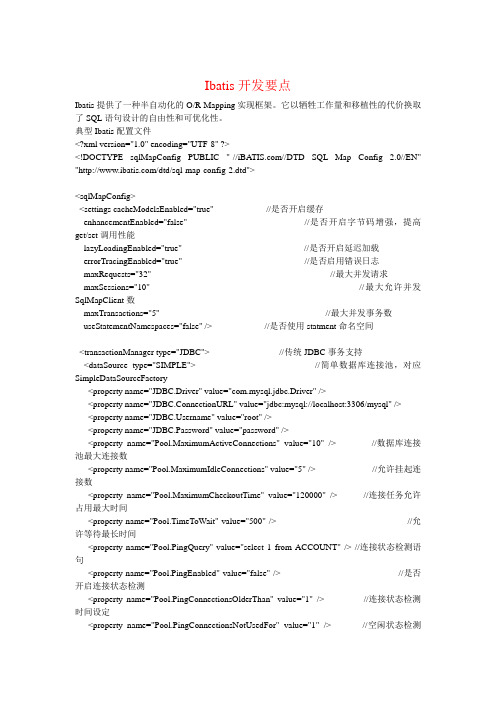
Ibatis开发要点Ibatis提供了一种半自动化的O/R Mapping实现框架。
它以牺牲工作量和移植性的代价换取了SQL语句设计的自由性和可优化性。
典型Ibatis配置文件<?xml version="1.0" encoding="UTF-8" ?><!DOCTYPE sqlMapConfig PUBLIC "-////DTD SQL Map Config 2.0//EN" "/dtd/sql-map-config-2.dtd"><sqlMapConfig><settings cacheModelsEnabled="true" //是否开启缓存enhancementEnabled="false" //是否开启字节码增强,提高get/set调用性能lazyLoadingEnabled="true" //是否开启延迟加载errorTracingEnabled="true" //是否启用错误日志maxRequests="32" //最大并发请求maxSessions="10" //最大允许并发SqlMapClient数maxTransactions="5" //最大并发事务数useStatementNamespaces="false" /> //是否使用statment命名空间<transactionManager type="JDBC"> //传统JDBC事务支持<dataSource type="SIMPLE"> //简单数据库连接池,对应SimpleDataSourceFactory<property name="JDBC.Driver" value="com.mysql.jdbc.Driver" /><property name="JDBC.ConnectionURL" value="jdbc:mysql://localhost:3306/mysql" /> <property name="ername" value="root" /><property name="JDBC.Password" value="password" /><property name="Pool.MaximumActiveConnections" value="10" /> //数据库连接池最大连接数<property name="Pool.MaximumIdleConnections" value="5" /> //允许挂起连接数<property name="Pool.MaximumCheckoutTime" value="120000" /> //连接任务允许占用最大时间<property name="Pool.TimeToWait" value="500" /> //允许等待最长时间<property name="Pool.PingQuery" value="select 1 from ACCOUNT" /> //连接状态检测语句<property name="Pool.PingEnabled" value="false" /> //是否开启连接状态检测<property name="Pool.PingConnectionsOlderThan" value="1" /> //连接状态检测时间设定<property name="Pool.PingConnectionsNotUsedFor" value="1" /> //空闲状态检测时间设定</dataSource></transactionManager><!-- JNDI<transactionManager type="JDBC"><dataSource type="JNDI"> //使用J2EE容器实现DataSource,对应实现类JndiDataSourceFactory<property name="DataSource" value="java:comp/env/jdbc/myDataSource" /></dataSource></transactionManager>--><!-- JTA<transactionManager type="JTA"> //使用容器提供的JTA服务实现全局事务管理<property name="UserTransaction" value="java:/ctx/con/UserTransaction" /><dataSource type="JNDI"><property name="DataSource" value="java:comp/env/jdbc/myDataSource" /></dataSource></transactionManager> --><sqlMap resource="com/ibatis/ao/User.xml" /></sqlMapConfig>User模型类public class User implements Serializable{private Integer id;private String name;private Integer sex;public User(){}public User(Integer id,String name,Integer sex){this.id=id;=name;this.sex=sex;}public Integer getId() {return id;}public void setId(Integer id) {this.id = id;}public String getName() {return name;}public void setName(String name) { = name;}public Integer getSex() {return sex;}public void setSex(Integer sex) {this.sex = sex;}}模型类映射文件<?xml version="1.0" encoding="UTF-8"?><!DOCTYPE sqlMap PUBLIC "-////DTD SQL Map 2.0//EN" "/dtd/ibatis/sql-map-2.dtd"><sqlMap namespace="User"><typeAlias alias="user" type="er" /> //设置映射路径<!-- 模块配置--><cacheModel id="userCache" type="LRU"> //设置缓存类型<flushInterval hours="24" /> //设置缓存有效期<flushOnExecute statement="updateUser" /> //执行特定statment是清空缓存<property name="size" value="1000" /> //设置缓存大小</cacheModel><resultMap id="userResult" class="user"> //resultMap结果映射<result property="id" column="id" /><result property="name" column="name" /><result property="sex" column="sex" /></resultMap><!-- Statement配置--><select id="getUser" resultMap="userResult" parameterClass="string"> //parameterClass参数类<![CDATA[selectname,sexfromt_userwherename=#name#]]></select><select id="getUserById" resultClass="user" parameterClass="Integer"> //resultClass结果类<![CDATA[selectname,sexfromt_userwhereid=#id#]]></select><insert id="insertUser" parameterClass="user"><![CDATA[INSERT INTO t_user (name,sex) values (#name#,#sex#)]]></insert><delete id="deleteUser" parameterClass="Integer"><![CDATA[delete from t_userWHERE id=#id#]]></delete><update id="updateUser" parameterClass="user"><![CDATA[update t_usersetname=#name#,sex=#sex#WHERE id=#id#]]></update></sqlMap>测试类public void testIbatisSqlMap() throws SQLException{String resource="sqlmap-config.xml";try {Reader reader=Resources.getResourceAsReader(resource);SqlMapClient sqlMap = SqlMapClientBuilder.buildSqlMapClient(reader); //SqlMapClient 核心类try{sqlMap.startTransaction();// User user=new User();// user.setId(new Integer(1));// user.setName("Samantha");// user.setSex(new Integer(11));// sqlMap.insert("insertUser",user);Integer key=new Integer(2);User user1=(User)sqlMap.queryForObject("getUserById",key);mitTransaction();System.out.println(user1.getName());} catch (SQLException e) {e.printStackTrace();}finally{sqlMap.endTransaction();}} catch (IOException e) {e.printStackTrace();}}Ibatis高级特性:1.数据关联:(一对多关联)<?xml version="1.0" encoding="UTF-8"?><!DOCTYPE sqlMap PUBLIC "-////DTD SQL Map 2.0//EN" "/dtd/ibatis/sql-map-2.dtd"><sqlMap namespace="User"><typeAlias alias="user" type="er" /><typeAlias alias="address" type="com.ibatis.ao.Address" /><resultMap id="get-user-result" class="user"><result property="id" column="id" /><result property="name" column="name" /><result property="sex" column="sex" /><result property="addresses" column="id" select="User.getAddressByUserId" /> </resultMap><select id="User.getUsers" parameterClass="ng.String"resultMap="get-user-result"><![CDATA[selectid,name,sexfrom t_userwhere id = #id#]]></select><select id="User.getAddressByUserId" parameterClass="int"resultClass="address"><![CDATA[selectaddress,zipcodefrom t_addresswhere user_id = #userid#]]></select></sqlMap>对应代码:public void testIbatisSqlMap() throws SQLException, IOException {String resource = "sqlmap-config.xml";Reader reader = Resources.getResourceAsReader(resource);SqlMapClient sqlMap = SqlMapClientBuilder.buildSqlMapClient(reader);// sqlMap系统初始化完毕List userList = sqlMap.queryForList("User.getUsers", "2");for (int i = 0; i < userList.size(); i++) {User user = (User) userList.get(i);System.out.println("==>" + user.getName());for (int k = 0; k < user.getAddresses().size(); k++) {Address addr = (Address)user.getAddresses().get(k);System.out.println(new String(addr.getAddress()));}}}这种对应在大数据量的情况下会产生性能问题如果是一对一关系:<resultMap ><result property="id" column="id"/><result property="name" column="name"/><result property="sex" column="sex"/><result property="address" column="t_address.address"/><result property="zipCode" column="t_address.zipcode"/></resultMap><select parameterClass="string"resultMap="get-user-result"><![CDATA[select*from t_user,t_addresswhere t_user.id=t_er_id]]></select>2.延迟加载:当真正访问对象时才执行SQL语句,提高了系统性能。
iBATIS的sqlMap配置文件
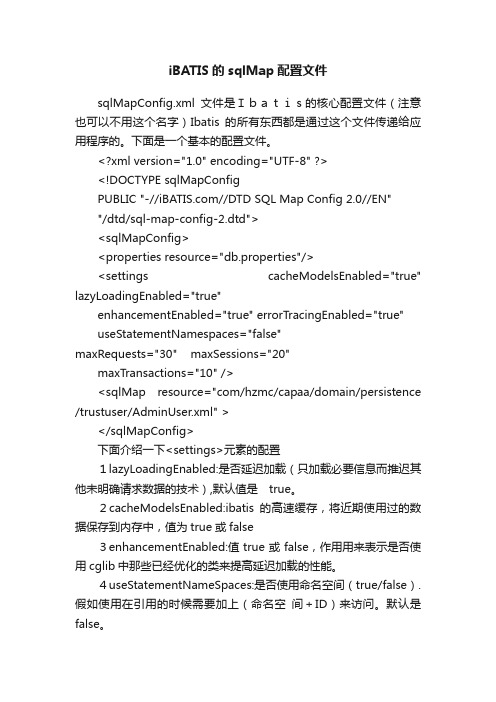
iBATIS的sqlMap配置文件sqlMapConfig.xml文件是Ibatis的核心配置文件(注意也可以不用这个名字)Ibatis的所有东西都是通过这个文件传递给应用程序的。
下面是一个基本的配置文件。
<?xml version="1.0" encoding="UTF-8" ?><!DOCTYPE sqlMapConfigPUBLIC "-////DTD SQL Map Config 2.0//EN""/dtd/sql-map-config-2.dtd"><sqlMapConfig><properties resource="db.properties"/><settings cacheModelsEnabled="true" lazyLoadingEnabled="true"enhancementEnabled="true" errorTracingEnabled="true"useStatementNamespaces="false"maxRequests="30" maxSessions="20"maxTransactions="10" /><sqlMap resource="com/hzmc/capaa/domain/persistence /trustuser/AdminUser.xml" ></sqlMapConfig>下面介绍一下<settings>元素的配置1lazyLoadingEnabled:是否延迟加载(只加载必要信息而推迟其他未明确请求数据的技术),默认值是true。
iBatis详细使用手册(.net版)

目录系列(1) 总览 (2)系列(2) 配置运行环境和日志处理 (4)系列(3) 映射文件基础 (11)系列(4) iBatisNet API基础 (14)系列(5) ParameterMap (19)系列(6) ResultMap (23)系列(1) 总览学习和使用Ibatisnet已经有一段时间了,前段时间也有写过一些与iBatis相关的Blog。
也答应过一些朋友要比较全面地介绍一下iBatis,分享自己的学习过程和使用经验,记录一些常见且容易出现的问题。
但由于前段时间一直在准备考试,而且当前的项目时间进度也比较紧,所以一直迟迟未能开始,在这里表示歉意,希望现在开始不会晚。
不过最近社区(博客园)好消息不断,我发现越来越多的人开始关注iBatis了,并且也有热心网友在极力推广,如果您已经对它已经有一些了解了,那么更推荐您去阅读ShanYou的文章,他写的文章可能更加适合您。
我本人也是一名初学者,这里记录的一些东西可能不会有很多的理论知识(理论知识还不够扎实),更多的可能是突出自己学习过程中需要很长时间来解决的一些问题,或者是个人认为特别重要,并且容易忘记的细节。
水平有限,出现错误在所难免,如在这过程中不当之处敬请愿谅,并请不啬赐教。
废话一翻后,进入今天的正题。
今天的主题是Introduction,非官方正式介绍的中文版,更多详细的介绍请参阅官方文档。
我们要使用它就必须要知道它是干什么用的,能为我们做哪些工作,开发效率如何,执行效率如何,技术难度怎么样。
提到iBatis,大家可能会与ORM技术联系起来。
是的,没错,它与ORM技术有一定程度上的联系,但是更确切地讲,它并不是一种很正统的ORM解决方案。
因为它不像NHi bernate那样,具备全自动的数据操作,包括查询,插入,更新,删除;也没有像它那样,与数据库的约束关系有紧密的联系(对NHibernate的了解不多,如果有不妥之处,希望能留下你们的臭鸡蛋,等着下回用)。
ibatis配置简介

IBATIS配置简介iBatis其实不是个真正意义上的OR-Mapping, 只能称为是个OSQL-Mapping吧,我们开发人员还是要自己写SQL,不过这个我比较喜欢,我们可以控制的更多,更灵活。
不像Hibernate那么死板。
iBatis将Java对象(大多是我们的Java Bean)映射成JDBC的PreparedStatement的输入参数和ResultSet。
个人认为主要就是将我的的Java 对象映射到SQL的参数和将SQL的查询结果转换为Java对象。
下面说说我学习iBATIS SQL Maps开发指南的一些收获吧。
(1) SQL Map XML 配置文件 SqlMapConfig.xml的深刻认识。
<setting>元素,这个以前自己没有接触过,最学习到了,想和大家分享一下。
<setting>元素用于配置和优化SqlMapClient实例。
<setting>元素本身及其所有的属性都是可选的,子元素如下:maxRequests 同时执行SQL语句的最大线程数,通常至少是maxTransactions 的10倍,默认值是512。
maxSessions 同时活动的最大session数。
应该小于maxRequests,并大于或等于maxTransactions,默认128。
maxTransactions 同时进入sqlMapClient.startTransaction()的最大线程数,默认32。
cacheModelsEnabled 全局性地启用或禁止SqlMapClient的所有缓存model,默认true。
调试程序时使用。
lazyLoadingEnabled 全局性地启用或禁用SqlMapClient的所有延迟加载,默认true。
调试程序时使用。
enhancementEnabled 全局性地启用或禁用运行时字节码增强,以优化访问Java Bean属性的性能,同时优化延迟加载的性能,默认false。
ibatis 缓存 (cacheModel)详解
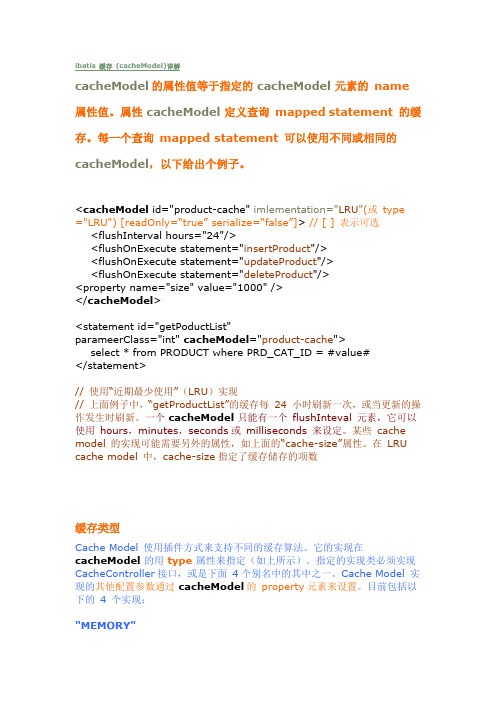
ibatis 缓存(cacheModel)详解cacheModel的属性值等于指定的cacheModel元素的name 属性值。
属性cacheModel定义查询mapped statement 的缓存。
每一个查询mapped statement 可以使用不同或相同的cacheModel,以下给出个例子。
<cacheModel id="product-cache" imlementation="LRU"(或type ="LRU")[readOnly=“true” serialize=“false”]> // [ ] 表示可选<flushInterval hours="24"/><flushOnExecute statement="insertProduct"/><flushOnExecute statement="updateProduct"/><flushOnExecute statement="deleteProduct"/><property name="size" value="1000" /></cacheModel><statement id="getPoductList"parameerClass="int" cacheModel="product-cache">select * from PRODUCT where PRD_CAT_ID = #value#</statement>// 使用“近期最少使用”(LRU)实现// 上面例子中,“getProductList”的缓存每24 小时刷新一次,或当更新的操作发生时刷新。
ibatis配置文件、映射文件详解
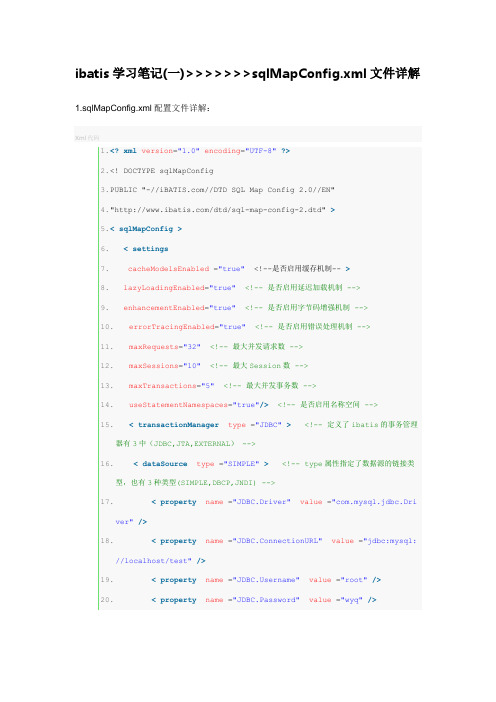
ibatis学习笔记(一)>>>>>>>sqlMapConfig.xml文件详解1.sqlMapConfig.xml配置文件详解:Xml代码1.<?xml version="1.0"encoding="UTF-8"?>2.<! DOCTYPE sqlMapConfig3.P UBLIC "-////DTD SQL Map Config 2.0//EN"4."/dtd/sql-map-config-2.dtd" >5.<sqlMapConfig>6.<settings7.cacheModelsEnabled ="true" <!--是否启用缓存机制-- >zyLoadingEnabled="true"<!-- 是否启用延迟加载机制 -->9.enhancementEnabled="true"<!-- 是否启用字节码增强机制 -->10.errorTracingEnabled="true"<!-- 是否启用错误处理机制 -->11.maxRequests="32"<!-- 最大并发请求数 -->12.maxSessions="10"<!-- 最大Session数 -->13.maxTransactions="5"<!-- 最大并发事务数 -->eStatementNamespaces="true"/><!-- 是否启用名称空间 -->15.<transactionManager type ="JDBC"><!-- 定义了ibatis的事务管理器有3中(JDBC,JTA,EXTERNAL) -->16.<dataSource type ="SIMPLE"><!-- type属性指定了数据源的链接类型,也有3种类型(SIMPLE,DBCP,JNDI) -->17.<property name ="JDBC.Driver"value ="com.mysql.jdbc.Driver"/>18.<property name ="JDBC.ConnectionURL"value ="jdbc:mysql://localhost/test"/>19.<property name ="ername"value ="root"/>20.<property name ="JDBC.Password"value ="wyq"/>21.<property name ="Pool.MaximumActiveConnections"value ="10"/><!-- 连接池维持的最大容量 -->22.<property name ="Pool.MaximumIdleConnections"value ="5"/><!-- 连接池允许挂起的最大连接 -->23.<property name ="Pool.MaximumCheckoutTime"value ="120000"/><!-- 连接被某个任务所允许占用的最大时间 -->24.<property name ="TimeToWait"value ="500"/><!-- 线程允许等待的最大时间 -->25.26.</dataSource>27.</transactionManager>28.<sqlMap resource ="com/wyq/map/userMap.xml"/>29.</sqlMapConfig>一transactionManager节点transactionManagerab 定义了ibatis的事务管理器,目前提供了以下几种选择:1) JDBC通过传统JDBC mit/rollback实现事务支持.2) JTA使用容器提供的JTA服务实现全局事务管理.3) EXTERNAL外部事务管理,如在EJB中使用ibatis,通过EJB的部署配置即可实现自动的事务管理机制.此时ibatis将把所有事务委托给外部容器进行管理.此外,通过Spring等轻量级容量实现事务的配置化管理也是一个不错的选择.二dataSource 节点dataSource 从属于transactionManager, 用于设定ibatis运行期使用DataSource属性.type 属性: dataSource 元素的type 属性指定了dataSource 的实现类型.可选项目:1) SIMPLE:SIMPLE 是ibatis 内置的dataSource 实现,其中实现了一个简单的数据库连接池机制,对应ibatis 实现类为com.ibatis.sqlmap.engine.datasource.SimpleDataSourceFactory.JDBC 使用数据库自己的事务(局部事务),connect.beginTranstion(), mit()等.2) DBCP基于Apache DBCP连接池组件实现的DataSource封装,当无容器提供DataSource服务时,建议使用该选项,对应ibatis实现类为com.ibatis.sqlmap.engine.datasource.DbcpDataSourceFactory.JTA :使用jta 事务管理器管理事务(全局事务),使用userTranstion对象.3) JNDI使用J2EE容器提供的DataSource实现, DataSource将通过指定的JNDI Name从容器中获取.对应ibatis实现类为com.ibatis.sqlmap.engine.datasource.JndiDataSourceFactory.Ibatis 不控制事务,事务交由外部控制,一般在CTM,或spring托管事务中使用.JNDI的配置大部分都在应用服务器中进行,所以在ibatis中的配置相对简单(1)jdbc事务控制的JNDI配置Xml代码1.<transctionManager type ="JDBC">2.<dataSource type ="JNDI">3.<property name ="DataSource"value ="java:comp/env/jdbc/myDataSource"/>4.</dataSource>5.</transctionManager>(2)JTA事务控制的JNDI配置Xml代码1.<transctionManager type ="JTA">2.<property name ="UserTransaction"value ="java:/ctx/con/UserTransaction"/>3.<dataSource type ="JNDI">4.<property name ="DataSource"value ="java:comp/env/jdbc/myDataSource"/>5.</dataSource>6.</transctionManager>sqmMap节点指定了映射文件的位置,配置文件中可以定义多个sqlMap元素,以指定项目内所包含的所有映射文件.ibatis学习笔记(二)>>>>>>>sqlMapConfig.xml文件详解ibatis基础代码包括:1.ibatis实例配置一个典型的配置文件如下(具体配置项目的含义见后):<? xml version="1.0" encoding="UTF-8" ?><! DOCTYPE sqlMapConfigPUBLIC "-////DTD SQL Map Config 2.0/"[url]/dtd/[/url]sql-map-config-2.dt<sqlMapConfig >< settingscacheModelsEnabled ="true"enhancementEnabled ="true"lazyLoadingEnabled ="true"errorTracingEnabled ="true"maxRequests ="32"maxSessions ="10"maxTransactions ="5"useStatementNamespaces ="false"/>< transactionManager type ="JDBC" >< dataSource type ="SIMPLE" >< property name ="JDBC.Driver" value ="com.p6spy.engine.spy.P6SpyDriver" />< property name ="JDBC.ConnectionURL" value="jdbc:mysql://localhost/sample" />< property name ="ername" value ="user" />< property name ="JDBC.Password" value ="mypass" />< property name ="Pool.MaximumActiveConnections" value ="10" />< property name ="Pool.MaximumIdleConnections" value ="5" />< property name ="Pool.MaximumCheckoutTime" value ="120000" />< property name ="Pool.TimeToWait" value ="500" />< property name ="Pool.PingQuery" value ="select 1 from ACCOUNT" />< property name ="Pool.PingEnabled" value ="false" />< property name ="Pool.PingConnectionsOlderThan" value ="1" />< property name ="Pool.PingConnectionsNotUsedFor" value ="1" /></ dataSource ></ transactionManager >< sqlMap resource ="com/ibatis/sample/User.xml" /></ sqlMapConfig >⑴Settings 节点cacheModelsEnabled是否启用SqlMapClient上的缓存机制。
Struts+Spring+Ibatis整合框架搭建配置文档
Struts + Spring +ibatis 整合开发步骤:框架配置-ActionContextCleanUp<!—过滤器,struts2用于销毁某些不再使用的对象等!--》<filter><filter-name>struts-cleanup</filter-name><filter-class>org.apache.struts2.dispatcher.ActionContextCleanUp</filter-class></filter><!-- 要保证在struts2核心过滤器映射之前配置这一项--> <filter-mapping><filter-name>struts-cleanup</filter-name><url-pattern>/*</url-pattern></filter-mapping>框架配置-FilterDispatcher<!-- 配置Struts 2框架的核心Filter --><filter><!-- 配置Struts 2核心Filter的名字--><filter-name>struts</filter-name><!-- 配置Struts 2核心Filter的实现类--><filter-class>org.apache.struts2.dispatcher.FilterDispatcher</filter-class></filter><!-- 配置Filter拦截的URL --> <filter-mapping><!-- 配置Struts 2的核心FilterDispatcher拦截所有用户请求--> <filter-name>struts</filter-name><url-pattern>/*</url-pattern></filter-mapping><!-- 向监听器类中传递初始化参数,以获取beanFactory对象--> <context-param><param-name>contextConfigLocation</param-name><param-value>classpath:applicationContext.xml</param-value></context-param><!-- 使用监听器初始化Spring的beanFactory,并将其放入到Context中,在使用时将其取出,以获取IOC容器中的bean --><listener><listener-class>org.springframework.web.context.ContextLoaderListener</listener-class></listener>框架配置-Ibatis<!--===IBATIS属性配置===--><bean id="SqlMapClient" class="org.springframework.orm.ibatis.SqlMapClientFactoryBean"><property name="configLocation" value="classpath:sqlMapConfig.xml"/> <property name="dataSource" ref="DataSource"/></bean>一.添加Spring 、Struts框架对web.xml文件的修改1.添加Spring框架2.在web.xml中引入Spring配置文件(注意:applicationContext.xml文件的路径)<context-param><param-name>contextConfigLocation</param-name><param-value>/WEB-INF/conf/applicationContext.xml</param-value></context-param><servlet><servlet-name>context</servlet-name><servlet-class>org.springframework.web.context.ContextLoaderServlet</servlet-class><load-on-startup>1</load-on-startup></servlet>3.添加Struts框架4.在web.xml中引入Spring配置文件(注意:struts-config.xml文件的路径)<servlet><servlet-name>action</servlet-name><servlet-class>org.apache.struts.action.ActionServlet</servlet-class><init-param><param-name>config</param-name><param-value>/WEB-INF/conf/struts-config.xml</param-value></init-param><init-param><param-name>debug</param-name><param-value>3</param-value></init-param><init-param><param-name>detail</param-name><param-value>3</param-value></init-param><load-on-startup>0</load-on-startup></servlet><servlet-mapping><servlet-name>action</servlet-name><url-pattern>*.do</url-pattern></servlet-mapping>5.web.xml自动添加的*.jsp文件起始路径(注意:jsp文件的访问路径)<welcome-file-list><welcome-file>/WEB-INF/jsp/emp.jsp</welcome-file></welcome-file-list>二、对Spring配置文件applicationContext.xml文件的修改1.配置JDBC数据源驱动文件jdbc.properties(服务器、端口、账户、密码因具体情况而定)MySql:jdbc.driver=com.mysql.jdbc.Driverjdbc.url=jdbc:mysql://localhost:3306/testername=rootjdbc.password=adminOracle:jdbc.driver=oracle.jdbc.driver.OracleDriverjdbc.url=jdbc:oracle:thin:@127.0.0.1:1521:orclername=scottjdbc.password=tigerMS Sql Server:jdbc.driver=com.microsoft.jdbc.sqlserver.SQLServerDriverjdbc.url=jdbc:microsoft:sqlserver://localhost:1433;DatabaseName=mssqlername=sajdbc.password=sa2.将JDBC驱动源文件部署到ApplicationContext.xml配置文件中<bean id="propertyConfigurer"class="org.springframework.beans.factory.config.PropertyPlaceholderConfigurer"> <property name="locations"><list><value>/WEB-INF/conf/jdbc.properties</value></list></property></bean>3.将Data Source配置到ApplicationContext文件中<bean id="dataSource" class="mons.dbcp.BasicDataSource"destroy-method="close"><property name="driverClassName"><value>${jdbc.driver}</value></property><property name="url"><value>${jdbc.url}</value></property><property name="username"><value>${ername}</value></property><property name="password"><value>${jdbc.password}</value></property><property name="minIdle"><value>1</value></property><property name="maxActive"><value>25</value></property><property name="maxIdle"><value>5</value></property></bean>4.在Spring配置中注入3中的datasource数据源<bean id="transactionManager"class="org.springframework.jdbc.datasource.DataSourceTransactionManager"> <property name="dataSource"><ref local="dataSource"/></property></bean>5.引入具体的sql语句配置文件(注意:sqlMapConfig.xml文件的路径)<bean id="sqlMapClient"c lass="org.springframework.orm.ibatis.SqlMapClientFactoryBean"><property name="configLocation"><value>/WEB-INF/conf/sqlMapConfig.xml</value></property><property name="dataSource"><ref local="dataSource"/></property></bean>6.注入操作数据库的dao(empDao是举例)<bean id="empDao" class="com.web.ssi.emp.dao.EmpDaoImpl"><property name="sqlMapClient"><ref local="sqlMapClient"/></property></bean>三.对Struts配置文件struts-config.xml文件的修改1.填写form-bean<form-beans><form-bean name="empForm" type="com.web.ssi.emp.form.EmpForm"/></form-beans>2.填写action-mapping<action-mappings><actionname="empForm"path="/queryEmp"type="org.springframework.web.struts.DelegatingActionProxy"scope="request" ><forward name="queryEmp" path="/jsp/emp.jsp"/></action></action-mappings>3.填写message-resource 和plug-in(注意:action-servlet.xml文件路径)<message-resources parameter="com.web.ssi.ApplicationResources"/><plug-in className="org.springframework.web.struts.ContextLoaderPlugIn"> <set-propertyproperty="contextConfigLocation"value="/conf/applicationContext.xml" /> </plug-in>4.Spring与Struts相对用的配置applicationContext.xml<beans><bean name="/queryEmp" class="com.web.ssi.emp.action.EmpAction" singleton="false"> <property name="empService"><ref bean="empService" /></property></bean></beans>附一:配置文件示意图如下附二:包结构建这么一个工程是我做毕业设计的前奏,我打算用myeclipse把毕业设计做一下。
ibatis 教程 详解
0.0 2004.8.1 夏昕第一版1.0 2004.9.1 夏昕补充ibatis in Spring 部分OpenDoc 版权说明本文档版权归原作者所有。
在免费、且无任何附加条件的前提下,可在网络媒体中自由传播。
如需部分或者全文引用,请事先征求作者意见。
如果本文对您有些许帮助,表达谢意的最好方式,是将您发现的问题和文档改进意见及时反馈给作者。
当然,倘若有时间和能力,能为技术群体无偿贡献自己的所学为最好的回馈。
另外,笔者近来试图就日本、印度的软件开发模式进行一些调研。
如果诸位可以赠阅日本、印度软件研发过程中的需求、设计文档以供研究,感激不尽!ibatis 开发指南ibatis Quick Start (5)准备工作 (5)构建ibatis 基础代码 (5)ibatis 配置 (11)ibatis 基础语义 (16)XmlSqlMapClientBuilder (16)SqlMapClient (16)SqlMapClient 基本操作示例 (16)OR 映射 (19)ibatis 高级特性 (26)数据关联 (26)一对多关联 (26)一对一关联 (28)延迟加载 (30)动态映射 (31)事务管理 (35)基于JDBC 的事务管理机制 (35)基于JTA的事务管理机制 (36)外部事务管理 (38)Cache (39)MEMORY类型Cache 与WeakReference (40)LRU 型Cache (42)FIFO 型Cache (43)OSCache (43)ibatis 开发指南相对Hibernate 和Apache OJB 等“一站式”ORM 解决方案而言,ibatis 是一种“半自动化”的ORM 实现。
所谓“半自动”,可能理解上有点生涩。
纵观目前主流的ORM ,无论Hibernate 还是Apache OJB,都对数据库结构提供了较为完整的封装,提供了从POJO 到数据库表的全套映射机制。
ibatis简单实例
Ibatis简单入门实例一:新建web工程二:导入需要的jar包三:写配置文件1.对数据库的操作配置:Customer.xml<?xml version="1.0" encoding="UTF-8"?><!DOCTYPE sqlMap PUBLIC "-////DTD SQL Map 2.0//EN" "/dtd/sql-map-2.dtd"><sqlMap><!--别名:用Customer代替类 --><typeAlias alias="Customer" type="com.ibatis.Customer"/><!--<select id="id名" resultClass="返回的值的类型(和类的别名对应)">sql语句</select> --><select id="selectAllCustomer" resultClass="Customer">select * from customer</select><!--<select id="id名" parameterClass="传入参数的类型(不区分大小写)" resultClass="返回值得类型">#id#(占位符表示传入参数的类型)</select> --><select id="selectCustomerById" parameterClass="int"resultClass="Customer">select * from customer where id=#id#</select><insert id="insertCustomer" parameterClass="Customer">insert into customer(firstname,lastname,street,city,birthday)values(#firstname#,#lastname#,#street#,#city#,#birthday#)</insert><delete id="deleteCustomerById" parameterClass="int">delete from customer where id=#id#</delete><update id="updateCustomerById" parameterClass="customer">update customerset firstname=#firstname#,lastname=#lastname#,street=#street#,city=#city#,birthday=#birthday#where id=#id#</update><select id="selectCustomerByName" parameterClass="String" resultClass="Customer">select * from customer where lastname like '%$name$%' </select><!-- 这种产生序列的方式是Oracle数据库 --><insert id="insertCutomerBySequence" parameterClass="Customer"> <!--查找下一个序列把查找出来的序列值赋值给Customer中的id --> <selectKey resultClass="int" keyProperty="id">select seq_nextValfrom dual</selectKey>insert into customer(id,firstname,lastname,street,city,birthday)values(#id#,#firstname#,#lastname#,#street#,#city#,#birthday#)</insert></sqlMap>2.参数值配置(ibatis数据库连接参数配置):SqlMap.properties#驱动driver = com.mysql.jdbc.Driver#地址url = jdbc:mysql://localhost:3306/khdd#数据库用户名username = root#数据库密码password = root3.总配置文件:SqlMapConfig.xml<?xml version="1.0" encoding="UTF-8"?><!DOCTYPE sqlMapConfig PUBLIC "-////DTD SQL Map Config 2.0//EN" "/dtd/sql-map-config-2.dtd"><sqlMapConfig><!-- 需要配置的参数文件 --><properties resource="com/ibatis/SqlMap.properties" /><transactionManager type="JDBC"><dataSource type="SIMPLE"><property name="JDBC.Driver" value="${driver}" /><property name="JDBC.ConnectionURL" value="${url}" /><property name="ername"value="${username}" /><property name="JDBC.Password" value="${password}" /></dataSource></transactionManager><!-- 数据库操作xml --><sqlMap resource="com/ibatis/Customer.xml" /></sqlMapConfig>四:写Java语句1.新建Customer.java(数据库表的数据模型)package com.ibatis;import java.sql.Date;/*** 数据模型**/public class Customer {private int id = 0;private String firstname = null;private String lastname = null;private String street = null;private String city = null;private Date birthday = null;public int getId() {return id;}public void setId(int id) {this.id = id;}public String getFirstname() {return firstname;}public void setFirstname(String firstname) { this.firstname = firstname;}public String getLastname() {return lastname;}public void setLastname(String lastname) {stname = lastname;}public String getStreet() {return street;}public void setStreet(String street) {this.street = street;}public String getCity() {return city;}public void setCity(String city) {this.city = city;}public Date getBirthday() {return birthday;}public void setBirthday(Date birthday) {this.birthday = birthday;}public String toString(){String content ="id="+id+"\t"+"firstname="+firstname+"\t"+"lastname="+lastna me+"\t"+"street="+street+"\t"+"city="+city+"\t"+"birthday="+bi rthday;return content;}}建表sql语句:CREATE TABLE `customer` (`ID` int(11) NOT NULL AUTO_INCREMENT,`FIRSTNAME` varchar(20) DEFAULT NULL,`LASTNAME` varchar(40) DEFAULT NULL,`STREET` varchar(100) DEFAULT NULL,`CITY` varchar(100) DEFAULT NULL,`birthday` date DEFAULT NULL,PRIMARY KEY (`ID`)) ENGINE=InnoDB AUTO_INCREMENT=14 DEFAULT CHARSET=utf8;2.新建对数据库操作接口:ICustomerDao.java package com.ibatis;import java.util.List;public interface ICustomerDao {public void addCustomer(Customer customer);//根据序列增加public void addCustomerBySequence(Customer customer);public int deleteCustomerById(int id);public void updateCustomerById(Customer customer);public List<Customer> queryAllCustomer();public List<Customer> queryCustomerByName(String name);public Customer queryCustomerById(int id);}3.新建继承上述接口的实体操作类:ICustomerDaoImpl.java package com.ibatis;import java.io.IOException;import java.io.Reader;import java.sql.Date;import java.sql.SQLException;import java.util.List;import mon.resources.Resources;import com.ibatis.sqlmap.client.SqlMapClient;import com.ibatis.sqlmap.client.SqlMapClientBuilder;public class ICustomerDaoImpl implements ICustomerDao {private static SqlMapClient sqlMapClient = null;static{try {//读取配置文件Reader reader =Resources.getResourceAsReader("com/ibatis/SqlMapConfig.xml");sqlMapClient=SqlMapClientBuilder.buildSqlMapClient(reader);//关闭reader.close();} catch (IOException e) {e.printStackTrace();}}/*** customer:需要插入的Customer信息*/public void addCustomer(Customer customer) {try {sqlMapClient.insert("insertCustomer",customer);} catch (SQLException e) {// TODO Auto-generated catch blocke.printStackTrace();}}/*** 通过序列添加Customer* 此种方法试用于oracle* 在mysql中 id可以设置为自动增长,可以不使用序列*/public void addCustomerBySequence(Customer customer) {}/*** 根据id删除一条数据* deletenum:删除返回的条数*/public int deleteCustomerById(int id) {int deletenum=0;try {//返回的是删除的条数deletenum=sqlMapClient.delete("deleteCustomerById",id);} catch (SQLException e) {// TODO Auto-generated catch blocke.printStackTrace();}return deletenum;}public List<Customer> queryAllCustomer() {List<Customer> studentList = null;try {//selectAllCustomer是Customer.xml中配置的sql 语句的id(即:selectAllCustomer代表了sql语句)//selectAllCustomer是Customer.xml中的映射studentList =sqlMapClient.queryForList("selectAllCustomer");} catch (SQLException e) {e.printStackTrace();}return studentList;}/*** id:传入的参数*/public Customer queryCustomerById(int id) {Customer customer = null;try {customer = (Customer)sqlMapClient.queryForObject("selectCustomerById",id);} catch (SQLException e) {e.printStackTrace();}return customer;}/*** 模糊查询*/public List<Customer> queryCustomerByName(String name) {List<Customer> studentList = null;try {studentList =sqlMapClient.queryForList("selectCustomerByName", name);} catch (SQLException e) {// TODO Auto-generated catch blocke.printStackTrace();}return studentList;}public void updateCustomerById(Customer customer) {try {//返回的也是更新的条数System.out.println(sqlMapClient.update(("updateCustomerBy Id"),customer));} catch (SQLException e) {e.printStackTrace();}}public static void main(String[] args) {ICustomerDao dao = new ICustomerDaoImpl();//查询所有// for(Customer customer:dao.queryAllCustomer()){ // System.out.println(customer);// }//根据id查询// System.out.println(dao.queryCustomerById(1));//插入一条 id为自增Customer customer =new Customer();customer.setFirstname("刘");customer.setLastname("心妍");customer.setStreet("河东路");customer.setCity("杭州");customer.setBirthday(Date.valueOf("1991-09-24"));dao.addCustomer(customer);//删除一条// int i=dao.deleteCustomerById(11);// System.out.println(i);//更新一条// Customer customer =new Customer();// customer.setId(10);// customer.setFirstname("刘");// customer.setLastname("心妍");// customer.setStreet("河东路");// customer.setCity("金华");// customer.setBirthday(Date.valueOf("1991-10-25")); // dao.updateCustomerById(customer);//模糊查询// for(Customer customer:dao.queryCustomerByName("三")){// System.out.println(customer);// }}}。
ibatis用法
ibatis用法iBATIS(现已更名为 MyBatis)是一种用于将对象与 SQL 语句映射的持久化框架。
以下是 iBATIS/MyBatis 的基本用法:配置文件:创建一个MyBatis 配置文件(通常是mybatis-config.xml),其中包含数据库连接信息、映射文件的位置等配置。
<!-- mybatis-config.xml --><configuration><environments default="development"><environment id="development"><transactionManager type="JDBC"/><dataSource type="POOLED"><property name="driver" value="com.mysql.jdbc.Driver"/><property name="url" value="jdbc:mysql://localhost:3306/mydatabase"/><property name="username" value="root"/><property name="password" value="password"/></dataSource></environment></environments><mappers><mapperresource="com/example/mappers/UserMapper.xml"/></mappers></configuration>映射文件:创建一个XML 文件,用于映射Java 对象与SQL 语句。
- 1、下载文档前请自行甄别文档内容的完整性,平台不提供额外的编辑、内容补充、找答案等附加服务。
- 2、"仅部分预览"的文档,不可在线预览部分如存在完整性等问题,可反馈申请退款(可完整预览的文档不适用该条件!)。
- 3、如文档侵犯您的权益,请联系客服反馈,我们会尽快为您处理(人工客服工作时间:9:00-18:30)。
iBatis 配置文件详解一:ibatis基础代码包括:1. ibatis实例配置一个典型的配置文件如下(具体配置项目的含义见后):<? xml version="1.0" encoding="UTF-8" ?><! DOCTYPE sqlMapConfigPUBLIC "-////DTD SQL Map Config 2.0/"/dtd/sql-map-config-2.dt<sqlMapConfig >< settingscacheModelsEnabled ="true"enhancementEnabled ="true"lazyLoadingEnabled ="true"errorTracingEnabled ="true"maxRequests ="32"maxSessions ="10"maxTransactions ="5"useStatementNamespaces ="false"/>< transactionManager type ="JDBC" >< dataSource type ="SIMPLE" >< property name ="JDBC.Driver" value ="com.p6spy.engine.spy.P6SpyDriver" /> < property name ="JDBC.ConnectionURL" value ="jdbc:mysql://localhost/sample"/>< property name ="ername" value ="user" />< property name ="JDBC.Password" value ="mypass" />< property name ="Pool.MaximumActiveConnections" value ="10" />< property name ="Pool.MaximumIdleConnections" value ="5" />< property name ="Pool.MaximumCheckoutTime" value ="120000" />< property name ="Pool.TimeToWait" value ="500" />< property name ="Pool.PingQuery" value ="select 1 from ACCOUNT" />< property name ="Pool.PingEnabled" value ="false" />< property name ="Pool.PingConnectionsOlderThan" value ="1" />< property name ="Pool.PingConnectionsNotUsedFor" value ="1" /></ dataSource ></ transactionManager >< sqlMap resource ="com/ibatis/sample/User.xml" /></ sqlMapConfig >⑴ Settings 节点cacheModelsEnabled是否启用SqlMapClient上的缓存机制。
建议设为"true"enhancementEnabled是否针对POJO启用字节码增强机getter/setter的调用效能,避免Reflect所带来的性能开销。
同时,这也为Lazy Loading带来提升。
建议设为"true"errorTracingEnabled是否启用错误日志,在开发期间建议设为"true" 以方便调试lazyLoadingEnabled是否启用延迟加载机制,建议设为"true"maxRequests最大并发请求数(Statement并发数)maxTransactions最大并发事务数maxSessions 最大Session数。
即当前最大允许的并发SqlMapClient数。
useStatementNamespaces是否使用Statement命名空间。
这里的命名空间指的是映射文件中,sqlMap节的namespace属性,如在上例中针对t_use表的映射文件sqlMap节点: <sqlMap namespace="User"> 这里,指定了此sqlMap节点下定义的操作均属于"User"命名空间。
在useStatementNamespaces="true"的情况下,Statement调用需追加命名空间,如:sqlMap.update("User.updateUser",user);否则直接通过Statement名称调用即可,如: sqlMap.update("updateUser",user); 但请注意此时需要保证所有映射文件中,Statement定义无重名。
transactionManager节点transactionManager节点定义了ibatis的事务管理器,目前提供了以下几种选择:JDBC通过传统JDBC mit/rollback实现事务支持。
JTA使用容器提供的JTA服务实现全局事务管理。
EXTERNAL外部事务管理,如在EJB中使用ibatis,通过EJB的部署配置即可实现自动的事务管理机制。
此时ibatis将把所有事务委托给外部容器进行管理。
dataSource节点dataSource从属于transactionManager节点,用于设定ibatis运行期使用的DataSource属性。
type属性:dataSource节点的type属性指定了dataSource的实现类型。
可选项目:SIMPLE:SIMPLE是ibatis内置的dataSource实现,其中实现了一个简单的数据库连接池机制,对应 ibatis 实现类为com.ibatis.sqlmap.engine.datasource.SimpleDataSourceFactory。
DBCP:基于Apache DBCP连接池组件实现的DataSource封装,当无容器提供DataSource服务时,建议使用该选项,对应ibatis实现类为com.ibatis.sqlmap.engine.datasource.DbcpDataSourceFactory。
JNDI:使用J2EE容器提供的DataSource实现,DataSource将通过指定的JNDI Name从容器中获取。
对应 ibatis实现类为com.ibatis.sqlmap.engine.datasource.JndiDataSourceFactory。
dataSource的子节点说明(SIMPLE&DBCP):JDBC.Driver JDBC 驱动。
如:org.gjt.mm.mysql.DriverJDBC.ConnectionURL数据库URL。
如:jdbc:mysql://localhost/sample如果用的是SQLServer JDBC Driver,需要在url后追加SelectMethod=Cursor以获得JDBC事务的多Statement支持。
ername数据库用户名JDBC.Password数据库用户密码Pool.MaximumActiveConnections数据库连接池可维持的最大容量。
Pool.MaximumIdleConnections数据库连接池中允许的挂起(idle)连接数。
JNDI由于大部分配置是在应用服务器中进行,因此ibatis中的配置相对简分别使用JDBC和JTA事务管理的JDNI配置:使用JDBC事务管理的JNDI DataSource配置< transactionManager type ="JDBC" >< dataSource type ="JNDI" >< property name ="DataSource" value ="java:comp/env/jdbc/myDataSource" /></ dataSource ></ transactionManager >< transactionManager type ="JTA" >< property name ="UserTransaction" value ="java:/ctx/con/UserTransaction" /> < dataSource type ="JNDI" >< property name ="DataSource" value ="java:comp/env/jdbc/myDataSource" /></ dataSource >sqlMap节点sqlMap节点指定了映射文件的位置,配置中可出现多个sqlMap节点,以指定项目内所包含的所有映射文件。
二:ibatis基础语义1、XmlSqlMapClientBuilderXmlSqlMapClientBuilder是ibatis 2.0之后版本新引入的组件,用以替代1.x版本中的XmlSqlMapBuilder。