汽车指南
汽车驾驶指南.pdf_1702096050.8677018说明书
Preparing to DriveYou should do the following checks and adjustments every day before you drive your car.1. Make sure all windows, mirrors,and outside lights are clean and unobstructed. Remove frost, snow,or ice.2. Check that the hood and trunk are fully closed.3. Check that any items you may be carrying with you inside are stored properly or fastened down securely.4. Check the adjustment of the seat (see page 54).5. Check the adjustment of the inside and outside mirrors (see page 60).6. Check the adjustment of the steering wheel (see page 44).7. Make sure the doors are securely closed and locked.8. Fasten your seat belt. Check that your passengers have fastened their seat belts (see page 7 ).9. Turn the ignition ON (II). Check the indicator lights in the instru-ment panel.10.Start the engine (see page 113 ).11. Check the gauges and indicator lights in the instrument panel (see page 33).Starting the Engine5-speed Manual Transmission 1. Apply the parking brake.2. In cold weather, turn off all electrical accessories to reduce the drain on the battery.3. Push the clutch pedal down all the way. START (III) does notfunction unless the clutch pedal is depressed.4. Without touching the accelerator pedal, turn the ignition key to the START (III) position. If the engine does not start right away, do not hold the key in START (III) for more than 15 seconds at a time.Pause for at least 10 seconds before trying again.5. If the engine does not start within 15 seconds, or starts but stalls right away, repeat step 4 with the accelerator pedal pressed half-way down. If the engine starts, release pressure on the accelerator pedal so the engine does not race.6. If the engine still does not start,press the accelerator pedal all the way down and hold it there while starting in order to clear flooding.As before, keep the ignition key in the START (III) position for no more than 15 seconds. Return to step 5 if the engine does not start.If it starts, lift your foot off the accelerator pedal so the engine does not race.Automatic Transmission 1. Apply the parking brake.2. In cold weather, turn off all electrical accessories to reduce the drain on the battery.3. Make sure the shift lever is in Park. Press on the brake pedal.4. Without touching the accelerator pedal, turn the ignition key to the START (III) position. If the engine does not start right away, do not hold the key in START (III) for more than 15 seconds at a time.Pause for at least 10 seconds before trying again.CONTINUEDStarting the Engine5. If the engine does not start within 15 seconds, or starts but stalls right away, repeat step 4 with the accelerator pedal pressed half-way down. If the engine starts, release pressure on the accelerator pedal so the engine does not race.6. If the engine still does not start,press the accelerator pedal all the way down and hold it there while starting in order to clear flooding.As before, keep the ignition key in the START (III) position for no more than 15 seconds. Return to step 5 if the engine does not start.If it starts, lift your foot off the accelerator pedal so the engine does not race.Starting in Cold Weather at High Altitude (Above 2,400 meters/8,000 feet)An engine is harder to start in cold weather. The thinner air found at high altitude above 2,400 meters (8,000 feet) adds to the e the following procedure:1. Turn off all electrical accessories to reduce the drain on the battery.2. Push the accelerator pedal half-way to the floor and hold it there while starting the engine. Do not hold the ignition key in START (III) for more than 15 seconds.When the engine starts, release the accelerator pedal gradually as the engine speeds up and smooths out.3. If the engine fails to start in step 2,push the accelerator pedal to the floor and hold it there while you try to start the engine for no more than 15 seconds. If the engine does not start, return to step 2.5-speed Manual TransmissionThe manual transmission is syn-chronized in all forward gears for smooth operation. It has a lockout so you cannot shift directly from Fifth to Reverse. When shifting up ordown, make sure you push the clutch pedal down all the way, shift to the next gear, and let the pedal upgradually. When you are not shifting,do not rest your foot on the clutch pedal. This can cause your clutch to wear out faster.Come to a full stop before you shift into reverse. You can damage the transmission by trying to shift into reverse with the car moving.You can get extra braking from the engine when slowing down byshifting to a lower gear. This extra braking can help you maintain a safe speed and prevent your brakes from overheating while going down a steep hill. Before downshifting,make sure engine speed will not go into the red zone in the lower gear.Refer to the Maximum Speeds chart.Recommended Shift Points Drive in the highest gear that lets the engine run and acceleratesmoothly. This will give you the best fuel economy and effective emis-sions control. The following shift points are recommended:5-speed Manual Transmission, Automatic TransmissionMaximum SpeedsThe speeds in this table are the maximums for the given gears. If you exceed these speeds, the engine speed will enter into the tachometer's red zone. If this occurs, you may feel the engine cut in and out. This is caused by a limiter in the engine's computer controls. The engine will run normally when you reduce the RPM below the red zone.(US: DX, LX, Canada: LX)(US: EX, Canada: EX-R)Automatic TransmissionYour Honda's transmission has four forward speeds, and is electronically controlled for smoother shifting. It also has a "lock-up" torque converter for better fuel economy. You may feel what seems like another shift when the converter locks.Automatic TransmissionShift Lever PositionsThis display is on the instrument panel between the speedometer and tachometer. It shows you the position of the shift lever. It also indicates a possible problem in the transmission if the "D 4" indicator light flashes.The shift lever has seven positions.It must be in Park or Neutral to start the engine. When you are stopped in D 4, D 3, 2, 1, N or R, press firmly on the brake pedal and keep your foot off the accelerator pedal.CONTINUED SHIFT LEVERAutomatic TransmissionPark (P) — This position mechani-cally locks the transmission. Use Park whenever you are turning off or starting the engine. To shift out of Park, you must press on the brake pedal and have your foot off the accelerator pedal. Press the release button on the side of the shift lever to move it.You must also press the release button to shift into Park. To avoid transmission damage, come to a complete stop before shifting into Park. The shift lever must be in Park before you can remove the key from the ignition switch.If you have done all of the above and still cannot move the lever out of Park, see Shift Lock Release on page 120.Reverse (R) — To shift to Reverse from Park, see the explanation under Park. To shift to Reverse fromNeutral, come to a complete stop and then shift. Press the release button before shifting into Reverse from Neutral.Neutral (N) — Use Neutral if you need to restart a stalled engine, or if it is necessary to stop briefly with the engine idling. Shift to Park posi-tion if you need to leave the car for any reason. Press on the brake pedal when you are moving the shift lever from Neutral to another gear.Drive (D 4) — Use this position for your normal driving. The transmis-sion automatically selects a suitable gear for your speed and acceleration.You may notice the transmission shifting up at higher speeds when the engine is cold. This helps the engine warm up faster.Automatic TransmissionDrive (D 3) —This position is similar to D 4, except only the first three gears are selected. Use D 3 when towing a trailer in hilly terrain, or to provide engine braking when going down a steep hill. D 3 can also keep the transmission from cycling between third and fourth gears in stop-and-go driving.For faster acceleration when in D 3 or D 4, you can get the transmission to automatically downshift by pushing the accelerator pedal to the floor.The transmission will shift down one or two gears, depending on your speed.Second (2) — To shift to Second,press the release button on the side of the shift lever. This position locks the transmission in second gear. It does not downshift to first gear when you come to a stop. Secondgives you more power when climbing,and increased engine braking when going down steep hills. Use second gear when starting out on a slippery surface or in deep snow. It will help reduce wheelspin.Whenever you move the shift lever to a lower gear, the transmission downshifts only if the engine's redline will not be exceeded in the lower gear.First (1) — To shift from Second to First, press the release button on the side of the shift lever. With the lever in this position, the transmission locks in First gear. By upshifting and downshifting through 1, 2, D 3 and D 4,you can operate this transmission much like a manual transmission without a clutch pedal.Automatic TransmissionMaximum SpeedsThe speeds in this table are the maximums for the given position. If you exceed these speeds, the engine speed will enter into the tachometer's red zone. If this occurs, you will feel the engine cut in and out. This is caused by a limiter in the engine's computer controls. The engine will run normally when you reduce the RPM below the red zone.Shift Lock ReleaseThis allows you to move the shift lever out of Park if the normal method of pushing on the brake pedal and pressing the release button does not work.1. Set the Parking brake.2. Remove the key from the ignition switch.3. Insert the key in the Shift Lock Release slot next to the shift lever.4. Push down on the key while you press the release button and move the shift lever out of Park to Neutral.5. Remove the key from the Shift Lock Release slot. Depress the brake pedal and restart the engine.If you need to use the Shift Lock Release, it could mean your car is developing a problem. Have the car checked by your Honda dealer.RELEASE BUTTONSHIFT LOCK RELEASE SLOT。
汽车ECON模式操作指南.pdf_1702089461.9305875说明书

How It Works
DECELERATE
STOP
RESTART
AUTO MATIC TRA NSMISSIO N
While driving, the engine is on.
At a stop with the brake pedal pressed, the engine turns off.
15
Low
NORMAL/ECON mode shown
13
Monitors the fuel efficiency of your driving stቤተ መጻሕፍቲ ባይዱle in real time and converts results into leaves, which are displayed in a series of five “plant” icons on the MID.
12
Driver Feedback
Deceleration Acceleration
Efficient Zones
Inefficient Braking Zone
Inefficient Driving Zone
Driving Style
Real-time Fuel Efficiency Coach
Eco Drive Bar (on the MID)
MANUAL TRANSMISSION
While driving, the engine is on.
At a stop with the brake pedal pressed and the transmission in neutral, the engine turns off.
When you take your foot off the brake pedal and fully depress the clutch, the engine turns back on.
指南车工作原理
指南车工作原理指南车是一种用于汽车转向系统的重要部件,它的工作原理对于汽车的操控和安全性具有至关重要的作用。
在本文中,我们将深入探讨指南车的工作原理,以便更好地理解它在汽车中的作用。
指南车是一种通过转向轴和齿轮传动来实现转向的装置。
它通常由转向轴、齿轮、齿条和传动机构等部件组成。
当驾驶员通过方向盘转动转向轴时,转向轴会带动齿轮的转动,齿轮再通过齿条和传动机构将转动的力量传递给车轮,从而实现汽车的转向。
在实际的工作过程中,指南车需要克服一定的阻力才能完成转向操作。
这个阻力主要来自于汽车行驶时的惯性和路面的摩擦力。
当驾驶员转动方向盘时,指南车需要克服这些阻力才能使车轮转向,因此指南车的工作原理也包括了克服阻力的过程。
除了克服阻力外,指南车还需要具有一定的传动比来保证转向的灵活性和准确性。
传动比是指转动方向盘所产生的转动角度与车轮实际转向角度之间的比值。
通过合理设计传动比,可以使驾驶员更轻松地控制车辆的转向,提高驾驶的舒适性和安全性。
在实际的汽车中,指南车的工作原理还受到了许多其他因素的影响,比如悬挂系统、轮胎的摩擦系数、转向系统的传动效率等。
这些因素都会对指南车的工作产生一定的影响,因此在设计和使用指南车时,需要综合考虑这些因素,以确保指南车能够正常、高效地工作。
总的来说,指南车作为汽车转向系统的重要部件,其工作原理涉及到转向轴、齿轮、齿条、传动机构等多个方面。
它通过克服阻力和合理设计传动比来实现汽车的转向,同时还受到其他因素的影响。
了解指南车的工作原理有助于我们更好地理解汽车的转向系统,从而更好地驾驶汽车,提高行车安全性。
汽车驾驶指南.pdf_1702098588.4977157说明书
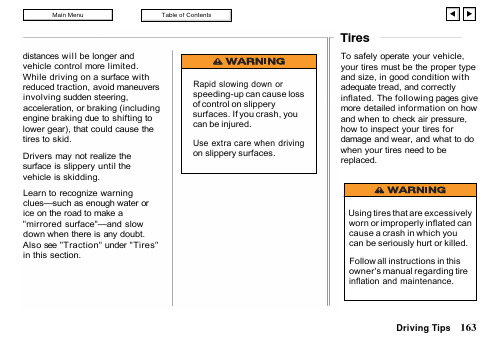
distances will be longer and vehicle control more limited.While driving on a surface with reduced traction, avoid maneuvers involving sudden steering,acceleration, or braking (including engine braking due to shifting to lower gear), that could cause the tires to skid.Drivers may not realize the surface is slippery until the vehicle is skidding.Learn to recognize warning clues—such as enough water or ice on the road to make a"mirrored surface"—and slow down when there is any doubt.Also see "Traction" under "Tires"in this section.To safely operate your vehicle,your tires must be the proper type and size, in good condition with adequate tread, and correctlyinflated. The following pages give more detailed information on how and when to check air pressure,how to inspect your tires fordamage and wear, and what to do when your tires need to be replaced.Driving TipsRapid slowing down orspeeding-up can cause loss of control on slipperysurfaces. If you crash, you can be injured.Use extra care when driving on slippery surfaces.TiresInflationKeeping the tires properly inflatedprovides the best combination ofhandling, tread life, and ridingcomfort. Underinflated tires wearunevenly, adversely affect handlingand fuel economy, and are morelikely to fail from being overheated.Overinflated tires can make yourvehicle ride more harshly, aremore prone to damage from roadhazards, and wear unevenly.We recommend that you visuallycheck your tires every day. If youthink a tire might be low, check itimmediately with a tire gauge.Use a gauge to measure the airpressure at least once a month.Even tires that are in goodcondition may lose one to two psiper month. Remember to checkthe spare tire at the same time youcheck all the other tires.Check the pressure in the tireswhen they are cold. This meansthe vehicle has been parked for atleast three hours. If you have todrive the vehicle before checkingthe tire pressure, the tires can stillbe considered "cold" if you driveless than 1 mile (1.6 km).If you check the pressure whenthe tires are hot (the vehicle hasbeen driven several miles), youwill see readings 4 to 6 psi (28 to41 kPa, 0.3 to 0.4 kg/cm2) higherthan the cold reading. This isnormal. Do not let air out tomatch the specified cold pressure.The tire will be underinflated.You should get your own tirepressure gauge and use it at alltimes. That makes it easier foryou to tell if a pressure loss iscaused by a tire problem and not avariation between gauges.Recommended Tire Pressures forNormal DrivingThe following chart shows therecommended cold tire pressuresfor most normal drivingconditions and speeds.Driving TipsThese pressures are also given on the tire information label on the driver's doorjamb.Tubeless tires have some ability to self-seal if they are punctured.However, because leakage is often very slow, you should look closely for punctures if a tire starts losing pressure.InspectionEvery time you check inflation,you should also examine the tires for damage, foreign objects, and wear.You should look for:Bumps or bulges in the tread or side of the tire. Replace the tire if you find either of theseconditions.Cuts, splits, or cracks in the side of the tire. Replace the tireif you can see fabric.Excessive tread wear.Your vehicle's tires have wear indicators molded into the tread.When the tread wears down to that point, you will see a 1/2 inch (12.7mm) wide band running across the tread. This shows that there is less than 1/16 inch (1.6 mm) of tread left on the tire. A tire that is this worn gives very little traction on wet roads. You should replace the tire if you can see the tread wearDriving TipsLABELTREAD WEARINDICATORSindicator in three or more places around the tire.MaintenanceIn addition to proper inflation,correct wheel alignment helps to decrease tire wear. You should get your vehicle's suspension parts inspected often, and aligned when needed.The tires were properly balanced at the factory. They may need to be rebalanced at some time before they are worn out. Have yourdealer check the tires if you feel a consistent vibration while driving.A tire should always berebalanced if it is removed from the wheel for repair.Make sure the installer balances the wheels when you have new tires installed. This increasesriding comfort and tire life. Your vehicle's original tires weredynamic or "spin" balanced at the factory. For best results, have the installer perform a dynamic balance.Tire RotationTo help increase tire life and distribute wear more evenly, you should have the tires rotated every 7,500 miles (12,000 km).Move the tires to the positions shown in the diagram each time they are rotated.Replacing Tires and WheelsThe tires that came with yourvehicle were selected to match its performance capabilities while providing the best combination of handling, ride comfort, and long life. You should replace them with radial tires of the same size, load range, speed rating, and maximum cold tire pressure rating (as shown on the tire's sidewall). Mixing radial and bias-ply tires on your vehicle can reduce its braking ability, traction, and steering accuracy.Driving TipsFRONT5 WHEEL4 WHEELWe urge you not to install oversize tires and wheels that would change your vehicle's ride height and possibly affect handling and stability.It is best to replace all four tires at the same time. If that is notpossible or necessary, then replace the two front tires or the two rear tires as a pair. Replacing just one tire can seriously affect your vehicle's handling.The ABS works by comparing the speed of the wheels. Whenreplacing tires, use the same size originally supplied with thevehicle. Tire size and construction can affect wheel speed and may cause the system to work inconsistently.If you ever need to replace a wheel, make sure thereplacement's specifications match the wheels that originally came on your Honda.Replacement wheels are available at your Honda dealer.Wheels and TiresWheels:16 x 7 JJ Tires:Standard on LX 2WD 225/75R16Standard on all other models 245/70R16See page 251 for information about DOT Tire Quality Grading.Driving TipsTractionA decrease in driving, cornering,and braking traction occurs whenwater, snow, ice, gravel, or othermaterials are on the road. Vehiclespeed should be adjusted to theroad conditions.When driving on wet or slushyroads, a wedge of water can buildup between the tire and road. Thisis known as hydroplaning andmay cause partial or complete lossof traction, vehicle control, andstopping ability. To reduce thechance of traction loss, followthese tips:1. Slow down during rainstormsor when roads are slushy.2. Slow down if the road hasstanding water or puddles.3. Replace tires when they areworn to a point where 1/16inch (1.6 mm) or less treadremains, or cord or fabriccan be seen.4. Keep the tires properlyinflated.If your vehicle has snow tires, besure they are the same size, loadrange and construction type as yourother tires. Vehicle speed should belimited to a maximum of 75 mph(120 km/h) when equipped witheither passenger vehicle-type ortruck-type snow tires.Tire ChainsTo prevent tire chains fromdamaging your vehicle:Install the chains on the reartires as tightly as possible.Tighten them again afterdriving 1/4 to 1/2 mile (0.4 to0.8 kilometer). Using chains onthe front tires is notrecommended. They maycontact the body and possiblydamage the vehicle. If youintend to use chains on thefront tires, be sure there isenough clearance.Do not exceed 45 mph(70 km/h) or the chainmanufacturer's suggested speedlimit if it is lower.Drive in a restrained mannerand avoid large bumps,potholes, severe turns or othermaneuvers that could cause thevehicle to bounce up and down.Follow the chainmanufacturer's instructions.Driving TipsWheel Replacement ConsiderationsDamaged wheels must bereplaced. For example, replace wheels if they are bent, cracked or heavily rusted, or if wheel nuts often become loose. Also replace wheels that leak air (except some aluminum wheels that can berepaired). See your Honda dealer.Do not use bent wheels that have been straightened, and do not use tubes in leaking wheels designed for tubeless tires. Such wheels may have structural damage and could fail without warning.Maximum loads, maximum inflation pressures, wheelidentification codes, and wheel sizes are stamped on each wheel.Service-tested and approvedwheels are available from your Honda dealer.When obtaining wheels for any reason from any other source, the replacement wheels should be equal in load capacity, inflation pressure capacity, diameter, width,offset and mounting configuration to those originally installed on your vehicle. A wheel of thewrong size or type may adversely affect load carrying capacity,wheel and bearing life, brake cooling, speedometer/odometer calibration, stopping ability,headlight aim, bumper height,vehicle ground clearance, and tire or tire chain clearance to the body and chassis. Replacement with used wheels is not advised: They may have been subjected to harshtreatment or very high mileage and could fail without warning.Installing wheels and/or tires that have a higher load carrying limit than those that originally came on your vehicle does not increase the GAWR or GVWR of the vehicle.Driving Tips。
汽车维修与操作指南说明书
Accessories Installation................................... 77ACCESSORY (Ignition Key Position).............. 44Adding Automatic Transmission Fluid........................................ 110Brake Fluid................................ 112Clutch Fluid............................... 113Engine Coolant......................... 105Engine Oil.................................. 101Manual Transmission Fluid... 111Power Steering Fluid............... 113Windshield Washer fluid......... 109Additional Safety Information..... 13Door Locks.................................. 13Driving with Pets....................... 14Seat-back Position..................... 13Storing Cargo Safely................. 14Additives, Engine Oil................... 102Adjustments Mirrors......................................... 54Seats............................................. 46Steering Wheel........................... 39Airbag (SRS)..................................... 9Air Cleaner.................................... 114Air Conditioning............................. 66Maintenance.............................. 122Usage........................................ 66Air Outlets (Vents)......................... 62Air Pressure, Tires...................... 123Alcohol and Drugs.......................... 21Alcohol in Gasoline........................ 70Antifreeze...................................... 105Anti-theft Steering Column Lock.............................................. 44Appearance Care.......................... 137Ashtrays........................................... 58Automatic Speed Control............. 40Automatic Transmission.............. 84Capacity, Fluid.......................... 168Checking Fluid Level.............. 110Shifting......................................... 84Shift Lever Positions................. 84Shift Lock Release..................... 87Auxiliary Lights............................. 38Replacing Bulbs........................ 130Turning on................................... 38Battery Charging System Light............. 28Jump Starting........................... 154Maintenance.............................. 117Specifications............................ 169Before Driving................................ 69Belts, Seat.......................................... 4Body Repair................................... 143Brakes Break-in, New Linings.............. 70Fluid............................................ 112Light, Burned-out.................... 132Parking......................................... 55System Light............................... 28Wear Indicators.......................... 89Braking System.............................. 89Break-in, New Car......................... 70Brightness Control,Instruments................................. 36Brights, Headlights........................ 35CONTINUEDIndexBulb Replacement Auxiliary Light......................... 130Back-up Lights......................... 132Brake Lights............................. 132Front Parking Lights.............. 131Front Side Marker Lights...... 131Headlights.................................. 129License Plate Lights................ 133Rear Side Marker Lights........ 132Specifications............................ 169Turn Signal Lights................... 131Bulbs, Halogen.............................. 129Cables, Jump Starting With....... 154Capacities Chart........................... 168Carbon Monoxide Hazard............. 22Cargo, Loading............................... 78CAUTION, Explanation of............ ii Certification Label....................... 166Chains............................................. 128Change Oil How to........................................ 103When to........................................ 95Changing a Flat Tire................... 147Changing Engine Coolant........... 106Charging System Light........ 28, 159Check Engine Light.............. 29, 160Checking Automatic Transmission Fluid........................................ 110Battery Condition..................... 117Brake Fluid................................ 112Clutch Fluid............................... 113Engine Belts.............................. 123Engine Coolant......................... 105Engine Oil.................................. 101Fuses........................................... 161Manual Transmission Fluid... 111Power Steering Fluid............... 113Checklist, Before Driving.............. 80Child Safety .................................. 15Cigarette Lighter........................... 58Cleaner, Air................................... 114Cleaning Exterior...................................... 138Interior....................................... 141Seat Belts................................... 141Vinyl............................................ 141Clock, Setting the........................... 56Clutch Fluid................................... 113CO in the Exhaust........................ 171Cold Weather, Starting in............. 82Compact Spare.............................. 146Console Compartment................... 57Consumer Information................ 177Controls, Instruments and............ 25Coolant Adding........................................ 105Checking.................................... 105Proper Solution......................... 105Temperature Gauge.................. 33Corrosion Protection................... 142Crankcase Emission Control System........................................ 171Cruise Control Operation.............. 40Cup Holder...................................... 57Customer Relations Office......... 177DANGER, Explanation of.............. ii Dashboard........................................ 26Daytime Running Lights.............. 35Dead Battery, What to Do.......... 154Defects, Reporting Safety............ 23Defogger, Rear Window...............38Defrosting the Windows............... 68DEXRON ® II Automatic Transmission Fluid.................. 110Dimensions.................................... 168Dimming the Headlights............... 35Dipstick Automatic Transmission........ 110Engine Oil.................................. 101Directional Signals......................... 36Disabled, Towing Your Car If... 164Disc Brake Wear Indicators......... 89Disposal of Used Oil..................... 104Doors Locking and Unlocking............ 44DOT Tire Quality Grading......... 126Downshifting, Manual Transmission.............................. 84Driving............................................. 79Economy...................................... 76In Bad Weather........................... 90In Foreign Countries................. 71Economy, Fuel................................ 76Emergencies on the Road........... 145Battery, Jump Starting........... 154Changing a Flat Tire............... 147Charging System Light........... 159Check Engine Light................. 160Checking the Fuses................. 162Low Oil Pressure Light........... 158Malfunction Indicator Lamp....................................... 160Overheated Engine.................. 156Emergency Brake.......................... 55Emergency Flashers...................... 38Emission Controls........................ 171Engine Check Light....................... 29, 160Coolant Temperature Gauge... 33Malfunction Indicator Lamp................................ 29, 160Oil Pressure Light............ 28, 158Oil, What Kind to Use............. 102Overheating............................... 156Specifications............................ 168Ethanol in Gasoline........................ 71Evaporative Emission Controls...................................... 171Exhaust Fumes............................... 22Expectant Mothers, Use of Seat Belts by........................................... 8Exterior, Cleaning the................. 138Fabric, Cleaning........................... 141Fan, Interior.................................... 64Fan, Radiator.................................. 24Features, Comfort and Convenience................................ 61Filling the Fuel Tank.................... 72Filters Fuel ............................................ 115Oil................................................ 103First Gear, Shifting........................ 845-speed Manual Transmission Checking Fluid Level..............1115-speed Manual Transmission,Shifting the.................................. 83Flashers, Hazard Warning........... 38CONTINUEDIndexFlat Tire, Changing a.................. 147Fluids Automatic Transmission........ 110Brake........................................... 112Clutch......................................... 113Manual Transmission.............. 111Power Steering......................... 113Windshield Washer.................. 109Foreign Countries, Driving in...... 71Four-way Flashers......................... 38Front End, Towing by Emergency Wrecker..................................... 164Fuel................................................... 70Fill Door and Cap....................... 72Filter........................................... 115Gauge............................................ 33Octane Requirement................. 70Oxygenated................................. 70Tank, Filling the ........................ 72Fuses, Checking the.................... 162Gas Mileage, Improving............... 76Gasohol............................................ 70Gasoline............................................ 70Filter........................................... 115Gauge............................................ 33Octane Requirement................. 70Tank, Filling the........................ 72Gas Station Procedures................. 72Gauges Engine Coolant Temperature.. 33Fuel............................................... 33Gearshift Lever Positions Automatic Transmission.......... 84Manual Transmission............... 84Glass Cleaning.............................. 142Glove Box......................................... 56Halogen Headlight Bulbs............ 129Hazard Warning Flashers........... 38Headlights Daytime Running Lights.......... 35High Beam Indicator................. 30High Beams, Turning on.......... 35Low Beams, Turning on........... 35Replacing Halogen Bulbs........ 129Turning on.................................. 35Heating and Cooling...................... 62High Altitude, Starting at............ 82High-Low Beam Switch................ 35Hood, Opening the......................... 73Horn.................................................. 42Hot Coolant, Warning about...... 105Hydraulic Clutch.......................... 113Hydroplaning................................... 91Identification Number,Vehicle........................................ 166If Your Car Has to be Towed.... 164Ignition Keys.............................................. 43Switch........................................... 43Timing Control System........... 172Indicator Lights, Instrument Panel............................................. 27Infant Restraint.............................. 17Inflation, Proper Tire.................. 123Inside Mirror................................... 54Inspection, Tire............................. 124Instrument Panel............................ 26Instrument Panel Brightness.......36IndexLoading Cargo................................ 78LOCK (Ignition Key Position)..... 44Locks Anti-theft Steering Column.....44Fuel Fill Door.............................. 72Rear Locking Compartment.... 46Trunk........................................... 45Low Coolant Level....................... 105Lower Gear, Downshifting to a... 84Low Oil Pressure Light........ 28, 158Lubricant Specifications Chart........................................... 168Luggage........................................... 78Malfunction Indicator Lamp.................................... 29, 160Neutral Gear Position................... 86New Vehicle Break-in................... 70Normal Shift Speeds...................... 84NOTICE, Explanation of................ ii Numbers, Identification.............. 166Occupant Protection System......... 4Octane Requirement, Gasoline.... 70Odometer......................................... 32Odometer, Trip............................... 32Oil Change, How to........................ 103Change, When to........................ 95Checking Engine...................... 101Pressure Light............................ 28Selecting Proper Viscosity Chart....................................... 102Interior Cleaning.......................... 141Interior Lights................................ 59Introduction........................................ i Jacking up the Car....................... 149Jack, Tire....................................... 148Jump Starting............................... 154Keys.. (43)Label, Certification...................... 166Lane Change, Signaling................ 36Lap/Shoulder Belts.......................... 6Leaking of Exhaust into Car........ 22Lighter, Cigarette.......................... 58Lights Bulb Replacement.................... 129Indicator....................................... 27Parking......................................... 35Turn Signal................................. 36Maintenance.................................... 93Periodic Items............................. 99Record..................................... 97-98Schedule ................................. 95-96Manual Transmission.................... 83Manual Transmission Fluid........ 111Maximum Shift Speeds................. 84Meters, Gauges............................... 32Methanol in Gasoline..................... 71Mirrors, Adjusting. (54)CONTINUED。
汽车手册:汽车制动系统操作指南说明书
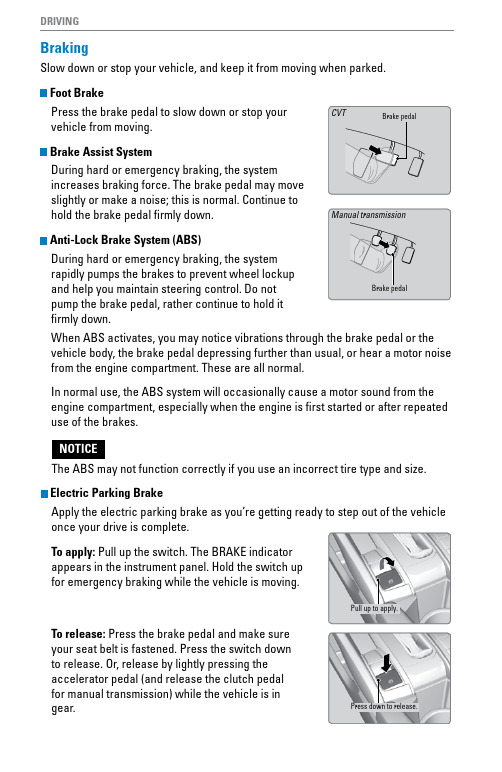
DRIVINGBraking Slow down or stop your vehicle, and keep it from moving when parked.Foot BrakePress the brake pedal to slow down or stop your vehicle from moving.Brake Assist SystemDuring hard or emergency braking, the system increases braking force. The brake pedal may move slightly or make a noise; this is normal. Continue to hold the brake pedal firmly down.Anti-Lock Brake System (ABS)During hard or emergency braking, the system rapidly pumps the brakes to prevent wheel lockup and help you maintain steering control. Do not pump the brake pedal, rather continue to hold it firmly down.When ABS activates, you may notice vibrations through the brake pedal or the vehicle body, the brake pedal depressing further than usual, or hear a motor noise from the engine compartment. These are all normal.In normal use, the ABS system will occasionally cause a motor sound from the engine compartment, especially when the engine is first started or after repeated use of the brakes.The ABS may not function correctly if you use an incorrect tire type and size. Electric Parking BrakeApply the electric parking brake as you’re getting ready to step out of the vehicle once your drive is complete.To apply: Pull up the switch. The BRAKE indicator appears in the instrument panel. Hold the switch up for emergency braking while the vehicle is moving.To release: Press the brake pedal and make sure your seat belt is fastened. Press the switch down to release. Or, release by lightly pressing the accelerator pedal (and release the clutch pedal for manual transmission) while the vehicle is in gear.Pull up to apply. Press down to release.DRIVINGAutomatic Brake HoldUse brake hold to make stop-and-go driving easier. It maintains rear brake hold even after the brake pedal is released. Make sure the vehicle is on and your seat belt is fastened when operating this feature.1.Press the BRAKE HOLD button behind the shift lever. The BRAKE HOLD indicator appears in the instrument panel.2.With the shift lever in Drive (D) or Neutral (N), press the brake pedal and come to a complete stop. The HOLD indicator appears, and brake hold is applied. Release the brake pedal.Press the accelerator pedal (or shift into a gear and release the clutch pedal for manual transmission) to cancel brake hold and start moving.To turn off brake hold:Press the brake pedal and press the BRAKE HOLD button again.Automatic brake hold cancels when:•Braking is applied for more than 10 minutes.•The electric parking brake is engaged.•The foot brake is pressed and the shift lever* is moved to Park or Reverse.•The engine stalls (manual transmission).•The driver’s seat belt is unfastened.•The engine is turned off.•There is a problem with the automatic brake hold system.DRIVINGVehicle Stability Assist® (VSA®)Also known as Electronic Stability Control (ESC), VSA helps to stabilize the vehicle during cornering if the vehicle turns more or less than what was intended. It assists in maintaining traction on slippery surfaces by regulating engine output and selectively applying the brakes.Turning VSA On or OffVSA is turned on every time you start the engine, Array even if you previously turned it off. If you turn VSAoff, your vehicle has normal braking and corneringability, but traction control will be less effective.Press and hold the VSA OFF button until youhear a beep to turn VSA on or off. The VSA OFFindicator appears when the system is off.When VSA is off, traction control stopsfunctioning, which may make it easier when tryingto free your vehicle if it is stuck in mud or snow.。
汽车导航系统设置指南

汽车导航系统设置指南随着科技的不断进步和智能化的发展,汽车导航系统已经成为现代驾驶中的常见装备。
一个好的导航系统可以为驾驶者提供清晰、准确的导航指引,帮助驾驶者更方便、安全地到达目的地。
本文将介绍汽车导航系统的设置指南,帮助驾驶者正确设置并充分利用导航系统,以获得最佳导航体验。
1. 更新地图数据导航系统的地图数据需要定期更新,以保证准确性和可靠性。
在使用导航系统之前,务必先进行地图更新。
可以通过连接手机或者Wi-Fi 自动下载地图更新,或者通过官方网站下载最新的地图文件后进行手动更新。
2. 选择语言和音量导航系统一般支持多种语言选项,可以根据个人喜好选择合适的语言。
同时,调整音量大小也很重要,确保导航的语音提示清晰可听但又不会干扰驾驶者。
3. 设置声音提示除了语言和音量外,导航系统还提供了多种声音提示设置选项,例如:转向提醒、限速警示、交通堵塞提示等。
根据个人需求,选择并设置适合自己驾驶习惯的声音提示选项,以便在行驶过程中能够及时获得相关提示信息。
4. 路径规划设置导航系统提供多种路径规划算法,包括最短路径、最快路径、避开拥堵等选项。
根据实际情况,选择合适的路径规划算法,以获得最优的行驶路线。
同时,还可以设置偏好选项,如避免高速公路、避免收费道路等,以满足个人行驶需求。
5. 附加功能设置现代导航系统通常提供了一些附加功能,如语音识别、实时天气信息、停车场搜索等。
根据个人需求进行相应设置,以提高导航系统的实用性和便利性。
6. 蓝牙连接设置如果车辆配备了蓝牙功能,可以将手机与导航系统进行蓝牙连接,以实现更多的功能。
例如,通过蓝牙连接可以实现导航系统与手机通话、音乐播放等互动操作。
7. 导航系统升级随着科技的进步,厂商会不断更新导航系统的软件和固件,以提供更好的功能和用户体验。
务必定期检查导航系统是否存在新的升级版本,并根据需要进行升级,以获得最新的功能和性能优化。
8. 道路安全优先在设置导航系统时,始终将道路安全放在首位。
汽车产品说明书驾驶技巧与安全使用指南
汽车产品说明书驾驶技巧与安全使用指南驾驶技巧与安全使用指南为了确保您在使用汽车产品时的安全和驾驶舒适性,我们提供了以下驾驶技巧与安全使用指南。
请仔细阅读并遵守以下内容:一、安全驾驶技巧1. 驾驶前检查在每次驾驶前,请确保您已经完成了以下检查:- 确认车辆状况良好,包括轮胎、制动系统、灯光等;- 调整座椅、后视镜和安全带以确保舒适和安全的驾驶姿势;- 确认车载工具和备胎已经完好存放在指定位置。
2. 注意气候和路况请根据不同的天气和路况,采取相应的驾驶措施:- 在雨天或者结冰路面上,减慢车速并保持足够的距离;- 注意观察交通路况,避免疲劳驾驶和超速行驶;- 注意气温和湿度对驾驶员视线的影响,并根据需要启动车辆的加热或者制冷系统。
3. 合理使用车载设备请合理使用车载设备,确保其不会干扰您的驾驶注意力:- 在驾驶过程中使用车载通讯设备时,请注意不要分散注意力;- 若需要操作导航系统或者调整音响设置,请在安全的时间和地点完成。
4. 维持安全距离在行驶中,请保持安全的车距以防止碰撞和追尾事故的发生。
根据路面状况和车速,将车距保持在安全范围内。
5. 注意交通信号请时刻注意交通信号,遵守红绿灯和交通标志的规定。
特别在路口、人行横道以及学校等区域,注意给行人和其他车辆让行。
二、特殊驾驶技巧1. 山区道路驾驶在山路行驶时,请注意以下事项:- 掌握合理的制动和换挡技巧,在陡峭坡道上减速和加速时保持车身平稳;- 注意油门和制动的力度控制,以避免车辆失控;- 注意急转弯的情况,保持适度速度以保证安全。
2. 高速公路驾驶在高速公路驾驶时,应注意以下事项:- 遵守限速标志并与车流保持合理的车距;- 注意并及时变道时,开启转向灯并通过后视镜确认周围交通情况;- 遇到紧急情况时,请保持镇定并依照要求采取应急措施。
三、车辆故障与应急处理1. 轮胎故障在遇到轮胎故障时,请采取以下措施:- 保持稳定,避免急刹车和急转方向盘;- 逐渐降低车速,并通过方向盘控制车辆行驶方向;- 尽快找到安全的地方停车,并寻求专业人员的帮助修复或更换轮胎。
- 1、下载文档前请自行甄别文档内容的完整性,平台不提供额外的编辑、内容补充、找答案等附加服务。
- 2、"仅部分预览"的文档,不可在线预览部分如存在完整性等问题,可反馈申请退款(可完整预览的文档不适用该条件!)。
- 3、如文档侵犯您的权益,请联系客服反馈,我们会尽快为您处理(人工客服工作时间:9:00-18:30)。
汽车指南1、什么是麦弗逊式独立悬架?作为汽车安全结构的重要组成部分,一直以来,汽车的行驶操控性和舒适性与底盘结构中的悬挂系统息息相关,而悬挂结构的简单与复杂也直接决定着汽车制造成本的高低。
麦弗逊式独立悬架是众多悬挂系统中的一种,它以结构简单、成本低廉、舒适性尚可的优点赢得了广泛的市场应用。
在人体构造中,骨头与骨头间往往都由软组织相连接,它能够起缓冲保护骨头的作用,并隔绝多余的振动以免传递到大脑损坏脑细胞。
在汽车的组成结构中,悬挂系统的作用正好与人体构造中的软组织相同,悬挂系统就是指由车身与轮胎间的弹性元件、减振器和传力装置三部分构成的整个支撑系统,这三个构成部分各自负责缓冲、减振和受力传递。
悬挂系统的具体职责是支撑车身,过滤掉路面多余的抖动,为驾乘人员提供一个平稳舒适的乘坐环境。
发展至今,悬挂系统已形成独立、半独立以及非独立三大类型。
在现代轿车中,大都采用独立式悬架,按结构形式不同,独立悬架又可分为横臂式、纵臂式、多连杆式、烛式以及麦弗逊式等。
而在众多种类的独立悬架中,麦弗逊式又以结构简单、成本低廉、舒适性尚可的优点而被最为广泛地运用。
自发明之日起,麦弗逊式独立悬架一直沿用至今,不过其结构已发展成为如今可以带横向稳定杆甚至副车架的复杂系统。
这种悬架之所以能得到广泛的应用,原因就在于它的结构非常紧凑,占用空间不大,并且制造成本也不高。
从耳熟能详的微型代步工具奥托到追求速度和操控极限的宝马M3、保时捷911,无一例外地都在前悬采用了这种结构简单、延伸性好的悬挂系统,只是为了适应各自不同的市场定位和产品诉求,在弹簧阻尼系数调校和结构匹配上各自有所不同。
麦弗逊式独立悬架的车轮也是沿着主销滑动的悬架,但与烛式悬架不完全相同,它的主销是可以摆动的『典型的麦弗逊式前悬挂示意图』麦弗逊式悬架是摆臂式与烛式悬架的结合。
与双横臂式悬架相比,麦弗逊式悬架的优点是:结构紧凑,车轮跳动时前轮定位参数变化小,有良好的操纵稳定性,加上由于取消了上横臂,给发动机及转向系统的布置带来方便;与烛式悬架相比,它的滑柱受到的侧向力又有了较大的改善。
麦弗逊式悬架多应用在中小型轿车的前悬架上,保时捷911、国产奥迪、桑塔纳、夏利、富康等轿车的前悬架均为麦弗逊式独立悬架。
虽然麦弗逊式悬架并不是技术含量最高的悬架结构,但它仍是一种经久耐用的独立悬架,具有很强的道路适应能力。
历史关于麦弗逊悬架,车坛历史上还有这么一段记载。
麦弗逊(Mcpherson)是美国伊利诺斯州人,1891年生。
『典型的麦弗逊式悬挂』大学毕业后他曾在欧洲搞了多年的航空发动机,并于1924年加入了通用汽车公司的工程中心。
30年代,通用的雪佛兰分部想设计一种真正的小型汽车,总设计师就是麦弗逊。
他对设计小型轿车非常感兴趣,目标是将这种四座轿车的质量控制在0.9吨以内,轴距控制在2.74米以内,设计的关键是悬架。
麦弗逊一改当时盛行的板簧与扭杆弹簧的前悬架方式,创造性地将减振器和螺旋弹簧组合在一起,装在前轴上。
实践证明这种悬架形式的构造简单,占用空间小,而且操纵性很好。
后来,麦弗逊跳槽到福特,1950年福特在英国的子公司生产的两款车,是世界上首次使用麦弗逊悬架的商品车。
麦弗逊悬架由于构造简单,性能优越的缘故,被行家誉为经典的设计。
麦弗逊式独立悬挂麦弗逊式悬挂是当今世界用的最广泛的轿车前悬挂之一。
麦弗逊式悬挂由螺旋弹簧、麦弗逊式独立悬架(4张)减震器、三角形下摆臂组成,绝大部分车型还会加上横向稳定杆。
主要结构简单的来说就是螺旋弹簧套在减震器上组成,减震器可以避免螺旋弹簧受力时向前、后、左、右偏移的现象,限制弹簧只能作上下方向的振动,并可以用减震器的行程长短及松紧,来设定悬挂的软硬及性能。
麦弗逊式悬挂结构简单所以它轻量、响应速度快。
并且在一个下摇臂和支柱的几何结构下能自动调整车轮外倾角,让其能在过弯时自适应路面,让轮胎的接地面积最大化,虽然麦弗逊式悬架并不是技术含量很高的悬架结构,但麦弗逊式悬挂在行车舒适性上的表现还是令人满意,不过由于其构造为直筒式,对左右方向的冲击缺乏阻挡力,抗刹车点头作用较差,悬挂刚度较弱,稳定性差,转弯侧倾明显。
保时捷911也采用麦弗逊式前悬挂主要优点:麦弗逊悬挂拥有良好的响应性和操控性,而且结构简单,占用空间小,成本低,重量轻,适合布置大型发动机以及装配在小型车身上。
其他优点:麦弗逊式悬架的其他优点是:a.由于具有较大的有效距离C,作用在车身连接点E和D处的力较小;b.点G和N之间只有很小的距离D;c.弹簧行程大;d.省去了三处支承;e.易于构造前部车底板形状。
缺点:行驶在不平路面时,车轮容易自动转向,故驾驶者必须用力保持方向盘的方向,当受到剧烈冲击时,滑柱易造成弯曲,因而影响转向性能。
稳定性差,抗侧倾和制动点头能力弱,增加稳定杆以后有所缓解但无法从根本上解决问题,耐用性不高,减震器容易漏油需要定期更换。
2、什么是多连杆独立悬架?悬架实际上是由连杆,减震器和减震弹簧组成的。
多连杆悬挂,顾名思义,就是他的连杆比一般悬架要多些,按惯例,一般都把4连杆或更多连杆结构的悬挂,称为多连杆。
多连杆独立悬挂,可分为多连杆前悬挂和多连杆后悬挂系统。
其中前悬挂一般为3连杆或4连杆式独立悬挂;后悬挂则一般为4连杆或5连杆式后悬挂系统,其中5连杆式后悬挂应用较为广泛。
典型的多连杆独立悬挂结构图特点功能特性多连杆式悬挂不仅可以保证拥有一定的舒适性,而且由于连杆较多,可以使车轮和地面尽最大可能保持垂直,尽最大可能减小车身的倾斜。
最大可能维持轮胎的贴地性。
其操控性能和双叉臂式悬挂难分伯仲,高档轿车由于空间充裕、且注重舒适性能和操控稳定性,所以大多使用多连杆悬架,可以说多连杆悬挂是高档轿车的绝佳搭档。
材料特性奔驰S级的多连杆前悬挂多连杆悬挂结构相对复杂,材料成本、研发实验成本以及制造成本远高于其它类型的的悬挂、而且其占用空间大,中小型车出于成本和空间考虑极少使用这种悬挂。
作用顾名思义,多连杆式悬架就是指由三根或三根以上连接拉杆构成,并且能提供多个方向的控制力,使轮胎具有更加可靠的行驶轨迹的悬架结构。
不过时下,由于三连杆结构已不能满足人们对于底盘操控性能的更高追求,只有结构更为精确、定位更加准确的四连杆式和五连杆式悬架才能称得上是真正的多连杆式,这两种悬架结构通常分别应用于前轮和后轮。
以常运用于后轮的五连杆式悬架为例,五根连杆分别指主控制臂、前置定位臂、后置定位臂、上臂和下臂,其中,主控制臂可以起到调整后轮前束的作用,以提高车辆行驶稳定性,有效降低轮胎的摩擦。
3、车体结构非承载式车身我们现在接触的非承载式车身车型比较少,多数是卡车、专业越野车之类。
非承载式车身的汽车有刚性车架,又称底盘大梁架。
这种车架一般都是矩形或者梯形的,布置在车身的最底部,我们平时是看不到的。
下图就是一个非承载式车身的车架,我们可以看到上面很多的横纵梁构成一个矩形结构。
车架承载着整个车体,发动机、悬挂和车身都安装在车架上。
我们从图片中可以看到车架上有用于固定车身的螺孔以及固定弹簧的基座。
所以从理论上说,即使没有车身,单是一个车架“裸奔”也是没有什么问题的。
那么车身的作用是什么呢?显而易见,为了给驾驶者和乘客提供一个舒适安全的环境,以及为了美观。
『理论上说,即使没有车身,单是一个车架“裸奔”也没问题』这种结构的最大优点就是车身强度高,钢架能够提供很强的车身刚性,也有利于提高安全性,对于载重车和越野车来说这一点非常重要。
另外驾驶过这种车的人应该有所体会,悬挂对路面颠簸的反馈在车内的感觉要轻微很多,这是因为有些车的车身和底盘之间采用降低振动的方法连接在一起,所以在走颠簸路面时更平稳舒适一些。
『非承载式车身适合载重和高强度越野』非承载式车身结构是一种历史非常悠久的底盘形式,在早期几乎所有汽车都采用这种结构。
一百多年以前,当时的汽车还是定制车的时代,人们买车时会先选择底盘,然后在底盘的基础上再选去择不同的车身制造商定制不同样式的车身。
但是随着时代的发展,非承载式车身的缺点暴露出来,其中之一是重量大,车架本身就很重,而车身和车架又是两个独立的部件,所以整体重量就更大了,用的钢材多,成本也会相对较高。
非承载式车身还有另外一个问题就是车辆重心比承载式更高。
我们可以想象一下,车架在底部,而车身是安装在车架上,那么车身的地板无论如何也要在车架之上。
如果各位有坐过非承载式车身结构的专业越野车可能会有这样的感觉:整辆车看上去非常高大,可是坐进去感觉却没有想象中那么大,因为地板也很高。
承载式车身对于家用车来说,非承载式车身最大的问题就是车身重量太大,因而随着汽车技术的发展,人们取消了非承载式结构中独立的刚性车架,整个车身成为一个单体结构,这就是承载式车身。
看到这里有些读者可能疑惑了,承载式车身没有“梁”?仅用钢板包裹出一个车身,在日常行驶中岂不是会像纸箱子一样脆弱?况且我们也经常听到厂家宣传说自己的轿车使用了多少兆帕的高强度钢梁,那么这里的“梁”和非承载式车身的“梁”有什么区别呢?承载式车身到底有没有“梁”,请仔细看下面这张图片,这是一个普通紧凑型车的车身半成品,我们可以看到车身的外壳、车顶和地板以及通常我们所说的A、B、C三根柱都是连接在一起的。
在冲压阶段,钢板先被冲压成不同的形状,然后焊接成一个完整的车身。
其实这些部件按照功能可以大致分为两种:车身覆盖件和结构件。
『车身覆盖件』所谓覆盖件就是覆盖在车身表面的部件,基本上我们从车外看到的部分都属于覆盖件,例如车门、车顶、翼子板等等,它们通常起到美观和遮风挡雨的作用,一般都用厚度不超过1毫米的钢板冲压而成。
我们平时所说的某辆车钢板的薄厚就是指这些部位。
实际上这些部位对于车身强度的影响很有限,所以我们已经不能从车身覆盖件的薄厚来判断一辆车的碰撞安全性了。
当然,较厚的钢板在抵御轻度刮蹭方面还是要更强一些。
『车身结构件』接下来我们说说承载式车身所谓的“梁”,它的学名应该叫做车身结构件。
车身结构件隐藏在车身覆盖件之下,对车身起到支撑和抗冲击的作用,分布在车身各处的钢梁是车身结构件的一种。
下图就是典型的车头处钢梁。
我们可以看到它由钢板围成一个闭合断面结构,钢板的厚度和材质规格都要比车身覆盖件高很多,而且为了在碰撞时有效吸收撞击能量,这些钢梁还会将不同强度的钢材焊接在一起,形成有效的溃缩吸能区。
还有一些钢梁不一定是闭合断面结构,它们在尽量轻量化的原则下被设计成各种不同形状以承受特定方向上的力。
承载式车身最大优点莫过于重量轻,而且重心较低,车内空间利用率也比非承载式车身结构更高,所以在家用轿车领域已经取代了非承载式车身结构。
但承载式车身的抗扭刚性和承载能力相对较弱,所以在越野车和载重货车领域还是非承载式车身的天下。
4、驻车制动类型手刹虽然驻车制动的操纵方式变得多样化起来,但是传统式的“手刹”仍是使用最为广泛的,操纵手柄一般安装在换档杆附近,其操纵方式也很简单。