思科新一代数据中心级交换机中文配置向导Nexus7000
Cisco_Nexus_7000交换矩阵模块
Cisco Nexus 7000 交换矩阵模块产品概述Cisco Nexus TM7000系列交换机构成一个模块化数据中心级产品系列,适用于高度可扩展的万兆以太网网络,其交换矩阵架构的速度可扩展至15Tbps。
它的设计宗旨是为满足大多数关键任务数据中心的要求,提供持续的系统运营和虚拟化、无所不在的服务。
Cisco Nexus 7000系列建立在一个成熟的操作系统上,其增强特性提供不中断服务情况下的实时系统升级,同时还提供出色的可管理性和可维护性。
它的创新设计专门用于支持端到端数据中心连接,它将IP、存储和IPC(进程间通讯)网络整合到单一以太网交换矩阵上。
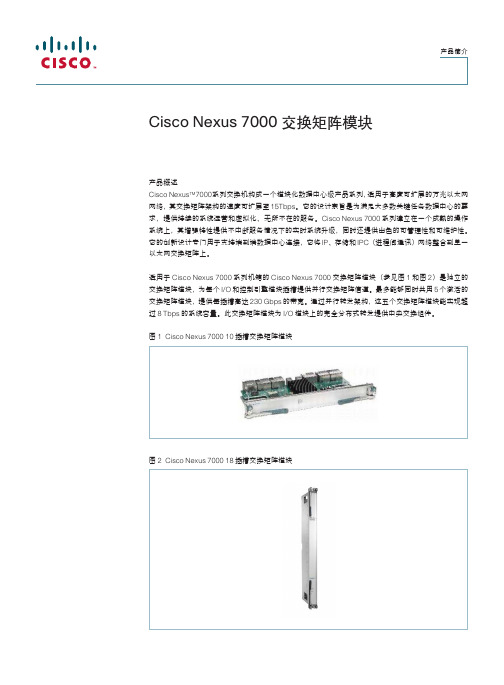
适用于Cisco Nexus 7000系列机箱的Cisco Nexus 7000交换矩阵模块(参见图1和图2)是独立的交换矩阵模块,为每个I/O和控制引擎模块插槽提供并行交换矩阵信道。
最多能够同时共用5个激活的交换矩阵模块,提供每插槽高达230 Gbps的带宽。
通过并行转发架构,这五个交换矩阵模块能实现超过8 Tbps的系统容量。
此交换矩阵模块为I/O模块上的完全分布式转发提供中央交换组件。
图1Cisco Nexus 7000 10插槽交换矩阵模块图2Cisco Nexus 7000 18插槽交换矩阵模块特性和优势通过支持1到5个并行激活交换矩阵模块,随需求增长而提高性能,能够实现交换交换矩阵可扩展性。
所有交换矩阵模块都与模块插槽相连。
每添加一个交换矩阵模块,即增加所有模块插槽的带宽,系统支持的上限为5个模块。
该架构支持无丢包交换矩阵故障切换,其余交换矩阵模块会将带宽负载均衡至所有I/O模块插槽,有助于确保平稳降级。
Cisco Nexus 7000 交换矩阵模块与控制引擎和I/O模块的结合,支持虚拟输出队列(VoQ),并为交叉矩阵交换机提供基于信用点的仲裁,以提高分布式转发系统的性能。
当速度不匹配或争用某一上行链路接口时,VoQ和基于信用点的仲裁支持资源的公平共享。
思科交换机配置教程

思科交换机配置教程首先,我们需要登录到交换机的控制台界面。
可以通过串口连接,或者通过网络连接,例如通过SSH协议进行连接。
登录后,我们进入到交换机的命令行界面。
接下来,我们需要进行基本的配置。
思科交换机的配置是通过命令行界面进行的,配置的命令是不同的,但是有一些通用的配置信息,我们可以先进行配置。
首先,我们要为交换机设置一个主机名。
可以使用如下命令进行配置:```Switch(config)# hostname Switch1```这样就为交换机设置了一个名字为"Switch1"的主机名。
接下来,我们可以配置交换机的管理IP地址。
可以使用如下命令进行配置:```Switch(config)# interface vlan 1Switch(config-if)# ip address 192.168.1.1 255.255.255.0Switch(config-if)# no shutdown```这样就为交换机的VLAN1接口配置了一个IP地址为192.168.1.1,子网掩码为255.255.255.0,并且启用了这个接口。
除了基本配置信息,我们还需要进行一些其他的配置,例如VLAN的配置。
VLAN是虚拟局域网的意思,可以将交换机的端口划分到不同的VLAN中,实现不同VLAN之间的隔离。
可以使用如下命令进行VLAN的配置:```Switch(config)# vlan 10Switch(config-vlan)# name VLAN10Switch(config-vlan)# exitSwitch(config)# interface fastEthernet 0/1Switch(config-if)# switchport access vlan 10Switch(config-if)# exit```这样就创建了一个编号为10的VLAN,名称为"VLAN10"。
Cisco Nexus 7000系列控制引擎模块

Cisco Nexus 7000系列控制引擎模块产品简介Cisco®Nexus 7000系列控制引擎模块(参见图1) 在可扩展的数据中心网络中,扩展了Cisco Nexus 7000系列系统的控制平面和数据平面服务。
图1. Cisco Nexus 7000系列控制引擎模块产品概述Cisco Nexus 7000系列交换机是一个模块化数据中心级产品系列,适用于高度可扩展的万兆以太网网络,其交换矩阵架构的速度能扩展至15Tbps以上。
它的设计旨在满足大多数关键任务数据中心的要求,提供持续的系统运营和无所不在的虚拟化服务。
Cisco Nexus 7000系列建立在一个成熟的操作系统上,借助增强特性提供了实时系统升级,以及出色的可管理性和可维护性。
它的创新设计专门用于支持端到端数据中心连接,将IP、存储和IPC网络整合到单一以太网交换矩阵之上。
Cisco Nexus 7000系列控制引擎模块的设计目的是为Cisco Nexus 7000系列机箱提供可扩展的控制平面和管理功能。
它采用了一个双核处理器,通过双核的灵活性和强大功能来扩展控制平面。
该控制引擎能够控制第二层和第三层服务、冗余功能、配置管理、状态监控、电源和环境管理等。
它集中协调所有线卡对于系统交换矩阵的使用。
借助完全分布式的转发架构,控制引擎能够透明升级到更高转发容量的I/O和交换矩阵模块。
此控制引擎包括一个创新、专用的连接管理处理器(CMP),能够对整个系统进行远程管理和故障排除。
一个全冗余系统由两个控制引擎构成,一个控制引擎模块为主用设备,另一个采用热备用模式,在数据中心级产品中提供了出色的高可用性特性。
特性和优势控制引擎模块Cisco Nexus 7000系列控制引擎模块提供了一套全面的特性,能够满足要求最为严格的数据中心部署的需要。
持续系统运行o主用和备用控制引擎o分段、冗余的带外配置和管理路径o管理平面的虚拟化o通过一个内嵌控制平面数据包分析器,提供集成诊断和协议解码∙便于升级的架构o完全独立的控制平面和数据平面,模块上无硬件转发o分布式转发架构,能够独立升级控制引擎和交换矩阵o作好了支持统一交换矩阵的准备o透明的升级功能,能够支持40Gb和100Gb以太网∙出色的运营效率o系统定位器和LED指示能够简化运营o专用带外管理处理器提供无人值守管理控制引擎连接管理处理器(CMP)CMP提供了完全带外的管理和监控功能,与主操作系统无关。
nexus 7000 ntp配置

C H A P T E RS e n d d o c u m e n t c o m m e n t s t o n e x u s 7k -d o c f e e d b a ck @c i s c o.c o m.3-1Cisco Nexus 7000 Series NX-OS System Management Configuration Guide, Release 5.xOL-20635-033Configuring NTPThis chapter describes how to configure the Network Time Protocol (NTP) on Cisco NX-OS devices. This chapter includes the following sections:•Information About NTP, page 3-1•Licensing Requirements for NTP, page 3-3•Prerequisites for NTP, page 3-3•Guidelines and Limitations, page 3-3 •Default Settings, page 3-4•Configuring NTP, page 3-4•Verifying the NTP Configuration, page 3-16•Configuration Examples for NTP, page 3-17•Additional References, page 3-18•Feature History for NTP, page 3-19Information About NTPThis section includes the following topics:•NTP Overview, page 3-1•NTP as Time Server, page 3-2•Distributing NTP Using CFS, page 3-2•Clock Manager, page 3-2•High Availability, page 3-3•Virtualization Support, page 3-3NTP OverviewThe Network Time Protocol (NTP) synchronizes the time of day among a set of distributed time servers and clients so that you can correlate events when you receive system logs and other time-specific events from multiple network devices. NTP uses the User Datagram Protocol (UDP) as its transport protocol. All NTP communications use Coordinated Universal Time (UTC).Chapter3 Configuring NTP Information About NTPS e n d d o c u m e n t c o m m e n t s t o n e x u s7k-d o c f e e d b a ck@c i s c o.c o m.An NTP server usually receives its time from an authoritative time source, such as a radio clock or anatomic clock attached to a time server, and then distributes this time across the network. NTP isextremely efficient; no more than one packet per minute is necessary to synchronize two machines towithin a millisecond of each other.NTP uses a stratum to describe the distance between a network device and an authoritative time source:• A stratum 1 time server is directly attached to an authoritative time source (such as a radio or atomic clock or a GPS time source).• A stratum 2 NTP server receives its time through NTP from a stratum 1 time server.Before synchronizing, NTP compares the time reported by several network devices and does notsynchronize with one that is significantly different, even if it is a stratum 1. Because Cisco NX-OScannot connect to a radio or atomic clock and act as a stratum 1 server, we recommend that you use thepublic NTP servers available on the Internet. If the network is isolated from the Internet, Cisco NX-OSallows you to configure the time as though it were synchronized through NTP, even though it was not.Note You can create NTP peer relationships to designate the time-serving hosts that you want your network device to consider synchronizing with and to keep accurate time if a server failure occurs.The time kept on a device is a critical resource, so we strongly recommend that you use the securityfeatures of NTP to avoid the accidental or malicious setting of incorrect time. Two mechanisms areavailable: an access list-based restriction scheme and an encrypted authentication mechanism. NTP as Time ServerBeginning with Cisco NX-OS Release 5.2, the Cisco NX-OS device can use NTP to distribute time.Other devices can configure it as a time server. You can also configure the device to act as anauthoritative NTP server, enabling it to distribute time even when it is not synchronized to an outsidetime source.Distributing NTP Using CFSCisco Fabric Services (CFS) distributes the local NTP configuration to all Cisco devices in the network.After enabling CFS on your device, a network-wide lock is applied to NTP whenever an NTPconfiguration is started. After making the NTP configuration changes, you can discard or commit them.In either case, the CFS lock is then released from the NTP application.For more information about CFS, see the “Configuring CFS” section on page2-1.Clock ManagerClocks are resources that need to be shared across different processes and across different VDCs.Multiple time synchronization protocols, such as NTP and Precision Time Protocol (PTP), might berunning in the system, and multiple instances of the same protocol might be running in different VDCs.Beginning with Cisco NX-OS Release 5.2, the clock manager allows you to specify the protocol and aVDC running that protocol to control the various clocks in the system. Once you specify the protocoland VDC, the system clock starts updating. For information on configuring the clock manager, see theCisco Nexus 7000 Series NX-OS Fundamentals Configuration Guide, Release 5.x.Cisco Nexus 7000 Series NX-OS System Management Configuration Guide, Release 5.xOL-20635-03Chapter3 Configuring NTPLicensing Requirements for NTPS e n d d o c u m e n t c o m m e n t s t o n e x u s7k-d o c f e e d b a ck@c i s c o.c o m. High AvailabilityStateless restarts are supported for NTP. After a reboot or a supervisor switchover, the runningconfiguration is applied. For more information on high availability, see the Cisco Nexus 7000 SeriesNX-OS High Availability and Redundancy Guide, Release 5.x.You can configure NTP peers to provide redundancy in case an NTP server fails. Virtualization SupportIf you are running a Cisco NX-OS Release prior to 5.2, up to one instance of NTP is supported on theentire platform. You must configure NTP in the default virtual device context (VDC), and you areautomatically placed in the default VDC unless you specify otherwise.If you are running Cisco NX-OS Release 5.2 or later, multiple instances of NTP are supported, oneinstance per VDC. By default, Cisco NX-OS places you in the default VDC unless you specificallyconfigure another VDC.Only one VDC (the default VDC by default) synchronizes the system clock at any given time. The NTPdaemon in all other VDCs acts only as an NTP server for the other devices. To change which VDCsynchronizes the system clock, use the clock protocol ntp vdc vdc-id command.NTP recognizes virtual routing and forwarding (VRF) instances. NTP uses the default VRF if you do notconfigure a specific VRF for the NTP server and NTP peer. See the Cisco Nexus 7000 Series NX-OSUnicast Routing Configuration Guide, Release 5.x for more information about VRFs.For more information about VDCs, see the Cisco Nexus 7000 Series NX-OS Virtual Device ContextConfiguration Guide, Release 5.x.Licensing Requirements for NTPProduct License RequirementCisco NX-OS NTP requires no license. Any feature not included in a license package is bundled with the Cisco NX-OS system images and is provided at no extra charge to you. For a complete explanation of the Cisco NX-OSlicensing scheme, see the Cisco NX-OS Licensing Guide.Prerequisites for NTPNTP has the following prerequisites:•To configure NTP, you must have connectivity to at least one server that is running NTP.•To configure VDCs, you must install the Advanced Services license. See the Cisco Nexus 7000 Series NX-OS Virtual Device Context Configuration Guide, Release 5.x. Guidelines and LimitationsNTP has the following configuration guidelines and limitations:Cisco Nexus 7000 Series NX-OS System Management Configuration Guide, Release 5.x OL-20635-03Chapter3 Configuring NTP Default SettingsS e n d d o c u m e n t c o m m e n t s t o n e x u s7k-d o c f e e d b a ck@c i s c o.c o m.•NTP server functionality is supported starting in Cisco NX-OS Release 5.2.•You should have a peer association with another device only when you are sure that your clock is reliable (which means that you are a client of a reliable NTP server).• A peer configured alone takes on the role of a server and should be used as a backup. If you have two servers, you can configure several devices to point to one server and the remaining devices topoint to the other server. You can then configure a peer association between these two servers tocreate a more reliable NTP configuration.•If you have only one server, you should configure all the devices as clients to that server.•You can configure up to 64 NTP entities (servers and peers).•If CFS is disabled for NTP, then NTP does not distribute any configuration and does not accept a distribution from other devices in the network.•After CFS distribution is enabled for NTP, the entry of an NTP configuration command locks the network for NTP configuration until a commit command is entered. During the lock, no changescan be made to the NTP configuration by any other device in the network except the device thatinitiated the lock.•If you use CFS to distribute NTP, all devices in the network should have the same VRFs configured as you use for NTP.•If you configure NTP in a VRF, ensure that the NTP server and peers can reach each other through the configured VRFs.•You must manually distribute NTP authentication keys on the NTP server and Cisco NX-OS devices across the network.Default SettingsTable3-1 lists the default settings for NTP parameters.T able3-1Default NTP ParametersParameters DefaultNTP Enabled in all VDCsNTP authentication DisabledNTP access EnabledNTP logging DisabledConfiguring NTPThis section includes the following topics:•Enabling or Disabling NTP, page3-5•Configuring the Device as an Authoritative NTP Server, page3-6•Configuring an NTP Server and Peer, page3-7•Configuring NTP Authentication, page3-10•Configuring NTP Access Restrictions, page3-11Cisco Nexus 7000 Series NX-OS System Management Configuration Guide, Release 5.xOL-20635-03S e n d d o c u m e n t c o m m e n t s t o n e x u s 7k -d o c f e e d b a ck @c i s c o.c o m.3-5Cisco Nexus 7000 Series NX-OS System Management Configuration Guide, Release 5.xOL-20635-03Chapter 3 Configuring NTPConfiguring NTP•Configuring the NTP Source IP Address, page 3-13•Configuring the NTP Source Interface, page 3-13•Configuring NTP Logging, page 3-13•Enabling CFS Distribution for NTP, page 3-14•Committing NTP Configuration Changes, page 3-15•Discarding NTP Configuration Changes, page 3-16•Releasing the CFS Session Lock, page 3-16NoteBe aware that the Cisco NX-OS commands for this feature may differ from those commands used in Cisco IOS.Enabling or Disabling NTPYou can enable or disable NTP in a particular VDC. NTP is enabled in all VDCs by default.BEFORE YOU BEGINMake sure that you are in the correct VDC. To change the VDC, use the switchto vdc command.SUMMARY STEPS1.config t2.[no] feature ntp3.(Optional) show ntp status4.(Optional) copy running-config startup-configDETAILED STEPSCommandPurposeStep 1config tExample:switch# config tEnter configuration commands, one per line. End with CNTL/Z.switch(config)#Places you in global configuration mode.Step 2[no ] feature ntpExample:switch(config)# feature ntpEnables or disables NTP in a particular VDC. NTP is enabled by default.NoteIf you are running a Cisco NX-OS Release prior to 5.2, NTP is enabled or disabled using the [no ] ntp enable command.S e n d d o c u m e n t c o m m e n t s t o n e x u s 7k -d o c f e e d b a ck @c i s c o.c o m.Cisco Nexus 7000 Series NX-OS System Management Configuration Guide, Release 5.xOL-20635-03Chapter 3 Configuring NTPConfiguring NTPThis example shows how to disable NTP:switch# config tEnter configuration commands, one per line. End with CNTL/Z.switch(config)# no feature ntpConfiguring the Device as an Authoritative NTP ServerYou can configure the device to act as an authoritative NTP server, enabling it to distribute time even when it is not synchronized to an existing time server.BEFORE YOU BEGINMake sure that you are in the correct VDC. To change the VDC, use the switchto vdc command.SUMMARY STEPS1.config t2.[no] ntp master [stratum ]3.(Optional) show running-config ntp4.(Optional) copy running-config startup-configDETAILED STEPSStep 3show ntp statusExample:switch(config)# show ntp status Distribution: EnabledLast operational state: Fabric Locked(Optional) Displays the status of the NTP application.Step 4copy running-config startup-config Example:switch(config)# copy running-config startup-config(Optional) Saves the change persistently through reboots and restarts by copying the running configuration to the startup configuration.CommandPurposeCommandPurposeStep 1config tExample:switch# config tEnter configuration commands, one per line. End with CNTL/Z.switch(config)#Places you in global configuration mode.Step 2[no ] ntp master [stratum ]Example:switch(config)# ntp masterConfigures the device as an authoritative NTP server.You can specify a different stratum level from which NTP clients get their time synchronized. The range is from 1 to 15.S e n d d o c u m e n t c o m m e n t s t o n e x u s 7k -d o c f e e d b a ck @c i s c o.c o m.Cisco Nexus 7000 Series NX-OS System Management Configuration Guide, Release 5.xOL-20635-03Chapter 3 Configuring NTPConfiguring NTPThis example shows how to configure the Cisco NX-OS device as an authoritative NTP server with a different stratum level:switch# config tEnter configuration commands, one per line. End with CNTL/Z.switch(config)# ntp master 5Configuring an NTP Server and PeerYou can configure an NTP server and peer.BEFORE YOU BEGINMake sure that you are in the correct VDC. To change the VDC, use the switchto vdc command.Make sure you know the IP address or DNS names of your NTP server and its peers.If you plan to use CFS to distribute your NTP configuration to other devices, then you should have already completed the following:–Enabled CFS distribution using the “Configuring CFS Distribution” section on page 2-6.–Enabled CFS for NTP using the “Enabling CFS Distribution for NTP” section on page 3-14.SUMMARY STEPS1.config t2.[no ] ntp server {ip-address | ipv6-address | dns-name } [key key-id ] [maxpoll max-poll ] [minpoll min-poll ] [prefer ] [use-vrf vrf-name ]3.[no ] ntp peer {ip-address | ipv6-address | dns-name } [key key-id ] [maxpoll max-poll ] [minpoll min-poll ] [prefer ] [use-vrf vrf-name ]4.(Optional) show ntp peers5.(Optional) copy running-config startup-configStep 3show running-config ntpExample:switch(config)# show running-config ntp(Optional) Displays the NTP configuration.Step 4copy running-config startup-config Example:switch(config)# copy running-config startup-config(Optional) Saves the change persistently through reboots and restarts by copying the running configuration to the startup configuration.CommandPurposeS e n d d o c u m e n t c o m m e n t s t o n e x u s 7k -d o c f e e d b a ck @c i s c o.c o m.Cisco Nexus 7000 Series NX-OS System Management Configuration Guide, Release 5.xOL-20635-03Chapter 3 Configuring NTPConfiguring NTPDETAILED STEPSCommandPurposeStep 1config tExample:switch# config tEnter configuration commands, one per line. End with CNTL/Z.switch(config)#Places you in global configuration mode.Step 2[no ] ntp server {ip-address | ipv6-address | dns-name } [key key-id ] [maxpoll max-poll ] [minpoll min-poll ] [prefer ] [use-vrf vrf-name ]Example:switch(config)# ntp server 192.0.2.10Forms an association with a server.Use the key keyword to configure a key to be used while communicating with the NTP server. The range for the key-id argument is from 1 to 65535.Use the maxpoll and minpoll keywords toconfigure the maximum and minimum intervals in which to poll a peer. The range for themax-poll and min-poll arguments is from 4 to 16 seconds, and the default values are 6 and 4, respectively.Use the prefer keyword to make this the preferred NTP server for the device.Use the use-vrf keyword to configure the NTP server to communicate over the specified VRF. The vrf-name argument can be default , management , or any case-sensitive alphanumeric string up to 32 characters.NoteIf you configure a key to be used while communicating with the NTP server, make sure that the key exists as a trusted key on the device. For more information on trusted keys, see the “Configuring NTP Authentication” section on page 3-10.S e n d d o c u m e n t c o m m e n t s t o n e x u s 7k -d o c f e e d b a ck @c i s c o.c o m.Cisco Nexus 7000 Series NX-OS System Management Configuration Guide, Release 5.xOL-20635-03Chapter 3 Configuring NTPConfiguring NTPThis example shows how to configure an NTP server and peer:switch# config tEnter configuration commands, one per line. End with CNTL/Z.switch(config)# ntp server 192.0.2.10 key 10 use-vrf Red switch(config)# ntp peer 2001:0db8::4101 prefer use-vrf Red switch(config)# show ntp peers-------------------------------------------------- Peer IP Address Serv/Peer -------------------------------------------------- 2001:0db8::4101 Peer (configured) 192.0.2.10 Server (configured) switch(config)# copy running-config startup-config [########################################] 100%switch(config)#Step 3[no ] ntp peer {ip-address | ipv6-address | dns-name } [key key-id ] [maxpoll max-poll ] [minpoll min-poll ] [prefer ] [use-vrf vrf-name ]Example:switch(config)# ntp peer 2001:0db8::4101Forms an association with a peer. You can specify multiple peer associations.Use the key keyword to configure a key to be used while communicating with the NTP peer. The range for the key-id argument is from 1 to 65535.Use the maxpoll and minpoll keywords toconfigure the maximum and minimum intervals in which to poll a peer. The range for themax-poll and min-poll arguments is from 4 to 17 seconds, and the default values are 6 and 4, respectively.Use the prefer keyword to make this the preferred NTP peer for the device.Use the use-vrf keyword to configure the NTP peer to communicate over the specified VRF. The vrf-name argument can be default , management , or any case-sensitive alphanumeric string up to 32 characters.Step 4show ntp peersExample:switch(config)# show ntp peers(Optional) Displays the configured server and peers.NoteA domain name is resolved only when you have a DNS server configured.Step 5copy running-config startup-config Example:switch(config)# copy running-config startup-config(Optional) Saves the change persistently through reboots and restarts by copying the running configuration to the startup configuration.CommandPurposeS e n d d o c u m e n t c o m m e n t s t o n e x u s 7k -d o c f e e d b a ck @c i s c o.c o m.Cisco Nexus 7000 Series NX-OS System Management Configuration Guide, Release 5.xOL-20635-03Chapter 3 Configuring NTPConfiguring NTPConfiguring NTP AuthenticationYou can configure the device to authenticate the time sources to which the local clock is synchronized. When you enable NTP authentication, the device synchronizes to a time source only if the source carries one of the authentication keys specified by the ntp trusted-key command. The device drops any packets that fail the authentication check and prevents them from updating the local clock. NTP authentication is disabled by default.BEFORE YOU BEGINMake sure that you configured the NTP server with the authentication keys that you plan to specify in this procedure. See the “Configuring an NTP Server and Peer” section on page 3-7 for information.Make sure that you are in the correct VDC. To change the VDC, use the switchto vdc command.SUMMARY STEPS1.config t2.[no ] ntp authentication-key number md5 md5-string3.(Optional) show ntp authentication-keys4.[no ] ntp trusted-key number5.(Optional) show ntp trusted-keys6.[no ] ntp authenticate7.(Optional) show ntp authentication-status 8.(Optional) copy running-config startup-configDETAILED STEPSCommandPurposeStep 1config tExample:switch# config tEnter configuration commands, one per line. End with CNTL/Z.switch(config)#Places you in global configuration mode.Step 2[no ] ntp authentication-key number md5 md5-stringswitch(config)# ntp authentication-key 42 md5aNiceKeyDefines the authentication keys. The device does not synchronize to a time source unless the source has one of these authentication keys and the key number is specified by the ntp trusted-key number command.The range for authentication keys is from 1 to 65535. Cisco NX-OS Release 5.2(3) and later 5.x releases support up to 15 alphanumeric characters for the MD5 string. Earlier releases support up to 8 alphanumeric characters.S e n d d o c u m e n t c o m m e n t s t o n e x u s 7k -d o c f e e d b a ck @c i s c o.c o m.Configuring NTPThis example shows how to configure the device to synchronize only to time sources that provide authentication key 42 in their NTP packets:switch# config tEnter configuration commands, one per line. End with CNTL/Z.switch(config)# ntp authentication-key 42 md5 aNiceKey switch(config)# ntp trusted-key 42switch(config)# ntp authenticateswitch(config)# copy running-config startup-config [########################################] 100%switch(config)#Configuring NTP Access RestrictionsYou can control access to NTP services by using access groups. Specifically, you can specify the types of requests that the device allows and the servers from which it accepts responses.If you do not configure any access groups, NTP access is granted to all devices. If you configure any access groups, NTP access is granted only to the remote device whose source IP address passes the access list criteria.BEFORE YOU BEGINMake sure that you are in the correct VDC. To change the VDC, use the switchto vdc command.Step 3show ntp authentication-keysExample:switch(config)# show ntp authentication-keys(Optional) Displays the configured NTP authentication keys.Step 4[no ] ntp trusted-key numberExample:switch(config)# ntp trusted-key 42Specifies one or more keys (defined in Step 2) that a time source must provide in its NTPpackets in order for the device to synchronize to it. The range for trusted keys is from 1 to 65535. This command provides protection against accidentally synchronizing the device to a time source that is not trusted.Step 5show ntp trusted-keysExample:switch(config)# show ntp trusted-keys(Optional) Displays the configured NTP trusted keys.Step 6[no ] ntp authenticateExample:switch(config)# ntp authenticateEnables or disables the NTP authentication feature. NTP authentication is disabled by default.Step 7show ntp authentication-status Example:switch(config)# show ntp authentication-status(Optional) Displays the status of NTP authentication.Step 8copy running-config startup-config Example:switch(config)# copy running-config startup-config(Optional) Saves the change persistently through reboots and restarts by copying the running configuration to the startup configuration.CommandPurposeS e n d d o c u m e n t c o m m e n t s t o n e x u s7k-d o c f e e d b a ck@c i s c o.c o m.Configuring NTPSUMMARY STEPS1.config t2.[no] ntp access-group {peer | serve | serve-only | query-only} access-list-name3.(Optional) show ntp access-groups4.(Optional) copy running-config startup-configDETAILED STEPSCommand PurposeStep1config tExample:switch# config tEnter configuration commands, one per line.End with CNTL/Z.switch(config)#Places you in global configuration mode.Step2[no] ntp access-group {peer | serve | serve-only | query-only} access-list-nameExample:switch(config)# ntp access-group peeraccesslist1Creates or removes an access group to control NTP access and applies a basic IP access list. The access group options are scanned in the following order, from least restrictive to most restrictive:•The peer keyword enables the device to receive time requests and NTP controlqueries and to synchronize itself to theservers specified in the access list.•The serve keyword enables the device to receive time requests and NTP controlqueries from the servers specified in theaccess list but not to synchronize itself to the specified servers.•The serve-only keyword enables the device to receive only time requests from serversspecified in the access list.•The query-only keyword enables the device to receive only NTP control queries from the servers specified in the access list.Step3show ntp access-groupsExample:switch(config)# show ntp access-groups (Optional) Displays the NTP access group configuration.Step4copy running-config startup-configExample:switch(config)# copy running-configstartup-config (Optional) Saves the change persistently through reboots and restarts by copying the running configuration to the startup configuration.S e n d d o c u m e n t c o m m e n t s t o n e x u s 7k -d o c f e e d b a ck @c i s c o.c o m.Configuring NTPThis example shows how to configure the device to allow it to synchronize to a peer from access group “accesslist1”:switch# config tswitch(config)# ntp access-group peer accesslist1switch(config)# show ntp access-groups Access List Type-----------------------------accesslist1 Peerswitch(config)# copy running-config startup-config [########################################] 100%switch(config)#Configuring the NTP Source IP AddressNTP sets the source IP address for all NTP packets based on the address of the interface through which the NTP packets are sent. You can configure NTP to use a specific source IP address.To configure the NTP source IP address, use the following command in global configuration mode:Configuring the NTP Source InterfaceYou can configure NTP to use a specific interface.To configure the NTP source interface, use the following command in global configuration mode:Configuring NTP LoggingYou can configure NTP logging in order to generate system logs with significant NTP events. NTP logging is disabled by default.BEFORE YOU BEGINMake sure that you are in the correct VDC. To change the VDC, use the switchto vdc command.CommandPurpose[no ] ntp source ip-addressExample :switch(config)# ntp source 192.0.2.1Configures the source IP address for all NTP packets. The ip-address can be in IPv4 or IPv6 format.CommandPurpose[no ] ntp source-interface interface Example :switch(config)# ntp source-interface ethernet 2/1Configures the source interface for all NTP packets. Use the ? keyword to display a list of supported interfaces.S e n d d o c u m e n t c o m m e n t s t o n e x u s 7k -d o c f e e d b a ck @c i s c o.c o m.Configuring NTPSUMMARY STEPS1.config t2.[no ] ntp logging3.(Optional) show ntp logging-status4.(Optional) copy running-config startup-configDETAILED STEPSThis example shows how to enable NTP logging in order to generate system logs with significant NTP events:switch# config tswitch(config)# ntp loggingswitch(config)# copy running-config startup-config [########################################] 100%switch(config)#Enabling CFS Distribution for NTPYou can enable CFS distribution for NTP in order to distribute the NTP configuration to other CFS-enabled devices.BEFORE YOU BEGINMake sure that you have enabled CFS distribution for the device using the “Configuring CFS Distribution” section on page 2-6.CommandPurposeStep 1config tExample:switch# config tEnter configuration commands, one per line. End with CNTL/Z.switch(config)#Places you in global configuration mode.Step 2[no ] ntp loggingExample:switch(config)# ntp loggingEnables or disables system logs to be generated with significant NTP events. NTP logging is disabled by default.Step 3show ntp logging-statusExample:switch(config)# show ntp logging-status(Optional) Displays the NTP logging configuration status.Step 4copy running-config startup-config Example:switch(config)# copy running-config startup-config(Optional) Saves the change persistently through reboots and restarts by copying the running configuration to the startup configuration.。
Nexus_7000S
– 存储网(SAN) + LAN + 服务器集群网(HPC) ……
▪ 端到端的整体网络解决方案
– 从核心、汇聚一直到接入
▪ 更完善的网络架构
– 带外网管网络、其它
© 2007 Cisco Systems, Inc. All rights reserved.
Cisco Confidential
Cisco Confidential
11
技术创新三:虚拟交换机 - VDC
虚拟交换机技术的优势 1) 提供了灵活、可变、快速部署的网络 2) 提高网络、电源的利用效率 3) 网络、设备的整合
© 2007 Cisco Systems, Inc. All rights reserved.
Cisco Confidential
Virtualization 虚拟化
Green Field 低耗电
• 高密度 10GE / 40G • SAN <-> Ethernet
/ 100G
• FC性
• 统一的布线 • 一致的网络管理 • 灵活的业务组合 • 灵活的虚拟网络
• 大量Server、 Storage的集中 • 有限的散热空间 • 空间 = Money • 更低的功耗 -> 更大 的带宽
Nexus 7000 产品介绍
姓名 _________ 职务 _________
© 2007 Cisco Systems, Inc. All rights reserved.
Cisco Confidential
1
Agenda
▪ Nexus 7000 ▪ 技术创新
© 2007 Cisco Systems, Inc. All rights reserved.
思科Nexus交换机-简介

思科Nexus交换机-简介Nexus新一代数据中心交换机一、思科Nexus交换机要点1、品牌定位:1993年,思科公司推出了一个交换机的品牌-Catalyst,这个品牌在市场上处于绝对的领导地位,经过了15年的时间,到了2008年1月,思科又对外宣布了另一个交换机的品牌-Nexus。
Nexus交换机是适应未来云计算、虚拟化、整合化数据中心的新一代交换机产品,对以前的Catalyst交换机有重大改进和扩展,是业界最先进的产品。
要点:全新的品牌,适应未来数据中心的先进架构,和Catalyst 交换机及其它厂家等交换机有本质上不同。
2、高性能/低延迟/不丢包的以太网Nexus交换机是适应未来数据中心的高密度万兆交换机,具有比Catalyst交换机高得多的极高的性能,端口交换延迟很低(比如N5K 端口间的交换延迟只有3微秒),同时又支持国际标准不丢包的以太网技术DCB。
这三者(高性能/低延迟/不丢包)的结合就使能Nexus 交换机具有一个独特的优势-计算机总线的延伸,相当于把彼此通讯的众多计算机的总线直接连接起来。
举个例子:高性能相当于修了一条非常宽的路,宽到有多少车都可以直接上来;低延迟相当于每辆车的速度都很快,不丢包相当于车上的货物在道路上不丢失,以前的所有交换机就做不到这点,相当于目的地有个货物检察员来检查车上的货物,一旦发现丢了,再重发货,效率会降低。
要点:Nexus交换机不简单是传输数据,而是一种全新的架构设计-计算机总线的延伸。
目前可能只有Brocade交换机能部分支持,其他厂商等根本无法支持这些特性。
3、统一的架构Nexus交换机能支持以太网和存储网的统一架构。
原来的计算机要支持很多以太接口卡NIC卡和存储接口卡HBA(通常6-8个接口),使用Nexus交换机的统一架构FCOE后,布线大大减少,考虑到冗余,只需要2个接口卡(CAN)即可,使得原来机房杂乱的布线变得非常简单、整洁,维护管理异常方便。
Cisco Nexus 7000系列产品资料

产品资料1 核心交换机Cisco Nexus 7000系列机箱产品概述Cisco Nexus™ 7000系列交换机最大限度地集成可扩展性和运营灵活性。
Cisco Nexus 7000系列交换机是一个模块化数据中心级产品系列,适用于高度可扩展的万兆以太网网络,其交换矩阵架构的速度能扩展至15Tbps以上。
它的设计旨在满足大多数关键任务数据中心的要求,提供永续的系统运营和无所不在的虚拟化服务。
Cisco Nexus 7000系列建立在一个成熟的操作系统上,借助增强特性提供实时系统升级,以及出色的可管理性和可维护性。
它的创新设计专门用于支持端到端数据中心连接,将IP、存储和IPC(进程间通讯)网络整合到单一以太网交换架构之上。
作为第一款数据中心级交换平台,Cisco Nexus 7000系列(图1)提供集成永续性,以及专为数据中心可用性、可靠性、可扩展性和易管理性而优化的特性。
图1. Cisco Nexus 7000系列特性和优势在Cisco® NX-OS软件的支持下,Cisco Nexus 7000系列提供一系列丰富的特性,保证系统的永续运营。
有两种机箱外型可用。
∙前后通风,带10个前面板接入的垂直模块插槽和一个集成电缆管理系统,能够支持新老设施中的安装、运营和冷却。
∙18个前操作模块插槽,具有端到端通风能力,紧凑水平的外型,以及特别设计的集成线缆系统,方便操作并降低复杂性。
∙面向数据中心的高可靠性和最高可用性设计,所有接口和控制引擎模块都采取前面板接入,冗余电源、风扇和交换矩阵模块则完全采用后端接入,以确保维护过程中布线不受影响。
∙系统采用两个专用控制引擎模块;可扩展、完全分布式的交换矩阵架构最多能容纳5个后端安装的交换矩阵模块,配合机箱背板设计,整个系统能提供每插槽最高230 Gbps带宽,使10插槽外型机箱可提供7 Tbps转发能力,18插槽外型机箱可提供15 Tbps转发能力。
∙中板平面设计支持随您的需求变化进行灵活的技术升级,以及提供持续的投资保护。
配置 XL 选项的Cisco Nexus 7000 M1 系列32 端口万兆以太网模块

产品手册配置 XL 选项的 Cisco Nexus 7000 M1 系列 32 端口万兆以太网模块产品概述配置 XL 选项的 Cisco Nexus® 7000 M1 系列 32 端口万兆以太网模块(图 1)是一款可高度扩展的高性能模块,专为任务关键型以太网网络而设计。
该模块使用 M1-XL 转发引擎,其特点是利用较大的转发信息库 (FIB)。
该模块还支持包括 Twinax CX1 在内的各种增强型小型封装热插拔 (SFP+) 收发器,可在各种类型的网络环境中灵活部署。
Cisco Nexus 7000 系列交换机是一个模块化数据中心级产品系列,专为可高度扩展的万兆以太网而设计,其交换矩阵架构的速度能扩展至 15 Tbps 以上,可支持高密度 40 和 100 千兆以太网部署。
该系列旨在满足大多数任务关键型网络环境的要求,可提供持续的系统运行和虚拟化普及服务。
Cisco Nexus 7000 系列以业界认可的思科® NX-OS 软件操作系统为基础,具备多种强化功能,凭借出众的可管理性和适用性来完成实时系统升级任务。
其统一交换矩阵的创新设计专用于支持将 IP、存储和进程间通信 (IPC) 网络整合到单一以太网交换矩阵之上。
图 1. 配置 XL 选项的 Cisco Nexus 7000 M1 系列 32 端口万兆以太网模块特性和优势配置 XL 选项的 Cisco Nexus 7000 M1 系列 32 端口万兆以太网模块具备诸多主要功能,旨在为要求最高性能和全面功能集的环境提供灵活的部署和支持。
此模块配备可选的可扩展功能许可证,可以在增强的 XL 模式下运行,从而能够使用完整的转发表,尤其适用于互联网对等连接环境等大规模部署。
更大的 FIB 表可利用虚拟路由和转发 (VRF) 以及虚拟设备环境 (VDC) 技术,支持在面向互联网的部署中使用完整互联网路由表的多个副本。
此模块能够在非 XL 或 XL 模式下运行,因此具有能够适应多种网络环境的灵活性,无需更改或升级硬件模块,同时还能降低总拥有成本(TCO)。
- 1、下载文档前请自行甄别文档内容的完整性,平台不提供额外的编辑、内容补充、找答案等附加服务。
- 2、"仅部分预览"的文档,不可在线预览部分如存在完整性等问题,可反馈申请退款(可完整预览的文档不适用该条件!)。
- 3、如文档侵犯您的权益,请联系客服反馈,我们会尽快为您处理(人工客服工作时间:9:00-18:30)。
Nexus Configuration Simple Guide目录Nexu7000缺省端口配置 (2)CMP连接管理处理器配置 (3)带外管理VRF (4)划分Nexus 7010 VDC (5)基于EthernetChannel的vPC (7)割裂的vPC:HSRP和STP (11)vPC的细部配置 (12)Nexus的SPAN (13)VDC的MGMT接口 (13)DOWN的VLAN端口 (13)Nexus的路由 (14)Nexus上的NLB (15)标识一个部件 (15)Nexus7000基本配置汇总 (16)Cisco NX-OS/IOS Configuration Fundamentals Comparison (16)Cisco NX-OS/IOS Interface Comparison (24)Cisco NX-OS/IOS Port-Channel Comparison (30)Cisco NX-OS/IOS HSRP Comparison (35)Cisco NX-OS/IOS STP Comparison (40)Cisco NX-OS/IOS SPAN Comparison (44)Cisco NX-OS/IOS OSPF Comparison (49)Cisco NX-OS/IOS Layer-3 Virtualization Comparison (54)vPC Role and Priority (61)vPC Domain ID (62)vPC Peer Link (62)Configuration for single 10 GigE Card (62)CFSoE (64)vPC Peer Keepalive or FT Link (64)vPC Ports (64)Orphan Ports with non-vPC VLANs (65)HSRP (66)HSRP Configuration and Best Practices for vPC (66)Advertising the Subnet (67)L3 Link Between vPC Peers (67)Cisco NX-OS/IOS TACACS+, RADIUS, and AAA Comparison (68)Nexus5000的配置同步 (73)初始化Nexus 2000 Fabric Module (75)Nexu7000缺省端口配置缺省时所有端口是关闭的no system default switchport shutdowncopy running-config startup-config vdc-all 存配置dir bootflash:dir bootflash://sup-standby/dir bootflash://sup-remoteshow roleshow inventory显示系统详细目录,或称为存货清单,可以看到各组件产品编号以及序列号show hardware 显示系统硬件详细信息show sprom backplane 1 显示交换机序列号show environment power 显示电源信息power redundancy-mode ps-redundant 如果没有双电网供电则使用此模式power redundancy-mode insrc-redundant 如果有双电网供电则使用此模式show module 检验各模块状态attach module slot_numberdir bootflash dir slot0:查看ACTIVE引擎的FLASH空间如果查看备份引擎的FLASH空间呢?首先attach module command to attach to the module number, and then use the dir bootflash: or dir slot0:out-of-service module slot Shutting Down a Supervisor or I/O Moduleout-of-service xbar slot Shutting Down a Fabric Moduleshow environmentshow environment temperatureshow environment fanbanner motd #Welcome to the switch#clock timezoneclock setreload 重启交换机reload module numberswitchto VDC切换至某VDC管理界面switchbackpoweroff module slot_numberno poweroff module slot_numberpoweroff xbar slot_numberCMP连接管理处理器配置CMP配置:You should also configure three IP addresses—one for each cmp-mgmt interface and one that is shared between the active and standby supervisor mgmt 0 interfaces.attach cmp 进入CMP命令输入后自动存盘,不需要copy run start通过NX-OS CLI来配置CMP1. configure terminal2. interface cmp-mgmt module slot 通过module 槽号分别为5/6来实现主备引擎上的CMP配置3. ip address ipv4-address/length4. ip default-gateway i pv4-address5. show running-config cmp通过CMP CLI来配置CMP1. attach cmp2. configure terminal3. ip default-gateway i pv4-address4. interface cmp-mgmt5. ip address ipv4-address/length6. show running-config在CMP上可执行的动作:show cp statereload cpattach cpmonitor cpping or traceroute 192.0.2.15reload system To reload the complete system, including the CMPs带外管理VRFManagement VRF and Basic ConnectivityThe management interface is, by default, part of the management VRF. The management interface “mgmt0” is the only interface allowed to be part of this VRF.The philosophy beyond Management VRF is to provide total isolation for the management trafficfrom the rest of the traffic flowing through the box by confining the former to its own forwarding table.In this step we will:- Verify that only the mgmt0 interface is part of the management VRF- Verify that no other interface can be part of the management VRF- Verify that the default gateway is reachable only using the management VRF如果想Ping 带外网管的网关等地址必须在Ping命令后面加上vrf managementping 10.2.8.1 vrf management划分Nexus 7010 VDCVDC是Nexus7000系列的特色功能。
通过将物理机箱划分为多个逻辑交换机,核心交换机区域将可以获得多台物理隔离的高性能交换机。
VDC具有完全隔离的路由表,VRF和接口,因此可以获得真实交换机属性的配置。
VDC的资源是占用全局机箱的,因此在必要的时候,需要通过调整VDC资源配置来进行VDC功能和性能的调整。
所有进入VDC的接口和资源都不能被其他VDC或者缺省VDC使用。
VDC配置/en/US/docs/switches/datacenter/sw/5_x/nx-os/virtual_device_context/quick/g uide/Cisco_Nexus_7000_Series_NX-OS_Virtual_Device_Context_Quick_Start__Release_5.x_cha pter1.htmlvdc MyVDC 创建VDCallocate interface ethernet 2/11-1 分配接口switchto vdc MyVDC Switch to the new VDC and enter the VDC admin user account password切换至一个VDCswitchbacksetup 根据安装向导配置VDCshow vdc membershipshow vdc current-vdcWhen interfaces in different VDCs share the same port ASIC, reloading the VDC (with the reload vdc command) or provisioning interfaces to the VDC (with the allocate interface command) might cause short traffic disruptions (of 1 to 2 seconds) for these interfaces. If such behavior is undesirable, make sure to allocate all interfaces on the same port ASIC to the same VDC.To see how the interfaces are mapping to the port ASIC, use this command:slot slot_number show hardware internal dev-port-map 这个命令没有帮助,需盲打copy running-config startup-config vdc-all通过命令可以查看当前VDC的数量和状态。