ZXSDR B8200操作手册信令跟踪分册
sjzl20081074-ZXSDR B8200 C100 技术手册

修订历史
Revision No. R1.0
Revision Date 2008/04/30
Revision Reason 第一次发布
资料编号:sjzl20081074 发布日期:2008/04/30
目录
1 产品概述 ............................................................................................1-1
法律声明
本资料著作权属中兴通讯股份有限公司所有。未经著作权人书面许可,任何单位或个人不得以任何方 式摘录、复制或翻译。
侵权必究。
“ZTE”和“ZTE中兴”是中兴通讯股份有限公司的注册商标。中兴通讯产品的名称和标志是中兴通 讯的专有标志或注册商标。在本手册中提及的其他产品或公司的名称可能是其各自所有者的商标或商 名。在未经中兴通讯或第三方商标或商名所有者事先书面同意的情况下,本手册不以任何方式授予阅 读者任何使用本手册上出现的任何标记的许可或权利。
1.6.1 系统架构 ..................................................................................................1-6 1.6.2 业务流程 ..................................................................................................1-7 1.7 对外接口 ............................................................................................................1-8 1.8 安装使用场景 .....................................................................................................1-9 1.9 组网 ................................................................................................................. 1-13 1.9.1 Abis接口组网 .......................................................................................... 1-13 1.9.2 基带-射频接口组网 ................................................................................ 1-14 1.10 操作维护系统 ................................................................................................. 1-14 1.11 技术指标 ........................................................................................................ 1-16 1.11.1 工程指标............................................................................................... 1-16 1.11.2 性能指标............................................................................................... 1-16 1.11.3 时钟参数............................................................................................... 1-17 1.12 遵循标准 ........................................................................................................ 1-17
ZXSDR B8200+R8860工程施工V2.0

GPS防雷器性能规格
外形尺寸: 74×64×34(mm) 插入损耗≤0.2dB。 工作频率1.4~1.6GHz ; 阻抗 50 ; 驻波比VSWR ≤1.3;
内部公开▲
野战光缆连接
野战 光缆 RRU1 RRU2
野战光缆
尾纤
尾纤
FS单板
内部公开▲
室外防雷箱
外形尺寸: 297×220×90(mm) × × ( ) 标称工作电压为 -48VDC 标称放电电流(8/20s)为 20kA 冲击通流容量(8/20s) 为40kA
内部公开▲
光纤布放帮扎工艺
机架内部的光纤应该用尼龙粘扣绑扎整齐,并在对应的光纤 上做好标签。
内部公开▲
B8200电源安装
1、在BBU正面左上角,可以清楚看到接线的 结构,确认室内防雷箱电源开关置于断路状 态。确定电源线连接位置,使用剪钳剪断多 余长度电缆,对电源线剥去合适长度的电缆 外皮做剥头,露出电缆的铜芯,将防水螺母 套上电缆;使用螺丝刀旋开电源接线端子紧 固螺钉;将电源线剥头完全插入接线口,拧 紧螺钉和防水螺母,检查电源线接线是否正 确;使用扳手松开保护地线接线端子紧固螺 栓,将黄绿色保护地线铜鼻紧固在BBU机柜 的接地螺栓上,拧紧螺母。 2、接地线:使用扳手松开保护地线接线端子 紧固螺栓,将黄绿色保护地线铜鼻紧固在 BBU的接地螺栓上,拧紧螺母
室外
目 录 设备及工程线缆介绍 室内安装介绍 室外安装介绍 工程注意事项
• • • •
内部公开▲
室外安装内容介绍
安装项目:
天线安装 GPS天线安装 R8860安装 直流电源室外防雷盒安装 线缆连接 射频跳线、 缆、 直流电源线、 接 线
天线
天
GPS天线 GPS天线
ZXSDR BS8800设备技术说明书

5 系统技术指标 ................................................................................................................... 12 5.1 设备运行环境指标要求 ........................................................................................... 12 5.1.1 外观图 ........................................................................................................... 12 5.1.2 尺寸............................................................................................................... 12 5.1.3 整机重量 ....................................................................................................... 12 5.1.4 电源系统范围 ................................................................................................ 12 5.1.5 功耗指标 ....................................................................................................... 12 5.1.6 设备散热量.................................................................................................... 13
ZTEZSDRGSMWCDMABR调试指导手册初稿
ZXSDRB8200&R8860调试指导手册目录第1章调试准备 ................................ 错误!未指定书签。
1.1上电前检查流程图........................ 错误!未指定书签。
1.2单板检查 ............................... 错误!未指定书签。
1.2.1SA板内部跳线开关检查 .............. 错误!未指定书签。
1.3输入电源检查............................ 错误!未指定书签。
1.4线缆连接检查............................ 错误!未指定书签。
1.5设备上电/下电........................... 错误!未指定书签。
1.5.1B8200上电/下电.................... 错误!未指定书签。
1.5.2R8860上电/下电.................... 错误!未指定书签。
第2章LMT安装和使用........................... 错误!未指定书签。
2.1LMT安装 ................................ 错误!未指定书签。
2.1.1安装JAVA环境软件................. 错误!未指定书签。
2.1.2修改IE浏览器设置................. 错误!未指定书签。
2.2LMT客户端IP设置........................ 错误!未指定书签。
2.3LMT软件安装............................. 错误!未指定书签。
2.4LMT使用 ................................ 错误!未指定书签。
2.4.1配置文件导出...................... 错误!未指定书签。
卡利福音频系统8200用户手册说明书

help. NOTE: Shielded cables may be required to be used with this unit to ensure compliance with the Class B FCC limits.
1
1. IMPORTANT SAFETY INSTRUCTIONS
Before using this product, read the instruction manual for important safety information. Please retain this manual for future reference and warranty information. Troubleshooting & Servicing Do not attempt to service or repair the device yourself. Refer all servicing to qualified service personnel. Do not attempt to modify the device in any way. Doing so could invalidate your warranty. Moisture and heat sources Do not use this apparatus near water (for example, sinks, baths, pools) or expose it to rain, moisture, dripping or splashing liquids. Do not expose the unit to high temperatures, high humidity or direct sunlight. Cleaning When cleaning the device, please use a soft, dry cloth. Never use benzene, paint-thinner, or other chemicals on the device. Location Place the device in stable location, so it will not fall causing damage to the device or bodily harm. Intended use The product may only be used with the original parts intended for it. The product may only be used in closed and dry rooms. The intended use includes adherence to the specified installation instructions. The manufacturer accepts no liability for damage arising due to improper use.
罗克韦尔自动化 Trusted T8200 高可靠电源系统 使用手册说明书
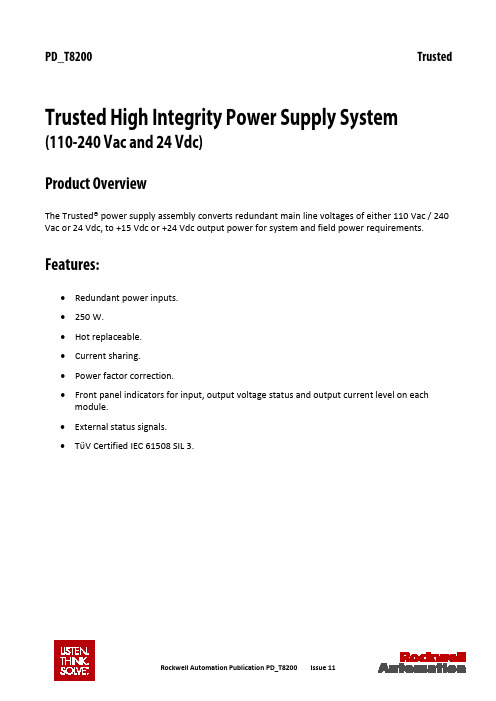
PD_T8200 Trusted Trusted High Integrity Power Supply System (110-240 Vac and 24 Vdc)Product OverviewThe Trusted® power supply assembly converts redundant main line voltages of either 110 Vac / 240 Vac or 24 Vdc, to +15 Vdc or +24 Vdc output power for system and field power requirements.Features:•Redundant power inputs.•250 W.•Hot replaceable.•Current sharing.•Power factor correction.•Front panel indicators for input, output voltage status and output current level on each module.•External status signals.•TϋV Certified IEC 61508 SIL 3.Trusted PD_T8200Page intentionally left blankPREFACEIn no event will Rockwell Automation be responsible or liable for indirect or consequential damages resulting from the use or application of this equipment. The examples given in this manual are included solely for illustrative purposes. Because of the many variables and requirements related to any particular installation, Rockwell Automation does not assume responsibility or reliability for actual use based on the examples and diagrams.No patent liability is assumed by Rockwell Automation, with respect to use of information, circuits, equipment, or software described in this manual.All trademarks are acknowledged.DISCLAIMERIt is not intended that the information in this publication covers every possible detail about the construction, operation, or maintenance of a control system installation. You should also refer to your own local (or supplied) system safety manual, installation and operator/maintenance manuals. REVISION AND UPDATING POLICYThis document is based on information available at the time of its publication. The document contents are subject to change from time to time. The latest versions of the manuals are available at the Rockwell Automation Literature Library under "Product Information" information "Critical Process Control & Safety Systems".TRUSTED RELEASEThis technical manual applies to Trusted Release: 3.6.1.LATEST PRODUCT INFORMATIONFor the latest information about this product review the Product Notifications and Technical Notes issued by technical support. Product Notifications and product support are available at the Rockwell Automation Support Centre atAt the Search Knowledgebase tab select the option "By Product" then scroll down and select the Trusted product.Some of the Answer ID’s in the Knowledge Base require a TechConnect Support Contract. For more information about TechConnect Support Contract Access Level and Features please click on the following link:https:///app/answers/detail/a_id/50871This will get you to the login page where you must enter your login details.IMPORTANT A login is required to access the link. If you do not have an account then you can create one using the "Sign Up" link at the top right of the web page.DOCUMENTATION FEEDBACKYour comments help us to write better user documentation. If you discover an error, or have a suggestion on how to make this publication better, send your comment to our technical support group at SCOPEThis manual specifies the maintenance requirements and describes the procedures to assist troubleshooting and maintenance of a Trusted system. WHO SHOULD USE THIS MANUALThis manual is for plant maintenance personnel who are experienced in the operation and maintenance of electronic equipment and are trained to work with safety systems. SYMBOLSIn this manual we will use these notices to tell you about safety considerations.SHOCK HAZARD: Identifies an electrical shock hazard. If a warning label is fitted, it can be on or inside the equipment.WARNING: Identifies information about practices or circumstances that can cause an explosion in a hazardous environment, which can cause injury or death, property damage or economic loss.ATTENTION: Identifies information about practices or circumstances that can cause injury or death.CAUTION: Identifies information about practices or circumstances that can cause property damage or economic loss.BURN HAZARD: Identifies where a surface can reach dangerous temperatures. If a warning label is fitted, it can be on or inside the equipment.This symbol identifies items which must be thought about and put in place when designing and assembling a Trusted controller for use in a Safety Instrumented Function (SIF). It appears extensively in the Trusted Safety Manual.IMPORTANT Identifies information that is critical for successful application and understanding of the product.NOTE Provides key information about the product or service.TIP Tips give helpful information about using or setting up the equipment.WARNINGS AND CAUTIONSWARNING: EXPLOSION RISKDo not connect or disconnect equipment while the circuit is live or unless the area is known to be free of ignitable concentrations or equivalentAVERTISSEMENT - RISQUE D’EXPLOSIONNe pas connecter ou déconnecter l’équipement alors qu’il est sous tension, sauf si l’environnement est exempt de concentrations inflammables ou équivalenteMAINTENANCEMaintenance must be carried out only by qualified personnel. Failure to follow these instructions may result in personal injury.CAUTION: RADIO FREQUENCY INTERFERENCEMost electronic equipment is influenced by Radio Frequency Interference. Caution should be exercised with regard to the use of portable communications equipment around such equipment. Signs should be posted in the vicinity of the equipment cautioning against the use of portable communications equipment.CAUTION:The module PCBs contains static sensitive components. Static handling precautions must be observed. DO NOT touch exposed connector pins or attempt to dismantle a module.ISSUE RECORDIssue Date Comments8 Sep 05 Format9 Mar 06 Removed hidden characters10 Sep 15 Rebranded and reformatted11 Apr 16 Standardisation of Operating Temperature and Relative Humidity RangeStatements in the Specification sectionPage intentionally left blankTrusted High Integrity Power Supply System Table of Contents Table of Contents1.Description (3)1.1. Power Supply Chassis (3)1.2. Power Supply Modules (4)1.3. Input Power Regulation (4)1.4. Front Panel Indicators (7)1.4.1. Input Power Voltage Indicator (7)1.4.2. Output Power Display (7)1.4.3. Output Power Indicator (7)2.Installation (9)2.1. Chassis Mounting (9)2.2.Backplane Versions and Module Keying (10)2.2.1. Input Power Terminals: TB1, TB2 (#8 Screw Terminals) (10)2.2.2. Output Power Terminals: TB3, TB4 (#6 Screw Terminals) (11)2.2.3. Status Connectors: J14, J15 (11)2.2.4. Monitor Connector: J13 (12)3.Configuration (13)3.1. Current Sharing (13)3.2. REGENT Power Supply Load Units (13)3.3. Regent I/O Triplicated Power Distribution (13)4.Maintenance (15)5.Specifications (17)Table of Contents Trusted High Integrity Power Supply SystemPage intentionally left blank1.DescriptionThe Power Supply Assembly consists of a Power Supply Chassis containing up to six Power Supply Modules. The Chassis may be configured to distribute power in various combinations. For example, a Chassis containing six Power Supply Modules may be set up with three Modules providing triplicated power for Regent+Plus Input/Output (I/O) assemblies and three Modules providing field power in a N+1 configuration. Alternatively, the Chassis may be set up to provide separate dual 24 Vdc supplies for both a Trusted System and associated field devices.Figure 1 Power Supply Assembly1.1.Power Supply ChassisThe Power Supply Chassis houses a maximum of six Power Supply Modules. It may be mounted in a 19-inch rack or flush mounted on a panel. Table 1 identifies the available types of Chassis.Catalogue No. Chassis Unit Input Power Voltage Configuration T8200 I/O Power Supply Chassis 110-240 Vac, 50/60 Hz Straight BussedT8201 I/O Power Supply Chassis 110-240 Vac, 50/60 Hz Cross BussedT8202 I/O Power Supply Chassis 24 VdcTable 1 Chassis Types1.2.Power Supply ModulesThe Power Supply Assembly Modules are single (if redundant inputs are not required) and dual input, hot swap, user-replaceable ac and dc units. Table 2 identifies the available types of Modules.Catalogue No. Input Type Input Power Voltage Output Power Voltage T8220 Dual 110-240 Vac 15 VdcT8222 Dual 24 Vdc 15 VdcT8223 Single 110-240 Vac 24 VdcT8224 Single 110-240 Vac 15 VdcT8225 Dual 110-240 Vac 24 VdcT8226 Dual 24 Vdc 24 VdcTable 2 Module TypesThe dual inputs on the ac Modules are galvanically isolated from each other. The inputs on the dc Modules are diode isolated and share a common return.1.3.Input Power RegulationA block diagram of a typical dual ac input I/O Power Supply Module is shown in Figure 2. A block diagram of a typical dual dc input I/O Power Supply Module is shown in Figure 3. ArrayFigure 2 Block Diagram of a Dual ac I/O Power Supply ModuleFigure 3 Block Diagram of a Dual dc I/O Power Supply ModuleEach primary power input is individually fused and filtered with both standard line filters and metal oxide varistors (MOVs). The filters attenuate any high frequency common mode and normal mode noise present in the power distribution system. The MOVs clamp high voltage transients.Filter, rectifier, and power factor correction circuits convert primary ac input power to bulk dc voltage. The switching regulator converts bulk dc power to regulated dc output voltage. Sensing, status, control and timing circuits provide for the following:•Input power failure - Active low status output. Indicates when the input voltage is below 85 Vac or 18 Vdc. There is a separate signal for each input.•Bulk power failure - Active high status output on ac input modules only. Indicates the dc bulk voltage (power factor correction (PFC output)) is outside the specifiedrange. There is a separate signal for each input.•High temperature warning alarm - Both an active high and active low status output are provided. Indicates when the module temperature exceeds 75 °C. Thetemperature is sensed near the air inlet (bottom) of the module.•High temperature shutdown - Internal signal that will shut down the switching regulator if module temperature is above 85 °C. The temperature is sensed near the air inlet (bottom) of the module.•Output over-voltage - Internal signal that will shut down the switching regulator if the output voltage exceeds +18 Vdc for the 15 volt module and +28 Vdc for the24 volt module. Over-voltage protection circuitry activation is a permanent errorcondition, requiring manual intervention to return module to normal operation.•dc output fail - Active high status output indicates the dc output voltage has gone out of regulation. The dc output fail threshold is 13.75 Vdc (±0.25 Vdc) for the 15 volt module, and 21.75 Vdc (±0.25 Vdc) for the 24 volt module.•Output current limiting - Internal signal limits output current in excessive current demand situations.•POWER FAIL - Active high status signal that indicates impending loss of output power due to one of the following:o Both inputs have indicated power failure.o Remote off control signal activated.o Thermal shutdown.o Output over-voltage.•RESET - Active high status signal that is generated a minimum of 10 ms (ac input module) or 0.5 ms (dc input module) after a POWER FAIL signal. RESET remainsasserted for 200 ms (minimum) after module power-up.•PFC off - Active low input that turns off the power factor correction of an individual input. This signal provides the capability to test the input circuitry of a module byturning off each input independently while monitoring the module fail signal.•Remote off - Active low input that turns off the output power of a module.Note: Bulk Power Fail, PFC Off and Remote Off are accessed through the Monitor Module Connector on the chassis backplane. The Monitor Module Connector allows for a future development of a monitor card that would provide remote control and enhanced monitoring of the Power Supply Chassis.Active low signals are not maintained while RESET is active. All status signals are open collector and require external pull-up resistors.RESET is used in the Regent I/O Transceivers for power system interlocking within the I/O system. A power failure (either input power or module fault) activates RESET and turns off the dc output Front Panel Indicator.The POWER FAIL and RESET signals are required for proper operation of Regent I/O Transceivers and I/O modules during power-up, power down, and loss of power. Refer to Assembly Installation in the associated Regent Product Description for details of connecting these signals to a Regent I/O Chassis.1.4.Front Panel IndicatorsThe Front Panel of each I/O Power Supply Module supports three Light Emitting Diode (LED) indicators detailed in the following sub-paragraphs1.4.1.Input Power Voltage IndicatorEach green INPUT POWER indicator is lit when the associated input (Input A, Input B) is above the lower input voltage threshold.1.4.2.Output Power DisplayThe 10-segment LED indicator bar displays the approximate output current level percentage(0 % - 100 %)1.4.3.Output Power IndicatorThe DC Output indicator is lit when the I/O Power Supply Module's dc output is within tolerance. Out-of-tolerance conditions, loss of input power or brown-out, and module failures turn off this indicator.Page intentionally left blank2.Installation2.1.Chassis MountingFigure 4 and Figure 5 show the front and rear views of the Power Supply Chassis.Figure 4 Power Supply Chassis Front ViewFigure 5 Power Supply Chassis Rear ViewMounting flanges can be attached to either the rear or the front of the Chassis. This allows flush mounting the Chassis to a panel or mounting in a 19-inch rack. The Input Crossover Patch is on the T8200 chassis only.2.2. Backplane Versions and Module KeyingConnector placement on ac Input Modules and backplanes differ from dc modules and backplanes. This prohibits insertion of the wrong Input Module type into a backplane. Module slots in a chassis can be individually keyed to only accept a Module of a particular output voltage.2.2.1. Input Power Terminals: TB1, TB2 (#8 Screw Terminals)Terminal No.T8200 T8202 Source 1 N DC- B 2 L DC+ 3 N DC- A 4LDC+Table 3 Input Power Terminals6E6 6E5 6E7 6E86E3 6E4 6E16E22.2.2. Output Power Terminals: TB3, TB4 (#6 Screw Terminals)Terminal No.Module SlotT8200, T820212 6 + DC Output 11 5 10 4 9 3 8 2 7 1 6 5 4 1-6 DC Return (terminals 1-6 are connected together onBackplane)3 2 1Table 4 Output Power Terminals2.2.3. Status Connectors: J14, J15• Type: 10 pin shrouded header, double row, 0.100 x 0.100 Centres • Manufacturer:AMP• Manufacturer Part No: 102618-3 • Mating Connector: AMP 87631-5• Pin Out:Pin J14J15Slot Signal Slot Signal 1 2 All Input ‘A’ Fail 3AllInput ‘B’ FailPin J14 J15Slot Signal Slot Signal4 All Hi Temperature5 1 Reset 4 Reset6 1 Power Fail 6 Reset7 2 Reset 4 Power Fail8 3 Power Fail 6 Power Fail9 2 Power Fail 5 Power Fail10 3 Reset 5 ResetTable 5 Status Connectors2.2.4.Monitor Connector: J13•Type: 72 pin Edge Connector, 0.125 in centreline •Manufacture: AMP•Manufacturer Part No: 1-530844-9•Pin-out: Not Configured3.Configuration3.1.Current SharingThe Modules are capable of current sharing by connecting their outputs together in parallel. This can be done external to the Chassis or by using a shorting bar that mounts directly to the output terminals on the Chassis backplane. This allows separate groups of Modules from within a single Chassis to have their outputs configured as Single, Dual or N+1. The Module uses a passive ‘droop’ method of current sharing and will share to within 25 % of the rated load.3.2.REGENT Power Supply Load UnitsWhen using the Power Supply System with Regent and Regent+Plus , power supply loading is based on the number of I/O Modules in the I/O Chassis and the load imposed by each I/O Module. Load units for each I/O Module are shown in that Module’s product description and specification sheet under the Safetybus Power heading. A set of three Power Supply Modules will provide the following load units:Number of I/O Units (Chassis): 1 2 3 4Load Unit Capacity: 82 78 74 70Table 6 Available Load Units (for a set of three power supplies) Calculating the number of load units in the system helps determine the number of I/O Power Supplies required by the system. For economic power distribution, and to avoid overloading individual Power Supply Units, calculate power supply loading when configuring systems.3.3.Regent I/O Triplicated Power DistributionA Chassis can contain two sets of triple-redundant Power supplies for Regent I/O. Each of the triple-redundant I/O Power Supply Modules within the I/O Power Supply Chassis provides power for one leg of the three redundant legs of the I/O Safetybus Transceivers, and provides power to all the I/O Modules within its associated I/O Chassis. Each I/O Module contains a diode OR power-sharing circuit that receives power from all three I/O Power Supply Modules.Should any I/O Power Supply Module fail, only one leg of the transceiver modules loses power: the two remaining legs maintain proper Regent operation. In addition, all the I/O Modules continue to operate properly by drawing their current from the two remaining Power Supplies within the I/O Power supply assembly.I/O Transceivers and I/O Modules require power fail and reset status signals for proper operation.4.MaintenanceNo periodic maintenance or calibration is required for I/O Power Supply Modules. There are no user-replaceable parts.A failed I/O Power Supply Module can be hot-replaced without disrupting system operations. Main power wiring and I/O power cables (connected to the Chassis) are not disturbed during Module replacement.Page intentionally left blank5.SpecificationsVoltage RangeT8220, T8223, T8224, T8225 85 Vac to 264 VacT8222, T8226 20 Vdc to 32 VdcFrequency RangeT8220, T8223, T8224, T8225 47 Hz to 63 HzInrush Current (120/260 Vac)T8220, T8223, T8224, T8225 20/4 0A (peak) Cold, 35/65 A (peak)HotPower Factor 0.95 min.Efficiency 70 %Use with ChassisT8220, T8223, T8224, T8225 T8200T8222, T8226 T8202Fusing (Internal to module)T8220, T8223, T8224, T8225 6 A, 250 V, 3AG Slow BlowT8222, T8226 20 A, 250 V, 3AB Slow Blow Output VoltageT8220, T8222, T8224 +15 VdcT8223, T8225, T8226 +24 VdcOutput Power 250 W, per modulePower Hold-up TimeT8220, T8223, T8224, T8225 20 ms, minimumT8222, T8226 1 ms, minimumOperating Temperature 0 °C to +60 °C (+32 °F to +140 °F)Non-operating Temperature -25 °C to +70 °C (-25 °F to +158 °F) Relative Humidity range(operating, storage & transport) 10 % – 95 %, non-condensing Environmental Specifications Refer to document 552517 Module DimensionsHeight 266 mm (10.47 in)Width 61 mm (2.38 in)Depth 318 mm (2.5 in)Chassis DimensionsHeight 266 mm (10.47 in)Width 483 mm (19 in)Depth 343 mm (13.5 in)Module Weight 3.25 kg (7.2 lb)Chassis Weight 7 kg (15.4 lb)。
复件 Architect Ci8200中文操作手册

ARCHITECT Ci8200中文操作手册美国雅培诊断产品中国部2005年1月目录第一章系统组成和检测原理 (3)第一节系统总揽 (3)第二节系统常用消耗品 (7)第三节系统主要附件 (8)第四节生化运行模块缓冲液 (8)第五节检测原理 (9)第六节系统特征 (12)第七节系统状态 (16)第八节定标 (19)第九节质量控制 (19)第十节系统设定 (19)第二章 Ci8200常规操作程序 (20)第一节启动、暂停和关机 (20)第二节登陆 (22)第三节建立和消耗库存 (22)第四节管路冲洗 (24)第五节试剂库存 (25)第六节放置 (28)第七节申请 (30)第八节运行 (30)第九节浏览申请 (31)第十节编辑申请 (31)第十一节浏览结果 (31)第十二节重运行测试 (32)第十三节释放结果 (32)第十四节保存结果 (33)第十五节传输结果 (33)第十六节不良结果 (34)第十七节打印 (34)第十八节收回 (35)第十九节质量控制 (35)第三章 Ci8200开放试剂参数设置程序 (39)第四章 Ci8200系统维护保养程序 (40)第五章 Ci8200操作简介 (44)第一章系统组成和检测原理1.1系统总览1.1.1仪器主要组成系统主要由三个部分组成:系统控制中心(SCC),运行模块(PM)和样品处理器(RSH)1.1.2系统控制中心(SCC)的标准配置17寸平面触摸式彩色显示屏,P III以上的CPU,1.44MM软盘驱动器,CD-RW可读写式光盘驱动器,标准键盘,鼠标,网络HUB,各类以太网接口,打印机等。
1.1.3运行模块的主要组份运行模块分为免疫模块和生化模块:1.1.3.1生化模块生化模块包含分样系统(主要提供样品的吸,放和确认),试剂系统(主要提供试剂的吸,放和确认)和反应检测系统(主要提供样品和试剂在反应杯中的混合,光学检测,电解质检测和反应杯的冲洗)。
除可通过SCC操作运行模块外,还可以通过机上操作面板进行一些操作:▪运行键:启动和重启动▪试剂转盘1旋转键:显示状态,并可旋转试剂转盘,便于试剂添加和更换▪试剂转盘2旋转键:显示状态,并可旋转试剂转盘,便于试剂添加和更换▪暂停键:暂停运行模块分配动作,但反应仍进行▪停止键:停止所有运行操作,但不关闭电源▪L1,L2,L3,L4键:一些仪器诊断和保养模式运行键▪显示区域:在仪器诊断和保养步骤时信息的显示1.1.3.1.1分样系统的组成和功能分样系统包括:1)机上样品转盘(LSH):主要放置病人样品,标准品和质控品。
科立讯8200车台说明书

使用说明书INSTRUCTION MANUAL7PIZ-1939-C01AO 警告:易爆环境(气体、粉尘以及烟雾等)加油或者停车于加油站时,请关闭车载电台。
O 注意事项请遵守以下注意事项,以避免发生火灾、人身伤害以及损坏车载电台:·建议车载电台使用率为发射1分钟,接收4分钟。
长时间发射或在高功率模式下连续使用将造成本机背面发热.·无论在任何情况下请不要拆装本机。
·请勿让车载电台受到长时间的阳光直射,也不要将车载电台放在加热装置附近。
·请勿将车载电台放在极度多尘、潮湿以及溅水之处,也不要将它放在不平稳的表面上。
·如果发现从车载电台发出异常气味或者冒烟,请立即关闭电源。
目录1.开箱和装置检查 (1)2.熟悉本机 (3)3.基本操作..............................................................................5 1.1随机附件1、开箱和装置检查请在使用本机前,详细检查包装盒内的主机及下表列出的随机附件,如果发现有任何物品丢失或损坏,请立即与经销商联系。
1.2 准备工作1.2.1 电源线的连接* * * 车载电台1.2.2 车载电台的安装车载电台车载* 车载电台* 车载车载电台* 将天线及电源线与车载电台连接。
* *车载电台首先,查找一下隔热板上是否有可以方便穿过电源线的孔。
如果没有可用的孔,请使用合适的钻头在隔热板上钻孔,并装上橡胶护孔环。
然后,将电源线穿过隔热板,从车内引入发动机室。
将红色导线连接在蓄电池的正极端子,将黑色导线连接在蓄电池的负极端子。
最后,将剩余导线绕成环状并加以固定。
注意:请保持电源线在车内有充分的松弛量,以便可以在连接电源的状态下可方便地拆装维修。
警告:为了保证乘车人员的安全,请使用固定支架牢固地安装,使得发生碰撞时电台不会松脱.使用固定支架作为样板,在仪表板上画出位置进行钻孔,然后使用4颗M5*16的自攻螺丝将固定支架安装固定。
- 1、下载文档前请自行甄别文档内容的完整性,平台不提供额外的编辑、内容补充、找答案等附加服务。
- 2、"仅部分预览"的文档,不可在线预览部分如存在完整性等问题,可反馈申请退款(可完整预览的文档不适用该条件!)。
- 3、如文档侵犯您的权益,请联系客服反馈,我们会尽快为您处理(人工客服工作时间:9:00-18:30)。
本手册上出现的任何标记的许可或权利。
本产品符合关于环境保护和人身安全方面的设计要求,产品的存放、使用和弃置应遵照产品手册、相 关合同或相关国法律、法规的要求进行。
ห้องสมุดไป่ตู้
如果本产品进行改进或技术变更,恕不另行专门通知。
当出现产品改进或者技术变更时,您可以通过中兴通讯技术支持网站查询有关 信息。
3 STS系统操作.......................................................................................3-1
3.1 操作流程 ............................................................................................................3-1 3.2 访问管理 ............................................................................................................3-2
1.1 STS软件概述 ......................................................................................................1-1 1.2 STS版本概述 ......................................................................................................1-1 1.3 STS应用场景 ......................................................................................................1-1
修订历史
Revision No. R1.0
Revision Date 20090930
Revision Reason 第一次发布
资料编号:sjzl20095640 发布日期:20090930
目录
1 概述 ...................................................................................................1-1
ZXSDR B8200 L200 LMT
本地维护终端 操作手册
信令跟踪分册
产品版本:1.00
中兴通讯股份有限公司 地址:深圳市高新技术产业园科技南路中兴通讯大厦 邮编:518057 电话:(86) 755 26770800 800-830-1118 传真:(86) 755 26770801 技术支持网站: 电子邮件:800@
法律声明
本资料著作权属中兴通讯股份有限公司所有。未经著作权人书面许可,任何单位或个人不得以任何方 式摘录、复制或翻译。
侵权必究。
和
是中兴通讯股份有限公司的注册商标。中兴通讯产品的名称和标志是中兴通讯的专有标志
或注册商标。在本手册中提及的其他产品或公司的名称可能是其各自所有者的商标或商名。在未经中
兴通讯或第三方商标或商名所有者事先书面同意的情况下,本手册不以任何方式授予阅读者任何使用
2 运行环境需求 .....................................................................................2-1
2.1 硬件环境需求 .....................................................................................................2-1 2.2 软件环境需求 .....................................................................................................2-1
3.4.6 排序信令 ................................................................................................ 3-14 3.4.7 查找信令 ................................................................................................ 3-14 3.4.8 复制信令 ................................................................................................ 3-15 3.4.9 全选信令 ................................................................................................ 3-15 3.4.10 清空信令............................................................................................... 3-16 3.4.11 导出信令记录 ........................................................................................ 3-16 3.4.12 自定义显示列 ........................................................................................ 3-18 3.5 文件管理 .......................................................................................................... 3-18 3.5.1 导出任务信息 ......................................................................................... 3-18 3.5.2 导入任务信息 ......................................................................................... 3-19 3.5.3 导出信令文件 ......................................................................................... 3-20 3.5.4 保存信令文件 ......................................................................................... 3-22 3.5.5 打开信令文件 ......................................................................................... 3-23 3.5.6 关闭信令文件 ......................................................................................... 3-24 3.6 查看功能 .......................................................................................................... 3-24 3.6.1 查看导航栏 ............................................................................................. 3-24 3.6.2 查看工具栏 ............................................................................................. 3-25 3.6.3 查看状态栏 ............................................................................................. 3-25 3.6.4 查看消息栏 ............................................................................................. 3-25 3.7 窗口管理 .......................................................................................................... 3-25 3.7.1 层叠窗口 ................................................................................................ 3-25 3.7.2 水平平铺窗口 ......................................................................................... 3-25 3.7.3 垂直平铺窗口 ......................................................................................... 3-26 3.7.4 网格平铺窗口 ......................................................................................... 3-26