西门子电热水器使用及安装说明书
西门子家用电器全自动咖啡机CT836LEB6W CT636LES6W说明书

Fully automatic coffee machineCT836LEB6WCT636LES6Wzh使用说明书en I nstruc tion manualR egister your product on My Siemensand discover exclusive services and offers./welcomeThe future moving in.Siemens Home Appliances1a222322c 22b22a92°№ 0063645592°dehg *i(参见第 6 页)Included in delivery (see page 29)B C4 4a咔嚓声!click!E1615a1.2.141515b2.1.zh内容供货范围(使用专用) ����������������������������������6感谢您… ���������������������������������������������������6使用范围 ���������������������������������������������������7重要安全须知 ��������������������������������������������7概览����������������������������������������������������������9操作控件 ��������������������������������������������������9启用 ��������������������������������������������������������10显示屏 �����������������������������������������������������11饮料制备 ��������������������������������������������������11使用咖啡豆制备 ���������������������������������������13制备添加牛奶的咖啡 ��������������������������������13使用预磨咖啡粉制备 ��������������������������������14冲制热水 ��������������������������������������������������14个性化饮料 ����������������������������������������������14同时制备两份 �������������������������������������������15设置研磨度 ����������������������������������������������15儿童安全锁 ����������������������������������������������16菜单 ���������������������������������������������������������16 Home Connect �����������������������������������������17维护和日常清洁 ��������������������������������������20保养程序 ������������������������������������������������22节能秘诀 �������������������������������������������������24防冻保护 �������������������������������������������������24存放附件 �������������������������������������������������24附件 ��������������������������������������������������������24废弃物处理 ���������������������������������������������24保修 �������������������������������������������������������25简单故障排除 ������������������������������������������25技术数据 �������������������������������������������������28这些使用说明书涉及到各种型号。
乐创电热水器使用说明

乐创电热水器使用说明简介乐创电热水器是一款高性能、节能环保的家用热水设备。
它采用先进的加热技术,能够快速加热水并保持恒定的水温,为用户提供舒适的洗浴体验。
本使用说明将详细介绍乐创电热水器的安装、操作和维护。
目录1.安装2.操作3.温度调节4.安全注意事项5.维护保养1. 安装在安装乐创电热水器之前,请确保您已经阅读并理解本使用说明。
同时,根据您的家庭用水需求选择合适的型号和容量。
步骤:1.将乐创电热水器安装在干燥、通风的地方,远离易燃易爆物品。
2.使用提供的安装配件将乐创电热水器固定在墙壁上,确保安装牢固。
3.连接冷热水管道,确保连接处密封良好,避免漏水。
4.连接电源,确保电压和频率与乐创电热水器的要求相匹配。
5.打开冷热水阀门,排出管道中的空气,直至水流稳定。
6.检查安装是否完整,确保没有松动的管道和电线。
2. 操作乐创电热水器的操作非常简单,只需按照以下步骤进行操作即可。
步骤:1.打开电源开关,此时乐创电热水器开始工作。
2.等待一段时间,乐创电热水器会自动加热水,当指示灯亮起时表示水已经加热到设定温度。
3.打开热水龙头,调节出水量和温度,即可享受热水洗浴。
3. 温度调节乐创电热水器具有温度调节功能,用户可以根据自己的需求调整水温。
步骤:1.确保乐创电热水器处于工作状态。
2.打开温度调节开关,通常位于乐创电热水器的侧面或顶部。
3.通过旋转调节开关,选择所需的水温。
通常有数字刻度或温度范围标识。
4.等待一段时间,乐创电热水器会自动调整水温到设定值。
4. 安全注意事项为了保证您的安全和乐创电热水器的正常运行,请务必遵守以下注意事项:1.在安装、操作和维护乐创电热水器时,请务必断开电源,避免触电事故。
2.使用乐创电热水器前,请确保供电线路和插座符合安全标准,避免电路过载和火灾风险。
3.在使用乐创电热水器时,请不要将电热水器浸泡在水中,以免发生电击事故。
4.定期检查乐创电热水器的电源线、水管和阀门是否有损坏,如有损坏请及时更换。
单位用电热水器200升电热水器安全操作规定
单位用电热水器200升电热水器安全操作规定一、前言电热水器是常见的用于热水供应的家用电器。
对于单位的热水供应而言,通常会选用更大容量的电热水器,以满足更多人的用水需求。
然而,使用过程中若不注意安全操作,可能会带来一定的安全隐患。
因此,为保障用电热水器的正常和安全使用,本文列出了单位用电热水器200升电热水器的安全操作规定。
二、安装和调试1.安装时应请专业人员进行,确保设备安装准确、牢固、不漏水。
安装过程中不得有人在场,防止发生意外伤害。
2.请用专门的电源插座连接电热水器,不得使用插头接口,也不得将电热水器与其他家电设备公用一个插座。
并且,插座应该符合国家标准,不得出现晃动、异常发热等情况。
3.安装好电热水器后,需要进行调试。
首先,检查水电管道和接头是否漏水;其次,检查电热水器的加热是否正常,以及水温设置是否准确。
三、日常用水维护1.在使用电热水器时,应该确保水管外缠上绝缘材料(如泡沫套),以避免电热水器与水管之间发生电腐蚀。
同时,为了防止热水多次循环,应该定期排放水垢。
2.切勿随意拆卸电热水器,以及对电热水器的加热盘、温控器等关键部件进行更改,否则可能会影响电热水器的正常工作,甚至引发火灾等事故。
3.在电热水器的使用过程中,要时刻留意水温的变化,不得将水温过高或过低。
一旦发现温度异常,应该及时调整加热盘、温控器等设置,以保障用水安全。
4.同时,使用过程中要时刻检查电热水器的线路是否正常。
如果发现电热水器的线路出现故障、老化等情况,应该及时找专业人员进行检修或更换。
四、常见故障及排除方法1.热水器不加热:首先检查电源插座是否接触不良。
其次,排除电热水器本身故障的可能,需要检查加热管、温控器等关键部件是否正常,如有异常需要及时更换或修复。
2.热水器漏水:检查水管系统所连接的轮换和接头是否密封,如有问题,则需要及时更换、修复接头和轮换。
3.热水器水量少:首先排除水管系统自身的问题,其次需要检查电热水器顶部左右两个开关的设置,确认水量和温度是否合适。
电热水器说明书
5
安装
安装注意事项
电热水器应安装在室内,环境温度0℃以上的地方,管路应集中 布置。热水出口离热水使用点不宜太远。如果超过8米,应对热 水管路作保温处理,以减少热量的损失。若为悬挂安装,墙体 应为承重墙。
电热水器的安装位置,应选择便于使用,维修和有地漏的地 方,在水箱或水管泄漏时,不会对附近或下层设施造成损坏。
9
安装
立式机安装步骤
本体控制
■ 安装挂板
根据图示尺寸和简图在墙体上钻两个Φ10的孔; 将膨胀螺丝手动旋入尼龙膨胀管后,再将它们插入到挂板孔 中,使膨胀管端面与挂板贴合; 将尼龙膨胀管插入墙体上的孔中,用附带的六角扳手旋紧膨 胀螺钉至挂板不能用手扳动为止。
■ 挂机
SIEMENS
197
B
L
B
抬起电热水器,将上挂架的两个方孔套在两个挂板的挂钩 上;注意:一定要在确保挂架的方孔套在挂钩上后才能松 手,以防电热水器坠落,造成人身伤害或财产损坏。 连接水路系统; 将内胆注满水,检查水路是否漏水,如有漏水需重新连好; 接通电源,试机。
目录
产品介绍
安装 功能介绍
保养维护 疑难解答 电路图及技术参数 装箱单
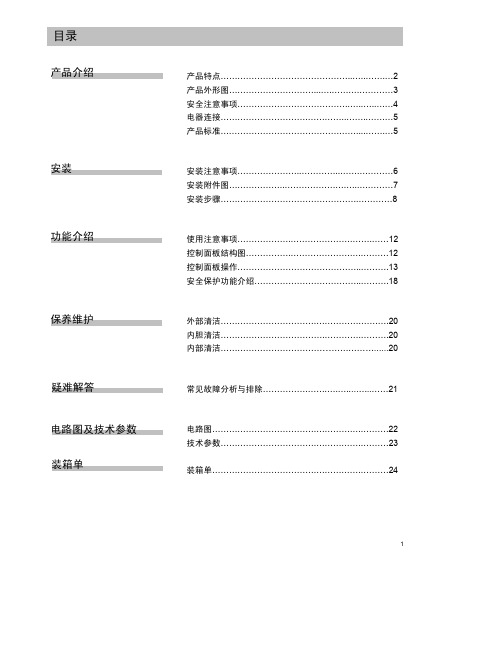
产品特点………………………………………..…..…….…2 产品外形图…………………………...….…….……………3 安全注意事项………………………………….…..…..……4 电器连接………………………….…………..……..………5 产品标准…………………………………………....…….…5
DG6026XTI
DG6526XTI
DG7526XTI DG8526XTI
1 外壳
2 进水管
4 遥控器(线控方式) 5 电源线
SioGreen IR-3000, 4000, 6000, 8000 电热水器安装手册说明书

OPERATION & INSTALLATION MANUALModel: IR-3000, 4000, 6000, 8000 Electric Tankless Hot Water GeneratorsTable of ContentsSAFETY INFORMATION (1)INTRODUCTION (2)Unit Operation (2)Unit Freezing (2)Maintenance (3)Included Parts List (3)Required Parts List (3)INTERFACE (4)PID CONTROLLER DISPLAY (4)MOUNTING YOUR WATER HEATER (5)ELECTRICAL INSTALLATION (7)IR-3000 – IR-8000 Wiring Diagram (8)HOW TO CALIBRATE (9)TROUBLE SHOOTING (10)WARRANTY (11)Thank you for choosing SioGreen products. The most advanced tankless water heaters in the world today using quartz technology and truemodulation. All of our products are made with the highest grade materials and professionally assembled.We strive to satisfy each customer with our unit’s superior quality, longevity, and the modern design of all our products.Before use of the unit, please carefully read and understand the manual. It contains important information regarding the correct use and care of the unit.SAFETY INFORMATIONIT IS IMPORTANT TO COMPLETELY READ AND UNDERSTAND THE INSTALLATION PROCEDURES BEFORE CONTINUING THE INSTALLATION.FAILURE TO FOLLOW THESE INSTRUCTIONS MAY RESULT IN PROPERTY DAMAGE, SERIOUS BODILY INJURY, OR DEATH.THIS PRODUCT SHOULD BE INSTALLED BY A LICENSED ELECTRICIAN AND PLUMBER IN ACCORDANCE WITH ALL NATIONAL, STATE, AND LOCAL ELECTRICAL & PLUMBING CODES.Keep this manual in a convenient place for future reference.DANGER! WATER TEMPERATURE SAFETY SETTINGSafety is our primary goal when selecting the water temperature. Any temperature above 120°F can cause serious scalding or death. Energy conservation is a factor to be considered when selecting the water temperature. Setting the water heater’s thermostat to a lower setting will allow a higher flowrate and use less energy.INTRODUCTIONSioGreen Tankless hot water heaters do not store water like a conventional tank-type water heater. It contains multiple high powered quartz heating tube elements that are capable of heating water “on-demand” and continuously as needed, so you will never have to worry about running out of hot water again. The unit’s working principle and designs are simple. When the power is turned on, the microprocessor will check the temperature sensor and current leakage sensor, if there are no errors, the hot water generator is ready to work.The performance of the products listed are dependent on incoming water temp, water flow rate, and set temperature of the thermostat. In order for it to function properly it must be matched by location, application, and unit size. As it requires no venting, all units can be installed literally anywhere that is convenient for the owner.This product should be installed indoors only. An outdoor installation is permitted as long as it is mounted in a suitable enclosure that protects it from all-weather elements including freezing. Freezing of the unit may result in permanent damage and will void the warranty.Unit Operation:When you open the hot water valve, the flow sensor activates at a minimum water flow. The flow sensor sends the information to the temperature controller to begin modulating the heating elements to heat the water as it passes through the quartz heating tubes and to maximize efficiency.If the water flow rate exceeds the maximum heating capacity of the unit, the unit will reach a maximum achievable temperature based on flow rate and unit size. When a reduction in the excessive flow rate is made, the unit will achieve the set point temperature.When the fixture is closed, the demand stops, the flow sensor sends information to the controller to turn off the power to the quartz heating elements. The unit remains in it standby mode until the demand for the hot water is needed.Unit Freezing:In case of freezing, please wait for the complete defrosting of the unit before using. Verify this by running water through it before turning on the power. Activating unit while still frozen will damage the heaters internal components and void the warranty.Maintenance:This unit requires no maintenance. To extend unit service life, it is recommended to use an inlet pre filter, check and clean it periodically. This is an additional part from the internal screen included with the unit. Do not attempt to open the case to make adjustments, repairs, or for any reason. Opening of unit will void all warranties and could result in serious injury or property damage.Included Parts List:•Electric water heater•Wall Mount bracket•Screws•Internal screenRequired Parts List:•Inlet Pre-Filter•Shut Off Valve•Gate ValveINTERFACEIR-3000, IR-4000, IR-6000, and IR-8000PID CONTROLLER DISPLAY•Upper Display (PV) – Actual Temperature • Lower Display (SV) – Set Temperature • Temperature Controlo ❑Down – Decrease Temperatureo ❒Up – Increase Temperature• Standby Mode (2517 ORAL) - This will blinkwhen the system is not running• Please DO NOT Touch ( or ) – This is for company use programming only.240 V CONNECTION CIRCUITBREAKERPIDCONTROLLERMOUNTING YOUR WATER HEATER1.Leave a minimum of 6” to both sides and 12” on the top and bottom of theunit for clearance and maintenance. A minimum clearance of 24" in front of the unit must be provided for safe removal of the front cover, for installation, advanced troubleshooting, and service if required.2.Mount the electric hot water generator securely to the wall with six (6)screws. The two (2) mounting brackets located at the top and bottom of the unit with eyelet holes.3.This unit must only be mounted in a vertical position with the electrical andwater fittings located at the bottom of the unit.4.Avoid installing the hot water generator in a corrosive environment, as thismay cause damage to the electronic components.5.Installation of the hotwater generator must bein accordance with allNational and Local codeshaving Jurisdiction andinstalled by a LicensedContractor.PLUMBING INSTALLATIONCAUTION: Breaker must remain off until installation is complete.Step 1: Flush cold water line to clear any debris before connecting to unit. Step 2: Install a shut off valve and pre filter (Not Supplied) to prevent anyparticles entering the unit that may clog or damage the internal parts.Step 3: Using flexible lines only, connect the Cold Water line to the water heater inlet labeled with a blue ring. Connect furnished Water Valve to the water heater outlet labeled with a red ring. Connect the HOT WATER outlet line to the Water Valve. DO NOT Solder any fittings to unit. This will damage internal sensors and components and void the warranty. Use flexible lines and screw fittings only to unit. A TP valve is not required in most jurisdictions. Verify your local codes accordingly and if required install on outlet side only. Step 4: Verify all fittings are tight and secure. Open hot water source and allow water to run though the water heater for at least 1 to 2 minutes. This will purge the air from the water lines and must be performed prior to turning on the power at the unit. This is a Mandatory step to prevent Damage to Heating Elements.Verify all connections are free of leaks.IR-3000.50 GPM 2.0 GPM3/4" NPTIR-4000 .50 GPM 2.2 GPM3/4" NPTIR-6000 .50 GPM 4.0 GPM3/4" NPTIR-8000 .50 GPM 4.4 GPM3/4" NPTELECTRICAL INSTALLATIONCAUTION: Breaker must remain off until installation is complete. SERIOUS BODILY INJURY OR DEATH COULD OCCUR IF YOU IGNORE THIS WARNING.SioGreen products must be installed by a licensed and qualified electrician in accordance with all applicable national, state, and local electrical codes depending on country.Before installing this product, ensure that the home has sufficient electrical power available to handle the maximum amperage load of the applicable model.Specifications by ModelMODEL NUMBER MAX KW VOLTS MINIMUM BREAKER MAX POWER (AMP) MINIMUM WIRE IR-3000 7.0 240 30 AMPDOUBLE POLE29 2 x 10 AWG IR-4000 9.0 240 40 AMP DOUBLE POLE37.5 2 x 8 AWG IR-6000 14.0 240 60 AMP DOUBLE POLE58.4 2 x 6 AWG IR-8000 18.024080 AMP DOUBLE POLE752 x 4 AWGStep 1: Remove cover of the water heater carefully and locate the electrical disconnect breaker on the bottom left hand corner facing the unit.Step 2: Use the correct wire gauge that meets all NEC or country of installation guidelines based on the size of the breakers used to feed the unit and the length of the wire run. Then run the set of wires from the home’s main panel to the tankless water heater. A separate ground conductor is required. (See above chart for minimum wire size) This minimum wire size is based on maximum of 50’ of length.Step 3: Connect the wires to one two-pole breaker (see wiring diagram). Use a green wire for the ground ONLY.Step 4: Verify all connections are tight and secure. Verify the correct breaker size. Verify the ground conductor size and connection per applicable codes.IR-3000 – IR-8000 Wiring Diagram:How to calibrate your hot water using water valve 1. Make sure all electrical wires and water pipes are properly installed. Check the power requirement for each model. Before start up, check that all connections are secure and fittings are tight. Confirm that all air has been purged from the system.2. Turn power on and verify the unit set temp (SV) is 105-110 degrees. Open tub faucet. The water begins to heat and the current temperature is shown in the display. Dial the Gate Valve on the Hot Side Only to calibrate your hot water vs the flow rate. Ideally, you will gain a higher flow rate by lowering the set temp as water moves through the water heaters quartz elements faster. If hotter water is required, simply raise the set temp and/or slow the water flow rate to meet your temperature needs.3. Calibrate using Gate Valve (water valve) at hot outlet and choose a desirable temperature by pressing the up or down buttons and adjusting the gate valve until you have a comfortable water temperature and flow rate. Never use the cold inlet valve to adjust flow. This will restrict water from flowing in and cause damage to the heating elements.4. Turn off water and unit is set.SIZING GUIDEIncoming Water TemperatureMODEL NUMBER MAXKW35 F 45 F 55 F 65 F 75 FIR-3000 7.0 .90 1.00 1.20 1.40 1.60 IR-4000 9.0 1.10 1.30 1.50 1.80 2.30 IR-6000 14.0 1.70 2.00 2.30 2.80 3.60 IR-8000 18.0 2.20 2.50 3.00 3.60 4.60GALLONS PER MIN OUTPUT BASED ON WATER TEMP.TROUBLE SHOOTINGIf you are having any problems getting your unit to work after going through the check list, please call our technical support team for any help.TOLL FREE 1-888-270-8452You can also email us at:*******************************No water flow or low water flow Closed valve or cloggedfilter or safety screenOpen valve. Clean filterand screen.WARRANTYBUYER’S REPRESENTATION AND LIMIATATIONS OF LIABILITYBy accepting and installing the Product, Buyer expressly acknowledges the terms and conditions of the Manufacturer Warranty and hereby expressly accepts and agrees to the Warranty, Representations and Limitations of Liability as set forth below.SioGreen’s Warranty Program is only valid for Products Purchased in the United States and installed in the U.S. 50 states.Manufacturer warrants that the hot water generator and its components as manufactured by the Manufacturer (the "Product") shall be free from defects in materials and workmanship, under normal use and service for the period of time identified below beginning from the date of Purchase. MANUFACTURER MAKES NO WARRANTY TO BUYER WITH RESPECT TO T HE WORK OR MAINTENANCE (other than set forth above) AND CUSTOMER DISCLAIMS ALL OTHER WARRANTIES, EXPRESS OR IMPLIED, INCLUDING, WITHOUT LIMITATION, ANY IMPLIED WARRANTY OF MERCHANTABILITY OR FITNESS FOR A PARTICULAR PURPOSE.IMPORTANT! YOU MUST REGISTER YOUR PRODUCT – WARRANTY REGISTRATIONBuyer’ s obligation under the terms of purchase and sale require that the Warranty Registration must be returned to Manufacturer within thirty (30) calendar days of delivery of the Product.Register your product on SioGreen Inc. website:https:///support/warranty-registration/Please fill out product and contractor information completely. Send or attach the following items (scan or copy) for Warranty Registration:•Proof of Purchase•Installer Receipts by licensed Contractor for Warranty in order to protect Buyer’s rights and obtain Manufacturer’s Warranty benefitsIF THE PRODUCT WARRANTY IS NOT REGISTERED WITHIN THE APPLICABLE TIME FRAME, THEN AFTER THE THIRTY (30) CALENDAR DAYS FROM RECEIPT OF PRODUCT HAVE PASSED, THERE SHALL BE NO RETURNS OR WARRANTY AVAILABLE TO BUYER10 Year Limited Heat Exchanger:The heat exchanger as referred to herein shall mean the body of the heat exchanger including the composite plastic component parts attached to the body of the heat exchanger.3 Year Limited Parts:ALL ELECTRICAL COMPONENTS.This warranty will replace defective components determined by SioGreen Technical Support. If a repair is needed, a repair fee will be in place depending on the unit. If faster shipping service is desired, the Buyer must select and pay. This warranty will replace the unit in its entirety should it be defective without repair determined solely by SioGreen Technical Support for the period above and warranty shall remain in effect from the original purchase date only.This WARRANTY is subject to the following:a)This Manufacturer Warranty is only applicable to the original purchaserat the original installation address of purchaser (“Buyer”). The Warrantyis personal only to the Buyer with proof of purchase and is not availableto an individual who is only in possession of the Product.b)IMPORTANT: MANUFACTURER REQUIRES BUYER TO INSTALL THISPRODUCT USING A LICENSED CONTRACTOR. OWNER INSTALLATION OFTHE PRODUCT VOIDS THE WARRANTY. Manufacturer Warranty is only offered if the Product is installed by a Licensed Contractor who installs the Product in accordance with any national and/or local codes and installed to Manufacturer Specifications using all included components supplied by Manufacturer and other parts that may be required to protect equipment. The Licensed Contractor shall comply with all laws, ordinances, and regulations, both state and federal, applicable to the Product. Buyer is solely responsible for being compliant with such laws and expressly warrants to Manufacturer that the Product will be installed according to such rules and regulations. Buyer assumes all such risk associated with being compliant with these laws. Buyer agrees to expressly relieve Manufacturer, its agents or employees from any all liability by reason of any action, injury, loss, or damage to any person or property resulting from any lack of compliance on behalf of Buyer, irrespective of the cause of such injury, loss, or damage. Should Buyer not be compliant, Buyer shall have no warranty rights.c)WARRANTY DOES NOT COVER:•Product misuse, tampering, or misapplication, accidental damage, or improper installation•Product failure caused by chemical corrosion, or freezing.•Product failure due to lightning, flood, or other natural or manmade calamities•Costs incurred for shipping, delivery, handling, and/or administrative charges•Labor charges of any kindBUYER’S REPRESENTATIONSa)Buyer warrants, acknowledges and agrees that it shall not use theProduct other than for the purposes it is intended for. Buyer further warrants that Buyer shall only use the Product in accordance with the Manufacturer’s recommended guidelines as set forth in this Manual.Buyer expressly waives all liability and indemnifies and holds Manufacturer harmless for any action against Manufacturer for any deviation by Buyer from the intended purposes of the Product.b)Buyer warrants, acknowledges and agrees that Buyer shall not reverse-engineer, modify or create a derivative work of the Product without prior written permission of Manufacturerc)Buyer has no right to modify or alter the Product and shall not makeany improvements, alterations or modifications to the Product. If Buyer modifies, alters or improves the Product, the Warranty shall be and is hereby voidedd)In the event that the Product is not installed or used in accordance withthe Manufacturer’s specifications as set forth in this manual, any and all warranties either expressed or implied shall be and are hereby voided. Only upon proper installation and use of the Product shall the above warranty apply. Any tampering, misuse or negligence in handling or use of Product shall render the warranty void. Further, any warranty is void if, at any time, Buyer attempts to make any changes to any of the components of the Product.LIMITATIONS OF LIABILITYa)Risk of Loss. Buyer agrees to assume all risk of loss or damage, nomatter how occasioned.b)Indemnification. The Buyer agrees to indemnify, hold harmless, saveand defend Manufacturer and its agents or employees from and against any and all claims, liens, liability, loss or damage, including expenses and attorney's fees, arising out of or in connection with, directly or indirectly, the Product, including claims, liens, liability, loss or damage to any employee, family member, agent or representative of the Buyer.This shall include claims, liens, liability, loss or damage caused by any actual or claimed negligence or gross negligence (active or passive), of Manufacturer and its contractors, agents or employees, either as the sole or contributing cause, whether for damage to property, wherever situated, or bodily or personal injury, including death, resulting from or sustained by any person or persons at any time.c)Waiver of Liability. The Client agrees to expressly relieve Manufacturer,its contractors, agents or employees from any and all liability by reasonof any injury, loss or damage to any person or property resulting fromthe installation of the Product, irrespective of the of the cause of suchinjury, loss or damage.d)Manufacturer shall not be liable for any water damage arising, directlyor indirectly, from any defect in the hot water heater component part(s)or from its use.e)IN NO EVENT SHALL MANUFACTURER BE LIABLE FOR ANY SPECIAL,INDIRECT, INCIDENTIAL, OR CONSEQUENTIAL DAMAGES OR FOR LOST INCOME, LOSS OF PROFITS, SAVINGS OR OTHER ECONOMIC LOSS ARISING OUT OF OR CONNECTED WITH THIS PRODUCT, REGARDLESS OF WHETHER A CLAIM IS BASED ON CONTRACT, TORT,STRICT LIABILITY OR OTHERWISE.f)NOTWITHSTANDING ANYTHING TO THE CONTRARY CONTAINED INTHIS MANUAL, THE LIABILITY FOR DAMAGES FROM ANY AND ALL CAUSES WHATSOEVER AND REGARDLESS OF THE FORM OF ACTION, WHETHER IN CONTRACT, TORT OR NEGLIGENCE, SHALL NOT EXCEEDTHE AMOUNT OF THE PRODUCT PRICEChoice of Law.The laws and statutes of the State of Florida shall govern the construction, interpretation, and performance of this Manual and Warranty. Any conflict in law shall be resolved in favor of the laws and statutes of the State of Florida. Venue for any dispute shall lie in Pinellas County, Florida.Manufacturer Contact:SioGreen Inc.4501 107th Circle N. Suite #1Clearwater, FL 33762888-270-8452CustomerSupport:***********************Manufacturer reserves the right to discontinue, or change at any time, specifications or designs without notice and without incurring obligation.。
西门子家电烤箱HB534AB.0W zh使用说明和安装说明说明书

Siemens Home Applianceszh 安全性2更多信息,请参考《数字用户指南》。
目录使用说明书1安全性 (2)2避免财物损失 (3)3环境保护和节约 (4)4了解机器 (5)5附件 (7)6首次使用前 (8)7操作基本知识 (8)8快速加热 (8)9时间功能 (9)10童锁 (10)11清洁和保养 (10)12支架 (12)13电器门 (12)14处理故障 (15)15处理旧机器 (16)16客户服务 (16)17技术参数 (16)18成功的做法 (16)19安装说明书 (19)19.1一般安装提示.......................................................191 安全性请注意以下安全注意事项。
1.1 一般注意事项¡请仔细阅读本说明书。
¡请妥善保管说明书及产品资料以备日后查阅或提供给下一位使用者。
¡出现运输损坏时请勿连接机器。
1.2 使用范围本机器仅可采嵌入式安装。
注意特别的安装说明。
仅允许获得授权的专业人员在不使用插头的情况下连接设备。
因错误连接而造成设备损坏时,则保修将失效。
本机器仅限用于:¡准备好食材。
¡仅限私人家庭和居家环境的室内区域。
¡最高在海拔 4000 m 使用。
请不要将本机器用于:¡使用外部定时器或遥控。
1.3 用户群的限制凡年满 8 岁的孩童,身体、感官或智力有缺陷的人士以及缺乏相关经验和知识的人士,应在负责安全使用机器人员的监督或指导下,了解使用机器可能带来的危险后,方能使用本机器。
严禁孩童将本机器当成玩具玩耍。
15 岁以上的未成年人除非在监督下,否则不得进行清洁及用户维护的工作。
请确保 8 岁以下的孩童远离本机器及其电源线。
1.4 安全使用务必将附件正确地推入腔体。
→"附件", 页7警告 ‒ 有着火危险!易燃物品放入烹饪箱中可能会起火燃烧。
西门子692928-热水器使用说明

产品介绍
安装 功能介绍 保养维护 疑难解答 电路图及技术参数 装箱单
¡¢£ ¡¤¥¦………………………………………..…..…….…2 §¨©…………………………...….…….……………3 ………………………………….…..…..……4 ¡………………………….…………..……..………5.
设定å(功ãë率ìæ#ä$(é'ùúû%ä&(ç'èä%&ëäì(Þ'ëìíóÝôä'5 â 2 ©ä8à00W !3%&1ç2è00ÝW 5 2000W
>=5
11
功能介绍
控制面板操作
设定k))ogP8f7FFFi 峰80-0839G)BhV666c-谷39i)RCgY41161y2时He5jQBxFD833f8R8)e“66段E-a091-S890fed44F“Fl@55qT9@fdFcGEu89rU5@h86 Fc49F638897VF6ycBGFI8599)WcYCm6FcD-9BFxFXQn8P-E@3He6cpi1019BF6eAfe662-T@Cec0f-BsfYFU8vfdpC)t`c47/qV09eSV05aD.y8rW51fTWFdDbE)9sXUcF5E3BEF@tHg8cGF6F8u611HwF656GGee29v)8e0ffV4dF09f)VHW4x/d0@gR61)8.5gFe5eeBhF5FFcfffic636dwF41ejeXFeDIcx5ff66cEF- wxyz{|}~xy/ 设定¤¹温¥º度»¦§¼¨½©¾ª¡¿3À«5Á¬¢Â-75®Ã¢¯Ä£°± ¦²©³´µ¶·¸
ï¨î©)01ABæçCDø&£¤E2345
èãF#IúP§QãRGï¦ôáôõ0õSïT2U3VWáïHX!Y`8a1bôî§
海尔 EC8002-JC7 80升变频速热横式电热水器 使用说明书
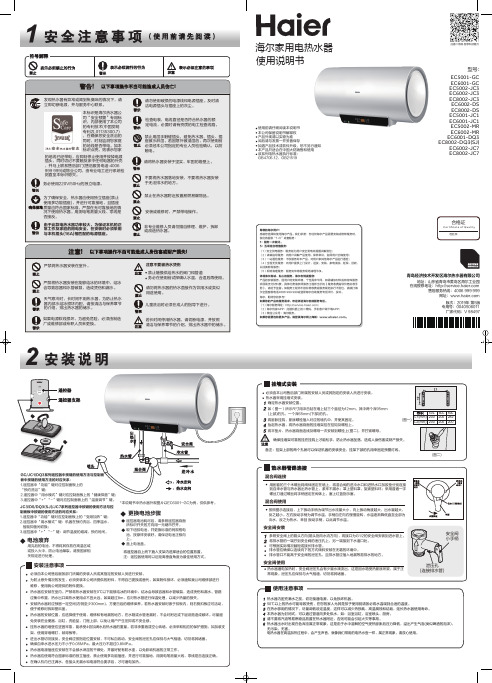
的地线已经带电,应即刻停止使用并拔掉电源插头,同时切记不要触及家中任何电器的外壳,并马上联系售后部门(售后服务电话:4006999 999)或物业公司,由专业电工进行系统检测直至本标识熄灭。
务必使用220V/50Hz的独立电源。
为了确保安全,热水器应使用独立插座(禁止使用多功能插座),并进行可靠接地,且插座质量应符合国家标准,严禁在无可靠接地的情况下使用热水器。
用测电笔测量火线、零线是否接反。
由于此款电热水器功率较大,为保证本机的正常工作及家庭的用电安全,在安装时必须采用与本机插头(16A)相匹配的电源插座。
GC/JC1/DQ3系列遥控器中按键的使用方法与控制面板中按键的使用方法的对应关系1.遥控器中“功能”键对应控制面板上的“预约洗浴”键;2.遥控器中“用水模式”键对应控制面板上的“健康抑菌”键;3.遥控器中“+”“-”键对应控制面板上的“温度调节”键。
JC3/DS/DQ3(SJ)/JC7系列遥控器中按键的使用方法与控制面板中按键的使用方法的对应关系:1.遥控器中“功能”键对应控制面板上的“变频加热”键;EC5001-GCEC6002-DSEC8002-DSEC6001-GCEC6001-DQ3注:以上参数(尺寸、重量)允许误差范围为±10%。
EC5001-JC1EC6001-JC1热水器会在设定的时间内自动提前将内胆中的水加热到设置温度。
每按一下 键,预约时间以1小时为单位在01~23之间循环显示。
持续按压,预约时间以1小时为单位连续增加。
(遥控器除外)进入预约状态,预约指示灯点亮, 显示实际温度。
在预约时间范围内完成加热,则进入保温状态,预约时间结束后,退出预约功能,进入正常的加热或保温状态。
预约洗浴期间预约指示灯红灯点亮,预约结束后预约指示灯熄灭;加热状态时,加热完成后,进入保温状态,“加热/保温”指示灯绿灯点亮。
设置好预约功能后,若发生断电或关机现象,通电后需再按 键进入此功能,重新设置预约洗浴时间。
- 1、下载文档前请自行甄别文档内容的完整性,平台不提供额外的编辑、内容补充、找答案等附加服务。
- 2、"仅部分预览"的文档,不可在线预览部分如存在完整性等问题,可反馈申请退款(可完整预览的文档不适用该条件!)。
- 3、如文档侵犯您的权益,请联系客服反馈,我们会尽快为您处理(人工客服工作时间:9:00-18:30)。
SZH西门子电热水器使用及安装说明书安装、使用产品前,请仔细阅读本说明书,并妥善保存以作参考本说明书内页采用可再生纸张,非常感谢您与西门子一起为环保做出的贡献!前言/Preface非常感谢您选购西门子家电产品,以及同西门子一起为环保做出的贡献!为提升安全(e X tra safe)、舒适(C omfort)、节能(E nergy saving)、耐用(L ong L ife)而推出的西门子X-CELL TM倍享TM全新技术平台,旗下各系列所有产品均达到或超过2009年3月1日开始执行的国家一级能效标准,并在具体参数指标:24小时固有能耗系数与热水产出率上遥遥领先!在低碳环保成为一种生活态度的今天,能够在提供舒适沐浴的同时,大幅降低能耗,省心省钱,是西门子家电不断追求的目标!欲知西门子电热水器的出色能效表现,请访问中国能效标识网() –“领袖榜”。
在使用本产品前,请您仔细阅读本说明书。
由于不遵守该使用及安装说明书中规定的注意事项,所引起的任何故障和损失均不在厂家的保修范围内,厂家亦不承担任何相关责任。
请妥善保管好所有文件。
如有疑问,请与当地的西门子家电客户服务中心或经销商联系。
如果您需要英文说明书,请登陆西门子家电网站下载。
您也可以通过发送电子邮件,或拨打服务热线向西门子家电客户服务部门免费索取。
谢谢!If you need the English user manual, please download from our website. You can also request via email or hot line. Our customer service will offer it to you for free. Thanks!西门子家电中国官方网站客户服务电子信箱Careline.China@全国统一客户服务热线:400-889-9999全国免费客户咨询热线:800-828-9828经销商:博西家用电器(中国)有限公司地址:江苏省南京市中山路129号中南国际大厦20-21层邮编:210005制造商:博西华电器(江苏)有限公司地址:江苏省南京市经济技术开发区尧新大道208号邮编:210046本资料内容如有变更,恕不另行通知。
目录产品介绍产品特点 (2)产品外形图 (3)安全注意事项 (4)电器连接 (4)产品标准 (4)安装及使用安装注意事项 (5)安装步骤 (6)使用注意事项 (8)环保/节约注意事项 (8)功能介绍控制面板结构图 (9)控制面板功能及操作说明 (10)漏电保护功能介绍 (16)维护保养外部清洁 (17)内部清洁 (17)疑难解答常见故障分析与排除 (18)电路图及技术参数电路图 (19)技术参数 (20)装箱单装箱单................................................................ .. (21)无线遥控无线遥控组件....................................................... .. (22)有线遥控有线遥控组件....................................................... .. (23)有线遥控安装图有线遥控嵌入式安装图........................................... .. (24)非常感谢您选购了西门子电热水器!为保证您和家人能最佳体验这款性能卓越的产品,请仔细阅读本说明书。
1产品特点1. 舒适与节能⏹本壁挂热水中心集高热水输出和智能加热于一身,而且最高加热温度可达80℃,适合多路热水同时使用。
⏹本热水器采用本机控制,无线遥控,有线遥控,操作灵活方便。
超大显示屏,热水器运行参数和相关功能信息一览无余,直观易用。
⏹加热管最大加热功率为3200W,采用此功率加热时每分钟温升约1℃(基于60升机型)。
⏹本热水器具有最大功率可调功能(1200W,2000W或3200W可选)。
这样热水器在新房旧居均可使用,避免电路过载造成的跳闸及相关隐患。
⏹“每周智能”以周为单位来跟踪用户的热水使用习惯,自动分析记忆,并在下一周预设。
周而复始,一年四季自动调节热水器的运行模式。
此功能全面满足用户需求,既无需用户频繁操作,又能有效控温节省能源。
⏹“只用谷电”热水器只利用谷电时段来加热,节约电费,满足用户的用水需求。
⏹“自动预约”每天早中晚三个时段,根据绝大部分人群的用水习惯所预设–不再需要每天预约。
适合每天早出晚归,周一到周五上班,周末休息,生活规律的家庭。
⏹“即时加热”当用户临时大量用水时,可以启动即时加热功能满足用水需求。
⏹热水器保温层采用整体式环戊烷发泡技术,多点绝热技术,节能环保。
⏹本热水器的24小时固有能耗系数≤0.5,优于国家I级能效标准≤0.6的要求。
2. 安全与耐用⏹微电脑控制;可靠的电气设计,强电与弱电控制分离,确保用户安全。
⏹欧洲最先进的自动焊接技术、超厚专用钢质内胆、进口搪瓷粉附着均匀,牢固,耐高温,耐压,耐腐蚀,确保内胆长寿命。
⏹一旦接地系统出现异常,三极漏保插头能够提供应急防护措施。
⏹带防冻结功能,使用更安全。
⏹热水器具有“阳极消耗指示”功能用户被随时告知阳极是否有效,是否需要更换。
此项功能,可以避免用户在不知情的情况下,由于内胆欠保护而腐蚀漏水,造成不必要的财产损失。
231 排污口(阳极棒更换口)2控制器3 出水口4进水口5 外壳6 维修端盖产品外形图① ② ③ ④ ⑤ ⑥产品介绍安全注意事项⏹电热水器在安装前,首先要确定安装环境的电源容量及电源配线是否满足电热水器功率的要求(电热水器参数详见电热水器铭牌)。
⏹电热水器一定要有可靠接地,严禁在无可靠接地的情况下使用电热水器,严禁将地线接在零线或自来水管上。
⏹请勿对电热水器直接进行熔焊管道连接。
⏹本电热水器配有泄压阀,为了保证热水器安全使用,不可私自改动其安装位置,严禁堵塞泄压阀出口。
⏹本产品的重要部件均使用绝缘和绝热材料进行防护,以保证产品安全可靠。
⏹当电热水器被水严重浸湿后,必须由制造商维修部门或制造商指定维修商的专业技术人员进行检验,确认热水器正常后方可重新使用。
⏹如果电源线损坏,必须由制造商维修部门或制造商指定的维修商进行更换。
⏹在没有负责其人身安全的人员的监护或指导的情况下,有生理缺陷、感官缺陷或智力缺陷的人(含幼儿)或缺乏相关经验和知识的人不适于使用本热水器。
⏹监护人员必须确保幼儿不玩耍热水器。
电器连接⏹电热水器的额定电压为交流220V,额定频率为50Hz。
⏹为确保使用安全,请务必选择与额定功率相适应的独立插座和布线。
产品标准该系列电热水器执行以下国家标准:⏹GB 4706.1-1998《家用和类似用途电器的安全第1部分: 通用要求》⏹GB 4706.12-2006《家用和类似用途电器的安全: 储水式热水器的特殊要求》⏹GB 21519-2008《储水式电热水器能效限定值及能效等级》4安装注意事项⏹电热水器应安装在室内,环境温度0℃以上的地方,管路应集中布置。
热水出口离热水使用点不宜太远。
如果距离超过8米,应对热水管路进行保温处理,以减少热量的损失。
⏹若电热水器为悬挂安装,墙体应为承重墙。
为了确保悬挂安全,建议60L及60L以上机型增加安装托架。
(托架为选购配件,若需使用,可向西门子客户服务中心购买)⏹电热水器的安装位置,应选择便于使用、维修并且设有地漏的地方,以防内胆或水管系统出现泄漏故障时对附近或下层设施造成损坏。
⏹电热水器的周围不得放置易燃易爆物品。
⏹安装位置应便于用户及安装维修人员阅读电热水器铭牌。
⏹安装环境中的冷水管、热水管分别与电热水器的进水口(需连接泄压阀)、出水口连接。
⏹安装过程中,必须按说明书指定位置安装泄压阀,并保持泄压出口畅通,不可私自改动。
⏹与泄压阀连接的导水管必须保持与大气相通,以一种连续向下的方式安装在无霜的环境中,并接到地漏处。
⏹为了确保安全,必须将热水器电源线插头插接在规格相对应的、带有地线的、符合电器标准的三芯插座内,确保热水器正确可靠地接地。
⏹插座必须远离喷淋区域,为避免插座进水,建议您向西门子客户服务中心购买西门子电热水器专用插座防水盒。
⏹为避免外部信号对漏电保护装置的干扰,与热水器相连接的部位建议进行绝缘处理。
推荐用户使用PPR等绝缘管材安装电热水器。
⏹电热水器的内部电路详见接线图,电压和功率的额定值详见产品上的铭牌,用户电源容量必须满足正常使用电热水器的要求。
⏹如果热水器附近空间需要吊顶,吊顶时应预留足够的热水器维修和拆卸空间。
维修空间应考虑到右侧电器的维修和下侧阳极棒的检修;拆卸空间应能将整机拆出。
⏹安装完毕后,必须先进行试水,确保水路系统没有泄漏后方可正常使用电热水器。
注意:本产品必须由制造商的维修部门或制造商指定的维修商进行安装,因用户私自安装造成的任何问题本公司恕不负责。
5安装步骤⏹安装挂架●根据上图所示尺寸和简图在墙体上钻两个Φ12mm的孔。
●将尼龙膨胀管插入到墙体上打好的孔中,至膨胀管端面与支撑热水器挂架的墙面齐平。
●将弯钩钉拧入膨胀管直至刻度线,一定要确保尼龙膨胀管端面在两条标记线之间,保证弯钩钉端头垂直向上。
●再将两个塑料绝缘垫卡在弯钩处。
⏹挂机抬升电热水器,将两个挂架上方的孔同时套在两个膨胀螺钉的挂钩上。
一定要保证方孔上边缘尽量挂到靠近挂钩底部。
⏹安装绝缘接头请先将绝缘接头直接连接在电热水器进出水管路上,如果已使用其他绝缘接头(如PPR管等),则不需要安装。
具体由客服安装人员根据实际情况判断是否需要安装。
注意:一定要在确保两个挂架上方的方孔都套在挂钩上后才能松手,以防电热水器坠落,造成人身伤害或财产损坏。
67⏹安装泄压阀●泄压阀额定压力为0.8MPa。
内螺纹规格:G1/2,与热水器的进水口相连;外螺纹规格:G1/2,与进水管路连接。
●导水管内径Φ8mm。
注意:泄压阀与热水器进水口之间禁止安装任何阀门。
泄压阀的泄压出口方向一定要朝下(如右图)。
⏹连接水路系统●将内胆注满水,检查水路系统是否漏水,如有漏水需重新连接好;●接通电源,试机。
8⏹ 内胆充满水之前,切勿接通电源,以免对电热水器造成损坏。
⏹ 52℃以上的热水就易造成烫伤,使用前应先试水,将水温调到适宜的温度,再进行洗浴,以防烫伤。
⏹ 使用过程中,应定期检查泄压阀,以去掉碳酸钙沉淀物。
方法为:扳动泄压阀的小手柄,如有水流出(如右图)则泄压阀工作正常;如无水流出,请与当地的客户服务部联系进行维修。
注意:泄压阀排出的水可能很热,小心烫伤。
⏹ 加热期间,热水器的进水阀必须处于打开状态,以免造成热水器内胆爆裂。
⏹ 在冬季不使用电热水器时,如果拔出电源插头彻底断电, 则必须把内胆中的水排空,以避免水冻结造成热水器损坏。