HPDS2017教程程序使用说明
6 2017 REMOTE CONTROLLED 1D HEAD 用户手册说明书

6/2017REMOTE CONTROLLED 1D HEADUser Manual pdf version of the manual available for download: 2Table of contents1. Technical specification .....................................................................22. Content of the set ............................................................................33. Construction ....................................................................................34. Power supply ...................................................................................45. Mounting ..........................................................................................46. Connections .....................................................................................57. AION IQ controller ...........................................................................67.1. Auto tracking feature - Smart Eye .............................................67.2. AION IQ modes .........................................................................78. Maintenance and operation .............................................................89. Terms of warranty . (8)1.Technical specificationBefore you start your work with the MONO HEAD adapter we strongly recommend to read the manual carefully.Please note that using the adapter in a manner inconsistent with the instructions, any unauthorized repair attempts or any kind of modification of the device can cause a damage the manufacturer is not responsible for. Slidekamera Office 80-175 Gdańsk (Poland)ul. Kartuska 386tel./fax (+48) 58 710 41 04e-mail:*********************Slidekamera ®High Engineering Technology CNC s.c.Sebastian Pawelec Karol Mikulski Glina 4582-522 SadlinkiVAT Identification Number: 581-188-33-322. Content of the set3. ConstructionHET BUSdirectly to the headclamping lever344. Power supply5. MountingMONO HEAD can be powered by many 10-17V DC power sources (min. 25W power output), such as: • AC power adapter;• external 12V battery - e.g. Slidekamera AF-7 power pack;• V-lock or BP-U battery with D-Tap connector (additional adapter is requied); •BP-U battery with SLIDEKAMERA BP-U Adapter with magnetic holder.MONO HEAD is equipped with a TRIGGER socket to connect the device with a photo camera using a proper shutter release cable, thus allowing for interval shots synchronized with a slow movement of the head.MONO HEAD is designed to be mounted on tripods and sliders by a quick release plate, which is included in the set.By using this adapter mounting of the head is fast, safe and reliable.With the adapter you can unmount the head and mount it again at the same angle. That enables you to reassemble your set in identical configuration andreuse previous configuration settings and recorded camera trajectories.HET BUS socket-HET BUS socket - OUTTRIGGERDriving motor markings:56. ConnectionsExamples of connecting MONO HEAD with other devices:MONO HEAD can be controlled by a wide range of devices equipped in the HET BUS socket (RJ45), such as AION controllers or SLIDE LINK wireless adapter.This allows the head to work with other elements of the motion control system, such as slider motors.Many devices can be connected to one controller and the order of the devices is not important.Connecting cables:• connect controller (e.g. AION IQ , SLIDE LINK ) to the first device of your choice, to it’s IN socket using steering cable;• further device (if there is any) connect by connecting it’s IN socket wih OUT socket of the previous device;• connect power supply to devices, that requires external power source for their motors (heads, sliders, etc.);• controlling devices may include own batteries or be powered by a steering cable. • mount the base of the quick release plate to the slider or tripod with Allen screws included in the set;• mount the head on the adapter;• tighten the clamping lever on the base of the adapter.SLIDE LINKCONTROLLERX MOTORTo mount MONO HEAD on a tripod or slider:67. AION IQ controllerMONO HEAD is delivered without dedicated controller. It can be controlled with any steering device equipped in HET BUS socket (RJ45). The most common controller of this type is AION IQ , included in the set with X MOTOR drives. After connecting to the MONO HEAD the AION IQ controller offers additional features, that are available only during operation with the head. Options mentioned below apply only to operation with MONO HEAD - for instructions regarding other usage of the AION IQ controller please refer to the corresponding user manual.AION IQ controller is equipped in auto tracking feature - Smart Eye . It is designed to keep correct angle of the camera during motion of the slider and to eliminate the parallax effect. That enables the camera to hold the subject in the frame and to keep correct composition of the image.Smart Eye feature has to be configured and calibrated to work properly.By default after powering up the AION IQ controller calibrates slider’s drive and enters the Smart Eye settings.After calibrating slider’s drive AION IQ will ask to select the Smart Eye Mode:SIMPLE - basic mode, that calculates the angle of the camera in a simplified manner. It works best in situations where the camera has to be set up quickly.Configuration of the controller in SIMPLE mode consist of setting two positions on the slider, that are used to calculate approximate angle of the camera.7.1. Auto tracking feature - Smart Eye• after selecting SIMPLE mode the controller will ask to …Set point A”;• push the joystick sideways to set first position on the slider; • push the joystick up and down to rotate the head - aim the camera at the filmed object and set correct composition of the frame;• confirm by pressing the joystick; • the controller will ask to …Set point B”;• similarly set the slider and the head in the opposite position; • confirm by pressing the joystick; • the device is ready to work.Set Point ASet Point B7PRECISE - advanced mode, that calculates exact position of the filmed object. It works best when the camera has to work precisely, on long focal length, at short distance to the object or at high angle.Configuration of the controller in the PRECISE mode consist of setting base position (0°) and two opposite positions, similar to SIMPLE mode. OFF - the head remains inactive during operation of the slider. MANUAL - the head will be controlled manually by using joystick. Slider can be used in manual and automatic modes, regardless of the operation of the head. This enables you to set automated movement of the slider and operate the head manually in real time.• after selecting the PRECISE mode the controller will ask to set “Smart Eye 0°” - hit YES to set the base position; if you have configured the device before, and now you’re only changing the angle of the filmed object, you can skip setting base position; • to set the base position (0°), by pushing the joystick up and down rotate the head to align the lens axis parallel to the slider; you can use the viewfinder of the camera to set a point on the axis of the slider (e.g. 1/4” mounting thread) in the middle of a frame;• confirm by pressing the joystick; • the controller will ask to …Set point A”;• push the joystick sideways to set first position;• push the joystick up and down to rotate the head - aim the camera at the filmed object and set correct composition of the frame;• confirm by pressing the joystick; • the controller will ask to …Set point B”;• similarly set the slider and the head in the opposite position; • confirm by pressing the joystick; • the device is ready to work.Set Point ASmart Eye Set 0°Set Point BLIVE - mode used to record footage in real time. MONO HEAD can be set to work automatically (Smart Eye feature), or to be controlled manually by the operator. All settings of the LIVE mode are available: FREERIDE , RECORDING , PLAYBACK and VideoLoop .TIMELAPSE and ANIMATION - modes used to record stop motion footage. The MONO HEAD can operate in automated modes of the Smart Eye feature (SIMPLE lub PRECISE ).The MONO HEAD remote head can operate in all modes of the AION IQ controller and SLIDEKAMERA drives.7.2. AION IQ modesTIPFor details regarding LIVE , TIMELAPSE and ANIMATION modes, or configuration of the device please refer to the user manual of the AION IQ controller.8IMPORTANT INFORMATION FOR CORRECT DISPOSAL OF THE PRODUCT IN ACCORDANCE WITH EC DIRECTIVE 2002/96/ECAt the end of its working life, the product must not be disposed of as urban waste. It must be taken to a special local authority differentiated waste collection centre or to a dealer providing this service. Disposing of electronic equipment separately avoids possible negative consequences for the environment and health deriving from inappropriate disposal and enables the constituent materials to be recovered to obtain significant savings in energy and resources. As a reminder of theobligation to dispose of electronic equipment separately, the product is marked with a crossed-out wheeled dustbin.BULL HEAD remote controlled head does not need any additional service or lubrication of the components.Maintenance procedures are reduced to keeping the equipment clean.All SLIDEKAMERA products are covered by the manufacturer’s warranty for a period of 12 months from the date of sale. Warranty covers production faults and material defects, which resulted in the product malfunctioning. Warranty covers the repair, or, if the repair proves impossible, replacement of the product with a new one. However, the cost of repair of the product cannot overrun the catalogue value of the product. The warranty does not cover damage and / or product defects resulting from the improper usage, as well as not following product maintenance specifications.The warranty excludes:• unauthorized attempts to repair or modify• mechanical damage caused during transport and operation of such features as scratches, dents, pits, dirt, etc. • flooding, moistureTo obtain warranty service the purchaser should deliver the damaged product together with a proof of purchase or proof of payment (invoice, cash register receipt). The product will be accepted for warranty service on condition, that it is delivered with correctly filled in complaint form and properly protected during transport.The complaint form is available for download at: After the warranty period is exceeded any spare parts can be purchased directly from the manufacturer or in any selected points of sale.PLEASE NOTE:Any package sent at the expense of HET-CNC s.c., 80-175 Gdańsk, ul. Kartuska 386 will not be received.8. Maintenance and operation9. Terms of warranty。
HP产品使用指南.pdf_1702037140.6428037说明书

摘要本指南提供元件、網路連線、電源管理、安全性和備份等相關資訊。
©Copyright 2021 HP Development Company, L.P.Bluetooth 是其所有人所擁有的商標,HP Inc. 經授權使用。
Intel、Celeron 和 Pentium 是 Intel Corporation 或其子公司在美國和/或其他國家/地區的商標。
Windows 是 Microsoft Corporation 在美國和/或其他國家/地區的註冊商標或商標。
USB Type-C® 和 USB-C® 是 USB Implementers Forum 的註冊商標。
Miracast® 是 Wi-Fi Alliance 的註冊商標。
本文件中所含資訊可能隨時變更,恕不另行通知。
HP 產品和服務的保固僅列於此類產品和服務隨附的明示保固聲明中。
不可將本文件的任何部分解釋為構成額外保固。
HP 對於本文件中的技術、編輯錯誤或遺漏概不負責。
第一版:2021 年 5 月文件編號:M50594-AB1產品通知本指南說明大部分產品共有的功能。
您可能無法在電腦上使用某些功能。
並非所有功能在所有 Windows 版本中皆可使用。
系統可能需要升級和/或另外購買硬體、驅動程式、軟體或 BIOS 更新,才能充分發揮 Windows 的功能。
Windows 10 一律會啟用自動更新功能。
可能需要支付網際網路服務供應商費用,且隨著時間的推移,更新可能有額外的要求。
請前往 以取得詳細資訊。
若要存取最新的使用指南,請前往/support,並依照指示尋找您的產品,然後選取使用手冊。
軟體條款透過安裝、複製、下載或以其他方式使用本電腦預先安裝的任何軟體產品,即表示您同意遵守 HP 使用者授權合約(EULA) 條款。
如果您不接受這些授權條款,可於 14 天內退回完整未使用的產品(含硬體和軟體),並依據銷售商的退款原則取得全額退款,此為唯一補償形式。
HP Media Center PC 软件指南说明书

HP Media Center PC软件指南HP 产品和服务的所有保修限于这些产品与服务所附带的明确保修声明。
本文的任何条款都不应视作构成保修声明的附加条款。
HP 不对本文的技术性错误、编印错误或冗长负任何责任。
对于在非 HP 提供的设备上 HP 软件的使用和可靠性,HP概不负责。
本文档包含的所有权信息均受版权保护。
未经 HP 事先书面许可,不得将本文档的任何部分影印、复制或翻译成其他语言。
Hewlett-Packard CompanyP.O. Box 4010Cupertino, CA 95015–4010USA Copyright © 2001–2006 Hewlett-Packard Development Company, L.P.截至 2008 年 8 月 28 日之前,在美国可能获得美国专利号 4,930,158 与 4,930,160 中一种或两种的许可。
Microsoft 和 Windows 是 Microsoft Corporation 在美国的注册商标。
HP 支持科技产品在法律允许范围内的使用,我们不认可、也不鼓励我们的产品被用于著作权法所不允许的目的。
本文档中的内容可随时更改,恕不另行通知。
目录欢迎 (1)感受 Media Center 带给您的无穷乐趣 (1)观看和录制电视节目 (1)随时播放您想听的音乐 (1)分享您的数码内存 (1)把您的客厅变成电影院 (1)使用 Media Center 的功能 (2)使用 Media Center (3)设置 Media Center (3)使用鼠标打开 Media Center (3)使用遥控器打开 Media Center (4)Media Center 菜单栏 (4)浏览 Media Center (5)Media Center 的控制菜单 (5)使用 Media Center 暂离模式 (6)完成设置向导中的所有步骤 (7)Media Center 开始菜单 (8)Media Center “开始”菜单选项 (8)在线聚焦 (9)使用 Media Center 中的即时消息 (9)登录至您的 Messenger 帐户 (9)更改 Media Center 设置 (10)Media Center 设置的类别 (10)查找更多 Media Center 信息 (11)使用遥控器 (13)遥控器按钮概述 (14)观看和录制电视节目 (17)浏览“我的电视” (17)观看电视 (18)观看实况电视 (18)控制电视回放 (19)在“我的电视”中使用遥控器 (20)使用“电视收视指南” (21)无“指南”情况下使用 Media Center (21)“电视收视指南”错误 (22)浏览电视收视指南 (22)设置 Media Center 下载“指南”的方式 (23)手动下载“指南” (24)添加邮政编码以接收正确的“指南” (24)将缺少的频道添加至“指南” (25)在“指南”中编辑频道 (25)从“指南”中删除频道 (26)搜索电视节目 (26)按类别搜索电视节目............................................................ 27录制电视节目 (28)从指南录制电视节目 (29)不使用“指南”手动录制节目 (30)录制质量和硬盘存储空间 (31)将录制的电视节目复制到 DVD 或 CD (31)媒体复制保护 (32)播放录制的电视节目 (32)播放音乐文件 (33)我的音乐 (33)Media Center 与“我的音乐”的配合使用 (33)向“我的音乐”曲库中添加音乐 (34)从硬盘添加音乐文件 (34)添加来自 CD 的音乐文件 (35)从“我的音乐”曲库删除音乐文件 (35)使用受支持的音乐文件类型 (36)在“我的音乐”中播放音乐文件 (36)在“我的音乐”中播放唱片集 (37)在“我的音乐”中播放歌曲 (37)在“我的音乐”中创建队列列表 (38)在“我的音乐”中查找和播放唱片集 (38)在“我的音乐”中创建播放列表 (39)在“我的音乐”中将音乐文件复制到 CD (40)处理图片 (41)HP Photosmart (41)我的图片 (41)处理数码图像 (42)在 Media Center 中使用 HP Photosmart (42)在 HP Photosmart Premier 中创建图片编录 (42)创建相册 (44)修改图片的日期 (44)为图片指定关键字 (45)为图片指定位置 (45)在 Media Center 中搜索图片 (46)在 HP Photosmart 中查看图片 (46)在 HP Photosmart 中观看幻灯片播放 (46)在 HP Photosmart 中观看配有音乐的幻灯片 (47)在 HP Photosmart Premier 中编辑图片 (47)从桌面 HP Photosmart Premier 编辑图片 (47)在 Media Center 的 HP Photosmart 中编辑图片 (48)在 HP Photosmart Premier 中共享图片 (48)HP Photosmart Premier 支持的文件类型 (50)在 HP Photosmart 中打印图片 (51)为您的图片创建备份光盘 (51)在 Media Center 中使用“我的图片” (52)向“我的图片”中添加图片 (53)从硬盘添加图片文件 (53)目录iii查看“我的图片”中的图片 (54)以幻灯片播放方式观看图片 (54)在“我的图片”中观看带有音乐的幻灯片 (55)“我的图片”支持的图片文件类型 (55)编辑“我的图片”中的图片 (56)修正红眼或对比度 (56)在“我的图片”中裁剪图片 (56)旋转图片 (57)在“我的图片”中打印图片 (57)将图片刻录到 CD 和 DVD (58)播放视频 (59)在 Media Center 中播放数字视频 (59)使用受支持的视频文件类型 (60)传输和刻录视频文件 (60)刻录模拟视频文件 (60)刻录数字视频文件 (60)从视频文件创建 CD/DVD (61)播放 DVD (63)在 Media Center 中播放 DVD 影片 (63)更改 DVD 影片的语言 (64)更改 DVD 的音频设置 (64)收听调频广播 (65)播放调频广播 (65)组织广播电台预设 (66)同时使用调频广播和电视信号 (66)制作音频和数据光盘 (67)刻录前请擦除光盘上的内容 (67)制作音频 CD (68)验证音频文件刻录有无错误 (69)音频 CD 提示 (69)制作音频 CD (70)制作 jukebox 光盘 (70)制作数据 DVD 和 CD (71)验证数据光盘刻录是否无误 (71)数据光盘提示 (71)制作数据光盘 (72)复制 DVD 或 CD (72)将文件归档至 CD 或 DVD (73)使用 Media Center 归档文件 (74)处理映像文件 (74)制作映像文件 (74)从映像文件进行烧录 (75)使用 LightScribe 制作光盘标签 (75)Lightscribe 要求................................................................... 75使用 Sonic Express Labeler 烧录 LightScribe 标签.. (76)使用胶粘光盘标签 (76)兼容性信息 (76)光盘特性及兼容性图表 (77)光驱快速参考图表 (78)软件快速参考图表 (79)制作视频光盘和影片 (81)开始捕获影片之前 (81)Sonic MyDVD Video 项目 (82)制作视频项目 (82)将文件添加到视频项目 (83)为视频项目捕获视频 (83)将幻灯片添加到视频项目 (84)将子菜单添加到视频项目 (84)编辑视频项目的样式 (85)编辑影片文件 (85)将视频项目刻录到光盘 (86)使用 Direct-to-Disc 向导制作视频项目 (87)视频质量和光盘尺寸 (88)DVD 刻录时间 (89)使用 muvee autoProducer 制作影像 (91)制作影像的基本步骤 (91)定位 muvee autoProducer 的两种版本 (92)使用桌面上的 muvee autoProducer (93)从桌面开始 (93)从数码视频摄像机截取影像 (94)加入影像 (95)加入图片 (96)加入音乐 (97)选择风格 (97)更改设置 (97)加入开场标题和结束署名 (98)制作影像 (99)预览影像 (99)修改影像 (100)保存影像项目 (101)将影像项目刻录到光碟 (102)在 Media Center 中使用 muvee autoProducer unPlugged (103)选择影像 (104)选择图片 (104)选择音乐 (105)选择风格 (106)调整音频和视频设置 (106)制作影像 (107)升级 muvee autoProducer (108)iv HP Media Center PC 软件指南使用 HP Personal Media Drive (109)安装 HP Personal Media Drive 使其与 Media Center协同工作 (109)安装后找到硬盘驱动器 (110)为 HP Personal Media Drive 指定一个盘符 (110)查看和存储文件 (110)播放媒体文件 (111)播放音乐文件 (111)查看图片文件 (111)播放视频文件 (112)观看 HP Personal Media Drive 中存储的电视节目 (112)关于将电视录制到 HP Personal Media Drive (113)将电视节目录制到 HP Personal Media Drive (114)将电视录制路径更改为 HP Personal Media Drive (114)将电视录制路径更改至本地硬盘 (115)安全断开 HP Personal Media Drive 的连接 (115)更改磁盘分配 (116)移除 HP Personal Media Drive 后更新录制的电视列表 (116)在其他电脑上观看录制的电视节目所需的系统配置 (116)索引 (117)目录vvi HP Media Center PC 软件指南欢迎感受 Media Center 带给您的无穷乐趣Microsoft® Windows® XP Media Center Edition2005 with Update Rollup 2 像一支魔术棒,它可以使您的电脑变得愈加神奇。
Hob PKN8..D17 使用说明书

HobPKN8..D17.[en]Instruction manualen2Table of contents8Intended use. . . . . . . . . . . . . . . . . . . . . . . . . . . . . 3(Important safety information . . . . . . . . . . . . . . . 3]Causes of damage. . . . . . . . . . . . . . . . . . . . . . . . 4Overview . . . . . . . . . . . . . . . . . . . . . . . . . . . . . . . . . . .47Environmental protection . . . . . . . . . . . . . . . . . . 4Energy-saving tips . . . . . . . . . . . . . . . . . . . . . . . . . . . .4Environmentally-friendly disposal . . . . . . . . . . . . . . . . .4*Getting to know your appliance . . . . . . . . . . . . . 5The control panel. . . . . . . . . . . . . . . . . . . . . . . . . . . . .5The hotplates . . . . . . . . . . . . . . . . . . . . . . . . . . . . . . . .5Residual heat indicator. . . . . . . . . . . . . . . . . . . . . . . . .51Operating the appliance . . . . . . . . . . . . . . . . . . . 6Switching the hob on and off . . . . . . . . . . . . . . . . . . . .6Setting a hotplate. . . . . . . . . . . . . . . . . . . . . . . . . . . . .6Table of cooking times. . . . . . . . . . . . . . . . . . . . . . . . .6A Childproof lock. . . . . . . . . . . . . . . . . . . . . . . . . . . 7Switching the childproof lock on and off . . . . . . . . . . .7Automatic childproof lock. . . . . . . . . . . . . . . . . . . . . . .7b Automatic safety cut-out. . . . . . . . . . . . . . . . . . . 7Q Basic settings. . . . . . . . . . . . . . . . . . . . . . . . . . . . 8Changing the basic settings. . . . . . . . . . . . . . . . . . . . .8D Cleaning . . . . . . . . . . . . . . . . . . . . . . . . . . . . . . . . 8Ceramic . . . . . . . . . . . . . . . . . . . . . . . . . . . . . . . . . . . .8Hob surround. . . . . . . . . . . . . . . . . . . . . . . . . . . . . . . .93Trouble shooting . . . . . . . . . . . . . . . . . . . . . . . . .9E-report in the displays. . . . . . . . . . . . . . . . . . . . . . . . .9A flashes in the hotplate indicators . . . . . . . . . . . . . . .94Customer service. . . . . . . . . . . . . . . . . . . . . . . .10E number and FD number . . . . . . . . . . . . . . . . . . . . .10E Test dishes . . . . . . . . . . . . . . . . . . . . . . . . . . . . .11Additional information on products, accessories, replacement parts and services can be found at and in the online shop 3.1 'Intended use en38Intended useRead these instructions carefully. Please keep the instruction and installation manual, as well as the appliance certificate, in a safe place for later use or for subsequent owners.Check the appliance for damage afterunpacking it. Do not connect the appliance if it has been damaged in transport.Only a licensed professional may connect appliances without plugs. Damage caused by incorrect connection is not covered under warranty.This appliance is intended for private domestic use and the household environment only. The appliance must only be used for the preparation of food and beverages. Thecooking process must be supervised. A short cooking process must be supervised without interruption. Only use the appliance in enclosed spaces.This appliance is intended for use up to a maximum height of 2000 metres above sea level.Do not use covers. These can causeaccidents, for example due to overheating, catching fire or materials shattering.Only use safety devices or child protection grilles approved by ourselves. Unsuitable safety devices or child protection grilles may result in accidents.This appliance may be used by children over the age of 8 years old and by persons with reduced physical, sensory or mental capabilities or by persons with a lack of experience or knowledge if they aresupervised or are instructed by a person responsible for their safety how to use the appliance safely and have understood the associated hazards.Children must not play with, on, or around the appliance. Children must not clean theappliance or carry out general maintenance unless they are at least 15 years old and are being supervised.Keep children below the age of 8 years old at a safe distance from the appliance and power cable.(Important safety information:Warning – Risk of fire!■Hot oil and fat can ignite very quickly. Never leave hot fat or oil unattended. Never use water to put out burning oil or fat. Switch off the hotplate. Extinguish flames carefully using a lid, fire blanket or something similar. ■The hotplates become very hot. Neverplace combustible items on the hob. Never place objects on the hob.■The appliance gets hot. Do not keep combustible objects or aerosol cans in drawers directly underneath the hob.■The hob switches off automatically and can no longer be operated. It may switch on unintentionally at a later point. Switch off the circuit breaker in the fuse box. Contact the after-sales service.:Warning – Risk of burns!■The hotplates and surrounding area (particularly the hob surround, if fitted) become very hot. Never touch the hot surfaces. Keep children at a safe distance.■The hotplate heats up but the display does not work. Switch off the circuit breaker in the fuse box. Contact the after-sales service.:Warning – Risk of electric shock!■Incorrect repairs are dangerous. Repairs may only be carried out by one of our trained after-sales engineers. If theappliance is faulty, unplug the mains plug or switch off the fuse in the fuse box. Contact the after-sales service.■Do not use any high-pressure cleaners or steam cleaners, which can result in an electric shock.■ A defective appliance may cause electric shock. Never switch on a defectiveappliance. Unplug the appliance from the mains or switch off the circuit breaker in the fuse box. Contact the after-sales service.■Cracks or fractures in the glass ceramic may cause electric shocks. Switch off the circuit breaker in the fuse box. Contact the after-sales service.en Causes of damage4:Warning – Risk of injury!Saucepans may suddenly jump due to liquid between the pan base and the hotplate.Always keep the hotplate and saucepan bases dry.]Causes of damageCaution!■Rough pot and pan bases scratch the ceramic.■Avoid boiling pots dry. This may cause damage.■Never place hot pots or pans on the control panel, the display area or the surround. This may cause damage.■Damage can occur if hard or pointed objects fall on the hob. ■Aluminium foil and plastic containers melt on hot hotplates. Oven protective foil is not suitable for your hob.OverviewYou will find the most frequently caused damage in the following table.7Environmental protectionIn this section, you can find information about saving energy and disposing of the appliance.Energy-saving tips■Always place suitable lids on saucepans. When cooking without a lid, considerably more energy is required. A glass lid means that you can see inside without having to lift the lid.■Use pots and pans with even bases. Uneven bases increase energy consumption.■The diameter of pot and pan bases should be the same size as the hotplate. In particular, small saucepans on the hotplate cause energy losses. Please note: cookware manufacturers often indicate the upper diameter of the saucepan. This is usually bigger than the diameter of the base of the pan.■Use a small saucepan for small quantities. A larger, less full saucepan requires a lot of energy.■Cook with only a little water. This will save energy. Vitamins and minerals in vegetables are preserved.■Always cover as large an area of the hotplate as possible with your saucepan.■Switch to a lower heat setting in good time.■Select a suitable ongoing cooking setting. You will waste energy by using an ongoing cooking setting which is too high.■Use the residual heat of the hob. For longer cooking times, you can switch the hotplate off 5-10 minutes before the end of the cooking time.Environmentally-friendly disposalDispose of packaging in an environmentally-friendly manner.This appliance is labelled in accordance with European Directive 2012/19/EU concerning used electrical and electronic appliances (waste electrical and electronic equipment - WEEE). The guideline determines theframework for the return and recycling of used appliances as applicable throughout the EU.Getting to know your appliance en5*Getting to know your applianceThe instruction manual is the same for various different hobs. You can find the hob dimensions in the overview of models. ~ Page 2The control panelNotes ■When you touch a symbol, the respective function is activated.■Always keep the controls dry. Moisture reduces their effectiveness.■Do not pull pans close to the displays and sensors. The electronics could overheat.The hotplatesNotes ■Any dark areas in the glow pattern of the hotplate are due to technical reasons. The function of the hotplate is not affected.■Hotplate temperature is regulated by the heatswitching on and off. The heat may also switch on and off at the highest setting.■With multi-circuit hotplates the heater elements of the inner filament circuits and the heater element of the activations may switch on and off at different times.Residual heat indicatorThe hob has a two-stage residual heat indicator for each hotplate.If • appears in the display the hob is still hot. It may be used, for example, to keep a small meal warm or to melt cooking chocolate. As the hotplate cools down further, the display changes to œ. The display remains lituntil the hotplate has cooled sufficiently.en Operating the appliance61Operating the applianceIn this section, you can find out how to set the hotplates. The table shows heat settings and cooking times for various meals.Switching the hob on and offThe main switch is used to switch the hob on and off.Switching onTouch the symbol #. An audible signal sounds. The indicator light above the main switch and the ‹ indicators light up. The cooktop is ready to use.Switching offTouch the symbol # until the indicator light above the main switch and the indicators go out. All hotplates are switched off. The residual heat indicator remains on until the hotplates have cooled down sufficiently.Notes ■The cooktop switches off automatically if all hotplates have been switched off for more than 20 seconds.■The settings remain stored for 4 seconds after the cooktop has been switched off. If you switch it on again during this time, the cooktop will operate using the previously stored settings.Setting a hotplateUse the + and - symbols to set the desired heat setting. Heat setting 1 = lowest setting Heat setting 9 = highest settingThere is an intermediate setting between each heat setting. This is identified by a dot.Setting the heat settingThe hob must be switched on.1. Touch the $ symbol to select the hotplate.2. Touch the + or - symbol within the next 10 seconds.The basic setting appears. + symbol: Heat setting 9- symbol: Heat setting 43.until the desired heat setting appears.Switching off the hotplateThere are 2 ways to switch off the hotplate.■Briefly touch the $ symbol on the hotplate 2x one after the other. ‹ appears in the heat setting display. After about 10 seconds, the residual heat indicator appears.■Use the $ symbol to select the hotplate. Touch the + or - symbol until ‹ appears. After about 10 seconds, the residual heat indicator appears.Note: The last selected hotplate remains activated. You can set the hotplate without selecting it again.Table of cooking timesThe following table provides some examples.Cooking times and heat settings may vary depending on the type of food, its weight and quality. Deviations are therefore possible.For bringing liquids to the boil, use heat setting 9.Stir thick liquids occasionally.Food that needs to be seared quickly or food which loses a lot of liquid during initial frying is best seared in several small portions.Tips for energy-saving cooking can be found in the Environmental protection section.~ Page 4Childproof lock en7A Childproof lockYou can use the childproof lock to prevent children from switching on the hob.Switching the childproof lock on and offThe hob must be switched off.To switch on: Touch the D symbol for approx.4 seconds. The display light above the D symbol lights up for 10 seconds. The hob is locked.To switch off: Touch the D symbol for approx. 4 seconds. The hob is unlocked.Automatic childproof lockThis function automatically activates the childproof lock every time you switch the hob off.Switching on and offFind out how to switch the automatic childproof lock on and off in the Basic settings section.~ Page 8b Automatic safety cut-outIf a hotplate has been switched on for a long time without the setting being changed, the automatic time limit is activated.The hotplate stops heating. ”‰ and the •/œ residual heat indicator flash alternately on the hotplate display.The display goes out when you touch any control. You can make new settings.When the time limit is activated depends on the heat setting selected (1 to 10 hours).en Basic settings8Q Basic settingsYour appliance has various basic settings. You can adjust these settings to meet your own needs.Changing the basic settingsThe hob must be switched off.1.Switch on the hob.2.Within the next 10 seconds, touch the D symbol for4 seconds.™ and ‚ flash alternately in the lower display and ‹lights up in the upper display.3.Touch the D symbol repeatedly until the desiredsetting appears in the lower display.4.Touch the + or - symbol repeatedly until the desired setting appears in the upper display.5.Touch the D symbol for 4 seconds.The setting is activated.Switching offTo exit the basic setting, switch off the hob with the main switch and make new settings.D CleaningSuitable maintenance and cleaning products can be purchased from the after-sales service or in our e-Shop.CeramicClean the hob after each use. This will prevent spills from burning onto the ceramic.Only clean the hob when it has cooled down e only cleaning agents which are suitable for glass ceramic. Follow the cleaning instructions on the packaging.Never use:■Undiluted washing-up liquid■Detergent intended for dishwashers ■Scouring agents■Harsh cleaning agents such as oven spray or stain remover■Abrasive sponges■High-pressure cleaners or steam jet cleanersGround-in dirt can be best removed with a glass scraper, available from retailers. Please note the manufacturer's instructions.You can also obtain a suitable glass scraper from our after-sales service or from the e-Shop.Using special sponges to clean glass ceramic achieves great cleaning results.Trouble shooting en9Hob surroundTo prevent damage to the hob surround, observe the following instructions:■Use only hot soapy water.■Wash new sponge cloths thoroughly before use.■Do not use any sharp or abrasive agents.■Do not use the glass scraper.3Trouble shootingFaults often have simple explanations. Please read the notes in the table before calling the after-sales service.The electronics of your hob are underneath the control panel. For various reasons, the temperature in this area may rise sharply. In order that the electronics do not overheat, thehotplates are switched off as and when necessary. The ”ƒ, ”…, or ”† display appears alternately with the • or œ residual heat indicator.E-report in the displaysWhen an error message with "E" appears in the display, e.g. E0111, switch the appliance off and on again.If it was a one-off error, the display goes out. If the error message appears again, call the after-sales service and quote the exact error message.A flashes in the hotplate indicatorsIf A flashes in the hotplate indicators when the appliance is connected to the mains or following a power cut, the electronics are malfunctioning. To acknowledge the fault, briefly cover the controls with your hand.en Customer service104Customer serviceOur after-sales service is there for you if your appliance needs to be repaired. We will always find anappropriate solution, also in order to avoid after-sales personnel having to make unnecessary visits.E number and FD numberPlease quote the E-number (product number) and the FD number (production number) of your appliancewhen contacting the after-sales service. The rating plate bearing these numbers can be found on the appliance certificate.Please note that a visit from an after-sales serviceengineer is not free of charge in the event of misuse of the appliance, even during the warranty period.Please find the contact data of all countries in the enclosed customer service list.To book an engineer visit and product advice Rely on the professionalism of the manufacturer. You can therefore be sure that the repair is carried out by trained service technicians who carry original spare parts for your appliances.GB ***********Calls charged at local or mobile rate.IE 01450 26550.03 € per minute at peak. Off peak 0.0088 € per minute.Test dishes en E Test dishesThis table has been produced for test institutes to facilitate the testing of our appliances.The data in the table refers to our accessory cookware from Schulte Ufer (4-part induction pot setHEZ 390042) with the following dimensions:■Saucepan dia.16 cm, 1.2 litres, for 14.5 cm dia.single-circuit hotplate ■Cooking pot dia. 16 cm, 1.7 litres, for 14.5 cm dia.single-circuit hotplate■Cooking pot dia. 22 cm, 4.2 litres, for 18 cm dia. or17 cm dia. hotplate■Frying pan dia. 24 cm, for 18 cm dia. or 17 cm dia.hotplateen Test dishesTest dishes enIf the tests are carried out with an 18 cm dia. hotplatewith a power rating of 1500 W, the boiling time isincreased by approx. 20% and the ongoing cookingsetting by one ongoing cooking setting.3PCFSU #PTDI )BVTHFSÉUF (NC)$BSM 8FSZ 4USB F.ßODIFO (&3."/:XXX CPTDI IPNF DPN*9001243656*。
HPDS2017教程程序使用说明
公路路面设计程序系统(HPDS2017)使用说明本说明由十一个部分和四个附件组成,它们是:一、系统总说明 ----------------------------------------------------------------------- 1二、系统主菜单窗口使用说明 ----------------------------------------------------------- 5三、改建路段留用路面结构顶面当量回弹模量计算程序(HOC)使用说明----------------------- 6四、沥青路面设计与验算程序(HAPDS)使用说明 ------------------------------------------ 8五、路基验收时路段内实测路基顶面弯沉代表值计算程序(HOCG)使用说明-------------------- 15六、路面交工验收时路段内实测路表弯沉代表值计算程序(HOCA)使用说明-------------------- 17七、改建路段原路面当量回弹模量计算程序(HOC1)使用说明-------------------------------- 19八、新建单层水泥混凝土路面设计程序(HCPD1)使用说明 ---------------------------------- 21九、新建复合式水泥混凝土路面设计程序(HCPD2)使用说明 -------------------------------- 28十、旧混凝土路面上加铺层设计程序(HCPD3)使用说明 ------------------------------------ 33十一、基(垫)层或加铺层及新建路基交工验收弯沉值计算程序(HCPC)使用说明 ------------- 38附件一、沥青路面材料代码与材料名称对照表 --------------------------------------------- 40 附件二、水泥混凝土路面基(垫)层材料代码与材料名称对照表 ----------------------------- 43 附件三、版权声明 --------------------------------------------------------------------- 44 附件四、作者简介 --------------------------------------------------------------------- 44现分别叙述如下:一、系统总说明1.本系统是根据新发行的《公路沥青路面设计规范》JTG D50-2017和已发行的《公路水泥混凝土路面设计规范》JTG D40-2011的有关内容编制的,共包括如下九个程序:(1)改建路段留用路面结构顶面当量回弹模量计算程序HOC(2)沥青路面设计与验算程序HAPDS(3)路基验收时路段内实测路基顶面弯沉代表值计算程序HOCG(4)路面交工验收时路段内实测路表弯沉代表值计算程序HOCA(5)改建路段原路面当量回弹模量计算程序HOC1(6)新建单层水泥混凝土路面设计程序HCPD1(7)新建复合式水泥混凝土路面设计程序HCPD2(8)旧混凝土路面上加铺层设计程序HCPD3(9)基(垫)层或加铺层及新建路基交工验收弯沉值计算程序HCPC2.系统的特点(1)采用Visual Basic 6.0 for Windows 语言编程,在Windows系统下运行,有良好的用户界面;(2)功能齐全,凡公路路面设计与计算所需的程序应有尽有;(3)计算速度快,精度高;(4)数据输入采用可视化、全屏幕的窗口输入方式,操作简单方便,一目了然。
HPDS+2017结构计算参数取值及对应规范
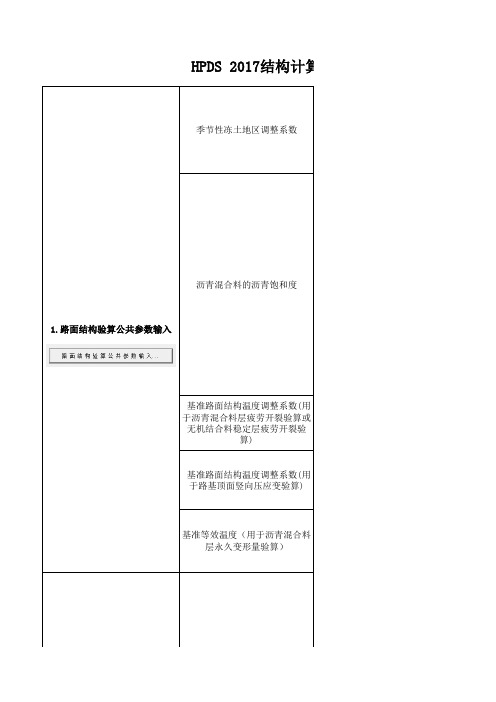
参考《公路沥青路面设计规范JTG D50-2017》第96页 表G.1.2 (1.28 1.13 20.9)
参考《公路沥青路面设计规范JTG D50-2017》第19页 表5.5.11 一级路(细粒式沥青混凝土:11000,中粒式沥青混凝土:10000) 二级路(细粒式沥青混凝土:10000,中粒式沥青混凝土:9500)
以改性沥青为例,沥青混合料动稳定度≥3200,由公式B.3.4反推 试验永久变形量Ro≤1.48√(9365/3200)=2.06,才能满足沥青混合料 车辙试验稳定度技术要求。(1.8)
注意:取值时,上下面层按是否改性沥青取对应值,软件计算出沥 青混合料车辙试验动稳定度技术要求后,需要自己核对表5.5.7,看是 否满足规范要求,软件自身对该指标不做判断。
根据标准条件下的车辙试验,得到各层沥青混合料的车辙试验永久 变形量(试验温度60℃,压强为0.7MPa,加载次数为2520次时,车辙试 验永久变形量)
陕西西安属于1-3区,以普通沥青为例,沥青混合料动稳定度≥ 1000,由公式B.3.4反推试验永久变形量Ro≤1.48√(9365/1000) =4.53,才能满足沥青混合料车辙试验稳定度技术要求。(低等级: 3.5,高等级:3)
连续10年年最低气温平均值 陕西西安属于1-3-2区,年极端最低气温-21.5~-9,见《公路沥青 路面施工技术规范JTG F40-2G D50-2017》第42页 B.5.1 (砂质路基:5,粉质粘土路基:3,粘土路基:2)
在路面低温设计温度提高10℃试验温度条件下,表面层沥青弯曲梁 流变试验加载180s时所得的蠕变劲度 (高等级:120-250,低等级可参照,也可结合工程经验,利用竣工验 收时100m调查单元内横向裂缝条数经验值,结合软件计算结果,反向调 整蠕变劲度值,直至计算结果接近低温开裂指数经验值即可)
筆記型電腦使用指南说明书

© Copyright 2010 Hewlett-Packard Development Company, L.P.Bluetooth 是其所有人所擁有的商標,由Hewlett-Packard Company 取得授權使用之。
SD 標誌是其所有人的商標。
Microsoft 和 Windows 是 Microsoft Corporation 在美國的註冊商標。
本文件包含的資訊可能有所變更,恕不另行通知。
HP 產品與服務的保固僅列於隨產品及服務隨附的明確保固聲明中。
本文件的任何部份都不可構成任何額外的保固。
HP 不負責本文件在技術上或編輯上的錯誤或疏失。
第 1 版: 2010 年 3 月文件編號:595485-AB2產品聲明本使用指南說明了大部分機型的常用功能。
某些功能可能無法在您的電腦上使用。
若要取得《筆記型電腦使用指南》的最新資訊,請前往 HP 網站/ support。
安全警告注意事項警告!為了降低因熱所造成的傷害或電腦過熱的可能性,請勿將電腦直接放在您的腿上或擋住電腦的通風孔。
請僅在穩固的平面上使用電腦。
請勿讓其他堅硬的物體(例如旁邊的選用印表機),或柔軟的物體(例如枕頭、地毯或衣服)阻礙空氣流通。
同時,在作業期間,請勿讓 AC 變壓器接觸皮膚或柔軟的物體(例如枕頭、地毯或衣服)。
本電腦及 AC 變壓器的使用者接觸表面溫度,符合資訊科技設備的國際安全標準 (IEC 60950)。
iiiiv安全警告注意事項目錄1 功能 (1)識別硬碟 (2)組件 (3)頂部組件 (3)觸控板 (3)指示燈 (4)按鈕和喇叭 (5)按鍵 (6)顯示器 (7)右側組件 (7)左側組件 (8)底部組件 (9)無線天線 (10)附加的硬體組件 (11)標籤 (12)2 無線、區域網路及數據機 (13)使用無線裝置 (14)識別無線及網路狀態圖示 (14)使用無線控制項 (15)使用無線動作鍵 (15)使用 HP Wireless Assistant (15)使用作業系統控制項 (16)使用 WLAN (17)設定 WLAN (17)保護 WLAN (17)連接至 WLAN (18)漫游到另一個網路 (19)使用 Bluetooth 無線裝置(僅限特定機型) (20)Bluetooth 與網際網路連線分享 (ICS) (20)疑難排解無線連線問題 (21)無法與 WLAN 連線 (21)無法連線至慣用無線網路 (21)v未顯示「網路」圖示 (22)目前未提供網路安全碼 (22)WLAN 連線非常微弱 (23)無法連線到無線路由器 (23)連線至區域網路 (24)3 指標裝置與鍵盤 (25)使用觸控板 (26)開啟及關閉觸控板 (26)使用觸控板的手勢 (27)捲動 (27)收放 (27)旋轉 (28)設定指標裝置偏好設定 (28)連接外接式滑鼠 (28)使用鍵盤 (29)使用動作鍵 (29)使用快速鍵 (30)清理觸控板和鍵盤 (31)4 多媒體 (32)多媒體功能 (33)識別多媒體組件 (33)調整音量 (34)使用媒體活動動作鍵 (36)多媒體軟體 (37)使用 CyberLink PowerDVD 8 軟體 (37)使用其他預先安裝的多媒體軟體 (37)從光碟安裝多媒體軟體(僅限特定機型) (37)音訊 (38)連接外接式音訊裝置 (38)檢查您的音訊功能 (38)視訊 (39)連接外接式顯示器或投影機 (39)連接 HDMI 裝置(僅限特定機型) (39)設定 HDMI 的音訊(僅限特定機型) (41)光碟機 (42)識別已安裝的光碟機 (42)使用光碟片 (43)選取正確的光碟 (44)CD-R 光碟 (44)CD-RW 光碟 (44)viDVD±R 光碟 (44)DVD±RW 光碟 (44)LightScribe DVD+R 光碟 (45)Blu-ray 光碟 (45)播放 CD、DVD 或 BD (45)設定自動播放 (46)變更 DVD 地區設定 (46)遵守著作權警告 (46)複製 CD 或 DVD (47)建立或「燒錄」CD 或 DVD (47)取出光碟(CD、DVD 或 BD) (49)取出光碟機 (50)網路攝影機(僅限特定機型) (53)攝像頭秘訣 (53)調整攝像頭內容 (53)疑難排解 (55)光碟托盤無法開啟以取出 CD、DVD 或 BD (55)電腦未偵測到光碟機 (55)光碟無法播放 (56)光碟未自動播放 (56)影片不規則地停止、跳過或播放 (57)影片無法在外接式顯示器上觀賞 (57)燒錄光碟片的程序尚未開始,或在完成前即停止 (57)Windows Media Player 中播放的 DVD 不發出聲音,也不顯示 (57)必須重新安裝裝置驅動程式 (58)取得最新的 HP 裝置驅動程式 (59)取得最新的 Windows 裝置驅動程式 (59)5 電源管理 (60)設定電源選項 (60)使用省電狀態 (60)啟動和結束睡眠 (60)啟動和結束休眠 (61)使用電池計量器 (61)使用電源計劃 (61)檢視目前的電源計劃 (62)選擇不同的電源計劃 (62)自訂電源計劃 (62)設定結束睡眠或休眠時使用密碼保護 (62)使用外部的 AC 電源 (62)連接 AC 變壓器 (63)測試 AC 變壓器 (64)vii使用電池電源 (64)顯示剩餘的電池電力 (64)在說明及支援中尋找電池資訊 (65)使用電池檢查 (65)裝入或取出電池 (65)電池充電 (66)將電池放電時間最大化 (67)管理低電池電力 (67)識別低電池電力 (67)解決低電池電力的方法 (68)可以使用外部電源時,解決低電池電力的方法 (68)當可以使用已充電的電池時,解決低電池電力的方法 (68)當沒有電源可以使用時,解決低電池電力的方法 (68)當電腦無法結束休眠時,解決低電池電力的方法 (68)校正電池 (68)步驟 1:將電池完全充飽 (68)步驟 2:停用休眠和睡眠 (69)步驟 3:釋放電池的電力 (69)步驟 4:將電池完全充飽電 (70)步驟 5:重新啟用休眠和睡眠 (70)節省電池電力 (70)存放電池 (70)用過電池處置方式 (71)更換電池 (71)電腦關機 (71)6 磁碟機/光碟機 (72)處理磁碟機/光碟機 (73)使用外接式磁碟機/光碟機 (74)改善硬碟效能 (75)使用磁碟重組工具 (75)使用磁碟清理 (75)更換硬碟 (76)7 外接式裝置和外接式媒體卡 (80)使用 USB 裝置 (81)連接 USB 裝置 (81)移除 USB 裝置 (81)使用數位媒體插槽卡 (82)插入數位卡 (82)取出數位卡 (82)viii8 記憶體模組 (84)9 安全性 (88)保護電腦 (88)使用密碼 (88)在 Windows 中設定密碼 (89)在設定公用程式中設定密碼 (89)管理員密碼 (90)管理系統管理員密碼 (90)輸入管理員密碼 (90)輸入開機密碼 (90)管理開機密碼 (91)輸入開機密碼 (91)使用防毒軟體 (91)使用防火牆軟體 (91)安裝重大更新 (92)10 設定公用程式 (BIOS) (93)啟動設定公用程式 (94)使用設定公用程式 (95)變更設定公用程式的語言 (95)在設定公用程式中瀏覽與選取 (95)顯示系統資訊 (96)在設定公用程式中還原預設設定 (96)離開設定公用程式 (96)設定公用程式功能表 (98)主要功能表 (98)安全性功能表 (98)「系統組態」功能表 (98)「診斷」功能表 (99)11 軟體更新 (100)更新 BIOS (101)確定 BIOS 版本 (101)下載 BIOS 更新檔 (101)更新程式和驅動程式 (103)12 備份與復原 (104)建立復原光碟 (105)備份您的資訊 (106)使用「Windows 備份與還原」 (106)ix使用系統還原點 (107)建立還原點時機 (107)建立系統還原點 (107)還原至之前的日期和時間 (107)執行復原 (108)從復原光碟進行復原 (108)從專用的復原分割區進行復原(僅限特定機型) (108)索引 (109)x1功能1識別硬碟若要查看電腦中已安裝硬體的清單,請依照下列步驟執行:▲選取「開始」>「控制台」>「系統及安全性」。
SOLIDWORKS PDM 2017 安装指南说明书

安裝指南SOLIDWORKS PDM 2017目錄法律注意事項 (8)1SOLIDWORKS PDM安裝指南 (11)2安裝概要 (12)必要安裝元件 (13)選用的安裝元件(僅適用於SOLIDWORKS PDM Professional) (15)SOLIDWORKS PDM部署案例 (15)系統需求 (17)安裝摘要 (18)安裝協助 (18)3安裝與組態SQL Server (19)SQL Server2016支援 (19)安裝SQL Server2016 (20)安裝SQL Server2016之前 (20)執行SQL Server2016安裝 (20)安裝SQL Server2016之後 (23)確認SQL Server2016安裝 (23)升級至SQL Server2016 (23)執行SQL Server2016升級 (24)升級至SQL Server2016之後 (26)SQL Server2014支援 (26)安裝SQL Server2014 (26)安裝SQL Server2014之前 (26)執行SQL Server2014安裝 (27)安裝SQL Server2014之後 (31)確認SQL Server2014安裝 (31)升級至SQL Server2014 (31)執行升級至SQL Server2014 (32)升級至SQL Server2014之後 (34)安裝SQL Server2012 (35)安裝SQL Server2012之前 (35)執行SQL Server2012安裝 (35)安裝SQL Server2012之後 (39)確認SQL Server2012安裝 (39)升級至SQL Server2012 (39)執行SQL Server2012的升級 (39)升級至SQL Server2012之後 (41)SQL Server疑難排解 (42)客戶端無法在檔案資料保險箱中工作 (42)SOLIDWORKS PDM管理功能失敗 (42)SOLIDWORKS PDM無法連接至伺服器 (42)變更SQL Server登入帳戶 (43)產生新的SQL登入帳戶 (43)在SOLIDWORKS PDM保存檔上使用新的SQL登入 (44)給予SQL使用者對現有SOLIDWORKS PDM檔案資料保險箱資料庫的db_owner存取權限 (44)不足的SQL權限 (45)4安裝與設定SQL Server Express (46)SQL Server2014Express支援 (46)安裝及管理SQL Server2014Express (46)安裝SQL Server2014Express之前 (46)安裝SQL Server Express資料庫引擎 (47)安裝SQL Server Express Management Studio (50)安裝SQL Server2014Express之後 (52)確認SQL Server2014Express安裝 (53)將SQL Server Express2014升級為SQL Server2014 (53)5安裝SOLIDWORKS PDM (54)初始化SOLIDWORKS PDM安裝 (54)安裝SOLIDWORKS PDM資料庫伺服器 (55)安裝資料庫伺服器之前 (56)執行資料庫伺服器安裝 (56)安裝SOLIDWORKS PDM保存檔伺服器 (57)安裝保存檔伺服器之前 (58)執行保存檔伺服器安裝 (58)開啟客戶端/伺服器通訊的連接埠 (62)在WAN環境中新增保存檔伺服器 (63)安裝與組態SolidNetWork使用許可 (65)安裝SolidNetWork License Manager (65)啟動SolidNetWork License (65)使用SolidNetWork License伺服器與防火牆 (66)SolidNetWork使用許可管理 (67)Licensing (70)安裝SOLIDWORKS PDM Web伺服器 (74)安裝SOLIDWORKS PDM Web2(僅限SOLIDWORKS PDM Professional) (74)安裝Web2之前 (74)執行Web2Server安裝 (78)在執行Web2的IIS伺服器上產生資料保險箱視圖 (79)設定SOLIDWORKS PDM Web2 (79)安裝SOLIDWORKS PDM客戶端 (90)安裝客戶端之前 (90)使用安裝精靈安裝客戶端 (92)安裝eDrawings (94)將SOLIDWORKS PDM Standard客戶端/伺服器升級為Professional (94)啟用記錄以排解安裝問題 (94)產生SOLIDWORKS PDM客戶端管理安裝點 (95)使用Windows Active Directory部署客戶端 (96)在部署SOLIDWORKS PDM時啟用記錄 (97)編寫SOLIDWORKS PDM的無訊息安裝指令碼 (98)6使用SOLIDWORKS安裝管理員 (101)SOLIDWORKS PDM (101)PDM伺服器元件的清單 (102)瞭解PDM客戶端之間的差異 (103)安裝PDM Server之前 (104)安裝PDM伺服器與SLDIM (105)安裝PDM客戶端與SLDIM (106)7產生與發送檔案資料保險箱視圖 (107)產生資料保險箱 (107)先決條件 (107)加入保存檔伺服器 (108)登入保存檔伺服器 (108)產生資料保險箱 (109)設定檔案資料保險箱的SolidNetWork License伺服器 (114)使用視圖設定精靈產生檔案資料保險箱視圖 (115)在有Windows防火牆時啟用廣播 (117)將共用檔案資料保險箱視圖與多個使用者設定檔搭配使用 (118)在終端機伺服器上使用SOLIDWORKS PDM (118)產生檔案資料保險箱視圖設定檔案 (119)編寫檔案資料保險箱視圖設定指令碼 (120)使用Microsoft Windows Active Directory散佈檔案資料保險箱視圖 (121)尋找SOLIDWORKS PDM資料保險箱ID (122)接收發送的檔案資料保險箱視圖 (122)手動組態向SOLIDWORKS PDM客戶端宣告的保存檔伺服器 (123)指定SOLIDWORKS PDM手動設定群組原則 (124)SOLIDWORKS PDM設定原則選項 (124)8將資料保險箱從Standard升級成Professional (127)將SolidNetWork使用許可從Standard升級成Professional (127)啟動Professional使用許可 (128)升級Standard資料保險箱 (129)將SOLIDWORKS PDM Standard客戶端/伺服器升級為Professional (129)升級檔案資料保險箱之後 (129)9設定內容搜尋(僅適用於SOLIDWORKS PDM Professional) (131)內容搜尋概要 (131)建議的電腦組態 (132)使用Windows搜尋來執行內容搜尋 (132)安裝WindowsSearch服務 (132)在Windows7、Windows8.1或更新版本中啟用Windows Search服務 (133)在Windows Server2008R2上啟用Windows Search服務 (133)在Windows Server2012上啟用Windows Search服務 (133)設定Windows搜尋 (133)編制Windows Search的保存檔索引 (134)使用Microsoft索引服務執行內容搜尋 (134)確認Microsoft索引服務的安裝 (135)監控及微調Microsoft編制索引的服務 (135)編制SOLIDWORKS PDM Professional檔案資料保險箱保存檔的索引 (135)在非SQL Server系統上組態索引服務 (136)新增索引伺服器濾器 (138)壓縮保存檔(gzip)濾器 (138)管理檔案資料保險箱索引目錄 (138)移除檔案資料保險箱索引 (139)10備份與回復檔案資料保險箱 (140)備份檔案資料保險箱資料庫 (140)備份SOLIDWORKS PDM主資料庫 (141)備份保存檔伺服器設定 (141)備份保存檔案 (142)排定資料庫備份 (142)啟動SQL Server Agent (142)設定資料庫備份的維護計劃(僅適用於SOLIDWORKS PDM Professional) (143)回復檔案資料保險箱 (145)確認ConisioMasterDb回復 (146)回復保存檔伺服器與檔案資料保險箱保存檔 (146)11升級SOLIDWORKS PDM (147)關於Enterprise PDM升級 (147)升級之前 (147)判斷目前版本 (148)決定已被套用的更新 (149)升級保存檔伺服器 (149)升級資料庫伺服器 (149)安裝或升級SolidNetWork License Manager (151)升級檔案資料保險箱 (151)升級檔案資料保險箱資料庫 (152)升級檔案資料保險箱保存檔 (153)升級SOLIDWORKS PDM中的Toolbox (159)12升級SOLIDWORKS檔案 (161)升級SOLIDWORKS檔案 (161)所需的升級公用程式軟體 (162)系統需求 (162)安裝檔案版本升級公用程式 (163)準備升級 (163)選擇版本設定 (163)產生檔案的新版本 (165)覆寫檔案的現有版本 (168)執行一試做的檔案升級 (176)執行升級公用程式 (176)產生及使用工作指示檔案 (177)完成中斷的升級 (178)升級之後 (178)升級記錄檔的檔案名稱格式 (179)管理備份檔案 (179)備份檔案的產生 (179)從備份中復原一被不正確升級的版本 (180)13其他組態 (181)管理SQL交易記錄檔大小 (181)變更為簡單復原模式 (181)壓縮交易記錄檔 (181)組態SOLIDWORKS PDM以便僅使用IP位址進行通訊 (182)更新保存檔伺服器以使用IP位址進行通訊 (182)更新SQL Server以使用IP位址進行通訊 (182)更新SOLIDWORKS PDM客戶端以使用IP位址進行通訊 (183)確認IP位址通訊 (183)將伺服器元件移至其他系統 (183)將檔案複製到新伺服器 (184)組態移動的SQL檔案資料保險箱資料庫 (184)移動SolidNetWork License Manager (185)移動SOLIDWORKS PDM資料庫伺服器 (185)組態移動的保存檔伺服器 (186)更新客戶端登錄機碼 (187)更新複製的設定(僅適用於SOLIDWORKS PDM Professional) (187)確認伺服器移動 (188)法律注意事項©1995-2017,Dassault Systemes SolidWorks Corporation,a Dassault Systèmes SE company, 175Wyman Street,Waltham,Mass.02451USA.All Rights Reserved.本文件中提及的資訊和軟體如有更改,恕不另行通知,Dassault Systemes SolidWorks Corporation (DS SolidWorks)不負任何責任。
- 1、下载文档前请自行甄别文档内容的完整性,平台不提供额外的编辑、内容补充、找答案等附加服务。
- 2、"仅部分预览"的文档,不可在线预览部分如存在完整性等问题,可反馈申请退款(可完整预览的文档不适用该条件!)。
- 3、如文档侵犯您的权益,请联系客服反馈,我们会尽快为您处理(人工客服工作时间:9:00-18:30)。
公路路面设计程序系统(HPDS2017)使用说明本说明由十一个部分和四个附件组成,它们是:一、系统总说明 ----------------------------------------------------------------------- 1二、系统主菜单窗口使用说明 ----------------------------------------------------------- 5三、改建路段留用路面结构顶面当量回弹模量计算程序(HOC)使用说明----------------------- 6四、沥青路面设计与验算程序(HAPDS)使用说明 ------------------------------------------ 8五、路基验收时路段内实测路基顶面弯沉代表值计算程序(HOCG)使用说明-------------------- 15六、路面交工验收时路段内实测路表弯沉代表值计算程序(HOCA)使用说明-------------------- 17七、改建路段原路面当量回弹模量计算程序(HOC1)使用说明-------------------------------- 19八、新建单层水泥混凝土路面设计程序(HCPD1)使用说明 ---------------------------------- 21九、新建复合式水泥混凝土路面设计程序(HCPD2)使用说明 -------------------------------- 28十、旧混凝土路面上加铺层设计程序(HCPD3)使用说明 ------------------------------------ 33十一、基(垫)层或加铺层及新建路基交工验收弯沉值计算程序(HCPC)使用说明 ------------- 38附件一、沥青路面材料代码与材料名称对照表 --------------------------------------------- 40 附件二、水泥混凝土路面基(垫)层材料代码与材料名称对照表 ----------------------------- 43 附件三、版权声明 --------------------------------------------------------------------- 44 附件四、作者简介 --------------------------------------------------------------------- 44现分别叙述如下:一、系统总说明1.本系统是根据新发行的《公路沥青路面设计规范》JTG D50-2017和已发行的《公路水泥混凝土路面设计规范》JTG D40-2011的有关内容编制的,共包括如下九个程序:(1)改建路段留用路面结构顶面当量回弹模量计算程序HOC(2)沥青路面设计与验算程序HAPDS(3)路基验收时路段内实测路基顶面弯沉代表值计算程序HOCG(4)路面交工验收时路段内实测路表弯沉代表值计算程序HOCA(5)改建路段原路面当量回弹模量计算程序HOC1(6)新建单层水泥混凝土路面设计程序HCPD1(7)新建复合式水泥混凝土路面设计程序HCPD2(8)旧混凝土路面上加铺层设计程序HCPD3(9)基(垫)层或加铺层及新建路基交工验收弯沉值计算程序HCPC2.系统的特点(1)采用Visual Basic 6.0 for Windows 语言编程,在Windows系统下运行,有良好的用户界面;(2)功能齐全,凡公路路面设计与计算所需的程序应有尽有;(3)计算速度快,精度高;(4)数据输入采用可视化、全屏幕的窗口输入方式,操作简单方便,一目了然。
所有程序既可人机对话输入,又可用数据文件输入,计算结束立即在输出窗口显示设计计算成果文件内容,并可根据用户要求打印输出,十分方便;(5)具有随机帮助以及自动识别错误并提出警告和提示的功能,让用户无后顾之忧。
3.系统的支持环境目前已安装Windows 2000、Windows XP和Windows 7的计算机用户均可使用HPDS2017系统进行设计和计算。
4.系统的启动与主要运行过程(1)由于本系统已采取加密措施,用户在程序安装完毕后,必须将“加密锁”插入主机上的USB接口中。
这次所采用的加密措施实行“一把钥匙开一把锁”的原则,不仅无“加密锁”时不能运行本系统,而且非本程序盘的“加密锁”也无法运行本系统。
建议用户在收到本程序盘后,复制一张拷贝盘并使用,而将本程序光盘保存起来。
此外,用户也不要拆卸“加密锁”,否则后果自负。
(2)对于已安装本程序系统的计算机,启动本系统的步骤如下:a.启动Windows;b.在安装文件夹中双击HPDS2017.EXE执行程序,本系统即启动。
(3)主要运行过程a. 系统启动后,出现的第一个界面窗口为系统标题“公路路面设计程序系统”(2017年最新版本)。
约2秒钟后,该窗口消失,进入第二个界面窗口-----系统主菜单窗口。
在主菜单窗口中用鼠标单击(注意:在以下各使用说明的叙述中“用鼠标单击”皆简称“单击”)“路面设计与计算”菜单及下拉子菜单,即出现对应的程序主窗口,开始某一个路面设计或计算。
b. 在出现某一个程序主窗口及相应的辅助窗口时,在窗口供数据输入的文本框中,一般已有输入变量的缺省值,这些缺省值是程序窗口加载时赋值的。
在主窗口左上角“原始数据输入”框架内用户可选择原始数据输入的方式,如选择“人机对话键盘输入”单选按钮,则用户可根据设计资料对程序提供的缺省输入值加以修改或保留并最终完成原始数据输入;如选择“原有数据文件输入”单选按钮,则用户先单击“数据文件名”文本框右侧的命令按钮,即出现一个“打开”通用对话框,在该对话框中选中一个位于上述HPDS2017算例文件夹或其他文件夹中的已有的存盘数据文件名([程序名]_*.DAT)并单击“打开”按钮后,即可将该数据文件中的数据输入程序并在程序主窗口的文本框中显示出来。
与此同时,在主窗口左上角“数据文件名”文本框中将出现刚选中的存盘数据文件名(包括路径)。
接下来用户可根据设计资料对刚输入文本框中的数据文件数据加以修改或保留并最终完成原始数据输入。
在数据输入过程中用户可通过鼠标单击以及按“TAB”键和“SHIFT+TAB”键实现文本框之间的光标移动(在某一个具体文本框中光标的移动则通过光标移动键来实现)。
c. 用户在文本框输入数据一般有两种情况,一种是文本框右侧或下方没有命令按钮,另一种是有与其有联系的命令按钮(后一种情况主要出现在“弯沉测定值输入”、“路面结构参数的输入”等输入中)。
对于后者,在文本框中输入数据无误后,请切勿忘记继续单击右侧或下方的命令按钮。
此时会出现相应的辅助窗口,让用户进一步补充输入相应的数据。
辅助窗口数据输入结束后请勿忘单击辅助窗口“确定”按钮。
一旦用户单击“确定”按钮,则程序将先检查在辅助窗口输入的数据是否有误(如夹有非数字字符或数值超出程序容许的范围等),如有误,将出现一个“警告对话框”,告诉用户某输入数据有误以及正确的取值范围,当用户单击“警告对话框”的“确定”按钮或按“回车”键后,“警告对话框”消失,光标落在数据输入有误的文本框中,等待用户修改错误。
用户修改错误后,勿忘再次单击辅助窗口“确定”按钮,则程序继续检查文本框中输入数据。
如果全部输入数据无误,程序将输入数据存入相关变量,辅助窗口消失,返回主窗口。
用户继续在主窗口文本框中输入下一个数据,直至全部数据输入完成。
d. 在所有程序主窗口最下一排有五个命令按钮,即“数据存盘”、“计算”、“查看文件”、“退出”和“帮助”。
在主窗口数据输入结束后,如用户打算将所输入数据以数据文件形式存盘以备后用可单击主窗口底部最左侧的“数据存盘”按钮。
在单击“数据存盘”按钮后,程序首先检查主窗口的所有输入数据是否有误,如有误将出现“警告对话框”,要求用户修改输入错误的数据,具体过程同上述辅助窗口,不再赘述。
当所有输入数据检查无误后,将出现一个“另存为”通用对话框,在该对话框的“文件名”文本框中请用户输入存盘数据文件名(注意:本系统规定存盘数据文件名一律采用[程序名]_*.DAT的形式以利对文件的统一管理和查阅)并单击“保存”按钮。
此时将出现一个“显示存盘文件”的窗口,在该窗口中显示刚存盘的数据文件的内容,单击该窗口“返回”按钮后,该窗口消失返回程序主窗口,数据存盘完成。
此时在主窗口的“存盘数据文件名”文本框中将出现刚存盘的数据文件名(包括路径)。
当单击该文本框右侧的“清文件名”按钮时,文本框中文件名消失,恢复显示“每次先单击‘数据存盘’按钮”的原始状态。
e. 在主窗口数据输入结束后,如用户单击主窗口“计算”按钮,程序将首先检查主窗口输入数据是否有误,如有误将出现“警告对话框”,要求用户修改输入错误的数据。
具体过程同前,不再赘述。
当所有输入数据检查无误后,将出现一个“另存为”通用对话框,在该对话框“文件名”文本框中请用户输入设计计算成果文件名(注意:本系统规定,设计计算成果文件名一律采用[程序名]_*.TXT的形式以利对文件的统一管理和查阅)并单击“保存”按钮。
经过短暂的约一、二秒钟的计算后,将出现一个“设计计算成果文件显示修改与打印”的窗口,在该窗口文本框中将显示刚存盘的设计计算成果文件的内容。
该窗口下方有三个命令按钮即“修改重存”、“打印”和“返回”。
当设计计算正确但对成果文件中某些内容(例如:文件中的路面材料名称与当地实际所采用的材料名称有差异)需要修改时,可单击文件需修改处,出现光标后对需修改处进行修改,修改完成后单击“修改重存”按钮,即可实现修改后成果文件(仍按原文件名)存盘。
在准备好打印机后,单击“打印”按钮,即可实现文件打印(注意:该“打印”可实现窗口中所显示文件内容的即时打印,但不能进行打印设置,因此正式打印最好在Word状态下进行)。
当用户单击“返回”按钮时,该窗口消失,返回程序主窗口。
此时在程序主窗口的“计算成果文件名”文本框中将出现刚存盘的设计计算成果文件名(包括路径)。
当单击该文本框右侧的“清文件名”按钮时,文本框中文件名消失,恢复显示“每次先单击‘计算’按钮”的原始状态。
f. 程序主窗口的“查看文件”按钮是供用户查看、修改和打印已存盘的数据文件和设计计算成果文件的内容之用的。
当用户单击“查看文件”按钮时,将出现“已存盘文件查看、修改与打印”窗口,该窗口有四个命令按钮,即“查看文件”、“修改重存”、“打印”和“返回”。
当用户单击“查看文件”按钮时,出现一个“打开”通用对话框,当用户在该对话框中选中某一个设计计算成果文件名或存盘数据文件名并单击“打开”按钮时,对话框消失,在该窗口中出现所选中的文件内容供用户查阅。