高速视频数模转换器ADV7127详细资料中文版
AD9713应用简介
摘要:AD9712B/AD9713B是一款12位的ECL/TTL兼容高速数模转换器,是针对DDS、信号重构、高质量图像信号处理等应用而专门设计的。
该芯片具有小的毛刺和快速建立时间,以及良好的动态性能和谐波抑制能力,因而在各种信号产生设备中有着大量的应用。
文章介绍了该芯片的结构和原理,同时给出了一个AD9713B在雷达视频信号处理中的应用实例。
关键词:DAC AD9712B/AD9713B 视频信号在为线性调频的雷达视频目标产生模拟信号的过程中,为了得到高质量的视频模拟信号,其前端通常采用数字信号处理或DSP+FPGA的结构来设计,然后经过数模转换和低通滤波以生成视频目标模拟信号。
而后端所选用的数模转换芯片的性能优劣对信号的质量有着极为重要的影响。
AD9712B/AD9713B 是AD9712/AD9713的替代产品,为12位高速数模转换器。
同AD9712/AD9713相比,该器件具有更好的静态性能和动态特性。
其中AD9712B与ECL兼容,更新速率可达10MSPS;而AD9713B则与TTL兼容,更新速率可达80MSPS。
由于该D/A转换器是针对DDS、波形重构和高质量图像信号处理等应用而设计的,因此,这两款芯片在动态特性方面表现特别突出,并且具有优良的谐波抑制能力。
本文选用AD9713B来输出雷达视频目标模拟信号。
1 AD9712B/AD9713B的主要特点AD9712B的数据输入口D1~D12和使能口LATCH ENABLE与ECL兼容,内部ECL参考节点也与10K ECL器件相匹配。
而在AD9713B中,每个输入口均加进了TTL转换单元。
除这点以外,AD9712B和AD9713B是完全相同。
AD9712B/AD9713B的主要特性如下:●具有100MSPS的更新速率;●与ECL/TTL兼容;●无杂散动态范围SFDR为70dBc(1MHz);●毛刺电压低至28Pv-s;●建立时间快(27ns);●低功耗:725mW;●1/2LSB DNL (B Grade);●具有40 MHz乘积带宽。
gxconfiguratordpv712中文使用手册

gxconfiguratordpv712中文使用手册
引言
这本手册旨在为您提供关于gxconfiguratordpv712的全面介绍和使用指南。
通过阅读本手册,您将能够了解如何安装、配置和使用gxconfiguratordpv712,从而充分利用其强大的功能来提高您的工作效率。
一、产品概述
gxconfiguratordpv712是一款功能强大的配置工具,专为满足各种配置需求而设计。
它支持多种配置项,包括网络设置、设备参数、安全设置等,使您能够轻松地管理和优化您的设备。
二、安装与配置
在本节中,我们将详细介绍如何安装和配置gxconfiguratordpv712。
1. 安装步骤
(1) 下载并安装gxconfiguratordpv712软件包;
(2) 运行安装程序,按照屏幕提示完成安装过程;
(3) 安装完成后,重启计算机。
2. 配置步骤
(1) 打开gxconfiguratordpv712应用程序;
(2) 选择“设置”菜单中的“网络设置”;
(3) 根据您的需求配置网络参数,如IP地址、子网掩码等;
(4) 配置其他所需的参数,如设备名称、密码等;
(5) 点击“保存”按钮以保存配置。
三、使用指南
在本节中,我们将详细介绍如何使用gxconfiguratordpv712进行设备配置和管理。
1. 网络配置
(1) 打开gxconfiguratordpv712应用程序;
(2) 选择“网络设置”选项卡;
(3) 根据您的需求配置网络参数,如IP地址、子网掩码等;
(4) 点击“应用”按钮以应用配置。
基于ADSP_BF533的多媒体通信终端设计与实现
收稿日期:2004-08-01;修订日期:2004-10-28 作者简介:陶猛(1979-),男,安徽泗县人,硕士研究生,主要研究方向:图像处理、多媒体通信; 黄小红(1979-),女,江西南丰人,硕士研究生,主要研究方向:图像处理、多媒体通信; 刘峰(1964-),男,浙江温州人,副教授,博士,主要研究方向:图像处理、多媒体通信.文章编号:1001-9081(2005)03-0717-03基于ADSP 2BF533的多媒体通信终端设计与实现陶 猛,黄小红,刘 峰(南京邮电学院信息工程系,江苏南京210003)(taomeng1979@hot m ail .com;taomeng79@ )摘 要:采用ADSP 2BF533DSP 处理器设计并实现了基于I P 网路的多媒体通信终端系统。
终端的管理采用μCOS 2II 实时嵌入式操作系统。
在分析μCOS 2II 操作系统特点的基础上,把Lw I P 协议栈移植到μCOS 2II 上实现了网络接口。
试验结果表明,该系统在局域网中多媒体信息的编码、传输是实时的。
关键词:I P 网络;多媒体通信终端;DSP;μCOS 2II ;Lw I P (L ightW eight I nternet Pr ot ocol )中图分类号:TP316.89 文献标识码:AD esi gn and rea li za ti on of m ulti m ed i a term i n a l ba sed on AD SP 2BF 533T AO Meng,HUANG Xiao 2hong,L I U Feng(Infor m ation Engineering D epart m ent ,N anjing U niversity of Posts and Teleco mm unications ,N anjing J iangsu 210003,China )Abstract:A multi m edia communicati on ter m inal based on ADSP 2BF533DSP p r ocess or and used in I P net w ork was designed and i m p le mented .μCOS 2II e mbedded operati on syste m was used in the system,with the trans p lantati on of Lw I P .The experi m ents show that by the multi m edia communicait on ter m inal,the coding and trans portati on of multi m edia inf or mati on can be realized in real ti m e in LAN.Key words:I P net w ork;multi m edia communicati on ter m inal;DSP;μC OS 2II ;Lw I P (L ightW eight I nternet Pr ot ocol )0 引言嵌入式系统通常是指被嵌入到各种产品或工程应用中的,以微处理器或微控制器为核心的软硬件系统。
ADV7170中文资料

CGMS & WSS INSERTION BLOCK
TELETEXT INSERTION
BLOCK
8
4:2:2 TO
4:4:4 INTER-
8
POLATOR
8
Y8
YCrCb TO U 8 YUV
MATRIX V8
ADD 9 SYNC
8
ADD BURST 8
INTER- 9 POLATOR
8
INTERPOLATOR 8
Multistandard Video Output Support:
Macrovision AntiTaping Rev 7.01 (ADV7170 Only)**
Composite (CVBS)
Closed Captioning Support
Component S-Video (Y/C)
Teletext Insertion Port (PAL-WST)
Individual ON/OFF Control of Each DAC
WSS (Wide Screen Signalling)
CCIR and Square Pixel Operation
Simultaneous Y, U, V, C Output Format
Integrated Subcarrier Locking to External Video Source
NTSC-M, PAL-M/N, PAL-B/D/G/H/I, PAL-60
Color Signal Control/Burst Signal Control
Single 27 MHz Clock Required (؋2 Oversampling)
GM7123 3通道高清视频编码电路 数据手册说明书

GM71233通道高清视频编码电路数据手册成都国腾电子技术股份有限公司设计上海福跃电子科技有限公司提供销售+86-21-58998693/58994470数据手册3通道高清视频编码电路GM71233 通道高清视频编码电路GM7123版本记录:1.0 当前版本时间:2010年7月新旧版本改动比较:旧版文档页数当前版本文档页数主题(和旧版本相比的主要变化)技术销售服务热线:+86-21-58998693/58994470在使用过程中所遇到问题或申请免费样片及索取相关解决方案均可致电+86-21-58998693/58994470-15或发Email至:***************您会得到工程师快捷、准确的回答.1概述GM7123是一款频率330MHz的3通道10位高速视频DAC芯片,兼容RS-343A/RS-170标准差分输出,输出电流范围是2mA~26mA。
输入兼容TTL电平,内部基准1.23V,单电源3.3V供电,采用LQFP48封装。
该芯片可应用于:数字视频系统(1600×1200@100Hz);高分辨率彩色图像;数字射频调制;图像处理;仪器和视频信号重建等。
2特征GM7123自带3个分离的10位数据输入端口,有视频控制信号SYNC和BLANK分别控制同步和消隐。
芯片带有省电模式,采用CMOS工艺制造。
a)最高330MSPS转换速率b)3个10位DACc)输入兼容TTL电平d)DAC输出电流范围2mA~26mAe)集成带隙基准电压源f)LQFP48封装3封装及引脚功能说明产品采用48引线的四边引线扁平外壳封装,实体尺寸7mm×7mm。
图1 GM7123引脚排布图该芯片的各引脚功能描述见表1:表1.芯片引脚功能说明引脚号引脚名方向说明1 G0 输入绿色通道输入数据2 G1 输入绿色通道输入数据3 G2 输入绿色通道输入数据4 G3 输入绿色通道输入数据5 G4 输入绿色通道输入数据6 G5 输入绿色通道输入数据48 R9 输入红色通道输入数据4 功能描述GM7123包含3个10位DAC ,带有3个输入通道,每个通道都有10位数据寄存器。
基于ADV7125的嵌入式系统VGA接口

基于ADV7125的嵌入式系统VGA接口
目前VGA接口是计算机系统以及智能仪器中重要的标准输出接口,但是大部分硬件系统选择LCD终端输出。
很多显示设备,如常见的CRT或LCD 显示器一般都采用统一的15针VGA显示接口。
如需要外接这些设备,则需要把LCD输出信号的接口转换为VGA接口。
本设计是在三星公司芯片
S3C2440平台下,利用最高频率可以达到330 MHz的ADV7125芯片,设计了能够把输出的LCD信号转换为VGA信号的转换电路。
该设计方案具有电路简单、价格低廉、输出图像清晰稳定等特点。
1 ADV7125芯片介绍
ADV7125是一款单芯片、3通道、高速度的数模转换器。
内置3个高速、8位、带互补输出的视频DAC、1个标准TTL输入接口,以及1个高阻抗、模拟输出电流源。
它具有3个独立的8位宽输入端口。
只需1个+5
V/+3.3V单电源和时钟便能工作。
ADV7125还具有其他视频控制信号:
复合同步信号控制端、消隐信号控制端,以及省电模式控制端。
它能够与各种高分辨率彩色图形系统兼容。
ADV7125功能框图如图1所示。
AD 精选高速数模转换器中文

A D76816-B i t高速数模转换器特性刷新率:30MSPS分辨率:16-Bit线性度:1/2LSBDNL@14Bits1LSBINL@14Bits最快建立时间:满量程25ns,精度0.025%SFDR@1MHz输出:86dBcTHD@1MHz输出:71dBc低干扰脉冲:35pV-s功率消耗:465mW片上基准源:2.5V边沿触发锁存器乘法参考能力应用任意波形发生器通信波形重建矢量图形显示产品描述AD768是16-Bit高速数模转换器(DAC)提供优良的交流和直流性能。
AD768是ADI公司的先进双极CMOS制造(abcmos)处理,结合双极晶体管的速度,激光微调薄膜电阻的精度和有效CMOS逻辑。
一个分段电流源架构与专有开关技术相结合,以减少毛刺能量来获得最大化的动态精度。
边沿触发输入锁存器和一个温度补偿的带隙基准源已集成,提供一个完整的单片DAC解决方案。
AD768是电流输出DAC标称满量程输出电流20mA和一个1K 的输出阻抗。
差分电流输出提供支持单端或差分应用。
电流输出可以绑接输出电阻提供电压输出,或连接到高速放大器的求和点提供一个缓冲电压输出。
同时,差分输出可以连接到变压器或差分放大器。
片上基准源和控制放大器配置为最大的准确性和灵活性。
AD768可以通过芯片上的基准源或由一个外部基准电压基于一个外部电阻的选择驱动。
外部电容器允许用户优化变换参考带宽和噪声性能。
AD768采用±5V电源运行,典型的消耗功率465毫瓦。
该芯片采用28引脚SOIC封装,规定工作在工业温度范围。
产品亮点1、低干扰和快速建立时间提供杰出的波形重建或数字动态性能合成的要求,包括通信。
2、AD768优良的直流精度使得它适合高速A/D转换应用。
3、温度补偿,包括片上2.5V带隙基准。
4、允许的参考同一个外部电阻器使用电流输入。
外部基准也可以使用。
5、AD768电流输出可单独使用或差分,无论是负载电阻,外部运算放大器求和点或变压器。
多媒体接收器DVM179用户手册说明书
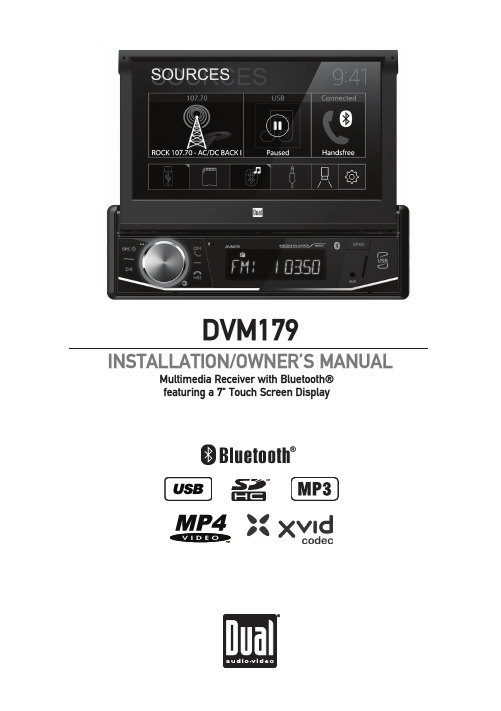
DVM179 INSTALLATION/OWNER’S MANUALMultimedia Receiver with Bluetooth®featuring a 7" Touch Screen DisplayCopyright NotesThe Bluetooth® word mark and logos are owned by the Bluetooth SIG, Inc. SD Logo is a trademark of SD-3C, LLC.Other trademarks and trade names are those of their respective owners.DVM179OPERATIONSafety InformationPlease read all instructions carefully before attempting to install or operate.Due to its technical nature, it is highly recommended that your DUAL DVM179 is installed by a professional installer or an authorized dealer. This product is only for use in vehicles with 12VDC negative ground only.To prevent damage or injury:• Make sure to ground the unit securely to the vehicle chassis ground.• Do not remove the top or bottom covers of the unit.• Do not install the unit in a spot exposed to direct sunlight or excessive heat or the possibility of water splashing.• Do not subject the unit to excessive shock.• When replacing a fuse, only use a new one with the prescribed rating. Using a fuse with the wrong rating may cause the unit to malfunction.• To prevent short circuits when replacing a fuse, disconnect the wiring harness first.• Use only the provided hardware and wire harness.• You cannot view video while the vehicle is moving. Find a safe place to park and engage the parking brake.• If you experience problems during installation, consult your nearest DUAL dealer.• If the unit malfunctions, reset the unit as described on page 10 first. If the problem still persists, consult your nearest DUAL dealer or call tech assistance @ 1-866-382-5476.• To clean the monitor, wipe only with a dry silicone cloth or soft cloth. Do not use a stiff cloth, or volatile solvents such as paint thinner and alcohol. They can scratch the surface of the panel and/or remove the printing.• When the temperature of the unit falls (as in winter), the liquid crystal inside the screen will become darker than usual. Normal brightness will return after using the monitor for a while.• When extending the ignition, battery or ground cables, make sure to use automotive-grade cables or other cables with an area of 0.75mm (AWG 18) or more to prevent voltage drops.• Do not touch the liquid crystal fluid if the LCD is damaged or broken. The liquid crystal fluid may be hazardousto your health or fatal. If the liquid crystal fluid from the LCD contacts your body or clothing, wash it off with soap immediately.FCC ComplianceThis device complies with Part 15 of the FCC Rules. Operation is subject to the following two conditions:(1) this device may not cause harmful interference, and(2) this device must accept any interference received, including interference that may cause undesired operation. Warning: Changes or modifications to this unit not expressly approved by the party responsible for compliance could void the user’s authority to operate the equipment.Note: This equipment has been tested and found to comply with the limits for a Class B digital device, pursuant to Part 15 of the FCC Rules. These limits are designed to provide reasonable protection against harmful interference in a residential installation. This equipment generates, uses and can radiate radio frequency energy and, if not installed and used in accordance with the instructions, may cause harmful interference to radio communications. However, there is no guarantee that interference will not occur in a particular installation. If this equipment does cause harmful interference to radio or television reception, which can be determined by turning the equipment off and on, the user is encouraged to try to correct the interference by one or more of the following measures:• Reorient or relocate the receiving antenna.• Increase the separation between the equipment and receiver.• Connect the equipment into an outlet on a circuit different from that to which the receiver is connected.• Consult the dealer or an experienced radio/TV technician for help.23DVM179OPERATIONBefore You Start • D isconnect negative battery terminal. Consult a qualified technician for instructions.• A void installing the unit where it would be subject to high temperatures, such as from direct sunlight, or where it would be subject to dust, dirt or excessive vibration.Getting Started• Insert the supplied keys into the slots as shown, and slide the unit out of the mounting sleeve. • I nstall mounting sleeve into opening, bending tabs to secure.• C onnect wiring harness as shown on page 4. Consult a qualified technician if you are unsure.• C ertain vehicles may require an installation kit and/or wiring harness adapter (sold separately).• Reconnect negative battery terminal, and test for correct operation.• Snap trim ring into place (if required).Preparation4DVM179OPERATIONWiring Diagram - Inputs/OutputsNote:When replacing a fuse, make sure to use the correct type and amperage. Using an incorrect fuse could cause damage. The unit uses (1) 10 amp ATC mini style fuse located on the power connector. Wiring Notes:Subwoofer outputThe Subwoofer preamp audio output (black jacket with green RCA) is active in all audio modes.Rear camera inputA rear view camera (not included) can be used with the Camerainput.DVM179 OPERATIONControl Locations1. Power / Source Mode2. Play / Pause3. Rotary Volume Up/Down4. Mute - Short Press Rotary5. Tune/Track Up / Answer Call6. Tune/Track Down / End Call7. BT Microphone8. LCD Display9. Open TFT - Press to open/close 10. 3.5mm AUX IN11. USB Media Port / Charging Port 12. microSD Media Port 13. Reset346138571211910BEHIND DOOR1. Power2. Play/Pause / Ok3. Seek Up / Next Track4. Volume Down 7. Dial 3 / Song Repeat 10. Dial 811. Dial 9 #Remove Battery Shipping Protector126DVM179 OPERATION General OperationPower On/OffModeVolumeMuteOpen Auxiliary InputUSB InputmicroSD CardMain MenuReset Momentarily press to turn the unit on. Press and hold to turn the unit off.Press to step through all available input modes: Radio, SD Card, USB, Bluetooth Phone, Bluetooth Music, Auxiliary Input, Rear Camera and Settings. Modes of operation are indicated on the display and/or the monitor. Optional USB device and SD card must be connected/ inserted to appear in the mode selection string.Rotate the volume knob to increase or decrease the volume level. Momentarily press the volume knob to silence the audio. Momentarily press the volume knob again to return to the previously selected volume. Rotating the volume knob while the volume is muted will also cancel the mute function.Press OPEN to open or close the LCD display screen.Connect external audio/video devices to the 3.5mm auxiliary input on the front panel.Insert a USB device to play MP3 audio files or view view XviD or MP4 video files or JPG photos.Insert an microSD card into the microSD slot to play MP3 audio files or view XviD or MP4 video files or JPG photos.Press the house icon in the top left corner to access the Main Menu screen.To resolve abnormal operation or if the unit is inoperable, use the tip of a pen to press the RESET button, which is located behind the door marked "USB". The unit will reset the main processor to the default settings.7DVM179OPERATIONGeneral OperationFrom the Main Menu, press the gear icon to access the Setup menu andadjust the following: General, Clock, Audio, Bluetooth, Display and About.General:• System Language - Select English or Spanish.• Tuner Region - Select between America, Europe or Latin America.• Beep - Turn the audible beep on or off.• Rear Camera Delay - Select 1 second, 2 seconds, 3 seconds of Off.• Reverse Trigger - Enable or disable this feature.Clock:• Mode - Select 12 Hour or 24 Hour clock settings.• Hour - Adjust the hours for time setting.• Minute - Adjust the minutes for time setting.• AM/PM - Adjust the AM/PM setting.Audio:• Camera Audio - Turn audio from the rear camera on or off.• Audio Level - Select preset audio levels for the following modes:Tuner, USB, SD Card and Handsfree.Bluetooth:• Bluetooth - Turn Bluetooth signal on or off.• Auto Connect - Turn auto connect feature on or off.• Auto Answer - Turn auto answer feature on or off.• PIN - Displays the Bluetooth PIN code.• Name - Displays the Bluetooth device name.Display:• Illumination Trigger - Turn illumination trigger on or off.• Brightness Day - Adjust 1-10.• Gamma Day - Adjust -4 to 4.• Panel Angle - Adjust the angle of the LED panel (1-4).• LED RGB - Adjust color of LED lights (or set to automatic).• Wallpaper - Select a wallpaper for the LED display.About:• Screen Calibration - Press to calibrate the touch screen.• Version - Press to display the version number.• System Reset - Press to restore unit to factory settings.• EULA - Need more infoSetup MenuDVM179 OPERATIONGeneral Operation1. Adjust the volume level for the current source.2. Displays the EQ Settings for the current source.3. Turns the EQ function on or off.4. Turns the Loudness function on or off.5. Press to reset to the default EQ settings.6. Press to return to the source screen.7. Select a preset EQ setting, or select User for custom settings.8. Press to display and adjust Balance / Fader screen.Adjust the Balance / Fader screen to select Balance, Fader and Subwoofer settings. These controls do not have source tone 1. Adjust the volume level of the unit.2. Adjust the Fader and Balance settings to distribute audio as desired front to back and left to right.3. Press to reset Balance and Fader to default settings.Turn the subwoofer on or off.Press to return to the source screen.6. Return to EQ control screens3465345DVM179OPERATIONAM/FM Tuner OperationAM/FM Tuner Operation14USB/microSD Card OperationUSB/SD Card Operation1615The following types of files are not compatible:• MP3 PRO format, MP3 playlists • RMP format • WAV format • WMV format• AAC, protected AAC, M4A formatMP3 playback sequence begins in the root folder of the USB flash drive or microSD card. Any folders that do not include MP3/JPG files are skipped. ISO9660 standards:• Maximum nested folder depth is 8 (including the root folder).• Valid characters for folder/file names are letters A-Z (all caps), numbers 0-9, and “_” (underscore). Some characters may not be displayed correctly, depending on the character type.Some files may not play, depending on sampling rates and bit rates. For best results, use the following settings when ripping MP3 files: 128kbps or higher constant bit rate; 44.1kHz or higher sampling frequencyMedia CompatibilityPlayback OrderCompatible Recording FormatsNotesNotes:• For USB mode, it is not possible to view JPG files on the in-dash monitor while the vehicle is moving. This is a safety feature to prevent driver distraction.• The JPG image viewer function will only operate when vehicle is in park and the parking brake is engaged.• Due to ongoing technological advancement, some USB flash drives and/or microSD cards may be incompatible with this unit.Bluetooth Operation1Bluetooth OperationFront 3.5mm Aux InputConnect an optional audio source into the 3.5mm (front panel) input. Select auxiliary input from the Main Menu to listen to audio.Adjust volume on the external audio source as needed (if connected to the headphone output of the device).Auxiliary InputFront/Rear Cameras - (Optional)Connect an optional rear camera to the Rear Camera inputs (Yellow RCA connector for video and Black RCA connector for audio). Refer to the wiring diagram for details.Manual selection - Touch the REAR CAMERA icon from the Main Menu or from any operational mode (when enabled) to select camera mode. Touch the top left area on the screen to exit camera mode.Note: The manual mode is for dedicated cameras that are ALWAYS on while driving, it is not meant for cameras that are connected to the vehicle's reverse light.The unit will automatically select camera mode when connected to the reverse lamp circuitry.Note: The external video output is not active when using the rear camera input.Connect an optional front camera to the Front Camera inputs (Yellow RCAconnector for video; there is no audio connection for a front camera. Refer to the wiring diagram for details.Using Rear CameraAuto SelectionUsing Front CameraSpecificationsFM TunerAM TunerFront USB microSD MonitorGeneralTuning range: 87.5MHz-107.9MHz Usable sensitivity: 10dBf50dB quieting sensitivity: 20dBf Stereo separation @ 1kHz: 38dB Frequency response: 30Hz-13kHz Tuning range: 530kHz-1710kHz Usable sensitivity: 24uVFrequency response: 30Hz-2.3kHz Compatibility: High Speed USB 2.0USB Class: Mass storage classCompatibility: microSD memory card & microSDHC memory card Panel size: 7” diagonal measurementView angle (up/down/left/right): 50/70/70/70Resolution: 800 (H) x 480 (V)Brightness (cd/m 2): 250Contrast ratio: 500:1Pixels: 1,152,000Speaker output impedance: 4 ohms Line output voltage: 4 volt RMS Line output impedance: 200 ohmsChassis dimensions: 7" x 7" x 2" (W x D x H)Design and specifications subject to change without notice.Limited One Year WarrantyThis warranty gives you specific legal rights. You may also have other rights which vary from state to state. Namsung America Inc. warrants this product to the original purchaser to be free from defects in material and workmanship for a period of one year from the date of the original purchase.Namsung America Inc. agrees, at our option, during the warranty period,to repair any defect in material or workmanship or to furnish an equal new, renewed or comparable product (whichever is deemed necessary) in exchange without charges, subject to verification of the defect or malfunction and proof of the date of purchase. Subsequent replacement products are warranted for the balance of the original warranty period. Who is covered? This warranty is extended to the original retail purchaser for products purchased from an authorized Dual dealer and used in the U.S.A.What is covered? This warranty covers all defects in material and workmanship in this product. The following are not covered: software, installation/removal costs, damage resulting from accident, misuse, abuse, neglect, product modification, improper installation, incorrect line voltage, unauthorized repair or failureto follow instructions supplied with the product, or damage occurring during return shipment of the product. Specific license conditions and copyright notices for the software can be found via www. .What to do?1.Before you call for service, check the troubleshooting guide in your owner’s manual. A slight adjustment of any custom controls may save you a service call.2.If you require service during the warranty period, you must carefully pack the product (preferably in the original package) and ship it by prepaid transportation with a copy of the original receipt from the retailer to an authorized service center.3.Please describe your problem in writing and include your name, a return UPS shipping address (P.O. Box not acceptable), and a daytime phone number with your shipment.4.For more information and for the location of the nearest authorized service center please contact us by one of the following methods:•Call: 866-382-5476•E-mail: cs@Exclusion of Certain Damages: This warranty is exclusive and in lieu of any and all other warranties, expressed or implied, including without limitation the implied warranties of merchantability and fitness for a particular purpose and any obligation, liability, right, claim or remedy in contract or tort, whether or not arising from the company’s negligence, actualor imputed. No person or representative is authorized to assume for the company any other liability in connection with the sale of this product. In no event shall the company be liable for indirect, incidental or consequential damages.TroubleshootingDVM179OPERATIONNotes20Dual Electronics Corp.Toll Free: 888-921-4088©2019 Namsung America Inc. All rights reserved.The Bluetooth® word mark and logos are owned by the Bluetooth SIG, Inc. Other trademarks and trade names are those of their respective owners.NSA0719-V01。