EPSON TM-T81 网络打印机驱动使用手册
EpsonTM系列打印机安装文档
EpsonTM系列打印机安装文档EpsonTM系列打印机安装说明1、TM3001)此打印机本身没有中文字库,由国内的代理公达公司附加了一个中文模块(GB2312-支持7K字符)来支持中文打印。
2)程序的安装比较简单,直接在windows打印机中添加打印机找到相应的OEMSETUP.INF即可以安装打印机。
3)编程硬字库打印需要将所有的asc码转换成中文全角字符才能在打印机的中文模式下进行快速打印。
4)编程软字库走的是windows的canves的驱动,只要拼好打印内容即可,不要特殊处理。
2、TM210、TM88II1)此2款打印机本身集成了中文字库((GB2312-支持7K字符))。
2)程序的安装比较简单,直接在windows打印机中添加打印机找到相应的OEMSETUP.INF即可以安装打印机。
3)编程硬字库打印直接输出字符即可在打印机的中文模式下进行快速打印。
4)编程软字库走的是windows的canves的驱动,只要拼好打印内容即可,不要特殊处理,TM88II在win98下软字库可以选择7.5cpi/3.5cpi可以直接输出硬字库中的字体,速度很快。
5)这2款机器已经停产。
3、TM220、TM88III、TM88IV1)Epson和microsoft签定的驱动使用许可协议在2003年到期,Epson决定自己开发打印驱动,这时的打印驱动安装就是以exe的安装为主了,目前最新中文驱动下载版本是Ver.3.01gSC,同时新版本的驱动只支持winXP、win2000以上操作系统,Epson不再提供win95、win98的驱动下载。
2)从这3款开始打印机本身集成了大中文字库((GB18030-支持27K字符)),这使得以前的驱动使用起来就会有相应的问题,打印字会断、打印速度慢等等。
3)TM88III、TM88IV之间的主要主要区别是,TM88IV的按钮更结实,后盖展开更小,支持双色热敏纸的打印,其他性能和TM88III 基本差不多4)安装这几款打印机首先安装GBEXTSUP文件夹下的字库程序。
EPSON USB打印软件TN BA EU打印机USB设备驱动安装指南说明书
EPSON USB Printing Software for TM/BA/EU PrintersUSB Device DriverInstallation ManualMay 23, 2000,Revision ASeiko Epson CorporationRevision HistoryRevision RevisionContents SHEET DateA2000/5/23Newly Created-Contents1. INTRODUCTION (1)2. OPERATING ENVIRONMENT (1)3. VERIFYING THE COMPUTER'S USB PORT (2)4. CONNECTION (4)5. INSTALLING THE USB DEVICE DRIVER (5)6. UPDATING OLD VERSIONS OF THE USB DEVICE DRIVER (13)NoEPSON TITLE EPSON USB Printing Software for TM/BA/EU PrintersUSB Device DriverRevision A NEXT 2SHEET 11. IntroductionTo use USB-connectable EPSON TM/BA/EU printers, it is necessary to install the USB device driver.This manual explains how to install the USB device driver.2. Operating environmentPersonal computer• AT compatibles∗This is restricted to devices that have USB ports and for which the manufacturer of the computer guarantees the operation of the USB port.OS• Microsoft Windows 2000• Microsoft Windows 98 Second EditionNoEPSON TITLE EPSON USB Printing Software for TM/BA/EU PrintersUSB Device DriverRevision A NEXT 3SHEET23. Verifying the computer's USB portCheck that the computer can use a USB before installing the USB device driver.For Windows 20001. Right click on the My Computer icon and open [Properties].2. Select the [Hardware] tab and click the [Device Manager] button to open [Device Manager].3. Check that [USB (Universal Serial Bus) controllers] is displayed.∗If [USB (Universal Serial Bus) controllers] is not displayed, the USB device driver cannot be used.NoEPSON TITLE EPSON USB Printing Software for TM/BA/EU PrintersUSB Device DriverRevision ANEXT 4SHEET 3For Windows 98 Second Edition1. Right click on the My Computer icon and open [Properties].2. Select the [Device Manager] tab and check that [Universal Serial Bus controllers] is displayed.∗If [Universal Serial Bus controllers] is not displayed, the USB device driver cannot be used.NoEPSON TITLE EPSON USB Printing Software for TM/BA/EU PrintersUSB Device DriverRevision A NEXT 5SHEET 44. ConnectionThe printer must be connected following the sequential order described in this manual.If a different order is used, the printer may not function normally.When connecting a printer directly to the computer1. Switch on the power to the computer.2. Connect the printer's AC adapter to the printer.3. Connect the AC adapter to the power outlet.4. Connect the USB cable's B connector to the printer's upstream port.5. Switch on the power to the printer.6. Connect the A connector for the already connected cable to the computer's USB port.Next, proceed to [5. Installing the USB device driver].When connecting a printer to a USB hub that is connected to the computer1. Switch on the power to the computer and check that the connected USB hub is functioning normally.2. Connect the printer's AC adapter to the printer.3. Connect the AC adapter to the power outlet.4. Connect the USB cable's B connector to the printer's upstream port.5. Switch on the power to the printer.6. Connect the A connector for the already connected cable to the downstream port for the USB hub that is connected to the computer.Next, proceed to [5. Installing the USB device driver].NoEPSON TITLE EPSON USB Printing Software for TM/BA/EU PrintersUSB Device DriverRevisionA NEXT6SHEET 55. Installing the USB device driverIf the printer is connected according to the procedure outlined in [4. Connection], [Generic USB Hub] will be detected and installed. After this, the [EPSON UB-U01/02] will be detected.For Windows 20001. The [EPSON UB-U01/02] is detected and the [Found New Hardware Wizard] appears.2. Click the [Next] button to display the following screen.NoEPSON TITLEEPSON USB Printing Software for TM/BA/EU Printers USB Device DriverRevision A NEXT7SHEET 63. Select [Search for a suitable drive for my device{recommended}] and click the [Next] button to display the following screen.4. Select [Specify a location] and click the [Next] button to display the following screen. Click the [Browse] button,installation folder location of USB device driver is specified.Exp.) C:¥Program Files¥EPSON Advanced Printer¥USB ControllerClick the [OK] button to start the search for the driver.NoEPSONTITLE EPSON USB Printing Software for TM/BA/EU PrintersUSB Device DriverRevision ANEXT 8SHEET 75. Once the driver is found, the following screen will appear.6. Check that [EPSON UB U01/02] is displayed. Click the [Next] button to begin installing the driver.7. After the driver has been installed, the following screen will appear.8. Click the [Finish] button to complete the installation process.NoEPSON TITLE EPSON USB Printing Software for TM/BA/EU PrintersUSB Device DriverRevision A NEXT 9SHEET 89. After the driver has been installed, check that [Generic USB Hub] and [EPSON USB Controller for TM/BA/EU Printers]are displayed under [USB (Universal Serial Bus) controllers] in [Device Manager].10. A fter the printer has been correctly connected and the USB device driver installed, only connection is required for the printer to function, as the USB device driver will be loaded automatically.NoEPSON TITLE EPSON USB Printing Software for TM/BA/EU PrintersUSB Device DriverRevisionA NEXT 10SHEET 9For Windows 98 Second Edition1. The [EPSON UB-U01/02] is detected and the [Add New Hardware Wizard] appears.2. Click the [Next] button to display the following screen.NoEPSON TITLE EPSON USB Printing Software for TM/BA/EU PrintersUSB Device DriverRevision A NEXT 11SHEET103. Select [Search for the best driver for your device.(Recommended)] and click the [Next] button to display the following screen.4. Click the [Browse] button, installation folder location of USB device driver is specified.Exp.) C:¥Program Files¥EPSON Advanced Printer¥USB ControllerClick the [OK] button to start the search for the driver.5. Once the driver is found, the following screen will appear.NoEPSON TITLE EPSON USB Printing Software for TM/BA/EU PrintersUSB Device DriverRevision A NEXT 12SHEET 116. Check that [EPSON USB Controller for TM/BA/EU Printers] is displayed and click the [Next] button to begin installing the driver.7. After the driver has been installed, the following screen will appear.8. Click the [Finish] button to complete the installation process.NoEPSON TITLE EPSON USB Printing Software for TM/BA/EU PrintersUSB Device DriverRevision A NEXT 13SHEET 129. After the driver has been installed, check that [Generic USB Hub] and [EPSON USB Controller for TM/BA/EU Printers] are displayed under [Universal Serial Bus controllers] in the [Device Manager].tab of [System Properties].10. After the printer has been correctly connected and the USB device driver installed, only connection is required to for the printer to function, as the USB device driver will be loaded automatically.NoEPSON TITLE EPSON USB Printing Software for TM/BA/EU PrintersUSB Device DriverRevision A NEXT 14SHEET 136. Updating old versions of the USB device driverThis section explains how to update an old version of the USB device driver being used with Windows 98 Second Edition.1. Connect the printer to the computer and select [EPSON USB Controller for TM/BA/EU Printers] under [Universal SerialBus controllers] in the [Device Manager].tab of [System Properties].NoEPSON TITLEEPSON USB Printing Software for TM/BA/EU PrintersUSB Device DriverRevision A NEXT 15SHEET 142. Click the [Properties] button to open the Properties screen. Select the [Driver] tab.3. Click the [Update Driver] button and the [Update Device Driver Wizard] will appear.NoEPSONTITLE EPSON USB Printing Software for TM/BA/EU PrintersUSB Device DriverRevision A NEXT 16SHEET 154. Click the [Next] button to display the following screen.5. Select [Search for a better driver than the one your device is using now. (Recommended)] and click the [Next] button to display the next screen.6. Click the [Browse] button, installation folder location of USB device driver is specified.Exp.) C:¥Program Files¥EPSON Advanced Printer¥USB ControllerClick the [OK] button to start the search for the driver.NoEPSON TITLEEPSON USB Printing Software for TM/BA/EU PrintersUSB Device DriverRevision A NEXT 17SHEET 167. Once the driver is found, the following screen will appear.8. Select [The updated driver (Recommended)] and click the [Next] button to display the following screen.NoEPSON TITLE EPSON USB Printing Software for TM/BA/EU PrintersUSB Device DriverRevision A NEXT 18SHEET 179. Check that [EPSON USB Controller for TM/BA/EU Printers] is displayed. Click the [Next] button to begin installing the driver.10. After the driver has been installed, the following screen will appear.11. Click the [Finish] button to complete the installation process.NoEPSONTITLE EPSON USB Printing Software for TM/BA/EU PrintersUSB Device DriverRevision A NEXT 19SHEET 1812. After the driver has been installed, check that the date on the Properties [Driver] tab is 5-19-2000.13. Click the [Driver File Details] button to open the [Driver File Details] screen.NoEPSON TITLEEPSON USB Printing Software for TM/BA/EU PrintersUSB Device DriverRevision A NEXT 20SHEET 1914. Select [WINDOWS¥SYSTEM32¥DRIVERS¥TMUSB90.SYS] to verify that file version 1.10 is being used.15. If [WINDOWS¥SYSTEM¥TMUSB90.SYS] is displayed in the [Driver File Details] screen, use Windows Explorer to delete TMUSB90.SYS in the WINDOWS¥SYSTEM directory, then reconnect the printer.NoEPSONTITLE EPSON USB Printing Software for TM/BA/EU PrintersUSB Device DriverRevision A NEXT 21SHEET 2016. Open the [Driver File Details] screen and verify that [WINDOWS¥SYSTEM¥TMUSB90.SYS] is not displayed.17. This completes the driver update process.。
爱普生打印机使用手册
爱普生打印机使用手册爱普生打印机使用手册一、产品概述1.1 产品介绍1.1.1 型号及规格1.1.2 主要特点1.1.3 主要应用领域1.2 打印机外观及部件1.2.1 外观介绍1.2.2 主要部件说明1.2.3 操作面板介绍二、安装与连接2.1 配置要求2.1.1 硬件要求2.1.2 软件要求2.2 打印机连接2.2.1 连接计算机2.2.2 连接电源三、驱动安装与设置3.1 驱动安装3.1.1 驱动与安装步骤 3.1.2 驱动更新与升级 3.2 驱动设置3.2.1 打印机选择与设置3.2.2 打印参数设置四、打印机操作4.1 打印测试页4.2 打印文档4.3 打印设置4.3.1 纸张设置4.3.2 高级打印设置五、故障排除5.1 常见故障及解决方法5.1.1 打印机无法连接 5.1.2 打印质量不佳5.1.3 纸卡纸张5.1.4 其他故障5.2 常见问题解答六、维护与保养6.1 清洁打印机6.2 更换耗材6.3 打印机存放与保养七、其他功能与扩展7.1 打印机高级功能介绍7.1.1 液晶显示屏设置 7.1.2 网络打印功能7.1.3 打印驱动高级设置 7.2 打印机的扩展功能7.2.1 扩展存储7.2.2 无线打印八、常见问题与解答九、文档更新与版本记录附件:1、驱动安装文件2、打印测试页样张法律名词及注释:1、版权: 版权是指著作权人对其所创作的作品所享有的权利。
2、商标: 商标是一种通过在商品或服务上使用的标记来区别自己的商品和服务与他人的商品和服务相区别的标识。
3、专利: 专利是国家对于在技术上具有创造性的发明给予的一种专有权。
4、法律责任: 法律责任是指违反法律法规所要承担的法律后果。
EPSON 打印机设置指南说明书
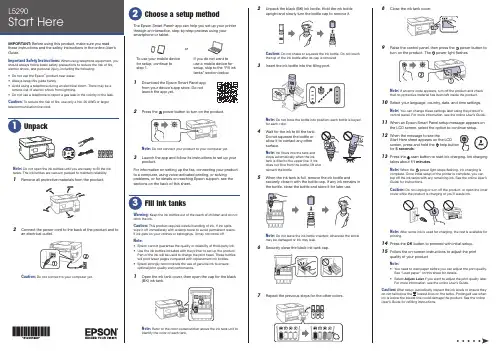
8 Close the ink tank cover.9 R aise the control panel, then press the power button toturn on the product. Thepower light flashes.Note: If an error code appears, turn off the product and check that no protective material has been left inside the product.10 S elect your language, country, date, and time settings.Note: You can change these settings later using the product’s control panel. For more information, see the online User’s Guide .11 W hen an Epson Smart Panel setup message appears onthe LCD screen, select the option to continue setup.12 WStart Here sheet appears on the LCDscreen, press and hold the help button for 5 seconds .13 P ress the start button to start ink charging. Ink chargingtakes about 11 minutes .Note: When the power light stops flashing, ink charging is complete. Once initial setup of the printer is complete, you can top off the ink tanks with any remaining ink. See the online User’s Guide for instructions.Caution: Do not unplug or turn off the product, or open the innercover while the product is charging or you’ll waste ink.Note:14 P ress the OK button to proceed with initial setup.15 F ollow the on-screen instructions to adjust the printquality of your product.Note:• Y ou need to load paper before you can adjust the print quality. See “Load paper” on this sheet for details.• S elect Adjust Later if you want to adjust the print quality later.For more information, see the online User’s Guide .Caution:User’s Guide for refilling instructions.Do not open the ink bottles until you are ready to fill the inktanks. The ink bottles are vacuum packed to maintain reliability.emove all protective materials from the product.The Epson Smart Panel ® app can help you set up your printer through an interactive, step-by-step process using your smartphone or tablet.If you do not want to use a mobile device for setup, skip to the “Fill ink tanks” section below.To use your mobile device for setup, continue to step 1.or1 D ownload the Epson Smart Panel appfrom your device’s app store. Do notlaunch the app yet.2 P ress the power button to turn on the product.Note: D o not connect your product to your computer yet.3 L aunch the app and follow its instructions to set up yourproduct.For information on setting up the fax, connecting your productto a computer, using voice-activated printing, or solving problems, or for details on reaching Epson support, see the sections on the back of this sheet.Warning: Keep the ink bottles out of the reach of children and do not drink the ink.Caution: This product requires careful handling of ink. If ink spills,wipe it off immediately with a damp towel to avoid permanent stains. If ink gets on your clothes or belongings, it may not come off.Note:• E pson cannot guarantee the quality or reliability of third-party ink.• U se the ink bottles included with the printer to set up the product. Part of the ink will be used to charge the print head. These bottles will print fewer pages compared with replacement ink bottles.• E pson strongly recommends the use of genuine ink to ensure optimal print quality and performance.1 O Note: Refer to the color-coded sticker above the ink tank unit to identify the color of each tank.Note:• I f you are using a Mac or your computer does not have aCD/DVD drive, an Internet connection is required to obtain the product software.• T o print from a Chromebook™, go to/support/chromebookprint for instructions.1 M ake sure the product is NOT CONNECTED to yourcomputer.W indows ®: If you see a Found New Hardware screen, click Cancel and disconnect the USB cable.2 I nsert the product CD (Windows only) or download andrun your product’s software package. For the latestsoftware, visit /support/L5290.3 F ollow the instructions on the computer screen to run the setup program.4 W hen you see the Select Your Connection screen, selectone of the following and follow the on-screen instructions:•Wireless connectionIn most cases, the software installer automatically attempts to set up your wireless connection. If setup is unsuccessful, you may need to enter your network name (SSID) and password.• Direct USB connectionMake sure you have the USB cable ready.•Wired network connectionMake sure you have an Ethernet cable (not included).Mobile and voice-activated printing• Print directly from your Android™ (v4.4 or later) device*.Simply connect your printer and device to the same networkand tap the menu icon to select the print option.• Turn your mobile device into an intuitive, easy-to-useprinting and scanning control center with Epson Smart Panel. Download the app from your mobile device’s app store.• Print from wherever you are, next to your printer orremotely, with Epson Connect™. Learn more at /connect .• Use voice-activated assistants to print a variety of creativeand everyday items from your Epson product. Simply add your product to an Epson Connect account, then link the account to a voice-activated assistant. See/support/voice for more information.* M ay require the Epson Print Enabler or Mopria Print Service app from Google Play™.EPSON and Epson Smart Panel are registered trademarks, EPSON Exceed Your Vision is a registered logomark, and Epson Connect is a trademark of Seiko Epson Corporation.Designed for Excellence is a trademark of Epson America, Inc.Windows is a registered trademark of Microsoft Corporation in the United States and/or other countries.Mac is a trademark of Apple Inc., registered in the U.S. and other countries.Android, Chromebook, and Google Play are trademarks of Google LLC.General Notice: Other product names used herein are for identification purposes only and may be trademarks of their respective owners. Epson disclaims any and all rights in those marks.This information is subject to change without notice.© 2021 Epson America, Inc., 2/21Printed in XXXXXXCPD-60040See the online User’s Guide for information about loading capacity, available paper types and sizes, loading envelopes, and using the ADF .1 M ake sure the product is not charging ink. Then raise thepaper support and tilt it backwards slightly.2 S lide the edge guides all theway out.3 L oad paper, glossy orprintable side up and shortedge first, in the middle of the rear paper feeder.Note:guides.4 Slide the edge guides againstthe paper, but not too tightly.5 Pthe paper stopper.6 Select the paper settings on the product’s control panel.C onnect the fax line1 C onnect a phone cord to a telephone wall jack and to theLINE port on your product. See the online User’s Guidefor more information.2 P ress the OK button to set up the fax, or press the #pound button to set it up later.Any problems?Network setup was unsuccessful.• Make sure you select the right network name (SSID).• Restart your router (turn it off and then on), then try toconnect to it again.• The printer can only connect to a network that supports2.4 GHz connections. If your router offers both 2.4 GHz and5 GHz connections, make sure 2.4 GHz is enabled.• If you see a firewall alert message, click Unblock or Allow to let setup continue.• If your network has security enabled, make sure you enteryour network password (WEP key or WPA passphrase) correctly. Be sure to enter your password in the correct case.• Print a network connection report to identify networkproblems and solutions. See your online User’s Guide forinstructions.There are lines or incorrect colors in my printouts.Run a nozzle check to see if there are any gaps in the printout. Then clean the print head, if necessary. See the online User’s Guide for more information.The product’s screen is dark.Make sure your product is turned on and press any button to wake it from sleep mode.Setup is unable to find my product after connecting it with a USB cable.Make sure your product is on and the USB cable is securely connected.Any questions?User’s GuideWindows: Click the icon on your desktop or Apps screen to access the online User’s Guide .Mac: Click the icon in Applications/Epson Software/Guide to access the online User’s Guide .If you don’t have a User’s Guide icon, go to the Epson website, as described in “Technical support.”Technical supportVisit /support/L5290 to download drivers, view manuals, get FAQs, or contact Epson.You can also speak to a service technician by calling one of these numbers:Argentina (54 11) 5167-0300 Guatemala * 1-800-835-0358 0800-288-37766 Mexico 01-800-087-1080Bolivia * 800-100-116 Mexico City (52 55) 1323-2052Chile (56 2) 2484-3400 Nicaragua * 00-1-800-226-0368Colombia 018000-915235Panama * 00-800-052-1376 Bogota (57 1) 592-2200 Paraguay 009-800-521-0019Costa Rica 800-377-6627 Peru 0800-10126DominicanLima (51 1) 418-0210 Republic * 1-888-760-0068 Uruguay 00040-5210067Ecuador * 1-800-000-044 Venezuela (58 212) 240-1111El Salvador * 800-6570* C ontact your local phone company to call this toll-free number from a mobile phone.If your country does not appear on the list, contact your nearest Epson sales office. Toll or long distance charges may apply.Need paper and ink?Ensure brilliant results with Epson specialty and plain papers, engineered specifically for Epson printers. You can purchase them from an Epson authorized reseller. To find the nearest one, visit or contact Epson as described in “Any questions?” on this sheet.L5290 replacement inks。
EPSON无线打印机 使用手册
Epson Connect用户指南NPD4945-00 SC此手册中出现的打印机/一体机以下简称“打印机”。
爱普生产品使用说明或网页等可能描述了其他公司(非爱普生)的硬件/软件产品、功能及服务,爱普生对于其他公司生产的产品和提供的服务(包括但不限于其内容、性能、准确性、兼容性、可靠性、合法性、适当性和连续性)不做任何明示和/或默示担保。
注释:其他信息,可查看产品本身、产品包装和其他形式的资料,包括爱普生网页()Epson Connect和其他移动解决方案Epson Connect是什么?Epson Connect提供移动服务,可让您在任何地方发送任务实现打印和扫描。
您可使用智能手机、平板电脑或笔记本电脑发送任务实现打印照片和文档。
如果您发送扫描的数据到与Epson Connect兼容的打印机,此时的打印机类似于彩色传真机。
您还可使用您的爱普生打印机扫描文档并将其上传到指定的地方,如:在线存储设备或“云(Colud)”帐户。
可使用下面服务。
一旦您已注册了您的打印机和帐户,您可使用下面的所有服务。
有关如何注册到Epson Connect、如何使用服务和故障排除的详细信息,参见Epson Connect入口网页:https:///服务概述Email Print从任何地方仅通过发送邮件即可实现打印照片和文档。
扫描至云(Cloud)扫描您的文档和照片至“云(Cloud)”帐户。
Epson iPrint对于iOS或Android智能手机和平板电脑的无线打印应用软件。
Epson iPrint具有二项有用的功能。
首先是本地打印,允许您打印并扫描至与本地相同Wi-Fi网络连接的打印机作为您的设备打印。
第二是远程打印,允许您通过互联网远程打印。
如果您未安装Epson iPrint,从下面的URL下载它并安装,然后注册。
http://ipr.toRemote Print Driver通过互联网远程打印。
注释:O扫描至云(Cloud)为Scan to cloud。
爱普生 TM-T81 用户手册说明书
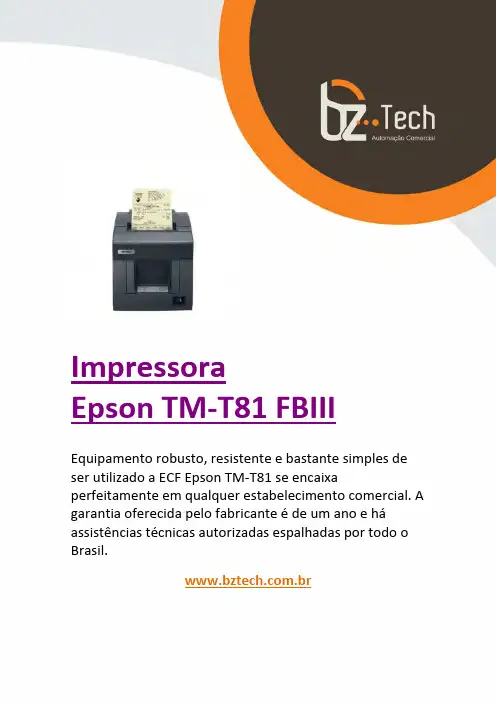
ImpressoraEpson TM-T81 FBIII Equipamento robusto, resistente e bastante simples de ser utilizado a ECF Epson TM-T81 se encaixa perfeitamente em qualquer estabelecimento comercial. A garantia oferecida pelo fabricante é de um ano e há assistências técnicas autorizadas espalhadas por todo o Brasil..brUser’s Manual411829003No part of this publication may be reproduced, stored in a retrieval system, or transmitted in any form or by any means, electronic, mechanical, photocopying, recording, or otherwise, without the prior written permission of Seiko Epson Corporation. No patent liability is assumed with respect to the use of the information contained herein. While every precaution has been taken in the preparation of this book, Seiko Epson Corporation assumes no responsibility for errors or omissions. Neither is any liability assumed for damages resulting from the use of the information contained herein.Neither Seiko Epson Corporation nor its affiliates shall be liable to the purchaser of this product or third parties for damages, losses, costs, or expenses incurred by purchaser or third parties as a result of: accident, misuse, or abuse of this product or unauthorized modifications, repairs, or alterations to this product, or (excluding the U.S.) failure to strictly comply with Seiko Epson Corporation’s operating and maintenance instructions.Seiko Epson Corporation shall not be liable against any damages or problems arising from the use of any options or any consumable products other than those designated as Original Epson Products or Epson Approved Products by Seiko Epson Corporation.EPSON is a registered trademark of Seiko Epson Corporation in Japan and other countries/regions. NOTICE: The contents of this manual are subject to change without notice.Copyright © 2009 by Seiko Epson Corporation. All rights reserved.2 TM-T81 User’s ManualImportant Safety InformationThis section presents important information intended to ensure safe and effectiveuse of this product. Read this section carefully and store it in an accessible location. Key to SymbolsThe symbols in this manual are identified by their level of importance, as definedbelow. Read the following carefully before handling the product.WARNING:Warnings must be observed carefully to avoid serious bodily injury.CAUTION:Cautions must be observed to avoid minor injury to yourself, damage to yourequipment, or loss of data.Safety PrecautionsThis section describes the warnings and cautions intended to ensure safe andeffective use of the TM-T81. Other warnings and cautions on handling of thisproduct for its safe and effective use are described in other sections of the manual.WARNING:If the TM-T81 produces smoke, a strange odor, or unusual noise, shut down the TM-T81, unplug the power cable immediately, and then contact your dealer or anEpson service center for advice. Continued use may lead to fire or electric shock.Never attempt to repair this product yourself. Improper repair work can bedangerous.Never disassemble or modify this product. Tampering with this product mayresult in injury or fire.Be sure to use the specified power source. Connection to an improper powersource may cause fire.Use the specified AC Adapter [Epson Model M159A/M159B (PS-180)] only.Connection to an improper power source may cause fire.Do not allow foreign matter to fall into the equipment. Penetration by foreignobjects may lead to fire.If water or other liquid spills into this equipment, shut down the TM-T81, unplugthe power cable of the TM-T81 immediately, and then contact your dealer oran Epson service center for advice. Continued use may lead to fire or shock.If you open the DIP switch cover, be sure to close the cover and tighten thescrew after adjusting the DIP switch. Using this product with the cover openmay cause fire or electric shock.Do not use aerosol sprayers containing flammable gas inside or around thisproduct. Doing so may cause fire.Do not connect a telephone line to the drawer kick-out connector; otherwise,the printer and the telephone line may be damaged.CAUTION:Do not connect cables in ways other than those mentioned in this manual.Different connections may cause equipment damage or fire.Be sure to set this equipment on a firm, stable, horizontal surface. The productmay break or cause injury if it falls.TM-T81 User’s Manual3Do not use this product in locations subject to high humidity or dust levels.Excessive humidity and dust may cause equipment damage or fire.Do not place heavy objects on top of this product. Never stand or lean on this product. Equipment may fall or collapse, causing breakage and possible injury.To ensure safety, unplug this product before leaving it unused for an extended period.Before moving this product, be sure to unplug it and all the cables connected to it.Restriction of UseWhen this product is used for applications requiring high reliability/safety, such as transportation devices related to aviation, rail, marine, automotive, etc.;disaster prevention devices; various safety devices, etc.; or functional/precision devices, etc.; you should use this product only after giving consideration toincluding fail-safes and redundancies into your design to maintain safety andtotal system reliability. Because this product was not intended for use inapplications requiring extremely high reliability/safety, such as aerospaceequipment, main communication equipment, nuclear power control equipment, or medical equipment related to direct medical care, etc., please make your own judgment on this product’s suitability after a full evaluation.Caution LabelsThe caution labels on the product indicate the following precautions.CAUTION:The thermal head can be very hot during printing and immediately afterprinting. Touching it may cause burns. Be sure to do cleaning and other work after the thermal head cools down. And be careful of the autocutter bladelocated close to the thermal head. For the location of the thermal head and the autocutter blade, see the illustration in “Cleaning the Thermal Head” onpage9.CAUTION:Take care not to injure your fingers on the manual cutter•When you remove printed paper•When you perform other operations such as loading/replacing roll paperPurpose of This ManualThis manual provides information to operators of the TM-T81 printer to describe basic operations to enable safe and correct use of the printer.UnpackingThe following items are included with the standard specification printer. If any item is damaged, contact your dealer.❏Printer❑Roll Paper (for operation check)❏AC adapter❑Power switch cover❏Locking wire saddle (for USB interface models)❏CD-ROM❑User’s Manual (this manual)4 TM-T81 User’s ManualTM-T81 User’s Manual 5Part Names Control PanelERROR LED: OrangeOn when the printer is offline (except during feeding using the FEED button, during test printing, and in the error state).Flashes when a paper near-end is detected, and when an error occurs.Note:When the ERROR LED is flashing with the following pattern, the roll paper is near its end. The ERROR LED goes off when the roll paper is replaced with a new one.(Power) LED: GreenOn when the printer is on.FEED buttonThis button feeds ing the Power Switch CoverThe enclosed power switch cover ensures that the power switch is not pressed accidentally. To use this cover, install it as shown in the illustration.You can turn on and off the power switch by inserting a sharp-pointed object in the holes in the power switch cover.To detach the power switch cover, use a sharp-pointed object.WARNING:If an accident occurs with the power switchcover attached, unplug the power cordimmediately. Continued use may cause fire orshock.Installing the Locking Wire SaddleFor USB interface models, the locking wire saddle is included to prevent the USBcable from falling off the connector.1.Insert the tip of the locking wire saddle into the leftmost hole in the back ofInstalling Roll Paper1.Place your fingers in the hollows under the printer cover shown in theillustration below, and pull in the direction of the arrow to open the printercover.2.Remove the used roll paper core if there is one.6 TM-T81 User’s ManualTM-T81 User’s Manual 73.Install the roll paper in the correct direction as shown in the illustration below.4.Pull out some roll paper as shown in the illustration below, and close the printer cover.5.Tear off the roll paper.TroubleshootingNo lights on the control panelCheck whether the power supply cable is correctly connected to the printer and the power outlet.ERROR LED flashing with no printing (and no paper jam)❏Check whether the roll paper cover is closed. If it is open, close it.❏Check whether the roll paper is correctly installed and any roll paper remains.❏Printing stops if the thermal head overheats and resumes automatically when it cools.❏Turn the printer off, and after 10 seconds, back on.8 TM-T81 User’s Manual Paper jam occurs CAUTION:Do not touch the thermal head because it can be very hot after printing.1.Turn the printer off, and open the printer cover.If you cannot open it, see “The roll paper cover will not open (the autocutter blade is locked)” to unlock the autocutter blade.2.Remove the jammed paper, reinstall the roll, and close the printer cover.The roll paper cover will not open (the autocutter blade is locked)The autocutter blade may be locked because of a paper jam or a foreign object. If the problem is not serious, the autocutter blade returns to its normal position automatically, but if it does not recover, follow the steps below to move its position manually.1.Turn off the printer.2.Place your fingers in the hollows next to the cutter cover, and remove the cutter cover by pulling it as shown in the illustration below.3.Turn the knob of the cutter blade in the direction of the arrow in the illustration below until you see a triangle mark in the opening in the frame.4.Attach the cutter cover.TM-T81 User’s Manual 9Cleaning the Thermal Head CAUTION:After printing, the thermal head can be very hot. Do not touch it and let it cool before you clean it. Do not damage the thermal head by touching it with your fingers or any hard object.Turn off the printer and open the printer cover. As shown in the illustration below, clean the thermal elements of the thermal head with a cotton swab moistened with an alcohol solvent (ethanol or isopropyl alcohol).Epson recommends cleaning the thermal head periodically (generally every 3months) to maintain good print quality.Setting the DIP SwitchesBe sure to turn off the printer before removing the DIP switch cover. If you remove it when the printer is turned on, the printer may be damaged because of fire or electric shock.1.Make sure the printer is turned off, and turn over the printer.2.Remove the DIP switch cover on the bottom of the printer by removing the screw as shown in the illustration.3.Set the DIP switch settings with a sharp-pointed object.4.Install the DIP switch cover, and tighten the screw.The new settings become effectiveafter the printer is turned on.10 TM-T81 User’s ManualDIP Switch TablesSpecificationsDIP switch 1 (Serial Interface)SW FunctionON OFF 1-1Data reception error Ignored Prints “?”1-2Receive buffer capacity 45 bytes 4 KB1-3Handshaking XON/XOFF DTR/DSR 1-4Data word length 7 bits 8 bits 1-5Parity check Enabled Disabled 1-6Parity selectionEvenOdd1-71-8Selects transmission speed. (See table below.)Transmission speedTransmission speed (bps)-bits per second 1-71-8Adjustable by control commands (default: 38400)ON ON4800OFF ON 9600ON OFF 19200OFFOFFDIP switch 2 (Serial Interface)SW Function ONOFF2-1Handshaking (BUSY condition)Receive buffer full Offline or Receive bufferfull2-2Reserved (Do not change)–Fixed to OFF2-32-4Selects print densitySee Table A.2-5Release condition of receive buffer BUSY (If receive buffer capacity set to 4 KB.)Releases BUSY when remaining receive buffer capacity reaches 138bytes.Releases BUSY whenremaining receive buffer capacity reaches 256bytes.2-6Reserved (Do not change)–Fixed to OFF 2-7I/F pin 6 reset Enabled Disabled 2-8I/F pin 25 resetEnabledDisabled DIP switch 1 (Other than Serial Interface)SW Function ON OFF 1-1Auto line feedAlways enabled Always disabled 1-2Receive buffer capacity45 bytes4 KB1-3~1-7Undefined ––1-8Reserved (Do not change)––DIP switch 2 (Other than Serial Interface)SWFunction ONOFF2-1Handshaking (BUSY condition)Receives buffer full Offline or receives bufferfull2-2Reserved (Do not change)–Fixed to OFF2-32-4Print density See Table A.2-5Release condition of receive buffer BUSY (If receive buffer capacity set to 4 KB.)Releases BUSY when remaining receive buffer capacity reaches 138bytesReleases BUSY whenremaining receive buffer capacity reaches 256bytes.2-62-7Reserved (Do not change)–Fixed to OFF2-8Reserved (Do not change)Fixed to ON –Table APrint density/low powerSW 3SW 4Print density (Standard)OFF OFF ON ON Print density (Darker than standard)ON OFF Print density (Darkest)OFFONPrinting method Thermal line printingDot density 203 dpi × 203 dpi [dots per 25.4 mm {1"}]Printing direction Unidirectional with friction feed Printing width 72 mm {2.83"}, 576 dot positionsCharacters per line (default)Font A, Special Font A *1: 48Font B, Special Font B *1: 64Kanji *2: 24Indic Font A *1, Indic Font B *1: Depend on font typeCharacter spacing (default)Font A: 0.25 mm (2 dots); Font B: 0.25 mm (2 dots)Special Font A *1: 0.25 mm (2 dots); Special Font B *1: 0.25 mm (2 dots)Indic Font A *1: 0.00 mm (0 dots), Indic Font B *1: 0.00 mm (0 dots)TM-T81 User’s Manual 11dpi: dots per 25.4 mm (dots per inch)*1:For South Asian font models *2:For Chinese font modelsCharacter sizeStandard/Double-height/Double-width/Double-width and Double-height Font A, Special Font A *1:1.25 × 3.00 mm/1.25 × 6.00 mm/2.50 ×3.00 mm/2.50 × 6.00 mmFont B:0.88 × 2.13 mm/0.88 × 4.25 mm/1.75 × 2.13 mm/1.75 × 4.25 mm Special Font B *1:0.88 × 3.00 mm/0.88 × 6.00 mm/1.75 × 3.00 mm/1.75 × 6.00 mmKanji *2: 3.00 × 3.00 mm/3.00 × 6.00 mm/6.00 × 3.00 mm/6.00 × 6.00 mm Indic Font A *1:Proportional × 4.00 mm/Proportional × 8.00 mm/Proportional × 4.00 mm/Proportional × 8.00 mmIndic Font B *1:Proportional × 3.00 mm/Proportional × 6.00 mm/Proportional × 3.00 mm/Proportional × 6.00 mmNumber of characters Alphanumeric characters: 95, Extended graphics: 128 × 1 page *1/128 × 11 pages *2International characters: 1*1 / 48*2Thai characters *1: 128 × 3 pages (133 character types)Vietnam characters *1: 128 × 2 pages (135 character types)Simplified Chinese characters (GB18030-2000)*2: 28553Indic characters (UTF-8)*1:Devanagari (Hindi/Marathi), Bengali, Gurumukhi, Gujarati, Oriya, Tamil, Telugu, Kannada, Malayalam, Currency Symbols (Rupee sign)Indic characters (ISCII)*1: 128 × 11 pages Printing speedNormal printing: 150 mm/s {5.91"/s} max.Page mode, Bit image printing: 150 mm/s {5.91"/s} max.Bar code, 2D code printing: 99 mm/s {3.9"/s} max.The values are when the printer prints with density "Normal" at 24 V and 25°C {77°F}.Speed is adjusted automatically depending on the voltage applied and head temperature.Paper feed speed Approx. 150 mm/s {approx. 5.91"/s} continuous paper feedLine spacing (default)3.75 mmCharacter structure *including 2-dot horizontal spacing (except for Kanji)Font A, Special Font A *1: 12 × 24Font B: 9 × 17, Special Font B *1: 9 × 24Kanji *2: 24 × 24Indic Font A *1: Proportional × 32Indic Font B *1: Proportional × 24<Thai characters size in Thai 1-pass mode (default)>Font A: 12 × 46, Font B: 9 × 35, Special Font A: 12 × 24, Special Font B: 9 × 24Roll Paper (single-ply)Size:79.5 mm ± 0.5 mm {3.13 ± 0.02"},Maximum outside diameter:83 mm {3.27"}Roll Paper spool diameter:Inside: 12 mm {0.47"}; Outside: 18 mm {0.71"} Thermal paper type Specified: NTP080-80Interface Serial (RS-232)/Parallel (IEEE1284)/USB (Full speed)/Ethernet (10/100Base-T)Receive buffer 4 KB/45 bytes Cash drawer function 2 drivesSupplied voltageDC 24 V ± 7%Current consumption (at 24V)Mean: Approx. 1.4 A Temperature Operating: 5 to 45°C {41 to 113°F}Storage:–10 to 50°C {14 to 122°F}, except for paper HumidityOperating:10 to 90% RHStorage:10 to 90% RH, except for paperOverall dimensions 145 × 144 × 189 mm {5.71 × 5.67 × 7.44"} (H × W × D)Weight (mass)Approx. 1.7 kg {3.75 lb} (Roll paper excluded)Printed in China。
爱普生TM-T81II,为票据打印增添新“微”力爱普生票据打印格式
爱普生TM-T81II,为票据打印增添新“微”力爱普生票据打印格式票据打印机打印的“小票”也变成了“长票”。
然而我们经常感觉到,打印机在打印较长的小票时,速度却没有平常快了,很耽误时间。
等待的时间过长,降低了工作效率。
要解决这种问题,缩短较长票据的打印耗时,提高打印机的打印速度无疑是最直接的解决方法。
爱普生TM-T81II微型打印机虽然也标称具有150mm/s的打印速度,但相比于其他标称同样速度的打印机,它会更快、更节省时间。
现在市面上标称具有150mm/s打印速度的微型打印机有很多,但很多的微型打印机标注的是瞬时最高速度,在打印较长的小票时,无法一直保持这种速度,因此实际需要的时间大于理论时间。
而爱普生的测定方法是持续打印一段时间后取平均值,因此爱普生TM-T81II微型打印机在打印较短的小票时会更快,在打印较长的小票时,也不会消耗更多的时间,锋利的镀铬刀头会在打印完成后瞬间完成切纸,整个过程一气呵成,更有助于商场、超市等企业提高工作效率,改善消费者购物体验。
精巧设计易用省心当然,速度并不是唯一。
对于单次打印来说,打印速度的快慢对于效率的高低确实有着直观的体现。
但是在多次打印之间的衔接和操作上,打印机本身结构设计和功能设置的优劣对于效率的高低则更有发言权。
如果打印机本身设计不合理,功能不完善,那么摆放位置将受到限制,更换纸卷时也需要更多的操作,这自然会增加工作耗时,降低效率。
爱普生TM-T81II微型打印机以其精巧的设计和优秀的性能,让使用者可以更加顺畅的操作这台打印机。
它被设计为可以适应各种摆放姿势,它的机舱开启角度超过了90°,保证在任何摆放位置都可以顺畅的开启和更换纸卷。
它的围栏设计能有效防止液体或异物进入机器,即使有少量液体不慎进入机舱内,严密的结构设计同样可以保护电路板,避免短路等故障的发生。
这款打印机还具有独特的卡纸保护功能,如果发生了可能导致卡纸的意外操作,TM-T81II内部独特的结构设计可以避免不正常切纸,保证已打印票据的完整性。
epson打印机使用方法
epson打印机使用方法EPSON打印机使用方法引言:EPSON(爱普生)是一家全球知名的打印机制造商,其打印机产品在市场上广受欢迎。
EPSON打印机拥有卓越的打印品质和高度的可靠性,使其成为家庭和办公环境中首选的打印解决方案。
本文将介绍EPSON打印机的使用方法,包括安装驱动程序、连接打印机、打印文档等操作步骤。
第一部分:安装驱动程序在使用EPSON打印机之前,需先安装相应的驱动程序。
下面是安装步骤的详细说明:步骤一:选择正确的驱动程序前往EPSON官方网站,找到与你的打印机型号相对应的驱动程序。
确保选择与你的操作系统兼容的驱动程序。
步骤二:下载驱动程序在驱动程序下载页面,点击“下载”按钮,然后选择文件保存位置。
下载完成后,找到保存的驱动程序。
步骤三:安装驱动程序双击驱动程序安装文件,按照提示完成安装过程。
可能需要重启计算机以使更改生效。
第二部分:连接打印机当驱动程序安装完毕后,需要将打印机与计算机连接起来。
以下是连接过程的详细步骤:步骤一:检查连接接口确保打印机的接口与计算机的接口匹配。
通常,EPSON打印机采用USB接口连接计算机。
步骤二:连接打印机使用打印机附带的USB线缆将打印机与计算机连接起来。
将USB 线缆一端插入打印机的USB接口,将另一端插入计算机的USB接口。
步骤三:打开打印机按下打印机的电源开关打开打印机。
请确保打印机已连接电源并打开。
第三部分:打印文档连接完成后,可以开始打印文档。
以下是打印文档的步骤:步骤一:选择文档打开要打印的文档,例如Microsoft Word文档、PDF文件等。
步骤二:选择打印菜单在文档窗口中,点击“文件”菜单,然后选择“打印”选项。
或者使用快捷键“Ctrl+P”。
步骤三:选择打印机在打印设置界面,选择EPSON打印机作为默认打印设备。
如果有多台打印机连接到计算机上,确保选择正确的打印机。
步骤四:设置打印参数根据需求,设置打印参数,例如打印份数、纸张大小、打印质量等。
EPSON爱普生TM-T81热敏票据打印机规格介绍
概述:•独特的票据顶部省纸设计,更节约纸张•标配USB口或串口或并口•高耐用性,切刀寿命可达150万次•贴心设计,防水防异物•人性化设计,操作简便Epson TM-T81热敏票据打印机,专为餐饮、连锁、零售、医疗、物流等行业用户度身定制,无论在耐用性、易用性、实用性上较前代产品都有明显提升,更加贴近行业需求。
Epson TM-T81集前代产品之大成,五大优势尽显,性价比超高。
如此用心杰作,当然值得选择!1级耐用,更节约纸张Epson TM-T81独特的票据顶部省纸设计,使打印出票据的上边距,比同类产品打印出的票据少近8mm,更加节约纸张。
2重保证,防水防异物贴心围栏设计,防异物落入;内部防护设计,让水滴远离重要器件。
3项优势,切刀寿命长经镀铬处理的自动切刀,能处理高达150万次的切割,并防止灰尘粘附。
4管齐下,四个标配口配有USB接口、以太网口、串口、并口,操作更便捷。
5星易用,纸卷易安装纸仓盖开口角度大,安装卷纸安全、方便!规格:打印方式Thermal line printing打印字符字符9×17 / 12×24列数64 / 48字符尺寸(mm)0.88 (W)×2.13 (H) / 1.25 (W) ×3.00 (H)字符集95 Alphanumeric, 48 International, 128×11 GraphicTraditional / Simplified Chinese, Thai, Japanese, KoreanBar code: UPC-A, UPC-E, JAN8 (EAN), JAN13 (EAN), CODE39, CODE93, CODE128, ITF, CODABARPDF417, QR codeCPI 23.0cpi / 17.0cpi接口RS-232, Bi-directional parallel, USB, Ethernet接收缓冲 4 KB or 45 bytes打印速度Max. 150 mm / sec.纸张尺寸(mm)Roll paper: 79.5 ±0.5 (W) x dia. 83.0厚度(mm)0.06 to 0.07电压24VDC±7%耗电Approx. 1.4A(mean)钱箱驱动 2 drivers可靠性MTBF 360,000 hoursMCBF 52,000,000 lines外观尺寸(mm)144(W)×189(D)×145(H)重量 1.7kg电磁兼容性VCCI class A, FCC class A, CE marking, AS / NZS 3548 class B电源PS-180选件DF-10 (affixing tape)安全标准UL / CSA / FCC ClassA/CE (EN60950)文章来源于中国商业信息网: 原文地址:/detail/77-9341.html。
APD_T81_TM_SC
打印机驱动说明说明 备注 驱动名 EPSON TM-T81 Receipt3版本5.00打印机字体 FontA11 FontA12 FontA21 FontA22 FontA24FontA42 FontA44 FontA48 FontA84 FontA88FontB11 FontB12 FontB21 FontB22 FontB24FontB42 FontB44 FontB48 FontB84 FontB88・代码页 16(WPC1252)・国际文字设定为简体中文・指定字体旋转时不可使用・缩小指定,有水印(WaterMark)时不可使用FontA11[255] FontA12[255] FontA21[255] FontA22[255] FontA24[255] FontA42[255] FontA44[255] FontA48[255] FontA84[255] FontA88[255]FontB11[255] FontB12[255] FontB21[255] FontB22[255] FontB24[255] FontB42[255] FontB44[255] FontB48[255] FontB84[255] FontB88[255] ・代码页 255・国际文字设定为简体中文・指定字体旋转时不可使用・缩小指定,有水印(WaterMark)时不可使用Chinese18030 ・代码页 16(WPC1252)・国际文字设定为简体中文・指定字体旋转时不可使用・缩小指定,有水印(WaterMark)时不可使用注)对GB18030,由UI指定的TrueType字体可替换为此字体。
GB18030的打印机字体有9.5、19、38、76四种尺寸。
替换前的TrueType字体的尺寸按以下方法替换打印机字体。
TrueType字体尺寸 >打印机字体尺寸1以上19未满 > 按9.5号尺寸替换19以上38未满 > 按19号尺寸替换38以上76未满 > 按38号尺寸替换76以上 > 按76号尺寸替换※替换后可能发生字间距变大或文字重叠现象。
- 1、下载文档前请自行甄别文档内容的完整性,平台不提供额外的编辑、内容补充、找答案等附加服务。
- 2、"仅部分预览"的文档,不可在线预览部分如存在完整性等问题,可反馈申请退款(可完整预览的文档不适用该条件!)。
- 3、如文档侵犯您的权益,请联系客服反馈,我们会尽快为您处理(人工客服工作时间:9:00-18:30)。
EPSON TM-T81 网络打印机驱动使用手册
【驱动名称】
千里马餐饮管理系统V7.0及V8.0 厨房打印EPSON TM-T81 网络打印机驱动
【驱动版本】
版本日期:2011-05-20
【适用版本】
V7餐饮2009年第四季度版本及以上版本
V8餐饮2009年第四季度版本及以上版本
【原理概述】
与以往使用的EPSON系列串口打印机不同,EPSON 网络打印机自带网络接口,可以直接接入局域网,无须使用N-Port、Moxa等连接到厨房打印服务器。
此驱动在不改动餐饮主体程序的前提下,只需设置好程序中的打印机端口和实际打印机IP地址的对应关系,即可直接向网络打印机发送指令的方式来完成打印工作。
【设置步骤】
1、将打印机和厨房打印服务器连接到同一局域网;
2、规划并设置各网络打印机的IP地址;
a)打印测试页(打开电源时按进纸键),按测试页上的IP地址将厨房打印服务器和打
印机设在同一网段;
b)在厨房打印服务器上,从浏览器登录各打印机的设置页面;
c)在【Configuration-TCP/IP】页面重新设置打印机的IP并重新启动打印机(图1)。
图1
3、安装打印机驱动;
a)执行APD_411SC_T81.exe程序,按提示进行操作;
b)在如图2界面时,点击Add进入图3界面,输入Printer Name,且Port Type选择
如图3,然后点Next,进行图4界面,输入打印机IP,然后继续按提示进行操作即
可;
图2
图3
图4
4、设置打印机端口和打印机IP地址的对应关系(重要!!!);
a)安装ADKT81E1.00目录的setup.exe程序;
b)打开安装好的程序SetupPOS Ver2.00.exe,设置打印机端口和打印机IP地址的对应
关系(图5、图6、图7);
图5
图6
图7
5、测试打印机端口,如图8、图9;
a)在厨房打印机前方打钩,选择OPOSDRV.dll文件,如图8;
b)点击设置,进入图9界面,选择打印机端口,点测试,结果如图9所示;
图8
图9。