安装Red Hat Enterprise Linux
Red Hat Enterprise Linux 5 安装教程

Red Hat Enterprise Linux 5 安装教程 /u3/93926/showart_1873407.htmlRedhat 5 光盘安装我们选用RedHat Enterprise Linux 5这个目前最流行的Linux发行版作 为我们的Linux入门。
RedHat Enterprise Linux 5可以说是相当成功的一个产品,正规的软件 销售部门和Redhat官方网站都可以购买。
1.1.1 安装的基础知识一、了解硬件需求如果你有一个老式的系统,或者你的系统是DIY的,硬件兼容性在这些情况 下就显得特别重要。
RedHat Enterprise Linux 5 应该与在最近两年内厂家制 作的系统内的多数硬件兼容。
然而,硬件的技术规范几乎每天都在改变,因此很 难保证你的硬件会百分之百地兼容。
最新的硬件支持列表可在以下网址中查到: http:///hcl/。
这个列表非常的长,可能会令你头晕, 比较简单但是不是非常准确的评定方法就是:只要你的机器能够正常安装Win98、WinXP或者Win2000,你的机器应该也能够正常安装RedHat Enterprise Linux 5。
当然了,在Linux中有一个比较有趣的特点,一般你的机器硬件 如果是市面上最最新的,那么可能对于Linux来说这并不见得是个好消息,因 为针对最新硬件的驱动程序可能还没有人写出来呢,除非你打算为自己来写一 个。
二、选择安装方式及安装类型几乎每一个操作系统(OS)都使用磁盘分区(disk partitions),RedHat En terprise Linux 5 也不例外。
当你安装 RedHat Enterprise Linux 5 时, 你可能也得使用磁盘分区。
如果 RedHat Enterprise Linux 5 将会与另一个 OS 共享你的系统,你 将需要确定在这次安装中你的硬盘驱动器上有足够的可用磁盘空间。
Red Hat Enterprise Linux 5.4安装(截图)说明
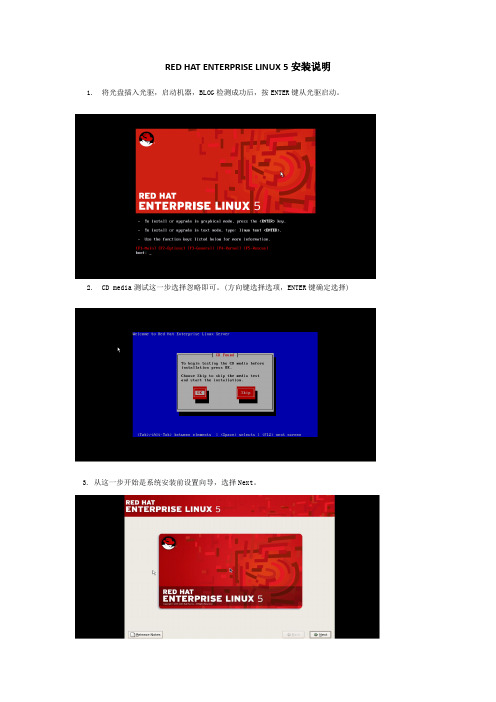
RED HAT ENTERPRISE LINUX 5安装说明1.将光盘插入光驱,启动机器,BLOG检测成功后,按ENTER键从光驱启动。
2.CD media测试这一步选择忽略即可。
(方向键选择选项,ENTER键确定选择)3. 从这一步开始是系统安装前设置向导,选择Next。
4.系统语言设置。
选择第一项简体中文。
注意,一定要选择’简体中文’.5. 键盘设置。
选择美国英语式键盘6. 输入安装号码2515dd4e215225dd 。
7. 硬盘分区设置。
硬盘分区选择‘建立自定义分区结构’,然后选择‘下一步’开始自定义硬盘分区.8. 如果硬盘已有默认分区,则删除这些分区至下图所示。
9. 硬盘分区----根目录设置。
点击新建开始编辑分区(如下图),挂载点选择‘/’,文件系统类型选择‘ext3’,大小输入40960(即4G),其他大小选项选择‘指定空间大小’。
10.上一步中编辑分区完成后,点击确定即可完成一个分区的编辑。
如下图所示。
11.硬盘分区----虚拟内存设置再次点击‘新建’到添加分区页面,如下图文件系统类型选择‘swap’,大小的值设置为与本机物理内存一样大即可,其他大小选项选择‘指定空间大小’,奔突设置的机器的物理内存为4G12.硬盘分区---user目录设置再次点击‘新建’进入添加分区页面(如下图)。
挂载点选择‘/usr’,文件系统类型选择‘ext3’,大小输入要设置的该分区的容量,其他大小选项选择‘使用全部可用空间’。
13. 硬盘分区完成根目录,虚拟内存,user目录分区配置完成后会得到如下图所示页面显示所有分区的信息。
核对分区信息如果分区无误,点击‘下一步’。
14.引导装载程序配置这一步使用默认选项,无须做修改,直接点击‘下一步’。
15.网络设置15.1 网络设置–接口设置点击‘编辑’进入编辑接口界面,选中Enable Ipv4 support,选择Manual configuration,IP Address 填写主机IP,Prefix添加子网掩码。
Red Hat Enterprise Linux 7.X LE ALT 安装指南说明书
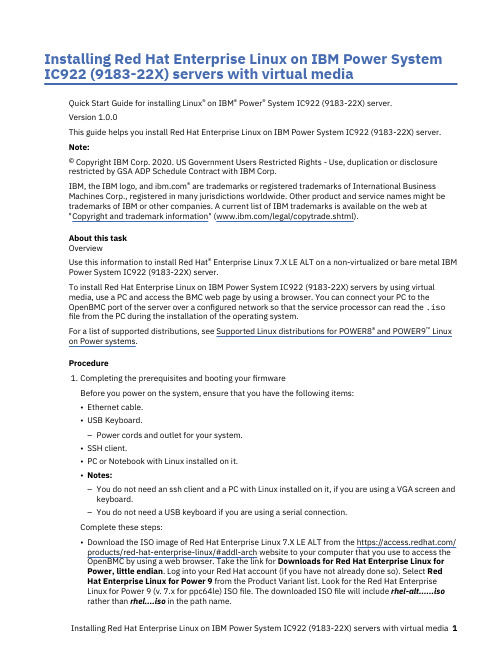
Installing Red Hat Enterprise Linux on IBM Power System IC922 (9183-22X) servers with virtual mediaQuick Start Guide for installing Linux® on IBM® Power® System IC922 (9183-22X) server.Version 1.0.0This guide helps you install Red Hat Enterprise Linux on IBM Power System IC922 (9183-22X) server.Note:© Copyright IBM Corp. 2020. US Government Users Restricted Rights - Use, duplication or disclosurerestricted by GSA ADP Schedule Contract with IBM Corp.IBM, the IBM logo, and ® are trademarks or registered trademarks of International BusinessMachines Corp., registered in many jurisdictions worldwide. Other product and service names might be trademarks of IBM or other companies. A current list of IBM trademarks is available on the web at"Copyright and trademark information" (/legal/copytrade.shtml).About this taskOverviewUse this information to install Red Hat® Enterprise Linux 7.X LE ALT on a non-virtualized or bare metal IBM Power System IC922 (9183-22X) server.To install Red Hat Enterprise Linux on IBM Power System IC922 (9183-22X) servers by using virtualmedia, use a PC and access the BMC web page by using a browser. You can connect your PC to theOpenBMC port of the server over a configured network so that the service processor can read the .iso file from the PC during the installation of the operating system.For a list of supported distributions, see Supported Linux distributions for POWER8® and POWER9™ Linux on Power systems.Procedurepleting the prerequisites and booting your firmwareBefore you power on the system, ensure that you have the following items:•Ethernet cable.•USB Keyboard.–Power cords and outlet for your system.•SSH client.•PC or Notebook with Linux installed on it.•Notes:–You do not need an ssh client and a PC with Linux installed on it, if you are using a VGA screen andkeyboard.–You do not need a USB keyboard if you are using a serial connection.Complete these steps:•Download the ISO image of Red Hat Enterprise Linux 7.X LE ALT from the https:///products/red-hat-enterprise-linux/#addl-arch website to your computer that you use to access theOpenBMC by using a web browser. Take the link for Downloads for Red Hat Enterprise Linux forPower, little endian. Log into your Red Hat account (if you have not already done so). Select RedHat Enterprise Linux for Power 9 from the Product Variant list. Look for the Red Hat EnterpriseLinux for Power 9 (v. 7.x for ppc64le) ISO file. The downloaded ISO file will include rhel-alt......isorather than rhel....iso in the path name.•If your system belongs in a rack, install your system into that rack. For instructions, see IBM Power Systems information at https:///support/knowledgecenter/POWER9/p9hdx/POWER9welcome.htm.•Make one of the following connections:–Connect an Ethernet cable to the dedicated BMC Ethernet port that is located close to the USB 3.0 port and it is labeled M. Connect the other end to your PC or Notebook which you use to configure the IP address.–You can also connect to the serial port of the server by using a serial connection.•Attach the USB to serial (RS232) adapter cable to the IPMI serial 9-pin D-shell connector on the Power system.•Attach USB connection to USB port on either PC or Notebook.•Open a terminal emulator program such as PuTTY or minicom.•Set the communications to use the following options:–115200 baud rate–Data bits of 8–Parity of None–Stop bits of 1•Connect the power cords to the system and plug them into the outlets.At this point, your firmware is booting. Wait for the green LED on the power button to start flashing, indicating that it is ready to use. If your system does not have a green LED indicator light, then wait 1 -2 minutes.2.Configuring the IP addressNote: You can use either a serial connection or a keyboard and monitor to connect to the BMC. After the IP details are configured, you can use SSH connection. For more information, see Managing BMC-based systems.To set up or enable your network connection to the BMC firmware, use the Petitboot bootloader interface. Follow these steps:a.Your system will power on to the Petitboot bootloader menu. This process usually takes about 1 - 2minutes to complete, but might take 5 - 10 minutes on the first boot or after a firmware update. Do not walk away from your system! When Petitboot loads, your monitor becomes active and you will need to push any key to interrupt the boot process.b.At the Petitboot bootloader main menu, select Exit to Shell.c.Program your BMC IP address by running the following commands:Note: The shared BMC port is located near to the USB 3.0 port and it is labeled 1 and the dedicated BMC port is located next to the shared BMC port and it is labeled M.1)Set the mode to static by running this command: ipmitool lan set 2 ipsrc static2)Set your IP address by running this command: ipmitool lan set 2 ipaddr ip_addresswhere ip_address is the static IP address that you are assigning to this system.3)Set your netmask by running this command: ipmitool lan set 2 netmasknetmask_address where netmask_address is the netmask for the system.4)Set your gateway server by running this command: ipmitool lan set 2 defgw ipaddrgateway_server where gateway_server is the gateway for this system.5)For the shared BMC port run the following command: Run ipmitool lan print 16)For the dedicated BMC port run the following command: Run ipmitool lan print 2d.To reset your firmware, run the following command: ipmitool mc reset cold.e.You should be able to ping the BMC now. If your ping does not return successfully within areasonable amount of time (2 - 3 minutes), try these additional steps:1)Power your system off with this command from the petitboot shell: poweroff2)Unplug the power cords from the back of the system. Wait 30 seconds and then apply power toboot BMC.3.Creating a bootable virtual mediaa.Open a supported web browser. In the address bar, enter the IP address of the BMC that you wantto connect to. For example, you can use the format https://<BMC IP> in the address bar of the web browser.b.From the OpenBMC logon window, enter the Host address of the BMC and the username andpassword that is assigned to you.c.Then select Server control → Virtual Media to network-attach the ISO image to the IBM PowerSystem IC922 (9183-22X) server. After clicking Start, the ISO is available to the server to start the operating system installation process.4.Powering on your server by using a PC or NotebookNote: After your system powers on, the Petitboot interface loads. If you do not interrupt the boot process by pressing any key within 10 seconds, Petitboot automatically boots the first option.To power on your server from a PC or Notebook that is running Linux, follow these steps:a.Connect an Ethernet cable from the BMC port to a PC or Notebook. Or you can also make sure yourPC or Notebook is on the same network as the BMC firmware.b.Open a terminal program on your PC or Notebook.c.Log in to the BMC by running the following commands.ssh root@<BMC server_ip_address>root@<BMC server password>where BMC server_ip_address is the IP address of the BMC and BMC server password is thepassword to authenticate.Note: The default username is root and the default password is 0penBmc (where, 0penBmc is using a zero and not a capital O).d.To power on your server, run the following command:$ root@<BMC server_ip_address>:~# obmcutil powerone.Connect to OS console and use the default password 0penBmc.ssh -p 2200 root@<BMC server_ip_address>root@where BMC server_ip_address is the IP address of the BMC and BMC server password is thepassword to authenticate.5.Configuring PetitbootAfter the system powers on, the Petitboot bootloader scans local boot devices and network interfaces to find boot options that are available to the system.a.After you start the system, Petitboot displays the virtual media boot device, and you can select theboot entry, but do not start the installation. If you start the installation, you might not be able to finish the installation and the system might show errors similar to the following string:dracut-initqueue[3537]: Warning: dracut-initqueue timeout - starting timeoutscriptsNote: Select Rescan devices if the virtual media boot device does not appear.b.Record the UUID of the virtual media boot device. The UUID of the virtual media boot device in thefollowing example is 2018-10-10-22-13-55-00.Petitboot (v1.11) 9183-22X 78002BA____________________________________________________________________________________[USB: sdc / 2018-10-10-22-13-55-00]Rescue Red Hat Enterprise Linux Alternate Architectures system (64 bit keTest this media & Install Red Hat Enterprise Linux Alternate Architectures* Install Red Hat Enterprise Linux Alternate Architectures 7.6 (64 bit kernelSystem informationSystem configurationSystem status logLanguageRescan devicesRetrieve config from URLPluginsExit to shell___________________________________________________________________________________Enter = accept, e=edit, n=new, x=exit, l=language, g=log, h=helpc.Select Install Red Hat Enterprise Linux Alternate Architectures 7.6 (64 bit kernel) and press e(Edit) to open the Petitboot Option Editor window.d.Move the cursor to the Boot arguments section and add the following information: inst.textinst.stage2=hd:UUID=your_UUID where your_UUID is the UUID that you recorded.Petitboot Option Editor_______________________________________________________________________Device: ( ) sda2 [3cb1868c-7fd4-466a-a7b0-70942ca452cd](*) sdb1 [2018-10-10-22-13-55-00]( ) Specify paths/URLs manuallyKernel: /ppc/ppc64/vmlinuzInitrd: /ppc/ppc64/initrd.imgDevice tree:Boot arguments: ro inst.text inst.stage2=hd:UUID=2018-10-10-22-13-55-00[ OK ] [ Help ] [ Cancel ]________________________________________________________________________tab=next, shift+tab=previous, x=exit, h=helpe.Select OK to save your options and return to the Main menu.f.Verify that Install Red Hat Enterprise Linux Alternate Architectures 7.6 (64 bit kernel) isselected and then press Enter to begin your installation.pleting your installationAfter you select to boot the Red Hat Enterprise Linux 7.X LE ALT installer, the installer wizard walks you through the steps.a.Follow the installation wizard for Red Hat Enterprise Linux to set up disk options, your usernameand password, time zones, and so on. The last step is to restart your system.b.After the system restarts, Petitboot displays the option to boot the Red Hat Enterprise Linux releasenumber. Select this option and press Enter.Note: Be sure to check for firmware updates. See https:///support/knowledgecenter/ POWER9/p9ei8/p9ei8_fixes_kickoff.htmWhat to do nextMore informationFor more information, see the following resources:•IBM Knowledge Center at https:///support/knowledgecenter/.•IBM Power System IC922 (9183-22X) server Redbook at /redpapers/ pdfs/redp5584.pdf.•The Linux on Power developer portal at Linux on Power developer portal.。
Red+Hat企业版Linux+4.6的安装
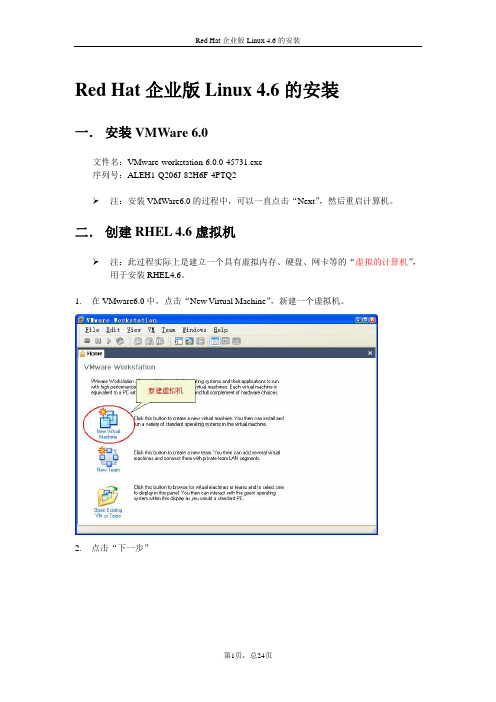
Red Hat企业版Linux 4.6的安装一.安装VMWare 6.0文件名:VMware-workstation-6.0.0-45731.exe序列号:ALEH1-Q206J-82H6F-4PTQ2注:安装VMWare6.0的过程中,可以一直点击“Next”,然后重启计算机。
二.创建RHEL 4.6虚拟机注:此过程实际上是建立一个具有虚拟内存、硬盘、网卡等的“虚拟的计算机”,用于安装RHEL4.6。
1.在VMware6.0中,点击“New Virtual Machine”,新建一个虚拟机。
2.点击“下一步”3.选择“Typical”(典型配置),然后点击“下一步”4.选择“Linux”操作系统,且Linux的版本为“Red Hat Enterprise Linux 4”,然后点击“下一步”。
注:步骤4的选择不能错误,否则在后续安装过程中会出现“无法找到硬盘”的问题。
5.设置RHEL4.6的虚拟机文件的存放位置(一般使用剩余空间较大的硬盘存放)6.选择“host-only”联网模式7.设置磁盘空间大小,如12G8.点击“完成”后的界面9.由于现在的计算机通常没有安装软驱,因此需要删除软驱。
删除软驱的过程:(1)点击“VM”菜单中的“Settings….”(2)选择“Floppy”(软驱),然后按“Remove”(删除)按钮。
(3)点击“OK”10.RHEL4.6虚拟机安装完成后的效果图三.安装RHEL4.61.下载RHEL4.6的DVD光盘,文件名为:r46asx86-xiso;大小为:2.27G。
2.点击“CD-ROM”(光驱)3.插入RHEL4.6的DVD光盘:r46asx86-xiso4.点击绿色“三角形”按钮,开机(相当于按真实计算机上的电源开关)5.开机后,进入RHEL4.6的安装界面,将鼠标点入虚拟机的内部,然后按“回车”键。
注:释放鼠标的方法:按Ctrl+Alt键6.按“Skip”键,跳过“光盘”检测7.点击“Next”按钮8.选择安装过程的语言为“简体中文”,然后点击“Next”按钮9.在“键盘配置”页面,点击“下一步”按钮10.磁盘分区设置,选择“自动分区”,点击“下一步”按钮11.在弹出的“警告”对话框中,点击“是”按钮12.选择“保存所有分区,使用现有的空闲空间”;点击“下一步”按钮13.接受默认磁盘设置,点击“下一步”按钮14.在“引导装载程序配置”页面,点击“下一步”按钮15.在“网络配置”页面,点击“下一步”按钮16.在“防火墙配置”页面,点击“下一步”按钮最好将默认语言设置为English(USA),点击“下一步”按钮18.在“时区选择”页面,点击“下一步”按钮19.设置root(根)用户的口令(最少6个字符),点击“下一步”按钮钮21.在“选择软件包组”页面,选择“全部”,单击“下一步”按钮22.在“即将安装”页面,点击“下一步”按钮23.在“安装软件包”页面,等待……….24.安装完成后,点击“重新引导”按钮25.在“Welcome”页面,点击“Next”按钮26.在“License Agreement”页面,点击“Next”按钮27.在“Date and Time”页面,点击“Next”按钮28.在“Display”页面,点击“Next”按钮29.在“System User”页面,创建一个用户(如xiaoyk),并设置该用户的登录口令30.在“Sound Card”页面,点击“Next”按钮31.在“Additional CDs”页面,点击“Next”按钮32.在“Finish Setup”页面,点击“Next”按钮33.进入“用户登录”界面34.安装完成。
安装RedHat_Enterprise_Linux

虚拟机安装RedHat Enterprise Linux Server 6操作系统过程一、RedHat Enterprise Linux Server 6镜像文件二、安装步骤如下:1、在虚拟机中新建虚拟机,磁盘选择IDE的,选择SCSI会在后面报找不到磁盘,给8G就行,内存建议给512MB以上,(不然的话就可能安装进入了字符界面安装了,只能安装最基本服务了,就没有图像界面了)我这里给了780MB,(现在给的大点,等安装完成后可以调低)打开虚拟机电源,回车即可,选择第一项:如图所示:按提示选择安装类型,这里我选择第一项安装系统,进入图形安装界面2、安装程序检测系统:3、检验光盘:为了节省时间,一般不会测试:按tab键切到Skip选项,按Enter键进入下一页4、安装欢迎界面:点选Next5、选择安装过程中使用的语言:首先安装程序会问您安装GUN/Linux时使用那种语言来显示信息,您在此选择的语言也会成为安装后RedHat Enterprise LinuxServer 6.0的缺省语言,RedHat Enterprise Linux Server 6.0对中文的支持算是不错,您可以选择Chinese(Simplified)简体中文,按Next键进入下一步安装界面。
6、为系统选择键盘:不同国家键盘的排列可能会有少许分别,对一般中国、香港、澳门、台湾的用户来说,请选择【美国英语式】,按【下一步(N)】键进入下一步安装界面;7、选择系统安装的设备:Rhel6可以直接支持安装在本地磁盘、网络磁盘、SAN等设备上,如选择指定的设备的话,则会出现类似以下界面的提示,显示所有已连接的设备供您选择。
8、安装程序提示分区表无法读取,需要创建分区:9、设置主机名和网络:选择安装程序自动分割硬盘或配置好启动管理器后,接着来到配置网络的界面;特别说明:rhel6安装支持直接设定网络IP等信息,已方便安装后马上使用网络,也可以先不设置,直接下一步;10、时区选择:为了方便日常日常操作,您需要配置您所在地区的时区。
Red Hat Enterprise Linux安装和基本命令
Chmod命令示范
1.将档案 file1.txt 设为所有人皆可读取: chmod ugo+r file1.txt 2.将档案 file1.txt 设为所有人皆可读取: chmod a+r file1.txt 3.将档案 file1.txt 与 file2.txt 设为该档案拥有者,与其所 属同一个群体者可写入,但其他以外的人则不可写入: chmod ug+w,o-w file1.txt file2.txt 4.将 ex1.py 设定为只有该档案拥有者可以执行: chmod u+x ex1.py 5.将目前目录下的所有档案与子目录皆设为任何人可读 取: chmod -R a+r *
3.把文件转换成raid格式
把A盘的剩余分区为raid文件
把B盘的所有空间分为raid文件
把C盘的所有空间分为raid文件
创建RAID设备
创建RAID 5分区
GRUB
软件定制
定制需要的软件
作业1
截图: 1.虚拟机上添加3块8G的硬盘( ide接口或者是scsi接口) 2.使用lvm和raid分区,划分/、 /boot和swap分区 3.最后安装好的截图
Find命令示范
范例: 将目前目录及其子目录下所有延伸档名是 c 的档案列出来。 # find . -name "*.c" 将目前目录其其下子目录中所有一般档案 列出 # find -ftype f 将目前目录及其子目录下所有最近 20 分 钟内更新过的档案列出 # find . -ctime -20
CP命令示范
将档案 aaa 复制(已存在),并命名为 bbb: cp aaa bbb 将所有的C语言程式拷贝至 Finished 子 目录中: cp *.c Finished
Red Hat Enterprise Linux 5.3linux系统安装(嵌入式平台)
Red Hat Enterprise Linux 5.3linux系统安装把机器的启动方式改为:光驱启动。
1.boot:linux xdriver=vesa回车enter2.Choose a Language:What language would you like to use during the installationprocess? Chinese(Simplified)(简体中文)选择语言:简体中文,OK3.弹出Language Unavailable窗口:OK4.Keyboard Type:选择键盘:us(缺省美国英语式),OK5.Installation Method:选择Local CDROM,OK6.弹出No driver found:选择Select driver,回车7.弹出Select Device Driver to load:选择USB Mass Storage driver for linux(usb-storage),OK8.CD Found:选择Skip9.下一步10.弹出安装号码输入框,输入:4cb1-7df3-4d3a-837d11.安装新系统这里直接点下一步,12.选择硬盘分区方式:选建立自定义的分区结构,next13.先把挂载组删掉,然后选中需要进行分区的/dev/sda,点击“新建”会弹出分区窗口,在此窗口内选择挂载点。
在下拉菜单中可以选出分区相应目录,文件类型默认为ext3。
注意:只有swap区需要在文件类型下拉菜单中选择,它不挂在ext3下。
制定目录最终大小:以2G内存,250G硬盘为例挂载点大小文件系统类型/boot 200M 固定大小强制主分区 ext3/ 4倍内存? 20480M 固定大小强制主分区 ext3Swap 4倍内存 8192M 固定大小强制主分区swap/usr 10G 10240M 固定大小 ext3/opt 10G 10240M 固定大小 ext3/var 4G 8192M 固定大小 ext3/users 剩余磁盘使用剩余全部可用空间 ext314.分区确认好后点击,“下一步”(无)15.选GRUB引导装载程序将会被安装在/dev/hda上,下一步16.网络设备:eth0,eth1配置网口时先点引导激活复选框再点编辑,取消DHCP,IPV6支持取消 Enable Ipv6 support选择 Enable Ipv4 support选择 manual configuration分别配置eth0、eth1的IP地址和子网掩码13.手工设置主机名,如:kf5,其它设置不填(网关、主从DNS)下一步,出现数据错误,“没指定‘网关’字段”点继续,出现“未指定‘主DNS’字段”错误,点“继续”。
Red_Hat_Linux的安装
Red Hat Linux的安装✧工作情境不论是实际的应用,还是学习了解Linux操作系统,都离不开Linux操作系统。
如何在计算机上安装Linux操作系统,这就是本章节的内容。
学习的过程是一个不断探索、不断提高的过程。
使用VMWare Workstation虚拟机软件安装、练习应用Linux操作系统是一个理想的选择。
其应用的过程如同一台实物计算机,但又具有备份还原的功能,该软件嵌套安装在一台计算机上,又可同时运行数台虚拟机,构建一个对立的网络体系。
本章节通过在VMWare Workstation虚拟机上安装一个Red Hat Enterprise Linux 5版本服务器为实例,说明Linux操作系统的安装方法。
采用的Linux系统安装光盘为DVD格式的Redhat.Enterprise.Linux.V5.UPDATE.3.DVD-HOTiSO.iso。
✧学习目标在这个章节学习中,不仅要能够掌握Linux操作系统的安装细节,同时要理解硬盘的分区模式与常见的操作系统所对应使用的文件系统。
能够懂得不同的硬盘接口类型与Windows、Linux 操作系统所采用的硬盘分区命名规则。
懂得常见的安装Linux系统的分区方案;能够理解防火墙与SELinux的应用对Red HatLinux系统的影响。
了解多重启动管理器的功能。
懂得在实际应用中正确登录Linux系统应使用的账号类型,能够调整Linux系统默认启动运行界面。
✧考核评价通过这个章节的学习,应该能够独立安装Linux操作系统;能够调整Linux默认启动运行界面为字符界面;能够启用或关闭防火墙和SELinux。
3.2.1 Red Hat Enterprise Linux 介绍Red Hat Enterprise Linux(缩写为RHEL)是Red Hat公司主要针对企业服务器设计的一套企业级Linux 操作系统,由Red Hat公司提供技术支持。
目前,Red Hat Enterprise Linux已获得大多数软、硬件厂商的认证和支持,如IBM、Dell、HP、Lotus、DB2、Novell、Oracle、Softimage、Sun和Legato等。
Red_Hat_Enterprise_Linux_5_安装手册
Red Hat Enterprise Linux 5 安装手册虚拟机设置在VMware Workstation上安装RHEL5,首先新建虚拟机,建立步骤如下:Step 根据配置选择建立虚拟机的类型,在此我们选择”Typical”。
Step 选择系统安装文件的位置。
Step ♦选择操作系统的类型和版本信息。
Step ⌧为虚拟机命名,确认虚拟机文件的存放路径。
Step ⍓选择虚拟机在本机硬盘上的文件分块方式。
Step 可以定制其它硬件,比如在step 中没有指定镜像文件的位置可以在此定位。
Step 进行完成前的硬件定制,例如:在此定位镜像文件的位置,点击OK后返回Step 。
Step 点击Step 中的Finish,完成虚拟机的设置。
在虚拟机中安装RHEL5具体安装及基础设置步骤:Step1 启动安装程序选择要安装的虚拟机如图0所示,点击后看到如图1所示的画面。
图0 启动虚拟机图1安装引导界面安装界面上有3个选项供用户选择:(1)按<Enter>键,直接进入图形模式(graphical mode)安装模式;(2)“boot:”之后输入:“Linux text”,然后按<Enter>键,则以文本模式(text mode)安装;(3)用下面以红色字体列出的功能键(function keys)来获得更多信息的方式安装。
这里选择图形化模式来安装,直接按<Enter>键。
Step2 CD媒体检测从开始安装后,系统一般要花费一段时间来检测计算机的各种硬件配置,当系统识别相应的设备后,出现如图2所示界面。
图2 CD检测选择“Skip”,按<Enter>键。
Step3 欢迎界面该界面如图3所示,单击“Next”。
图3 欢迎界面Step4 语言选择该界面如图4所示,我们在此选择“Chinese(Simplified)(简体中文)”,单击“Next”。
图 4Step5 键盘配置该界面如图5所示,默认为“美国英语式”,正是我们所需要的选项,单击“下一步(N)”。
RedHat Enterprise Linux 5.2系统安装
RedHat Enterprise Linux 5.2 i386 操作系统的安装1,硬件环境说明目前已经安装过的的机型有:DELL 755等系列微机,HP xw4400,4600 ,7800 等系列工作站,HP DL380 ,580系列服务器。
2,RedHat Enterprise Linux 5.2 i386 操作系统的安装2.1启动RedHat Enterprise Linux 5.2 i386安装光盘插入RHEL5-i386 DVD 光盘并选择从光盘启动,出现蓝色CD Found画面,选择Skip,等待几十秒后,可以看到RedHat Enterprise Linux的初始画面,选择Next ,进入下一步。
2.2选择语言和地区选中Chinese(Simplified) (简体中文),点击Next ,进入下一步。
2.3选择键盘类型默认为美国英语式,直接点击下一步。
系统会出现对话框,提示输入安装号码,选择跳过,再次出现对话框时时,仍选择跳过,出现警告画面,是否要初始化这个驱动器并删除所有数据,选择是,进入下一画面。
2.4分割硬盘以及格式化硬盘首先选择在选定磁盘上删除所有分区并创建默认分区结构,并在左下角检验和修改分区方案选项中打勾,然后选择下一步,在出现的警告对话框中,选择是,进入下一画面。
在这里你可以看到硬盘原有的分区大小,点击删除安钮,把原有分区删除,重新创建,过程如下:2.4.1创建根区点击新建,挂接点:选择“/”文件系统类型:选择默认“ext3”允许的驱动器:选择要分区的硬盘,如果有多块硬盘时需要选择,一块硬盘不需要选择。
其他大小选项:选中指定空间大小后面输入分区大小,选中强制为主分区2.4.2创建交换分区在创建swap分区时,交换分区挂载点不选文件系统类型:选“swap”,输入大小,一般为内存的两倍,可根据硬盘大小放大到10G。
2.4.3创建/usr挂接点:选择“/usr”文件系统类型:选择默认“ext3”其他大小选项:选中指定空间大小后面输入分区大小40G,不需要选择强制为主分区2.4.4最后创建/usr/users,分区挂载点没有需输入/usr/users,文件系统类型:选择默认“ext3”其他大小选项:选中指定空间大小后面选择使用全部可用空间/ 10G/usr 40Gswap 10G/usr/users 剩余全部后面创建的数据库用户,程序和数据库的数据文件放在/usr/users下面。
- 1、下载文档前请自行甄别文档内容的完整性,平台不提供额外的编辑、内容补充、找答案等附加服务。
- 2、"仅部分预览"的文档,不可在线预览部分如存在完整性等问题,可反馈申请退款(可完整预览的文档不适用该条件!)。
- 3、如文档侵犯您的权益,请联系客服反馈,我们会尽快为您处理(人工客服工作时间:9:00-18:30)。
1.2 LINUX系统特点
• 开放性 遵循世界标准规范,特别是开放系统互连(OSI)国际标准 • 多用户
系统资源可被不同用户使用,且每个用户互不影响 • 多任务
计算机可同时执行多个程序,且程序间的运行互相独立 • • 良好的用户界面 设备独立性
操作系统把所有外部设备统一当作成文件,任何用户都可象使用文件一样使 用这些设备 • • 提供了丰富的网络功能 可靠的安全系统
显卡:VGA兼容显卡。
光驱:CD-ROM/DVD-ROM。 其他设备:如声卡、网卡和Modem等。 软驱:可选。
虚拟机设置
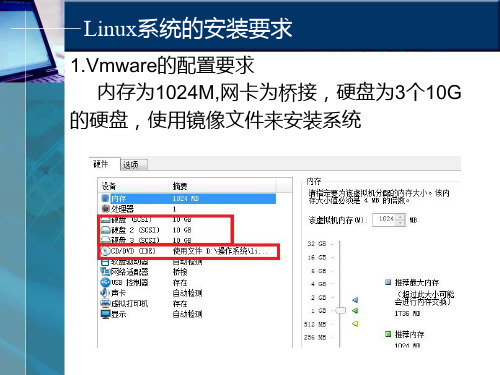
1.在虚拟机中新建虚拟机,磁盘选择IDE,选择SCSI会在
后面报找不到硬盘,内存建议给512MB以上(不然不能 进入图形安装界面,只能使用文本文件方式安装),这 里给720M,硬盘给的是2个8G硬盘,方便解释卷分区的含 义。如下图1-1
部署简单 缺点 无冗余,通常和其他RAID级别混合 使用 不适合用于关键数据环境 最小硬盘数 2
RAID级别 —— RAID 1
RAID 1 定义:
RAID 1又称镜像(Mirror),数据同时一致写到主 硬盘和镜像硬盘
数据
A B C D E
……
A B C D E
=
A B C D E
RAID级别 —— RAID 2
Vmware介绍
1. vmware介绍 Vmware虚拟机软件,是全球桌面到数据中心 虚拟化解决方案的领导厂商。该公司它提主要产品 分为如下三个: (1)VMware-ESX-Server 不需要操作系统的支持。它本身就是一个操作 系统,用来管理硬件资源。带有远程web管理和客 户端管理功能。 (2)VMware-GSX-Server 安装在操作系统下了,带有远程web管理和客 户端管理功能。 (3)VMware-WorkStation 安装在操作系统下了,没有远程web管理和客 户端管理功能
LVM( 逻辑卷管理器)
pv
vg
lv
/
/var
/home
LVM增加空间
pv
vg
lv
/
/var
/home
RAID技术
RAID是英文Redundant Array of Inexpensive Disks的缩写,中文简 称为廉价磁盘冗余阵列。简单的说,RAID是一种把多块独立的硬盘 (物理硬盘)按不同的方式组合起来形成一个硬盘组(逻辑硬盘) ,从而提供比单个硬盘更高的存储性能和提供数据备份技术。
硬盘分区的命名
• Windows硬盘分区的命名 • Linux硬盘分区的命名 – Linux使用设备名称+分区号码标 明硬盘的各个分区,对于主分区 (或扩展分区)分区号码的编号 为1~4,逻辑分区的分区号码编 号从5开始。
LVM的介绍
出现背景
如果划分了 10G 的一个分区,挂接到 /home 下,可是
硬盘分区和文件系统 硬盘接口
IDE接口
Linux对连接到IDE接口的硬盘使用/dev/hdx的方式命 名,x的值对应于硬盘安装位置。x的值可以是a、b 、c、d(a为ide1口的主盘,b为ide1的从盘,c为ide2 的主盘,d为ide2的从盘)
硬盘
IDE1口的主盘 IDE1口的从盘 IDE2口的主盘 IDE2口的从盘
1.4 LINUX内核版本
Linux内核版本的序号由三部分数字构成: major.minor.patchlevel-build.desc ������ major为主版本号 ������ minor为次版本号,二者共同构成了当前核心版 本号 ������ patchlevel表示对当前版本的修订次数。次版本 号为奇数时:测试版本。次版本号为偶数时:稳定 版本 bulid:表示编译(或构建)的次数 Desc:用来描述当前的版本特殊信息 -bash-3.2$ uname -a Linux eyou5.eyoumail 2.6.18-274.el5 #1 SMP Fri Jul 8 17:36:59 EDT 2011 x86_64 x86_64 x86_64 GNU/Linux
1.1 LINUX 发展史 Linux 的创始人LinusTorvalds
芬兰大学生LinusTorvalds在从1990年底到1991年的几个月中, 利用Minix操作系统作为开发平台,为他自己的操作系统课程和后 来的上网用途而陆续编写了若干程序。 1991.10.5 在Internet的comp.os.minix讨论区发表了一篇文章, 表明他正在研制一个要超越Minix的操作系统,从而宣告了Linux 的诞生。
系统硬件设备型号
Red Hat网站提供了经过兼容性测试和认证的“硬件 兼容性列表”,在得到系统硬件设备的具体型号后, 最好访问/hwcert/来查看用户 的配置是否在清单之中 。
与其他操作系统并存的问题 Linux支持在一台计算机中安装多个操 作系统,它通过使用GRUB多重启动管 理器来支持多操作系统并存,GRUB可 以引导FreeBSD、OpenBSD、DOS和 Windows等操作系统。计算机启动时 ,用户可以使用GRUB提供的菜单选择 需要启动的系统,所以不必担心出现 安装了Linux后,导致其他操作系统不 能使用的问题。 但是安装多系统要求先安装其他系统
RAID基本概念 ——条带
分条 条带
硬盘0
硬盘1
硬盘2
硬盘3
RAID基本概念 ——校验
表1-3 异或 XOR 的校验原理 A0值 0 1 0 A1值 0 0 1 P值 0 1 1 异或运算
P=A0 XOR A1
1
1
0
A0
数据盘
A1
数据盘
P
校验盘
RAID基本概念 —重建(REBUILD)
A0 XOR XOR
Vmware介绍
VMWare是什么? VMWare是一个―虚拟机‖软体,允许一台真实的 计算机同时运行数个操作系统。 VMWare网卡设置 Bridge:桥接模式。Guest IP与Host IP在同一网 段内 Host-only:主机模式。所有虚拟系统间可以相互 通信,但和真实的网络是隔开的,IP与VMware Network Adapter VMnet1虚拟网卡在同一网段内 NAT:网络地址转换模式。Guest通过VMware Network Adapter VMnet8虚拟网卡访问网络,非 常简单
随着时间的流逝,10G 的空间开始不够用了,需要把它扩 充。假设要扩充到 12G,那么就需要建立一个 12G 的新 分区,然后将原来的 10G 分区中的数据全部移动到新分区 中,再修改挂接配置。这样不仅麻烦而且浪费时间。
我们可以通过LVM逻辑编辑器实现动态地改变分区的大小
LVM的基本概念
LVM(Logical Volume Manager)逻辑卷管理,是一 种将一个或多个硬盘的分区在逻辑上集合,相当于一 个大硬盘来使用,当硬盘的空间不够使用的时候,可 以继续将其它的硬盘的 分区加入其中,这样可以事 项一种磁盘空间的动态管理,相对于普通的磁盘分区 有很大的灵活性,使用普通的磁盘分区,当一个磁盘 的分区空间不够使用的时候,可 能就会带来很大的 麻烦。使用LVM在一定程度上就可以解决普通磁盘分 区带来的问题。故障 更换A0
数据盘
A1
数据盘
A2
数据盘
P
校验盘
RAID基本概念——RAID组状态
RAID组 创建
RAID组 失效
RAID组 降级
RAID、逻辑卷的形成过程
LUN1 LUN2 LUN3
逻辑卷
分割
硬盘组
(RAID)
物理磁盘
RAID级别 —— RAID 0
定义:
RAID0即没有容错设计的条带硬盘阵列(Striped
名称
/dev/hda /dev/hdb /dev/hdc /dev/hdd
硬盘分区和文件系统 SCSI接口 对于SCSI硬盘则标识为“sdx~”,一个 scsi接口可以接最多15个或者更多硬盘 。SCSI硬盘是用“sd”来表示分区所在 设备的类型的,其余则和IDE硬盘的 表示方法一样
硬盘分区和文件系统
定义: RAID 2 采用早期的海明码校验组成硬盘阵列,RAID中第1个、 第2个、第4个„„第2的n次幂个硬盘都是校验盘。RAID2的硬 盘利用率很低,目前基本不再使用
A0 A1 A2 A3 B0 B1 B2 B3 C0 C1 C2
硬盘的容量= 主分区的容量+扩展分区的量 扩展分区的容量= 各个逻辑分区的容量之和
硬盘分区和文件系统
文件系统
• 文件系统是操作系统最为重要的一 部分,它定义了磁盘上储存文件的 方法和数据结构。文件系统是操作 系统组织、存取和保存信息的重要 手段,每种操作系统都有自己的文 件系统,如Windows所用的文件系 统主要有FAT16、FAT32和NTFS, Linux所用的文件系统主要有ext2、 ext3和lvm等。
RAID 0 RAID 1 RAID 2 RAID 3 RAID 4 RAID 5 RAID 6 数据条带化,无校验 数据镜像,无校验 海明码错误校验及校正 数据条带化读写,校验信息存放于专用硬盘 单次写数据采用单个硬盘,校验信息存放于专用硬盘 数据条带化,校验信息分布式存放 数据条带化,分布式校验并提供两级冗余
硬盘分区和文件系统
硬盘分区 每个硬盘上主要分为主分区(Primary Partition)、 扩展分区(Extension Partition)和逻辑分区( Logical Partition)3种 。
硬盘分区和文件系统
给新硬盘上建立分区时都要遵循以下的顺序:建立 主分区→建立扩展分区→建立逻辑分区→激活主分 区→格式化所有分区
1993年,Linux 1.0问世
1999年,Linux Kernel 2.2问世 2001年,Linux Kernel 2.4问世