Jumpstart安装实例
MicroTiles显示墙与JumpStart服务器连接指南
Before You Begin• Turn the display wall and master ECU on.• Make sure that the MicroTiles display wall that you are connecting to has 1 to 6 ECUs with a single master ECU.• Select a location that has accessible power for the JumpStart server and the display wall. • Select a location for the server that has unrestricted airfl ow so that the maximum temperature of 35° C (95° F) is not exceeded. • If you mount the server into a rack, avoid uneven mechanical loading. (Optional Rail Kit: P/N: 128-100102-xx)Kit Contents• JumpStart server • Accessory box:• Product registration card• JumpStart Quick Setup Guide • JumpStart software CD• JumpStart Operation Manual • Keyboard • Mouse• AC power cord• 6 x Mini DisplayPort to DVI-D cable adapter • 4 x DVI to VGA adapter• 4 x DVI to Component adapter • 4 x DVI to HDMI adapter❸ Connect to the Display Wall with theMicroTiles Connection WizardIf the JumpStart server is successfully connected to a MicroTiles wall, the Micro-Tiles Connection Wizard appears.1. If the MicroTiles Connection Wizard does not appear, disconnect one of outputsand connect it to a computer monitor. Complete steps 2 to 8 and then discon-nect the computer monitor and reconnect the connector to the JumpStart server. 2. Click Next.Configure an Ethernet Connection1. Enter the master ECU IP address in the IP Address fi eld.To identify the master ECU IP address, press and hold the Powerbutton on the master ECU for 10 seconds. On your display wall, the IP address is called Pair Remote Control .2. Enter the master ECU port to which the JumpStart server is connected in thePort fi eld.3. Click Test . If an error message appears, make sure that your master ECU and display wall are powered on and that your JumpStart server is connected properly. 4. Click Next .❶ Unpack the Server and Accessories1. Remove and set aside the accessories box from the JumpStart box.2. Pull the JumpStart server up and out of the box with the handles on the uppercorners of the server. 3. Unpack the keyboard and the mouse from the accessories box.❷ Connect the JumpStart ServerTurn your ECUs and display wall on.When you turn the ECUs on for the fi rst time, they perform a negotiation phase to determine which one will be the master ECU. During the negotiation process, the LED lights of all ECUs fl ash green. When negotiation is complete, only the LED light on the right side of the back panel of the master ECU fl ashes green. 4. Connect the smaller end of each of the Mini DisplayPort-to-DVI-D adaptor cablesto the port on the back panel of the JumpStart server.Port Description1DVI 2Mini Display Port5. Connect the DVI extension cable (not supplied) to the DVI output port.6. Connect the extension cable to a display device in any order.7. Connect the keyboard and the mouse to the USB 2.0 ports on the back panelof the JumpStart server.If you are connecting the server directly to the master ECU with an Ethernet cable, the server and master ECU IP addresses must be the same network. For assistance adding the JumpStart server to a network, see your network administrator.continued...8. Connect one end of a CAT5 Ethernet cable (not provided) to an Ethernet porton the server.9. Connect the other end of the CAT5 Ethernet cable to an Ethernet port on therouter that is connected to the master ECU, or directly into the master ECU. 10. Connect the server to a power supply using the supplied AC power cord.11. Press the power button on the front panel of the server.Q u i c k -S t a r t G u i d e f o r I n s t a l l a t i o n w i t h M i c r o T i l e s3. Select Ethernet or Serial and then move to the Confi gure an Ethernet Connec-tion or Configure a Serial Connection procedures.Confi gure a Serial Connection1. Enter the serial port to which the master ECU is connected in the Serial Portfield.2. Enter the baud rate of the master ECU serial port in the Baud Rate fi eld.3. Click Test .If an error message appears, make sure that your master ECU and display wallare turned on and that your JumpStart server is connected properly. 4. Click Next .Update the FirmwareTo work with JumpStart, your ECUs and MicroTiles need the latest version of thefi rmware. If you need to upgrade your fi rmware, a link appears on the MicroTiles web interface. For more information, see the MicroTiles User Manual (P/N: 020-100329-XX) on (click Products > Christie MicroTiles > Downloads > User Manuals ).Adobe Flash is required to view the MicroTiles web interface. To download this free application, visit the Adobe Flash Player web site.1. Click the link.2. Select Confi guration > Firmware Upgrade > ECUs and MicroTiles .If DHCP is EnabledTo work with JumpStart, your ECU must be networked and DHCP must be disabled.If you have DHCP enabled, a link appears on the MicroTiles web interface. For more information, see the MicroTiles User Manual (P/N: 020-100329-XX) on (click Products > Christie MicroTiles > Downloads > User Manuals ). Adobe Flash is required to view the MicroTiles web interface. To download this free application, visit the Adobe Flash Player web site.1. Click the link.2. Select Confi guration > Ethernet .3. From the DHCP list, select Disabled , and then click Apply .Automatically Confi gure MicroTiles Resolution1. Select Automatically confi gure MicroTiles resolution (server will restart) -Recommended.If the Automatic confi guration fails, select Manually confi gure MicroTiles resolu-tion and move to the Manually Confi gure MicroTiles Resolution procedure.2. Click Next .The extended display identifi cation data (EDID) values are set on each ECU toachieve the optimal canvas resolution supported by the server. Any subarrays that you have defi ned are also reset.F o r t h e m o s t c u r r e n t t e c h n i c a l d o c u m e n t a t i o n , v i s i t w w w .c h r i s t i e d i g i t a l .c o mManually Confi gure MicroTiles ResolutionComplete this procedure if the automatic MicroTiles resolution confi guration fails.1. Click Click here to access the Web UI .2. Select Canvas Management > Layout > Subarray Confi guration .3. Click Auto Subarray .4. Select Source Management > Customize EDID .5. Adjust the Horizontal Size , Vertical Size , and Frame Rate settings to matchyour display wall. When you adjust these settings, the Bandwidth is updated dynamically. Christie recommends that the bandwidth should not exceed 150 MHz.Click Apply .For more information, see the MicroTiles User Manual (P/N: 020-100329-XX)on (click Products > Christie MicroTiles > Down-loads > User Manuals ).C o r p o r a t e o f fi c e sU S A – C y p r e s s p h : 714-236-8610C a n a d a – K i t c h e n e rp h : 519-744-8005W o r l d w i d e o f fi c e sU n i t e d K i n g d o m p h : +44 118 977 8000F r a n c ep h : +33 (0) 1 41 21 00 36G e r m a n yp h : +49 2161 664540E a s t e r n E u r o p ep h : +36 (0) 1 47 48 100M i d d l e E a s tp h : +971 (0) 4 299 7575S p a i np h : +3491 633 9990S i n g a p o r ep h : +65 6877-8737B e i j i n gp h : +86 10 6561 0240S h a n g h a ip h : +86 21 6278 7708J a p a np h : 81-3-3599-7481S o u t h K o r e a p h : +82 2 702 1601020-100918-02Page 1Page 2Page 3Page 4Page 5Page 6Page 7Page 8Page 9Page 10Page 11020-100918-02 Rev. 1 (05/13)020-100918-02 Rev. 1 (05/13)020-100918-02 Rev. 1 (05/13)020-100918-02 Rev. 1 (05/13)020-100918-02 Rev. 1 (05/13)020-100918-02 Rev. 1 (05/13)020-100918-02 Rev. 1 (05/13)020-100918-02 Rev. 1 (05/13)020-100918-02 Rev. 1 (05/13)020-100918-02 Rev. 1 (05/13)020-100918-02 Rev. 1 (05/13)020-100918-02 Rev. 1 (05/13)020-100918-02 Rev. 1 (05/13)COPYRIGHT AND TRADEMARKS© 2013 Christie Digital Systems USA, Inc. - All rights reserved.All brand names and product names are trademarks, registered trademarks or trade names of their respective holders.REGULATORYThe product has been tested and found to comply with the limits for a Class A digital device, pursuant to Part 15 of the FCC Rules. These limits are designed to provide reasonable protec-tion against harmful interference when the product is operated in a commercial environment. The product generates, uses, and can radiate radio frequency energy and, if not installed and used in accordance with the instruction manual, may cause harmful interference to radio communications. Operation of the product in a residential area is likely to cause harmfulinterference in which case the user will be required to correct the interference at the user’s own expense.This Class A digital apparatus complies with Canadian ICES-3 (A) / NMB-3 (A).Cet appareil numérique de la classe A est conforme à la norme ICES-3 (A) / NMB-3 (A) du Canada.GENERALEvery effort has been made to ensure accuracy, however in some cases changes in the products or availability could occur which may not be refl ected in this document. Christie reserves the right to make changes to specifi cations at any time without notice. Performance specifi cations are typical, but may vary depending on conditions beyond Christie’s control such as maintenance of the product in proper working conditions. Performance specifi cations are based on information available at the time of printing. Christie makes no warranty of any kind with regard to this material, including, but not limited to, implied warranties of fi tness for a particular purpose. Christie will not be liable for errors contained herein or for incidental or consequential damages in connection with the performance or use of this material.The product is designed and manufactured with high-quality materials and components that can be recycled and reused. This symbol means that electrical and electronic equipment, at their end-of-life, should be disposed of separately from regular waste. Please dispose of the product appropriately and according to local regulations. In the European Union, there are separate collection systems for used electrical and electronic products. Please help us to conserve the environment we live in!Arrange Your Displays1. Click Nextto display the Microsoft Windows Desktop Display Settings window.Arrange Your Displays continued 2. If the display wall image is arranged correctly, click Cancel to return to theMicroTiles Connection Wizard.3. If the image is not arranged correctly, move the icons so they match the layoutof your MicroTiles wall.4. Click OK .5. Click Next .Full Screen Applications1. Click Open the AMD Control Panel if you are using multiple ECUs and wantto show full-screen applications or use the Christie Interactivity Kit across the entire canvas.2. Click AMD Eyefi nity Multi-Display > Create Eyefi nity Group .3. Select a display in the list.4. Click Continue .5. Select a layout for the display group and then click Continue .6. Click Arrange and then select the screens in the order that they should ap-pear.7. Click Done.❹ Install the JumpStart Client SoftwareThe JumpStart client software is installed on the JumpStart server. You can also install it on another computer (optional).1. Insert the installation CD into the computer on which you want to run Jump-Start.2. Click Install Products .3. Click Install JumpStart Client .4. Read and accept the license agreement.5. Click Install .6. When the installation is complete, click Finish .❺ Run the JumpStart Client SoftwareOn the server or the computer where the JumpStart client is installed, click Start >All Programs > Christie > JumpStart .❻ Connect a JumpStart Client to a Server1. Click Start > All Programs > Christie > JumpStart .2. Click the File tab and then click Manage .3. Click Add .4. Enter a descriptive name for the JumpStart server in the Name fi eld.5. Enter the IP address or host name of the server in the Address fi eld.6. Click OK .7. To close the Manage Servers dialog box, click OK .8. Click the File tab and then click Select to select a JumpStart server.❼ Create a Scenario1. Click the File tab and then click New . A new, empty scenario grid appears onthe JumpStart canvas.2. Expand a list in the left pane.• Videos • Pictures• Applications • Input Channels • Color Windows • Text Windows • Commands3. Click and drag content windows from the lists in the left panel to the canvas inthe right panel.4. Add additional windows to the canvas.You can have more than 60 windows on your canvas, but you cannot exceed 60 when you save or activate the scenario 5. Click Save .6. Enter a name for the scenario in the Scenario Name fi eld.7. Click OK .❽ Add ContentJumpStart can display windows with videos, pictures, applications, input channels,and color and text content. For videos, pictures, applications, and input channels, you need to add the source content to JumpStart before you can add them to a scenario. The items you can add to a scenario are shown in the panels to the left of the canvas.Videos and Pictures: You typically store content on the hard drive of the Jump-Start server. You can store content on a remote hard drive, but the device must be connected when playing scenarios.1. Transfer fi les onto the JumpStart server with a USB fl ash drive, portable harddrive, or network share. Once you have content on the JumpStart server hard drive or another accessible drive, you can add that content to JumpStart. 2. Click the appropriate panel in the left pane and then click Add .Applications: Any applications that you add to JumpStart must be installed on the JumpStart server.1. Click the Applications panel in the left pane and then click Add .2. Specify which applications are Removed (not visible to JumpStart) and Added(visible to JumpStart). Color and Text Boxes: Create customized color and text boxes to show in ascenario. Click the appropriate panel and click Add . Any fonts that are used in text windows must be installed on the JumpStart server.Input Channels: To view the input channels that you have attached to the Jump-Start server, click the Input Channels panel.❾ Change Schedule and Run ScenarioYou use the schedule to defi ne when and how frequently content appears in ascenario. You can also use the schedule pane to change the order in which content is displayed (which windows are on top and which are underneath).To run a scenario on your display wall, click Activate on the Home or File ribbons.GENERAL WARRANTY STATEMENTSFor complete information about Christie’s limited warranty, please contact your Christie dealer. In addition to the other limitations that may be specifi ed in Christie’s limited warranty, the warranty does not cover:a. Damage occurring during shipment, in either direction.b. Damage caused by misuse, improper power source, accident, fi re, fl ood, lightning, earthquake or other natural disaster.c. Damage caused by improper installation/alignment, or by product modifi cation, if by other than a Christie authorized repair service provider.d. Problems caused by combination of the equipment with non-Christie equipment, such as distribution systems, cameras, video tape recorders, etc., or use of the equipment with any non-Christie interface device.e. Failure due to normal wear and tear.f. Warranty does not cover image retention.PREVENTATIVE MAINTENANCEPreventative maintenance is an important part of the continued and proper operation of your product. Please see the Service Manual for specifi c maintenance items as they relate to your product. Failure to perform maintenance as required, and in accordance with the maintenance schedule specifi ed by Christie, will void the warranty.Page 12Page 13Page 14Page 15Page 16Page 17Page 18Page 19020-100918-02 Rev. 1 (05/13)020-100918-02 Rev. 1 (05/13)020-100918-02 Rev. 1 (05/13)020-100918-02 Rev. 1 (05/13)020-100918-02 Rev. 1 (05/13)020-100918-02 Rev. 1 (05/13)020-100918-02 Rev. 1 (05/13)020-100918-02 Rev. 1 (05/13)020-100918-02 Rev. 1 (05/13)。
jumpstart-sparc

# install systems as standalone
system_type standalone
# specify patches to install
patch 119281-06 nfs 192.168.240.11:/export/home/patches
# specify packages to install
package SPROcc add nfs 192.168.240.11:/export/home/packages
----------------
ZFS:
install_type initial_install
cluster SUNWCall
profile:
install_type flash_install
archive_location nfs 192.168.1.50:/export/home/flash/sol10u10_Generic_147440-25.flar
partitioning explicit
pool rpool auto 64g 10g mirror any any
# Place share(1M) commands here for automatic execution
# on entering init state 3.
#
# Issue the command 'svcadm enable network/nfs/server' to
# [resource]
# for example,
搭建Solaris 10 JumpStart安装服务器
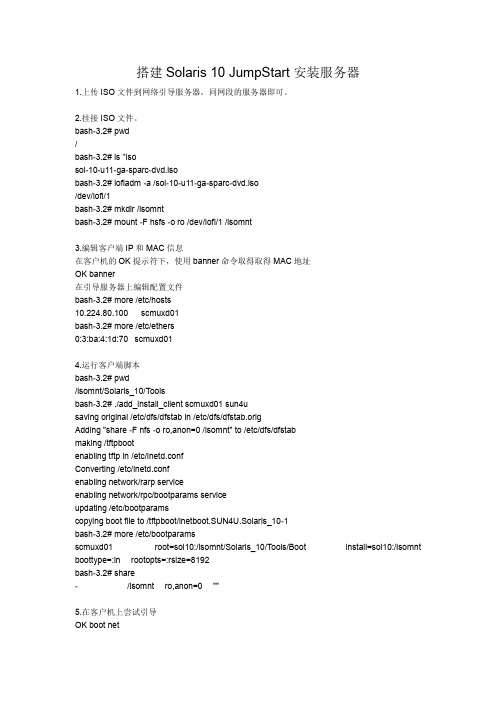
搭建Solaris 10 JumpStart安装服务器1.上传ISO文件到网络引导服务器,同网段的服务器即可。
2.挂接ISO文件。
bash-3.2# pwd/bash-3.2# ls *isosol-10-u11-ga-sparc-dvd.isobash-3.2# lofiadm -a /sol-10-u11-ga-sparc-dvd.iso/dev/lofi/1bash-3.2# mkdir /isomntbash-3.2# mount -F hsfs -o ro /dev/lofi/1 /isomnt3.编辑客户端IP和MAC信息在客户机的OK提示符下,使用banner命令取得取得MAC地址OK banner在引导服务器上编辑配置文件bash-3.2# more /etc/hosts10.224.80.100 scmuxd01bash-3.2# more /etc/ethers0:3:ba:4:1d:70 scmuxd014.运行客户端脚本bash-3.2# pwd/isomnt/Solaris_10/Toolsbash-3.2# ./add_install_client scmuxd01 sun4usaving original /etc/dfs/dfstab in /etc/dfs/dfstab.origAdding "share -F nfs -o ro,anon=0 /isomnt" to /etc/dfs/dfstabmaking /tftpbootenabling tftp in /etc/inetd.confConverting /etc/inetd.confenabling network/rarp serviceenabling network/rpc/bootparams serviceupdating /etc/bootparamscopying boot file to /tftpboot/inetboot.SUN4U.Solaris_10-1bash-3.2# more /etc/bootparamsscmuxd01 root=sol10:/isomnt/Solaris_10/Tools/Boot install=sol10:/isomnt boottype=:in rootopts=:rsize=8192bash-3.2# share- /isomnt ro,anon=0 ""5.在客户机上尝试引导OK boot net。
一步一步安装Jumpserver(Ubuntu)

⼀步⼀步安装Jumpserver(Ubuntu)环境系统: Ubuntu 16.04IP: 192.168.244.144数据库:mysql 版本⼤于等于 5.6 mariadb 版本⼤于等于 5.5.6测试推荐硬件CPU: 64位双核处理器内存: 4G DDR3⼀. 准备 Python3 和 Python 虚拟环境1.1 安装依赖包$ apt-get update && apt-get -y upgrade$ apt-get -y install wget gcc libffi-dev git libmysqlclient-dev# 修改字符集, 否则可能报 input/output error的问题, 因为⽇志⾥打印了中⽂$ apt-get -y install language-pack-zh-hans$ export LC_ALL=zh_CN.UTF-8$ echo 'LANG="zh_CN.UTF-8"' > /etc/default/locale1.2 安装 Python3.6$ add-apt-repository ppa:jonathonf/python-3.6 -y$ apt-get update$ apt-get -y install python3.6 python3.6-dev python3.6-venv1.3 建⽴ Python 虚拟环境为了不扰乱原来的环境我们来使⽤ Python 虚拟环境$ cd /opt$ python3.6 -m venv py3$ source /opt/py3/bin/activate# 看到下⾯的提⽰符代表成功, 以后运⾏ Jumpserver 都要先运⾏以上 source 命令, 以下所有命令均在该虚拟环境中运⾏(py3) [root@localhost py3]⼆. 安装 Jumpserver2.1 下载或 Clone 项⽬项⽬提交较多 git clone 时较⼤, 你可以选择去 Github 项⽬页⾯直接下载zip包。
Centos7.3下安装Jumpserver1.0.0(支持windows组件)

Centos7.3下安装Jumpserver1.0.0(⽀持windows组件)Jumpserver最新版本⽀持windows组件,废话不多介绍了,下⾯直接介绍下部署过程:0)系统环境CentOS 7.3IP: 192.168.10.210[root@jumpserver-server ~]# cat /etc/redhat-releaseCentOS Linux release 7.4.1708 (Core)关闭防⽕墙和selinux[root@jumpserver-server ~]# systemctl stop firewalld.service[root@jumpserver-server ~]# systemctl disable firewalld.service[root@jumpserver-server ~]# setenforce 0[root@jumpserver-server ~]# getenforce[root@jumpserver-server ~]# cat /etc/sysconfig/selinux........SELINUX=disabled修改字符集,否则可能报 input/output error的问题,因为⽇志⾥打印了中⽂[root@jumpserver-server ~]# localedef -c -f UTF-8 -i zh_CN zh_CN.UTF-8[root@jumpserver-server ~]# export LC_ALL=zh_CN.UTF-8[root@jumpserver-server ~]# echo 'LANG=zh_CN.UTF-8' > /etc/sysconfig/i18n1)准备Python3和Python虚拟环境1.1)安装依赖包[root@jumpserver-server ~]# yum -y install wget libselinux-python sqlite-devel xz gcc automake zlib-devel openssl-devel epel-release git1.2)编译安装(这⾥必须执⾏编译安装,否则在安装 Python 库依赖时会有⿇烦)[root@jumpserver-server ~]# cd /usr/local/src/[root@jumpserver-server src]# wget https:///ftp/python/3.6.1/Python-3.6.1.tar.xz[root@jumpserver-server src]# tar xvf Python-3.6.1.tar.xz[root@jumpserver-server src]# cd Python-3.6.1[root@jumpserver-server Python-3.6.1]# ./configure && make && make install1.3)建⽴Python虚拟环境因为CentOS 6/7⾃带的是Python2,⽽Yum等⼯具依赖原来的Python,为了不扰乱原来的环境我们来使⽤Python虚拟环境[root@jumpserver-server ~]# cd /opt/[root@jumpserver-server opt]# python3 -m venv py3[root@jumpserver-server opt]# source /opt/py3/bin/activate(py3) [root@jumpserver-server opt]#看到上⾯的提⽰符代表成功,以后运⾏Jumpserver都要先运⾏以上source命令,以下所有命令均在该虚拟环境中运⾏!2)安装Jumpserver 1.0.02.1)下载或clone项⽬除了在github上下载外,还可以到百度云盘上下载:https:///s/1BVYRF7M-akKjUOoYZPBi7Q (提取密码:v5rs)(py3) [root@jumpserver-server ~]# cd /opt/(py3) [root@jumpserver-server opt]# git clone https:///jumpserver/jumpserver.git2.2)安装依赖rpm包(py3) [root@jumpserver-server opt]# cd /opt/(py3) [root@jumpserver-server opt]# cd jumpserver/requirements(py3) [root@jumpserver-server requirements]# yum -y install epel-release(py3) [root@jumpserver-server requirements]# yum -y install $(cat rpm_requirements.txt) //如果没有任何报错请继续2.3)安装python库依赖(py3) [root@jumpserver-server requirements]# pip install -r requirements.txt //如果没有任何报错请继续2.4)安装Redis, Jumpserver 使⽤ Redis 做 cache 和 celery broke(py3) [root@jumpserver-server requirements]# yum -y install redis(py3) [root@jumpserver-server requirements]# systemctl start redis(py3) [root@jumpserver-server requirements]# lsof -i:6379COMMAND PID USER FD TYPE DEVICE SIZE/OFF NODE NAMEredis-ser 11281 redis 4u IPv4 90233 0t0 TCP localhost:6379 (LISTEN)2.5)安装MySQL(py3) [root@jumpserver-server requirements]# yum -y install mariadb mariadb-devel mariadb-server(py3) [root@jumpserver-server requirements]# systemctl enable mariadb(py3) [root@jumpserver-server requirements]# systemctl start mariadb(py3) [root@jumpserver-server requirements]# systemctl status mariadb(py3) [root@jumpserver-server requirements]# lsof -i:3306设置mysql密码,⽐如密码设置为123456(py3) [root@jumpserver-server requirements]# mysql_secure_installation......Set root password? [Y/n] yNew password: //⽐如密码是123456Re-enter new password:...... //其他项全部回车默认创建数据库Jumpserver并授权(py3) [root@jumpserver-server requirements]# mysql -p123456MariaDB [(none)]> create database jumpserver default charset 'utf8';MariaDB [(none)]> grant all on jumpserver.* to 'jumpserver'@'127.0.0.1' identified by 'jumpserver@123';MariaDB [(none)]> flush privileges;MariaDB [(none)]> show databases;+--------------------+| Database |+--------------------+| information_schema || jumpserver || mysql || performance_schema || test |+--------------------+2.6)安装 python3 mysql驱动: mysqlclient由于MySQLdb库不⽀持 python3.5+,所以选择了mysqlclient作为驱动,pymysql使⽤python写的,速度较慢(py3) [root@jumpserver-server requirements]# pip install mysqlclient2.7)修改jumpserver配置⽂件计划修改 DevelopmentConfig中的配置,因为默认jumpserver是使⽤该配置,它继承⾃Config。
虚拟机Jumpstart网络安装Solaris10系统

虚拟机Jumpstart网络安装Solaris10系统预览说明:预览图片所展示的格式为文档的源格式展示,下载源文件没有水印,内容可编辑和复制虚拟机Jumpstart网络安装Solaris10系统1.概述在网络安装多台同样配置的Solaris 操作系统时,如果逐台安装会做大量重复的工作浪费不必要的时间,Jumpstart定制配置自动安装可以节约很多时间和劳力,并且通过Jumpstart可以自动带镜像(SVM)安装系统,避免安装系统后手动配置的繁琐步骤。
主要讲述通过Oracle VM VirtualBox虚拟机引导Jumpstart安装Solaris平台操作系统。
2.安装准备1.下载Oracle VM VirtualBox虚拟机软件;2.下载Solaris10 X86和Sparc平台ISO文件;3.安装3.1.1.安装Oracle VM VirtualBox虚拟机Oracle VM VirtualBox虚拟机软件的安装不做详细说明,一直【下一步】即可;3.1.2.安装Solaris_X86虚拟机Solaris虚拟机的安装我们也不做详细说明,可参考《VirtualBox 虚拟机安装Solaris10 X86系统》;3.1.3.Solaris配置和安装3.1.3.1.设置虚拟机:【网络】设置:连接到物理网卡(物理PC上配置上网IP为10.233.23.142的网卡)【存储】设置:光盘加载Solaris 10 sparc的ISO文件,显示如下:点击【启动】启动Solaris x86系统查看光盘文件:系统启动后,可以看到已经挂在的Solaris 10 for sparc的系统盘;3.1.3.2.检查个人电脑和网络个人电脑ip地址的配置需要跟虚拟机Solaris系统在同一网段,并且保证通信;虚拟机ip地址:个人电脑地址:连通性:注意:只有个人电脑网卡UP的时候,虚拟机才能ping通个人电脑IP地址;3.1.3.3.确定V240安装网口和MAC地址◆个人电脑网口与Sun V240网口直连或在同一VLAN;ok show-nets //查看系统网卡列表a) /pci@1d,700000/network@2,1b) /pci@1d,700000/network@2c) /pci@1f,700000/network@2,1d) /pci@1f,700000/network@2q) NO SELECTIONEnter Selection, q to quit: qok◆确定Sun V240安装网口并确认MAC地址;这里我们选择用网卡上的第一个网口(即/pci@1f,700000/network@2)安装,确定该网卡MAC地址(00:14:4f:69:8e:00)ok cd /pci@1f,700000/network@2 //进入网卡路径ok .properties //查看.properties文件确认该网卡MAClocal-mac-address 00 03 ba fc e2 5dassigned-addresses 83001010 00000000 00200000 00000000 0020000083001018 00000000 00110000 00000000 00010000compatible pci14e4,1648.108e.1648.0pci14e4,1648.108e.1648pci108e,1648pci14e4,1648.0pci14e4,1648pciclass,020000pciclass,02003.1.3.4.配置Server服务器◆在虚拟机创建存放镜像文件的共享目录bash-3.2# mkdir –p /quan/iso◆进入光盘系统目录,安装Server启动程序bash-3.2# cd /cdrom/Sol_10_113_sparc/Solaris_10/T ools/bash-3.2# lsBoot add_install_client rm_install_clientInstallers dial setup_install_serverbash-3.2# ./setup_install_server /quan/iso/Verifying target directory...Calculating the required disk space for the Solaris_10 product Calculating space required for the installation boot image Copying the CD image to disk...Copying Install Boot Image hierarchy...Copying /boot netboot hierarchy...Install Server setup completebash-3.2#◆启动tftp服务bash-3.2# vi /etc/inet/inetd.conf## Copyright 2004 Sun Microsystems, Inc. All rights reserved.# Use is subject to license terms.##ident "@(#)inetd.conf 1.56 04/10/21 SMI"## Legacy configuration file for inetd(1M). See inetd.conf(4).## This file is no longer directly used to configure inetd.# The Solaris services which were formerly configured using this file # are now configured in the Service Management Facility (see smf(5))# using inetadm(1M).## Any records remaining in this file after installation or upgrade,# or later created by installing additional software, must be converted # to smf(5) services and imported into the smf repository using# inetconv(1M), otherwise the service will not be available. Once# a service has been converted using inetconv, further changes made to # its entry here are not reflected in the service.### CacheFS daemon. Provided only as a basis for conversion by inetconv(1M).#100235/1 tli rpc/ticotsord wait root /usr/lib/fs/cachefs/cachefsd cachefsd# TFTPD - tftp server (primarily used for booting)tftp dgram udp6 wait root /usr/sbin/in.tftpd in.tftpd -s /tftpboot bash-3.2# //删除最后一行前面的#注释bash-3.2# svcadm enable svc:/network/tftp/udp6:defaultsvcadm: 模式 'svc:/network/tftp/udp6:default' 与所有实例都不匹配//开启tftp服务报错bash-3.2# inetconv -i /etc/inet/inetd.conf 1>/dev/null 2>&1//将/etc/inet/inetd.conf 项转换为SMF 服务清单bash-3.2# svcadm enable svc:/network/tftp/udp6:default//重新开启tftp服务bash-3.2# svcs -a|grep tftp //查看tftp服务状态online 11:08:51 svc:/network/tftp/udp6:defaultbash-3.2# netstat -a | grep tftp*.tftp Idle*.tftp Idle bash-3.2#◆查看NFS服务bash-3.2# svcs -a|grep nfs //保证nfs/server服务开启online 11月_13 svc:/network/nfs/mapid:defaultonline 11月_13 svc:/network/nfs/cbd:defaultonline 11月_13 svc:/network/nfs/status:defaultonline 11月_13 svc:/network/nfs/nlockmgr:defaultonline 11月_13 svc:/network/nfs/client:defaultonline 11月_13 svc:/network/nfs/rquota:defaultonline 11月_14 svc:/network/nfs/server:defaultbash-3.2# svcadm enable svc:/network/nfs/server:default//如果没有开启nfs/server服务3.1.3.5.服务器上添加客户端配置信息◆修改/etc/hosts 文件添加Sun V240系统的IP地址和主机名bash-3.2# vi /etc/hosts## Internet host table#::1 localhost127.0.0.1 localhost10.233.23.159 Solaris10-test loghost10.233.23.145 test-jumpsbash-3.2#注意:网络引导的Server和Client的IP地址必须在同一网段;◆修改/etc/ether,添加网口MAC地址和主机名bash-3.2# vi /etc/ethers00:14:4f:69:8e:00 test-jumpsbash-3.2#◆在服务器上创建 JumpStart 目录bash-3.2# cd /quanbash-3.2# mkdir configbash-3.2# cp -r /quan/iso/Solaris_10/Misc/jumpstart_sample/* ./config //复制Jumpstart文件到config目录bash-3.2#◆共享安装文件和JumpStart安装目录bash-3.2# vi /etc/dfs/dfstabshare -F nfs -o ro,anon=0 -d "install server directory" /quan/isoshare -F nfs -o ro,anon=0 -d "jumpstart install directory" /quan/config//共享/quan/iso和/quan/config目录bash-3.2# shareall //运行shareall共享bash-3.2# share //查看共享文件- /quan/iso ro,anon=0 " install server directory "- /quan/config ro,anon=0 " jumpstart install directory "bash-3.2#bash-3.2# showmount -e localhostlocalhost 的导出列表:/quan/iso (每一个)/quan/config (每一个)bash-3.2#◆建立sysidcfg文件,并配置客户端信息●sysidcfg文件名字是固定的,用其他名字jumpstart程序不能识别和调用)●独立关键字可以按任意顺序列出●关键字不区分大小写●将所有的依赖关键字括在花括号({}) 中,以将其绑定到关联的独立关键字●对于除network_interface 关键字之外的所有其他关键字,一个关键字只有一个实例有效●如果多次指定一个关键字,那么将仅使用该关键字的第一个实例bash-3.2# vi /quan/config/sysidcfgnetwork_interface=primary //配置网卡信息,primary代表网络启动的网卡{netmask=255.255.255.128 //安装时,会调用hosts中的IP和主机名,这里就不用写default_route=10.233.23.129 protocol_ipv6=no}root_password=9EXF/VIthknr2 //安装客户机的root密码,9EXF/VIthknr2从已经密码的shadow中复制的密文密码,代表root123system_locale=en_US //安装时的提示语言为en_UStimezone=PRC //时区使用PRCtimeserver=localhost //时间服务器指向自己name_service=none //不选择系统服务security_policy=none //不设置安全策略terminal=vt100 //终端用vt100keyboard=US-English //键盘用US-Englishnfs4_domain=dynamic //nfs4域名为动态auto_reg=none //用匿名注册bash-3.2#◆配置存放安装信息的文件cfgfile●cfgfile文件名字是自己定义的,只要放在/quan/config目录下,在rules文件中输入正确的名字,就可以调用。
vm虚拟机使用kickstart自动安装linux教程
在vm虚拟机中用kickstart自动安装linux教程学习完kickstart,想尝试下在VM虚拟机中实现无人值守安装linux系统。
通过U盘来引导。
1 准备kickstart文件下面是kickstart文件:# System timezonetimezone Asia/Shanghaiignoredisk --drives=sdb1bootloader --driveorder=sdabootloader --location=mbr --driveorder=sda,sdb --append="nomodesetcrashkernel=auto rhgb quiet"# Network information设置IP、网关等network --bootproto=static --device=eth0 --gateway=192.168.4.1 --ip=192.168.4.199 --hostname= --nameserver=219.141.136.10 --netmask=255.255.255.0 --onboot=on --noipv6 #network --bootproto=static --device=eth1 --ip=10.12.1.240 --netmask=255.255.255.0 --onboot=on --noipv6# System bootloader configuration# Clear the Master Boot Recordzerombr# Partition clearing informationclearpart --all --initlabel# Disk partitioning informationpart /boot --fstype="ext4" --size=200part swap --fstype="swap" --size=8192part / --fstype="ext4" --grow --size=1user --name=javadev%packages@base@basic-desktop@chinese-support@compat-libraries@console-internet@debugging@fonts@graphical-admin-tools @legacy-unix@network-tools@performance@scientific@system-admin-tools@system-management-snmp compat-openmpicompat-openmpi-psmdumphttpdftpiptrafjwhoislogwatchmuttnet-snmp-perlnet-snmp-pythonnmaprrdtoolrrdtoolrwhosystem-config-kickstart tcp_wrapperstelnettftplm_sensorstigervnc-serveryum-plugin-downloadonly -authconfig-gtk-b43-fwcutter-cas-control-center-extra-crash-crash-gcore-command-crash-trace-command-elfutils-elinks-eog-avahi-gdm-plugin-fingerprint -gnome-applets-gnome-disk-utility-gnome-media-gnome-packagekit-gnome-packagekit-gnome-vfs2-smb-gok-ibus-table-cangjie-ibus-table-erbi-ibus-table-wubi-ltrace-mdadm-microcode_ctl-nano-openssh-askpass-oprofile-orca-pcmciautils-perf-powertop-pulseaudio-module-gconf -pulseaudio-module-x11-rfkill-scl-utils-seekwatcher-setuptool-smartmontools-sos-system-config-users-units-valgrind-vconfig-vino-wireless-tools-words%post# Install the yum repository configuration files#post you will need to add it here/bin/echo "nameserver 8.8.8.8" > /etc/resolv.conf#下文为自动执行脚本,自动安装puppet、拷贝oracle安装程序等,如果不需要可注释cd /tmp/bin/rpm -ivh "/pub/epel/6/x86_64/epel-release-6-8.noarch.rp m"/bin/rpm -ivh "/el/6/products/x86_64/puppetlabs-release-6-7.no arch.rpm"/usr/bin/wget"/rpmforge-release/rpmforge-release-0.5.3-1.el6. rf.x86_64.rpm"/bin/rpm -ivh ./rpmforge-release-0.5.3-1.el6.rf.x86_64.rpm/bin/mkdir -p /home/software /tmp/mnt/bin/mount /dev/sdb2 /tmp/mnt#/bin/cp -prf /tmp/mnt/*.rpm /home/software//bin/rpm -ivh /home/software/*.rpm/bin/rpm --import /etc/pki/rpm-gpg/RPM-GPG-KEY-EPEL-6上述文件保存为yufa199.cfg2 制作可引导U盘另外制作一个可引导的U盘,具体过程如下:准备工作:1.准备一个大于8G的U盘2.Linux系统在vm下手动安装一个也可以将U盘插入系统,然后格式U盘, 将U盘格式化为2个分区,一个为msdos分区, 500M空间, 另一个为ext2分区,余下的所有空间,分2个区的主要原因是因为,一个盘符做引导,另外一个盘符放置iso文件, iso文件较大,如果都放在一个分区下, 重做格式化还需要再次拷贝iso文件耗时长.完整配置方法:Command actiona toggle a bootable flag#设置启动盘b edit bsddisklabelc toggle the dos compatibility flagd delete a partition #删除分区l list known partition typesm print this menun add a new partition #添加分区o create a new empty DOS partition tablep print the partition table #打印分区信息q quit without saving changess create a new empty Sun disklabelt change a partition's system id #修改分区系统IDu change display/entry unitsv verify the partition tablew write table to disk and exit #写入并退出x extra functionality (experts only)Command (m for help): n #添加一个新分区Command actione extendedp primary partition (1-4)p #分区格式为主分区Partition number (1-4): 1 #第一个分区First cylinder (1-14786, default 1):Using default value 1Last cylinder, +cylinders or +size{K,M,G} (1-14786, default 14786): +500M #设置分区大小为500MCommand (m for help): n #再添加一个分区Command actione extendedp primary partition (1-4)p至此U盘启动就已经完成,将U盘接入windows系统,可以看到500M的空间,将上文中的yufa199文件拷贝到该U盘(第一个分区)。
ASP.NETJumpstart:构建应用程序和网页框架
Jumpstart:构建应用程序和网页框架简介欢迎您阅读第三篇 Jumpstart 文章,该系列的四篇文章将从头至尾引领您创建一个完整的应用程序。
该系列的第一篇文章介绍了完整的初学者工具包,向您展示如何安装和运行该应用程序。
第二篇文章讨论如何构建应用程序的数据层,以及如何理解 页面上的数据源控件与初学者工具包中底层数据的交互原理。
第三篇文章将继续帮助您了解如何构建该应用程序的表示层—通过研究应用程序和网页框架(自始至终使用的)的创建过程而实现。
正在构建的初学者工具包名为Media Share Library Starter Kit。
通过它创建一个允许注册用户表示其媒体项目集合(例如,电影DVD、音乐CD、书籍等)的应用程序很容易,以便供其他注册用户借用。
用户可以集中浏览使用该应用程序的组所持有的项目库,并向项目的注册所有者请求借用指定的项目。
Media Share Library Starter Kit 的概念为您提供一个快速组织库集合的框架,以便该库集合可以在更多的人之间共享。
正如前几篇文章所阐述的那样,无论是否使用初学者工具包,它本身就说明了 在这一最新的版本的 2.0 中所具有的一些更为激动人心的附加功能,这正是其微妙之处。
初学者工具包广泛使用母版页、新的代码隐藏模型、新服务器控件以及其他功能。
但是,本文的重点是有关它使用的一些令人振奋、新的 基本功能(例如,母版页的使用),以及应用程序页面中主题和导航的使用,在 2.0 中可以找到这些功能。
让我们开始自己动手构建初学者工具包的框架吧,首先来使用 2.0 的母版页功能。
返回页首使用贯穿应用程序的网页模板 2.0 加入了母版页,这是令人更为振奋的附加功能之一。
母版页提供的基本功能是创建一个应用程序自始至终所使用的网页模板。
大多数个体用户不会构建各自应用程序的所有页面,因为应用程序之间的差异太大了。
因此,您会发现页与页之间存在很多相同的应用程序页面元素。
jumpserver安装与部署
jumpserver安装与部署1.简介Jumpserver 是⼀款由Python编写开源的跳板机(堡垒机)系统,实现了跳板机应有的功能。
基于ssh协议来管理,客户端⽆需安装agent。
特点:完全开源,GPL授权Python编写,容易再次开发实现了跳板机基本功能,认证、授权、审计集成了Ansible,批量命令等⽀持WebTerminalBootstrap编写,界⾯美观⾃动收集硬件信息录像回放命令搜索实时监控批量上传下载2.部署环境系统:centos7ip:192.168.199.218关闭selinux 和防⽕墙CentOS 7setenforce 0 # 可以设置配置⽂件永久关闭systemctl stop iptables.servicesystemctl stop firewalld.service修改字符集,否则可能报 input/output error的问题,因为⽇志⾥打印了中⽂localedef -c -f UTF-8 -i zh_CN zh_CN.UTF-8export LC_ALL=zh_CN.UTF-8echo 'LANG=zh_CN.UTF-8' > /etc/locale.confCentOS6setenforce 0service iptables stop2.1准备Python环境和Python虚拟环境2.1.1安装依赖包yum -y install wget sqlite-devel xz gcc automake zlib-devel openssl-devel epel-release git2.1.2编译安装wget https:///ftp/python/3.6.1/Python-3.6.1.tar.xztar xvf Python-3.6.1.tar.xz && cd Python-3.6.1./configure && make && make install# 这⾥必须执⾏编译安装,否则在安装 Python 库依赖时会有⿇烦...2.1.3建⽴Python虚拟环境centos 7 ⾃带的是 Python2,⽽ Yum 等⼯具依赖原来的 Python,为了不扰乱原来的环境我们来使⽤ Python 虚拟环境cd /optpython3 -m venv py3source /opt/py3/bin/activate# 看到下⾯的提⽰符代表成功,以后运⾏ Jumpserver 都要先运⾏以上 source 命令,以下所有命令均在该虚拟环境中运⾏(py3) [root@localhost py32.2安装Jumpserver 1.0.02.2.1下载或 Clone 项⽬#项⽬提交较多 git clone 时较⼤,你可以选择去 Github 项⽬页⾯直接下载zip包。
网络安装solaris
利用jumpstart网络安装solaris 10 sparc准备:sol-10-u4-ga-sparc-dvd.isoe450-1做客户机计算机名:e450-1 IP:218.6.172.58 mac:0:3:ba:11:2e:ed e450-2做服务器计算机名:e450-2 IP:218.6.172.60 mac:0:3:ba:11:36:56a 建立文件服务器vi /etc/rc3.d/S55isomount;chmod +x /etc/rc3.d/S55isomount#为了重复使用该资源,将该共享写成启动运行#!/sbin/shsvcadm disable svc:/network/nfs/server:defaultlofiadm -a /opt/sou/sol-10-u4-ga-sparc-dvd.iso /dev/lofi/1mount -F hsfs -o ro /dev/lofi/1 /opt/sou/iso1 #使用iso文件做安装源svcadm enable svc:/network/nfs/server:defaulthzj# mkdir -p /opt/sparcinstall #安装需要的文件服务所在位置,空间要求>4Ghzj# cd /opt/sou/iso1/Solaris_10/Tools/ #复制要安装的系统源文件到文件服务器目录hzj# ./setup_install_server /opt/sparcinstallhzj#这几步可以不用,在share时指定共享目录改/opt/sparcinstall成/opt/sou/iso1即可。
b 设置客户机系统配置文件vi /etc/hosts #建立宿主主机和客户机的对应关系127.0.0.1 localhost218.6.172.58 e450-1 #e450-1是客户机218.6.172.60 e450-2 loghost #e450-2是宿主服务器主机:wqmkdir -p /jumpstart #复制配置文件服务器的范例文件到文件服务器目录cd /jumpstartcp -rf /opt/sou/iso1/Solaris_10/Misc/jumpstart_sample/check .vi sysidcfg #建立客户机安装os使用的配置文件system_locale=en_US.ISO8859-1timezone=Asia/Shanghaiterminal=vt100name_service=DNS {domain_name=name_server=221.236.9.9, 210.77.146.30, 61.139.2.69search= } #最好使用none,简单root_password=Els7v.cLie0DM #root的密码是:1qaz~!@#root_password=<encrypted from /etc/shadow>network_interface=hme0 {hostname=e450-1 #指定安装后的主机名为e450-1ip_address=218.6.172.58 #ip是218.6.172.58netmask=255.255.255.0 #掩码是24default_route=218.6.172.1 #网关是218.6.172.1protocol_ipv6=no} #禁用ipv6security_policy=none #禁用安全:wqc 设置客户机系统属性文件vi rules #定制配置规则文件,创建check脚本hostname e450-1 - e450-1_prof - #指定客户机e450-2使用的属性文件是e450-1_prof:wqvi e450-1_prof #创建客户机的profile文件e450-1_prof,定义其安装参数install_type initial_install #初始化安装system_type standalone #独立系统partitioning explicit #分区如下filesys c0t0d0s0 2000 / #/分区2Gfilesys c0t0d0s1 1024 swap #swap分区filesys c0t0d0s3 free /w #剩下的全给/w私有分区cluster SUNWCXall #安装OEM Solaris OS 群集#cluster SUNWCprog安装开发软件./check #检查配置规则文件正确性Validating rules...Validating profile e450-1_prof...The custom JumpStart configuration is ok.d 设置nfs共享share -F nfs -o ro,anon=0 /opt/sparcinstallshare -F nfs -o ro,anon=0 /opt/sou/iso1 #如果在a中没有用hzj#则用该行,不用上面一行。
- 1、下载文档前请自行甄别文档内容的完整性,平台不提供额外的编辑、内容补充、找答案等附加服务。
- 2、"仅部分预览"的文档,不可在线预览部分如存在完整性等问题,可反馈申请退款(可完整预览的文档不适用该条件!)。
- 3、如文档侵犯您的权益,请联系客服反馈,我们会尽快为您处理(人工客服工作时间:9:00-18:30)。
Jumpstart安装实例一、正常用CD-ROM手工安装一台机器(以下称Install_sever),准备将其配置成Install Server <过程省略>二、按照用户分配的IP地址、规划的hostname,和需要利用网络安装的主机的Ethernet Address 修改Server的/etc/hosts和/etc/ethers例如:/etc/hosts中加入以下行129.148.94.6 Client1129.148.94.7 Client2../etc/ethers中加入以下行8:0:20:30:6:9a Client18:0:20:30:6:83 Client2..三、制作Solaris OS Image1、在Install_sever的CD-ROM中放入Solaris 8 Software 1 of 2光盘2、运行以下命令:# mkdir /export/install# cd /cdrom/cdrom0/s0/Solaris_8/Tools# ./setup_install_server /export/install(其中/export/install所在的分区必须有足够的空间,至少800M以上,建议1G如果/分区空间不够,可选用其他目录,只要于以后使用该目录时保持一致即可如可以使用/export/home/install)3、等待程序运行完成以后,运行以下命令取出Solaris 8 Software 1 of 2光盘并放入Solaris 8 Software 2 of 2光盘# cd /# eject4、运行以下命令:# cd /cdrom/cdrom0/Solaris_8/Tools# ./add_to_install_server /export/install5、等待程序运行完成以后,运行以下命令取出Solaris 8 Software 2 of 2光盘并放入Solaris 8 Language 光盘# cd /# eject6、运行以下命令:# cd /cdrom/cdrom0/Tools# ./add_to_install_server -s /export/install按照系统提示选择"Simplified Chinese"(简体中文)选项,安装相应软件包7、等待程序运行完成以后,运行以下命令取出Solaris 8 Language 光盘# cd /d# eject至此制作Solaris OS Image的工作完成四、配置jumpstart相关信息1、运行以下命令# mkdir /jumpstart# cp -r /export/install/Solaris_8/Misc/jumpstart_sample/* /jumpstart2、用ftp将事先制作好的以下几个文件上传至/jumpstart中(ftp上传时请用ascii码格式)(用vi看一下文件的内容,如果文本行结尾有多余的^M,请将文件中的^M全部删除,或用命令dos2unix转换)sysidcfgrulestest_prof_18Gtest_prof_36G3、按照用户设置的netmask(网络掩码)修改sysidcfg文件中network_interface的相关参数例如:原条目:network_interface=primary {netmask=255.255.255.0 protocol_ipv6=no}修改成:network_interface=primary {netmask=255.255.252.0 protocol_ipv6=no}保存文件4、运行以下命令:# cd /jumpstart# ./check<---检查rules文件语法,并生成rules.ok文件此时可以查看一下rules.ok文件是否生成五、共享必要的目录1、编辑/etc/dfs/dfstab文件加入以下行share -F nfs -o ro,anon=0 /jumpstart2、运行以下命令:# /usr/lib/nfs/nfsd -a 16# /usr/lib/nfs/mountd# share /jumpstart# shareall(用以下命令查看/jumpstart是否share出来了,如果有以下输出表示share正常)# dfshares Install_severRESOURCE SERVERACCESSTRSPOTInstall_sever:/jumpstart Install_sever--六、授权Clients安装运行以下命令:# cd /export/install/Solaris_8/Tools# ./add_install_client -c Install_sever:/jumpstart -p Install_sever:/jumpstart Client1 sun4u # ./add_install_client -c Install_sever:/jumpstart -p Install_sever:/jumpstart Client2 sun4u ...以上命令要逐个授权在/etc/hosts中加入的每一个需要利用网络安装的主机七、引导Client机器,利用网络安装操作系统1、检查网络连接是否正确2、Client开机后用Stop+A将机器控制在OK提示符下3、键入以下命令利用网络安装操作系统:ok boot net - install附录1:例子文件及相关解释:sysidcfg 文件内容#system_locale=en_US#install_locale=en_USname_service=NONE#指定名服务为NONEnetwork_interface=primary {netmask=255.255.252.0 protocol_ipv6=no}#设置网络相关参数security_policy=NONE#设置安全策略为NONEterminal=dtterm#设置终端类型为dttermtimezone=PRC#设置时区信息为PRCsystem_locale=zh#设置本地信息为zh(中文)timeserver=localhost#设置时钟信息为localhost(本机)rules 文件内容# rule keywords and rule values begin script profile finish script# ----------------------------- ------------ -------- -------------disksize c0t0d0 15000-20000- test_prof_18G-disksize c0t0d0 30000-40000- test_prof_36G-第一行设置磁盘大小在15G-20G(18G硬盘)的用test_prof_18G 配置文件第一行设置磁盘大小在30G-40G(36G硬盘)的用test_prof_36G 配置文件test_prof_18G 文件内容install_type initial_install#指定安装类型为initialusedisk c0t0d0#指定系统选择的硬盘为c0t0d0boot_device c0t0d0s0 update#设置root文件系统及引导设备位置,并更新EEPROM 中的参数。
root_device c0t0d0s0#设置root文件系统位置为c0t0d0s0cluster SUNWCXall#设置系统软件安装类别为Entire Distribution Plus OEM Supportsystem_type standalone#设置系统类型为standalonepartitioning explicit#指定硬盘分区方式(explicit 表示使用filesys 定义的结构)filesys c0t0d0s0 2000 / -\filesys c0t0d0s1 1500 /var - |filesys c0t0d0s3 2500 swap |filesys c0t0d0s5 3000 /opt - }-> 具体每一个分区的信息(大小为兆字节)filesys c0t0d0s6 2000 /usr - |filesys c0t0d0s4 15 unnamed |filesys c0t0d0s7 free /export/home -/geo Asia#指定地理区域locale zh#指定本地化语言包isa_bits 64#计算位长(64 或32)配置注意事项:1、install_type 必须写在第1行2、标记为容量为“free”的分区如“filesys c0t0d0s7 free /export/home -”必须写在所有“filesys”定义的最后一个test_prof_36G 文件内容相应的解释与test_prof_18G 文件相同区别只在“filesys”的分区大小定义不同install_type initial_installusedisk c0t0d0boot_device c0t0d0s0 updateroot_device c0t0d0s0cluster SUNWCXallsystem_type standalonepartitioning explicitfilesys c0t0d0s0 3000 / -filesys c0t0d0s1 3000 /var -filesys c0t0d0s3 3000 swapfilesys c0t0d0s5 5000 /opt -filesys c0t0d0s6 3000 /usr -filesys c0t0d0s4 15 unnamedfilesys c0t0d0s7 free /export/home -geo Asialocale zhisa_bits 64如果有其他特殊需求请参照:“Solaris 8 Advanced Installation Guide”(Part Number:806–0957–10)附例:JumpStart Install Server 安装过程:附录1:实例安装记录此例中:JumpStart Install_Server的信息如下:Hostame: jumptestIP: 10.11.147.602个Install Client信息如下Client1:Hostame: test-1IP: 10.11.147.38Ethernet: 8:0:20:ce:ec:d6c0t0d0: 18GClient2:Hostame: test-2IP: 10.11.147.39Ethernet: 8:0:20:ce:ec:aec0t0d0: 18Groot@jumptest # cd /cdrom/sol_8_sparc/s0/Solaris_8/Toolsroot@jumptest # ./setup_install_server /export/home/installVerifying target directory...Calculating the required disk space for the Solaris_8 productCopying the CD image to disk...Install Server setup completeroot@jumptest # cd /root@jumptest # ejectroot@jumptest # cd /cdrom/sol_8_sparc_2/Solaris_8/Toolsroot@jumptest # ./add_to_install_server /export/home/installThe following Products will be copied to /export/home/install/Solaris_8/Product: Solaris_2_of_2If only a subset of products is needed enter Control-Cand invoke ./add_to_install_server with the -s option.Checking required disk space...Copying the Early Access products...41990 块Processing completed successfully.root@jumptest # cd /root@jumptest # ejectroot@jumptest # cd /cdrom/sol_8_lang_sparc/Toolsroot@jumptest # ./add_to_install_server -s /export/install /export/home/installEnter the number of the product(s) you want to addto /export/home/install/Solaris_8/Product or 'all' for all products.The following are valid products:1Simplified_Chinese2French3German4Italian5Japanese6Korean7Spanish8Swedish9Traditional_Chinese10shared1Checking required disk space...Copying SimplifiedChinese packages...Processing completed successfully.root@jumptest # cd /root@jumptest # ejectroot@jumptest # cd /jumpstartroot@jumptest # ./checkValidating rules...Validating profile test_prof_18G...Validating profile test_prof_36G...The custom JumpStart configuration is ok.root@jumptest # lsany_machine net924_sun4c rules sysidcfg x86-begin.confcheck test_prof_18G rules.ok upgrade x86-classhost_class test_prof_36G set_root_pw x86-beginroot@jumptest # /usr/lib/nfs/nfsd -a 16root@jumptest # /usr/lib/nfs/mountdroot@jumptest # share /jumpstartroot@jumptest # shareallroot@jumptest # dfshares jumptestRESOURCE SERVER ACCESS TRANSPORTjumptest:/jumpstart jumptest - -root@jumptest # cd /export/home/install/Solaris_8/Toolsroot@jumptest # ./add_install_client -c jumptest:/jumpstart -p jumptest:/jumpstart test-1 sun4u saving original /etc/dfs/dfstab in /etc/dfs/dfstab.origAdding "share -F nfs -o ro,anon=0 /export/home/install" to /etc/dfs/dfstabupdating /etc/bootparamscopying inetboot to /tftpbootroot@jumptest # ./add_install_client -c jumptest:/jumpstart -p jumptest:/jumpstart test-2 sun4u updating /etc/bootparamsroot@jumptest #备注:例子中会有目录不同的情况如不是/cdrom/cdrom0,而是/cdrom/sol_8_sparc/、/cdrom/sol_8_sparc_2或/cdrom/sol_8_lang_sparc,其实/cdrom/cdrom0是指向这些目录的连接,没有问题。