Smart IQ and HAPSITE Smart Installation Instructions
HAPSITE ER 顶空操作培训
Running Analyze 运行分析
Quantitation Reports 定量报告
Contamination Issues 污染问题
2 Copyright © 2009
What is the Headspace Sampling System 什么是顶空采样系统
HAPSITE accessory HAPSITE 辅件 Sampling system for: 采样系统用于:
• Align the red dots 对准红点
For the HAPSITE Smart Plus, plug the side labeled This End to Accessory into the HSS 对于 HAPSITE Smart Plus, 将边上标志此端至附件端的 一端插入 HSS
• All components will be heated to their set point temperature 全部组件将加热至它们的设定温度 • AutoTune will be run 自动调谐将运行 • Concentrator Cleanout will be run if a concentrator is installed 如安装浓缩器将运行浓缩器清理
• Water 水 • Soil 土壤 • Liquids 液体
Detects VOCs 检测 VOCs
• Qualitative methods 定性方法 • Quantitative methods定量方法 • PPB to PPT range PPB 至 PPT 量程
3 Copyright © 2009
Headspace Sampling System 顶空采样系统
安达发 C1 智能制造管理软件 客户端安装操作手册说明书

安达发
C1智能制造管理软件
客户端安装操作手册
版本:20191026.1
本文档内容受版权法的保护,未经明确的书面许可,不得擅自泄漏或复制本文档的内容。
目录
1 C1软硬件环境准备 (3)
2 软件包文件结构 (3)
3 客户端安装 (3)
1C1软硬件环境准备
安达发C1系统客户端安装时需要如下环境要求:
1.客户端
●CPU:2GHz以上
●内存:4G及以上
●硬盘:空余2G以上
●操作系统:Windows 7或以上
●安装好Microsoft .net 4.8 或以上
●(下载地址:https:///download/dotnet-framework)
2.网络
●标准局域网即可。
要求网络畅通、无丢包、无明显延迟。
2软件包文件结构
软件包AndafaC1Client.zip:安达发C1客户端标准程序。
3客户端安装
第一步:解压文件。
拷贝客户端文件包到对应的终端用户电脑中,解压后如下图:双击打开安达发C1应用程序。
第二步:双击执行AndafaC1.exe。
双击执行AndafaC1.exe,进入系统登录界面如图所示,点“…”配置服务器(主机、端口、用户名、密码由管理员提供),如对应的配置文件已经配置好,则可直接点击“确定”,如用户名与密码正确则可直接进入系统,系统提供默认的管理员用户名和密码。
点击登录,进入C1系统主界面;各模块的操作说明可参考安达发C1系统标准版操作手册。
Epson Force Guide 说明书

SPECIFICATION SHEETFactory Automation Specification Sheet | Page 1 of 2Epson® Force GuideIntuitive robot force guidance forhigh-precision performance.Powerful performance — integrated force control system driven by proprietaryQuartz Technology from EpsonUltra precise — detects force and adjusts motion with amazingprecision — down to 0.1 NSuperior rigidity — durable sensor built to withstand excessive forceFast robot/force guidance response — internal sensor with real-time servosystem integrationPoint-and-click setup — easy-to-use interface with graphical wizards,charts and moreFast, easy implementation — helps reduce the amount of coding withdecision-based flowcharts and intelligent objectsReal-time monitoring and data logging of force feedback — for quality controlMulti-axis force/torque sensor — includes three linear and three rotationalmeasurement axesEasy set up and configuration — fully integrated into the Epson RC+®development environmentSimplify common force guidance applications — perfect for tasks such asscrew driving, part insertion, grinding/polishing and more/forceguideSpecification Sheet | Page 2 of 2Specifications and terms are subject to change without notice. EPSON and Epson RC+ are registered trademarks,EPSON Exceed Your Vision is a registered logomark and Better Products for a Better Future is a trademark of SeikoEpson Corporation. SmartWay is a registered trademark of the U.S. Environmental Protection Agency. All other productand brand names are trademarks and/or registered trademarks of their respective companies. Epson disclaims any andall rights in these marks. Copyright 2018 Epson America, Inc. Com-SS-Oct-13 CPD-55977 9/18Epson America, Inc.3840 Kilroy Airport Way, Long Beach, CA 90806Epson Canada Limited185 Renfrew Drive, Markham, Ontario L3R 6G3www.epson.caSee the latest innovations from Epson Business Solutions at /forbusiness/forceguideContact:1 Robots not supported: G1, LS-Series, T-Series, EZ Modules2 Weight includes force sensor and mounting flange; does not include control board and cables.3 Controllers not supported: RC180 and RC904 The measurement resolution including the noise level and time drift (25 ° Celsius), when then measurement time is 5 seconds.5 The measurement accuracy when the measurement time is6 minutes.Internal Cable Routing Example External Cable Routing Example。
腾讯云-智能钛机器学习平台白皮书

智能钛机器学习平台产品概述目录产品简介产品概述 (3)什么是TI-ONE..................................................................................................................................................................3.....如何使用TI-ONE ..............................................................................................................................................................3....TI-ONE 定价....................................................................................................................................................................3.......其他相关产品...................................................................................................................................................................3....... 客户价值 (5)技术价值...........................................................................................................................................................................5.......业务价值...........................................................................................................................................................................5....... 应用场景 (6)金融风控...........................................................................................................................................................................6.......营销推荐...........................................................................................................................................................................6.......工业质量检测...................................................................................................................................................................7.......算法大赛...........................................................................................................................................................................7.......物业智能化管理................................................................................................................................................................8......人物监察管理识别...........................................................................................................................................................8...... 版本更新. (11)V.1.5 版本说明..............................................................................................................................................................1..1.....新特性.....................................................................................................................................................................1..1.....V.1.4 版本说明..............................................................................................................................................................1..1.....新特性.....................................................................................................................................................................1..1.....问题修复及优化.....................................................................................................................................................1..2....V1.3 版本说明...............................................................................................................................................................1...2....新特性.....................................................................................................................................................................1..2.....问题修复及优化.....................................................................................................................................................1..2....V1.2 版本说明...............................................................................................................................................................1...2....新特性.....................................................................................................................................................................1..2.....产品简介产品概述什么是TI-ONE智能钛机器学习平台(TI-ONE )是为AI 工程师打造的一站式机器学习服务平台,为用户提供从数据预处理、模型构建、模型训练、模型评估到模型服务的全流程开发及部署支持。
HAPSITE Smart 第三章 Smart IQ软件的安装、联机与使用
13
March 12
file_name
Smart IQ软件的使用 软件的使用——数据分析 软件的使用 数据分析
3.1 定性(续)。勾选“Switch to NIST”,点击ok,进 入NIST库进行检索,得到物质的分子式,结构式,分子 量,碎片离子等信息。
14
March 12
file_name
15
23
March 12
file_name
Smart IQ软件的使用 软件的使用——查看状态 软件的使用 查看状态
11.双击Frontpanel Display,可以通过 电脑查看主机前面板 显示内容,他们是同 步的。
24
March 12
file_name
联系我们
如有任何问题,请联系英福康有限公司 电话:021-6209 3094
Smart IQ软件的使用 软件的使用——编辑方法 软件的使用 编辑方法
6.双击Method Editor可以对方法进行编辑;
选择方法类型 选择扫描模式 方法的描述性文字
19
March 12
file_name
Smart IQ软件的使用 软件的使用——编辑方法 软件的使用 编辑方法
7.单击Next;
6
March 12
file_name
Smart IQ软件的联机 软件的联机
1.双击桌面上Smart IQ软件的快捷方式;
2.双击软件界面中的System;
3.单击HAPSITE List;
7
March 12
file_name
Smart IQ软件的联机 软件的联机
4.通过面板上显示的仪器序号,将第一位数字“0”改成字母“H”后, 填入到如左图的位置上。点击Add,会在上方的列表中显示出添加后的仪 器型号,点击“ok”,即可添加当前仪器。
Dubenton Philips 5100-6HBS智能门锁说明书
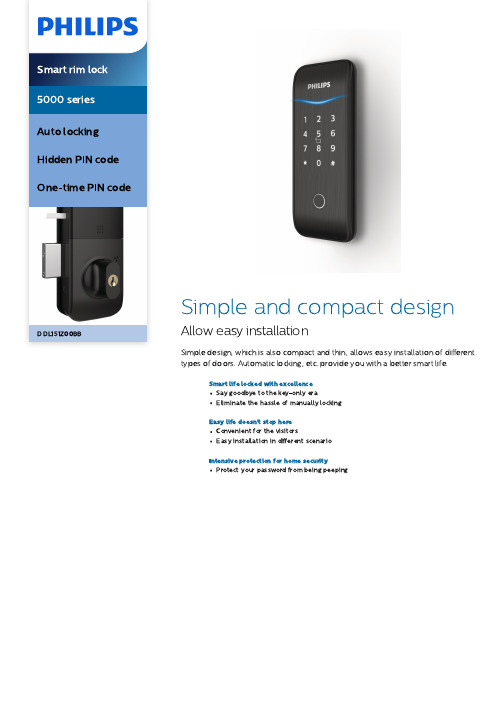
DDL151Z00BBand compact design llow easy installationSimple design, which is also compact and thin, allows easy installation of different types of doors. A utomatic locking, etc. provide you with a better smart life.Smart life locked with excellenceSay goodbye to the key-only eraEliminate the hassle of manually lockingEasy life doesn't stop hereConvenient for the visitorsEasy installation in different scenarioIntensive protection for home securityProtect your password from being peepingSmart rim lockDDL 151Z 00BB /97HighlightsSpeci ficationsVarious ways ofunlockingMultiple choices as fingerprint , PIN code , key tag , and app meet di fferent unlocking needs and allow users to enjoy a smart and convenient door opening experience .Fully automortisePhilips 5100-6HBS employs fully automatic mortise . Without the need for any extraaction , the deadbolt will spontaneously pop up after closing the door . If the door is not locked properly , the mortise will give an alert to remind you of the door lock status .One -time PINcodeWhen visitors or cleaners come while you are not at home , you can set a one -time password in advance , and it will becomeinvalid after being used . There is no need to change the master PIN code frequently ,which eliminates the hassle of resetting the PIN code (s ).CompactdesignThe simple and compact design allows easy installation for home , studio , o ffice , etc .,which is widely suitable for installation on both inside and outside doors , which could also ensure a private space .Hidden PINcodeFeatured 32-digit hidden PIN codetechnology , Philips 5100-6HBS allows you to enter any random number combination to get identi fied and unlock the door as long as there is a consecutive input of the real password . This feature can e ffectively prevent peeping and safeguard your real password .A ccess Solution Card /Key Tag FingerprintPassword /PIN CodeDesign & A ppearanceColor : Champagne gold , Obsidian black Fingerprint Sensor : SemiconductorEasy OperationIndicator : Door locks status prompt , Lowbattery prompt , Mute status prompt , Outside forced lock prompt , System locking prompt Voice Guide : Human voice guideInstallationDoor Opening Direction : Left inwardopening , Left outward opening , Right inward opening , Right outward oepningDoor Thickness : 30-50 mm , 50-90 mm ,Other range *Door Type : A ntitheft door , Copper door ,Wooden door Lock Capacity Master PIN Code : 1One -time PIN Code : 1ModeOperationg Mode : A uto mode , Manual modePower Speci ficationEmergency Power Supply : 5V power bank Maximum Batteries Capacity : 4 batteries* May be less depending on the actual usage .* The e ffect of the digital keypad showed in the photos of this product may be inconsistent with the actual display e ffect . Please be subject to the digital keypad displaying status under the actual usage scenarios .* Other door thickness range : If the thickness of the door is out of the mentioned range , please contact our local dealers or consumer care center .© 2022 Koninklijke Philips N .V .A ll Rights reserved .Speci fications are subject to change without notice . Trademarks are the property of Koninklijke Philips N .V . or their respective owners .Issue date 2022‑11‑19Version : 1.0.112 NC : 8670 001 77655E A N : 69 71318 50279 8www .philips .com。
人工智能开发平台安装说明书的基础知识
人工智能开发平台安装说明书的基础知识人工智能开发平台安装说明书的基础知识人工智能(Artificial Intelligence,简称AI)作为一项前沿技术,正在快速发展,并广泛应用于各个领域。
为了方便广大开发者使用人工智能技术,各大科技公司纷纷提供了人工智能开发平台。
本文将介绍人工智能开发平台的安装过程,并提供相应的基础知识。
一、人工智能开发平台安装前的准备工作1. 硬件要求人工智能开发平台通常对硬件有一定的要求,一般需要一台性能较强的计算机,最低配置要求包括:- 处理器:Intel i5或以上- 内存:8GB或以上- 存储空间:至少100GB的硬盘空间2. 操作系统要求不同的人工智能开发平台对操作系统有不同的要求。
常见的操作系统包括Windows、Mac OS和Linux。
在安装人工智能开发平台之前,请确保你正在使用的操作系统符合平台要求。
3. 软件依赖部分人工智能开发平台可能依赖于其他软件,例如CUDA、cuDNN等。
在安装人工智能开发平台之前,请安装相应的软件依赖,并确保其版本与平台要求一致。
二、人工智能开发平台的安装步骤1. 下载安装包访问人工智能开发平台的官方网站,下载相应的安装包。
通常安装包会提供不同的版本选择,根据自己的需求选择合适的版本进行下载。
2. 安装平台双击下载的安装包,按照提示完成平台的安装。
在安装过程中,可以选择安装路径、是否创建桌面快捷方式等选项。
3. 配置环境变量部分人工智能开发平台需要配置环境变量,以便在命令行中能够方便地使用平台相关的命令。
在安装完成后,打开终端或命令提示符窗口,输入以下命令配置环境变量:```export PATH=/path/to/platform/bin:$PATH```其中`/path/to/platform`需要替换为实际安装路径。
4. 验证安装结果在终端或命令提示符窗口中输入以下命令验证平台是否成功安装:```platform --version```如果安装成功,将显示平台的版本号信息。
siemens ipc3000 smart v2016 操作说明
1.2
外部设计 ........................................................................................................................... 10
1.3
操作员控件 ....................................................................................................................... 14
SIMATIC IPC3000 SMART(2016 版)
4
操作说明, 06/2019, A5E41134026 - AD
目录
前言....................................................................................................................................... 3
需要的基本知识 需要具备个人计算机和 Microsoft 操作系统的相关知识。 同时,最好了解自动化控制工程方面的一般知识。
在信息系统中的位置 SIMATIC IPC3000 SMART 文档包括以下部分: ● SIMATIC IPC3000 SMART 快速安装指南 ● SIMATIC IPC3000 SMART 操作说明 产品随附的附件盒中提供了快速安装指南和“文档和驱动程序”DVD。 操作说明是“文档和 驱动程序”DVD 的一部分。 有关如何使用软件的详细说明,请参见相应的文档。
3.2 3.2.1 3.2.2
安装设备 ........................................................................................................................... 24 安装信息 ........................................................................................................................... 24 安装位置和方式 ................................................................................................................ 25
4--INFICON HAPSITE Smart 便携式GCMS操作维护规程
INFICON HAPSITE Smart 便携式GC/MS 操作维护规程1.开机前准备工作1)用拇指打开HAPSITE 面板。
2)将带紫色条纹的氮气瓶插入主机标有紫色条纹的气瓶开口中。
在压入气瓶的同时,按下“PUSH”控制杆使气瓶与主机卡好。
松开“PUSH”控制杆,并轻轻地拉一下气瓶,确认它已经卡紧。
相同操作把黄色内部标准气瓶插入顶部标有黄色条纹的气瓶开口中。
3)将充足电的电池(充满电需要17小时,可以使用2-3小时,按电池上test 键可看电量)插入气瓶口左面的矩形开口中。
将电池的曲面侧面向开口的左侧。
当电池妥善地座入时,发出“卡嗒”声。
轻轻地拉一下电池确认它已正确就位。
4)将AC 至DC HAPSITE 适配器电源终端的四脚插头插入位于HAPSITE 左侧的四脚插座中。
(注:红点应向着HAPSITE 的前面. 将AC 至DC HAPSITE 适配器电源的另一端插入墙上的电源插座中。
载气标气 按住杆闸电源插口电池稳压器5)将采气探头连接至HAPSITE 上,将探头终端的插头插入黄色顶盖上的4插脚探头插口中。
(注:应对准探头和探头插口上的红色标记。
)(如测水样需用顶空装置,卸下采气探头,把连接管插入该探头,同时接上相同接口的顶空装置)。
6)如用笔记本电脑,打开笔记本无线连接开关(笔记本左侧),也可用黄色网络线连接HAPSITE 与电脑直接,本地连接设置:IP:10.210.133.144,子网掩码:255.252.0.0。
HAPSITE 的以太网端口位于仪器的顶部(注: 以太网端口可用螺丝帽盖上。
)2.开机1)按住主机面板内侧的POWER,面板上的POWER字体亮(注意:从开机到调谐完毕,调出分析方法这个过程要接到车载电源,否则将会耗掉电池的40%)。
2) 在HAPSITE 启动引导(约1分钟)后,它将自动开始加热各个区域,准备运行指定的启动方法。
工厂编程的HAPSITE 启动方法是速查(Survey)。
Silicon Labs Wi-SUN SDK 1.3.2.0 产品说明书
Wi-SUN SDK 1.3.2.0 GAGecko SDK Suite 4.1 September 28, 2022Wireless Smart Ubiquitous Network (Wi-SUN) is the leading IPv6 sub-GHz mesh tech-nology for smart city and smart utility applications. Wi-SUN brings Smart Ubiquitous Networks to service providers, utilities, municipalities/local government, and other enter-prises, by enabling interoperable, multi-service, and secure wireless mesh networks. Wi-SUN can be used for large-scale outdoor IoT wireless communication networks in a wide range of applications covering both line-powered and battery-powered nodes. Silicon Labs' Wi-SUN hardware is certified by the Wi-SUN Alliance, a global industry association devoted to seamless LPWAN connectivity. Wi-SUN builds upon open stand-ard internet protocols (IP) and APIs, enabling developers to extend existing infrastruc-ture platforms to add new capabilities. Built to scale with long-range capabilities, high-data throughput and IPv6 support, Wi-SUN simplifies wireless infrastructure for industrial applications and the evolution of smart cities.These release notes cover SDK versions: 1.3.2.0 released September 28, 2022 1.3.1.0 released August 17,2022 1.3.0.0 released June 8, 2022Compatibility and Use NoticesFor information about security updates and notices, see the Security chapter of the Gecko Platform Release notes installed with this SDK or on the TECH DOCS tab on https:///developers/wi-sun-protocol-stack . Silicon Labs also strongly recommends that you subscribe to Security Advisories for up-to-date information. For instructions, or if you are new to the Silicon Labs Wi-SUN SDK, see Using This Release . Compatible Compilers:IAR Embedded Workbench for ARM (IAR-EWARM) version 9.20.4 •Using wine to build with the IarBuild.exe command line utility or IAR Embedded Workbench GUI on macOS or Linux could result in incorrect files being used due to collisions in wine’s hashing algorithm for generating short file names.•Customers on macOS or Linux are advised not to build with IAR outside of Simplicity Studio. Customers who do should carefully verify that the correct files are being used.GCC (The GNU Compiler Collection) version 10.3-2021.10, provided with Simplicity Studio.Contents Contents1Wi-SUN Stack (2)1.1New Items (2)1.2Improvements (2)1.3Fixed Issues (2)1.4Known Issues in the Current Release (3)1.5Deprecated Items (3)1.6Removed Items (3)2Wi-SUN Applications (4)2.1New Items (4)2.2Improvements (4)2.3Fixed Issues (4)2.4Known Issues in the Current Release (4)2.5Deprecated Items (4)2.6Removed Items (4)3Using This Release (5)3.1Installation and Use (5)3.2Security Information (5)3.3Support (6)1 Wi-SUN Stack1.1 New ItemsAdded in release 1.3.0.0•Most of the stack crypto operations are now made through ARM PSA Crypo API.•Added a new API sl_wisun_set_device_private_key_id() that indicates which PSA Crypto key handler contains the de-vice private key and has to be used by the stack. It is the application’s responsibility to create the key.•Added a new API sl_wisun_set_regulation() that configures the regional regulation to which the stack must comply. Refer to UG495: Silicon Labs Wi-SUN Developer's Guide for more information about regional regulation in the Wi-SUN Stack.•Added a new event SL_WISUN_MSG_REGULATION_TX_LEVEL_IND_ID that is fired when the transmission budget crosses one of the transmission budget thresholds. The transmission budget is defined by the regional regulation. Refer to UG495: Silicon Labs Wi-SUN Developer's Guide for more information about regional regulation in the Wi-SUN Stack.•Added a new API sl_wisun_set_regulation_tx_thresholds()that configures the threshold used to fire SL_WISUN_MSG_REGULATION_TX_LEVEL_IND_ID event.•Added a new API sl_wisun_set_advert_fragment_duration() that configures the asynchronous transmission fragment duration. It can be used to reduce the impact on the latency of long advertisement periods.•Added a new API sl_wisun_set_unicast_tx_mode() that enables a high-reliability transmission mechanism for unicast communication. It trades off unicast communication reliability for latency.1.2 ImprovementsChanged in release 1.3.1.0•When ARIB radio regulation is selected, the stack refuses all EDFE initialization requests sending an EDFE final frame.Changed in release 1.3.0.0•sl_wisun_set_channel_mask() channel filter is now applied to asynchronous transmissions and unicast listening schedule.The function was renamed sl_wisun_set_allowed_channel_mask() to make it more self-explanatory.1.3 Fixed IssuesFixed in release 1.3.2.01023782 Fixed an invalid Path Control field configuration in RPL DAO packet.Fixed in release 1.3.1.0851960 Fixed PAN Advert and PAN Config Trickle timer configuration. Inconsistent transmissions were not correctly managed. It could lead to suboptimal behavior in dense areas of a network.840698Fixed a performance issue that was causing Linux Border Router RCP to become unreachable when running throughput tests with high-speed data rates. That issue was fixed by using DMA to collect UART data.853035 Fixed an initialization issue that was causing PAN Advert and PAN Config asynchronous transmission requests to be dropped. That issue was most likely to happen with TEST and SMALL network size configuration and couldcause connection durations to be significantly longer.Fixed in release 1.3.0.0Fixed an error that was causing radio calibrations to be skipped during Wi-SUN Stack initialization. 8134407742901.4 Known Issues in the Current ReleaseNone1.5 Deprecated ItemsNone1.6 Removed ItemsNoneWi-SUN Applications 2 Wi-SUN Applications2.1 New ItemsAdded in release 1.3.0.0iPerf2 support•Integrated into Wi-SUN - SoC Network Measurement Application•Option to install the Iperf2 component to other applications alsoWi-SUN Configurator – UI Tool•Configuration options are being used by the Applications automatically•MAC Address•MAC Allow/Deny List•Unicast Dwell IntervalCoAP discovery feature (limited, RFC 6690):•Register Resources•Return list of Registered Resources in response to GET .well-known/core request2.2 ImprovementsAdded in release 1.3.1.0Wi-SUN Linux Border Router RCP•Released version 1.1.0•It now collects UART data using a DMA.2.3 Fixed IssuesNone2.4 Known Issues in the Current ReleaseIssues in bold were added since the previous release.Simplicity Studio – Network Analyzer: Wi-SUN Encrypted Packets arenot supported.2.5 Deprecated ItemsNone2.6 Removed ItemsRemoved in release 1.3.0.0•Wi-SUN - SoC Border Router with backhaul.3 Using This ReleaseThis release contains the following•Wi-SUN stack library•Wi-SUN sample applications•Wi-SUN border router pre-compiled demos•DocumentationIf you are a first time user, see QSG181: Silicon Labs Wi-SUN Quick-Start Guide.3.1 Installation and UseThe Wi-SUN SDK is provided as part of the Gecko SDK (GSDK), the suite of Silicon Labs SDKs. To quickly get started with the GSDK, install Simplicity Studio 5, which will set up your development environment and walk you through GSDK installation. Simplicity Studio 5 includes everything needed for IoT product development with Silicon Labs devices, including a resource and project launcher, software configuration tools, full IDE with GNU toolchain, and analysis tools. Installation instructions are provided in the online Simplicity Studio 5 User’s Guide.Alternatively, Gecko SDK may be installed manually by downloading or cloning the latest from GitHub. See https:///SiliconLabs/gecko_sdk for more information.Simplicity Studio installs the GSDK by default in:•(Windows): C:\Users\<NAME>\SimplicityStudio\SDKs\gecko_sdk•(MacOS): /Users/<NAME>/SimplicityStudio/SDKs/gecko_sdkDocumentation specific to the SDK version is installed with the SDK.3.2 Security InformationSecure Vault IntegrationThis version of the stack does not integrate Secure Vault Key Management.Security AdvisoriesTo subscribe to Security Advisories, log in to the Silicon Labs customer portal, then select Account Home. Click HOME to go to the portal home page and then click the Manage Notifications tile. Make sure that ‘Software/Security Advisory Notices & Product Change Notices (PCNs)’ is checked, and that you are subscribed at minimum for your platform and protocol. Click Save to save any changes.3.3 SupportDevelopment Kit customers are eligible for training and technical support. Contact Silicon Laboratories support at /support.Silicon Laboratories Inc.400 West Cesar Chavez Austin, TX 78701USAIoT Portfolio/IoTSW/HW/simplicityQuality /qualitySupport & Community/communityDisclaimerSilicon Labs intends to provide customers with the latest, accurate, and in-depth documentation of all peripherals and modules available for system and software imple-menters using or intending to use the Silicon Labs products. Characterization data, available modules and peripherals, memory sizes and memory addresses refer to each specific device, and “Typical” parameters provided can and do vary in different applications. Application examples described herein are for illustrative purposes only. Silicon Labs reserves the right to make changes without further notice to the product information, specifications, and descriptions herein, and does not give warranties as to the accuracy or completeness of the included information. Without prior notification, Silicon Labs may update product firmware during the manufacturing process for security or reliability reasons. Such changes will not alter the specifications or the performance of the product. Silicon Labs shall have no liability for the consequences of use of the infor -mation supplied in this document. This document does not imply or expressly grant any license to design or fabricate any integrated circuits. The products are not designed or authorized to be used within any FDA Class III devices, applications for which FDA premarket approval is required or Life Support Systems without the specific written consent of Silicon Labs. A “Life Support System” is any product or system intended to support or sustain life and/or health, which, if it fails, can be reasonably expected to result in significant personal injury or death. Silicon Labs products are not designed or authorized for military applications. Silicon Labs products shall under no circumstances be used in weapons of mass destruction including (but not limited to) nuclear, biological or chemical weapons, or missiles capable of delivering such weapons. Silicon Labs disclaims all express and implied warranties and shall not be responsible or liable for any injuries or damages related to use of a Silicon Labs product in such unauthorized applications. Note: This content may contain offensive terminology that is now obsolete. Silicon Labs is replacing these terms with inclusive language wherever possible. For more information, visit /about-us/inclusive-lexicon-projectTrademark InformationSilicon Laboratories Inc.®, Silicon Laboratories ®, Silicon Labs ®, SiLabs ® and the Silicon Labs logo ®, Bluegiga ®, Bluegiga Logo ®, EFM ®, EFM32®, EFR, Ember ®, Energy Micro, Energy Micro logo and combinations thereof, “the world’s most energy friendly microcontrollers”, Redpine Signals ®, WiSeConnect , n-Link, ThreadArch ®, EZLink ®, EZRadio ®, EZRadioPRO ®, Gecko ®, Gecko OS, Gecko OS Studio, Precision32®, Simplicity Studio ®, Telegesis, the Telegesis Logo ®, USBXpress ® , Zentri, the Zentri logo and Zentri DMS, Z-Wave ®, and others are trademarks or registered trademarks of Silicon Labs. ARM, CORTEX, Cortex-M3 and THUMB are trademarks or registered trademarks of ARM Holdings. Keil is a registered trademark of ARM Limited. Wi-Fi is a registered trademark of the Wi-Fi Alliance. All other products or brand names mentioned herein are trademarks of their respective holders.。
- 1、下载文档前请自行甄别文档内容的完整性,平台不提供额外的编辑、内容补充、找答案等附加服务。
- 2、"仅部分预览"的文档,不可在线预览部分如存在完整性等问题,可反馈申请退款(可完整预览的文档不适用该条件!)。
- 3、如文档侵犯您的权益,请联系客服反馈,我们会尽快为您处理(人工客服工作时间:9:00-18:30)。
Smart IQ and HAPSITE Smart Installation Instructions September 2005Updated Dec 18 2006 Note: These instructions are based on Windows XP SP2.Installation InstructionsThe HAPSITE Smart must be updated before the Smart IQ upgrade is installed on the PC.Smart IQandHAPSITE SmartThis document provides instructions for installing the Smart IQ software and the HAPSITE Smart software. There is also a software patch included with this version that must be installed after the HAPSITE Smart software.The HAPSITE Smart must be updated before the Smart IQ upgrade is installed on the PC. Failure to upgrade in this order can cause communications issues between the PC and the HAPSITE Smart.If your HAPSITE Smart has already been upgraded then proceed to the section on installation of Smart IQ.Due to Method and Data File changes, both the PC (Smart IQ) and the HAPSITE Smart must be updated with their respective software to maintain compatibility. If you have multiple HAPSITE Smarts and PCs then be sure to update all of them with the same software to maintain cross-system compatibility.Smart IQ runs on Windows 2000 and Windows XP. No other operating systems are supported at this time.This document assumes some HAPSITE Smart training has taken place and that the user is familiar with the HAPSITE Smart and Smart IQ communications setup.In summary, this document contains three sections and each section must be completed to successfully install this software:∙Installation of HAPSITE Smart∙Installation of the Software Patch∙Installation of Smart IQ168612607.doc 1 of 11Installation of HAPSITE SmartThe HAPSITE Smart software (HAPSITE.upd) can be found in the following folder on the CD: D:\HAPSITE Smart Software (this example assumes the CD drive is the D: drive)To install or upgrade the HAPSITE Smart, use these instructions:1. Start your current version of Smart IQ and insert the Smart IQ Software CD into the CD drive ofthe PC.2. Ensure the HAPSITE Smart is powered on and attached to the PC via the Ethernet cable(supplied with the HAPSITE Smart). The HAPSITE Smart should be displaying the main screen and should not be in Extended Standby. Note: Attempting to upgrade the HAPSITE Smart software when in Extended Standby may cause the system to lock up.3. Once the HAPSITE Smart is online, right-click on the icon and select …Update HAPSITESoftware‟. Note: The Smart IQ Access Level (Tools>>Set Access Level) must be set toAdvanced to enable this selection.4. Locate the HAPSITE.upd file in the \HAPSITE Smart Software folder on the CD and pressOpen.168612607.doc 2 of 11Note 1 File details and bitmaps shown are examples only. Actual file details and dialogs may be different.5. The HAPSITE.upd file will then be copied from the CD to the HAPSITE Smart. The HAPSITESmart Front Panel display will show activity during this copy process.6. After the file is copied, the HAPSITE Smart will use it to update its software. A dialog will appearon the PC to indicate that the update is occurring. The HAPSITE Smart Front Panel display will show activity during this update process.168612607.doc 3 of 117. When the update is complete, a dialog will appear on the PC. Press Ok on the PC or press theEscbutton on the HAPSITE Smart Front Panel to restart the HAPSITE Smart.8. After the HAPSITE Smart has restarted and reconnected to the PC, proceed with the installationof the software patch.168612607.doc 4 of 11Installation of the Software Patch (TunePatch-1-14.upd)The software patch (TunePatch-1-14.upd) can be found in the following folder:D:\Patches (this example assumes the CD drive is the D: drive)To install the software patch, use these instructions:Note: If this software patch has been installed previously then it is not necessary to install it.1. Start Smart IQ and ensure the HAPSITE Smart is powered on and attached to the PC via theEthernet cable.2. Right-click on the icon and select …Update HAPSITE Software‟.3. Locate the TunePatch-1-14.upd file in D:\Patches and press Open.168612607.doc 5 of 114. When the patch is copied and the update is complete, a dialog will appear on the PC. Press Okto restart the HAPSITE Smart. (Note: This patch is small and takes about two seconds to copy to the HAPSITE Smart).Proceed now to the installation of Smart IQ.168612607.doc 6 of 11Installation of Smart IQTo install or upgrade Smart IQ, use these instructions:1. Make sure Smart IQ is not running on the PC.2. Insert the Smart IQ Software CD into the CD drive of the PC.3. Locate and double-click on Setup.exe on the CD.4. Press the …Next >‟ button on the installation “Welcome” dialog.5. Browse and select the destination folder for the program or accept the default folder by pressingthe …Next >‟ button. INFICON recommends the use of the default folder (C:\Smart IQ) for the program. Note: If this is a new installation then p lease be sure to check all boxes in the …Select Components‟ dialog.168612607.doc7 of 116. Browse and select the destination folder for data storage or accept the default folder by pressingthe …Next >‟ button. INFICON recommends the use of the default folder (C:\Smart IQ) for data storage. (Note: Subfolders for data storage will automatically be created by the program under the folder selected in this step).7. Review and confirm the selections made and press Next > to proceed with the installation.168612607.doc8 of 118. After the Smart IQ software is installed, a dialog will appear which allows the NIOSH database tobe installed (if selected). If this is not desired (i.e. the latest version is already installed), then press the Close button and proceed to step 10. To install the NIOSH database, press theUnzip button.9. Allow the full NIOSH database to install, which may take a few minutes. An indicator at thebottom of the dialog will show the progress.10. After the NIOSH database has been successfully installed, press the OK button and then pressthe Close button.168612607.doc9 of 1111. As the final step, check the checkbox to view the README file and press the Finish button. TheREADME file contains information on the enhancements and fixes provided in this release as well as information on how to contact INFICON with questions.168612607.doc10 of 11Smart IQ and HAPSITE Smart Installation Instructions168612607.doc11 of 11。