Linux平台Oracle 11.2.0.1.0 升级 11.2.0.4.0 操作参考_V1.10_文库
10g静默升级10.2.0.1---10.2.0.4

1、编辑升级介质中的../Disk1/response/patchset.rsp文件,主要编辑以下条目
UNIX_GROUP_NAME="oinstall"
ORACLE_HOME="/u01/app/oracle/product/10.2.0/db_1"
ORACLE_HOME_NAME="OraDb10g_home1"
加 -force升级正常
[oracle@DB Disk1]$ ./runInstaller -silent -ignoreDiskWarning -force -responseFile /home/oracle/Disk1/response/patchset.rsp
Starting Oracle Universal Installer...
Checking installer requirements...
Checking operating system version: must be redhat-3, SuSE-9, SuSE-10, redhat-4, redhat-5, UnitedLinux-1.0, asianux-1, asianux-2 or asianux-3
Oracle Internet Directory Client Patch 10.2.0.4.0
iSQL*Plus 10.2.0.4.0
Oracle Advanced Security Patch 10.2.0.4.0
Oracle Net Patch 10.2.0.4.0
.................................................................................................... 100% Done.
Oracle RAC 10.2.0.1升级到10.2.0.4-安装配置参考手册

数据库RAC版本升级方案一、概述数据库做版本升级,版本从oracle10g 10.2.0.1 升级到oracle10g10.2.0.4。
本次操作因为涉及到生产数据库系统,须停止生产服务应用,所以升级需要在业务量尽可能少的环境下操作。
升级操作大概需要3~4个小时,具体安排如下表。
二、数据库升级操作如下操作步骤实现数据库由Oracle10.2.0.1版本到Oracle10.2.0.4版本的升级,建议有数据库应用经验者操作。
1.1 升级前准备1.1.1 升级背景Oracle升级介质:Oracle10.2.0.4补丁包。
下载地址:ftp:///6810189/p6810189_10204_Linux-x86-64.zip在升级包内有关于RAC升级英文说明文档(README.html),供参考。
用oracle用户上传下载的升级包到节点1的/home/oracle目录下。
Oracle当前版本:Oracle10.2.0.1计划升级到版本:Oracle10.2.0.4应用服务器节点名字:rac1、rac2应用数据库全局服务名:rac应用数据库实例名:rac1、rac21.1.2 停止业务系统(一)停止业务应用系统。
登陆两台web服务器其中一台,执行clpcl -t -a命令停止业务系统HA。
确定两台web服务器没有业务在运行[root@web1 ~]# ps –ef |grep java[root@web2 ~]# ps –ef |grep java没有进程在运行,否则需要把当前运行的进程kill掉。
1.1.3 备份应用数据库数据一、执行rman命令对数据库进行完全备份用oracle用户登陆节点1(rac1)。
执行如下命令,备份全局数据库[oracle@rac1 ~]$/opt/app/oracle/backup_scripts/full_backup.sh > rac_full_backup.log确认备份成功。
Linux系统(X64)安装Oracle11g完整安装图文教程另附基本操作

Linux系统(X64)安装Oracle11g完整安装图⽂教程另附基本操作⼀、修改操作系统核⼼参数在Root⽤户下执⾏以下步骤:1)修改⽤户的SHELL的限制,修改/etc/security/limits.conf⽂件输⼊命令:vi /etc/security/limits.conf,按i键进⼊编辑模式,将下列内容加⼊该⽂件。
oracle soft nproc 2047oracle hard nproc 16384oracle soft nofile 1024oracle hard nofile 65536编辑完成后按Esc键,输⼊“:wq”存盘退出2)修改/etc/pam.d/login ⽂件,输⼊命令:vi /etc/pam.d/login,按i键进⼊编辑模式,将下列内容加⼊该⽂件。
session required /lib/security/pam_limits.sosession required pam_limits.so编辑完成后按Esc键,输⼊“:wq”存盘退出3)修改linux内核,修改/etc/sysctl.conf⽂件,输⼊命令: vi /etc/sysctl.conf ,按i键进⼊编辑模式,将下列内容加⼊该⽂件fs.file-max = 6815744fs.aio-max-nr = 1048576kernel.shmall = 2097152kernel.shmmax = 2147483648kernel.shmmni = 4096kernel.sem = 250 32000 100 128net.ipv4.ip_local_port_range = 9000 65500net.core.rmem_default = 4194304net.core.rmem_max = 4194304net.core.wmem_default = 262144net.core.wmem_max = 1048576编辑完成后按Esc键,输⼊“:wq”存盘退出4)要使 /etc/sysctl.conf 更改⽴即⽣效,执⾏以下命令。
Oracle11.2.0.4安装及配置规范

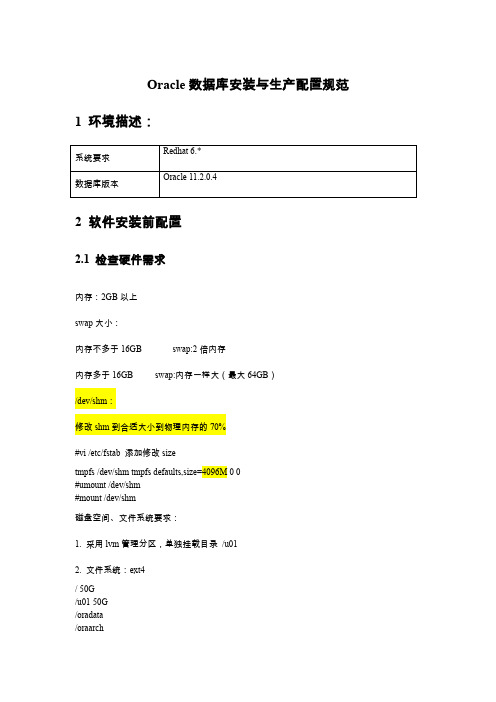
Oracle数据库安装与生产配置规范1 环境描述:2 软件安装前配置2.1 检查硬件需求内存:2GB以上swap大小:内存不多于16GB swap:2倍内存内存多于16GB swap:内存一样大(最大64GB)/dev/shm:修改shm到合适大小到物理内存的70%#vi /etc/fstab 添加修改sizetmpfs /dev/shm tmpfs defaults,size=4096M 0 0#umount /dev/shm#mount /dev/shm磁盘空间、文件系统要求:1. 采用lvm管理分区,单独挂载目录/u012. 文件系统:ext4/ 50G/u01 50G/oradata/oraarch2.2 检查软件需求1. 操作系统版本及数据库版本确认操作系统版本为Redhat 6,下载的oracle版本是11.2.0.42. 安装操作系统软件包The following packages (or later versions) must be installed:#rpm -ivh 下面安装包binutils-2.20.51.0.2-5.28compat-libstdc++-33-3.2.3-69.el6gcc-4.4.6-3.el6gcc-c++-4.4.6-3.el6glibc-2.12-1.47.el6glibc-2.12-1.47.el6glibc-devel-2.12-1.47.el6glibc-devel-2.12-1.47.el6libaio-0.3.107-10.el6libaio-0.3.107-10.el6libaio-devel-0.3.107-10.el6libgcc-4.4.6-3.el6libgcc-4.4.6-3.el6libstdc++-4.4.6-3.el6libstdc++-devel-4.4.6-3.el6make-3.81-19.el6pdkshsysstat-9.0.4-18.el62.3 禁用透明大页内存编辑/etc/grub.conf文件,添加transparent_hugepage=never ,在系统启动是禁用root(hd0,0)kernel /vmlinuz-2.6.32-642.el6.x86_64 ro root=/dev/mapper/vg00-lv_root quiet transparent_hugepage=neverinitrd /initramfs-2.6.32-642.el6.x86_64.img#reboot服务器2.4 创建操作系统组和用户创建用户组oinstall、dba#groupadd oinstall#groupadd dba创建oracle用户和密码:#useradd -u 500 -g oinstall -G dba -m oracle#passwd oracle提示输入密码,输入两次(口令长度至少6位,并包括数字、小写字母、大写字母和特殊符号4类中至少3类),确认。
ORACLE RAC 11Gr2 升级PSU 从11.2.0.3.0到11.2.0.3.8

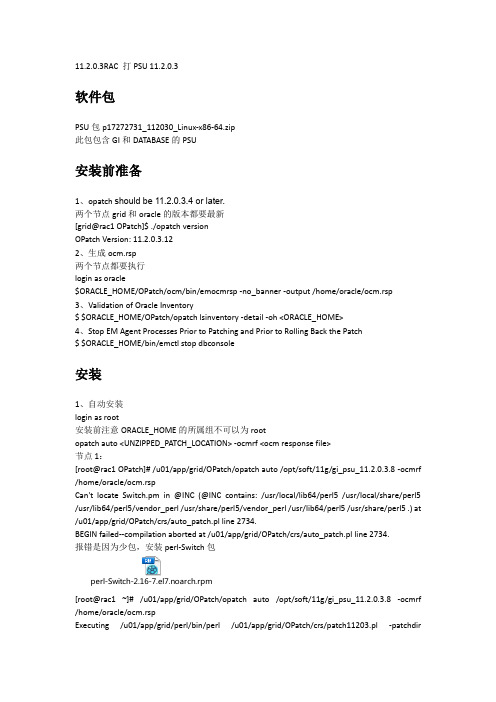
11.2.0.3RAC 打PSU 11.2.0.3软件包PSU包p1*******_112030_Linux-x86-64.zip此包包含GI和DATABASE的PSU安装前准备1、opatch should be 11.2.0.3.4 or later.两个节点grid和oracle的版本都要最新[grid@rac1 OPatch]$ ./opatch versionOPatch Version: 11.2.0.3.122、生成ocm.rsp两个节点都要执行login as oracle$ORACLE_HOME/OPatch/ocm/bin/emocmrsp-no_banner -output /home/oracle/ocm.rsp3、Validation of Oracle Inventory$ $ORACLE_HOME/OPatch/opatch lsinventory -detail -oh <ORACLE_HOME>4、Stop EM Agent Processes Prior to Patching and Prior to Rolling Back the Patch$ $ORACLE_HOME/bin/emctl stop dbconsole安装1、自动安装login as root安装前注意ORACLE_HOME的所属组不可以为rootopatch auto <UNZIPPED_PATCH_LOCATION> -ocmrf <ocm response file>节点1:[root@rac1 OPatch]# /u01/app/grid/OPatch/opatch auto /opt/soft/11g/gi_psu_11.2.0.3.8 -ocmrf /home/oracle/ocm.rspCan't locate Switch.pm in @INC (@INC contains: /usr/local/lib64/perl5 /usr/local/share/perl5 /usr/lib64/perl5/vendor_perl /usr/share/perl5/vendor_perl /usr/lib64/perl5 /usr/share/perl5 .) at /u01/app/grid/OPatch/crs/auto_patch.pl line 2734.BEGIN failed--compilation aborted at /u01/app/grid/OPatch/crs/auto_patch.pl line 2734.报错是因为少包,安装perl-Switch包perl-Switch-2.16-7.el7.noarch.rpm[root@rac1 ~]# /u01/app/grid/OPatch/opatch auto /opt/soft/11g/gi_psu_11.2.0.3.8 -ocmrf /home/oracle/ocm.rspExecuting /u01/app/grid/perl/bin/perl /u01/app/grid/OPatch/crs/patch11203.pl -patchdir/opt/soft/11g -patchn gi_psu_11.2.0.3.8 -ocmrf /home/oracle/ocm.rsp -paramfile /u01/app/grid/crs/install/crsconfig_paramsThis is the main log file: /u01/app/grid/cfgtoollogs/opatchauto2016-10-15_19-49-07.logThis file will show your detected configuration and all the steps that opatchauto attempted to do on your system:/u01/app/grid/cfgtoollogs/opatchauto2016-10-15_19-49-07.report.log2016-10-15 19:49:07: Starting Clusterware Patch SetupUsing configuration parameter file: /u01/app/grid/crs/install/crsconfig_paramsUnable to determine if /u01/app/oracle/product/11.2.0.3/db1 is shared oracle homeEnter 'yes' if this is not a shared home or if the prerequiste actions are performed to patch this shared home (yes/no):yesUnable to determine if /u01/app/grid is shared oracle homeEnter 'yes' if this is not a shared home or if the prerequiste actions are performed to patch this shared home (yes/no):yesStopping RAC /u01/app/oracle/product/11.2.0.3/db1 ...Stopped RAC /u01/app/oracle/product/11.2.0.3/db1 successfullypatch /opt/soft/11g/gi_psu_11.2.0.3.8/17076717/custom/server/17076717 apply successful for home /u01/app/oracle/product/11.2.0.3/db1patch /opt/soft/11g/gi_psu_11.2.0.3.8/16902043 apply successful for home /u01/app/oracle/product/11.2.0.3/db1Stopping CRS...Stopped CRS successfullypatch /opt/soft/11g/gi_psu_11.2.0.3.8/17076717 apply successful for home /u01/app/grid patch /opt/soft/11g/gi_psu_11.2.0.3.8/16902043 apply successful for home /u01/app/gridStarting CRS...CRS-4123: Oracle High Availability Services has been started.Starting RAC /u01/app/oracle/product/11.2.0.3/db1 ...Started RAC /u01/app/oracle/product/11.2.0.3/db1 successfullyopatch auto succeeded.节点2:[root@rac2 ~]# /u01/app/grid/OPatch/opatch auto /opt/soft/11g/gi_psu_11.2.0.3.8 -ocmrf /home/oracle/ocm.rspExecuting /u01/app/grid/perl/bin/perl /u01/app/grid/OPatch/crs/patch11203.pl -patchdir /opt/soft/11g -patchn gi_psu_11.2.0.3.8 -ocmrf /home/oracle/ocm.rsp -paramfile /u01/app/grid/crs/install/crsconfig_paramsThis is the main log file: /u01/app/grid/cfgtoollogs/opatchauto2016-10-15_20-54-32.logThis file will show your detected configuration and all the steps that opatchauto attempted to do on your system:/u01/app/grid/cfgtoollogs/opatchauto2016-10-15_20-54-32.report.log2016-10-15 20:54:32: Starting Clusterware Patch SetupUsing configuration parameter file: /u01/app/grid/crs/install/crsconfig_paramsUnable to determine if /u01/app/oracle/product/11.2.0.3/db1 is shared oracle homeEnter 'yes' if this is not a shared home or if the prerequiste actions are performed to patch this shared home (yes/no):yesUnable to determine if /u01/app/grid is shared oracle homeEnter 'yes' if this is not a shared home or if the prerequiste actions are performed to patch this shared home (yes/no):yesStopping RAC /u01/app/oracle/product/11.2.0.3/db1 ...Stopped RAC /u01/app/oracle/product/11.2.0.3/db1 successfullypatch /opt/soft/11g/gi_psu_11.2.0.3.8/17076717/custom/server/17076717 apply successful for home /u01/app/oracle/product/11.2.0.3/db1patch /opt/soft/11g/gi_psu_11.2.0.3.8/16902043 apply failed for home /u01/app/oracle/product/11.2.0.3/db1Stopping CRS...Stopped CRS successfullypatch /opt/soft/11g/gi_psu_11.2.0.3.8/17076717 apply successful for home /u01/app/grid patch /opt/soft/11g/gi_psu_11.2.0.3.8/16902043 apply failed for home /u01/app/gridStarting CRS...CRS-4123: Oracle High Availability Services has been started.Starting RAC /u01/app/oracle/product/11.2.0.3/db1 ...Started RAC /u01/app/oracle/product/11.2.0.3/db1 successfullyopatch auto succeeded.报错Missing command :fuserUtilSession failed:Prerequisite check "CheckSystemCommandAvailable" failed.Prerequisite check "CheckSystemCommandAvailable" failed.Prerequisite check "CheckSystemCommandAvailable" failed.Prerequisite check "CheckSystemCommandAvailable" failed.Prerequisite check "CheckSystemCommandAvailable" failed.Prerequisite check "CheckSystemCommandAvailable" failed.Prerequisite check "CheckSystemCommandAvailable" failed.Prerequisite check "CheckSystemCommandAvailable" failed.安装psmisc包[root@rac2 ~]# /u01/app/grid/OPatch/opatch auto /opt/soft/11g/gi_psu_11.2.0.3.8 -ocmrf /home/oracle/ocm.rspExecuting /u01/app/grid/perl/bin/perl /u01/app/grid/OPatch/crs/patch11203.pl -patchdir /opt/soft/11g -patchn gi_psu_11.2.0.3.8 -ocmrf /home/oracle/ocm.rsp -paramfile /u01/app/grid/crs/install/crsconfig_paramsThis is the main log file: /u01/app/grid/cfgtoollogs/opatchauto2016-10-15_21-55-47.logThis file will show your detected configuration and all the steps that opatchauto attempted to do on your system:/u01/app/grid/cfgtoollogs/opatchauto2016-10-15_21-55-47.report.log2016-10-15 21:55:47: Starting Clusterware Patch SetupUsing configuration parameter file: /u01/app/grid/crs/install/crsconfig_paramsUnable to determine if /u01/app/oracle/product/11.2.0.3/db1 is shared oracle homeEnter 'yes' if this is not a shared home or if the prerequiste actions are performed to patch this shared home (yes/no):yesUnable to determine if /u01/app/grid is shared oracle homeEnter 'yes' if this is not a shared home or if the prerequiste actions are performed to patch this shared home (yes/no):yesStopping RAC /u01/app/oracle/product/11.2.0.3/db1 ...Stopped RAC /u01/app/oracle/product/11.2.0.3/db1 successfullypatch /opt/soft/11g/gi_psu_11.2.0.3.8/17076717/custom/server/17076717 apply successful for home /u01/app/oracle/product/11.2.0.3/db1patch /opt/soft/11g/gi_psu_11.2.0.3.8/16902043 apply successful for home /u01/app/oracle/product/11.2.0.3/db1Stopping CRS...Stopped CRS successfullypatch /opt/soft/11g/gi_psu_11.2.0.3.8/17076717 apply successful for home /u01/app/grid patch /opt/soft/11g/gi_psu_11.2.0.3.8/16902043 apply successful for home /u01/app/gridStarting CRS...CRS-4123: Oracle High Availability Services has been started.Starting RAC /u01/app/oracle/product/11.2.0.3/db1 ...Started RAC /u01/app/oracle/product/11.2.0.3/db1 successfullyopatch auto succeeded.2、手动安装修改数据字典1、修改数据库字典cd $ORACLE_HOME/rdbms/adminsqlplus /nologSQL> CONNECT / AS SYSDBASQL> STARTUPSQL> @catbundle.sql psu applySQL> QUITSQL> select * from dba_registry_history;ACTION_TIMEACTION NAMESPACE VERSION ID--------------------------------------------------------------------------- ------------------------------ ------------------------------ ------------------------------ ----------BUNDLE_SERIES------------------------------COMMENTS--------------------------------------------------------------------------------------------------------------------------------------------------------------------------------------------------------17-SEP-11 10.21.11.595816 AM APPLY SERVER 11.2.0.3 0PSUPatchset 11.2.0.2.015-OCT-16 01.36.13.936629 PM APPLY SERVER 11.2.0.3 0PSUPatchset 11.2.0.2.015-OCT-16 09.26.08.161876 PM APPLY SERVER 11.2.0.3 8PSUPSU 11.2.0.3.82、Upgrade Oracle Recovery Manager CatalogIf you are using the Oracle Recovery Manager, the catalog needs to be upgraded. Enter the following command to upgrade it:$ rman catalog username/password@aliasRMAN> UPGRADE CATALOG;回滚1、自动回滚login as root# opatch auto <UNZIPPED_PATCH_LOCATION> -rollback -ocmrf <ocm response file>。
Linux安装oracle客户端

Linux安装oracle客户端环境:CentOS release 6.4 (Final)⼀、下载⽂件1、⾸先要查看oracle版本,对应的SQL如下:select * from V$version ;2、根据oracle版本下载对应的版本,先下载下⾯三个⽂件,注意版本⼀致:instantclient-sqlplus-linux.x64-11.2.0.4.0.zipinstantclient-sdk-linux.x64-11.2.0.4.0.zipinstantclient-basic-linux.x64-11.2.0.4.0.zip备注:不同版本,或者不同操作系统的,请到官⽅⽹站下载,⾥⾯有详细说明⼆、创建⽬录与上传⽂件1、创建客户端的安装⽬录,但配置环境变量时,需要⼀致。
[root@localhost ~]#mkdir -p /opt/oracle[root@localhost ~]# cd /opt/oracle/2、上传上⾯下载的三个⽂件⾄刚才创建的⽬录中,查看⽬录结构如下:[root@localhost oracle]# ll三、解压1、先解压上⾯下载的三个⽂件[root@localhost oracle]#unzip instantclient-basic-linux.x64-11.2.0.4.0.zip[root@localhost oracle]#unzip instantclient-sqlplus-linux.x64-11.2.0.4.0.zip[root@localhost oracle]#unzip instantclient-sdk-linux.x64-11.2.0.4.0.zip注意,这三个⽂件都解压到当前⽬录下的同⼀个⽬录下⾯:instantclient_11_2可进⼊⽬录进⾏查看[root@localhost oracle]#cd instantclient_11_2四、配置环境变量[root@vm4 instantclient_11_2]#vi /etc/profile //注意,这是所有⽤户的环境变量,若针对某⽤户,只能编辑⽤户的配置⽂件。
在linux64上安装oracle11g_完整版本
Oracle 11g安装手册1、在linux的root用户下建立一个oracle用户//添加用户组及用户groupadd dbagroupadd oinstalluseradd oracle -g oinstall -G dbapasswd oracle//新建目录权限mkdir -p /u01chown -R oracle:dba /u01chmod -R 755 /u01安装时步骤8、9会指向此位置(建议:用户更改/opt/oracle11g)2、将Oracle11g安装文件复制到linux中的指定目录下(/home/oracle/tools)cp /光盘目录/linux.x64_11gR2_database_1of2 /home/oracle/tools3、执行目录中的runInstallsu - oracleLANG=zh_CN.gbk4、开始图像界面安装可能需要export DIAPLAY=:1.0xdpyinfo步骤1:将红框中的内容勾选去掉,点击下一步。
提示“未指定电子邮件地址”点击“是”步骤2:点选“创建和配置数据库”此选项也为默认选项,点击下一步。
步骤3:点击选中“服务器类”,点击“下一步”步骤4:点击选中“单实例数据库安装”,点击下一步。
步骤5:点击选中“高级安装”,点击“下一步”步骤6:选择需要的语言,点击“下一步”,此处客户确认是否需要增加其他语言步骤7:点击选中“企业版(4.29GB)”,点击“下一步”点击上图的“选择选项”,勾选需要的组件,此处全部勾选。
步骤8:此处为默认路径,u01的建立参考第1点orcale用户的建立,点击“下一步”步骤9:此处默认即可,点击“下一步”步骤10:点击选中“一般用途/事务处理”,点击“下一步”步骤11:此处默认,点击“下一步”vpmsdbs步骤12:此处可以设置内存、字符集、安全性、示例方案(可根据用户环境调整),点击“下一步”,内存分配建议至少50%步骤13:此处默认,点击“下一步”步骤14:此处默认处理,点击“下一步”步骤15:点击选中“不启用自动备份”,点击“下一步”步骤16:各帐号口令设定,此处统一使用相同口令,客户现场请在同客户确认口令设定规则步骤17:点击“下一步”步骤18:点击“修补并在此检查”,会产生修补文件,按照提示内容执行即可A、切换到root用户,此处为测试环境执行内容如上述步骤执行完成后依旧存在失败内容,请到linux光盘中寻找对应的rpm文件,复制到linux某一目录中,按下图命令执行步骤19:修补完成后,出现如下信息,点击“完成”步骤20:执行安装过程复制文件,创建实例过程完成后信息,点击“确定”完成后,如出现以下内容,请按照操作步骤,执行完成后,完成安装过程配置监听器1、执行su - oraclesh /u01/app/oracle/product/11.2.0/dbhome_1/bin/netca2、点击选中“监听程序配置”,点击“下一步”3、点击选中“添加”,点击“下一步”4、设定监听程序名,点击“下一步”5、选定协议所有协议,点击“下一步”6、设定标准端口号,点击“下一步”7、设定标准TCP/IP SSL端口号,点击“下一步”8、设置IPC键值,点击“下一步”9、提示是否配置另一个监听程序,点“是”,再点击“下一步”配置数据库1、执行sh /u01/app/oracle/product/11.2.0/dbhome_1/bin/dbca2、点击“下一步”3、点选“创建数据库”,点击“下一步”4、点选“一般用途或事物处理”,点击“下一步”5、设定数据库名及SID,点击“下一步”6、配置管理选项,此处暂时用7、设定口令,点击“下一步”8、网络配置,点击“下一步”9、数据库文件所在位置,点击“下一步”,按照实际的文件规划位置10、恢复配置,点击“下一步”11、数据库内容,点击“下一步”12、初始化参数,点击“下一步”13、数据库存储,点击“下一步”14、创建选项,点击“完成”15、概要显示,点击“确定”16、创建进行17、创建完成,点击“退出”环境变量设置及启动1、设置环境变量在服务器上配置环境变量,编辑vi /etc/profile,在末尾加入以下配置export ORACLE_HOME=/u01/app/oracle/product/11.2.0/dbhome_1export PATH=.:$ORACLE_HOME/bin:$PATHexport ORACLE_SID=VPMSDBS (数据库SID)保存并退出vi /etc/oratab最后的N 改成Y(否则dbstart和dbshut命令无效)lsnrctl start (启动oracle监听)提示:The listener supports no servicesThe command completed successfully这样启动后远程连接会造成oracle ORA-12514:TNS:listener does not currently know of service requested in connect descriptor-----方案一-------------------------在listener.ora里面添加了一行SID_LIST_LISTENER =(SID_LIST =(SID_DESC =(GLOBAL_DBNAME = VENDB)(ORACLE_HOME = /opt/oracle11g/app/oracle/product/11.2.0/dbhome_1)(SID_NAME = VENDB)))-----方案二-------------------------linux上面:[oracle@localhost ~]$ netmgr在下图的Listeners->Database Services中配置要监听的SID及ORACLE_HOME,退出保存。
oracle升级方案
Oracle升级方案1. 简介Oracle是一种强大的关系数据库管理系统(RDBMS),被广泛用于企业级应用程序。
随着时间的推移,Oracle不断推出新的版本和升级,以提供更好的性能、功能和安全性。
本文档旨在介绍Oracle数据库升级的一般步骤和最佳实践。
2. 升级前的准备工作在进行Oracle数据库升级之前,需要进行一些准备工作,以确保顺利完成升级过程,并最大程度地减少潜在的风险和中断。
以下是一些准备工作的关键部分:2.1. 确定升级类型首先,需要确定要执行的Oracle升级类型。
可以是小版本的升级,例如从Oracle 11.2.0.2到11.2.0.4,也可以是大版本的升级,例如从Oracle 11g到Oracle 12c。
2.2. 评估硬件和软件要求在选择升级版本之前,需要评估现有硬件和软件的要求。
必须确保新版本的Oracle数据库可以在现有硬件上运行,并且与现有的操作系统和其他应用程序兼容。
2.3. 创建备份在进行任何数据库升级之前,最重要的一步是创建完整的数据库备份。
这样,在升级过程中出现任何问题或数据丢失的风险时,可以恢复到原始状态。
2.4. 检查数据库健康状况在升级之前,建议进行数据库的健康检查和性能评估。
可以使用Oracle提供的工具,例如Enterprise Manager或AWR报告,来评估数据库的性能和稳定性。
2.5. 计划测试环境在进行升级之前,应该创建一个测试环境,用于模拟实际的升级流程。
可以将生产环境的数据库和应用程序复制到测试环境,以便测试升级过程和验证应用程序的兼容性。
3. 升级过程一旦完成了准备工作,就可以开始实施Oracle数据库的升级。
下面是一个一般的升级过程:3.1. 升级前检查在进行升级之前,需要执行一些先决条件检查,以确保满足升级的要求。
这些检查通常涉及硬件和软件的一些要求,并可以使用Oracle提供的预升级检查工具来执行。
3.2. 安装升级程序安装升级程序是升级过程的下一步。
Oracle-11.2.0.1-升级到-11.2.0.3-示例
(3)Out-of-placepatch set upgrades recommended, in which you install the patch set into a new,separate Oracle home. In-place upgrades are supported, but not recommended.
这部分内容copy 自patchset的readme 文档。
Oracle Databasepatch set, release 11.2.0.3(11.2.0.2) is a full installation of the Oracle Database software. This meansthat you do not need to install Oracle Database 11gRelease 2 (11.2.0.1)before installing Oracle Database 11gRelease 2 (11.2.0.3/11.2.0.2).
注意这里的安装位置,我之前的安装目录是11.2.0. 这里我改成了11.2.0.3. 即将oracle 安装到其他位置,这样可以减少宕机时间,也是oracle 推荐的方法。
注意这里的Inventory directory,这里用来存放安装文件的,我们之前安装过DB,所以这个目录已经存在,2种解决方法,删除之前的目录,二放到其他目录,我这里将安装文件存放到其他目录。
Oracle11.2.0.3 的Patchset no是:10404530,下载地址:
linux下安装oraclesqlplus以及imp、exp工具
linux下安装oraclesqlplus以及imp、exp⼯具⼀、下载oracle 11g sqlplus软件 linux 64位操作系统,oracle安装包地址 /technetwork/topics/linuxx86-64soft-092277.html oracle-instantclient11.2-sqlplus-11.2.0.3.0-1.x86_64.rpm oracle-instantclient11.2-basic-11.2.0.4.0-1.x86_64.rpm⼆、安装rpm包 进⼊rpm包所在⽬录下,执⾏如下命令: rpm -ivh oracle-instantclient11.2-sqlplus-11.2.0.3.0-1.x86_64.rpm rpm -ivh oracle-instantclient11.2-basic-11.2.0.4.0-1.x86_64.rpm三、指定sqlplus运⾏所需要的库 由于是RPM包安装的,因此,oracle客户端默认所在的路径为/usr/lib/oracle/11.2/client64/lib/ 在任意⽬录下运⾏命令:vi /etc/ld.so.conf 在最后加⼊:/usr/lib/oracle/11.2/client64/lib/四、重启ldconfig 运⾏ ldconfig 命令,链接动态库。
五、配置oracle环境变量 在任意⽬录下执⾏命令:vi /etc/profile, 在⽂件的末尾加⼊ export ORACLE_HOME=/usr/lib/oracle/11.2/client64/ export LD_LIBRARY_PATH=:$ORACLE_HOME/lib:/usr/local/lib:$LD_LIBRARY_PATH:. export TNS_ADMIN=$ORACLE_HOME export PATH=$PATH:$ORACLE_HOME/bin:. 保存退出后,执⾏命令source /etc/profile,使修改的配置⽂件⽴刻⽣效。
- 1、下载文档前请自行甄别文档内容的完整性,平台不提供额外的编辑、内容补充、找答案等附加服务。
- 2、"仅部分预览"的文档,不可在线预览部分如存在完整性等问题,可反馈申请退款(可完整预览的文档不适用该条件!)。
- 3、如文档侵犯您的权益,请联系客服反馈,我们会尽快为您处理(人工客服工作时间:9:00-18:30)。
Linux平台Oracle 11.2.0.1.0 升级 11.2.0.4.0 操作参考Version 1.10关键字:Database、Update、Upgrade、Patchset2017年1月9日版本控制欢迎来函交流,请MAIL至目录1环境信息 (4)2安装部署源数据库 (4)3升级前的准备 (6)4升级数据库 (9)5升级后的验证 (18)6增补资料 (18)1环境信息1)操作系统Oracle Enterprise Linux 5.8 64bit2)升级前源数据库Oracle 11.2.0.1.03)升级后目标数据库Oracle 11.2.0.4.04)从MOS获取11.2.0.4.0安装包p1*******_112040_Linux-x86-64_1of7.zipp1*******_112040_Linux-x86-64_2of7.zip2安装部署源数据库此部分内容请参阅本人相关知识库文档,本文不再赘述。
安装部署妥当后,源数据库相关信息如下。
3升级前的准备1)升级前先备份当前数据库[oracle@ol58 ~]$ rman target /Recovery Manager: Release 11.2.0.4.0 - Production on Mon Feb 1 19:37:36 2016Copyright (c) 1982, 2011, Oracle and/or its affiliates. All rights reserved. connected to target database: ORCL (DBID=1429779892)RMAN> backup as compressed backupset database plus archivelog;Starting backup at 01-FEB-16current log archivedusing target database control file instead of recovery catalogallocated channel: ORA_DISK_1channel ORA_DISK_1: SID=6 device type=DISKchannel ORA_DISK_1: starting compressed archived log backup setchannel ORA_DISK_1: specifying archived log(s) in backup setinput archived log thread=1 sequence=7 RECID=1 STAMP=901999520input archived log thread=1 sequence=8 RECID=2 STAMP=902691503channel ORA_DISK_1: starting piece 1 at 01-FEB-16channel ORA_DISK_1: finished piece 1 at 01-FEB-16piecehandle=/oracle/oraclebase/fast_recovery_area/ORCL/backupset/2016_02_01/o1_mf_annnn_TAG2 0160201T193824_cbyjxk6r_.bkp tag=TAG20160201T193824 comment=NONEchannel ORA_DISK_1: backup set complete, elapsed time: 00:00:07Finished backup at 01-FEB-16Starting backup at 01-FEB-16using channel ORA_DISK_1channel ORA_DISK_1: starting compressed full datafile backup setchannel ORA_DISK_1: specifying datafile(s) in backup setinput datafile file number=00001name=/oracle/oraclebase/oradata/ORCL/datafile/o1_mf_system_cb9dqfns_.dbfinput datafile file number=00002name=/oracle/oraclebase/oradata/ORCL/datafile/o1_mf_sysaux_cb9dqfqg_.dbfinput datafile file number=00005name=/oracle/oraclebase/oradata/ORCL/datafile/o1_mf_example_cb9dt258_.dbfinput datafile file number=00003name=/oracle/oraclebase/oradata/ORCL/datafile/o1_mf_undotbs1_cb9dqfrd_.dbfinput datafile file number=00004name=/oracle/oraclebase/oradata/ORCL/datafile/o1_mf_users_cb9dqfst_.dbfchannel ORA_DISK_1: starting piece 1 at 01-FEB-16channel ORA_DISK_1: finished piece 1 at 01-FEB-16piecehandle=/oracle/oraclebase/fast_recovery_area/ORCL/backupset/2016_02_01/o1_mf_nnndf_TAG2 0160201T193832_cbyjxs39_.bkp tag=TAG20160201T193832 comment=NONEchannel ORA_DISK_1: backup set complete, elapsed time: 00:02:26channel ORA_DISK_1: starting compressed full datafile backup setchannel ORA_DISK_1: specifying datafile(s) in backup setincluding current control file in backup setincluding current SPFILE in backup setchannel ORA_DISK_1: starting piece 1 at 01-FEB-16channel ORA_DISK_1: finished piece 1 at 01-FEB-16piecehandle=/oracle/oraclebase/fast_recovery_area/ORCL/backupset/2016_02_01/o1_mf_ncsnf_TAG2 0160201T193832_cbyk2f4p_.bkp tag=TAG20160201T193832 comment=NONEchannel ORA_DISK_1: backup set complete, elapsed time: 00:00:01Finished backup at 01-FEB-16Starting backup at 01-FEB-16current log archivedusing channel ORA_DISK_1channel ORA_DISK_1: starting compressed archived log backup setchannel ORA_DISK_1: specifying archived log(s) in backup setinput archived log thread=1 sequence=9 RECID=3 STAMP=902691662channel ORA_DISK_1: starting piece 1 at 01-FEB-16channel ORA_DISK_1: finished piece 1 at 01-FEB-16piecehandle=/oracle/oraclebase/fast_recovery_area/ORCL/backupset/2016_02_01/o1_mf_annnn_TAG2 0160201T194102_cbyk2gdw_.bkp tag=TAG20160201T194102 comment=NONEchannel ORA_DISK_1: backup set complete, elapsed time: 00:00:01Finished backup at 01-FEB-165)将11.2.0.4.0补丁包传输到相关目录,并解压4升级数据库1)运行升级程序详细安装过程请参见本人相关知识库文档,此处不再赘述。
2)升级现有数据库3)配置安装目录ORACLE_BASE目录不变,ORACLE_HOME目录要指定新位置。
4)配置监听安装过程中,程序会跳出监听配置程序,配置方法和原有一样。
5)数据库升级助手6)选择orcl实例7)忽略警告8)升级选项9)配置快速闪回区10)数据库升级概要11)开始升级数据库,请耐心等待12)数据库升级顺利完成13)检查升级结果14)关闭升级程序5升级后的验证select ACTION_TIME,ACTION,VERSION,COMMENTS from dba_registry_history;6增补资料。
