立马电动车用户手册
电动车说明书了解电动车的使用方法和维护保养
电动车说明书了解电动车的使用方法和维护保养电动车说明书电动车是一种环保、经济、便捷的交通工具,越来越受到人们的青睐。
为了让用户更好地了解电动车的使用方法和维护保养,本说明书将详细介绍电动车的相关知识。
一、电动车的使用方法1. 车身结构和功能电动车主要由车架、电动机、电池、控制器、变速器(如果有)、刹车系统、灯光系统、显示仪表等部分组成。
不同型号的电动车可能会有所差异,但总体结构相似。
请在确保车辆完好无损的情况下进行下一步操作。
2. 开启电动车电源使用钥匙将电动车电源开关扭至“ON”位置,此时仪表盘会显示电动车的电池电量、速度等信息。
确认仪表正常后即可准备骑行。
3. 电动车的起步和驾驶缓慢踩下踏板,在踏板行程到达一定程度后,电机会开始工作,为您提供动力。
在行驶过程中,请注意遵守交通规则,注意安全。
行驶时,可以根据需要调整速度,通过旋转手柄等方式控制车速。
4. 刹车和停车为了确保安全,请提前减速并使用刹车来停车。
电动车的刹车系统通常有前置刹车和后置刹车,可以通过手柄或脚踏两种方式刹车。
停车后,请关闭电动车电源,确保电动车处于停机状态。
5. 充电和换电池当电动车电池电量过低时,可以通过充电或更换电池来恢复电动车的使用时间。
根据电动车型号的不同,充电方式可能会有所差异,请按照所配备的充电器说明进行操作。
若需要更换电池,请按照电池更换方法进行操作。
6. 其他使用注意事项- 避免长时间以高速行驶,以免造成电动车零部件损坏;- 注意电动车重心的稳定,搭载物品时应均匀分布;- 在雨天或湿滑路面上行驶时请减速谨慎驾驶。
二、电动车的维护保养为了保证电动车的正常运行和延长使用寿命,请定期进行维护保养。
1. 电池维护- 定期检查电池电量,避免电量过低;- 注意保持电池通风,避免在高温或极寒环境下使用;- 长时间不使用电动车时,应将电池充电至50%~70%的电量,并存放在干燥通风的环境中。
2. 轮胎维护- 定期检查轮胎气压,确保符合制造商要求;- 检查轮胎磨损情况,如有必要,及时更换磨损严重的轮胎;- 均匀翻转轮胎,避免磨损不均。
Razor E100 E125 E150 E175 电动自行车用户手册说明书

NOTE:The E100/E125/E150/E175 must be traveling up to 3 mph before motor will engage. Kick start up to 3 mph while applying the throttle to engage motor.WARNING: Riding an electric scooter does present potential risks and caution is required. Like any riding product, an electric scooter has inherent hazards associated with its use (for example, falling off or riding it into a hazardous situation). Like any riding product, electric scooters can and are intended to move and it is therefore, of course, possible to lose control or otherwise get into dangerous situations. Both children and adults responsible for supervising them must recognize that if such things occur, a rider canbe seriously injured or die, even when using safety equipment and other precautions. RIDE AT YOUR OWN RISK AND USE COMMON SENSE. WARNING: PARENTAL AND ADULT RESPONSIBILTY AND SUPERVISION IS NECESSARY: Because products, like electric scooters, can and do present potential hazards plainly associated with their use, it is well recognized THE NEED FOR EXERCISE OF PARENTAL RESPONSIBILITY IN SELECTING RIDING PRODUCTS APPROPRIATE TO THE AGE OF A CHILD, OR PARENTAL SUPERVISION IN SITUATIONS IN WHICH CHILDREN OF VARIOUS AGES MAY HAVE ACCESS TO THE SAME RIDING PRODUCTS, IS IMPORTANT. Not every product is appropriate for every age or size of child, and different age recommendations are found within this category of product which are intended to reflect the nature of the hazards and the expected mental or physical ability, or both, of a child to cope with the hazards.The recommended rider age is 8 and older. Any rider unable to fit comfortably on the scooter should not attempt to ride it. A parent’s decision to allow his or her child to ride this product should be based on the child’s maturity, skill and ability to follow rules.Keep this product away from small children and remember that it is intended for use only by persons who are, at a minimum, completely comfortable and competent while operating the scooter.Persons with any mental or physical conditions that may make them susceptible to injury, impair their physical dexterity or mental capabilitiesto recognize, understand, and follow safety instructions and to be ableto understand the hazards inherent in scooter use, should not use or be permitted to use products inappropriate for their abilities. Persons with heart conditions, head, back or neck ailments (or prior surgeries to these areas of the body), or pregnant women, should be cautioned not to operate such products.DO NOT EXCEED THE WEIGHT LIMIT OF 120 lbs (54 kg). Rider weight does not necessarily mean a person’s size is appropriate to fit or maintain control of the scooter.CHECK AND MAINTAIN SCOOTER CONDITIONS Before use, check to confirm that any and all chain guards or other covers and guards are in place and in serviceable condition. Check thatthe brake is functioning properly, and that tires are inflated properly and have sufficient tread remaining. The scooter should be maintained and repaired in accordance with the manufacturer’s specifications, usingonly the manufacturer’s authorized replacement parts, and should notbe modified from the manufacturer’s original design and configuration. ACCEPTABLE RIDING PRACTICES AND CONDITIONSAlways check and obey any local laws or regulations, which may affect the locations where the electric scooter may be used. Keep safely away from cars and motor vehicle traffic at all times, and only use where allowed and with caution.Do not activate the speed control on the hand grip unless you are on the scooter and in a safe, outdoor environment suitable for riding. The electric scooter must be moving 3 mph before the motor will engage.The normal powered top speed of this scooter will be approximately 10 mph (16 kph), which can be affected by conditions, such as rider weight, inclines, tire inflation and battery charge level. Avoid excessive speeds that can be associated with downhill rides.Maintain a hold on the handlebars at all times. Do not touch the brakes or motor on your scooter when in use or immediately after riding as these parts can become very hot.Ride defensively. Watch out for potential obstacles that could catch your wheel or force you to swerve suddenly or lose control. Be careful to avoid pedestrians, skaters, skateboards, scooters, bikes, children or animals who may enter your path, and respect the rights and property of others.The electric scooter is intended for use on flat, dry surfaces such, as pavement or level ground, without loose debris, such as sand, leaves, rocks or gravel. Wet, slick, bumpy, uneven or rough surfaces may impair traction and contribute to possible accidents. Do not ride your scooter in mud, ice, puddles or water. Watch out for potential obstacles that could catch your wheel or force youto swerve suddenly or lose control. Avoid sharp bumps, drainage grates, and sudden surface changes.Do not attempt or do stunts or tricks on your electric scooter. The scooter is not made to withstand abuse from misuse, such as jumping, curb grinding or any other type of stunts. Racing, stunt riding, or other maneuvers also enhance risk of loss of control, or may cause uncontrolled rider actions or reactions. Never allow more than one person at a time to ride the scooter.Do not ride at night or when visibility is limited.Never use near steps or swimming pools.Do not allow hands, feet, hair, body parts, clothing, or similar articles to come in contact with moving parts, wheels, or drivetrain, chain while the motor is running.Never use headphones or a cell phone when riding.Never hitch a ride with a vehicle.Do not ride your scooter in wet or icy weather and never immerse the scooter in water, as the electrical and drive components could be damaged by water or create other possibly unsafe conditions. Never risk damaging surfaces, such as carpet or flooring, by use of an electric scooter indoors.PROPER RIDING ATTIREAlways wear proper protective equipment, such as an approved safety helmet (with chin strap securely buckled), elbow pads and kneepads. A helmet may be legally required by local law or regulation in your area. A long-sleeved shirt, long pants, and gloves are recommended. Always wear athletic shoes (lace-up shoes with rubber soles), never ride barefooted or in sandals, and keep shoelaces tied and out of the way of the wheels, motor and drive system. USING THE CHARGERThe charger supplied with the electric scooter should be regularly examined for damage to the cord, plug, enclosure and other parts. In the event of such damage, the scooter must not be charged until the charger has been repaired or replaced.Use only with the recommended charger.Use caution when charging.The charger is not a toy. Charger should be operated by an adult.Do not operate charger near flammable materials.Unplug charger and disconnect from scooter when not in use.Do not exceed charging time.Always disconnect from the charger prior to wiping down and cleaning your scooter with damp cloth.FAILURE TO USE COMMON SENSE AND HEED THE ABOVE WARNINGS INCREASES RISK OF SERIOUS INJURY. USE WITH APPROPRIATE CAUTION AND SERIOUS ATTENTION TO SAFE OPERATION.Remove contents from box. Remove the foam separators that protect the components from damage duringshipping. Inspect the contents of the box for scratches in the paint, dents or kinked cables that may haveoccurred during shipping. Because the scooter was 95 percent assembled and packed at the factory, thereshould not be any problems, even if the box has a few scars or dents.MAKE SURE POWER SWITCH IS TURNED “OFF” BEFORE CONDUCTING ANY ASSEMBLYOR MAINTENANCE PROCEDURES.Estimated Assembly and Set-Up TimeRazor recommends assembly by an adult with experience in bicycle mechanics.Allow up to 10 minutes for assembly, not including initial charge time.Allow up to 12 hours for charge (see page 3 for charging information)WARNING:DO NOT USE NON-RAZOR PARTS WITHYOUR RAZOR ELECTRICSCOOTER.The scooter has been builtto certain Razor designspecifications. The originalequipment supplied at the timeof sale was selected on the basisof its compatibility with theframe, fork and all other parts.Certain aftermarket parts maynot be compatible and will voidthe warranty.Required Tools3.Note:Electric scooter mustbe moving at 3 mph/4.8 kphwhile applying the throttleto engage motor.Product ID Locations:See locations to the left1. Handlebar Stem2. Underneath Battery Tray3. Charger4. Box - Side of UPC (not shown)Note: Make sure the cables/wires are out of the way before inserting the stem in the fork. WARNING: Failure to properly tighten the collar clamp may allow the handlebars to dislodge while riding and may cause you to lose control and fall. When correctly tightened, the handlebars will not rotate out of alignment with the front wheel under normal circumstances.Note: The cable and wire assembly from the handlebar must not wrap around thesteering tube or handlebar. Sharp bends or twisting of the brake cable can cause the brakes to malfunction.Note: The pressure air supplies found at gasoline stations are designed to inflate high-volume automobile tires. If you decide to use such an air supply toinflate your electric scooter tires, first make sure the pressure gauge is working, then use very short bursts to inflate to the correct PSI. If you inadvertently over-inflate the tire, release the excess pressure immediately.WARNING: Batterycharge can deplete over time. Periodically recharge battery when not in use.WARNING: Rechargeable batteries are only to be charged under adult supervision. Always disconnect your scooter from the charger before cleaning with damp cloth.Note: If your charger does not look like the one illustrated, your unit has been supplied with an alternative charger. The specifications and charging procedure would not change.The charger has a small window with one LED to indicate the charge status. Refer to the illustration on the charger unit for the actual “charging” and “charged” status indications for your model charger.Chargers have built-in over-charge protection to prevent battery from being over-charged.Charger may get warm during use. This is normal for some chargers and is no cause for concern. If your charger does not get warm during use, it does not mean that it is not working properly.HardwareCheck all parts such as nuts, bolts, cables, fasteners, etc. to ensure they are secure and assembled correctly. If the unit is damaged do not ride. Reference “Safety Warnings” on page 1 of this manual.Laws and RegulationsAlways check and obey any local laws or regulations.InsuranceDo not assume that your existing insurance policies necessarily provide coverage for scooter use. Check with your insurance company for information regarding insurance.BrakeCheck the brakes for proper function. When you squeeze the lever, the brake should provide positive braking action. Make sure that brakes are not rubbing.Frame, Fork and HandlebarsCheck for cracks or broken connections. Although broken frames are rare, it is possible for an aggressive rider to run into a curb or wall and wreck, bend or break a frame. Get into the habit of inspecting your scooter on a regular basis.TiresPeriodically inspect the tires for excess wear and regularly check the front tire pressure. Re-inflate as necessary.q q qqqStarting the ScooterTo start unit, turn on power switch; place both hands on handlebars and kick start the unit using one foot to push scooter forward while applying the throttle with right hand. The scooter must accelerate to 3mph/5kph for motor to engage.q Stopping the ScooterTo stop unit, release the throttle and apply the brake until the unit comes to a complete stop .Note: Electric scooter must be moving at 3 mph/5 kph while engaging throttle to engage motor.q qNote: As an additional safety feature, the scooter is designed to cut power to the motor when the hand brake is applied.q Chain and Rear Wheel ReplacementTools required: Phillips screwdriver and two (2) 13 mm open wrenches.1 With a Phillips screwdriver,loosen the two screws and remove the chain guard.2 Using two 13 mm openwrenches, loosen the locknuts by turning the wrenches counter clockwise. Reference rear wheel hardware sequence (page 6).3 To loosen the chain, pushingthe tensioner down to create some slack in the chain.loosen the brake cable bolt.q Front Wheel ReplacementTools required: 10 mm open wrench and two (2) 16 mm open wrenches.wrenches, loosen the locknuts by turning the wrenches counter clockwise. Remove wheel and install replacement wheel.Reference front wheel hardware sequence on this page.Right Side (Throttle)8-3 Spacer8-2 Washer Fork 8-2 Washer 8-7 Spring Washer 8-1 16 mm locknut Left Side (Brake)8-5 Spacer 8-2 Washer Fork 8-2 Washer 8-7 Spring Washer 8-1 16 mm locknutMiddle8-6 Front axle bolt Note: Front wheel hardware sequenceTurn power switch “OFF” before conducting any maintenance procedures.1 To adjust brake cable play,brake adjustment is attained. Most adjustments are complete at this step. If brake still needs further adjustment, proceed to step 2.and adjust accordingly. realign brake pads, loosen thefixing nut (B) and adjust the pad to contact the rim. Retighten and readjust as needed. Verify proper brake function prior to riding the scooter.q Adjusting the BrakesTools required:8-28-18-28-18-28-58-68-38-28-78-73 Reassemble, adjust andtighten brake cable. Verify proper brake function prior to riding the scooter.4 Remove wheel and installreplacement wheel.(Note the sequence of thehardware)5 Push the chain tensioner down to install the chain on both sprockets.6 With two 13 mm openwrenches, re-tighten the locknuts.Note: Rear wheel hardware sequenceRight Side (Throttle)18-1 13 mm Locknut 18-7 Spring Washer 18-2 Washer Frame18-3 Washer (Plate Cut)18-4 Spacer (Short)Left Side (Brake)18-1 13 mm Locknut 18-7 Spring Washer 18-2 Washer Frame18-3 Washer (Plate Cut)18-4Spacer (Long)7Re-attach the chain guard.q Battery Care and DisposalDo not store in freezing or below freezing temperatures. To properly maintain your battery and ensure maximum battery life, carefully read the “Charging the Battery” section on page 3 of this owner’s manual.CONTAINS SEALED LEAD ACID BATTERIES. BATTERIES MUST BE RECYCLED.Your Razor product uses sealed lead-acid batteries which must be recycled or disposed of in an environmentally safe manner. Do not dispose of a lead-acid battery in a fire. The battery may explode or leak.Do not dispose of a lead-acid battery in your regular household trash. The incineration, land filling or mixing of sealed lead-acid batteries with household trash is prohibited by law in most areas. Return exhausted batteries to a federal or state approved lead-acid battery recycler or a local seller of automotive batteries. If you live in Florida or Minnesota, it is prohibited by law to throw away lead-acid batteries in the municipal waste stream.q ChargerThe charger supplied with the electric scooter should be regularly examined for damage to the cord, plug, enclosure and other parts. In the event of such damage, the product must not be charged until it has been repaired or replaced.Use ONLY the charger supplied with this product or a replacement specified by Razor.q WheelsWheels and drive system are subject to normal wear and tear. It is the responsibility of the user to periodically inspect wheels for excess wear, and to adjust and replace drive train components as required.WARNING: If a battery leak develops, avoid any contact with leaking acid and place the damaged battery in a plastic bag. Refer to the disposal instructions at left. If acid comes into contact with skin or eyes, flush with cool water for at least 15 minutes and contact a physician.WARNING: Battery posts, terminals and relatedaccessories contain lead and lead compounds. Wash your hands after handling.18-118-718-218-318-418-418-318-218-718-1Middle18-8 Rear Axle Bolt18-8Problem Possible Cause SolutionDoes Not Work Out Of The Box Unit must be traveling up to 3 mph beforemotor will engageLoose connection(s)Kickstart to 3 mph while applying the throttle to engage motorCheck for loose connections/wires underneath the deck plateNo Longer Works Loose connection(s)Charger not workingTripped reset buttonBattery will not hold a charge Check for loose connections/wires underneath the deck plateCheck power to wall outlet and/or try a different outletCheck lights on charger:Plugged into wall = GreenPlugged into wall & unit = Red = Charging Charging Complete = GreenNo lights/Blinking lights - Replace Charger With no weight on the unit, carefully lift up the back end; manually (and carefully, of course) spin rear wheel and apply throttle to engage the motor. If motor engages - Replace Battery The reset button will trip if the motor is overloaded. An excessive overload may be caused, for example, by too heavy a rider, too steep a hill, etc. Wait a few seconds then press reset button. Correct riding conditions to prevent overloadIf motor does not engage, but makes a clicking sound - Replace Battery. If motor does not engage, no clicking sound - Replace Control Module & On/Off SwitchShort Ride Time/Runs Slow Riders weightRiding conditionsBattery not fully chargedOld/damaged batteryTire is not properly inflatedImproper battery maintenanceBrake dragging Do not exceed 120 lbs maximum weight limitUse only on flat, dry surfaces. Avoid inclines and areas with heavy debrisCharge unit for a full 12 hrsWith no weight on the unit, carefully lift up the back end; manually (and carefully, of course) spin rear wheel and apply throttle to engage the motor. If motor engages - Replace Battery Charge battery periodically when not in use Tire will lose some pressure over time. Verify correct tire pressureDo not store unit in freezing or below freezing temperatures. Freezing will permanently damage the battery and greatly reduce ride time. Refer to Pg. 3 Charging the Battery Refer to adjusting the brake on page 5Runs Intermittently Loose connection(s)Check the wires around the throttle andconnectors underneath the deck plateReplace - Twist Grip Throttle01 Handlebar grip (right/left)02 Single speed twist grip throttle 02-1 Sleeve 03 Handlebar stem 04 Brake lever assembly 05 Collar clamp 06 Headset (upper/lower)07 Limiter08 Front caliper brake with brake pads 09 Front fork10 Front wheel complete(See pg. 5 for hardware sequence)11 Battery tray 12 Control module 13 On/Off switch 14 Charger port 15 Reset button 16 Kickstand 17 Motor (24V/100W)18 Rear wheel complete(See pg. 6 for hardware sequence)19 Chain Tensioner 20 Chain 21 Chain Guard 22 Battery (2) 24V/4.5 Ah 23 Deck PlateSB 1918 (CALIFORNIA) DECLARATIONYOUR INSURANCE POLICIES MAY NOT PROVIDE COVERAGE FOR ACCIDENTS INVOLVING THE USE OF THIS SCOOTER/ELECTRIC RIDE-ON PRODUCT. TO DETERMINE IF COVERAGE IS PROVIDED, YOU SHOULD CONTACT YOURINSURANCE COMPANY OR AGENT.Razor Limited WarrantyThe manufacturer warranties this product to be free of manufacturing defects for a period of 90 days from date of purchase. This Limited Warranty does not cover normal wear and tear, tires, tubes or cables, or any damage, failure or loss caused by improper assembly, maintenance, storage or use of the Razor E100, E125, E150, E175.This Limited Warranty will be void if the product is ever• used in a manner other than for recreation or transportation• modified in any way;• rented.The manufacturer is not liable for incidental or consequential loss or damagedue directly or indirectly to the use of this product.Razor does not offer an extended warranty. If you have purchased anextended warranty, it must be honored by the store at which it was purchased.For your records, save your original sales receipt with this manual and writethe serial number below.Discover skating and wheel toys in our online store.。
电动车使用说明书

WARNING/AVERTISSMENTOPERATION INSTRUCTION 12●Read the manuel and safety instruction labels on the golf car before driving :●Be sure that passengers are seated stably .●Select “ forward “ or “ reverse “ key .●Tread the accelerator to start moving ; and tread the parking pedal to stop .●Please drive safely according to the terrain ,visibility and driving experience ; please drive carefully in the crowded and slippery places .●When parking , please tread the parking pedal and draw up the handle of hand brake . When starting the car , please release the handle .GOSTOPparking pedal Accelerator pedal Brake pedalWhen operating:Keep your body in the car and keep well-seated when the car starts moving. Do not start the car until all passengers are seated.Keep your hands on the steering wheel and your eyes on the path ahead.Be especially careful when backing the car in crowded places. Please keep watching back and roll back slowly.Avoid sudden start and brake.Please accelerate or decelerate the car according to the ground condition. Do not turn the steering wheel too sharply at high speed.Keep driving slowly straight up or straight down, not at one same angle when Do not overload or make any modification towards spare!Whole structure:111213141516 rear tire cover windshield frame head light base/L side cover sheet rear body cover steering wheel combination switch power indicator steering column12345678910111213141516182117192022232426252728 29detailed specification refers to actual contract Body configuration Wind shield Organic glass Seat Leather Side mirror L & R side mirrors Light&signal48V/12-300W Front light, turning light, rear combo lights, horn, reverse buzzBody PP plastic injectionDash board PP plastic injection, power indicator, head light switch, turning light switch, key switch, F/R switch Brake rear drum + combo brake pedal parkingFront Suspension Spring+hydraulic shock absorber, independent suspensionRear suspension Excellent transaxle, gear ratio 12.31:1, half independent suspension + hydraulic shock absorberBody configuration Wind shield Organic glassSeat LeatherSide mirror L & R side mirrorsLight&signal48V/12-300W Front light, turning light, rear combo lights, horn, reverse buzzdetailed specification refers to actual contractWind shield Organic glassSeat LeatherSide mirror L & R side mirrorsLight&signal48V/12-300W Front light, turning light, rear combo lights, horn, reverse buzzBody configuration Wind shield Organic glassSeat LeatherSide mirror L & R side mirrorsLight&signal48V/12-300W Front light, turning light, rear combo lights, horn, reverse buzzdetailed specification refers to actual contractdetailed specification refers to actual contract Body configuration Wind shield Organic glass Seat Leather Side mirror L & R side mirrors Light&signal48V/12-300W Front light, turning light, rear combo lights, horn, reverse buzzspecification refers to actual contractBody configuration Wind shield Organic glassSeat LeatherSide mirror L & R side mirrorsLight&signal48V/12-300W Front light, turning light, rear combo lights, horn, reverse buzz Body PP plastic injectionRUNOFFOFFCompletely stopping car beforeswitch, please turn switch to middle position for 2s at first, then choosing Forward switch or Reverse48VAB。
电动车使用说明书三篇
电动车使用说明书三篇篇一:电动车使用说明书XXXXXX电动车有限公司是在XXX集团XXX自行车三厂基础上组建的专业生产电动车和高档自行车的合资企业,公司具有四十年历史的军工企业,具有完整的研发、制造、销售、服务体系。
公司自主研发的镁、铝合金折叠自行车和镁、铝合金锂电池折叠电动车处于国际领先地位,先后参加国际、国内展会获得国际、国内客户一致好评。
该产品绿色环保、休闲舒适又方便实用,是未来居家必备的产品。
质量第一、用户至上,坚持信誉、打造精品、创造品牌、满足市场需求是我们企业的宗旨。
尊敬的用户朋友,为了您和他人的安全,为确保电动自行车性能优良、稳定,请您在使用前详细阅读说明书后再使用本产品。
本手册中提供的有关日常形式和保养知识,可便于您更熟悉本车的操控,任何不当操作,都有可能损坏您的爱车。
感谢您购买“XXX”牌电动自行车。
由于产品在技术上不断改进更新,可能未现实物与说明书稍有不同的情况,请以实物为准。
本手册中标有号内容,请认真阅读和遵守。
1用户注意事项2电动自行车结构示意图3电动车主要技术参数4产品特性介绍5电池充电说明6骑行注意事项7维修保养说明8常见保养说明9重要提示与忠告10保修卡11 售后服务承诺敬请用户注意1、骑行前,请仔细阅读《产品使用说明书》,认真检查各零部件是否完好,以确保您骑行安全,如发现问题请及时与经销商联系。
2、请遵守城市交通法规,不准带人;雨雪天及路滑地段应减慢速度,刹车时应增加制动距离,以确保安全。
3、本车不怕雨、雪天气,但不能涉水,当水位淹至后轮电机轮毂时,将造成整车内部线路的短路并损坏电器,务请注意!4、本车所用电池为安全电源,但电池盒的两个金属触点不能用湿手同时触摸,更不能与金属同时接触,否则将产生较大的短路电流而引发事故。
务请注意!5、请勿自行拆卸分解零部件,如需更换,请向本公司电动自行车总代理处购买标准零件。
为了他人的安全,请不要将您的电动自行车借给不会操作的人骑行,从而也使您的爱车免受不必要得损坏。
产品说明书折叠电动自行车操作手册

产品说明书折叠电动自行车操作手册产品说明书:折叠电动自行车操作手册一、产品概述折叠电动自行车是一种便携式、环保的出行工具,将传统自行车与电动技术相结合,有效解决城市交通拥堵问题。
本操作手册将详细介绍折叠电动自行车的操作方法、注意事项以及常见故障的排除方法,以便用户正确、安全地使用本产品。
二、操作步骤1. 展开折叠电动自行车a) 将自行车打开箱体;b) 找到折叠点,按照说明展开自行车主体;c) 检查车身各部件是否稳固,确保无松动。
2. 上电与开关机a) 按下电池锁定按钮,取出电池;b) 将电池正确插入电池插槽;c) 打开自行车上方的电源开关,此时显示屏亮起;d) 长按电源按钮,启动自行车;e) 长按电源按钮,关闭自行车。
3. 骑行模式选择a) 在电源开关下方的控制器上按下“MODE”按钮,可以切换助力模式、纯电动模式和智能模式;b) 辅助模式下,电机将根据用户的踩踏力度提供相应助力;c) 纯电动模式下,电机将全程提供动力;d) 智能模式下,根据电池电量和用户的骑行习惯自动调整助力程度。
4. 前进与刹车a) 踏板带动脚踏传感器后,电机提供相应的动力助力;b) 刹车时,按下手刹把或脚踏刹车,电机立即停止工作。
5. 变速操作a) 根据路况和个人需求,选择变速模式;b) 手柄上方的变速器用于调节不同的档位。
6. 充电与电池续航a) 使用配套充电器将电池插入充电座,充电过程中显示屏亮起并显示充电进度;b) 充电时间为约4-6小时,待充电完成后拔出充电器和电池;c) 电池容量会影响电动自行车的续航里程,使用过程中请合理规划骑行距离。
三、安全须知1. 骑行前的准备a) 确保电池电量充足;b) 检查自行车各部件是否固定可靠;c) 确认刹车器能有效制动。
2. 注意事项a) 骑行时请戴好安全头盔,并穿着适合的骑行服装;b) 骑行时注意道路情况,尽量避免高速行驶和猛刹车;c) 不要在泥浆、雪地或水洼中骑行;d) 不要在人流密集的地方骑行。
电动车制造公司专卖店导购员指导手册

导购员指导手册(专卖店专用)上海立马电动车制造有限公司(内部资料、注意保密)一、企业概况1、企业简介2、企业精神3、企业文化追求卓越、共创辉煌,精良的品质、创新的理念、完善的服务、打造百年立马世界品牌4、企业目标通过高品质产品为载体,整合社会资源,打造电动车航母,扩大市场占有率,增强品牌影响力,为社会、为企业、为员工创造价值。
树立行业内标杆企业;二、产品知识1.产品图册2.产品理论知识3.电动车常见故障处理方法(售后服务手册)三、成功需要好心态成功是一种心态、一种习惯,是人的一种思考模式和生活方式。
成功的定义是:每天进步一点点。
因此,不需要等到拥有一千万的华屋,或等别人告诉你,你已经成功。
只要每天不断进步与突破,你每天都是成功的人。
世界三级跳远冠军米兰提夫在8岁之前患了小儿麻痹症,自己学走、学跑,研究怎样的姿势合乎自然法则,结果他跳出了世界上最远的记录。
记者问他;“到底是什么原因,使你成为奥运金牌得主和世界记录保持者呢?”他回答道:“参加比赛时,一般人都在看我跳远时的表现,其实任何比赛的成功,不单决定于他表现的那个时刻,更取决于他表现之前所做的准备。
”能不能表现良好,不在于这个人的能力,而在于那个时刻,这个人的心态是否达到颠峰,他是否做好完善的心理准备以及拥有必胜的信念。
成功信念之一:过去不等于未来成功信念之二:没有失败,只有暂时停止成功成功信念之三:上帝的延迟并不是上帝的拒绝。
成功信念之四:任何事情的发生必有其目的,并且有助于我。
我曾在一次心连心公益活动上认识了一名活泼的女士,她非常幽默热力贯穿会场,快乐着感染着每一个人。
谁都想不到她曾有过坎坷的经历。
这名叫安华的女子从小被认为智能不足,在智障学校呆到5岁,才发现不是智障,而是失去听力,于是转往特殊学校直到十几岁时,才借着助听器过上了较为正常的生活。
然而,一次以外的车祸又使她在医院躺了两年。
当时她自问:为什么我的人生有这么多的不如意?但她随即深信:任何事情的发生必有其目的,并且助于我,因此咬紧牙根度过难关。
电动自行车产品说明书介绍电动自行车的使用方法和续航能力绿色出行
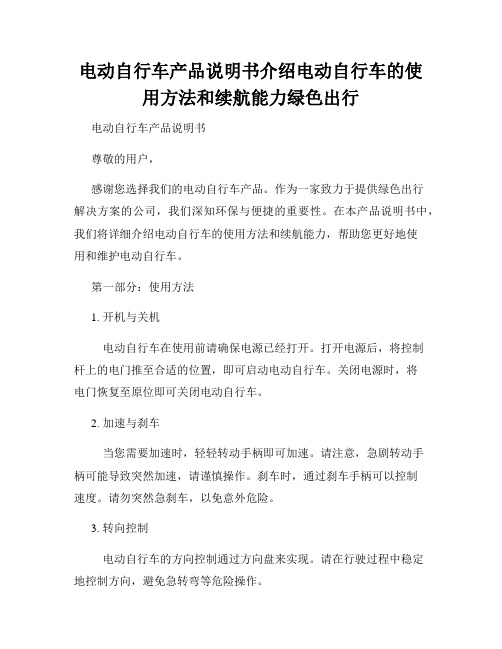
电动自行车产品说明书介绍电动自行车的使用方法和续航能力绿色出行电动自行车产品说明书尊敬的用户,感谢您选择我们的电动自行车产品。
作为一家致力于提供绿色出行解决方案的公司,我们深知环保与便捷的重要性。
在本产品说明书中,我们将详细介绍电动自行车的使用方法和续航能力,帮助您更好地使用和维护电动自行车。
第一部分:使用方法1. 开机与关机电动自行车在使用前请确保电源已经打开。
打开电源后,将控制杆上的电门推至合适的位置,即可启动电动自行车。
关闭电源时,将电门恢复至原位即可关闭电动自行车。
2. 加速与刹车当您需要加速时,轻轻转动手柄即可加速。
请注意,急剧转动手柄可能导致突然加速,请谨慎操作。
刹车时,通过刹车手柄可以控制速度。
请勿突然急刹车,以免意外危险。
3. 转向控制电动自行车的方向控制通过方向盘来实现。
请在行驶过程中稳定地控制方向,避免急转弯等危险操作。
4. 骑行姿势骑行时,请保持身体平衡并坐直。
双手握紧把手,脚保持踩在脚踏板上。
骑行过程中请时刻保持警惕,并注意周围的交通情况。
5. 电池充电当电动自行车的电池电量低于20%时,请及时将电动自行车连接至配套电源充电器,进行充电。
请注意使用配套充电器,避免使用不符合规定的充电设备。
第二部分:续航能力电动自行车的续航能力取决于多个因素,如电池容量、速度、坡度、气温等。
一般来说,我们的电动自行车在标准条件下可以提供约40公里的续航里程。
然而,请在实际使用时根据不同的情况进行评估和规划。
为了最大限度地延长电动自行车的续航里程,我们建议您遵循以下几点:1. 保持适当的速度:较低的速度能够更有效地利用电池能量,推荐速度为20公里/小时。
2. 避免过重载:在携带重物时,请注意不要超出电动自行车的最大承载重量,以免增加功耗。
3. 合理使用电动模式:我们的电动自行车配备了不同档位的电动模式,根据需要合理选用电动模式。
4. 充电时机选择:建议在电量严重不足前及时充电,以保障日常使用需求。
电动两轮摩托车使用说明书

禁止对车辆进行非法改装。
使用前请仔细阅读说明书,未了解电动摩托车的特性前,请不要使用。
为了确保您的行车安全,骑乘前请务必详细阅读本手册,并确认自己随时符合下列要求:完全了解本手册的各项信息,包括但不限于相关说明、注意事项及警告信息等。
完全了解TS 智能电动车的操作方法及应变措施。
完全了解TS 智能电动车的警示标签。
请勿擅自拆解整车及零部件,如需更换,请联系售后部门及经销商进行更换、购买。
请妥善保管该使用说明书。
为保证车辆使用的安全性,如更改了原电器电路线路引起超标如提高车速等现象,本公司概不负责。
12345为确保自身与他人的安全,请务必遵行下列事宜:12345安全须知SAFE INSTRUCTION用户须知USER INSTRUCTION请勿将车借予不会操控人员行驶,以免发生伤害。
请谨遵当地法律法规驾驶本车上道路行驶。
服用可能影响驾驶能力的药物、饮酒,或身体不适时,请勿骑乘上路。
驾驶本车请确认持有D &E &F 驾驶证,切勿无照驾驶。
遵守交通法规及交通标志,按照法律法规规定载人载物,随时确认周围路况及车况,以主动规避危险。
16789101112安全须知SAFE INSTRUCTION雨、雪天气,制动距离会延长,注意减速慢行,暴雨台风等恶劣天气,尽量避免出行。
佩戴安全装备,例如安全头盔,必要时穿戴适当防护衣物,如手套、口罩。
为了保证您和他人的安全,请在照明条件良好的情况下,避免使用远光灯,持续使用远光灯会给对面车辆及行人造成视觉障碍,影响安全行驶。
在照明不良的情况下,及时打开灯光。
请您在使用完毕后立即切断电源,取下钥匙,不能让小孩玩耍,以免带来不必要的损失。
每次上路前进行基本检测。
请使用人注意 使用安全:骑行前的检查,如有异常请及时进行维修或找专业维修:a )车辆严禁在室内或楼道内停放。
b )严禁在室内或楼道内对电池/车辆进行充电,充电时应远离可燃物,且充电时间不宜过长。
c )请注意电池的正确使用方法和警示用语;废旧电池不可擅自进行拆解,应当由相关专业部门组织回收。