51CTO下载-RHEL+5[1].0+postfix+dovecot+openwebmail+邮件服务器
Redhat安装及使用

Redhat安装及使用版权所有不得复制关于保密性的说明:此文档含有专有信息,文中涉及的所有资料及相关文档必须保密。
此方案及相关资料是上海铭创软件技术有限公司所做的设计,任何无关人员直接或间接接触和传播本方案书中的任何内容,均违反了中国有关知识产权的相关法律和法规,对此上海铭创软件技术有限公司均有权追究其法律和商务道德之责任。
修订历史:目录1安装前准备 (5)2安装虚拟机和REDHAT的列表 (5)3虚拟机安装步骤 (5)4REDHAT安装步骤 (14)5LINUX目录说明 (39)6LINUX常用命令 (40)6.1快速入门命名 (41)6.2文件命令 (48)6.2.1cat (49)6.2.2chmod(change mode) (49)6.2.3chown(change owner) (50)6.2.4cp(copy) (51)6.2.5file (52)6.2.6cmp(compare) (53)6.2.7find (53)6.2.8grep (56)6.2.9mv (58)6.2.10ls(list) (59)6.3系统管理命令 (61)6.3.1date (61)6.3.2exit (63)6.3.3adduser (63)6.3.4free (63)6.3.5groupadd(group add) (64)6.3.6groupdel(group delete) (64)6.3.7groupmod(group modify) (64)6.3.8id (65)6.3.9kill (65)6.3.10shutdown (66)6.3.11su(super user) (66)6.3.12useradd (67)6.3.13userdel (68)6.3.14usermod (68)6.4系统设置命令 (69)6.4.1export (69)6.4.2passwd(password) (69)6.4.3rpm(redhat package manager) (70)6.4.4setup (73)6.5压缩备份命令 (74)6.5.1dump (74)6.5.2gunzip(gnu unzip) (75)6.5.3ln(link) (76)6.5.4restore (77)6.5.5tar(tape archive) (78)6.5.6unzip (81)6.5.7zip (82)6.6磁盘管理命令 (83)6.6.1cd(change directory) (83)6.6.2grep (84)6.6.3df(disk free) (85)6.6.4dirs (86)6.6.5du(disk usage) (86)6.6.6ls(list) (87)6.6.7mkdir(make directories) (90)6.6.8mlabel (90)6.6.9pwd(print working directory) (90)6.6.10quota (91)6.6.11rmdir(remove directory) (91)6.7通讯命令 (92)6.7.1telnet (92)6.7.2ifconfig (93)6.7.3netstat (94)6.7.4ping (95)7经验 (95)7.1.1Chmod设置 (95)7.1.2Linux系统分区的基本要求 (96)1安装前准备redhat-6.5-x86_64-bin-DVD1VMware Workstation 12.0.2(注册码:VY1DU-2VXDH-08DVQ-PXZQZ-P2KV8)SSH Secure Shell Client2安装虚拟机和redhat的列表(1)安装VMware Workstation(2)安装redhat,主机命名为:redhat(3)磁盘需要大于30G(经验值)(4)内存必须大于1G(官方要求)(5)操作系统swap分区大于2G(如果物理内存小于2G,则需要设置,设置值为物理内存的1-2倍,如果物理内存大于8G,给8-16G即可)(6)虚拟机网络连接方式:桥接模式(B)直接连接物理网络(7)安装完成后设置虚拟机网络(ipv4)为固定IP地址(system-config-network)(8)进行网络测试OK,则操作系统环境准备完毕(9)安装虚拟机时一定要选择:先创建虚拟机后安装操作系统(10)安装SSH Secure Shell Client并连接主机3虚拟机安装步骤首先,准备安装环境,此次实验是在VMware Workstation虚拟机环境下来实现的,下面就开始安装。
RPM安装POSTFIX

RPM安装POSTFIX+DOVECOT2010-10-17 10:50:23标签:linux mail postfix dovecot1。
rpm方式安装好apache+php测试PHP正常访问。
(为webmail先搭建好运行环境)2。
yum安装postfix(安装postfix前先卸载sendmail)和dovecot(pop3+imap),启动两个服务。
3。
配置dovecot: vi /etc/dovecot.conf,dovecot 只需把protocols前的注释去掉,修改protocols = imap imaps pop3 pop3s,并重起 service dovecot restart4。
修改postfix配置文件/etc/postfix/main.cf#myhostname = host.domain.tld ←找到此行,将等号后面的部分改写为主机名myhostname = ←变为此状态,设置系统的主机名#mydomain = domain.tld ←找到此行,将等号后面的部分改写为域名mydomain = ←变为此状态,设置域名(我们将让此处设置将成为E-mail地址“@”后面的部分)#myorigin = $mydomain ←找到此行,将行首的#去掉myorigin = $mydomain ←变为此状态,将发信地址“@”后面的部分设置为域名(非系统主机名)inet_interfaces = localhost ←找到此行,将“localhost”改为“all”inet_interfaces = all ←变为此状态,接受来自所有网络的请求mydestination = $myhostname, localhost.$mydomain, localhost ←找到此行,在行为添加“$mydomain”mydestination = $myhostname, localhost.$mydomain, localhost, $mydomain ←变为此状态,指定发给本地邮件的域名#relay_domains = $mydestination ←找到此行,将行首的#去掉relay_domains = $mydestination ←变为此状态,定义允许转发的域名#mynetworks = 168.100.189.0/28, 127.0.0.0/8 ←找到此行,依照自己的内网情况修改mynetworks = 168.100.189.0/28, 127.0.0.0/8 ←变为此状态,指定内网和本地的IP地址范围#home_mailbox = Maildir/ ←找到这一行,去掉行首的#home_mailbox = Maildir/ ←变为此状态,指定用户邮箱目录 (这个一般不用做)# SHOW SOFTWARE VERSION OR NOT## The smtpd_banner parameter specifies the text that follows the 220# code in the SMTP server's greeting banner. Some people like to see# the mail version advertised. By default, Postfix shows no version.## You MUST specify $myhostname at the start of the text. That is an# RFC requirement. Postfix itself does not care.##smtpd_banner = $myhostname ESMTP $mail_name#smtpd_banner = $myhostname ESMTP $mail_name ($mail_version) ←找到这一行,接此行添加如下行:smtpd_banner = $myhostname ESMTP unknow ←添加这一行,不显示SMTP服务器的相关信息在配置文件的文尾,添加如下行:smtpd_sasl_auth_enable = yes ←服务器使用SMTP认证smtpd_sasl_local_domain = $myhostname ←指定SMTP认证的本地域名(主机名)smtpd_sasl_security_options = noanonymous ←不允许匿名的方式认证smtpd_recipient_restrictions = permit_mynetworks, permit_sasl_authenticated,reject_unauth_destinationmessage_size_limit = 15728640 ←规定邮件最大尺寸为15MB vi /usr/lib/sasl2/smtpd.confpwcheck_method: saslauthdlog_level:3mech_list:PLAIN LOGIN如此,postfix应该可以使用本地系统用户收发邮件了。
在RHEL5包管理中添加本地光盘资源

在RHEL5包管理中添加本地光盘资源
--by moroo
安装RHEL5的同学会发现,打开添加删除程序的界面是这个样子的:
这是因为从5开始,使用了yum升级安装机制,安装必须连入网络,你还有red hat的注册账号,或者你就乖乖用命令行方式完成安装。
能不能向以前4一样,采用图形化安装本地光盘中的程序呢,答案是肯定的:挂载光盘,添加路径,清理yum。
3步搞定:
1.挂载光盘到/media/cdrom/中
2-1.在Package Manager中添加一条yum repositories (yum 软件资源库)定义
2-2.我添加了一条RHEL5DVD的定义,关键是Location要指向光盘挂载的位置,使用file://协议。
(这里注意用file:///mountpoint/Server ,因为RPM包在Server目录下!)
2-3.Close时提示出错,没关系选择退出,这会在/etc/yum.repo.d/目录下生成一个rhel5dvd.repo文件:
3.清除yum记录(yum clean all)
重新运行add/remove packages 管理看看!
简单吧^_^。
Redhat5安装图例

Red Hat Enterprise Linux 5 图形模式安装
1. 开机,将安装光盘放入光驱,出现引导画面直接回车安装
2,不用检测光盘,选择“ skip”
3. 进入安装界面,选择“下一步”
4,选择安装过程中(非系统语言)的语言:简体中文
5,选择键盘类型
6,单击下一步,需要安装序列号,此项在您购买的正版CD盒中有一张纸片,数字和字母的组合,将其输入。
如果选择“跳过输入安装号码”
1,您可能不能访问您的订阅包括软件包
2,可能导致没有支持或者未认证的Red Hat Enterprise Linux的安装
3,您将不能获得您的订阅里不包括的软件包的软件和安全性的更新
7,验证安装号成功,提示将格式化硬盘分区
8,对于全新安装的服务器,可以选择删除所有分区
9,弹出警告信息,继续下一步
10,弹出配置网卡ip,此时可以手工输入。
也可以进入系统以后再配置
11,设置好以后下一步,选择时区
12,输入根用户口令
13,根据应用需求选择需要安装的组件
14,选择好以后,下一步继续,注意:这个地方要用鼠标右击每个项目,把所有的可选项包选择进行安装,否则以后安装软件,会提示少库文件或者编译包。
16,单击下一步
17,安装完成,单击重新引导,重启服务器
18,启动过程
19,进入登陆前的系统信息设置界面
20,输入用户名密码
21,登陆成功
至此PER805 服务器Redhat Enterprise linux 5.0安装完成。
自已redhat5安装oracle的整个过程

自已redhat5安装oracle的整个过程一.安装jdk1.我使用的是jdk-1.6.0_23-linux-i586.rpm.bin下载后的BIN文件可以直接执行2.使用root用户,执行以下几步# chmod 755 jdk-1.6.0_23-linux-i586.rpm.bin# ./ jdk-1.6.0_23-linux-i586.rpm.bin此步完成后,会生成jdk-1.6.0_23-linux-i586.rpm的文件默认安装到了/usr/java/jdk1.6.0_233.设置环境变量vi /etc/profile在文件中增加如下内容:JAVA_HOME=/usr/java/jdk1.6.0_23JRE_HOME=/usr/java/jdk1.6.0_23/jrePATH=$PATH:$JAVA_HOME/bin:JRE_HOME/binCLASSPATH=.:$JAVA_HOME/lib/jt.jar:$JAVA_HOME/lib/tools.jar:$JRE_HOME/libexport JAVA_HOME JRE_HOME PATH CLASSPATH按Esc,然后:wq保存退出4.使环境变量生效Source /etc/profile此时可以查看jdk的环境配置echo $JAVA_HOME(会显示JDK所在目录)二.安装oracle1.检查安装包(当前用户是root)rpm -q gcc make binutils openmotif setarch compat-db compat-gcccompat-gcc-c++compat-libstdc++ compat-libstdc++-devel libXp使用此命令可以查看这些rpm包是否安装,由于缺失的包之间有严格的依赖关系,所以必须按照如下顺序安装缺失的包:rpm -Uvh compat-db-4*rpm -Uvh libaio-0*rpm -Uvh compat-libstdc++-33-3*rpm -Uvh glibc-headers-2.5-12.i386.rpmrpm -Uvh glibc-devel-2.5-12.i386.rpmrpm -Uvh compat-gcc-34-3*rpm -Uvh compat-gcc-34-c++-3*rpm -Uvh libXp-1*rpm -Uvh openmotif-2*rpm -Uvh gcc-4*rpm -Uvh glibc-2.5-12.i686.rpmrpm -Uvh libgomp-4.1.1-52.el5.i386.rpmrpm -Uvh gcc-4.1.1-52.el5.i386.rpm其中U是升级的意思update。
Cent OS 5.5下postfix+extmail+mysql邮件服务器

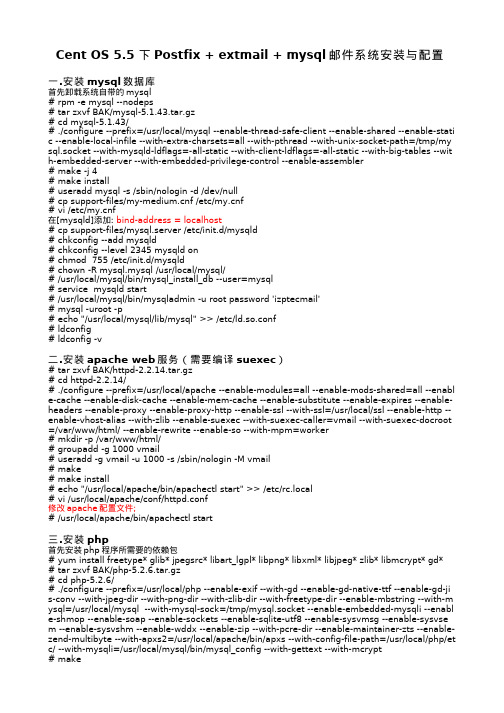
Cent OS 5.5 下Postfix + extmail + mysql邮件系统安装与配置一.安装mysql数据库首先卸载系统自带的mysql# rpm -e mysql --nodeps# tar zxvf BAK/mysql-5.1.43.tar.gz# cd mysql-5.1.43/# ./configure --prefix=/usr/local/mysql --enable-thread-safe-client --enable-shared --enable-stati c --enable-local-infile --with-extra-charsets=all --with-pthread --with-unix-socket-path=/tmp/my sql.socket --with-mysqld-ldflags=-all-static --with-client-ldflags=-all-static --with-big-tables --wit h-embedded-server --with-embedded-privilege-control --enable-assembler# make -j 4# make install# useradd mysql -s /sbin/nologin -d /dev/null# cp support-files/f /etc/f# vi /etc/f在[mysqld]添加: bind-address = localhost# cp support-files/mysql.server /etc/init.d/mysqld# chkconfig --add mysqld# chkconfig --level 2345 mysqld on# chmod 755 /etc/init.d/mysqld# chown -R mysql.mysql /usr/local/mysql/# /usr/local/mysql/bin/mysql_install_db --user=mysql# service mysqld start# /usr/local/mysql/bin/mysqladmin -u root password 'izptecmail'# mysql -uroot -p# echo "/usr/local/mysql/lib/mysql" >> /etc/ld.so.conf# ldconfig# ldconfig -v二.安装apache web服务(需要编译suexec)# tar zxvf BAK/httpd-2.2.14.tar.gz# cd httpd-2.2.14/# ./configure --prefix=/usr/local/apache --enable-modules=all --enable-mods-shared=all --enabl e-cache --enable-disk-cache --enable-mem-cache --enable-substitute --enable-expires --enable-headers --enable-proxy --enable-proxy-http --enable-ssl --with-ssl=/usr/local/ssl --enable-http --enable-vhost-alias --with-zlib --enable-suexec --with-suexec-caller=vmail --with-suexec-docroot =/var/www/html/ --enable-rewrite --enable-so --with-mpm=worker# mkdir -p /var/www/html/# groupadd -g 1000 vmail# useradd -g vmail -u 1000 -s /sbin/nologin -M vmail# make# make install# echo "/usr/local/apache/bin/apachectl start" >> /etc/rc.local# vi /usr/local/apache/conf/httpd.conf修改apache配置文件;# /usr/local/apache/bin/apachectl start三.安装php首先安装php程序所需要的依赖包# yum install freetype* glib* jpegsrc* libart_lgpl* libpng* libxml* libjpeg* zlib* libmcrypt* gd*# tar zxvf BAK/php-5.2.6.tar.gz# cd php-5.2.6/# ./configure --prefix=/usr/local/php --enable-exif --with-gd --enable-gd-native-ttf --enable-gd-ji s-conv --with-jpeg-dir --with-png-dir --with-zlib-dir --with-freetype-dir --enable-mbstring --with-m ysql=/usr/local/mysql --with-mysql-sock=/tmp/mysql.socket --enable-embedded-mysqli --enabl e-shmop --enable-soap --enable-sockets --enable-sqlite-utf8 --enable-sysvmsg --enable-sysvse m --enable-sysvshm --enable-wddx --enable-zip --with-pcre-dir --enable-maintainer-zts --enable-zend-multibyte --with-apxs2=/usr/local/apache/bin/apxs --with-config-file-path=/usr/local/php/et c/ --with-mysqli=/usr/local/mysql/bin/mysql_config --with-gettext --with-mcrypt# make# make install# cp php.ini-dist /usr/local/php/etc/php.ini# vi /usr/local/php/etc/php.ini---------------------------------------;include_path = ".:/php/includes" 改为include_path = ".:/usr/local/php/lib/php"---------------------------------------四.安装courier-authlib库(验证登陆)# tar jxvf BAK/courier-authlib-0.63.0.tar.bz2# cd courier-authlib-0.63.0/# CFLAGS="-march=i686 -O2 -fexpensive-optimizations" CXXFLAGS="-march=i686 -O2 -fexpe nsive-optimizations"# ./configure --prefix=/usr/local/courier-authlib --sysconfdir=/etc --without-authpam --without-a uthldap --without-authpwd --without-authshadow --without-authvchkpw --without-authpgsql --wi th-authmysql --with-mysql-libs=/usr/local/mysql/lib/mysql --with-mysql-includes=/usr/local/mys ql/include/mysql --with-redhat --with-authmysqlrc=/etc/authmysqlrc --with-authdaemonrc=/etc/ authdaemonrc# make# make install# chmod 755 /usr/local/courier-authlib/var/spool/authdaemon# cp /etc/authdaemonrc.dist /etc/authdaemonrc# vi /etc/authdaemonrc修改为以下配置:authmodulelist="authmysql"authmodulelistorig="authmysql"daemons=15authdaemonvar=/usr/local/courier-authlib/var/spool/authdaemonDEBUG_LOGIN=0DEFAULTOPTIONS=""LOGGEROPTS=""--------------------------------------------------------------# cp /etc/authmysqlrc.dist /etc/authmysqlrc# vi /etc/authmysqlrc修改为以下配置:MYSQL_SERVER localhostMYSQL_USERNAME rootMYSQL_PASSWORD izptecmailMYSQL_SOCKET /tmp/mysql.socketMYSQL_PORT 3306MYSQL_OPT 0MYSQL_DATABASE extmailMYSQL_USER_TABLE mailboxMYSQL_CRYPT_PWFIELD passwordMYSQL_UID_FIELD 1000MYSQL_GID_FIELD 1000MYSQL_LOGIN_FIELD usernameMYSQL_HOME_FIELD homedirMYSQL_NAME_FIELD nameMYSQL_MAILDIR_FIELD maildirMYSQL_QUOTA_FIELD quotaMYSQL_SELECT_CLAUSE SELECT username,password,"",uidnumber,gidnumber,\CONCAT('/home/domains/',homedir), \CONCAT('/home/domains/',maildir), \quota, \name \FROM mailbox \WHERE username = '$(local_part)@$(domain)'--------------------------------------------------------------# cp courier-authlib.sysvinit /etc/init.d/courier-authlib# chmod 755 /etc/init.d/courier-authlib# chkconfig --add courier-authlib# chkconfig --level 2345 courier-authlib on# pstree | grep authdaemond显示init-+-courierlogger---authdaemond---15*[authdaemond] 表示安装成功;五.安装courier-imap (提供pop3服务)# tar jxvf BAK/courier-imap-4.0.3.tar.bz2# cd courier-imap-4.0.3/# ./configure --prefix=/usr/local/courier-imap --with-redhat --enable-unicode --disable-root-chec k --with-trashquota --without-ipv6 CPPFLAGS='-I/usr/include/openssl -I/usr/local/courier-authlib/i nclude' LDFLAGS='-L/usr/local/courier-authlib/lib/courier-authlib' COURIERAUTHCONFIG='/usr/lo cal/courier-authlib/bin/courierauthconfig'# make# make install# cp /usr/local/courier-imap/etc/imapd.dist /usr/local/courier-imap/etc/imapd# cp /usr/local/courier-imap/etc/imapd-ssl.dist /usr/local/courier-imap/etc/imapd-ssl# cp /usr/local/courier-imap/etc/pop3d.dist /usr/local/courier-imap/etc/pop3d# cp /usr/local/courier-imap/etc/pop3d-ssl.dist /usr/local/courier-imap/etc/pop3d-ssl# vi /usr/local/courier-imap/etc/pop3d修改POP3DSTART字段,改为YES;如果需要提供imapd服务,编译/usr/local/courier-imap/etc/imoa pd的IMAPDSTART字段;# mkdir -p /home/domains/# chown -R vmail.vmail /home/domains/# chmod 755 /etc/init.d/courier-imapd# chkconfig --add courier-imapd# chkconfig --level 2345 courier-imapd on# netstat -tupln查看110端口是否开启,如开启则pop3服务正常;六.安装Cyrus-sasl (认证)# tar jxvf BAK/cyrus-sasl-2.1.22.tar.bz2# cd cyrus-sasl-2.1.22/# ./configure --prefix=/usr/local/sasl2 --disable-gssapi --disable-anon --disable-sample --disable-digest --enable-plain --enable-login --enable-sql --with-mysql=/usr/local/mysql --with-mysql-incl udes=/usr/local/mysql/include/mysql --with-mysql-libs=/usr/local/mysql/lib/mysql--with-authdae mond=/usr/local/courier-authlib/var/spool/authdaemon/socket# make# make install# chkconfig --level 2345 saslauthd off# cd /usr/lib******# mv libsasl2.a libsasl2.a.OFF# mv libsasl2.so.2.0.22 libsasl2.so.2.0.22.OFF# mv sasl2 sasl2.OFF# rm libsasl2.so libsasl2.so.2# ln -sv /usr/local/sasl2/lib/* .******进入/usr/lib64 同上修改sasl库链接关系;进入/usr/local/lib/库链接关系;同时链接头文件到/usr/loca/include;# ln -sv /usr/local/sasl2/include/sasl /usr/local/include/sasl# mkdir -pv /var/state/saslauthd# /usr/local/sasl2/sbin/saslauthd -a shadow pam -d输出:saslauthd[20634] :main : num_procs : 5saslauthd[20634] :main : mech_option: NULLsaslauthd[20634] :main : run_path : /var/state/saslauthdsaslauthd[20634] :main : auth_mech : shadowsaslauthd[20634] :ipc_init : using accept lock file: /var/state/saslauthd/mux.accept saslauthd[20634] :detach_tty : master pid is: 0saslauthd[20634] :ipc_init : listening on socket: /var/state/saslauthd/muxsaslauthd[20634] :main : using process modelsaslauthd[20635] :get_accept_lock : acquired accept locksaslauthd[20634] :have_baby : forked child: 20635saslauthd[20634] :have_baby : forked child: 20636saslauthd[20634] :have_baby : forked child: 20637saslauthd[20634] :have_baby : forked child: 20638表示正常,Ctrl+c 结束;# /usr/local/sasl2/sbin/saslauthd -a shadow pam# pstree | grep saslauthd显示|-saslauthd---4*[saslauthd],表示程序启动;# /usr/local/sasl2/sbin/testsaslauthd -u root -p (root 用户密码)显示0: OK "Success." 测试成功# echo “/usr/local/sasl2/lib” >> /etc/ld.so.conf# echo “/usr/local/sasl2/lib/sasl2” >> /etc/ld.so.conf# ldconfig -v# echo “/usr/local/sasl2/sbin/saslauthd -a shadow pam” >> /etc/rc.local# vi /usr/local/sasl2/lib/sasl2/smtpd.conf------------------------------------------------------------pwcheck_method: authdaemondlog_level: 3mech_list: PLAIN LOGINauthdaemond_path: /usr/local/courier-authlib/var/spool/authdaemon/socket------------------------------------------------------------# vi /etc/init.d/saslauthd------------------------------------------------------------修改为:SOCKETDIR=/var/state/saslauthdMECH="shadow pam"注释:#if test -x ${path}.${MECH} ; then# path=/usr/sbin/saslauthd.$MECH#fi------------------------------------------------------------# vi /etc/sysconfig/saslauthd------------------------------------------------------------SOCKETDIR=/var/state/saslauthdMECH="shadow pam"------------------------------------------------------------# chkconfig --level 2345 saslauthd on七.安装配置postfix# rpm -e sendmail --nodeps# tar zxvf BAK/postfix-2.6.5.tar.gz# cd postfix-2.6.5/# groupadd postdrop# useradd -M -s /sbin/nologin postfix# make makefiles 'CCARGS=-DHAS_MYSQL -I/usr/local/mysql/include/mysql -DUSE_SASL_AUTH -DUSE_CYRUS_SASL -I/usr/local/sasl2/include/sasl -DUSE_TLS -I/usr/include/openssl' 'AUXLIBS=-L/usr/local/mysql/lib/mysql -lmysqlclient -lz -lm -L/usr/local/sasl2/lib -lsasl2 -L/usr/local/ssl/lib -lss l -lcrypto'# make# make install# /usr/bin/newaliases# vi /etc/postfix/main.cf------------------------------------------------------------#####################BASE#########################queue_directory = /var/spool/postfixcommand_directory = /usr/sbindaemon_directory = /usr/libexec/postfixdata_directory = /var/lib/postfixmail_owner = postfixunknown_local_recipient_reject_code = 550debug_peer_level = 2debugger_command =PATH=/bin:/usr/bin:/usr/local/bin:/usr/X11R6/binddd $daemon_directory/$process_name $process_id & sleep 5sendmail_path = /usr/sbin/sendmailnewaliases_path = /usr/bin/newaliasesmailq_path = /usr/bin/mailqsetgid_group = postdrophtml_directory = nomanpage_directory = /usr/local/mansample_directory = /etc/postfixreadme_directory = nomyhostname = mydomain = myorigin = $mydomaininet_interfaces = allmynetworks = 127.0.0.0/8------------------------------------------------------------测试postfix 发信功能# telnet localhost 25Trying 127.0.0.1...Connected to localhost.Escape character is '^]'.220 ESMTP Postfixhelo 250 mail from:root@250 2.1.0 Okrcpt to:hanyongming@250 2.1.5 Okdata354 End data with <CR><LF>.<CR><LF>from:root Test <root@>to:hanyongming@subject:Mail Test.Mail Test Date 2011-03-13..250 2.0.0 Ok: queued as DEF0D330054quit221 2.0.0 ByeConnection closed by foreign host.# /usr/sbin/postconf -a显示cyrusdovecot则表示postfix支持cyrus-sasl认证# vi /etc/postfix/main.cf------------------------------------------------------------添加以下内容:#####################CYRUS-SASL######################### broken_sasl_auth_clients = yessmtpd_recipient_restrictions = permit_mynetworks,permit_sasl_authenticated,reject_invalid_hostname,reject_non_fqdn_hostname,reject_unknown_sender_domain,reject_non_fqdn_sender,reject_non_fqdn_recipient,reject_unknown_recipient_domain,reject_unauth_pipelining,reject_unauth_destinationsmtpd_sasl_auth_enable = yessmtpd_sasl_authenticated_header = yessmtpd_sasl_local_domain = $myhostnamesmtpd_sasl_security_options = noanonymoussmtpd_sasl_path = smtpdsmtpd_banner = Welcome to our $myhostname ESMTP,Warning: Version not Available! --------------------------------------------------------------------# /usr/sbin/postfix reload验证认证是否生效# telnet localhost 25显示以下内容:Trying 127.0.0.1...Connected to localhost.Escape character is '^]'.220 Welcome to our ESMTP,Warning: Version not Available!ehlo 250-PIPELINING250-SIZE 10240000250-VRFY250-ETRN250-AUTH LOGIN PLAIN250-AUTH=LOGIN PLAIN250-ENHANCEDSTATUSCODES250-8BITMIME250 DSN^]telnet> qConnection closed.表示postfix验证生效;# vi /etc/postfix/main.cf---------------------------------------------------------------------添加虚拟域配置文件:#####################Virtual Mailbox Settings##################### virtual_mailbox_base = /home/doaminsvirtual_mailbox_maps = mysql:/etc/postfix/mysql_virtual_mailbox_maps.cfvirtual_mailbox_domains = mysql:/etc/postfix/mysql_virtual_domains_maps.cf#virtual_alias_domains =virtual_alias_maps = mysql:/etc/postfix/mysql_virtual_alias_maps.cfvirtual_minimum_uid = 1000virtual_uid_maps = static:1000virtual_gid_maps = static:1000virtual_transport = maildropmaildrop_destination_recipient_limit = 1maildrop_destination_concurrency_limit = 1#####################QUOTA Settings######################## message_size_limit = 14336000virtual_mailbox_limit = 20971520virtual_create_maildirsize = yesvirtual_mailbox_extended = yesvirtual_mailbox_limit_maps = mysql:/etc/postfix/mysql_virtual_limit_maps.cfvirtual_mailbox_limit_override = yesvirtual_maildir_limit_message = Sorry, the user's maildir has overdrawn his diskspace quota, pl ease Tidy your mailbox and try again later.virtual_overquota_bounce = yes----------------------------------------------------------------------八.安装extmail extman# tar zxvf BAK/extmail-1.2.tar.gz# cp -a extmail-1.2 /var/www/html/extmail# tar zxvf BAK/extman-1.1.tar.gz# cp -a extman-1.1 /var/www/html/extman# cd /var/www/html# cp extmail/webmail.cf.default extmail/webmail.cf# vi extmail/webmail.cf----------------------------------------------------------------------修改extmail的配置项:SYS_CONFIG = /var/www/html/extmail/SYS_LANGDIR = /var/www/html/extmail/langSYS_TEMPLDIR = /var/www/html/extmail/htmlSYS_USER_LANG = zh_CNSYS_MYSQL_USER = rootSYS_MYSQL_PASS = izptecmailSYS_MYSQL_DB = extmailSYS_MYSQL_HOST = localhostSYS_MYSQL_SOCKET = /tmp/mysql.socketSYS_AUTHLIB_SOCKET = /usr/local/courier-authlib/var/spool/authdaemon/socket SYS_G_ABOOK_FILE_PATH = /var/www/html/extmail/globabook.cf-----------------------------------------------------------------------# cp extman/webman.cf.default extman/webman.cf# vi extman/webman.cf-----------------------------------------------------------------------修改extman的配置项:SYS_CONFIG = /var/www/html/extman/SYS_LANGDIR = /var/www/html/extman/langSYS_TEMPLDIR = /var/www/html/extman/htmlSYS_MYSQL_USER = rootSYS_MYSQL_PASS = izptecmailSYS_MYSQL_DB = extmailSYS_MYSQL_HOST = localhostSYS_MYSQL_SOCKET = /tmp/mysql.socket安装数据库链接的perl模块:# tar zxvf BAK/Unix-Syslog-1.1.tar.gz# cd Unix-Syslog-1.1/# make# make install# tar zxvf BAK/DBI-1.604.tar.gz# cd DBI-1.604/# perl Makefile.PL# make# make install# tar zxvf BAK/DBD-mysql-4.006.tar.gz# cd DBD-mysql-4.006/# perl Makefile.PL --mysql_config=/usr/local/mysql/bin/mysql_config# tar zxvf BAK/GD-2.45.tar.gz# cd GD-2.45/# perl Makefile.PL# make# make install# cd /var/www/html/extman/docs/# /usr/local/mysql/bin/mysql -uroot -p <extmail.sql# /usr/local/mysql/bin/mysql -uroot -p <init.sql# cp mysql_virtual_alias_maps.cf /etc/postfix/# cp mysql_virtual_domains_maps.cf /etc/postfix/# cp mysql_virtual_limit_maps.cf /etc/postfix/# cp mysql_virtual_mailbox_maps.cf /etc/postfix/修改虚拟域配置文件内链接mysql数据库的用户名,密码;# vi /usr/local/apache/conf/httpd.conf----------------------------------------------------------修改apache配置文件User vmailGroup vmail<Directory />Options FollowSymLinksAllowOverride NoneOrder deny,allowAllow from all</Directory><VirtualHost *:80>ServerName DocumentRoot /var/www/html/extmail/html/ScriptAlias /extmail/cgi/ /var/www/html/extmail/cgi/Alias /extmail /var/www/html/extmail/html/ScriptAlias /extman/cgi/ /var/www/html/extman/cgi/Alias /extman /var/www/html/extman/html/SuexecUserGroup vmail vmail</VirtualHost>----------------------------------------------------------# chown -R vmail.vmail /var/www/html# mkdir -pv /tmp/extman# chown -R vmail.vmail /tmp/extman/# /usr/local/apache/bin/apachectl stop# /usr/local/apache/bin/apachectl startweb方式访问登录邮箱管理登录名:root@ 密码:extmail*123*新建域,新建邮箱账户;九.安装maildrop邮件投递# tar zxvf BAK/pcre-8.10.tar.gz# cd pcre-8.10/# ./configure --enable-utf8 --enable-unicode-properties --enable-newline-is-any --enable-pcregr ep-libz --enable-pcregrep-libbz2# make# make install# tar jxvf BAK/maildrop-2.0.4.tar.bz2# cd maildrop-2.0.4/# ln -sv /usr/local/courier-authlib/bin/courierauthconfig /usr/bin# ln -sv /usr/local/courier-authlib/include/* /usr/include# ./configure --enable-sendmail=/usr/sbin/sendmail --enable-trusted-users='root vmail' --enabl e-syslog=1 --enable-maildirquota --enable-maildrop-uid=1000 --enable-maildrop-gid=1000 --wi th-trashquota --with-dirsync# make# make install# vi /etc/maildroprc---------------------------------------------------------添加以下内容:logfile "/var/log/maildrop.log"---------------------------------------------------------# touch /var/log/maildrop.log# chown -R vmail.vmail /var/log/maildrop.log# vi /etc/postfix/master.cf---------------------------------------------------------添加以下内容:maildrop unix - n n - - pipeflags=DRhu user=vmail argv=/usr/local/bin/maildrop -d ${recipient}---------------------------------------------------------# service courier-authlib restart# service courier-imapd restart# service saslauthd restart# /usr/sbin/postfix reload# /usr/local/apache/bin/apachectl restart建立邮箱收发邮件测试!。
快速搭建基于postfix+dovecot的邮件系统

安装环境:Centos5.5 32位系统rpm安装apache、mysql、php编译安装postfix、dovecot一、安装Centos5.5系统将Centos5.5光盘放入光驱启动系统出现如下画面直接回车系统提示”是否需要校验cd媒介”,选择“Skip”跳过安装欢迎界面:点击next选择安装界面语言选择键盘类型默认即可分区设置选择“是”点击“下一步”选择“检验和修改分区方案”选择“是”然后点击“下一步”手动分区(如果不想手动分区在上一步不要选择“检验和修改分区方案”)点击“重置”创建boot分区大小分300M(默认的100M也足够了)创建交换分区(如果物理内存较小swap分区大小就设为物理内存两倍,如果物理内存较大设为同内存一样大就Ok了)创建home分区(主要用于存放数据)创建根分区()完成分区安装grub引导程序设置网络设置时区设置超级用户root密码软件选择界面选择“现在定制”如果不需要图形界面可以将Desktop-Gnome去掉“应用程序”中只选择“编辑器”就行了“服务器”中选择“MySQL数据库”、“万维网服务器”(也就是mysql和apache)选择“MySQL数据库”---可选的软件包选择php-mysql组件“开发”中选择开发工具开始安装系统和定制的软件安装完成系统设置向导禁用防火墙禁用SElinux不用选择Kdump直接点击“前进”即可时间和日期设置创建用户(创建普通用户,如果不想创建直接点击“前进”)重启系统完成设置打开终端修改/etc/inittab 将id:5:initdefault:改为id:3:initdefault:设置为3用户模式启动系统(不带图形界面)如果之前安装的时候没有安装Desktop-Gnom这里默认进入3用户模式就不需要设置该项如果在装系统时没有安装apache、mysql、php系统安装完成之后可以通过rpm或者yum在线安装apache、mysql、php#yum install httpd-manual httpd system-config-httpd#yum install php-mysql mysql libdbi-dbd-mysql mysql-connector-odbc mysql-server mysql-devel #yum install php-cli php-mysql php-ldap php-pdo php php-common开启apache、mysql#service httpd start#service mysqld start测试phpvi /var/www/html/test.php内容如下:<?phpphpinfo();?>在浏览器里输入http://your ip/test.php成功运行将会出现PHP的logo图标和配置信息。
在RHEL5.0中用YUM解决RPM包的依赖关系

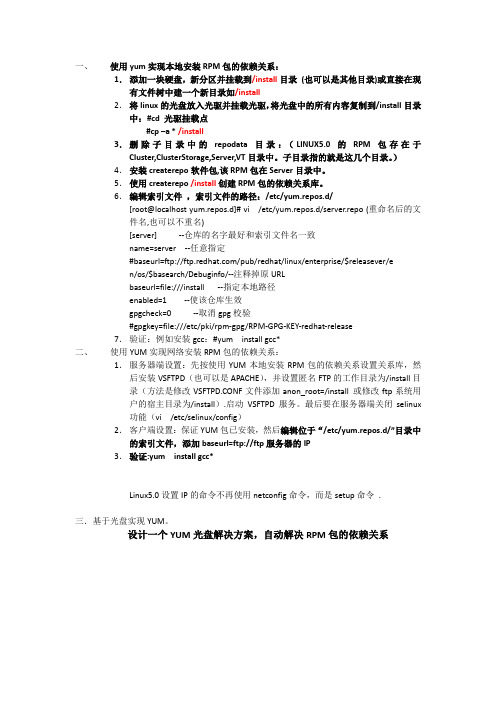
一、使用yum实现本地安装RPM包的依赖关系:1.添加一块硬盘,新分区并挂载到/install目录(也可以是其他目录)或直接在现有文件树中建一个新目录如/install2.将linux的光盘放入光驱并挂载光驱,将光盘中的所有内容复制到/install目录中:#cd 光驱挂载点#cp –a * /install3.删除子目录中的repodata目录:(LINUX5.0的RPM包存在于Cluster,ClusterStorage,Server,VT目录中。
子目录指的就是这几个目录。
)4.安装createrepo软件包,该RPM包在Server目录中。
5.使用createrepo /install创建RPM包的依赖关系库。
6.编辑索引文件,索引文件的路径:/etc/yum.repos.d/[root@localhost yum.repos.d]# vi /etc/yum.repos.d/server.repo (重命名后的文件名,也可以不重名)[server] --仓库的名字最好和索引文件名一致name=server --任意指定#baseurl=ftp:///pub/redhat/linux/enterprise/$releasever/en/os/$basearch/Debuginfo/--注释掉原URLbaseurl=file:///install --指定本地路径enabled=1 --使该仓库生效gpgcheck=0 --取消gpg校验#gpgkey=file:///etc/pki/rpm-gpg/RPM-GPG-KEY-redhat-release7.验证:例如安装gcc:#yum install gcc*二、使用YUM实现网络安装RPM包的依赖关系:1.服务器端设置:先按使用YUM本地安装RPM包的依赖关系设置关系库,然后安装VSFTPD(也可以是APACHE),并设置匿名FTP的工作目录为/install目录(方法是修改VSFTPD.CONF文件添加anon_root=/install 或修改ftp系统用户的宿主目录为/install).启动VSFTPD服务。
- 1、下载文档前请自行甄别文档内容的完整性,平台不提供额外的编辑、内容补充、找答案等附加服务。
- 2、"仅部分预览"的文档,不可在线预览部分如存在完整性等问题,可反馈申请退款(可完整预览的文档不适用该条件!)。
- 3、如文档侵犯您的权益,请联系客服反馈,我们会尽快为您处理(人工客服工作时间:9:00-18:30)。
RHEL 5.0 postfix dovecot openwebmail 邮件服务器一、先卸载sendmain[root@ser ~]# yum remove sendmail二、安装postfix ,dovecot,cyrus-sasl[root@ser ~]# yum -y install postfix[root@ser ~]# yum -y install dovecot[root@ser ~]# yum -y install cyrus-sasl四、修改postfix的配置文件[root@ser ~]# vim /etc/postfix/main.cfmyhostname = mydomain = myorigin = inet_interfaces =allmynetworks = 192.168.1.0/24relay_domains = , $mydomainmydestination = $myhostname, localhost.$mydomain, localhost, $mydomain, mail.$mydomain,www.$mydomain,ftp.$mydomain重启postfix 服务[root@ser ~]# service postfix restartShutting down postfix: [ OK ]Starting postfix: [ OK ][root@ser ~]# chkconfig postfix on[root@ser ~]# chkconfig dovecot on修改dovecot的配置文件vim /etc/dovecot.confprotocols = imap imaps pop3 pop3slisten = *在iptables 里开放25,110,143端口[root@ser ~]# vim /etc/sysconfig/iptables-A RH-Firewall-1-INPUT -m state --state NEW -m tcp -p tcp --dport 110 -j ACCEPT-A RH-Firewall-1-INPUT -m state --state NEW -m tcp -p tcp --dport 25 -j ACCEPT-A RH-Firewall-1-INPUT -m state --state NEW -m tcp -p tcp --dport 143 -j ACCEPT重启iptables[root@ser ~]# service iptables restartFlushing firewall rules: [ OK ]Setting chains to policy ACCEPT: filter [ OK ]Unloading iptables modules: [ OKApplying iptables firewall rules: [ OK ]Loading additional iptables modules:ip_conntrack_netbios_n[ OK ]ntrack_ftp[root@ser ~]# yum -y install cyrus-sasl[root@ser ~]# chkconfig saslauthd on修改 /etc/sysconfig/saslauthd[root@ser ~]# vim /etc/sysconfig/saslauthd# Directory in which to place saslauthd's listening socket, pid file, and so# on. This directory must already exist.SOCKETDIR=/var/run/saslauthd# Mechanism to use when checking passwords. Run "saslauthd -v" to get a list# of which mechanism your installation was compiled with the ablity to use.MECH=shadow# Additional flags to pass to saslauthd on the command line. See saslauthd(8)# for the list of accepted flags.FLAGS=修改 /usr/lib/sasl2/smtpd.conf[root@ser ~]# vim /usr/lib/sasl2/smtpd.confpwcheck_method: saslauthd测试 saslauthd[root@ser ~]# service saslauthd restart[root@ser ~]# testsaslautd -u yjw -p '020304'0: OK "Success."在postfix 的配置文件中,添加以下内容,使其支持SMTP认证[root@ser ~]# vim /etc/postfix/main.cfmessage_size_limit = 1073741824 # 邮件的大小为10Mdefault_process_limit = 50default_destination_concurrency_limit = 20smtpd_sasl_auth_enable = yessmtpd_sasl_local_domain = $myhostnamesmtpd_sasl_application_name = smtpdbroken_sasl_auth_clients = yessmtpd_recipient_restrictions = permit_mynetworks,permit_sasl_authenticated,reject_unauth_destinationsmtpd_client_restrictions = permit_sasl_authenticatedsmtpd_sasl_security_options = noanonymous测试 25端口[root@ser ~]# telnet 25Trying 192.168.1.2...Connected to (192.168.1.2).Escape character is '^]'.220 ESMTP PostfixEHLO 250-PIPELINING250-SIZE 10240000250-VRFY250-ETRN250-AUTH LOGIN PLAIN250-AUTH=LOGIN PLAIN250-ENHANCEDSTATUSCODES250-8BITMIME250 DSNquit221 2.0.0 ByeConnection closed by foreign host.[root@ser ~]#五、安装openwebmail[root@ser ~]# vim /etc/yum.repos.d/openwebmail.repo [openwebmail]## Thomas Chung## 2008.05.29name=Openwebmail for Fedora or Enterprise Linuxbaseurl=/openwebmail/download/redhat/rpm/releas e/enabled=1gpgcheck=1gpgkey=/openwebmail/download/redhat/rpm/release /RPM-GPG-KEY-openwebmail#metadata_expire=0若这样安装不成功,先安装 perl-Text-Iconv-1.4-1.2.el4.rf.i386.rpm [root@ser ~]# yum -y install openwebmail[root@ser ~]# cd /var/www/cgi-bin/openwebmail/[root@ser openwebmail]# ./openwebmail-tool.pl --init #出现Y/N时,按N.修改openwebmail 的一些配置文件[root@ser etc]# vim dbm.confdbm_ext .dbdbmopen_ext .dbdbmopen_haslock no[root@ser etc]]# cd defaults/[root@ser defaults]# vim dbm.confdbm_ext .dbdbmopen_ext .dbdbmopen_haslock yessmtpserver 192.168.1.2[root@ser defaults]# vim openwebmail.confdomainnames smtpserver 192.168.1.2authpop3_server 192.168.1.2再次初始化openwebmail[root@ser defaults]# cd ../../openwebmail-tool.pl --init出现Y/N 时,按Y。
六、安装httpd[root@ser ~]# yum - y install httpd[root@ser ~]# chkconfig httpd on[root@ser ~]# service httpd restartStopping httpd: [ OK ]Starting httpd: [ OK ][root@ser ~]# vim /etc/httpd/conf/httpd.confServerAdminroot@ServerName :80AddHandler cgi-script .cgi .pl七、登陆openwebmail.在IE 中输入 /cgi-bin/openwebmail/openwebmail.pl, 这个地址是不是很长,那么我们来点短点的在 httpd的配置文件中添加下面内容:ScriptAlias /mail /var/www/cgi-bin/openwebmail/openwebmail.pl这样在IE 中直接输入/mail八、安装反垃圾邮件软件,MailScanner到MailScanner .org 上下载MailScanner-4.75.11-1.rpm.tar.gz[root@ser ~]# tar zxvf MailScanner-4.75.11-1.rpm.tar.gz[root@ser ~]# cd MailScanner-4.75.11[root@ser MailScanner-4.75.11-1]# ./install.sh # 安装安装 spamassassin先检查您的系统内是否已经安装SpamAssassin软件包。
