DNSECWITHGTMv2.0_EN_part1
DPtech DPX8000 系列深度业务网关用户配置手册统一审计网关业务板

iii
DPtech DPX8000 系列深度业务交换网关用户配置手册统一审计网关分册 ----------------------------------------------------------------------------------------------------------------------------------------------------
目
录
UAG 插卡部分.................................................................................................................................................. 2 2 ..................................................................................................................................................2 第 1 章 防病毒.................................................................................................................................................. 2 1.1 简介..............................................................................................................................
VPDN配置命令

神州数码网络有限公司
第1章 VPDN 配置命令
1.1 VPDN配置命令
VPDN 子模块是 L2TP 模块以及 PPTP 模块中和 VPDN 组打交道的一个子模块,主要用 于创建和管理 VPDN 组信息, NAC(Network Access Concentrator)和 ห้องสมุดไป่ตู้S(Network Server,又称 Tunnel Server)都需要从 VPDN 组配置中获取相关的信息,用于创建通道 和会话。这里要特别说明的是,在下面的说明中,对于 L2TP 协议,NAC 被称作 LAC (L2TP Access Concentrator),NS 被称作 LNS(L2TP Network Server);对于 PPTP,NAC 被称作 PAC(PPTP Access Concentrator),NS 被称作 PNS(PPTP Network Server);对于 PPPOE,NAC 作为其 Client 端,NS 作为其 Server 端。
VPDN 配置命令
神州数码网络有限公司 2008 年 8 月
神州数码网络有限公司
目录
第 1 章 VPDN配置命令...........................................................................................................................1 1.1 VPDN配置命令 .........................................................................................................................1 1.1.1 accept-dial
centos7无线网卡驱动的安装及无线网络的配置详解
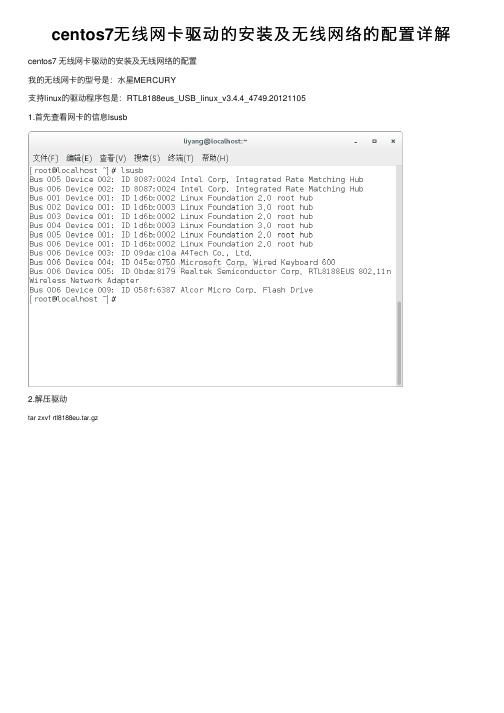
centos7⽆线⽹卡驱动的安装及⽆线⽹络的配置详解centos7 ⽆线⽹卡驱动的安装及⽆线⽹络的配置我的⽆线⽹卡的型号是:⽔星MERCURY⽀持linux的驱动程序包是:RTL8188eus_USB_linux_v3.4.4_4749.201211051.⾸先查看⽹卡的信息lsusb2.解压驱动tar zxvf rtl8188eu.tar.gz3.進⼊rtl8188eu/rtl8188eu-master切換root權限,執⾏make和make iinstall⼀般linux内核会⾃动加载新安装的模块,此处发现并没有加载,那是什么原因呢?原因是这样的,当系统重新安装了驱动模块后,系统⼀般会在重新启动后加载,如果不能加载,我们可以使⽤指令:insmod +具体路径和模块或者直接使⽤modprobe 不需指明路径或将⽣成的8188eu.ko复制到/lib/modules/3.10.0-327.el7.x86_64/kernel/drivers/net/wireless。
下⾯我们重启后,看看系统能否⾃动加载模块(下圖已加載):4.⽤ifconfig查看若沒有⽤ ifconfig -a查看(PS:这是为什么呢?原来是ifconfig查看的是已激活的⽹卡,ifconfig -a 查看的所有的,此时我们只需要将wlp0s29u1u6激活;激活⽤ifconfig wlp0s29u1u6 up)5.進⼊rtl8188eu/wireless_tools我们再次将包拆解到/usr/local/src⽬录下tar -zxvf wireless_tools.30.rtl.tar.gz -C /usr/local/src/进⼊到拆解的⽬录切換root權限,執⾏make和make iinstall我们进⼊/usr/local/sbin⽬录下:6.接着我们使⽤iwlist scanning 列出周围的⽆线⽹络:7.当然光搜素到⽆线⽹络是没有⽤处的,因为这些⽆线⽹络都是加密的,我们必须要验证⼯具来进⾏密钥验证,下⾯我们进⼊到rtl8188eu/wpa_supplicant_hostapd⽬录解压 wpa_supplicant_hostapd-0.8_rtw_20120803.zip 进⼊到/wpa_supplicant_hostapd-0.8/wpa_supplican 执⾏make和make install8.我们进⼊/usr/local/sbin⽬录:此时,我们可以去连接我们的⽆线⽹络了:为了安全起见,我们需要将明⽂密码删除9.现在,我们的驱动模块和密钥⽂件都形成了,现在进⾏⽆线⽹络的连接:复制代码代码如下:wpa_supplicant -i wlp0s29u1u6-c/etc/wpa_supplicant/wpa_supplicant.conf -D wext –B 各参数的含义:-i 指明连接的⽹卡-c 指明密钥⽂件的存放位置-D 指明驱动类型为通⽤型-B 放到后台运⾏我们使⽤iwconfig查看⽆线⽹卡的连接转状态:10.接着重新启动⽹络服务service network restart下⾯看看我们的wlp0s29u1u6能否成功获取Ip地址吧:11.执⾏dhclientdhclient 是直接控制 eth 来进⾏⽹络操作获取 IP。
HP Color LaserJet Enterprise MFP M776用户指南说明书
Legal informationCopyright and License© Copyright 2019 HP Development Company, L.P.Reproduction, adaptation, or translation without prior written permission is prohibited, except as allowedunder the copyright laws.The information contained herein is subject to change without notice.The only warranties for HP products and services are set forth in the express warranty statementsaccompanying such products and services. Nothing herein should be construed as constituting anadditional warranty. HP shall not be liable for technical or editorial errors or omissions contained herein.Edition 1, 10/2019Trademark CreditsAdobe®, Adobe Photoshop®, Acrobat®, and PostScript® are trademarks of Adobe Systems Incorporated.Apple and the Apple logo are trademarks of Apple Inc., registered in the U.S. and other countries.macOS is a trademark of Apple Inc., registered in the U.S. and other countries.AirPrint is a trademark of Apple Inc., registered in the U.S. and other countries.Google™ is a trademark of Google Inc.Microsoft®, Windows®, Windows® XP, and Windows Vista® are U.S. registered trademarks of MicrosoftCorporation.UNIX® is a registered trademark of The Open Group.iiiT able of contents1 Printer overview (1)Warning icons (1)Potential shock hazard (2)Printer views (2)Printer front view (2)Printer back view (4)Interface ports (4)Control-panel view (5)How to use the touchscreen control panel (7)Printer specifications (8)T echnical specifications (8)Supported operating systems (11)Mobile printing solutions (12)Printer dimensions (13)Power consumption, electrical specifications, and acoustic emissions (15)Operating-environment range (15)Printer hardware setup and software installation (16)2 Paper trays (17)Introduction (17)Load paper to Tray 1 (multipurpose tray) (17)Load Tray 1 (multipurpose tray) (18)Tray 1 paper orientation (19)Use alternative letterhead mode (24)Enable Alternative Letterhead Mode by using the printer control-panel menus (24)Load paper to Tray 2 (24)Load Tray 2 (24)Tray 2 paper orientation (26)Use alternative letterhead mode (29)Enable Alternative Letterhead Mode by using the printer control-panel menus (29)Load paper to the 550-sheet paper tray (30)Load paper to the 550-sheet paper tray (30)550-sheet paper tray paper orientation (32)Use alternative letterhead mode (35)Enable Alternative Letterhead Mode by using the printer control-panel menus (35)ivLoad paper to the 2 x 550-sheet paper trays (36)Load paper to the 2 x 550-sheet paper trays (36)2 x 550-sheet paper tray paper orientation (38)Use alternative letterhead mode (41)Enable Alternative Letterhead Mode by using the printer control-panel menus (41)Load paper to the 2,700-sheet high-capacity input paper trays (41)Load paper to the 2,700-sheet high-capacity input paper trays (41)2,700-sheet HCI paper tray paper orientation (43)Use alternative letterhead mode (45)Enable Alternative Letterhead Mode by using the printer control-panel menus (45)Load and print envelopes (46)Print envelopes (46)Envelope orientation (46)Load and print labels (47)Manually feed labels (47)Label orientation (48)3 Supplies, accessories, and parts (49)Order supplies, accessories, and parts (49)Ordering (49)Supplies and accessories (50)Maintenance/long-life consumables (51)Customer self-repair parts (51)Dynamic security (52)Configure the HP toner-cartridge-protection supply settings (53)Introduction (53)Enable or disable the Cartridge Policy feature (53)Use the printer control panel to enable the Cartridge Policy feature (54)Use the printer control panel to disable the Cartridge Policy feature (54)Use the HP Embedded Web Server (EWS) to enable the Cartridge Policy feature (54)Use the HP Embedded Web Server (EWS) to disable the Cartridge Policy feature (55)Troubleshoot Cartridge Policy control panel error messages (55)Enable or disable the Cartridge Protection feature (55)Use the printer control panel to enable the Cartridge Protection feature (56)Use the printer control panel to disable the Cartridge Protection feature (56)Use the HP Embedded Web Server (EWS) to enable the Cartridge Protection feature (56)Use the HP Embedded Web Server (EWS) to disable the Cartridge Protection feature (57)Troubleshoot Cartridge Protection control panel error messages (57)Replace the toner cartridges (58)T oner-cartridge information (58)Remove and replace the cartridges (59)Replace the imaging drums (62)Imaging drum information (62)Remove and replace the imaging drums (63)Replace the toner-collection unit (66)T oner-collection unit information (66)vRemove and replace the toner-collection unit (67)Replace the staple cartridge (M776zs model only) (70)Staple cartridge information (70)Remove and replace the staple cartridge (71)4 Print (73)Print tasks (Windows) (73)How to print (Windows) (73)Automatically print on both sides (Windows) (74)Manually print on both sides (Windows) (74)Print multiple pages per sheet (Windows) (75)Select the paper type (Windows) (75)Additional print tasks (76)Print tasks (macOS) (77)How to print (macOS) (77)Automatically print on both sides (macOS) (77)Manually print on both sides (macOS) (77)Print multiple pages per sheet (macOS) (78)Select the paper type (macOS) (78)Additional print tasks (79)Store print jobs on the printer to print later or print privately (79)Introduction (79)Create a stored job (Windows) (79)Create a stored job (macOS) (80)Print a stored job (81)Delete a stored job (81)Delete a job that is stored on the printer (81)Change the job storage limit (82)Information sent to printer for Job Accounting purposes (82)Mobile printing (82)Introduction (82)Wi-Fi, Wi-Fi Direct Print, NFC, and BLE printing (82)Enable wireless printing (83)Change the Wi-Fi Direct name (83)HP ePrint via email (83)AirPrint (84)Android embedded printing (85)Print from a USB flash drive (85)Enable the USB port for printing (85)Method one: Enable the USB port from the printer control panel (85)Method two: Enable the USB port from the HP Embedded Web Server (network-connectedprinters only) (85)Print USB documents (86)Print using high-speed USB 2.0 port (wired) (86)Method one: Enable the high-speed USB 2.0 port from the printer control panel menus (86)Method two: Enable the high-speed USB 2.0 port from the HP Embedded Web Server (network-connected printers only) (87)vi5 Copy (88)Make a copy (88)Copy on both sides (duplex) (90)Additional copy tasks (92)6 Scan (93)Set up Scan to Email (93)Introduction (93)Before you begin (93)Step one: Access the HP Embedded Web Server (EWS) (94)Step two: Configure the Network Identification settings (95)Step three: Configure the Send to Email feature (96)Method one: Basic configuration using the Email Setup Wizard (96)Method two: Advanced configuration using the Email Setup (100)Step four: Configure the Quick Sets (optional) (104)Step five: Set up Send to Email to use Office 365 Outlook (optional) (105)Introduction (105)Configure the outgoing email server (SMTP) to send an email from an Office 365 Outlookaccount (105)Set up Scan to Network Folder (108)Introduction (108)Before you begin (108)Step one: Access the HP Embedded Web Server (EWS) (108)Step two: Set up Scan to Network Folder (109)Method one: Use the Scan to Network Folder Wizard (109)Method two: Use Scan to Network Folder Setup (110)Step one: Begin the configuration (110)Step two: Configure the Scan to Network Folder settings (111)Step three: Complete the configuration (118)Set up Scan to SharePoint (118)Introduction (118)Before you begin (118)Step one: Access the HP Embedded Web Server (EWS) (118)Step two: Enable Scan to SharePoint and create a Scan to SharePoint Quick Set (119)Scan a file directly to a SharePoint site (121)Quick Set scan settings and options for Scan to SharePoint (122)Set up Scan to USB Drive (123)Introduction (124)Step one: Access the HP Embedded Web Server (EWS) (124)Step two: Enable Scan to USB Drive (124)Step three: Configure the Quick Sets (optional) (125)Default scan settings for Scan to USB Drive setup (126)Default file settings for Save to USB setup (126)Scan to email (127)Introduction (127)Scan to email (127)Scan to job storage (129)viiIntroduction (129)Scan to job storage on the printer (130)Print from job storage on the printer (132)Scan to network folder (132)Introduction (132)Scan to network folder (132)Scan to SharePoint (134)Introduction (134)Scan to SharePoint (134)Scan to USB drive (136)Introduction (136)Scan to USB drive (136)Use HP JetAdvantage business solutions (138)Additional scan tasks (138)7 Fax (140)Set up fax (140)Introduction (140)Set up fax by using the printer control panel (140)Change fax configurations (141)Fax dialing settings (141)General fax send settings (142)Fax receive settings (143)Send a fax (144)Additional fax tasks (146)8 Manage the printer (147)Advanced configuration with the HP Embedded Web Server (EWS) (147)Introduction (147)How to access the HP Embedded Web Server (EWS) (148)HP Embedded Web Server features (149)Information tab (149)General tab (149)Copy/Print tab (150)Scan/Digital Send tab (151)Fax tab (152)Supplies tab (153)Troubleshooting tab (153)Security tab (153)HP Web Services tab (154)Networking tab (154)Other Links list (156)Configure IP network settings (157)Printer sharing disclaimer (157)View or change network settings (157)Rename the printer on a network (157)viiiManually configure IPv4 TCP/IP parameters from the control panel (158)Manually configure IPv6 TCP/IP parameters from the control panel (158)Link speed and duplex settings (159)Printer security features (160)Introduction (160)Security statements (160)Assign an administrator password (160)Use the HP Embedded Web Server (EWS) to set the password (160)Provide user access credentials at the printer control panel (161)IP Security (161)Encryption support: HP High Performance Secure Hard Disks (161)Lock the formatter (161)Energy-conservation settings (161)Set the sleep timer and configure the printer to use 1 watt or less of power (161)Set the sleep schedule (162)Set the idle settings (162)HP Web Jetadmin (163)Software and firmware updates (163)9 Solve problems (164)Customer support (164)Control panel help system (165)Reset factory settings (165)Introduction (165)Method one: Reset factory settings from the printer control panel (165)Method two: Reset factory settings from the HP Embedded Web Server (network-connectedprinters only) (166)A “Cartridge is low” or “Cartridge is very low” message displays on the printer control panel (166)Change the “Very Low” settings (166)Change the “Very Low” settings at the control panel (166)For printers with fax capability (167)Order supplies (167)Printer does not pick up paper or misfeeds (167)Introduction (167)The printer does not pick up paper (167)The printer picks up multiple sheets of paper (171)The document feeder jams, skews, or picks up multiple sheets of paper (174)Clear paper jams (174)Introduction (174)Paper jam locations (174)Auto-navigation for clearing paper jams (175)Experiencing frequent or recurring paper jams? (175)Clear paper jams in the document feeder - 31.13.yz (176)Clear paper jams in Tray 1 (13.A1) (177)Clear paper jams in Tray 2 (13.A2) (182)Clear paper jams in the fuser (13.B9, 13.B2, 13.FF) (188)ixClear paper jams in the duplex area (13.D3) (194)Clear paper jams in the 550-sheet trays (13.A3, 13.A4) (199)Clear paper jams in the 2 x 550 paper trays (13.A4, 13.A5) (206)Clear paper jams in the 2,700-sheet high-capacity input paper trays (13.A3, 13.A4, 13.A5, 13.A7) (213)Resolving color print quality problems (220)Introduction (220)Troubleshoot print quality (221)Update the printer firmware (221)Print from a different software program (221)Check the paper-type setting for the print job (221)Check the paper type setting on the printer (221)Check the paper type setting (Windows) (221)Check the paper type setting (macOS) (222)Check toner-cartridge status (222)Step one: Print the Supplies Status Page (222)Step two: Check supplies status (222)Print a cleaning page (222)Visually inspect the toner cartridge or cartridges (223)Check paper and the printing environment (223)Step one: Use paper that meets HP specifications (223)Step two: Check the environment (223)Step three: Set the individual tray alignment (224)Try a different print driver (224)Troubleshoot color quality (225)Calibrate the printer to align the colors (225)Troubleshoot image defects (225)Improve copy image quality (233)Check the scanner glass for dirt and smudges (233)Calibrate the scanner (234)Check the paper settings (235)Check the paper selection options (235)Check the image-adjustment settings (235)Optimize copy quality for text or pictures (236)Edge-to-edge copying (236)Improve scan image quality (236)Check the scanner glass for dirt and smudges (237)Check the resolution settings (238)Check the color settings (238)Check the image-adjustment settings (239)Optimize scan quality for text or pictures (239)Check the output-quality settings (240)Improve fax image quality (240)Check the scanner glass for dirt and smudges (240)Check the send-fax resolution settings (242)Check the image-adjustment settings (242)Optimize fax quality for text or pictures (242)Check the error-correction setting (243)xSend to a different fax machine (243)Check the sender's fax machine (243)Solve wired network problems (244)Introduction (244)Poor physical connection (244)The computer is unable to communicate with the printer (244)The printer is using incorrect link and duplex settings for the network (245)New software programs might be causing compatibility problems (245)The computer or workstation might be set up incorrectly (245)The printer is disabled, or other network settings are incorrect (245)Solve wireless network problems (245)Introduction (245)Wireless connectivity checklist (245)The printer does not print after the wireless configuration completes (246)The printer does not print, and the computer has a third-party firewall installed (246)The wireless connection does not work after moving the wireless router or printer (247)Cannot connect more computers to the wireless printer (247)The wireless printer loses communication when connected to a VPN (247)The network does not appear in the wireless networks list (247)The wireless network is not functioning (247)Reduce interference on a wireless network (248)Solve fax problems (248)Checklist for solving fax problems (248)What type of phone line are you using? (249)Are you using a surge-protection device? (249)Are you using a phone company voice-messaging service or an answering machine? (249)Does your phone line have a call-waiting feature? (249)Check fax accessory status (249)General fax problems (250)The fax failed to send (250)No fax address book button displays (250)Not able to locate the Fax settings in HP Web Jetadmin (250)The header is appended to the top of the page when the overlay option is enabled (251)A mix of names and numbers is in the recipients box (251)A one-page fax prints as two pages (251)A document stops in the document feeder in the middle of faxing (251)The volume for sounds coming from the fax accessory is too high or too low (251)Index (252)xiPrinter overview1Review the location of features on the printer, the physical and technical specifications of the printer,and where to locate setup information.For video assistance, see /videos/LaserJet.The following information is correct at the time of publication. For current information, see /support/colorljM776MFP.For more information:HP's all-inclusive help for the printer includes the following information:●Install and configure●Learn and use●Solve problems●Download software and firmware updates●Join support forums●Find warranty and regulatory informationWarning iconsUse caution if you see a warning icon on your HP printer, as indicated in the icon definitions.●Caution: Electric shock●Caution: Hot surface●Caution: Keep body parts away from moving partsPrinter overview1●Caution: Sharp edge in close proximity●WarningPotential shock hazardReview this important safety information.●Read and understand these safety statements to avoid an electrical shock hazard.●Always follow basic safety precautions when using this product to reduce risk of injury from fire orelectric shock.●Read and understand all instructions in the user guide.●Observe all warnings and instructions marked on the product.●Use only a grounded electrical outlet when connecting the product to a power source. If you do notknow whether the outlet is grounded, check with a qualified electrician.●Do not touch the contacts on any of the sockets on the product. Replace damaged cordsimmediately.●Unplug this product from wall outlets before cleaning.●Do not install or use this product near water or when you are wet.●Install the product securely on a stable surface.●Install the product in a protected location where no one can step on or trip over the power cord.Printer viewsIdentify certain parts of the printer and the control panel.Printer front viewLocate features on the front of the printer.2Chapter 1 Printer overviewPrinter front view3Printer back viewLocate features on the back of the printer.Interface portsLocate the interface ports on the printer formatter. 4Chapter 1 Printer overviewControl-panel viewThe control panel provides access to the printer features and indicates the current status of the printer.NOTE:Tilt the control panel for easier viewing.The Home screen provides access to the printer features and indicates the current status of the printer.screens.NOTE:The features that appear on the Home screen can vary, depending on the printerconfiguration.Control-panel view5Figure 1-1Control-panel view?i 12:42 PM6Chapter 1 Printer overviewHow to use the touchscreen control panelPerform the following actions to use the printer touchscreen control panel.T ouchT ouch an item on the screen to select that item or open that menu. Also, when scrolling T ouch the Settings icon to open the Settings app.How to use the touchscreen control panel 7SwipeT ouch the screen and then move your finger horizontally to scroll the screen sideways.Swipe until the Settings app displays.Printer specificationsDetermine the specifications for your printer model.IMPORTANT:The following specifications are correct at the time of publication, but they are subject to change. For current information, see /support/colorljM776MFP .T echnical specificationsReview the printer technical specifications.Product numbers for each model ●M776dn - #T3U55A ●Flow M776z - #3WT91A ●Flow M776zs - #T3U56APaper handling specificationsPaper handling features Tray 1 (100-sheet capacity)Included Included Included Tray 2 (550-sheet capacity)IncludedIncludedIncluded8Chapter 1 Printer overview550-sheet paper trayOptional Included Not included NOTE:The M776dn models accept one optional550-sheet tray.Optional Included Included2 x 550-sheet paper tray and standNOTE:The M776dn models accept one optional550-sheet tray that may be installed on top of thestand.Optional Not included Not included2,700-sheet high-capacity input (HCI) paper trayand standNOTE:The M776dn models accept one optional550-sheet tray that may be installed on top of theoptional printer stand.Printer standOptional Not included Not included NOTE:The M776dn models accept one optional550-sheet tray that may be installed on top of theoptional printer stand.Inner finisher accessory Not included Not included Included Automatic duplex printing Included IncludedIncludedIncluded Included Included10/100/1000 Ethernet LAN connection with IPv4and IPv6Hi-Speed USB 2.0Included Included IncludedIncluded Included IncludedEasy-access USB port for printing from a USBflash drive or upgrading the firmwareIncluded Included Included Hardware Integration Pocket for connectingaccessory and third-party devicesHP Internal USB Ports Optional Optional OptionalOptional Optional OptionalHP Jetdirect 2900nw Print Server accessory forWi-Fi connectivity and an additional Ethernet portOptional IncludedIncludedHP Jetdirect 3100w accessory for Wi-Fi, BLE, NFC,and proximity badge readingPrints 45 pages per minute (ppm) on Letter-sizepaper and 46 ppm on A4-size paperEasy-access USB printing for printing from a USBIncluded Included Includedflash driveT echnical specifications9Included Included Included Store jobs in the printer memory to print later orprint privatelyScans 100 pages per minute (ppm) on A4 andIncluded Included Included letter-size paper one-sidedIncluded Included Included 200-page document feeder with dual-headscanning for single-pass duplex copying andscanningNot included Included Included HP EveryPage T echnologies including ultrasonicmulti-feed detectionNot included Included Included Embedded optical character recognition (OCR)provides the ability to convert printed pages intotext that can be edited or searched using acomputerIncluded Included Included SMART Label feature provides paper-edgedetection for automatic page croppingIncluded Included Included Automatic page orientation for pages that haveat least 100 characters of textIncluded Automatic tone adjustment sets contrast,Included Includedbrightness, and background removal for eachpageIncluded Included Includedfolders on a networkIncludedSend documents to SharePoint®Included IncludedIncluded Included Included NOTE:Memory reported on the configurationpage will change from 2.5 GB to 3 GB with theoptional 1 GB SODIMM installed.Mass storage: 500 GB hard disk drive Included Included IncludedSecurity: HP Trusted Platform Module (TPM)Included Included IncludedT ouchscreen control panel Included Included IncludedRetractable keyboard Not included Included Included 10Chapter 1 Printer overviewFax Optional Included IncludedSupported operating systemsUse the following information to ensure printer compatibility with your computer operating system.Linux: For information and print drivers for Linux, go to /go/linuxprinting.UNIX: For information and print drivers for UNIX®, go to /go/unixmodelscripts.The following information applies to the printer-specific Windows HP PCL 6 print drivers, HP print driversfor macOS, and to the software installer.Windows: Download HP Easy Start from /LaserJet to install the HP print driver. Or, go tothe printer-support website for this printer: /support/colorljM776MFP to download the printdriver or the software installer to install the HP print driver.macOS: Mac computers are supported with this printer. Download HP Easy Start either from /LaserJet or from the Printer Support page, and then use HP Easy Start to install the HP print driver.1.Go to /LaserJet.2.Follow the steps provided to download the printer software.Windows 7, 32-bit and 64-bit The “HP PCL 6” printer-specific print driver is installed for this operating system aspart of the software installation.Windows 8.1, 32-bit and 64-bit The “HP PCL-6” V4 printer-specific print driver is installed for this operating systemas part of the software installation.Windows 10, 32-bit and 64-bit The “HP PCL-6” V4 printer-specific print driver is installed for this operating systemas part of the software installation.Windows Server 2008 R2, SP 1, 64-bit The PCL 6 printer-specific print driver is available for download from the printer-support website. Download the driver, and then use the Microsoft Add Printer tool toinstall it.Windows Server 2012, 64-bit The PCL 6 printer-specific print driver is available for download from the printer-support website. Download the driver, and then use the Microsoft Add Printer tool toinstall it.Windows Server 2012 R2, 64-bit The PCL 6 printer-specific print driver is available for download from the printer-support website. Download the driver, and then use the Microsoft Add Printer tool toinstall it.Windows Server 2016, 64-bit The PCL 6 printer-specific print driver is available for download from the printer-support website. Download the driver, and then use the Microsoft Add Printer tool toinstall it.Windows Server 2019, 64-bit The PCL 6 printer-specific print driver is available for download from the printer-support website. Download the driver, and then use the Microsoft Add Printer tool toinstall it.Supported operating systems11macOS 10.13 High Sierra, macOS 10.14 MojaveDownload HP Easy Start from /LaserJet , and then use it to install the print driver.NOTE:Supported operating systems can change.NOTE:For a current list of supported operating systems and HP’s all-inclusive help for the printer, go to /support/colorljM776MFP .NOTE:For details on client and server operating systems and for HP UPD driver support for this printer, go to /go/upd . Under Additional information , click Specifications .●Internet connection●Dedicated USB 1.1 or 2.0 connection or a network connection● 2 GB of available hard-disk space ●1 GB RAM (32-bit) or2 GB RAM (64-bit)●Internet connection●Dedicated USB 1.1 or 2.0 connection or a network connection●1.5 GB of available hard-disk spaceNOTE:The Windows software installer installs the HP Smart Device Agent Base service. The file size is less than 100 kb. Its only function is to check for printers connected via USB hourly. No data is collected. If a USB printer is found, it then tries to locate a JetAdvantage Management Connector (JAMc) instance on the network. If a JAMc is found, the HP Smart Device Agent Base is securelyupgraded to a full Smart Device Agent from JAMc, which will then allow printed pages to be accounted for in a Managed Print Services (MPS) account. The driver-only web packs downloaded from for the printer and installed through the Add Printer wizard do not install this service.T o uninstall the service, open the Control Panel , select Programs or Programs and Features , and then select Add/Remove Programs or Uninstall a Programto remove the service. The file name isHPSmartDeviceAgentBase.Mobile printing solutionsHP offers multiple mobile printing solutions to enable easy printing to an HP printer from a laptop, tablet, smartphone, or other mobile device.T o see the full list and to determine the best choice, go to /go/MobilePrinting .NOTE:Update the printer firmware to ensure all mobile printing capabilities are supported.●Wi-Fi Direct (wireless models only, with HP Jetdirect 3100w BLE/NFC/Wireless accessory installed)●HP ePrint via email (Requires HP Web Services to be enabled and the printer to be registered with HP Connected)●HP Smart app ●Google Cloud Print12Chapter 1 Printer overview。
RG-MACC_2.0 安装说明书

RG-MACC_2.0 Installation ManualRuijie Networks Co., Ltdall rights reservedCopyright ClarifyCopyright ownership belongs to Ruijie, shall not be reproduced , copied, or used in other ways without permission. Otherwise Ruijie will have the right to pursue legal responsibilities.、、、、、、、、、、All above are registered trademark and all rights reserved.Table Of ContentRG-MACC_2.0 Installation Manual (1)1. Installation (4)1.1. Prepare Before Installation (4)1.1.1. The Physical Server Requirement (4)1.1.2. Disk Partition And Directory Requirement (4)1.1.3. Change The System Time (6)1.1.4. Configure IP address and DNS server (6)1.1.5. Copy And Deployment upgrade package (7)1.2. Deployment And Installation (9)1.2.1. Deploy And Upgrade MACC (10)1.2.2. Verifying the Depolyment and Installation (10)2. Reference (12)2.1. Files Transmission Tool (12)2.2. Maintainence Tool (13)1.Installation1.1.Preparation1.1.1.The Physical Server RequirementThe minimum requirement of the server hardware:Ports Mapping (This section can be skipped if server uses outer public IP):The operation system of MACC is CentOS, which does not contain default self defense. Users need ports mapping instead of whole case mapping when there is not any protection.Please make sure the following ports are not isolated by the firewall.1.1.2.Disk Partition And Directory RequirementThe /macc directory is used for both MACC installation and operation data. This directory is required to be existed and assigned 200G or more space.1.Single high-capacity diskFor high-capacity disk, if OS was installed and new partitions cannot be made, /macc directory can be created by the following commend:[root@localhost ~]# mkdir /macc2.Multiple disks, and data disk is not mounted. (Use aliyun as an example)Usually there are system disk and data disk.The disks status can be checked by the commend: fdisk –l[root@xxxxxxx ~]# fdisk -lDisk /dev/xvda: 21.5 GB, 21474836480 bytes <------System Disk255 heads, 63 sectors/track, 2610 cylindersUnits = cylinders of 16065 * 512 = 8225280 bytesSector size (logical/physical): 512 bytes / 512 bytesI/O size (minimum/optimal): 512 bytes / 512 bytesDisk identifier: 0x00078f9cDevice Boot Start End Blocks Id System/dev/xvda1 * 1 2611 20970496 83 LinuxDisk /dev/xvdb: 429.5 GB, 429496729600 bytes <-------Data Disk255 heads, 63 sectors/track, 52216 cylindersUnits = cylinders of 16065 * 512 = 8225280 bytesSector size (logical/physical): 512 bytes / 512 bytesI/O size (minimum/optimal): 512 bytes / 512 bytesDisk identifier: 0x00000000Use df commend to check disk mounting status:[root@iZ28iclrr63Z ~]# df -hFilesystem Size Used Avail Use% Mounted on/dev/xvda1 20G 2.4G 17G 13% //dev/xvdb 394G 275G 100G 74% /maccIf the data disk (/dev/xvdb in the example above) is not mounted then it needs to be formatted and mount to /macc. The following process is recommended:mkfs -t ext4 /dev/xvdbmkdir /maccmount /dev/xvdb /macc##Modify /etc/fstab, auto mount disk after start.vi /etc/fstab append at the end/dev/xvdb /macc ext4 defaults 0 0/dev/xvdb is added on demand. Use df commend to confirm after restarting the server.3.Multiple disks, and data disk is mounted.It needs to create data disk soft link to /macc in this case.Checking disk mounting status by df commend:[root@iZ28iclrr63Z ~]# df –hFilesystem Size Used Avail Use% Mounted on/dev/xvda1 20G 2.4G 17G 13% //dev/xvdb 394G 275G 100G 74% /dataIf the data disk is mounted under /data directory, you need to use commend ln –s /data/macc /macc to create macc directory.1.1.3.Change The System TimeThe system time needs to be synchronized with the real time.1.Server without internet connectionFor the server without internet connection, use date commend to change the time and write into CMOS, for example:[root@localhost ~]# date 0830********Sun Aug 30 00:27:00 CST 2015[root@localhost ~]# clock –w2.Server with internet connectionServer with internet connection is able to synchronize time automatically.1.1.4.Configure IP address and DNS serverThe IP address and DNS server need to be configured before deployment and installation. Configure IP addressUse commend ifconfig to check outer network interface:[root@localhost ~]# ifconfigeth0 Link encap:Ethernet HWaddr 00:15:5D:5D:27:0Binet addr:172.18.33.67 Bcast:172.18.33.255 Mask:255.255.255.0inet6 addr: fe80::215:5dff:fe5d:270b/64 Scope:LinkUP BROADCAST RUNNING MULTICAST MTU:1500 Metric:1RX packets:1212674 errors:0 dropped:0 overruns:0 frame:0TX packets:1061523 errors:0 dropped:0 overruns:0 carrier:0collisions:0 txqueuelen:1000RX bytes:1133515990 (1.0 GiB) TX bytes:1032504656 (984.6 MiB)lo Link encap:Local Loopbackinet addr:127.0.0.1 Mask:255.0.0.0inet6 addr: ::1/128 Scope:HostUP LOOPBACK RUNNING MTU:16436 Metric:1RX packets:3407442 errors:0 dropped:0 overruns:0 frame:0TX packets:3407442 errors:0 dropped:0 overruns:0 carrier:0collisions:0 txqueuelen:0RX bytes:504690004 (481.3 MiB) TX bytes:504690004 (481.3 MiB)Use eth0 above as an example, modify /etc/sysconfig/network-scripts/ifcfg-eth0. Assume theeth0 port ip is 192.168.23.128, gateway is 192.168.23.1.vi /etc/sysconfig/network-scripts/ifcfg-eth0Let ONBOOT = yes, BOOTPROTO = static. Add IPADDR, GATEWAY, NETMASK, then restart the server.Configure the DNS serverecho “nameserver 8.8.8.8” >> /etc/resolv.conf1.1.5.Copy And Deployment upgrade packageThere are two types deployment upgrade package: ISO and .tar.gz, the only difference betweenthem is the file type.1.ISO deployment upgrade package: Upload directlyUse the communication tool for windows/linux in CentOS to copy the ISO file into any directory in the server. For the tool detail please go to chapter 2.1.Run the commend of mounting ISO: mount –o loop /[File Direcotory]/[File Name] /mnt/isoFor example:mkdir /mnt/isomount –o loop /home/ RG-MACC_2.0_Build20160509.iso /mnt/isoDo not mount under tmp directory otherwise tmp will be read only and the script cannot be installed.Copy ISO content into /mnt/install/[Directory]mkdir /mnt/installcp -r /mnt/iso/* /mnt/install/2.ISO deployment upgrade package: Upload with flash diskInsert the flash disk into the server usb port.Use commend fdisk –l to check flash disk partitions:Mount the flash disk under /mnt directory: mount -o loop /dev/sdb2 /mnt/Do not mount under tmp directory otherwise tmp will be read only and the script cannot be installed.3.ISO deployment upgrade package: Download from internetSet up a http/ftp server which is connected with the MACC server and contains the deploymentfiles, login the MACC server and run the following commend to download files.If using http then run the commend:wget http://[Server Address]/[File Name]If there is ‘wget commend is not known’ error, please make sure the server is able to access the internet and use yum to install wget.If using ftp then run the commend:wget ftp://[ftp user name]:[ftp password]@[address]/[directory]/[file name] Run the following commend to mount ISO under /mnt/iso directory:mkdir /mnt/isomount -o loop RG-MACC_2.0_Build20160509.iso /mnt/iso/cd /mnt/iso/Copy the ISO content into /mnt/install/directorymkdir /mnt/installcp -ar /mnt/iso/* /mnt/install/4.ISO deployment upgrade package: Upload by ISO diskLogin CentOS and mount CDROM.Run the following commend to mount ISO disk under /mnt/iso:mkdir /mnt/isomount -o loop /dev/cdrom /mnt/iso/cd /mnt/iso/Copy the ISO content into /mnt/install/directorymkdir /mnt/installcp -ar /mnt/iso/* /mnt/install/5..tar.gz deployment upgrade package: UploadThe package can be copied directly or download by HTTP/FTP. Usr tar commend to extract the package.[root@localhost pkg]# tar xzvf RG-MACC_2.0_Build20160509.tar.gz1.2.Installation and Upgrade1.2.1.Install MACCa)Make sure the archive is OK, and set the executable authority of script files.[root@localhost pkg]# cd /mnt/install/[root@localhost install]# ls -ldrwxr-xr-x. 4 root root 4096 Aug 29 16:43 installpkg-rwx--x--x. 1 root root 35048 Aug 29 16:43 install.sh <<-----First time installation-rwx--x--x. 1 root root 35048 Aug 29 16:43 upgrade.sh <<-----Upgrade installation[root@localhost install]#[root@localhost install]# chmod 777 *.shb)Install the package.[root@localhost install]#./install.sh -l en<<--- setting for English versionSystem version : CentOS release 6.5 (Final)Checking for system ...64-bitChecking for macc directory...yesChecking for ppl...noInstalling ppl...The following rpm signature warning can be ignored.warning:/macc/install_pkg/RG-MACC_2.0_Build20160509/installpkg/soft/rpm/kernel-headers-2.6.32-504.1.3.el6.x86_64.rpm: Header V3 RSA/SHA1 Signature, key ID c105b9de: NOKEYThe following Mysql startup error can be ignored.Initializing mysql...ERROR! MySQL server PID file could not be found!Starting MySQL.. SUCCESS!SUCCESS! MySQL running (2811)Initialize mysql....................[OK]Checking for tomcat...nospawn openssl genrsa -des3 -out ./ca/serverkey.pem 2048c)Check if the DB works well.[root@localhost install]# ps –ef | grep mongodmongod 3810 1 2 13:24 ? 00:00:00 /usr/bin/mongod -f /etc/mongod.conf root 3838 2110 0 13:24 pts/0 00:00:00 grep mongodwarning:root 1605 1 2 Aug12 ? 05:05:28 mongod -f /etc/mongod.conf <<-- exist d)Restart DB if it can’t be seen.[root@localhost install]# rm –rf /var/lib/mongo/* <<-----Delete files under this directory [root@localhost install]# service mongod start <<-----Start mongoDBStarting mongod: [ OK ]1.2.2.Verify the Installationa)Login MACC with URL (http://IP [:port]) in browser (Chrome is recommended), the IP is serverip addr, and default port is 80.b)Input the account info. The default account admin can be login.username : adminpassword: adminc)Setting the language of English.1)Go to account button on the right part of top view, you can see such as “admin”;2)Click account name, and you can see “setting” sub menu;3)Choose “language” options and select “English”;1.2.3.Upgrade MACCIf you had use an older release before, and need to upgrade to the new one. There are two ways to upgrade MACC, online upgrade and console manual upgrade.1.Online upgradeYou can access http://maccIP:8090, that is MACC online upgrade GUI as following, default account is the same as MACC account: admin/admin.After login in, select xxx.tar.gz upgrade package, then click upgrade.2.Console manual upgradea)Execute the upgrade script in the directory as install path.[root@localhost pkg]# cd /mnt/install/[root@localhost install]# ls -ldrwxr-xr-x. 4 root root 4096 Aug 29 16:43 installpkg-rwx--x--x. 1 root root 35048 Aug 29 16:43 install.sh <<-----First time installation-rwx--x--x. 1 root root 35048 Aug 29 16:43 upgrade.sh <<-----Upgrade installationb)Upgrade the package.[root@localhost pkg]#./upgrade2.Reference2.1.Files Transmission ToolYou can use SecureFXPortable to transmit files to linux server in SFTP way.2.2.Maintainence ToolThe SecureCRTPortable can be used for configuration by connecting linux server with SSH2.。
西默智能DNS系统安装配置手册

西默智能DNS系统安装配置手册上海西默通信技术有限公司本手册适用于产品版本:XMDNS V20.0.3声明Copyright@2011-2012上海西默通信技术有限公司(以下简称:西默科技、XIMO)版权所有,保留一切权利。
未经书面许可,任何单位和个人不得擅自摘抄、复制本书内容的部分或全部,并不得以任何形式传播。
由于产品版本升级或者其它原因,本手册内容可能有变更,西默科技保留在没有任何通知或提示的情况下对本手册的内容进行修改的权利。
本手册作为本产品安装配置的指导手册,西默科技会尽力为您提供准确的信息,但西默科技并不确保手册内容完全没有错误,本手册中所有陈述、信息和建议不构成任何明示或暗示的担保。
技术支持地址:上海市闵行区集心路168号1号楼302邮编:201100400服务热线:400-8200-354客服部QQ号码:support@电话:021-3453 7583 3453 7683 3453 7783传真:021-3453 7785前言本书简介《西默智能DNS安装配置手册》主要介绍了西默智能DNS产品的硬件安装、电缆连接、为实现某种产品特性的部署和配置过程。
为了避免可能出现的设备损坏和人身伤害,以及充分发挥本产品的功能特性,在您上架使用本产品之前,建议您仔细阅读本手册。
本手册包含以下章节:第一章:产品介绍,主要介绍产品的外观、电源、散热等。
第二章:安装前的准备,包含安全注意事项和环境要求。
第三章:安装上架,介绍产品的部署方式和安装过程。
第四章:设备配置,分别举例详细介绍不同需求下的配置过程。
本书约定西默智能DNS产品支持全中文的WEB界面操作,在本手册中关于WEB界面的格式约定如下:环境保护本产品符合关于环境保护方面的设计要求,产品的存放、使用和弃置应遵照国家相关法律、法规的要求进行。
目录1产品介绍 (4)1.1引言 (4)1.2产品外观 (4)1.3电源系统 (5)1.4散热系统 (5)2安装前的准备 (6)2.1安全注意事项 (6)2.2一般场所要求 (6)2.2.1环境要求 (6)2.2.2电源考虑 (6)2.2.3警告 (6)3安装上架 (7)3.1部署模式 (7)3.2设备安装 (7)4设备配置 (8)4.1准备配置 (8)4.2西默智能DNS主辅部署模式 (10)4.2.1应用部署背景 (10)4.2.2部署优势 (11)4.2.3详细配置过程 (11)4.2西默智能DNS双机热备部署模式 (20)4.2.1 实现设备的高可用性与容灾性 (20)4.2.2多线路接入实现智能解析 (21)4.2.3部署拓扑 (21)4.2.4 拓扑分析及部署优势 (22)4.2.3功能实现的操作步骤及检测步骤 (22)1产品介绍1.1引言西默智能DNS产品是上海西默通信技术有限公司针当前中国多运营商,运营商间互访存在速度瓶颈的网络现状,提出的一套解决方案。
VPDN配置清单

Page2 of 6
VPDN-项目系统配置清单
编号 分类/产品 描述
2.4 3 3.1 3.4 3.5
Redhat Linux 操作系统软件 (自有) 应用软件包 一级功能模块 VPDN-业务处理服务软件 VPDN-周边系统接口应用 系统操作管理(OAM)模块
Redhat Enterprise Linux AP 5.0
Page3 of 6
数量
单位
3
台
2
块
1 3 2 2 2
套 块 套 套 根
2 2 4 2 2 0
台 个 块 套 套 台
Page4 of 6
数量
单位
1 2
台 套
2 2
台 套
2 2 0 6 8 1 1 1
台 套 套 套 套 套 套 套
2
套
1 1 1
套 套 套
Page5 of 6
数量
单位
2
套
1 1 1 1 1 1 1
套 套 套 套 套 套 套
1
套
5 5
天 人天
Page6 of 6
VPDN-项目系统配置清单
编号
1 1.1
分类/产品
第三方硬件 Sun Enterprise T5220服务器
描述
1.1.1
SEDPFFF1Z
Sun SPARC Enterprise T5220 服务器,8 核 1.4 GHz UltraSPARC T2 处理器,第二代底盘,32 GB(16 个 2 GB FBDIMM)内存,,2 个 PCIe 薄型或 XAUI(10 Gb 以太网)插槽,2 个 (N+1) 750 W 电源设备,预装 Solaris 10 操作系统,符合 RoHS-6 Sun XVR-300 图形加速卡,2D 图形,24 位彩色,128 MB 帧缓冲内存,高分辨率,PCIe x8 接口和双 DVI-I, 符合 RoHS-6; XVR-300 2D Graphics Frame Buff Sun Type7 USB键盘鼠标套装; Type 7 Chinese Country Kit. RoHS-6 (Lead-Free) Compliant. Sun StorageTek 4Gb FC PCIe 双端口主机总线适配器,QLogic,包括标准和薄型支架,符合 RoHS-6 Sun SPARC Enterprise T5220 服务器,机架/导轨套件 Sun SPARC Enterprise T5220 服务器,组件,理线环 长度5M LC-LC光纤线; 5M LC to LC FC Optical Cable RoHS-6 compliant
Mellanox ConnectX-2 Dual Port 10 GbE Adapter for I

Mellanox ConnectX-2 Dual Port 10 GbE Adapter for IBM System xProduct Guide (withdrawn product)The Mellanox ConnectX-2 Dual Port 10 GbE Adapter for IBM System x delivers high-bandwidth and industry leading low latency 10 GbE connectivity. With industry-leading performance, power-efficiency, integration and feature set, ConnectX-2 EN with RDMAoE (RDMA over Ethernet) adapters provide an optimized, low-latency solution for high-transaction databases, financial services, cloud computing, and virtualized server and storage data center environments. The ConnectX-2 Dual-Port 10 GbE Adapter improves network performance by increasing available bandwidth to the CPU and providing enhanced performance especially in virtualized server environments.The adapter is shown in Figure 1.Figure 1. Mellanox ConnectX-2 Dual Port 10 GbE Adapter for IBM System xDid you know?Click here to check for updatesDid you know?The Mellanox ConnectX-2 Dual Port 10GbE Adapter for IBM System x is a a high-performance, dual-port network adapter for 10Gb/s Ethernet (10GbE) networks with performance requirements for low latency. It provides an ideal solution for all servers needing high- performance, low-latency data transfer in LAN connectivity for mission-critical applications. This network adapter provides support for 10GbE networking with optical or copper connectivity.Part number informationThe part number to order this card is shown in Table 1.Table 1. Ordering part number and feature codeDescription Part number Feature code Mellanox ConnectX-2 Dual Port 10 GbE Adapter for IBM System x81Y9990A1M4The adapter has two empty SFP+ cages that support either SFP+ SR transceivers or twin-ax direct-attached copper (DAC) cables as listed in Table 2.Table 2. Supported transceivers and direct-attach copper (DAC) cablesDescription Part number Feature code Optical TransceiversQLogic 10Gb SFP+ SR Optical Transceiver49Y42180064Brocade 10Gb SFP+ SR Optical Transceiver49Y42160069IBM SFP+ SR Transceiver46C34475053Active Direct-attach copper (DAC) cables1m IBM Active DAC SFP+ Cable95Y0323A25A3m IBM Active DAC SFP+ Cable95Y0326A25B5m IBM Active DAC SFP+ Cable95Y0329A25CPassive Direct-attach copper (DAC) cables0.5m IBM Passive DAC SFP+ Cable00D6288A3RG1m IBM Passive DAC SFP+ Cable90Y9427A1PH3m IBM Passive DAC SFP+ Cable90Y9430A1PJ5m IBM Passive DAC SFP+ Cable90Y9433A1PK7m IBM Passive DAC SFP+ Cable00D6151A3RH Features and benefitsSupported serversThe adapter is supported in the IBM System x servers listed in Table 3.Table 3. Supported System x servers (Part 1)Mellanox ConnectX-2 Dual Port 10 GbE AdapterN N N N N N N N Y N N N Y N NTable 3. Supported System x servers (Part 2)Mellanox ConnectX-2 Dual Port 10 GbE AdapterY Y Y N N N Y N Y N Y N N Y YSupported operating systemsTrademarksLenovo and the Lenovo logo are trademarks or registered trademarks of Lenovo in the United States, other countries, or both. A current list of Lenovo trademarks is available on the Web athttps:///us/en/legal/copytrade/.The following terms are trademarks of Lenovo in the United States, other countries, or both:Lenovo®Intelligent ClusterServerProven®System x®The following terms are trademarks of other companies:Linux® is the trademark of Linus Torvalds in the U.S. and other countries.Microsoft®, Windows Server®, and Windows® are trademarks of Microsoft Corporation in the United States, other countries, or both.Other company, product, or service names may be trademarks or service marks of others.Mellanox ConnectX-2 Dual Port 10 GbE Adapter for IBM System x (withdrawn product)11。
- 1、下载文档前请自行甄别文档内容的完整性,平台不提供额外的编辑、内容补充、找答案等附加服务。
- 2、"仅部分预览"的文档,不可在线预览部分如存在完整性等问题,可反馈申请退款(可完整预览的文档不适用该条件!)。
- 3、如文档侵犯您的权益,请联系客服反馈,我们会尽快为您处理(人工客服工作时间:9:00-18:30)。
13
DNSSEC-trust chain
root . DS of com. DNSKEY(ksk,zsk)
Ldns Has ksk of root.
.com. DS of DNSKEY(ksk,zsk)
DNSKEY(KSK,ZSK) DS of subdomain(sub.dnssecc )
5
Cache poisoning
?
ቤተ መጻሕፍቲ ባይዱ
?
012.012.012.012 LDNS
123.123.123.123
GSLB
App Servers
Spoofing with first response
Hacker
Cache poisoning
DNSSEC AND GTM
Lin Jing 2011/7/17
2
Version history
Ver V1.0 V1.1 V2.0 V2.1 Author Lin jing Linjing Linjing Linjing Date Note 2011.7.17 Initial version 2011.7.18 Minor change, Add current dnssec status of the world 2011.7.31 Add DLV ,in another ppt 2012/12/1 Add something not so important 2
14
How to configure NS which support DNSSEC
• • • • • • • • • BIND9.6+, recommend 9.7 +, and should compile with openssl 1.Create KSK and ZSK dnssec-keygen -a DSA -b 1024 -n ZONE dnssec-keygen -a DSA -b 1024 -n ZONE -f KSK We can put the keys into the same folder with zone files 2、Edit zone file to include public keys of KSK and ZSK: $include **.key 3.Sign zone, It will be generating adn.ent.signed file root@bind:/etc/bind# dnssec-signzone -t -k .+003+61822 -o .+003+04739 • 4.Add dnssec-enable yes; into option sector of named.conf file • 5.Edit named.conf,Change zone file name to the signed zones file
10
DNSSEC theory
• Within DNSSEC, clients will not make any decision, clients just say he can accept dnssec security RRs, there will be a record type named OPT in dns request. • Recursive NS will authenticate response and make decision if the answer is correct. • Recursive NS will set AD flag which in response if the answer is correct and can be believed, otherwise will respond server fail to clients.
15
Example of Name server
• Refer to Slide memo
16
Set a recursive server which support DNSSEC
• Most of LDNS now don’t support dnssec. So we need set a ldns for test. • Add below into option sector of named.conf • recursion yes; • dnssec-enable yes; • dnssec-validation yes; • After bind v9.7, BIND will use a key file which include root key if enable dnssec-validation, the file name maybe named bind.keys (Depend on system)
4
Why do we need DNSSEC
• The current DNS architecture is not security, Clients(resolver) can’t check if the answer is spoofed • Recursive server cache poisoning is a typical case. • DNSSEC can verify if the answer originate from authoritative server, and can verify that responses are not modified, also can secure denial of existence. • But DNSSEC doesn’t prevent the DNS DOS attack.
Problem
Need to secure DNS infrastructure
• • Cache poisoning and spoofing can hijack DNS records Need a method for trusted responses
6
Status of TLD DNSSEC
11
DNSSEC authentication process
• ZSK will sign zones, so theoretically we can authenticate response once we have public key of ZSK. • How to get public key of ZSK? It is in DNSKEY RR, we can send DNSKEY type request just like sending a A type request. • But how to identify this ZSK? Is it the issue of eggs and chickens? So we need KSK to authenticate ZSK. • But how can we get KSK and how do we know KSK is not corrupted? • --We get KSK from DNSKEY type RR. • --We need first trust the KSK, so KSK should be got through a safe way. At this time, KSK is a trust anchor for clients.
12
DNSSEC-trust chain
• So we just need to get KSK safely, then we can validate answers • But there are so many domain in the world, we can’t get all KSKs of these domains. So if we trust only one domain, then the thing will be easy, so trust the root is a good way. • TLDs will submit its DS to root • Second domains will submit their DS to TLDs • DS is hash of KSK, so KSK can be validated by DS • So I we trust root, then we can validate KSK of TLDs by DS which in root, if TLDs answer is validated ,then we can use DS which in TLDs to validate KSK of second domains. • If KSK of second domains is validated, then we can authenticate ZSK by KSK, after ZSK is validated we will authenticate RR by ZSK. • The above whole steps build a trust chain.
3
What is DNSSEC
• DNSSEC- Domain name system Security Extensions • RFC 2535 Domain name system Security Extensions (deprecated) • RFC4033 4034 4035 for DNSSEC • RFC 4641 DNSSEC Operational Practices
7
Trend of TLD DNSSEC deployment
8
How about DNSSEC of TLD
• /