Joyo_Amazon_Overview_Deck
RAZER BASILISK ULTIMATE遊戲滑鼠使用指南说明书

進階指南來瞧瞧這款採用超高速無線技術,提供專業級效能水準的遊戲滑鼠。
20,000 DPI 解析度能夠提供極高的追蹤精準度,光學滑鼠按鍵軸能夠提供光速般的觸發速度,且最長可連續使用 70 個小時。
目录1. 內含 (3)2. 使用需求 (4)3. 註冊即可獲得保固 (5)4. 技術規格 (6)5. 開始使用 (7)6. 設定你的 RAZER BASILISK ULTIMATE (12)7. 安全與維護 (28)8. 法律條文 (30)1. 內含RAZER BASILISK ULTIMATE滑鼠左鍵滑鼠右鍵滾輪DPI 分段調升DPI 分段調降多功能按鍵模塊滑鼠按鍵 5滑鼠按鍵 4 Ultraslick 滑鼠腳滾輪阻力調整鈕Razer™ Focus+ 20,000 DPI 光學感測器設定檔指示燈設定檔切換鍵電源開關無線 USB 傳輸器收納槽無線 USB 傳輸器充電線Razer Chroma™ Mouse Charging Dock預設 DPI 分段如下:800、1800、4000、9000 和 20000。
你可以使用 Razer Synapse 3 自訂DPI 分段。
2. 使用需求產品需求▪具一個閒置 USB 連接埠的 PCRAZER SYNAPSE 需求▪Windows®7 64位元(或更新版本)▪網際網路連線▪500 MB 的可用硬碟空間3. 註冊即可獲得保固你不僅擁有一台超棒的裝置,更享有 2 年有限保固服務。
前往 註冊,即可讓裝置發揮所有潛力,並享受獨家 Razer 好康有問題嗎? 歡迎來信詢問 Razer 支援小組:產品序號標示於此處。
4. 技術規格技術規格▪實感 20,000 DPI Focus+ 光學感測器,解析精準度高達 99.6%▪每秒最多 650 英吋 (IPS) / 50 G 加速度▪進階自訂抬升 / 放下距離▪HyperSpeed 無線技術▪11 顆可獨立編程按鍵▪可更換的多功能按鍵模塊▪Razer™光學滑鼠按鍵軸可承受 7,000 萬次點擊▪符合人體工學右手抓握設計與紋理防滑側握▪電競級觸覺回饋滾輪,自訂阻力不受限▪即時靈敏度調整(預設分段:800/1800/4000/9000/20000)▪ 5 個內建記憶體設定檔(4+1 組設定檔)▪支援 Razer Synapse 3▪14 個 Razer Chroma™發光區域,支援 1,680 萬種真實可自訂色彩選項▪裝置間燈光效果色彩同步▪有線和無線使用模式▪ 2.4 GHz 傳輸器▪ 1.8 公尺 / 6 英呎 Speedflex 纜線,可用於充電和有線連接▪相容 Razer 滑鼠充電座▪電池續航力:約 100 個小時(不使用燈光效果)(電池續航力因使用設定而異)▪約略尺寸:130 公釐 / 5.11 吋(長)x 75 公釐 / 2.75 吋(寬)x 42 公釐 / 1.65 吋(高)▪約略重量:107 公克 / 3.77 盎司(不含纜線)▪相容 Xbox One 的基本輸入功能概略尺寸與重量▪長度: 130 公釐 / 5.11 英吋▪寬度︰75 公釐 / 2.75 英吋▪高度:42 公釐 / 1.65 英吋▪ 重量*:107 公克 / 0.24 磅5. 開始使用為 RAZER BASILISK ULTIMATE 充電將電腦 USB 連接埠的充電線插入 Basilisk Ultimate 。
亚马逊Alexa推动游戏“侏罗纪世界揭晓”与智能技术相融合

亚马逊Alexa推动游戏“侏罗纪世界揭晓”与智能技术相融合Amazon Alexa Fueled ‘Jurassic World Revealed’ Combines Smart Tech and GamingBy Andrew Nichols 来自ElectronicHouse / 编辑部编译亚马逊Alexa语音界面在“侏罗纪世界揭晓”游戏中展示了该技术的影响力。
随着“Jurassic World Revealed”的发布,亚马逊Alexa闪现了一些新技能,玩家们进入了“侏罗纪公园”系列的传说和故事,以帮助虚构的播客Janet Best报道侏罗纪世界的麻烦。
根据CE Pro的数据,预计2018年语音控制的集成将增加一倍,用于照明和多房间音频的安装将从13%跃升到26%,因此技术进入游戏是有道理的。
2017年CE Pro的44%的集成商安装了这些产品。
这个趋势在本月早些时候发布,当时著名的视频游戏开发商Bethesda发布了其热门游戏“The Elder Scrolls: Skyrim.”的Alexa版本。
智能家居技术和视频游戏的反应不温不火。
但是经过尝试后,粉丝们意识到“选择你自己的冒险”是一种相当有风格的有趣味的游戏体验。
在“侏罗纪世界揭晓”中,玩家的任务是做出正确的决定来帮助Janet Best做她的工作,虽然这听起来可能不太令人兴奋,但是当我说很容易被这个游戏吸引时,请相信我。
很多次我都感觉我的决定是有分量的,并且玩过类似风格的游戏,我知道我的决定会在以后产生影响。
就用户体验而言,我在与Alexa交谈时没有遇到任何问题,不过背景噪音是一个问题。
尽管如此,Janet以无缝和自然的方式引导我完成在侏罗纪世界的挣扎,我尽力提供能够带来更加身临其境的游戏玩法的答案(顺便说,我总是选择使用火炬枪!)。
“侏罗纪世界揭晓”显示了亚马逊Alexa的潜力,似乎亚马逊希望使用“侏罗纪世界揭晓”等视频游戏来增加用户与Alexa的交互平台,这在我看来是一个自然的契合。
搜索引擎营销十大品牌简介

移动搜索优化( Mobile SEO):优化 移动设备的网站内容 和结构,提高移动搜 索结果中的排名,吸 引更多移动用户。
优势与特点
01
02
03
04
05
Yahoo Search Marketing 的优势在于 其强大的搜索引擎技术 和广泛的广告投放网络 。它具有以下特点
高效的搜索引擎优化技 术:Yahoo Search Marketing 拥有高效的 搜索引擎优化技术,能 够快速提高网站在搜索 引擎中的排名。
成立时间:成立于2005年,是国内最早从事搜索引擎广告业务的公司之一。
总部地点:中国北京。
服务类型搜索广告基于搜索引擎,为广 告客户提供搜索关键词广 告投放、品牌展示等推广
服务。视频广告通过视频平台,为广 告客户提供视频广告投放 、品牌宣传 动端广告投放、品牌推广
全面的数据分析与报告 :Yahoo Search Marketing 提供全面的 数据分析和报告功能, 帮助企业了解广告投放 效果和网站流量情况, 为优化营销策略提供数 据支持。
05
品牌5:AOL Search
简介
• AOL Search是AOL(美国在线)旗下的搜索引擎,是全球 使用广泛的互联网搜索引擎之一。AOL Search除了拥有强 大的搜索功能,还提供了一系列附加功能,如个性化搜索、 社区搜索、问答系统等,为用户提供更加全面的搜索体验。
多样化的广告投放方式 :Yahoo Search Marketing 提供多种广 告投放方式,包括关键 词广告、图像广告、视 频广告等,满足企业不 同的营销需求。
精准的目标用户定位: 通过精确的目标用户定 位功能,Yahoo Search Marketing 能够将广告 展示给最符合企业需求 的目标用户,提高广告 转化率。
Gaming Console Deployment指南说明书

Gaming Console Deployment GuideApril 2011 | By Thomas Lee & Mike Ruiz1. EXECUTIVE SUMMARYGaming consoles like the Sony PlayStation 3, Nintendo Wii, and Microsoft Xbox 360 are beingincreasingly used in wireless mode in enterprise environments like university dormitories. Testing inMeru’s Interoperability Lab has shown that there are unique issues in connectivity with gaming system as compared to other mainstream Wi-Fi™ enabled devices. University IT personnel have to address how they will handle game console interoperability. This document shows the detailed configurations needed in Meru System Director 4.0 and 4.1 releases to support interoperability between Meru Networkscontrollers and APs with Sony PlayStation 3, Nintendo Wii, and Microsoft Xbox 360.1.1 SONY PLAYSTATION 3BACKGROUNDSony Playstation 3 gaming console (like many common console systems) has both a wired Ethernet port and 802.11bg wireless network connectivity for online community access. While both of these interfaces have a MAC address, Sony utilizes one of them. During the process of associating to a wireless network the PS3 uses one MAC to probe for wireless APs and the other for the authentication portion of theassociation process.INTEROPERABILITY DETAILSVirtual Cell and Virtual Port features are enabled by default in 3.6.1 and newer versions of Meru System Director as well as on AP300 family access points. This allows for optimization of client association and seamless roaming. The Virtual Port feature uses the client MAC Address to create a Virtual WirelessNetwork (BSSID) specific to that client. A Virtual Port is assigned to the first MAC address. When thePS3 changes its MAC address during the association process, the second MAC address assignment is denied access.PS3 can be connected by disabling the Virtual Cell and Virtual Port features in the ESS Profiles and in the AP300 radio settings. This would affect ALL ESS profiles on those APs and be suboptimal for all clients.With System Director 4.1, support for the AP1000 was added. The AP1000 can support Virtual Port and non-Virtual Port ESSes concurrently.In Meru System Director 4.1, a feature called VCell Overflow was introduced. This enables the creation of a non-Virtual ESS Profile alongside existing ESS Profiles that are running Virtual Cell/Virtual Port on an AP300 radio in VCell Mode. The Sony PS3 has been successfully field tested in VCell Overflow on 4.1-39 and 4.1-55 versions of System Director.CONFIGURATION OVERVIEWTo configure VCell Overflow ESSID for PS3, TWO ESS Profiles are required. In the example below, we will be presenting an ESSID to the community with an SSID of “GamingDevices.”For VCell Overflow to work there is a ‘Parent’ ESS Profile with VCell enabled from which the clients can overflow from. To keep non-PS3 clients from trying to associate to this VCell ESS Profile, we will set the “New APs join ESS” option to “NO.” IF this is an existing ESS Profile, you need to set this to NO ANDremove all ESS-AP entries. NOTE: This ESS will NOT be available to users.VCell and VPort remain enabledNew APs Join ESS is set to OFFSSID = GamingDevicesProfile Name = GamingDevices_VCNext we are going to create the “Child” ESS Profile.VCell and VPort are set to OFFNew APs Join ESS is set to ON*Overflow FROM = GamingDevices_VCSSID = GamingDevicesProfile Name = GamingDevices_Overflow* If you do not want the “GamingDevices” ESS Profile on ALL APs you can set “New APs Join ESS” to“OFF” and use the ESS-AP table to manage the radio list on which this ESS is broadcast. Make sure you ONLY use the OVERFLOW profile when doing this.These ESS Profiles were created as a new profile. That ensures that all data rates are using the 4.1DEFAULT settings. PS3 requires a minimum 11Mbps 11b data rate be available as a base AND transmit rate. The defaults are acceptable.All Testing was done with Clear, WEP64 (ASCII & Hex), WEP128 (ASCII & Hex), WPA TKIP, and WPA2-PSK (AES) security.1.2 NINTENDO WIIBACKGROUNDNintendo Wii is a gaming console which provides by default ONLY an 802.11bg wireless networkinterface for online access. There is a USB-Wired Ethernet adapter available.The Wii does not work with the DEFAULT ESS Configuration created in current versions of Meru System Director. Modifications to the base transmit speeds must be made as outlined below.INTEROPERABILITY DETAILSNintendo Wii is compatible with Clear, WEP64 (ASCII & Hex), WEP128 (ASCII & Hex), WPA-PSK (TKIP) or WPA2-PSK (AES) security profiles.It is recommended on AP300 to use Clear OR WPA2-PSK security.Nintendo Wii also REQUIRES that 802.11b or 802.11b+g data rates are available.CONFIGURATION OVERVIEWIt is recommended that more data rates be made available for the Nintendo Wii gaming console bymodifying the default ESS profile configuration.If you have created a special ESS Profile for the PS3 using the System Director 4.1 VCell Overflowfeature, that same OVERFLOW ESS Profile can be used for the Wii. Note that the Wii is fully compatible with Virtual Cell and Virtual Port and does not REQUIRE System Director 4.1 or VCell overflow.In the Example below we will create and modify an ESS Profile Called “WiiConsole”Profile Name = WiiConsoleSSID = WiiConsoleVCell and VPort remain OnChanges from default in the BGN Transmit Base Rates matrix are required if your BGN data ratesassuming your 2.4 GHz Radios are in “bgn” mode. If your AP radio is in “bg” mode then make themodifications in the BG data rates.The change made from the default is in the BGN Transmit Base Rates matrix where 1 Mbps, 2 Mbps, 5.5 Mbps and 11Mbps data rates are checked. In the default configuration, only 11Mbps is checked.1.3 XBOX 360BACKGROUNDThe Microsoft Xbox 360 has a built-in 802.11bgn wireless adapter. The Xbox 360 can run in Virtual Port mode or non-Virtual Port mode.INTEROPERABILITY DETAILSMicrosoft Xbox 360 is compatible with Clear, WEP64 (hex or ASCII characters), WEP128 (hex or ASCII characters), WPA-PSK (TKIP), and WPA2-PSK (AES) security profiles.CONFIGURATION OVERVIEWExcept for RADIUS authenticated ESSIDs, the Xbox 360 can associate to any network ESSIDconfiguration in Virtual Port mode or non Virtual Port mode.2. CONFIGURATIONSUPPORT ALL 3 GAMING CONSOLES IN SYSTEM DIRECTOR 4.0Summary of steps to configure a security profile and ESSID to support all 3 gaming consoles in System Director 4.01. Create a security profile or select an existing security profile.2. Create an ESS profile or select an existing profile.3. Optionally, create a VLAN.4. Disable Virtual Port and Virtual Cell on the ESS profile.5. Disable Virtual Cell on the AP300.Detailed configuration1. Connect to the controller using an internet browser. The address is ‘http://<IP address of controller>’.Log in with your controller username and password.2. Click on the ‘Configuration’ tab on the upper left hand corner of the screen.3. Scroll down to the ‘Security’ section and click on the ‘Profile’ button. The screen above will now beshown.4. Click on the ‘Add’ button to add a security profile and the screen above will be shown.5. Add the security profile name.6. Select the allowed L2 mode.7. Select the relevant data encryption mode.8. Enter the WEP key or preshared key depending upon the L2 mode selected.9. Click OK to locally save the security profile.10. Depending upon the design of the network, this step may be optional. If so, skip to step 19. Otherwise,scroll down to the Wired section and click on the VLAN button to create a VLAN. The screen aboveshould appear.11. Click on the Add button to add a VLAN. The screen above should appear.12. Input the VLAN name.13. Input the VLAN tag number.14. Input the IP address of the VLAN.15. Input the subnet mask.16. Input the default gateway.17. Depending upon the DHCP server configuration, input the IP address of DHCP server if it is on a differentsubnet.18. Click OK to locally save the VLAN configuration.should appear.20. Click on the Add button and the screen above should appear.21. Input the ESS profile name.22. Input the SSID.23. Input the security profile that was created earlier.24. If a VLAN is to be used in this profile, change the Tunnel Interface Type to configured VLAN only.25. At the VLAN pull-down menu, select the VLAN name that was previously created.26. Scroll down the screen until the Virtual Cell selection menu appears on the top of the screen.27. Turn off Virtual Port.28. Turn off Virtual Cell.29. The default mode of operation of the Meru APs in the 2.4 Ghz spectrum is 802.11bgn mode. The otherpossible modes are: 802.11b, 802.11g, or 802.11bg. By default, the base transmit rates are only set to 11mb for 802.11b, 802.11bg, and 802.11bgn. In order to support the Nintendo Wii, the base transmit rates must be changed to include 1mb, 2mb, and 5.5mb. This is done by checking the respective boxes in the respective mode sections.30. Click the OK button to save the ESS profile locally.31. If the wireless network has AP300s and/or AP300is, then click on the Radio button to make changes tothe APs that are in the ESS-AP table for the ESS profile that will support gaming consoles. Otherwise,skip to step 37.33. Click on the Bulk Update button.34. Check the Virtual Cell menu and pull down the menu to set Virtual Cell to off.35. Click OK. Now the APs will be rebooted and come up in non Virtual Cell mode.36. When the APs are back up and running, go back into the ESS profile that will support the gamingconsoles and check the ESS-AP table to ensure the AP radios are assigned to this ESS profile. If not, then add those radios back to the ESS profile.37. Click on the save button to save the configuration to the flash drive of the controller.38. You are now ready to configure and test the gaming consoles. Refer to the screens and documentationof each gaming console to configure the SSID and wireless encryption modes.SUPPORT ALL 3 GAMING CONSOLES IN SYSTEM DIRECTOR 4.1Summary of steps to configure a security profile and ESSID to support all 3 gaming consoles in System Director 4.11. Create a security profile or select an existing security profile.2. Optionally, create a VLAN.3. Create an ESS profile or select an existing profile.4. Create an overflow ESS profile or select an existing profile.Detailed configuration settings1. Connect to the controller using an internet browser. The address is ‘http://<IP address of controller>’.Log in with your controller username and password.2. Click on the ‘Configuration’ tab on the upper left hand corner of the screen.3. Scroll down to the ‘Security’ section and click on the ‘Profile’ button. The screen above will now beshown.4. Click on the ‘Add’ button to add a security profile and the screen above will be shown.5. Add the security profile name.6. Select the allowed L2 mode.7. Select the relevant data encryption mode8. Enter the WEP key or preshared key depending upon the chosen L2 mode.9. Click OK to locally save the security profile.Otherwise, scroll down to the Wired section and click on the VLAN button to create a VLAN.11. Click on the Add button to add a VLAN. The screen above should appear.12. Input the VLAN name.13. Input the VLAN tag number.14. Input the IP address of the VLAN.15. Input the subnet mask.16. Input the default gateway.17. Depending upon the DHCP server configuration, input the IP address of DHCP server if it is on a differentsubnet.18. Click OK to locally save the VLAN configuration.above should appear.20. Click on the Add button and the screen above should appear.21. Input the ESS profile name.22. Input the SSID.23. Input the security profile that was created earlier.24. Turn off ‘New APs Join ESS’.25. If a VLAN is to be used in this profile, change the Tunnel Interface Type to configured VLAN only.26. Select the VLAN name from the VLAN name pull down menu.27. Scroll down the page until the screen looks like the above screen shot.28. The default mode of operation of the Meru APs in the 2.4 Ghz spectrum is 802.11bgn mode. The otherpossible modes are: 802.11b, 802.11g, or 802.11bg. By default, the base transmit rates are only set to11mb for 802.11b, 802.11bg, and 802.11bgn. In order to support the Nintendo Wii, the base transmitrates must be changed to include 1mb, 2mb, and 5.5mb.29. Click the OK button to save the ESS profile locally.30. Click on the save button to save the configuration to the flash drive of the controller.31. Complete the following steps to create the Virtual Cell overflow ESS profile. Go to the Wireless sectionand click on the ESS button.32. Click on the Add button and the screen above should appear.33. Input the ESS profile name. This profile name must be different from the name entered in step 21.34. Input the same SSID that was entered in step 22.35. Input the security profile that was created earlier.36. If a VLAN is to be used in this profile, change the Tunnel Interface Type to configured VLAN only.37. Scroll down the page until the screen looks like the above screen shot.38. Click on the ‘Overflow from’ pull-down menu and select the ESS profile that was created in step 21.39. Click on the OK button to save the ESS profile locally.40. Click on the ESS button on the left side.41. Select the Virtual Cell overflow ESS profile by clicking on the adjacent red arrow box.42. Click on the ESS-AP Table tab to add the APs to this ESS profile if the APs are not in the ESS-AP table.The screen above should appear.43. Click on the save button to save the configuration to the flash drive of the controller.44. You are now ready to configure and test the gaming consoles. Refer to the screens and documentationof each gaming console to configure the SSID and wireless encryption modes.3. SUMMARYThis deployment document outlined the configuration steps required to support gaming consoles on Meru Networks controllers and access points. To support the Sony Playstation 3, ESS profiles must have Virtual Port and Virtual Cell disabled due to its unique MAC address change during the AP association phase. To support the Nintendo Wii, transmit data rates must be added. To support both of the Nintendo Wii and Xbox360, Virtual Port can be enabled or disabled.。
GL规范是什么
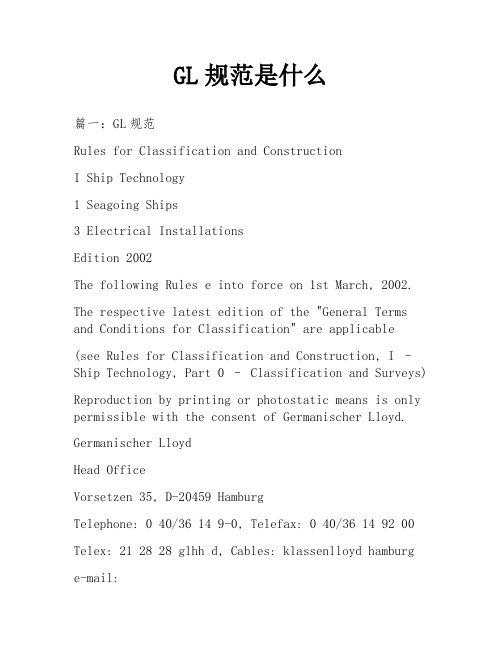
GL规范是什么篇一:GL规范Rules for Classification and ConstructionI Ship Technology1 Seagoing Ships3 Electrical InstallationsEdition 2002The following Rules e into force on 1st March, 2002.The respective latest edition of the "General Terms and Conditions for Classification" are applicable(see Rules for Classification and Construction, I –Ship Technology, Part 0 – Classification and Surveys)Reproduction by printing or photostatic means is only permissible with the consent of Germanischer Lloyd.Germanischer LloydHead OfficeVorsetzen 35, D-20459 HamburgTelephone: 0 40/36 14 9-0, Telefax: 0 40/36 14 92 00 Telex: 21 28 28 glhh d, Cables: klassenlloyd hamburge-mail:Published by: Germanischer Lloyd Printed by: Gebrüder Braasch, Hamburg Alterations to the preceding Edition are marked by beams at the text margin. I - Part 1GL 2002Table of Contents Chapter 3Page 3Table of ContentsSection 1 General Requirements and InstructionsA. General ....... 1- 1B. Definitions .. 1- 1C. Documents forApproval ............................................. ...................................................... ......... 1- 4D. Ship'sDocumentation ........................................ ...................................................... ................... 1- 4E. AmbientConditions ........................................... ...................................................... ................... 1- 7F. Operating...................................................... ................. 1- 10G. Power SupplySystems .............................................. ...................................................... ............ 1- 10H. Voltages andFrequencies .......................................... ...................................................... ........... 1- 11I. Visual and Acoustical SignallingDevices .............................................. .................................... 1- 11J. Materials andInsulation ........................................... ...................................................... ............ 1- 11K. ProtectiveMeasures ............................................. ...................................................... ................. 1- 13Section 2 Installation of Electrical EquipmentA. Availability of Main Power............................................. 2- 1B. Generators .. 2- 1C. StorageBatteries ............................................ ...................................................... ....................... 2- 2D. PowerTransformers ......................................... ...................................................... .................... 2- 3E. Electronics .. 2- 4F. Low-VoltageSwitchboards ......................................... ...................................................... ......... 2- 4G. Appliances for Medium Voltages (> 1 kV - 17,5 kVAC) .................................................. ........ 2- 4Section 3 Power Supply InstallationsA. Electrical Power...................................................... ...... 3- 1B. Main Electrical PowerSupply ............................................... ..................................................... 3- 1C. Emergency Electrical PowerSupply ............................................... ............................................ 3- 5D. Operation of the emergency generator inport ................................................. ........................... 3- 7Section 4 Installation Protection and Power DistributionA. Three-Phase MainGenerators ........................................... ...................................................... ... 4- 1B. Emergency Three-PhaseGenerators ........................................... ................................................ 4- 2C. Direct Current...................................................... .......... 4- 3D. PowerTransformers ......................................... ...................................................... .................... 4- 3E. StorageBatteries ............................................ ...................................................... ....................... 4- 3F. PowerElectronics .......................................... ...................................................... ....................... 4- 3G. ShoreConnection ........................................... ...................................................... ...................... 4- 3H. Consumer ProtectionEquipment ............................................ .................................................... 4- 4 I. Power...................................................... ....................... 4- 4Chapter 3Page 4Table of Contents I - Part 1GL 2002Section 5 Low-Voltage Switchgear AssembliesA. General ....... 5- 1B. Calculations 5- 1C.Construction ......................................... ...................................................... ................................ 5- 2D. Selection ofSwitchgear ........................................... ...................................................... ............. 5- 4E. Choice of Electrical ProtectionEquipment ............................................ .................................... 5- 5F. Conductors and Busbar................................................... 5- 6 G. Measuring Instruments and InstrumentTransformers ......................................... ....................... 5- 8H. Testing of Switchboards andSwitchgear ........................................... ........................................ 5- 8Section 6 Power ElectronicsA. General ....... 6- 1B.Construction ......................................... ...................................................... ................................ 6- 1C. Rating andDesign ............................................... ...................................................... ................. 6- 1D. Cooling ....... 6- 2E. Control andMonitoring ........................................... ...................................................... ............. 6- 2F. ProtectionEquipment ............................................ ...................................................... ............... 6- 2G. Tests ........... 6- 2Section 7 Power equipmentA. SteeringGear ................................................. ...................................................... ....................... 7- 1B. Lateral Thrust Propellers and ManoeuvringAids ................................................. ..................... 7- 3C. Variable Pitch Propellers for Main PropulsionSystems .............................................. .............. 7- 4D. Auxiliary Machinery andSystems .............................................. ................................................ 7- 4 E. DeckMachinery ............................................ ...................................................... ....................... 7- 6F. Electrical Heating Equipment andHeaters .............................................. ................................... 7- 6G. Heel-CompensatingSystems .............................................. ...................................................... .. 7- 7 H. Cross-FloodingArrangements ......................................... ...................................................... ..... 7- 7Section 8 Medium-Voltage InstallationsA. Scope .......... 8- 1B. GeneralProvisions ........................................... ...................................................... .................... 8- 1C. Network Design and ProtectionEquipment ............................................ ................................... 8- 2D. ElectricalEquipment ............................................ ...................................................... ................ 8- 4E. Installation .. 8- 7Section 9 Control, Monitoring and Ship's Safety SystemsA. GeneralRequirements ......................................... ...................................................... ................. 9- 1B. Machinery Control and MonitoringInstallations ........................................ ............................... 9- 2C. Ship ControlSystems .............................................. ...................................................... ............. 9- 4D. Ship SafetySystems .............................................. ...................................................... ............... 9- 7I - Part 1GL 2002Table of Contents Chapter 3Page 5Section 10 Computer SystemsA. General ....... 10- 1B. Requirementclasses .............................................. ...................................................... ................ 10- 1C. SystemConfiguration ........................................ ...................................................... ................... 10- 4D. Testing of ComputerSystems .............................................. ....................................................... 10- 6 Section 11 Lighting and Socket-Outlets篇二:GL船级社规范德国劳氏船级社 2002 第3-1页第3节电源装置A. 电力需求1.须提交电气设备的功率平衡表以验证发电、蓄电和变电装置的定额是足够的。
Gaming Desktop产品说明说明书

Service and Support Department Gaming Desktop - Enabling ResizableBAR1.If your system is on the list, please proceed to Step 2.Compatible DesktopDT Series Marketing NameAegis RS Aegis RS 10DS-217US Aegis RS 10TD-059US Aegis RS 10TD-067US Aegis RS 10TD-213US Aegis RS 10TE-054US Aegis RS 10TE-058US Aegis RS 10TE-066US Aegis RS 10TE-072US Aegis RS 10TE-081US Aegis RS 10TF-214US Aegis RS 10TG-091US Aegis RS 10TH-060US Aegis RS 10TH-061US Aegis RS 11TD-096US Aegis RS 11TE-095US Aegis RS 11TE-219US Aegis RS 11TG-222USAegis R Aegis R 10TC-083US Aegis R 10TC-087US Aegis R 10TC-204US Aegis R 10TC-205US Aegis R 10TC-220US Aegis R 10TD-055US Aegis R 10TD-068US Aegis R 10TG-069USCodex R Codex R 10TC-027US Codex R 10TC-028US Codex R 10TD-022US Codex R 10TG-020US Codex R 10TG-021USInfinite RS Infinite RS 10TD-065US Infinite RS 10TD-080US Infinite RS 10TD-208US Infinite RS 10TE-063US Infinite RS 10TE-064US Infinite RS 10TH-062US Infinite RS 11TE-092US Infinite RS 11TE-093USfor specific technical requirements for Resizeable BAR, see *1.1Compatible Graphic Cards (NVIDIA Ampere)RTX 3090RTX 3080 TiRTX 3080RTX 3070 TiRTX 3070RTX 3060 TiRTX 3060Compatible CPUs (Intel & AMD)Intel 10th Gen Intel 11th Gen S AMD Zen 3 i9-10xxx i9-11xxx Ryzen 3 5xxx i7-10xxx i7-11xxx Ryzen 5 5xxx i5-10xxx i5-11xxx Ryzen 7 5xxx i3-10xxx Ryzen 9 5xxxCompatible Chipsets (Intel & AMD)Intel Series AMD SeriesZ590 X570B560 B550H510 A520Z490 X470B460 B450H4102. Compatibility ContinueTo verify Resizable BAR status, open NVIDIA Control Panel (right-click on Desktop) and select Help > System Information from the top menu.If Resizable BAR is showing “No”, proceed to Step 3.3. Updating the MB BIOSTo download and update to the latest BIOS for your system’s motherboard, please follow the instructions below:1.From https:///Desktops , go to your system’sproduct page by clicking Support and selecting the model.2.Download the latest BIOS, extract, and save its content ontoa USB flash drive. Leave the USB drive inserted.3.Restart your computer and enter BIOS by pressing “DEL”during boot up.3. Updating the MB BIOS - cont’d4.Press M-Flash and click “Yes” to enter M-Flash mode.Alternatively, you can press “CTRL+ALT+T” to enter.5.Select the BIOS file that was saved onto the USB flash drive.Please make sure the PC is not turned off during thisprocess.6.System will automatically reboot after the flash hascompleted.4. Updating the vBIOSTo enable Resizable BAR, compatible graphics cards require a vBIOS update through MSI Dragon Center or MSI Live Update.At the top right corner of the Dragon Center menu, go to Support, Advanced, and click “Scan”.Once scanning is complete, the program will show any available firmware and/or vBIOS update. Please update to the latest vBIOS for your VGA by checking the box in front of it, then click “Install” and follow the instructions.4. Updating the VBIOS ContinueWhen the vBIOS update begins, it will prompt for confirmation. Press “Y”Wait for the update process to complete.Once completed, restart the PC.5. Updating the NVIDIA DriversGo to https:///Download/index.aspx?lang=en-us to download the latest NVIDIA drivers. Run the downloaded NVIDIA file and Click OK to extract the setup files *driver version at the time ofdownload may be differentWait for the ExtractionClick on “Agree and Continue”Select “Custom (Advanced)”Click on “Next”Check “Perform a Clean Installation”Click on “Next”Wait for process to complete*Some systems will uninstall the drivers and then prompt for a reboot in between, please reboot and the new driver install willautomatically resume after loginWhen Installation is complete, click on “Close” and restart the PC.6. Enabling Resizable BAR under BIOS Enter BIOS by restarting your system and pressing “DEL” during boot up. Go to "Settings > Advanced > PCI Subsystem Settings"Enable the following settings:•Re-Size BAR Support•Above 4G memory/Crypto Currency miningThen press "F10", to save the settings and reboot.Menus may vary depending on motherboard model, rut the Re-Size BAR Support sub-menu should always be there.7. Verify Drivers Support Resizebar Feature To verify Resizable BAR status , open the NVIDIA Control Panel and select “Help > System Information” from the menu.Check if Resizable BAR is showing “YES”. If itis, your system is now Resizable BAR-ready.Congratulations!。
Google AdWords Product Listing Ads 设置指南说明书

Example: Acme Bikes Shop
Google Confidential and Proprietary
Deep Dive: Create Additional Targets
3. Combine segments from step #1 and targeting from step #2
Shoes -
These shoes perfectly match
oes
es.jpg
Black, 49.0 technology and comfort for a
great fit and even better
performance.
availability in stock in stock
position. Rear coaster brakes
make it easy to stop.
http://www. example. com/LadiesDel mar
http://www. example. com/LadiesDelm ar.jpg
Schwinn
3 Louis
Who doesn’t appreciate value? If clearance 137.00 USD Apparel >
Product Target
product_type= Bicycles > Professional
product_type= Bicycles > Cruisers
Average ROI $500 $125 $50 $15
Example: Acme Bikes Shop
Google Confidential and Proprietary
外研版九年级英语上册课件 Module9 Unit1

changes in communication
In the past: We waited for weeks to hear from our pen friends abroad.
Today: We can send and receive photos and mails on the Internet.
ToHnye promises TDoandy to look after it.
Read and underline the sentences with future simple passive.
一般将来时的被动语态: 主语 + will/be (am/is/are) going to + be + done
4. HThowis bmoaonkyhpaasg1e6s2dopeasgeths.is book have? 5. WI ohfitcehn wgoebtsoitwe wdow.yyoauhooft.ecnomgowthoewnhIen
ygoeut ogneltinoen.line?
6. CWahmaetrias aisnaenxaemxapmlepolef oefleecltercotnriocnic technology.?
2. All of Daming’s friends’ numbers are _k_e_p_t_ in his phone.
3. Today’s cameras are better than old cameras because they do not _n_e_e_d_f_i_lm__ and the photos can _b_e_s_e_n_t_b_y__e_m__a_il_.
- 1、下载文档前请自行甄别文档内容的完整性,平台不提供额外的编辑、内容补充、找答案等附加服务。
- 2、"仅部分预览"的文档,不可在线预览部分如存在完整性等问题,可反馈申请退款(可完整预览的文档不适用该条件!)。
- 3、如文档侵犯您的权益,请联系客服反馈,我们会尽快为您处理(人工客服工作时间:9:00-18:30)。
10
亚马逊全球分布 Amazon’s Global Presence
, , www.amazon.de, www.amazon.co.jp, www.amazon.fr, www.amazon.ca,
11
关于卓越亚马逊 About Joyo Amazon
卓越亚马逊公司介绍 Joyo Amazon Overview
1
日程 Agenda 关于亚马逊 About Amazon
– 公司愿景、文化及核心价值观 Amazon’s Vision, Culture & Core Value – 今日亚马逊 Amazon Today – 全球分布 Global Presence
12
卓越亚马逊介绍 Joyo Amazon Introduction
卓越亚马逊为亚马逊旗下公司,成立于2000年5月,总部位于北京。作为中 国电子商务领袖,卓越亚马逊为消费者提供28大类、超过150万类的产品以 供选择,提供免运费的服务,并致力为中国网民提供“天天低价、正品保证” 卓越体验。 Joyo Amazon was founded in May 2000, headquartered in Beijing. As an e-commerce leader in China, Joyo Amazon offers products spanning 28 categories, with more than 1,500,000 items. All orders are delivered to our customers free of shipping charge. With our promise of “low price, genuine products”, Joyo Amazon is determined to provide the best online shopping experience to the Chinese consumers.
• 支付 Payment – 支付宝、货到付款、信用卡支付、借记卡支付、礼品卡支付 Alipay, COD, POS, Credit Card, Debit Card, Gift Card – 900个城市、1300个地区货到付款 COD in 900 Cities and 1300 Areas – 6大城市支持移动POS机刷卡支付 POS in 6 Cities 快递 Shipment and Transportation – – 标准送货上门、加急送货上门、当日送达、邮寄、邮政快递 STD-D2D, Exp- D2D, Same Day Delivery, Postal , EMS 在北京、天津、上海、广州建立卓越亚马逊配送队伍 JODS in Beijing, Tianjin, Shanghai and Guangzhou • Risk无风险购物 Risk-Free Shopping – 正品保证、假一赔二 Genuine Product Guarantee and Double Compensation for Fake Product – 15天内无条件退货 15-Day No Questions Asked Return Policy – 在线退换货服务 Online Return Service 免费送货 Free Delivery
13
卓越亚马逊合作品牌 Joyo Amazon Brands
eThe Leader of e-Commerce Company in China 中国电子商务领袖
卓越亚马逊大事记
2010.11 我要开店/卓越亚马逊物流上线 Selling on Amazon / FBA launched 2010.11 服饰箱包店上线 Apparel Store Launched 2010.9 2010.9 厦门运营中心成立 Xiamen Fulfillment Center Opened 2010.8 西安运营中心成立 Xi’an Fulfillment Center Opened 2010.8 办公用品店上线 Office Product Store Launched 2010.7 沈阳运营中心成立 Shenyang Fulfillment Center Opened 2010.7 网页全面改版 New web UI Launched 2010.6 母婴店、食品店上线 Baby Store and Dry Food Store Launched 2010.6 武汉运营中心成立 Wuhan Fulfillment Center Opened 2010.4 珠宝首饰店和钟表店上线 Jewelry Store and Watch Store Launched 2010.3 北京第二运营中心成立 Beijing 2nd Fulfillment Center Opened 2009.12 推出“掌上亚马逊”业务 Amazon Anywhere Launched 2009.12 鞋靴店上线 Shoe Store Launched 2009.11 成都运营中心成立 Chengdu Fulfillment Center Opened 2008.6 新北京运营中心成立 New Beijing Fulfillment Center Opened
•
•
20
九个运营中心 9 Fulfillment Centers
>10万平方米 万平方米Joyo 卓越亚马逊运营中心 >10万平方米Joyo Amazon Fulfillment Centers >100,000 square meters
US '95 '99 '00 '99 '99 '03 '03 '04 '03 '99 '02 '05 '06 '08 '06 '08 '07 '07
China '04 '04 '09 ‘04 '06 '04 '06 '06 '06 '09 ’10 '09
’10 ’10
19
便捷 Convenience
关于卓越亚马逊 About Joyo Amazon
– 合作品牌 Partnering Brands – 卓越亚马逊大事记 Key Milestones – 客户体验 Customer Experience – 媒体眼中的卓越亚马逊 In the Media
2
关于亚马逊 About Amazon
3
亚马逊介绍 Amazon Introduction
选品比较 Product Offering Comparison
Product Categories
Physical Media Electronics Home & Garden Toys Baby Health & Personal Care Jewelry & Watches Beauty Sports & Outdoors Tools & Home Improvement Apparel & Accessories Shoes Auto Parts & Accessories Office Supplies Grocery Musical Instruments Digital Media Kindle
7
今日亚马逊 Amazon Today
在线销售排行第一 #1 online retail destination worldwide 2010年度 财富排名100 2010 - Fortune 100 净销售额245.1亿美元
$24.51 BB in net sales
6500万用户 65+ Million active customer accounts 35大类商品 35 retail categories 可配送超过220个国家 Order fulfillment to more than 220 countries • 面积超过1400万平方英尺的运营中心 14M+ sq ft fulfillment
8
全球最受尊敬公司 The World’s Most Admired Company
1. 苹果 2. 谷歌 3. 伯克希尔·哈撒韦 4. 强生 5. 亚马逊 6. 宝洁 7. 丰田汽车 8. 高盛 9. 沃尔玛 10. 可口可乐
9
全球最受尊敬CEO 全球最受尊敬CEO The World’s Most Admired CEO
15
卓越亚马逊大事记 (接上) Joyo Amazon History (Continued) Continued)
2007.6 卓越网正式更名为“卓越亚马逊” Company Re-branded As Joyo Amazon 2007.5 广州运营中心成立 Guangzhou Fulfillment Center Opened 2006.11 苏州运营中心成立 Suzhou Fulfillment Center Opened 2006.1 卓越网成为最大网上中文书店 Joyo Became The Largest Online Chinese Bookstore 2004.8 亚马逊收购卓越网 Amazon Acquired Ltd 2000.5 卓越网建立 Website Launched