AF-HR-239 系统设计说明书
PD239系列产品使用说明书

Owner’s manualPlease read this manual carefully before operating your device.MODEL : PD239W/ PD239P/ PD239Y/ PD239TW/ PD239TP/ PD239TY/ PD239SP/ PD239SL/ PD239SA/ PD239G/PD239PH/ PD239BH/ PD239YH/ PD239SFBluetooth®ENGLISH The actual device may differ from the image.CAUTION: TO REDUCE THE RISK OF ELECTRIC SHOCK DO NOT REMOVE COVER (OR BACK) NO USER-SERVICEABLE PARTS INSIDE REFER SERVICING TO QUALIFIED SERVICE PERSONNEL.This lightning flash with arrowheadsymbol within an equilateral triangle isintended to alert the user to the presenceof uninsulated dangerous voltage withinthe product’s enclosure that may be of sufficientmagnitude to constitute a risk of electric shock topersons.The exclamation point within anequilateral triangle is intended to alertthe user to the presence of importantoperating and maintenance (servicing)instructions in the literature accompanying theproduct.WARNING: TO PREVENT FIRE OR ELECTRIC SHOCKHAZARD, DO NOT EXPOSE THIS PRODUCT TO RAINOR MOISTURE.WARNING: Do not install this equipment in aconfined space such as a book case or similar unit.CAUTION: Do not block any ventilation openings.Install in accordance with the manufacturer’sinstructions.Slots and openings in the cabinet are providedfor ventilation and to ensure reliable operation ofthe product and to protect it from over heating.The openings shall never be blocked by placingthe product on a bed, sofa, rug or other similarsurface. This product shall not be placed in a built-in installation such as a bookcase or rack unlessproper ventilation is provided or the manufacturer’sinstruction has been adhered to.2CAUTION concerning the Power CordMost appliances recommend they be placed upon a dedicated circuit;That is, a single outlet circuit which powers onlythat appliance and has no additional outlets or branch circuits. Check the specification page of this owner’s manual to be certain. Do not overload wall outlets. Overloaded wall outlets, loose or damaged wall outlets, extension cords, frayed power cords, or damaged or cracked wire insulation are dangerous. Any of these conditions could result in electric shock or fire. Periodically examine the cord of your appliance, and if its appearance indicates damageor deterioration, unplug it, discontinue use of the appliance, and have the cord replaced with an exact replacement part by an authorized service center. Protect the power cord from physical or mechanical abuse, such as being twisted, kinked, pinched, closed in a door, or walked upon. Pay particular attention to plugs, wall outlets, and the point where the cord exits the appliance. To disconnect power from the mains, pull out the mains cord plug. When installing the product, ensure that the plug is easily accessible.This device is equipped with a portable battery or accumulator.Safety way to remove the battery or the battery from the equipment: Remove the old batteryor battery pack, follow the steps in reverse order than the assembly. To prevent contamination ofthe environment and bring on possible threatto human and animal health, the old battery orthe battery put it in the appropriate containerat designated collection points. Do not disposeof batteries or battery together with other waste. It is recommended that you use local,free reimbursement systems for batteries and accumulators. The battery shall not be exposed to excessive heat such as sunshine, fire or the like. NOTICE: For safety making information including product identification and supply ratings, please refer to the main label inside the apparatus. NOTICE: Only use the AC adaptor supplied with this device. Do not use a power supply from another device or another manufacturer. Using any other power cable or power supply may cause damage to the device and void your warranty.3CAUTION:y The apparatus should not be exposed to water (dripping or splashing) and objects filled withliquids, such as vases, shouldn’t be placed on the apparatus.y Minimum distance around the apparatus for sufficient ventilation, no less than 5 cm.y The ventilation should not be impeded by covering the ventilation openings with items, such as newspapers, table-cloth, curtains etc.y No naked flame sources, such as lighted candles, should be placed on the apparatus.y The unit’s internal lithium battery should only be serviced by an authorised service centre.4ContentsSafety information . . . . . . . . . . . . . . . . . . . . . .2 STEP 1 Getting Started . . . . . . . . . . . . . . . . . .6 Supplied items (6)Product Overview (6)Power On / Off (7)STEP 2 Charging Battery . . . . . . . . . . . . . . . . .7 STEP 3 Inserting Photo Paper . . . . . . . . . . . .9 Cleaning printer head using Smart Sheet 10 About photo paper (10)Paper Jam Solution (12)STEP 4 Installing App . . . . . . . . . . . . . . . . .12 Installing App for Android phone (12)App Setting (13)Installing App for iPhone (14)Setting Bluetooth of iPhone .............14Installing App for Windows phone . (15)Setting Bluetooth of Windows phone (15)STEP 5 Printing Photo . . . . . . . . . . . . . . . . .16 Printing using Android phone (16)Printing using iPhone (20)Printing using Windows phone (22)Using the edit mode (24)Notes on the printing (24)Checking where to buy paper (26)Updating the device (26)Checking Label . . . . . . . . . . . . . . . . . . . . . . . .27 About LED Indicator . . . . . . . . . . . . . . . . . . .28 Specifications . . . . . . . . . . . . . . . . . . . . . . . . .30 Troubleshooting . . . . . . . . . . . . . . . . . . . . . .315STEP 1 Getting Started Supplied itemsUSB cableZINK Photo Paper Simple manualy Depending on the model, supplied items may differ . (ex . Charger, Photo Paper etc .)Product Overview6Power On / OffOn: Slide the switch to direction of the arrow. Off: Slide the switch to the opposite direction.STEP 2 Charging Battery This device uses built-in battery. Before using it,charge the battery in full. (Refer to below)yyyprinted.7Charger (AC Adapter) Array y Model : ADS-5MA-06A 05050GPG/ ADS-5MA-06A 05050GPCU/ ADS-5MA-06A 05050GPB/ ADS-5MA-06A 05050GPI/ ADS-5MA-06A 05050GPSAy Manufacturer : SHENZHEN HONOR ELECTRONIC CO. ,LTD.y Input : 100 - 240 V ~, 50 / 60 Hz Max. 0.3 Ay Output : 5 V 0 1.0 A8Paper1.2. Unwrap the pack of the photo papers.3. Slide Smart Sheet (Blue) and photo paperstogether into the Paper insert slot. Smart Sheetwill be ejected automatically before first printing.y Do not insert more than 10 Photo papers and1 Smart Sheet. Otherwise2 papers may beejected at once or paper jam may occur.y Once the pack is unwrap, keep the remaining papers after using in an airtight plastic bag.y When power is turned on, you cannot open theupper cover. To open it, turn off the power.9Cleaning printer head using Smart SheetSmart sheet (Cleaner)When you insert new smart sheet and photo papers, this device scans the barcode of smart sheet to maintain optimized photo paper. (It will be ejected before the first printing.)To maintain the best quality, remove foreign material of the head using cleaning feature.About photo paperPhoto paper pouch10Use exclusive photo paper for LG Pocket Photo.Otherwise, the print quality cannot be guaranteed, and it may cause damage of Pocket Photo .y Using photo papers from other company may result in malfunction, paper jam or lowquality.y Do not place inside a car or, expose to direct sunlight or moisture.y Do not leave in a place where thetemperature or humidity is too high or low.It may reduce the quality of the printedphoto.1112Paper Jam SolutionDo not pull the paper out. Turn the device off and on again, the paper will be ejected automatically.y If there are foreign material or dust on the roller, it may not be ejected properly.In that case, remove the foreign material of thesmart sheet and try again. y If this problem is not solved, please refer to “Troubleshooting”.STEP 4 Installing AppInstalling App for Android phoneFrom Play Store (Android market)Search for “LG Pocket Photo”.Using QR codeScan the QR code on the product box.Using NFCRefer to “Printing using NFC” .Taging: Tagging for the first time, it links to Play Store where you can download LG Pocket Photo App.Preparation : Before using NFCTo print a photo using NFC, go to [setting] of smart phone and then, activate [Read and Write]mode.13App SettingSet the options in [Setting y NFC *: Prints using NFC (NFC-enabled phone only)y Bluetooth : Prints using Bluetoothy GPS **: Saves the location where you took a photo* NFC : Near Field Communication** GPS : Global Positioning System using a satellitey To optimize printing photo, activate all modes and use pocket photo App.See “Help” for detailsFor more information about the App, touch []14From App StoreSearch for “LG Pocket Photo”.Using QR codeScan the QR code on the product box.1.2. Touch “Bluetooth” and touch the slider to turnBluetooth [On].3. To connect your Pocket Photo device to theiPhone, turn on your device and make sure it isdiscoverable mode.4. When you find the device, touch the model nameof Pocket Photo on the screen.See “Help” for detailsFor more information about the App, touch [].Installing App for Windows phoneFrom StoreSearch for “LG Pocket Photo”.Setting Bluetooth of Windows phone1. On your Windows phone home screen, touch[Settings].2. Select “Bluetooth” on the system and touch theslider to turn Bluetooth [On].3. To connect your Pocket Photo device to Windowsphone, turn on your device and make sure it isdiscoverable mode.4. When you find the device, touch the model nameof Pocket Photo on the list.5.After Checking [Connected], Run the App.15STEP 5 Printing Photowith the LED indicator turning on.1. Run LG Pocket Photo App on Android phone.2. Select a photo to print, and touch [].3. Touch [OK], then it will start searching forBluetooth devices.y To print, set print mode or the number of photo on the preview screen.4. When LG Pocket Photo is paired for the first time,[Bluetooth pairing request] appears. To startprinting, touch [Pairing] or input the PIN code ‘0000’. y If Smart Sheet is in the device, it will be ejected before the printing starts.16Printing using NFC (Bluetooth®)Check whether your Android phone supports NFCfirst.yto the NFC tag on the device.1. Tagging for the first time, it links to Play Storewhere you can download LG Pocket Photo App.2. Go to [Setting] in the App installed, and check[NFC].3. Choose a photo to print and tag, then printing isstarted immediately. From this time, you can runthe App and print a photo by just tagging.17,You can print photos directly from Android phones or PC via Bluetooth without the App.Choose a photo and select [Bluetooth] in [Share]or [Menu].1819Setting Pocket Photo App of Android phone You can check remaining battery, the number of photos printed, Help, Where to buy paper, device version, update, MAC address, and setting of print mode, etc.1. Run LG Pocket Photo App on Android phone. (To check [Device information], set to [On] the Bluetooth of smartphone.)2. Go to Setting .3.Touch [Device Information].[] Paper FullPrints without white space. (The edge of the image can be cut off.)[] Image FullPrints an image as a whole. (White space can occur at the edge of the paper.)Auto Power OffSet a time so that the device turns itself off.(Default is [5 min]. If you set to [Off], the device can be on for up to 2.5 hours when fully charged.)20Printing using Bluetooth (with the LED indicator turning on. 1. Run LG Pocket Photo App on iPhone.2. Select a photo to print, and touch [].3. “Do you want to print?” message appeares. Touch [OK] to start printing.y To print, set print mode or the number of photo on the preview screen. y If Bluetooth is not connected, “ Paired device not found” message is appeared. (refer to the Bluetooth setting for iPhone.)y If Smart Sheet is in the device, it will be ejected before starting printing.21Setting iPhone Pocket Photo AppYou can check remaining battery, the number of the photos printed, Help, Where to buy paper, device version, update, MAC address, and setting of print mode, etc.1. Run LG Pocket Photo App on iPhone.(To check [Device information], set to [On] the Bluetooth of iPhone.)2. Go to Setting .3. Touch Settingoptions to change.[] Paper FullPrints without white space. (Theedge of the image can be cut off.)[] Image FullPrints an image as a whole. (White space can occur at the edge of the paper.)Auto Power OffSet a time so that the device turns itself off.(Default is [5 min]. If you set to [Off], the device can be on for up to 2.5 hours when fully charged.)22Printing using Bluetooth (with the LED indicator turning on. 1. Run LG Pocket Photo App on Windows phone.2. Select a photo to print, and touch [].3. “Do you want to print?” message appeares. Touch [OK] to start printing.y If the printing is not started, check power of the device. y If Bluetooth is not connected, select registered Pocket photo device or reset Bluetooth by selecting [Search].Print modey [] Paper Full: Prints without white space. (The edge of the image can be cut off.) y [] Image Full: Prints an image as a whole. (White space can occur at the edge of the paper.)23See “Help” for detailsFor more information about the App, touch [] /[Help].At under downloadable,you can download the Owner’s manual using PCs.Note on Windows Phoney You can check Manual, Share, App version and Where to buy paper by touching []. y Windows phone does not support installing App or printing photo by NFC function. y In case of Windows phone, to print a photo in the normal folder via bluetooth it is available only when using the app. y The limitations of Windows Phone -Device information is not supported.-Windows phone does not support firmware /TMD *update of Pocket Photo.(At , under Downloadable, you can download the Pocket Photo update tool for Windows PCs.)TMD : TMD means colour correction data.24Using the edit modeYou can edit a photo quality, color or size using edition tool on the menu.Use the edit function with a variety of imagecorrection filterNotes on the printingy The printed image may differ from the orginal image due to the printing method (thermal transfer printing). y Use the lastest App of LG Pocket Photo ( when printing a photo, it makes optimized image.) y The higher resolution the image has, the higher quality the printed photo has. (The proper resolution is more than 1280 x 2448 pixel.) y Once the battery is fully charged, you can print up to 30 papers in a row. y The maximum prints are based on ISO 24712Colour image standard and the number of photos printed may vary depending on user enviromental conditions (time, temperture,humidity or printing method). y If there are more than a LG Pocket Photo device, check MAC address on the label to choose one you want to use. (Refer to “Checking Label”.)y The Bluetooth searching and transferring may Array fail depending on its environment. Check theBluetooth condition on your phone and try again.y If pairing multiple smartphone, re-pairing mayoccur.25Checking where to buy paper1. To check where to buy paper, go to setting ormenu screen.2.After touching [], select a country.Updating the deviceYou can update the device by pairing smart phone to the latest software to enhance the products operation and /or add new features.1. Connect the device and smart phone viaBluetooth.2. Run the Pocket Photo App and then, touch[Setting] menu.3. The current version and higher version are shownif new version is existed. 4. Touch [Update]button to update the device.During the device update procedure, donot turn off the power or press Reset button.This device cannot be updated to previousIf there is no higher version, the MessageNote26Checking LabelIn case there are more than a LG Pocket Photo device, check MAC address on the product label to choose one you want to use.1. Open the upper cover.2729SpecificationsPhoto size50 mm x 76 mm (Dot size : 640x 1224)Image file type/ size PNG (Max: 1350x1050), JPEG (Baseline) / less than 10 MB (Progressive JPEG is not supported.)Media paper used ZINK TM Photo Paper (exclusive for LG)Media paper storage environment Temperature : 20 - 25 °C Humidity : 40 - 55 % RHDevice operation environment Temperature : 5 - 40 °C Humidity : less than 70 % (35 °C) (An temperature limitation message appears on the App.)Optimum print environment Temperature : 15 - 32 °CHumidity : less than 70 % (32 °C)LED indicatorPower / Waiting / Bluetoothtransmitting / Charged /Discharged / Error / Condition ofprinter/ UpdateCommunication Bluetooth 4.0ExternalconnectorMicro USB port for chargingbatteryBus PowerSupply (USB)(Adapter) DC 5 V 0 1.0 ABattery life500 mAh Li-Polymerrechargeable batteryPower supply AC adapter (DC 5 V 0 1.0 A)Imageresolution More than 1280 x 2448 pixelsDimensions (Wx D x H)76 mm x 126 mm x 20 mmNet Weight221 g30Pocket Photo App supporting version y Android v2.2 or highery iOS v5.1 or highery Windows Phone 8.0 or highery Your phone may be incompatible with the device depending on its manufacturer, environment or(Android or iOS) operating system.y Design and specifications are subject to change without prior notice.y All other product and brand names are trademarks or registered trademarks of their respectiveowners.Troubleshooting31The paper is jammed before printing.1. Turn the device off and onagain then paper is ejectedautomatically.2. If above solution doesnot work, open the Uppercover and arrange thepapers. Then insert themwith Smart Sheet (Blue) orpull the paper out slowlyand gently.The paper is jammed during printing.The printed photo has lines.Open the Upper cover, arrange the papers and insert them with Smart Sheet locating at the bottom. Then try printing again. (To open the Upper cover, refer to “Checking Label”.No or incomplete image is printed.The edge of the image on the photo is cut off.Set Print mode to [] in theApp’s setting then the imageis printed as a whole.White spaceappears at theedge of the paper.When print mode is set to[] , white space mayappears if the aspect ratio ofthe paper and your image isnot the same.When print mode is set to[] , the edge of the imagecan be cut off o r white spaceat the edge of the paper mayappear.32Quality of printed photo is too low.In case you magnify an imageusing [] menu in the App,the quality of the printedphoto may be reduced.Turn off the device and insertSmart Sheet locating at thebottom of the papers. Then tryprinting again.Be sure the photo size isbigger than the properresolution.(1280 x 2448 pixels)When using Smart Sheet, itshould be used with photopapers in the same pouch.If you use other company’sphoto paper, it cannot beguaranteed for print quality ordamage of pocket photo.Device does notprint.Preheating is needed. Wait forabout 2 min.Be sure there are papers inthe device.It may take time to print afterSmart Sheet is ejected.Be sure the photo file is lessthan 10 MB.Only baseline JPEG, PNG(Max: 1350x1050) format issupported.Device is turned offautomatically.Check [Auto Power Off] timein the App’s setting.Above solutions donot work.Press Reset hole with apointed thing like mechanicalpencil to initialize.33。
U-901,U-902电能质量分析仪用户手册_4.5_CH

Unipower AB
Copyright (c) UNIPOWER AB Alingsås, Sweden 2006 E-mail: Internet:
注: 北京华辉奥特科技有限公司是瑞典联合电力公司系列产品在中国大陆的总代理,本用户手册由北京华辉公司按原文翻译,若有歧义,以 原文为主。以后若有更改,恕不另行通知,敬请用户及时浏览本公司的网站信息。 单位:北京华辉奥特科技有限公司 地址:北京西三环中路 18 号万发大厦 502 电话:010-63964018,63964019 传真:010-63964178 网址: 邮件:support@
Unilyzer 902 / 901
用户手册
中文版 4.5
UNIPOWER
用户手册 Unilyzer 902 / 901
UNIPOWER
用户手册 Unilyzer 902/ 901介绍 现在,数量越来越多的非线性负载例如电脑、办公设备和频率转换设备接入到电网之中。这 类电器设备对电网中的电能质量造成不好的影响,同时,往往这些设备对电网中的干扰也较 老型设备更加敏感。 由此产生了对先进便携式电能质量测量仪器的需求。现代电力工程师繁忙而实际的工作对测 量仪器提出了另一项重要的需求,即:易于操作!电能质量测量仪器必须简单、直观、易于 安装,方便取得测量结果,从而制订如何改善电能质量的行动计划。 Unilyzer 902 / 901 采用防尘防雨的 IP65 封装,是户外型仪表,可以测量所有电能质量参数, 包括长时间同时测量塌陷/浪涌和瞬变。Unilyzer 902 / 901 的设计适合任何电网场合,例如供 电分局、远程通信设施、工厂和商业建筑等。Unilyzer 902 / 901 为满足新的通信趋势要求,设 置了多种通信选择,可以用普通的 RS-232,内置调制解调器(选件)或以太网(选件)。这 样的设计使 Unilyzer 902 / 901 既是便携式电能质量分析仪,又可作为在线式电能质量监测仪 (它与在线式电能质量监测仪 UP-2210 使用了同样的监测系统软件),这充分体现了“便携 仪器是在线监测系统的补充”理念。 祝贺您选择了我们的 Unilyzer 902 / 901!如果您对我们的仪表有任何问题,请直接联系我们或 向我们的本地代表处询问。 顺颂商祺, 瑞典联合电力公司
尚沃采暖产品使用说明

感谢您购买尚沃采暖产品。
您购买的尚沃采暖产品在出厂前已进行了测试和检验以保证其产品质量,希望您能使用满意。
在使用本产品前,请您仔细阅读使用说明书。
由于不遵守使用说明书中规定的注意事项,所引起的任何故障和损失均不在厂家的保修范围之内,厂家亦不承担任何相关责任。
请妥善保管好使用说明书。
如有疑问,请与当地的经销商联系。
一、尚沃采暖产品低温辐射供暖系统优点:⑴舒适性尚沃采暖产品低温辐射电热供暖系统是以红外线低温辐射为主要能量传递方式的产品。
试验证明人体处在低温辐射环境中,就如同置于阳光下,人体的实感温度要高于室内空气温度2—3℃,从而提高了生活环境舒适度。
同时在低温辐射条件下,室内空气的对流速度大幅度降低,使室内减少灰尘,无噪音,室内无冷点和热点,温度均衡,使人无干燥感,温度柔和如阳光般感觉。
尚沃采暖电热板产生的远红外线波长在6—18μm区域内,人长期处在这样的环境中可以改善人体微循环,促进新陈代谢,增强细胞活力,同时有调节神经系统和呼吸系统,舒筋活血,提高人体免疫力等功能。
⑵经济性尚沃采暖产品低温辐射供暖系统供暖效果好,升温快。
由于实现了分户、分室供暖,可根据气温和需要随意调节各室温度,亦可节约运行费用。
系统效率高,当室温设定为16℃时,能达到20℃的取暖效果,室温每降低一度可节约5%的能源。
由于室内周围物体温度高于空气温度,在短期关闭供热系统时,室内周围物体散发的热量会起到保持室温稳定的作用。
试验表明低温辐射电热系统停电6小时,室温仅下降2℃。
⑶安全性尚沃采暖产品的生产符合GB/T 19001-2000—ISO 9001:2000标准,并通过国家红外及工业电热产品质量监督检验中心直检,以及相关《家用和类似用途电器的安全通用要求》GB4706.1—1998、《家用和类似用途电器安全室内加热器的特殊要求》GB4706.23—1996标准的检验。
产品绝缘强度高、阻燃、防水、防潮、耐腐蚀、免维修、使用寿命长(通过10万小时老化试验)。
Aeroflex 2394A 1 kHz 至 13.2 GHz 光谱分析仪说明书

2394AA s p e c t r u m a n a l y z e r w i t h o u t s t a n d i n g p e r f o r m a n c e a n d a u s e r f r i e n d l y v i s u a l i n tMarker TableThe marker system allows up to a maximum of 9 markers to be dis-played on the screen at any one time. A marker table shows the fre-quency and level of each marker selected thus allowing multiple sig-nals to be evaluated simultaneously. In addition to the Normal mark-ers 2394A provides Delta, Peak Search, Peak T rack, 1/Delta, Markerrack, Marker to Center and Marker to Reference capabilities.Measurement LimitsThe Limits facility allows an Upper and/or a Lower Limit to be seton the screen of the 2394A. Should the signal being displayed falloutside either limit a message will appear on the screen showingwhich limit has been exceeded and how many times this hashappened.X dB DownOccupied BandwidthChannel PowerHarmonic Distortion Adjacent Channel PowerS P E C I F I C A T I O NF R E Q U E N C YTuning Range1 kHz to 13.2 GHzRange Band1 kHz to 3 GHz 02.9 GHz to 6.4 GHz 16.3 GHz to 13.2 GHz 2All ranges employ fundamental mixing.Resolution1 HzFrequency Span Width100 Hz/div to 1000 MHz/div in 1, 2, 5 step selections (auto-selected) Zero span and Full span (1 kHz to 13.2 GHz)Manual selection of Start, Stop and SpanSpan Accuracy<±3% of indicated span widthReadout Accuracy± (Span Accuracy + Frequency Standard Accuracy + 50% of RBW) StabilityResidual FM <100 Hz p-p at 1 kHz RBW, 1 kHz VBW,(p-p in 200 ms)Noise Sidebands<-90 dBc/Hz at 10 kHz offset measured at 2.9 GHz-98 dBc/Hz at 100 kHz offset measured at 2.9 GHzF R E Q U E N C Y C O U N T E RResolution1 Hz, 10 Hz, 100 Hz and 1 kHzAccuracy±(Reference frequency error + frequency readout accuracy + counter resolution ±1 count)Sensitivity<-70 dBm from 50 kHz to 13.2 GHzA M P L I T U D EMeasurement Range+30 dBm to -110 dBmDisplayed Average Noise Level (DANL)300 Hz RBW, 10 Hz VBW, 50 Ωtermination-105 dBm @ 50 kHz to 100 kHz***************************************************************Pre-amp On-115 dBm @ 50 kHz to 100 kHz******************************************1 dB Compression Point>-10 dBm, 100 kHz to 13.2 GHz at 0 dB attenuation Displayed Range100 dB in 10 dB/div log scale50 dB in 5 dB/div log scale20 dB in 2 dB/div log scale10 dB in 1 dB/div log scale 10 divisions with linear amplitude scale Amplitude UnitsLog scale mode dBm and dBmV. Linear scale mode V (µV, mV, etc.) or dBV (dBmV only) Quasi Peak mode dBµV, dBmV or dBmDisplay Linearity5 and 10 dB/div, ±0.1 dB/dB, ±1.0 dB over 10 divisions1 and2 dB/div, ±0.5 dB over 10 divisionsLinear, ±10 % of Reference Level over 10 divisionsFrequency Response1 kHz to 5 MHz-3 dB to +1 dB5 MHz to 2.9 GHz ≤±1.0 dB2.9 GHz to 6.4 GHz<±1.5 dB6.4 GHz to 13.2 GHz<±2.2 dBA T T E N U A T O RRange0 dB to 55 dB in 5 dB steps selected manually or automatically coupled to the Reference LevelAccuracy±0.5 dB/step up to ±1.5 dB maximumR E F E R E N C E L E V E LRange-110 dBm to +30 dBm with 1 kHz filter using 1 dB/div scale Accuracy±1.0 dB (50 kHz to 13.2 GHz)Resolution0.1 dB stepsResidual Spurious-85 dBm (input terminated, 0 dB attenuation)Harmonic Distortion-60 dBc (-40 dBm input at 0 dB attenuation)Intermodulation Distortion-70 dBc 100 MHz to 13.2 GHz-65 dBc 1 MHz to 100 MHz (at -30 dBm input, 0 dB input attenuation)Other Spurious-60 dBc (10 MHz to 13.2 GHz at -30 dBm)R E S O L U T I O N B A N D W I D T HSelection-300 Hz, 1 kHz, 3 kHz, 10 kHz, 30 kHz, 100 kHz, 300 kHz, 1 MHz, 3 MHz9 kHz and 120 kHz (Quasi-Peak Detector, Option 4)100 Hz, 30 Hz, 10 Hz (Digital Resolution Bandwidth, Option 5) Accuracy±10% (Digital Resolution Bandwidth, Option 5)±20%For the very latest specifications visit Data Length7 bit or 8 bit selectableStop Bits1 bit or2 bitProtocolNone, Xon-Xoff, RTS-CTS, DTR-DSRE N V I R O N M E N T A LOperating0 to 40°CStorage-20 to +60°CTemperature & HumidityMeets MIL-T-28800E for Type 2, Class 5, non-condensing(85% operating, 90% storage)Vibration/ShockMeets MIL-T-28800E for Type 2, Class 5AltitudeOperational up to 3,000 m (19,842 ft.), non-operational to 12,200 m (40,026 ft).P R O D U C T S A F E T YConforms to EN61010-1 for Class 1 portable equipment and is for use in a pollution degree 2 environment. The instrument is designed to operate from an Installation Category II.E L E C T R O M A G N E T I C C O M P A T A B I L I T YComplies with the limits specified in the following standards:EN 55011: Class A and EN 50082-1G E N E R A L C H A R A C T E R I S T I C SDIMENSIONS350 mm (13.78 in.) W, 185 mm (7.28 in.) H, 395 mm (15.5 in.) D including handleWeight<12 kg/26.5 lbs (without options)Warm-up Time15 minutes for specified accuracyP O W E R R E Q U I R E M E N T SVoltage100 to 240 VAC ± 10%Frequency50 to 60 HzPower Consumption100 W max (without options fitted)H A R D W A R E O P T I O N SH I G H S T A B I L I T Y T I M E B A S E(O P T I O N03)Temperature Stability<±0.2 ppm/°C 0°C to 40°CAgeing Rate<±0.1 ppm/yrQ U A S I-P E A K D E T E C T O R(O P T I O N04)Quasi-Peak detector and EMC filtersRBW9 kHz Band B120 kHz Band C Frequency Range150 kHz to 30 MHz30 MHz to 1 GHz Charge Time (ms) 1 ±20% 1 ±20% Discharge Time (ms)160 ±20%550 ±20%Display Time (ms)160 ±20%100 ±20%D I G I T A L RE S O L U T I O N B A N D W I D T HF I L T E R S(O P T I O N05) Bandwidths100 Hz, 30 Hz, 10 HzBandwidth accuracy±20%Selectivity (-60 dB/-3 dB)<5:1Maximum span1 MHzSweep times for 10 kHz spanRBW100 Hz<0.9 sec30 Hz<3 sec10 Hz<4.5 secDisplayed Average Noise Levels (DANL) between 1 MHz and 13.2 GHz reduces DANL by typically 5 dB from the values in the 300 Hz resolution bandwidth filter.A C/D C P O W E R S U P P L Y(O P T I O N6)DC Voltage12 VDC to 21 VDCExternal Battery14.4 VDC @ 7 AHFor the very latest specifications visit For the very latest specifications visit 。
CN送风机组电加热控制系统

压水堆核电厂二回路热力系统初步设计说明书 推荐

哈尔滨工程大学本科生课程设计压水堆核电厂二回路热力系统初步设计说明书目录目录.............................................................................................. 错误!未定义书签。
摘要.. (2)1、设计内容及要求 (2)1.1设计要求 (2)1.2设计内容 (2)2、热力系统原则方案................................................................ 错误!未定义书签。
2.1 汽轮机组 (3)2.2 蒸汽再热系统 (3)2.3 给水回热系统 (3)3、主要热力参数选定 (4)3.1 一回路冷却剂的参数选择 (4)3.2 二回路工质的参数选择 (4)3.2.1 蒸汽初参数的选择 (4)3.2.2 蒸汽终参数的选择 (4)3.2.3 蒸汽中间再热参数的选择 (4)3.2.4 给水回热参数的选择 (5)3.3 主要参数汇总表 (5)4、热力计算方法与步骤 (9)4.1 计算步骤如下面的流程图 (9)4.2 根据流程图而写出的计算式 (10)5、程序及运行结果.................................................................... 错误!未定义书签。
6、热力系统图 (19)7、结果分析与结论 (20)8、参考文献 (20)摘要该说明书介绍了一个1000MW核电厂二回路热力系统设计过程。
该设计以大亚湾900MW核电站为母型,选择了一个高压缸,三个低压缸,设有两级再热器的汽水分离器,四个低压给水加热器,一个除氧器,两个高压给水加热器。
蒸汽发生器的运行压力为 5.8MPa,高压缸排气压力为0.77MPa,一级再热器抽汽压力2.76MPa,低压缸进口过热蒸汽压力为0.74MPa,温度为259.34℃,冷凝器的运行压力为5.32kPa,给水温度为216.53℃。
239-1 二级通讯接收机使用说明书

GZH-0.4A
EG25-2 DK5
限幅二极管
限幅器
EG25-3 DK5
限幅二极管
限幅器
EG22-1 2AP10 检波二极管
检波器
EG25-1 2AP10 检波二极管
自动增益,稳压管
EG24-1 2AB1 温度补偿二极管 低频功率放大管作温度补 1Z51
偿
EG24-2 2AB1 温度补偿二极管 低频功率放大管作温度补 1Z51
7
第二章 使用说明 第一节 开始前的检查
开机前应先检查各旋钮开关动作是否正常,天线及电源是否妥当。 一. 面板上接扦件:
1. 检查一下天线架设是否妥当。收听。
耳机阻抗为 600Ω,如果用其他耳机插入也可收听,但由於阻抗不匹配,收听效果(响 度,清晰度等) ,将变坏些。 二. 面板上的旋钮和开关: 1. 波段开关正反向旋转是各波段定位应正确,然後放在准备收讯的波段。 2. 频率调谐旋钮在名波段度盘标线范围内应运转自如,度盘有”锁紧”旋钮可以锁定。 3. 带宽选择开关,三个位置应跳步清晰,然後放在”宽”位置。 4. “报话” 开关有三个位置:报,话 和 晶校,旋钮在”报”位收第幅报,在”话”位置收话 和调幅报,,旋钮在”晶校”位时可容配合校正使用,校正频率度盘的刻度;同时也可 防止接收机输入端击穿,起强讯号保护作用。 5. “校正” 在保护罩内,报话开关在晶校位,旋开保护罩,可用螺丝起止旋动校正,使指 针对准相应的校准点刻度。 6. 自动增益开关,为控制自动增益断接用。 7. 照明小开关控制照明灯,少用照明灯可节约用电。 8. “射频增益” 旋钮用以控制高放和中放的增益。旋钮在 180˚范围内应运转平滑。 三. 电源检查: 使用电池盒时,应注意电池正负极接法是否正确(电池负极与电池盒的弹簧相接触) ; 使用交流供电时,应检查交流换能器 110/220 选择开关位置是否正确,整机接上电後, 电压指示表应指示在 9.5~12.5 伏(绿色区域内) 。
全极低功耗霍尔开关SS239使用手册
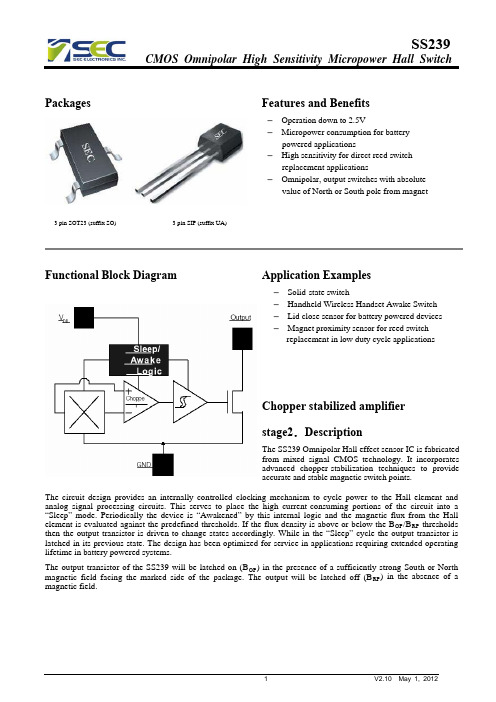
Packages Features and Benefits– Operation down to 2.5V– Micropower consumption for batterypowered applications– High sensitivity for direct reed switchreplacement applications– Omnipolar, output switches with absolutevalue of North or South pole from magnet 3 pin SOT23 (suffix SO) 3 pin SIP (suffix UA)Functional Block Diagram Application Examples–Solid-state switch– Handheld Wireless Handset Awake Switch – Lid close sensor for battery powered devices –Magnet proximity sensor for reed switch replacement in low duty cycle applicationsChopper stabilized amplifier stage2.DescriptionThe SS239 Omnipolar Hall effect sensor IC is fabricated from mixed signal CMOS technology. It incorporates advanced chopper-stabilization techniques to provide accurate and stable magnetic switch points.The circuit design provides an internally controlled clocking mechanism to cycle power to the Hall element and analog signal processing circuits. This serves to place the high current-consuming portions of the circuit into a “Sleep” mode. Periodically the device is “Awakened” by this internal logic and the magnetic flux from the Hall element is evaluated against the predefined thresholds. If the flux density is above or below the B OP /B RP thresholds then the output transistor is driven to change states accordingly. While in the “Sleep” cycle the output transistor is latched in its previous state. The design has been optimized for service in applications requiring extended operating lifetime in battery powered systems.The output transistor of the SS239 will be latched on (B OP ) in the presence of a sufficiently strong South or North magnetic field facing the marked side of the package. The output will be latched off (B RP ) in the absence of a magnetic field.Typical Application CircuitSEC's pole-independent sensing technique allows for operation with either a north pole or south pole magnet orientation, enhancing the manufacturability of the device. The state-of-the-art technology provides the same output polarity for either pole face.It is strongly recommended that an external bypass be connected (in close proximity to the Hall sensor) between the supply and ground of the device to reduce both external noise and noise generated by the chopper-stabilization technique. This is especially true due to the relatively high impedance of battery supplies.Internal Timing CircuitPin Definitions and DescriptionsSOT Pin №SIP Pin №Name Type Function1 1 VDD Supply Supply Voltage pin2 3 OUT Output Open Drain Output pinGroundpin3 2 GNDGroundTable 1: Pin definitions and descriptionsAbsolute Maximum RatingsParameter Symbol Value UnitsSupply Voltage (operating) V DD 6 VmASupply Current I DD 5Output Voltage V OUT 6 VOutput Current I OUT 5mA85°CtoOperating Temperature Range T A -40150°CStorage Temperature Range T S -50toESD Sensitivity - 4000 VTable 2: Absolute maximum ratingsExceeding the absolute maximum ratings may cause permanent damage. Exposure to absolute-maximum-rated conditions for extended periods may affect device reliability.DC Electrical CharacteristicsDC Operating Parameters: T A = 25℃, V DD= 2.75V.Parameter Symbol Test Conditions Min Typ Max UnitsSupply Voltage V DD Operating 2.5 3 5.5 VSupply Current I DD Average 5 µAmA Output Current I OUT 1.0 Saturation Voltage V SAT I OUT = 1mA 0.4 VAwake mode time T AW Operating 175µsms Sleep mode time T SL Operating 70Table 3: DC Electrical CharacteristicsMagnetic CharacteristicsOperating Parameters: T A = 25°C, V DD = 2.75V DCSS239Parameter Symbol Min Type Max Units Operating Point B OP- +/-35 +/-60 Gs Release Point B RP+/-5 +/-21 - Gs Hysteresis B HYST- 14 - Gs Table 4: Magnetic SpecificationsESD ProtectionHuman Body Model (HBM) tests according to: Mil. Std. 883F method 3015.7Limit ValuesUnit Notes Parameter SymbolMin MaxESD Voltage V ESD 4 kVPerformance CharacteristicsUnique FeaturesCMOS Hall IC TechnologyThe chopper stabilized amplifier uses switched capacitor techniques to eliminate the amplifier offset voltage, which, in bipolar devices, is a major source of temperature sensitive drift. CMOS makes this advanced technique possible. The CMOS chip is also much smaller than a bipolar chip, allowing very sophisticated circuitry to be placed in less space. The small chip size also contributes to lower physical stress and less power consumption.Installation CommentsConsider temperature coefficients of Hall IC and magnetic, as well as air gap and life time variations. Observe temperature limits during wave soldering. Typical IR solder-reflow profile:– No Rapid Heating and Cooling.– Recommended Preheating for max. 2minutes at 150°C– Recommended Reflowing for max. 5seconds at 240°CESD PrecautionsElectronic semiconductor products are sensitive to Electro Static Discharge (ESD).Always observe Electro Static Discharge control procedures whenever handling semiconductor products.Package UA, 3-Pin SIP:Package SOT, 3-Pin SOT-23:SOT-23 Package Hall Location:Ordering InformationPart No. Pb-free Temperature Code Package Code PackingSS239ESOT YES -40°C to 85°C SOT-23 7-in. reel, 3000 pieces/reel SS239EUA YES -40°C to 85°C TO-92 Bulk, 1000 pieces/bagSS239KSOT YES -40°C to 125°C SOT-23 7-in. reel, 3000 pieces/reel SS239KUA YES -40°C to 125°C TO-92 Bulk, 1000 pieces/bagSS239LSOT YES -40°C to 150°C SOT-23 7-in. reel, 3000 pieces/reel SS239LUA YES -40°C to 150°C TO-92 Bulk, 1000 pieces/bag。