opencv for c# 开发文档
OPENCV初级教程及范例
OPENCV初级教程及范例一、安装OPENCV要使用OPENCV,首先需要在计算机上安装它。
安装步骤如下:3.打开命令行工具,并进入解压后的文件夹。
4.运行以下命令来编译和安装OPENCV:cmake .makesudo make install二、OPENCV基本概念1.图像数据结构在OPENCV中,图像被表示为一个多维数组,每个数组元素对应着图像中的一个像素。
例如,对于一个RGB彩色图像,每个像素由三个颜色通道(红、绿、蓝)组成,可以使用3维数组来表示。
2.图像读取和显示import cv2#读取图像image = cv2.imread("image.jpg")#显示图像cv2.imshow("Image", image)cv2.waitKey(0)cv2.destroyAllWindows3.图像处理import cv2import numpy as np#读取图像image = cv2.imread("image.jpg")#图像模糊处理kernel = np.ones((5,5), np.float32) / 25blurred = cv2.filter2D(image, -1, kernel) #显示处理后的图像cv2.imshow("Blurred Image", blurred)cv2.waitKey(0)cv2.destroyAllWindows三、OPENCV实例以下是一些使用OPENCV的实际范例:1.边缘检测import cv2#读取图像image = cv2.imread("image.jpg", 0)#边缘检测edges = cv2.Canny(image, 100, 200)#显示边缘图像cv2.imshow("Edges", edges)cv2.waitKey(0)cv2.destroyAllWindows2.目标识别import cv2#读取图像image = cv2.imread("image.jpg")#创建目标识别器cascade = cv2.CascadeClassifier("cascade.xml")#对图像进行目标识别objects = cascade.detectMultiScale(image, scaleFactor=1.1, minNeighbors=5, minSize=(30, 30))#绘制识别结果for (x, y, w, h) in objects:cv2.rectangle(image, (x, y), (x+w, y+h), (0, 255, 0), 2)#显示识别结果cv2.imshow("Objects", image)cv2.waitKey(0)cv2.destroyAllWindows这些范例只是OPENCV功能的冰山一角,OPENCV还提供了很多强大的功能和工具。
opcv
OpenCV是Intel开源计算机视觉库。
它由一系列C 函数和少量C++ 类构成,实现了图像处理和计算机视觉方面的很多通用算法。
OpenCV 拥有包括300 多个C函数的跨平台的中、高层API。
它不依赖与其它的外部库,尽管也可以使用某些外部库。
OpenCV 对非商业应用和商业应用都是免费(FREE)的。
在VC6.0中利用OpenCV进行开发视觉,首先,需要将OpenCV正确的配置到VC开发环境中。
主要是设置预先编译的头文件的路径与动态链接库的路径。
一在VC编译器下,在Project菜单下选择setting,弹出对话框。
1 设置预编译的头文件选择C/C++【Category】,在下拉菜单中选择Preprocessor,然后在A dditional Include directories 中输入以下几项:C:\Program Files\OpenCV\cv\include (根据本人机器上OpenCV的安装路径进行设置,如在D盘,则写D: ,以下同)C:\Program Files\OpenCV\otherlibs\highguiC:\Program Files\OpenCV\cxcore\include(新版本需要)C:\Program Files\OpenCV\otherlibs\cvcam\include每一条之间用逗号隔开。
其中C:\Program Files\Intel\opencv为OpenC V的安装路径,这是通用的安装路径,建议最好采用这种设置,以方便大家交流;不然,每次都要重新设置路径,比较麻烦。
2 设置链接库在Link按键下的Category下拉菜单中选择Input选项(指定要连接的库文件,放弃连接的库文件hao ),在Additional library path中,输入:C:\Program Files \OpenCV\lib最后在Setting For下拉菜单中依次选择Win32 Debug和Win32 Releas e,分别在Object /library modules 输入:cv.lib highgui .lib cxcore.lib cvcam.lib注意每个库之间用一个空格隔开。
opencv for unity语法
OpenCV for Unity 是一个将OpenCV 库集成到Unity 中的插件,它提供了一系列的API,可以在Unity 中使用OpenCV 的图像处理和计算机视觉功能。
以下是一些常见的OpenCV for Unity 语法:1. 导入OpenCV for Unity 插件:在Unity 中创建一个新项目,然后从Asset Store 中下载并导入OpenCV for Unity 插件。
2. 创建OpenCV 图像:using OpenCVForUnity.CoreModule;using UnityEngine;public class CreateMatExample : MonoBehaviour{void Start(){// 创建一个640x480 的8 位单通道灰度图像Mat img = new Mat(480, 640, CvType.CV_8UC1);// 在控制台输出图像信息Debug.Log("Image size: " + img.width() + "x" + img.height());Debug.Log("Image type: " + img.type());}}3. 加载和显示图像:```csharpusing OpenCVForUnity.CoreModule;using OpenCVForUnity.ImgcodecsModule;using OpenCVForUnity.UnityUtils;using UnityEngine;using UnityEngine.UI;public class LoadImageExample : MonoBehaviour{public RawImage rawImage;void Start(){// 从Resources 文件夹中加载图像Texture2D texture = Resources.Load<Texture2D>("lena");// 将Texture2D 转换为Mat 对象Mat img = new Mat(texture.height, texture.width, CvType.CV_8UC3);Utils.texture2DToMat(texture, img);// 在控制台输出图像信息Debug.Log("Image size: " + img.width() + "x" + img.height());Debug.Log("Image type: " + img.type());// 显示图像rawImage.texture = texture;}}4. 图像处理:using OpenCVForUnity.CoreModule;using OpenCVForUnity.ImgprocModule;using OpenCVForUnity.UnityUtils;using UnityEngine;using UnityEngine.UI;public class ImageProcessingExample : MonoBehaviour{public RawImage rawImage;void Start(){// 从Resources 文件夹中加载图像Texture2D texture = Resources.Load<Texture2D>("lena");// 将Texture2D 转换为Mat 对象Mat img = new Mat(texture.height, texture.width, CvType.CV_8UC3);Utils.texture2DToMat(texture, img);// 转换为灰度图像Mat gray = new Mat();Imgproc.cvtColor(img, gray, Imgproc.COLOR_BGR2GRAY);// 边缘检测Mat edges = new Mat();Imgproc.Canny(gray, edges, 100, 200);// 在控制台输出图像信息Debug.Log("Image size: " + edges.width() + "x" + edges.height());Debug.Log("Image type: " + edges.type());// 将Mat 对象转换为Texture2D 并显示Texture2D resultTexture = new Texture2D(edges.width(), edges.height(), TextureFormat.RGBA32, false);Utils.matToTexture2D(edges, resultTexture);rawImage.texture = resultTexture;}}以上示例仅供参考,具体的语法和API 可以在OpenCV for Unity 的官方文档中查看。
c语言image用法 -回复

c语言image用法-回复C语言image用法C语言是一种通用的编程语言,广泛应用于各种领域,包括图像处理。
在C语言中,image用法非常重要,它可以帮助我们处理图像数据,并对其进行各种操作。
本文将会详细介绍C语言中image的用法,从图像的读取到图像的处理,帮助读者了解如何使用image来处理图像数据。
首先,我们需要了解如何读取图像。
在C语言中,读取图像通常需要借助第三方库,最常用的是OpenCV库。
OpenCV是一种开源的计算机视觉库,提供了很多图像处理的功能,并支持多种图像格式。
要使用OpenCV 库,我们需要在程序中包含相应的头文件,并链接相应的库文件。
下面是一个简单的例子:c#include <opencv2/opencv.hpp>#include <iostream>using namespace cv;using namespace std;int main() {Mat image;image = imread("image.jpg", IMREAD_COLOR);if (image.empty()) {cout << "Could not open or find the image" << endl;return -1;}namedWindow("Display window", WINDOW_AUTOSIZE);imshow("Display window", image);waitKey(0);return 0;}在这个例子中,我们首先包含了OpenCV的头文件,并使用`using namespace`语句简化了对OpenCV的使用。
然后我们定义了一个`Mat`类型的变量`image`,用来存储图像数据。
通过`imread`函数读取了一张名为"image.jpg"的图像,并将图像数据保存到`image`中。
opencv函数
imread 读图namedWindow 产生一个被命名的窗口imshow 显示图像using namespace 全局的命名空间,可以避免导致全局命名冲突问题。
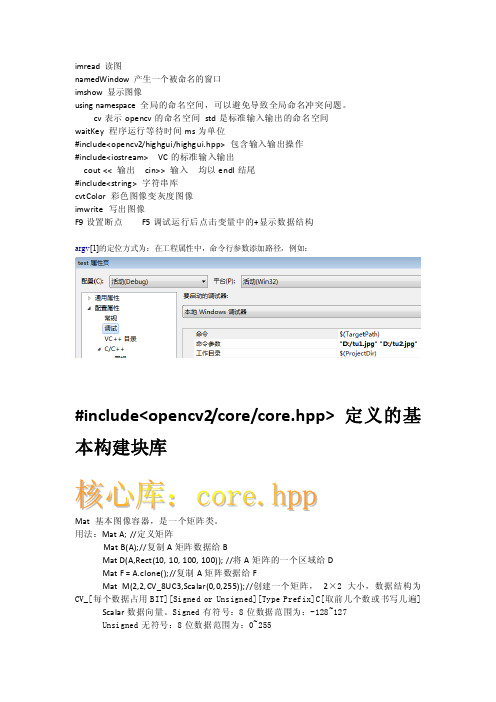
cv表示opencv的命名空间std是标准输入输出的命名空间waitKey 程序运行等待时间ms为单位#include<opencv2/highgui/highgui.hpp> 包含输入输出操作#include<iostream> VC的标准输入输出cout << 输出cin>> 输入均以endl结尾#include<string> 字符串库cvtColor 彩色图像变灰度图像imwrite 写出图像F9设置断点F5调试运行后点击变量中的+显示数据结构argv[1]的定位方式为:在工程属性中,命令行参数添加路径,例如:#include<opencv2/core/core.hpp> 定义的基本构建块库Mat 基本图像容器,是一个矩阵类。
用法:Mat A; //定义矩阵Mat B(A);//复制A矩阵数据给BMat D(A,Rect(10, 10, 100, 100)); //将A矩阵的一个区域给DMat F = A.clone();//复制A矩阵数据给FMat M(2,2,CV_8UC3,Scalar(0,0,255));//创建一个矩阵,2×2大小,数据结构为CV_[每个数据占用BIT][Signed or Unsigned][Type Prefix]C[取前几个数或书写几遍] Scalar数据向量。
Signed有符号:8位数据范围为:-128~127Unsigned无符号:8位数据范围为:0~255Mat::eye(4, 4,CV_64F) //单位矩阵Mat::ones(2, 2,CV_32F) //全1矩阵Mat::zeros(3,3,CV_8UC1) //全0矩阵Mat C = (Mat_<double>(3,3) << 0, -1, 0, -1, 5, -1, 0, -1, 0);//常规矩阵定义randu(R,Scalar::all(0),Scalar::all(255));//任意矩阵的生成Point2f P(5, 1);//定义二维点Point3f P3f(2, 6, 7); //定义三维点vector<float> v;//定义浮点数向量vector<Point2f> vPoints(20);//定义点坐标(二维数据)向量uchar就是uint8加注const 不能改变参数值;sizeof 读取大小I.channels(); //图像维数I.rows; //图像的行数I.cols;//图像的列数I.depth();//图像的深度对于图像的点式处理:uchar* p;//定义一个uint8图像for(i = 0;i < nRows; ++i){p = I.ptr<uchar>(i); //将每一行的向量赋给pfor (j = 0;j < nCols; ++j){p[j] = table[p[j]];//对每一行的向量,每一列的元素进行赋值,table是变换好的数组}}或者:uchar* p = I.data;//将图像的数据空间给pfor( unsigned int i =0;i < ncol*nrows; ++i)*p++ = table[*p];//*p中存储了图像的数据,一个一个赋值或者:LUT(I,lookUpTable,J); //效率最高的读图方式Mat lookUpTable(1, 256,CV_8U);uchar * p2 = lookUpTable.data;for( int i = 0;i < 256; ++i)p2[i] = table[i];图像的RGB分离:const int channels = I.channels();switch(channels){case 1:{MatIterator_<uchar> it,end;//灰度图像的变换for(it = I.begin<uchar>(),end = I.end<uchar>();it != end; ++it)*it = table[*it];break;}case 3:{MatIterator_<Vec3b> it,end;//RGB图像的变换for(it = I.begin<Vec3b>(),end = I.end<Vec3b>();it != end; ++it)//<Vec3b>指三列向量,即三个通道分量{(*it)[0] = table[(*it)[0]];//B分量(*it)[1] = table[(*it)[1]]; //G分量(*it)[2] = table[(*it)[2]]; //R分量}}}或者:case 3:{Mat_<Vec3b> _I = I;for( int i = 0;i < I.rows; ++i)for( int j = 0;j < I.cols; ++j){_I(i,j)[0] = table[_I(i,j)[0]];_I(i,j)[1] = table[_I(i,j)[1]];_I(i,j)[2] = table[_I(i,j)[2]];}I = _I;break;}Mat& ScanImageAndReduceC(Mat& I, const uchar* const table)//看图函数Mat& ScanImageAndReduceIterator(Mat& I, const uchar* const table) //看图函数Mat& ScanImageAndReduceRandomAccess(Mat& I, const uchar* const table) //看图函数模板运算:void Sharpen(const Mat& myImage, Mat& Result) //图像锐化函数CV_Assert(myImage.depth() == CV_8U); //判决图像是否是整型的数据Result.create(myImage.size(),myImage.type());//创建MAT矩阵类型执行算法:for(int j = 1 ;j < myImage.rows-1; ++j){const uchar* previous = myImage.ptr<uchar>(j - 1);const uchar* current = myIma ge.ptr<uchar>(j);const uchar* next = myImage.ptr<uchar>(j + 1);uchar* output = Result.ptr<uchar>(j);for(int i= nChannels;i < nChannels*(myImage.cols-1); ++i){*output++ = saturate_cast<uchar>(5*current[i]-current[i-nChannels] - current[i+nChannels] - previous[i] - next[i]);}}Result.row(0).setTo(Scalar(0));//将0行的像素值设为0或者:Mat kern = (Mat_<char>(3,3) << 0, -1, 0,-1, 5, -1,0, -1, 0);filter2D(I,K,I.depth(),kern);//使用模板滤波锐化图像,该函数所在库为<opencv2/imgproc/imgproc.hpp>图像融合算法:addWeighted(src1,alpha,src2,beta, 0.0,dst);//融合函数,需两幅图像一样大图像的亮度调整算法:相应的代码for( int y = 0;y < image.rows;y++ ){ for( int x = 0;x < image.cols;x++ ){ for( int c = 0;c < 3;c++ ) //三个通道分别运算{new_image.at<Vec3b>(y,x)[c] =saturate_cast<uchar>(alpha*(image.at<Vec3b>(y,x)[c]) + beta);}}}Mat::zeros(image.size(),image.type());//创建0阵image.convertTo(new_image, -1,alpha,beta);//线性图像变换图元:Point pt = Point(10, 8);//点的坐标Scalar(B,G,R) ;//给出像素的颜色值ellipse( img,Point(x,y),Size(x,y), angle,0, 360,Scalar( 255, 0, 0 ),thickness, lineType );//画椭圆,img图像名,point中心点,size大小,angle角度,0,起始点角度,360终点角度,scalar色彩,thickness线宽(-1为全填充),lineType 线型;调用时凡是给定的参数不管,只需给出其他参数,例如Ellipse( atom_image, 90 );给出了图像名和角度,其他量为已知。
opencvforunityexample里面features2d例子
opencvforunityexample里面features2d例子1.简介本文档将介绍op en cv f or un it ye xa mp le中的f ea tu re s2d例子,帮助读者了解该例子的功能和用法。
2.例子的背景f e at ur es2d是o pen c vf or un it ye xa mpl e中的一个重要例子,它提供了一系列功能强大的特征检测和描述方法,用于在图像处理中进行特征提取和匹配。
这些特征可以用于目标识别、物体跟踪、图像拼接等应用。
3.例子示例及用法3.1特征检测f e at ur es2d例子提供了多种特征检测算法,包括SI FT、S UR F、O RB 等。
这些算法可以用来检测图像中的关键点和其它特征,从而对图像进行描述和分析。
3.1.1S I F T特征检测S I FT(尺度不变特征变换)是一种基于尺度空间的特征检测算法,它对图像进行多尺度的高斯模糊处理,然后通过Do G(差分高斯)算法来检测图像中的关键点。
S I FT特征检测可以对图像进行旋转、缩放和仿射变换不变。
```p yt ho ni m po rt cv2加载图像i m ag e=cv2.im re ad('im ag e.jp g')s i ft=c v2.x fe at ure s2d.S IF T_cr ea te()检测关键点和特征描述子k e yp oi nt s,de sc rip t or s=si ft.d et ect A nd Co mp ut e(im age,No ne)绘制关键点i m ag e_wi th_k ey poi n ts=c v2.d ra wK eyp o in ts(i ma ge,k eyp o in ts, N o ne)c v2.im sh ow('Ke ypo i nt s',i ma ge_w ith_ke yp oi nt s)c v2.wa it Ke y(0)c v2.de st ro yA ll Wind ow s()```3.1.2S U R F特征检测S U RF(加速稳健特征)是一种基于图像的局部特征检测和描述算法,它通过构建高斯金字塔和He ss ia n矩阵来检测关键点。
opencv常用函数

01、cvL oad:矩阵读取;102、c vOpen FileS torag e:为读/写打开存储文件;103、cv Relea seFil eStor age:释放存储的数据;104、cvS tartW riteS truct:开始写入新的数据结构;105、cvE ndWri teStr uct:结束写入数据结构;106、cv Write Int:写入整数型;107、cvWri teRea l:写入浮点型;108、cv Write Strin g:写入字符型;109、cv Write Comme nt:写一个XML或YAML的注释字串;110、cvWri te:写一个对象;111、cvWr iteRa wData:写入多个数值;112、cv Write FileN ode:将文件节点写入另一个文件存储器;113、cvGet RootF ileNo de:获取存储器最顶层的节点;114、cvGet FileN odeBy Name:在映图或存储器中找到相应节点;115、cvGet Hashe dKey:为名称返回一个惟一的指针;116、cv GetFi leNod e:在映图或文件存储器中找到节点;117、cvG etFil eNode Name:返回文件的节点名;118、c vRead Int:读取一个无名称的整数型;119、cvRe adInt ByNam e:读取一个有名称的整数型;120、c vRead Real:读取一个无名称的浮点型;121、c vRead RealB yName:读取一个有名称的浮点型;122、cv ReadS tring:从文件节点中寻找字符串;123、cv ReadS tring ByNam e:找到一个有名称的文件节点并返回它;124、c vRead:将对象解码并返回它的指针;125、c vRead ByNam e:找到对象并解码;126、cvRea dRawD ata:读取多个数值;127、cvSt artRe adRaw Data:初始化文件节点序列的读取;128、cv ReadR awDat aSlic e:读取文件节点的内容;129、cvG etMod uleIn fo:检查IPP库是否已经正常安装并且检验运行是否正常;130、cv Resiz eWind ow:用来调整窗口的大小;131、cvSav eImag e:保存图像;132、cvM oveWi ndow:将窗口移动到其左上角为x,y的位置;133、cv Destr oyAll Windo w:用来关闭所有窗口并释放窗口相关的内存空间;134、cv GetTr ackba rPos:读取滑动条的值;135、cv SetTr ackba rPos:设置滑动条的值;136、cv GrabF rame:用于快速将视频帧读入内存;137、cv Retri eveFr ame:对读入帧做所有必须的处理;138、cvC onver tImag e:用于在常用的不同图像格式之间转换;139、c vErod e:形态腐蚀;140、cvD ilate:形态学膨胀;141、c vMorp holog yEx:更通用的形态学函数;142、c vFloo dFill:漫水填充算法,用来进一步控制哪些区域将被填充颜色;143、cvRe size:放大或缩小图像;144、cv PyrUp:图像金字塔,将现有的图像在每个维度上都放大两倍;145、cvPyr Segme ntati on:利用金字塔实现图像分割;146、cvThr eshol d:图像阈值化;147、cv Acc:可以将8位整数类型图像累加为浮点图像;148、cv Adapt iveTh resho ld:图像自适应阈值;149、cvFi lter2D:图像卷积;150、cvC opyMa keBor der:将特定的图像轻微变大,然后以各种方式自动填充图像边界;151、cvSo bel:图像边缘检测,Sobe l算子;152、c vLapl ace:拉普拉斯变换、图像边缘检测;153、cv Hough Lines2:霍夫直线变换;154、c vHoug hCirc les:霍夫圆变换;155、cvRem ap:图像重映射,校正标定图像,图像插值;156、cvWa rpAff ine:稠密仿射变换;157、cvGe tQuad rangl eSubP ix:仿射变换;158、cv GetAf fineT ransf orm:仿射映射矩阵的计算;159、c vClon eImag e:将整个IplIm age结构复制到新的IplIm age中;160、cv2DR otati onMat rix:仿射映射矩阵的计算;161、c vTran sform:稀疏仿射变换;162、cv WarpP erspe ctive:密集透视变换(单应性);163、cv GetPe rspec tiveT ransf orm:计算透视映射矩阵;164、cv Persp ectiv eTran sform:稀疏透视变换;165、cv CartT oPola r:将数值从笛卡尔空间到极坐标(极性空间)进行映射;166、cvPo larTo Cart:将数值从极性空间到笛卡尔空间进行映射;167、c vLogP olar:对数极坐标变换;168、cv DFT:离散傅里叶变换;169、cvM ulSpe ctrum s:频谱乘法;170、cvD CT:离散余弦变换;171、cvInt egral:计算积分图像;172、cv DistT ransf orm:图像的距离变换;173、cvE quali zeHis t:直方图均衡化;174、c vCrea teHis t:创建一新直方图;175、cvMak eHist Heade rForA rray:根据已给出的数据创建直方图;176、c vNorm alize Hist:归一化直方图;177、cvT hresh Hist:直方图阈值函数;178、cv CalcH ist:从图像中自动计算直方图;179、cvCo mpare Hist:用于对比两个直方图的相似度;180、c vCalc EMD2:陆地移动距离(EMD)算法;181、c vCalc BackP rojec t:反向投影;182、cvC alcBa ckPro jectP atch:图块的方向投影;183、cv Match Templ ate:模板匹配;184、c vCrea teMem Stora ge:用于创建一个内存存储器;185、cvCre ateSe q:创建序列;186、cvS eqInv ert:将序列进行逆序操作;187、c vCvtS eqToA rray:复制序列的全部或部分到一个连续内存数组中;188、cvFi ndCon tours:从二值图像中寻找轮廓;189、cvD rawCo ntour s:绘制轮廓;190、cvA pprox Poly:使用多边形逼近一个轮廓;191、cvC ontou rPeri meter:轮廓长度;192、cvCo ntour sMome nts:计算轮廓矩;193、cvMom ents:计算Hu不变矩;194、cv Match Shape s:使用矩进行匹配;195、cvIni tLine Itera tor:对任意直线上的像素进行采样;196、cv Sampl eLine:对直线采样;197、cvA bsDif f:帧差;198、cvWat ershe d:分水岭算法;199、cv Inpai nt:修补图像;200、cv GoodF eatur esToT rack:寻找角点;201、cvFin dCorn erSub Pix:用于发现亚像素精度的角点位置;202、c vCalc Optic alFlo wLK:实现非金字塔的Luca s-Kan ade稠密光流算法;203、cvMea nShif t:mea n-shi ft跟踪算法;204、cvC amShi ft:ca mshif t跟踪算法;205、cvCr eateK alman:创建Ka lman滤波器;206、cv Creat eConD ensat ion:创建cond ensat ion滤波器;207、cvC onver tPoin tsHom ogeni ous:对齐次坐标进行转换;208、c vFind Chess board Corne rs:定位棋盘角点;209、cvFin dHomo graph y:计算单应性矩阵;210、cvRod rigue s2:罗德里格斯变换;211、cvFi tLine:直线拟合算法;212、cv CalcC ovarM atrix:计算协方差矩阵;213、c vInve rt:计算协方差矩阵的逆矩阵;214、cvMah alano bis:计算Maha lanob is距离;215、cvKMe ans2:K均值;216、c vClon eMat:根据一个已有的矩阵创建一个新矩阵;217、cvP reCor nerDe tect:计算用于角点检测的特征图;218、cv GetIm age:C vMat图像数据格式转换成Ip lImag e图像数据格式;219、cv MatMu l:两矩阵相乘;。
C语言实现图像识别
C语言实现图像识别图像识别是计算机视觉领域的重要研究方向之一,它通过算法和模型实现计算机对图像内容的理解和分类。
C语言是一种通用的高级编程语言,具有高效性和强大的计算能力,因此在图像识别领域中也有广泛的应用。
本文将介绍C语言在图像识别方面的应用和实现。
一、图像预处理在进行图像识别之前,首先需要对图像进行预处理。
图像预处理的目的是去除图像中的噪声、调整图像的对比度和亮度等,从而更好地提取图像特征。
在C语言中,我们可以使用各种图像处理库,如OpenCV来实现图像预处理。
下面是一个简单的C语言代码示例,演示了如何使用OpenCV对图像进行预处理:```C#include <opencv2/opencv.hpp>using namespace cv;int main(){// 读取图像Mat image = imread("image.jpg", IMREAD_COLOR);// 转为灰度图像cvtColor(image, image, COLOR_BGR2GRAY);// 高斯模糊GaussianBlur(image, image, Size(5, 5), 0);// 边缘检测Canny(image, image, 50, 150);// 显示图像imshow("Processed Image", image);waitKey(0);return 0;}```二、特征提取在进行图像识别之前,还需要提取图像的特征。
特征提取是将图像转换为计算机可理解的数值形式,以便进行进一步的处理和分类。
C 语言提供了各种特征提取的方法和算法的实现,下面是一个简单的C 语言代码示例,演示了如何使用C语言进行图像特征提取:```C#include <stdio.h>int main(){// 读取图像特征数据float features[100];FILE *file = fopen("features.txt", "r");for (int i = 0; i < 100; i++) {fscanf(file, "%f", &features[i]);}fclose(file);// 进行图像分类或其他处理// ...return 0;}```三、模型训练与识别在进行图像识别之前,需要训练一个模型来对图像进行分类。
- 1、下载文档前请自行甄别文档内容的完整性,平台不提供额外的编辑、内容补充、找答案等附加服务。
- 2、"仅部分预览"的文档,不可在线预览部分如存在完整性等问题,可反馈申请退款(可完整预览的文档不适用该条件!)。
- 3、如文档侵犯您的权益,请联系客服反馈,我们会尽快为您处理(人工客服工作时间:9:00-18:30)。
OpenCV for Unity 1.2.3iOS & Android supportWin & Mac Standalone support(if Unity4,Pro only)Support for preview in the Editor(if Unity4,Pro only)Work with Unity Free & ProSystem RequirementsBuild Win Standalone & Preview Editor : Windows7 or laterBuild Mac Standalone & Preview Editor : OSX 10.8 or laterOpenCV for Unity is an Assets Plugin for using OpenCV from within Unity.●Since this package is a clone of OpenCV Java, you can use as it is all the APIReference OpenCV Java 2.4.11 (link). (“org.opencv.android” and “SURF and SIFT of org.opencv.features2d” are excluded)●You can image processing in real-time by using the WebCamTexture capabilities ofUnity. (real-time face detection works smoothly in iPhone 5)●Provides a method to interconversion of Unity's Texture2D and OpenCV's Mat.●Includes many classes from OpenCVForUnity, and implements IDisposable. Youcan manage the resources with the "using" statement.Please download Demo Application for Android and watch Setup Tutorial Video(Unity4 Unity5).API Reference OpenCV for UnitySampleCode using OpenCV for Unity is available.●MarkerBased AR Sample●FaceTracker Sample●Voforia with OpenCV for Unity Sample●Kinect with OpenCV for Unity SampleIf you want to try the Beta7 Version of “OpenCV for Untiy” based on “OpenCV3.0.0”, unzip the OpenCVForUntiy3.0.0-beta7.zip, please replace the “OpenC VForUnity” folder.“OpenCV for Untiy” based on“OpenCV3.0.0” support Unity5.not support Unity4.Version changes1.2.3 [Common] Add Beta7 Version of “OpenCV for Untiy” based on “OpenCV3.0.0”. [Common]Add WrapPerspectiveSample, HandPoseEstimationSample, MultiObjectTrackingBasedOnColorSample.1.2.2 [iOS]Move “OpenCVForUnity/ iOSforXcode/opencv2.framework” to “OpenCVForUnity/Plugins/iOS/”folder. [iOS]Fix WebCamTexture bug of SampleScene in Unity5.2.1.2.1 [Common] Add Beta5 Version of “OpenCV for Untiy” based on “OpenCV3.0.0”(Add Linux support). [Common]Rewrite SampleScene.1.2.0 [Common]Add Utils. getGraphicsDeviceType(). [Common]Add SampleScene Setup Tutorial Video for Unity5.1.1.9 [Common]Add CamShiftSample.(Object Tracking) [Common]Add OpenCVForUnityMenuItem.cs.( This script set plugin import settings automatically from MenuItem.)1.1.8 [iOS] Fix problem when working with Metaio(UnityAppController problem). [iOS]Change file name fr om “OpenCVForUnity/Plugins/iOS/MyAppController.mm” to “OpenCVForUnity/Plugins/iOS/OpenCVForUnityAppController.mm”.[Common]Add [System.Serializable] to basic class. [iOS]Move “OpenCVForUnity/ iOSforXcode/iOS_BuildPostprocessor.cs” to “OpenCVForUnity/Editor”folder. [Common] Add Beta2 Version of “OpenCV for Untiy” based on “OpenCV3.0.0”(support Unity5).1.1.7 [Common] Update to OpenCV2.4.11. [Common] Add Beta Version of “OpenCV for Untiy” based on “OpenCV3.0.0”(support Unity5).1.1.6 [Common]Fix FaceRecognizer.cs(Compile Error had happened only in the case of Unity4 Non Pro License).1.1.5 [Common]Add Beta Version of “OpenCV for Untiy” based on “OpenCV3.0.0-rc1”(support Unity5).[Android]Fix Utils.getFilePath(). [Common]Add WebCamTextureAsyncDetectFaceSample. [iOS]Change folder name from “OpenCVForUnity/iOS for Xcode/” to “OpenCVForUnity/iOSfor Xcode/”.Add iOS_BuildPostprocessor.cs.1.1.4 [Common]Add FaceRecognizer subclass. [Common]AddFaceRecognizerSampleScene. [Common]Fix SampleScene.1.1.3 [Common]Fix SampleScene. [Common] Change Property of Platform Dependent Compilation from UNITY_IPHONE to UNITY_IOS.1.1.2 [Common]Fix the direction of rotation of the mat that is converted from WebCamTexture.1.1.1 [Common]Add OpticalFlowSampleScene.[Common]Fix SampleScene. [Common] Fix function name of CvANN_MLP_TrainParams class.1.1.0 [Common]Divide asset for Unity4 and Unity5.1.0.9 [Common]Support for Unity5.1.0.8 [Common]Update to OpenCV2.4.101.0.7 [iOS]Support for arm64 build target.(Unity 4.6.1p3 or higher) [Common]Add Constructor VideoCapture(string filename). [Common]Add Method copyToMat(),copyFromMat().1.0.6 [Android]Support for x86 build target.(Unity 4.6 or higher)1.0.5 [Common] Bug fixes SampleScene.1.0.4[Common]Add Method matToTexture2D( Mat mat, Texture2D texture2D, Color32[] bufferColors = null).1.0.3 [Common]Support for preview in the Editor.(Pro only) [Common]Support for Win & Mac Standalone.(Pro only) [Android]Change of location of the file that you want to use for Utils.getFilePath().Changed to use“Aseets/StreamingAssets/” folder. [iOS] Add the file that you want to use for Utils.getFilePath() to Xcode project is no longer required.Changed to use“Aseets/StreamingAssets/” folder.1.0.2 [iOS]fix library(libjpeg,libpng) version coflicts.1.0.1 Initial versionIn Unity4 and Unity5 the different files to be imported.When you update the project that you made in Unity4 to Unity5, please import again this asset in Unity5.Quick setup procedure to run the sample scene(Setup Tutorial Video Unity4Unity5)1.If Unity4, Move “OpenCVForUnity/Plugins/”folder to“Assets/”folder.2.If Unity5,Select MenuItem[Tools/OpenCV for Unity/Set Plugin Import Settings].3.Move “OpenCVForUnity/StreamingAssets/”folder to “Assets/”folder.4.Please set [PlayerSettings]-[Resolution and Presentation]-[Orientation]-[DefaultOrientation : Landscape Left] when you build the sample scene.5.Add all of the “***.unity” in the “OpenCVForUnity” folder to [Build Settings] –[Scene In Build].※Inspector Setting of “opencv2.framework” and “opencvforunity.bundle”might have been reset at the time of import. In that case, re-setup is required.Screenshot after the setupUnity4Unity5Android Setup ProcedureUnity4●Copy from “OpenCV ForUnity/Plugins/Android/” to “Assets/Plugin s/Android/”folder.( libnative_camera_r*.*.*.so is only required when using the VideoCapture.)Unity5●“OpenCVForUnity/Plugins/Android/opencvforunity.jar”–Select platformAndroid in Inspector.●“OpenCVForUnity/Plugins/libs/armeabi-v7a/*.so” –Select platform Androidand CPU ARMv7 in Inspector. ( libnative_camera_r*.*.*.so is only required when using the VideoCapture.)●“OpenCVForUnity/Plugins/libs/x86/*.so” – Select platform Android and CPUx86 in Inspector.( libnative_camera_r*.*.*.so is only required when using the VideoCapture.)Put the file that you want to use for Utils.getFilePath() in the “Aseets/StreamingAssets/”folder. (haarcascade_frontalface_alt.xml etc is forOpenCVForUnitySample.scene. Please copy only when necessary.)iOS Setup ProcedureUnity4●Copy from “OpenCVForUnity/Plugins/iOS/” to “Assets/Plugin s/iOS/” folder.●Link “OpenCVForUnity/Plugins/iOS/opencv2.framework” to Xcode project. (inXcode project. Build Phases > Link Binary with Libraries > Add opencv2.framework . recommend to use PostprocessBuildPlayer.)Unity5●“Op enCVForUnity/Plugins/iOS/libopencvforunity.a” – Select platform iOS inInspector.●“OpenCVForUnity/Plugins/iOS/opencv2.framework” – Select platform iOS inInspector.●Put the file that you want to use for Utils.getFilePath() in the“Aseets/StreamingAssets/”folder. (haarcascade_frontalface_alt.xml etc is for OpenCVForUnitySample.scene. Please copy only when necessary.)Win Standalone Setup ProcedureUnity4●Copy from “OpenCVForUnity/Plugins/x86/” to “Assets/Plugins/x86/” folder.●Copy from “OpenCVForUnity/Plugins/x86_64/”to “Assets/Plugins/x86_64/”folder.Unity5●“OpenCVForUnity/Plugins/x86/opencvforunity.dll” –Select platformEditor,Standalone and CPU x86 and OS Windows in Inspector.●“OpenCVForUnity/Plugins/x86_64/opencvforunity.dll” –Select platformEditor,Standalone and CPU x86_64 and OS Windows in Inspector.●Put the file that you want to use for Utils.getFilePath() in the“Aseets/StreamingAssets/”.(haarcascade_frontalface_alt.xml etc is for OpenCVForUnitySample.scene. Please copy only when necessary.)●If you use the “VideoCapture(string filename)”, require setup.1)Download "OpenCV for Windows Version2.4.11"(/downloads.html).2)Set Path to "opencv_ffmpeg2411.dll"if 32bit, "C:¥opencv¥build¥x86¥vc10¥bin¥".if 64bit, "C:¥opencv¥build¥x64¥vc10¥bin¥".Mac Standalone Setup ProcedureUnity4●Copy from “OpenCVForUnity/Plugins/opencvforunity.bundle” to“Assets/Plugins/” folder.Unity5●“OpenCVForUnity/Plugins/opencvforunity.bundle” –Select platformEditor,Standalone and CPU x86_64 and OS OSX in Inspector.●Put the file that you want to use for Utils.getFilePath() in the“Aseets/StreamingAssets/”.(haarcascade_frontalface_alt.xml etc is for OpenCVForUnitySample.scene. Please copy only when necessary.)Q & AQ1.“DllNotFoundException: opencvforunity” is displayed on the console when run the sample scene.A1.Plugin does not seem to be loaded correctly. Please check the setup procedure.Q2.“ArgumentException: The output Mat object has to be of the same size” is displayed on the console when run the sample scene.A2.After having set up Plugin, Plugin may work well when you reboot Unity.Q3."Level 'Texture2DtoMatSample' (-1) could not be loaded because it has not been added to the build settings." is displayed on the console when run the sample scene.A3.Please Add all of the “***.unity” in the “OpenCVForUnity” folder to [Build Settings] – [Scene In Build].Q4.In DetectFaceSample or WebCamTextureDetectFaceSample, red rectangle is not displayed around face.A4.you might have failed to read the "haarcascade_frontalface_alt.xml".Please confirm whether there is ”OpenCVForUnity/StreamingAssets”folder at the right position.Q5.Support Web platform?A5.Since the Unity Web Player does not support the native plugin, "OpenCV for Unity" does not support "WebPlayer Platform".Q6.Support WindowsStoreApps8.1 & WindowsPhone8.1.A6.If you want to try the Beta Version of “OpenCV for Untiy” based on “OpenCV3.0.0”(Support WindowsStoreApps8.1 & WindowsPhone8.1), unzip the OpenCVForUntiy3.0.0-beta.zip, please replace the “OpenCVForUnity” folder.“OpenCV for Untiy” based on “OpenCV3.0.0” s upport Unity5.not support Unity4.IMPORTANT: READ BEFORE DOWNLOADING, COPYING, INSTALLING OR USING.By downloading, copying, installing or using the software you agree to this license.If you do not agree to this license, do not download, install,copy or use the software.License AgreementFor Open Source Computer Vision LibraryCopyright (C) 2000-2008, Intel Corporation, all rights reserved.Copyright (C) 2008-2011, Willow Garage Inc., all rights reserved.Third party copyrights are property of their respective owners.Redistribution and use in source and binary forms, with or without modification,are permitted provided that the following conditions are met:* Redistributions of source code must retain the above copyright notice,this list of conditions and the following disclaimer.* Redistributions in binary form must reproduce the above copyright notice,this list of conditions and the following disclaimer in the documentationand/or other materials provided with the distribution.* The name of the copyright holders may not be used to endorse or promote products derived from this software without specific prior written permission.This software is provided by the copyright holders and contributors "as is" andany express or implied warranties, including, but not limited to, the implied warranties of merchantability and fitness for a particular purpose are disclaimed.In no event shall the Intel Corporation or contributors be liable for any direct, indirect, incidental, special, exemplary, or consequential damages(including, but not limited to, procurement of substitute goods or services;loss of use, data, or profits; or business interruption) however causedand on any theory of liability, whether in contract, strict liability,or tort (including negligence or otherwise) arising in any way out ofthe use of this software, even if advised of the possibility of such damage.。