ShineKTV10助唱功能使用说明
双屏点歌机使用说明书v10
机顶盒歌曲文字,简体繁体任意切换输出。
多国语言同时支持,可以任意设定卡拉OK点唱机的系统语言,支持多语言歌曲列表。
皮肤界面坐标自动抓取
批量加歌加歌星
任意添加私有歌库,保护自己的歌曲不被他人拷贝使用
任意导出歌单,方便打印歌本。
6,支持串口(SATA)硬盘
除了具有以上双屏硬盘点歌机的常见普通功能外,新版双屏硬盘点歌机还具有六大专业功能:
1,支持播放格式多:
除了解码AVI视频外,还能完美支持解码MPEG1/2(5M以下)的节目格式,支持多音轨的AVI节目。
2,超强专业后台管理工具:
任意语言WIN系统运行,完美运行,不会出现任何乱码。
2、检查产品清单:
多媒体娱乐终端包装清单
名 称
数量
1
卡拉OK点唱机
1台
2
遥控器
1个
3
外置接收器
1个(另购)
4
视频线
1根(2头)
5
音频线
1根(4头)
6
2.0 USB连接线
1根
7
产品用户手册(中文)
1本
8
保修单
1份
9
产品合格证
1份
放置位置选择
请勿将本机置于阳光直射或靠近发热源的地方。
请将本机放置于通风良好之处,如需装入机柜内,请确保机柜有足够的通风孔,以防机内过热,影响正常使用。
SONG文件夹里面存放的点歌机的歌曲文件,所有的歌曲文件都是存放在这个文件目录的
SYSTEM文件夹是系统目录,里面存放的是系统文件,所有的系统文件都是存放在这个目录下的
KtvManager是添加歌星歌曲的后天服务软件,双击该文件,就可以打开该软件,如下图:
KTV操作的全过程
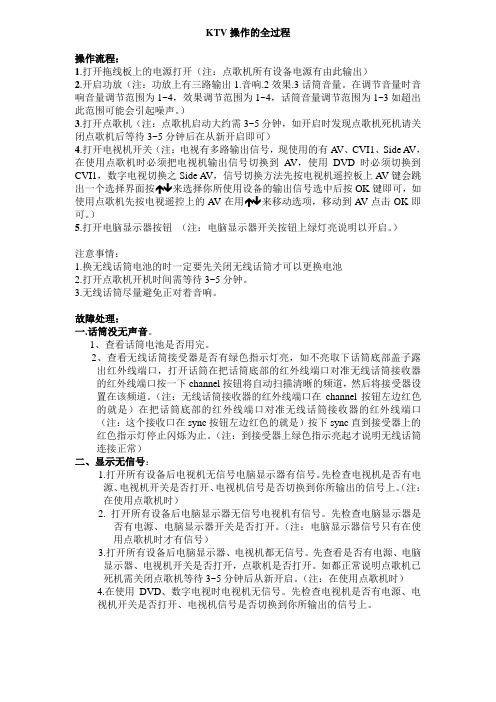
KTV操作的全过程操作流程:1.打开拖线板上的电源打开(注:点歌机所有设备电源有由此输出)2.开启功放(注:功放上有三路输出1.音响.2效果.3话筒音量。
在调节音量时音响音量调节范围为1~4,效果调节范围为1~4,话筒音量调节范围为1~3如超出此范围可能会引起噪声。
)3.打开点歌机(注:点歌机启动大约需3~5分钟,如开启时发现点歌机死机请关闭点歌机后等待3~5分钟后在从新开启即可)4.打开电视机开关(注:电视有多路输出信号,现使用的有A V、CVI1、Side A V,在使用点歌机时必须把电视机输出信号切换到A V,使用DVD时必须切换到CVI1,数字电视切换之Side A V,信号切换方法先按电视机遥控板上A V键会跳出一个选择界面按↑↓来选择你所使用设备的输出信号选中后按OK键即可,如使用点歌机先按电视遥控上的A V在用↑↓来移动选项,移动到A V点击OK即可。
)5.打开电脑显示器按钮(注:电脑显示器开关按钮上绿灯亮说明以开启。
)注意事情:1.换无线话筒电池的时一定要先关闭无线话筒才可以更换电池2.打开点歌机开机时间需等待3~5分钟。
3.无线话筒尽量避免正对着音响。
故障处理:一.话筒没无声音。
1、查看话筒电池是否用完。
2、查看无线话筒接受器是否有绿色指示灯亮,如不亮取下话筒底部盖子露出红外线端口,打开话筒在把话筒底部的红外线端口对准无线话筒接收器的红外线端口按一下channel按钮将自动扫描清晰的频道,然后将接受器设置在该频道。
(注:无线话筒接收器的红外线端口在channel按钮左边红色的就是)在把话筒底部的红外线端口对准无线话筒接收器的红外线端口(注:这个接收口在sync按钮左边红色的就是)按下sync直到接受器上的红色指示灯停止闪烁为止。
(注:到接受器上绿色指示亮起才说明无线话筒连接正常)二、显示无信号:1.打开所有设备后电视机无信号电脑显示器有信号。
先检查电视机是否有电源、电视机开关是否打开、电视机信号是否切换到你所输出的信号上。
KTV智能灯控调试软件使用说明

KTV智能灯控调试软件使用说明一、软件的安装运行软件程序,将KTV智能灯光控制系统软件安装到你指定的目录。
参考软件安装说明文档。
打开程序软件;二、硬件的连接1、用USB线连接电脑和USB调试盒。
2、使用配备的网线连接USB调试盒的DMX输出口和智能灯控的DMX输入口。
3、218型灯控DMX输入口插入网线后自动进入调试模式。
4、在智能灯控上长按“确认”键3秒进入学习模式,或者2秒内短按“确认”键5次后再短按“下翻”键同样也可以进入学习模式。
三、软件操作说明1、打开调试软件,软件会提示进行通讯参数设置,选取到连接USB调试盒的串口号,设置通讯波特率为115200, 点击打开串口后返回。
智能灯控会短鸣叫一声进入PC模式,显示屏上显示-PC-。
这时就可以打开软件主界面。
2、场景编辑功能。
在软件菜单里选择文件——新建,新建一个场景列表。
输入你想要保存的文件名称,点确定后会自动新建一个场景,或者选择想要保存到硬盘的目录再输入文件名。
鼠标双击该场景弹出场景参数修改对话框此时你可以修改场景的名称如“动感场景”并设置软件播放的每步停留时间,以25ms为单位。
确定后退回到DMX模拟控台主界面。
点左侧按钮增加一个新场景,点左侧按钮插入一个新场景,点左侧按钮删除选定的场景;点右侧按钮增加一个新步数,点右侧按钮插入一个新步数,点右侧按钮删除选定的步数;点左侧的复制按钮会将选中的一个场景复制到粘贴板,此时粘贴按钮会亮起。
然后你可以新建一个场景并选中后点粘贴,将复制的内容完全粘贴过来,你可再修改场景名称。
拉动下方的DMX模拟推杆,设置每步每个通道(最多512个通道)的数值。
完成后点保存按钮保存当前的场景列表文件。
方便下次打开调用。
如何将其他场景列表文件中的场景数据复制到另一个场景文件中:1、打开你需要复制数据的场景文件,选中你要复制的场景,点复制按钮;2、关闭当前的场景,打开你另一个场景文件;3、选中一个场景(不要的或新建的),点粘贴按钮就可以将复制的数据粘贴过来。
劲歌狂舞 KTV 麦克风用户手册说明书

TABLE OF CONTENTSTABLE OF CONTENTS (2)SET UP: (3)OPERATION (3)CONTROLS AND INDICATORS: (4)ON-OFF SWITCH (4)TREBLE (4)BASS (4)MICROPHONE VOLUME (4)PHANTOM POWER (4)VOICE/MUSIC (5)OUTPUT MAXIMUM (5)CASSETTE PLAYER: (6)EJECT (6)STOP (6)PLAY (6)REWIND (6)FAST FORWARD (6)RECORD (6)TAPE COUNTER (6)PITCH (6)MODE (7)CD PLAYER (7)HANDLING THE DISCS (7)LOADING AND UNLOADING DISCS (7)NORMAL DISC PLAY (7)PAUSE (7)STOP (7)FAST FORWARD AND FAST REVERSE (7)TRACK SEARCH (8)REPEAT DISC PLAY (8)SHUFFLE (8)PROGRAMMED DISC PLAY (8)INPUTS AND OUTPUTS: (8)MICROPHONE/INSTRUMENT INPUTS (8)RECORD/LINE OUT (9)LINE INSERT (9)EXTERNAL SPEAKER OUTPUT (9)SAFETY:SPECIAL FEATURES (9)REPLACING FUSES.....................................................................................................10 This product complies with DHHS Rules CFR21 Subpart J, applicable at the date of manufacture . Keep away from moisture. Do not operate ifelectronic equipment is wet. Severe electrical shock can occur No user serviceable parts inside. FRONT PANEL DIAGRAM.........................................................................................11 TROUBLESHOOTING............................................................................................12-13SPECIFICATIONS.........................................................................................................14 CONTROLS AND INDICATORS :SET UP:ON-OFF SWITCH:When power switch is in the ON position, the BATTERY STATUS LED will be illuminated. The color of the LED indicates the condition of the battery. TO OPERATEIf using microphones or external input jacks, plug these in first. Turn system on (rocker switch located on the Control Panel on the rear of the unit near the word POWER). The Battery Status light located on lower left hand portion of Control Panel will light with a green color, indicating that power is available. (See Controls and Indicators section if light is color other than green) Rotate VOLUME control knob clockwise to obtain desired listening level throughout the coverage area.Green – adequately charged Orange – battery LowRed – battery must be rechargedTo charge the batteries, connect the unit to 110VAC using the supplied power cord. For full charge, allow battery to charge overnight. The red CHARGER ON LED will be illuminated indicating battery is charging. Batteries will charge when unit is operating with AC power. Unit will charge faster with the power in the “off” position.If unit is not operating, refer to the Troubleshooting Table on pgs.12-13 for assistance.Note: Channel 3 Volume Control also controls the Volume levels for the CD and Tape Players.The Travel Audio Pro must be left plugged in and charging when not in use to maximize battery life. Recharging only when the Battery Status LED is Orange or Red will shorten the useful life of the internal batteries.Specific information concerning Controls and Indicators are covered in the next pages of this manual.AC POWERThe unit can also be operated with AC power. Use supplied power cord to plug unit into 110V AC household power if charging the batteries or using unit with AC power.MASTER VOLUME:This is the master volume control for the system. Rotate clockwise to increase volume to desired levels.This device complies with Part 15 of FCC Rules. Operation is subject to the following two conditions:TREBLE(1) This device may not cause harmful interference. This control cuts or boosts the treble level. Rotate knob clockwise to increase treble to desired level. Center detent is neither cut nor boosted.(2) This device must accept any interference received, including interference that may cause undesired operation .BASSThis control cuts or boosts the bass level. Rotate knob clockwise to increase bass to desired level. Center detent is neither cut nor boosted.MICROPHONE VOLUMECASSETTE PLAYER:There are three microphone input channels, (Channels 1, 2 & 3 on the Control Panel) and each channel has individual volume adjustment controls. See “Inputs and Outputs” section for more details.EJECT:PHANTOM POWER When this button is pressed, the door of the cassette compartment swings open to allow a tape to be inserted or removed. Close with a gentle push until a click is heard. The door cannot be opened during the playback or recording operation!If using Condenser type microphones, phantom power is required. To operate, insert microphone connector into Channel 1, 2 or 3 microphone input corresponding to the type of connector you have. Set the associated Channel’s INPUT SELECT button to the MIC position (it is in the Mic position when depressed), and press associated PHANTOM POWER to on. (Button is in ON mode when depressed).STOP:This button will stop all tape transport functions such as play, record, fast forward and rewind. It will also disengage the Record-pause and Play-pause mode.VOICE/MUSIC:PLAY: This button is used to select voice or music. For speech, it provides a midrange boost for better sound projection when in the VOICE position. (Button is in VOICE position when depressed.)Press either the F-PLAY or R-PLAY button to play back a tape.REWIND:The rewind function rewinds the tape from right to left and stops automatically once the beginning of the tape is reached. Press the STOP button on the Tape Player to manually stop Rewind.FAST FORWARD:The fast-forward function winds the tape forward from left to right and is stopped automatically once the end of the tape is reached. Press the STOP button on the Tape Payer to manually stop Fast Forward.RECORD:Press the PLAY and RECORD buttons simultaneously to activate the Record mode. Recording will start instantly.TAPE COUNTER:Press this button to reset the tape counter to “0000”. The counter can be reset at any point while a tape is playing to mark a particular place on the tape.PITCH:The PITCH tuning control allows you to change the playback speed to alter the pitch of the sound. Turning the control clockwise will increase tape speed and counter clockwise will decrease tape speed. Normal position for this control should be at center detent. OUTPUT MAXIMUM:Red MAXIMUM OUTPUT LED light will illuminate when amplifier is clipping. This indicates a high amount of distortion is present. Adjust volume levels until LED no longer comes on while unit is playing music or voice is being amplified. Occasional flashing is acceptable.NOTE: Channel 3 Volume Control controls Volume of Cassette Tape Player.TRACK SEARCH: MODE:To forward to the next track, press F-FWD once. The CD player will forward to the next track each time the button is pushed. To search for previous tracks, press R-RWD. The CD player will reverse to the next track each time the button is pushed. The cassette player has three operating modes- CONTINUOUS LOOP (plays side A then side B over and over until stopped), AUTO REVERSE (plays side A, then side B and stops), NORMAL (plays side A then stops).REPEAT DISC PLAY: OPERATING COMPACT DISC PLAYER:Use the REPEAT button for repeat of a selected or programmed track or press twice to repeat all tracks or programmed tracks.HANDLING THE DISCS:Always insert a CD or CD-R into player with label side up! The TRAVEL AUDIO PRO will not play CD-R/W media. Proper handling and care of CDs should be taken to insure proper operation. Fingerprints and dust should be carefully wiped off the surface, starting from the center of the disc and moving out towards the edge. It is best to avoid touching the surface opposite the label to prevent scratching or leaving fingerprints on the surface area. Always remove disc from player before transporting unit.SHUFFLE:Press the SHUFFLE button to play discs tracks randomly.PROGRAMMED DISC PLAY: NOTE: CD will play automatically when TRAVEL AUDIO PRO unit is powered on if CD is left inside CD playerIt is not possible to enter programs during disc play.LOADING AND UNLOADING DISCS: Entering a program:1. Press the PROGRAM button.To insert disc, gently insert into disc player slot until engagement mechanism pulls CD into player. Do not force CD into unit.2. Using the TRACK button to select the track to be programmed.3. Once desired track is selected, press the ENTER (Same as REPEAT) button. To remove disc press EJECT button and gently remove CD, place CD back into jewel case. CD can be ejected from player at any time. Player will automatically stop when CD is removed.4. Repeat 1-3 to add more selections to the program.5. Once all selected tracks are programmed, push the PLAY button. This unit will accept a maximum of 20-programmed tracks.6. Press the PAUSE to pause disc. The programmed selections will remain in memory. NORMAL DISC PLAY:7. To clear the programmed tracks. Press the STOP button.Insert CD into player and press PLAY/PAUSE button if CD hasn’t already begun to play. Disc play will start at first track.NOTE: Channel 3 Volume Control controls Volume of CD Player.Player display will indicate track number and time.INPUTS AND OUTPUTS:PAUSE:MICROPHONE/INSTRUMENT INPUTS: To pause CD during play, press PLAY/PAUSE button. Play will stop immediately. To resume play, press PLAY/PAUSE button again. There are 3 types of input jacks on your TRAVEL AUDIO PRO, as follows:2 – 1/8” phone jacks (3.5 mm) STOP: 2 – RCA jacks3 – XLR or ¼” combination jacks (this jack will accept either type) To stop play, press STOP. The disc will stop and the CD player will return to beginning of first track.There are two types of microphones the TRAVEL AUDIO PRO is designed for:Dynamic - for standard dynamic cartridge microphones FAST FORWARD AND FAST REVERSE:Condenser - for electret or condenser microphones, which require phantomTo skip forward during disc play, press and hold F-FWD. To skip back, press and hold R-RWD. power (supplied from the amplifier)There are three microphone channels (Channel 1, Channel 2, and Channel 3), and each channel has individual volume controls. Each channel will accept any of the listedThe TRAVEL AUDIO PRO panel has ¼” phone jacks labeled ‘Record/Line Out’ and ‘Line Insert’ respectively. ‘Record/Line Out’ provides a feed from the Mixer stage, but before this signal goes through the Output stage. In other words, this signal is not affected by settings on the music/voice switch, treble, bass & master volume controls. It can be used to drive an external recording device or another audio system. microphone types, but only one microphone or instrument can be plugged into each channel at a time.You can add pre-recorded music during your presentations by using the internal CD or tape player. In addition, external sources such as a computer or MP3 player can be used by connecting to the RCA jacks. Channel 3 Volume Control controls the volume for units connected to these inputs. It is recommended to use only one of these devices at a time.The advantage to this configuration (pre-EQ & master volume) is that the external system’s own EQ & volume settings can be separately adjusted to suit its environment and the two systems do not interact with each other.RECORD/LINE OUT:The ‘Line Insert’ jack works in two ways. When no plug is inserted it internally connects the Mixer to the Output. However, when a plug is inserted it disconnects the Mixer from the Output, replacing it with the external audio signal from the device the plug’s cable is attached to. In this configuration, the TRAVEL AUDIO PRO Output stage can be used to amplify a feed from an external mixer or playback device. For instance, assume a facility’s main meeting room has a built-in sound system, but the adjoining room for the overflow crowd has no system. A ‘Line Out’ feed from the house system could be plugged into the ‘Line Insert’ jack of a TRAVEL AUDIO PRO located in the overflow room. The TRAVEL AUDIO PRO’s EQ & master volume can then be adjusted to suit the overflow room’s conditions without any effect on the main system.This provides the output of the mixer. To record or connect to a house PA system, External Equalizer, Audio Mixer, or Amplivox S1292 powered companion speaker, connect the LINE OUT on the amplifier, to the input on an external recorder or PA system. This jack functions the same as a signal “send”. (See Special Features Section)LINE INSERT:Use this jack to supply a signal directly to the power amp. This jack functions as a signal “return”. Doing so will disconnect the mixer section of the TRAVEL AUDIO PRO and act as a power amplifier. See the “Special Features” section for more details. This is the input to use for the return signal from the Output of the Equalizer, Audio Mixer or other type of audio equipment connected in the paragraph above. (See Special Features Section)The other way this pair of jacks can be used is to insert an external device such as a graphic equalizer, echo/reverb machine or other audio processing device between the Mixer and Output stages of the TRAVEL AUDIO PRO. The ‘Record/Line Out’ on the ‘905 connects to the ‘Line In’ of the external device and its ‘Line Out’ connects to the ‘905 ‘Line Insert’. Remember from the above discussion that a plug in the ‘Line Insert’ jack breaks the direct internal connection from the Mixer so in effect the external device is electrically inserted between the 2 stages and becomes a functional block of the TRAVEL AUDIO PRO.EXTERNAL SPEAKER OUTPUT:This input allows for the use of an extra non-powered speaker. Care must be taken when using an external speaker. The speaker must be of suitable power handling and impedance. (100 Watts peak at 4 ohms)FUSESCAUTION: Improper speaker selection could result in equipment damage or fire.There are two fuses in the TRAVEL AUDIO PRO. One is mounted in the Control panel (10A) next to the power switch and the other is in the AC input receptacle (2A). Replace them only with fuses of the same size (5x20mm), type and ratingSPECIAL FEATURESAmplivox part numbers E071-0001, 120 VAC 10A, Wickmann 1952100 orequivalentTo facilitate this discussion, see the Front Panel Diagram on page 11 as we identify the following functional blocks: E071-0002, 120 VAC 2A, Wickmann 1951200 or equivalentMixer stage – includes all the individual volume controls, input jacks (14”-XLR combo, 3.5mm, RCA) and mic/line & phantom power switches for the 5 input channels (2 internal wireless, 3 direct or corded) ‘Record/Line Out’ and ‘Line Insert’ stage – see below.WARNING!RISK OF SHOCK! DO NOT OPEN UNIT- NO USER SERVICEABLE PARTS INSIDE!Output stage - includes the music/voice switch, treble, bass & master volume controls, power amps and speakers.Front Panel Diagram TroubleshootingProblem Items to checkUnit will not turn on •Is unit plugged in?•Are batteries charged?•Are fuses blown?Unit operates on AC but not on battery •Check battery terminals•Check 10A fuseSound is distorted •If “Maximum Output” is lit, turndown volume•If using wireless mic, is red ‘AudioPeak’ lit? If so, signal (such asvoice) is too strong. Movemicrophone farther away fromsource.•Turn down input source (such askeyboards, etc.) since the output ofsome devices may be too high•Check for debris on speaker cone(sand, etc.)Sound is muffled •Bass too high•Treble too lowLoud squealing sound coming from unit •“Feedback” occurs when amicrophone is too close to thespeaker or gain is too high. Movemicrophone farther away fromspeakers and/or turn down channelgain.Power is on, but no sound •check volume levels for eachchannel and main volume•if using wireless, be surereceiver(s) and/or transmitterbattery is installed and/or is on•If using “line insert”, loop must becompleted. See “special features”section.•Check speaker connection•If “Maximum Output” is lit,replace power amplifier board Microphone signal is weak •If mic has batteries, check batteriesin microphone•Turn on phantom power ifapplicable•Check cables/connectors•Is Mic/Line switch in properposition?Specifications:Wired Mic and CD/Tape audio cuts in and out • Reduce signal input if “Maximum Output” flickersUnit makes buzzing noise• Check cables – a damaged cablewill cause this. Unplug cables one at a time until buzzing stops.• Check for Ground loops – use a ground loop isolator where needed. Unit will operate only if plugged into AC• Check battery status LED• Are batteries charged? If not, check fuses and recharge overnight.Batteries will not hold charge • Replace Batteries every 1-2 years if unit is not left charging when not in use.CD does not play• Is unit turned on?• Be sure CD or CD-R is loaded into tray correctly. Unit will not play CD-R/W media.• Inspect disc for deep scratches or cracks• Check if player is in “pause” mode CD skips• Be sure unit is steady. If it is jarred, this may occur.• Check for scratches in CD. Remove scratches with a CD buffer/cleaner. Cassette Tape does not play• Is unit turned on?• Be sure Cassette is loaded in player • Check if player is in “pause” mode • Remove Cassette from player and check for entanglementTape becomes entangled in cassette player• Carefully remove tape from player. Clean heads and pinch roller with rubbing alcohol and a swab or a commercially available cassette player cleaner.Rated Power Output: 100 Watts peak/ 50 Watts per channelMax SPL : 116 dB voice mode, 114 dB music modeFrequency Response: 35 Hz – 20 kHz (voice mode + 4 dB from 2-12 kHz)Bass/Treble Controls: 10 dB cut/boost @ 100 Hz, 8 kHzUnbalanced Input: Hi-Z, Neutrik combo 1/ 4” phone or 3.5mm jack (Line Level)Balanced Input: Lo-Z, Neutrik combo XLR (Microphone Level) Phantom Power 12VDC (switchable)Auxiliary Input: Phono Jacks (right and left) for computer, MP3 player, etc.Sensitivity for rated output: Balanced Mic -58 dBV (1.25 mVrms) Balanced Line -15 dBV (175 mV rms) Unbalance Line -20 dBV (100 mV rms)Line Output: Buffered 600 ohm, 1 / 4 “ phone (pre fader)Speaker Output: 1 / 4 “ phone jack (4 ohm impedance)Batteries: (2) 12 Volt rechargeable SLA batteries, 7.5 Ah ratedAC Power requirements: 90-250 VAC, 50/60 HzDimensions: 24” x 16” x 14”Weight: 54 Lbs. (With batteries installed)Warranty: 6 yearsSerial #_________________________AmpliVox Sounds Systems LLC 3149 Mac Arthur Blvd. Northbrook, IL 600621-800-267-5486NOTES:AmpliVox Sounds Systems LLC3149 Mac Arthur Blvd.Northbrook, IL 600621-800-267-5486。
k歌软件使用说明

软件简介麦克风拥有,免费在线卡拉OK,免费K歌!海量歌库、录音上传、多人包房、竞技评分、个人博客,等功能。
麦克疯下载地址:/zjaCqVU软件使用说明在个人欢唱中点播你想录制的歌曲。
在播放歌曲停止的状态下,会发现录音按钮亮起,点击按钮进入录音棚。
请在录制歌曲前,先将歌曲缓存到本地。
这样可以保证在制作个人音乐时,不出现卡机、缓存、延时等现象。
下载完成后会自动跳转到“录音棚”,提供摄像头和照片2种录制模式,如下图:摄像头模式录制需要您先确定好您的视频设备是否能正常使用。
选择右上方的摄像头模式,随后点击”录音”开始录制。
歌曲录制完毕后或者录制中途可点击“停止”按键停止录音,点击“预览作品”可看到录制结果。
预览不满意可以按“录制”键,重新录制。
选择“保存作品”,作品即被上传到服务器。
照片模式录音选择右上方的照片模式,如下图:点击“浏览并上传”可以将您本地图片批量添加为背景照片。
选完照片后,再按“录制”键就可以开始录音了。
歌曲录制完毕后或者录制中途可点击“停止”按键停止录音,点击“预览作品”可看到录制结果。
预览不满意可以按“录制”键,重新录制。
选择“保存作品”,作品即被上传到服务器。
评分:得分评判原理:系统采用音乐内容分析技术,从演唱者的歌声中提取音准、节奏、音色、音量以及难度系数等信息,然后综合所有这些因素,对演唱进行评判,并通过专家信息库对比,得到最终分值。
开始评分:点播您想要评分的歌曲(且这首歌是可以评分的),建议在评分前将这首歌曲“缓存完成”,因为歌曲播放的不流畅会直接影响到歌曲的评分结果。
在播放歌曲停止的状态下按下“打开评分”按钮,如下图:播放一首你想要评分的歌曲,评分功能将自动运行。
在评分的同时,请注意音量条的显示。
可以通过调节主音量和话筒音量的大小,将其控制在绿色区域为最佳效果。
评分结束:正常评分:当您唱完该评分歌曲时(完整的播放完毕后),系统将对您所唱的歌曲进行评估。
中止评分:当您想放弃评分时,可以点击“退出”按钮,然后选择“是”,即可中止评分,系统将不会评分。
新版点歌机使用说明书
卡拉OK点唱机Karaoke jukeboxSHIYOU用户手册(适用网络版、硬盘版)目录安全须知 (1)设置场所 (2)使用 (2)其它 (2)温馨提示 (2)功能特点 (2)使用前说明 (3)开机检查产品包装清单 (3)放置位置选择 (4)安全注意事项 (4)遥控器使用须知 (4)卡拉OK点唱机产品示意图及接线图 (5)前面板示意图 (6)后面板接线图 (6)点歌遥控器图示说明 (6)遥控器按键介绍: (7)键盘按键说明 (8)安装说明 (8)后台管理工具软件操作 (8)卡拉OK点唱机操作说明 (12)怎样输入密码 (18)简单故障处理 (18)郑重声明 (19)安全须知感谢您使用此卡拉OK点唱机!为方便您正确安全的使用和操作,请先详细阅读该手册并妥善保管,以备今后参考!本机内有高压电源,使用不当,有可能引起火灾及触电,严重者可能导致重伤及生命安全,请仔细阅读以下注意事项,注意操作。
设置场所请将本机置放在稳定的支架上使用,不可在颠簸、振动的环境中使用,如因人为跌落所造成的损坏,不予保修。
请勿将本机置于有水份或潮湿环境中,不要将本机暴露在雨雪中,以免引起火灾或机器故障。
请勿将本机置于阳光直晒或温度高的地方。
请将本机放在通风良好处,以免发生故障。
请勿将本机置于靠近发热产品及有磁性的物体附近,以免影响机器正常使用。
使用勿用湿手触摸电源。
拔电源时,请勿强拉电线,请将插头拔离插座。
为了你的安全,请勿自行拆卸本机外壳。
不可使用汽油、酒精等液体清洁剂,用柔软的干抹布擦拭即可。
长时间不使用此机时,请拔出电源插头。
其它为防止触电,有可靠的电源保障,请使用宽片插头宽槽插座相配并确保接插牢靠。
使用完本机后,请关闭电源。
如发现异常,请与各地经销商或我公司客服中心联系。
本机不适用儿童操作,请务必在大人指导下进行操作。
温馨提示未经我公司或我公司授权单位的认可同意,任何对本机的改装及变动都可能对用户的使用带来诸多不便。
功能特点1,支持超大硬盘高达2TG2,幻影同屏功能3,在线时尚换肤功能4,支持PS2鼠标,点歌面板,红外点歌触摸屏(PS2)5,单屏双屏同时使用功能,同时点歌互不影响6,支持串口(SATA)硬盘除了具有以上双屏硬盘点歌机的常见普通功能外,新版双屏硬盘点歌机还具有六大专业功能:1,支持播放格式多:除了解码AVI视频外,还能完美支持解码MPEG1/2,VOB,DAT,(5M以下)的节目格式,支持多音轨的AVI节目。
ktv效果器使用技巧
ktv效果器使用技巧KTV效果器是在KTV唱歌时常见的音频处理设备,它可以改变音频信号的声音特性,使得人声更加清晰、音质更加优美。
以下是一些使用KTV效果器的技巧,帮助您更好地发挥其功能。
首先,调整音量。
效果器通常有输入音量和输出音量两个调节旋钮。
输入音量控制麦克风输入信号的音量大小,输出音量控制效果器输出到音响设备的音量大小。
在调整音量时,需要保证输入信号不过大或过小,以免产生噪音或失真。
同时,通过调节输出音量,可以使输出信号适合于你所使用的音响设备。
其次,调节混响。
混响是指音频信号在空间中产生的反射声,它可以使声音更加自然、富有立体感。
效果器中的混响参数通常有调节声音的大小和延迟时间,可以根据个人喜好适当调整。
当需要唱出宏伟的感觉时,可以增加混响的声音和延迟时间;当需要唱出干净清晰的感觉时,可以减少混响。
第三,使用均衡器。
均衡器可以调整不同频率的音量,以使声音更加平衡。
效果器中通常有低音、中音和高音三个频段的均衡器。
在使用过程中,可以根据自己的声音特点,适当调节各个频段的音量,使得声音更加饱满,不会出现过于尖锐或沉闷的情况。
第四,使用压缩器。
压缩器可以控制音频信号的动态范围,使得声音更加平稳,不会出现过于突然的音量变化。
在KTV唱歌时,由于人的情绪和唱功的不稳定性,音量可能会有较大的波动。
使用压缩器可以有效地控制这种波动,使得声音更加平衡连贯。
最后,注意反馈问题。
当音量过大时,可能会产生反馈,即麦克风接收到从音响设备传回的声音信号,产生刺耳的尖叫声。
为了避免反馈问题,可以减小音响设备的音量,或者调整麦克风位置,使其远离音响设备。
总而言之,KTV效果器是一种帮助提升唱歌效果的重要设备,通过调整音量、混响、均衡器和压缩器等参数,可以使声音更加优美、清晰。
然而,在使用效果器时,需要根据个人情况调整各项参数,并注意避免反馈问题。
只有正确地使用效果器,才能使得KTV唱歌的效果更加出色。
卡拉OK音箱使用说明书

使用说明书感谢您购买 卡拉 0K 音箱。
使用前请仔细通读下面的使用说明,并熟悉卡拉 OK 音箱的操作方法。
卡拉 OK 音箱设置并连接扬声器使合成阻抗介于6 至 32 Ω 范围内。
注意:说明书规定合成阻抗可以在 4 到 32 Ω 之间,但是,不推荐采用 4 Ω 设置;请尽可能不要采用 4 Ω 设置。
操作注意事项扬声器的最大输入功率为 400 瓦(峰值)。
输入功率太高可能会损坏卡拉OK 音箱,因此请务必注意将功率保持在规格范围之内。
即使所用的功放最大输出功率低于 400 瓦,也不要将扬声器的音量调得太高,或让扬声器播放失真的声音,这些都会损坏扬声器。
将扬声器与功放相连时,请确保功放的电源开关位于“OFF ”(关)位置。
将功放的电源开关打到“ON ”(开)位置时,请确保功放的音量处于最低位置。
将扬声器与功放相连时,请确保功放的电源开关位于“OFF ”(关)位置。
让扬声器的“-”极和“+”极对准功放左(L)、右(R) 声道的“-”极和“+”极,然后将扬声器与功放上的扬声器端子相连。
(请参见下图。
)请不要在有阳光直射和非常潮湿的环境中安装扬声器。
也不要在炉子或其他热源附近进行。
对于卡拉OK 音箱来讲,听到的声音由于安装位置的不同将有很大变化。
要想获得最佳的音乐欣赏水平,请牢记如下几点。
a) 的位置。
b) 与扬声器的最佳距离为2到5米。
c) 放置扬声器的位置必须至少离墙 7 如果您要从天花板悬挂扬声器,请与专业的安装人员联系。
注意:本CSE-308扬声器若以天花板悬吊方式使用,请使用能充分耐负荷的安装零件。
另外,务必使用与天花板材料相符的螺钉在质地坚硬的部位旋紧安装零件。
* 如果左右扬声器的极性连接不正确,则再现音质、环境气氛和方向感将受到明显的影响。
* 进行连接时,请务必注意不要让扬声器线的线芯短路。
关于多方位式CSE-308是为了能在宽敞的房间中、体现出逼真的音像效果而制造的多方位式扬声器。
以低音扬声器为中心,外加中高音扬声器一个、高音扬声器一个、共由三个扬声器构成。
- 1、下载文档前请自行甄别文档内容的完整性,平台不提供额外的编辑、内容补充、找答案等附加服务。
- 2、"仅部分预览"的文档,不可在线预览部分如存在完整性等问题,可反馈申请退款(可完整预览的文档不适用该条件!)。
- 3、如文档侵犯您的权益,请联系客服反馈,我们会尽快为您处理(人工客服工作时间:9:00-18:30)。
关于V10助唱功能的说明
一、助唱功能简介:
在使用软件过程中,
1.音响系统中正常播放当前歌曲,可以随意控制通过软件控制音量大小,原伴唱等功能。
2.同时通过一个无线耳机作为助唱工具,不论音响系统中播出的歌曲是原唱还是伴唱,助
唱耳机里面始终播放歌曲的原唱音乐。
3.以此方便客人在包房演唱歌曲时,能够听到歌曲的原唱。
为一些有这方面需求的特殊应
用准备。
二、测试基本配置
点歌软件:ShineKTV10点歌系统。
无线耳机:雷柏H1000(下图)(价格大约100RMB)。
三、无线耳机安装方法
1.取出USB发射器(下图)插入任意一USB口,免驱版无需安装驱动程序。
2.等待系统自动识别安装完成后,耳机即可正常使用。
四、点歌软件相关配置
1.打开ShineKTV10软件根目录下的配置工具ShineKTV10Tool.exe
2.左上角点击打开文件——配置向导,打开软件配置界面
3.点击下一步,进入配置向导第三步,勾选“启用助唱功能”。
然后在助唱声卡处的下拉菜单中选择无线耳机声卡Rapoo Wireless Audio(若使用其他型号或品牌的无线耳机,此处选项可能会有所不同,请确认无线耳机所使用的声卡名称)。
4.点击“下一步”直至设置完成。
5.启动ShineKTV10点歌软件,此时已经可以正常使用助唱功能了。
五、注意
1.只有点播的歌曲,且点歌软件的歌曲数据库中的原伴唱信息正确的情况下,助唱无线耳机中才会播放当前歌曲的原唱音乐。
2.在测试使用中有其他问题请电话与北京总公司联系。
KTV研发部
2011年4月8日。