99lubA03V-C
MOXA UC-8100系列硬件用户手册说明书
UC-8100 Series Hardware User’s ManualEdition 3.1, September 2018/product© 2018 Moxa Inc. All rights reserved.UC-8100 Series Hardware User’s Manual The software described in this manual is furnished under a license agreement and may be used only in accordance withthe terms of that agreement.Copyright Notice© 2018 Moxa Inc. All rights reserved.TrademarksThe MOXA logo is a registered trademark of Moxa Inc.All other trademarks or registered marks in this manual belong to their respective manufacturers.DisclaimerInformation in this document is subject to change without notice and does not represent a commitment on the part of Moxa.Moxa provides this document as is, without warranty of any kind, either expressed or implied, including, but not limited to, its particular purpose. Moxa reserves the right to make improvements and/or changes to this manual, or to the products and/or the programs described in this manual, at any time.Information provided in this manual is intended to be accurate and reliable. However, Moxa assumes no responsibility for its use, or for any infringements on the rights of third parties that may result from its use.This product might include unintentional technical or typographical errors. Changes are periodically made to the information herein to correct such errors, and these changes are incorporated into new editions of the publication.Technical Support Contact Information/supportMoxa AmericasToll-free: 1-888-669-2872 Tel: +1-714-528-6777 Fax: +1-714-528-6778Moxa China (Shanghai office) Toll-free: 800-820-5036Tel: +86-21-5258-9955 Fax: +86-21-5258-5505Moxa EuropeTel: +49-89-3 70 03 99-0 Fax: +49-89-3 70 03 99-99Moxa Asia-PacificTel: +886-2-8919-1230 Fax: +886-2-8919-1231Moxa IndiaTel: +91-80-4172-9088 Fax: +91-80-4132-1045Table of Contents1.Introduction ...................................................................................................................................... 1-1Overview ........................................................................................................................................... 1-2 Model Descriptions .............................................................................................................................. 1-2 Package Checklist ............................................................................................................................... 1-2 Hardware Specifications ...................................................................................................................... 1-2 Hardware Block Diagram ..................................................................................................................... 1-3 2.Hardware Introduction...................................................................................................................... 2-1Appearance ........................................................................................................................................ 2-2 LED Indicators .................................................................................................................................... 2-3 Default Programmable Button Operations .............................................................................................. 2-4 Diagnosing Device and Subsystem Failures ..................................................................................... 2-4 Reset to Default Button ....................................................................................................................... 2-5 Real Time Clock .................................................................................................................................. 2-5 Placement Options .............................................................................................................................. 2-5 DIN Rail Mounting ....................................................................................................................... 2-5Wall or Cabinet Mounting ............................................................................................................. 2-6 3.Hardware Connection Description ..................................................................................................... 3-1Wiring Requirements ........................................................................................................................... 3-2 Connecting the Power .................................................................................................................. 3-2Grounding the Unit ...................................................................................................................... 3-2 Connecting to the Console Port ............................................................................................................. 3-3 Connecting to the Network ................................................................................................................... 3-3 Connecting to a Serial Device ............................................................................................................... 3-4 Inserting the SD and SIM Card ............................................................................................................. 3-4 USB Port ............................................................................................................................................ 3-4 Installing the Cellular/Wi-Fi Module ....................................................................................................... 3-5 A.Regulatory Approval Statements ....................................................................................................... A-11Introduction The UC-8100 series computing platform is designed for embedded data acquisition applications. The computer comes with one or two RS- 232/422/485 serial ports and dual 10/100 Mbps Ethernet LAN ports, as well as a Mini PCIe socket to support cellular modules. These versatile communication capabilities let users efficiently adapt the UC-8100 computers to a variety of complex communications solutions.The following topics are covered in this chapter:❒Overview❒Model Descriptions❒Package Checklist❒Hardware Specifications❒Hardware Block DiagramOverviewThe UC-8100 Series is built around an ARMv7 Cortex-A8 RISC processor that has been optimized for use inenergy monitoring systems, but is widely applicable to a variety of industrial solutions. With flexible interfacing options, this tiny embedded computer is a reliable and secure gateway for data acquisition and processing at field sites as well as a useful communication platform for many other large-scale deployments. Model DescriptionsThe UC-8100 Series includes the following models:•UC-8131-LX: RISC-based platform with 300 MHz CPU, 2 Ethernet ports, 1 serial port, 8 GB eMMC, SD socket, USB port, and Moxa Industrial Linux pre-installed•UC-8132-LX: RISC-based platform with 300 MHz CPU, mPCIe socket for cellular/Wi-Fi module, 2 Ethernet ports, 2 serial ports, 8 GB eMMC, SD socket, USB port, and Moxa Industrial Linux pre-installed •UC-8162-LX: RISC-based platform with 600 MHz CPU, mPCIe socket for cellular/Wi-Fi module, 2 Ethernet ports, 2 serial ports, 8 GB eMMC, SD socket, USB port, and Moxa Industrial Linux pre-installed •UC-8112-LX: RISC-based platform with 1 GHz CPU, mPCIe socket for cellular/Wi-Fi module, 2 Ethernet ports, 2 serial ports, 8 GB eMMC, SD socket, USB port, and Moxa Industrial Linux pre-installed Package ChecklistBefore deploying the UC-8100 computer, verify that the package contains the following items:•UC-8100 embedded computer•Console cable•Power jack•3-pin terminal block for power (Pre-installed on the UC-8100)•5-pin terminal block for UART x 2 (Pre-installed on the UC-8100)NOTE: Notify your sales representative if any of the above items are missing or damaged. Hardware SpecificationsNOTE The latest specifications for Moxa’s products can be found at https://.Hardware Block Diagram2Hardware Introduction The UC-8100 Series of embedded computers are compact and rugged, making them suitable for industrial applications. The LED indicators allow users to monitor performance and identify trouble spots quickly, and the multiple ports can be used to connect a variety of devices. The UC-8100 Series comes with a reliable and stable hardware platform that lets you devote the bulk of your time to application development. In this chapter, we provide basic information about the embedded computer’s hardware and its various components.The following topics are covered in this chapter:❒Appearance❒LED Indicators❒Default Programmable Button OperationsD iagnosing Device and Subsystem Failures❒Reset to Default Button❒Real Time Clock❒Placement OptionsD IN Rail MountingW all or Cabinet MountingAppearanceFront ViewTop & Bottom ViewsTop BottomDimensions [units: mm (in)]LED IndicatorsRefer to the following table for information about each LED. LED NameColorFunctionUSB Green Steady On USB device is connected and working normally Off USB device is not connected.SDGreen Steady On SD Card inserted and working normally OffSD Card is not detectedPowerGreen Power is on and the computer is working normally. Off Power is off.LAN1/2 (On RJ45 connector)GreenSteady On 100 Mbps Ethernet link Blinking Data transmitting Yellow Steady On 10 Mbps Ethernet link BlinkingData transmittingOff Ethernet is not connectedWireless Signal StrengthGreenYellow Red Number of glowing LEDs indicates signal strength 3 (Green + Yellow + Red): Excellent 2 (Yellow + Red) : Good 1 (Red) : PoorOff Wireless module is not detectedDiagnosis Programmable Green Yellow RedRefer to the section Chapter 3 in Hardware Manual for details. These 3 LEDs are programmable; refer to Chapter 5 in Hardware Manual for details.Default Programmable Button OperationsThe push button is used to diagnose device failure or to perform firmware restoration. After depressing the button, release it at the appropriate time to enter the desired mode to either diagnose your device or restore your device to the default configuration. See below for detailed instructions.The LED indicators behave differently when diagnosing a device failure compared to performing a firmware restoration. See the following table for details. StatusRed LED Yellow LED Green LED Executing diagnostics program Blinking Off On Resetting to default configurationBlinkingBlinkingOnDiagnosing Device and Subsystem FailuresThe red LED will start blinking once you press the push button. Keep the button pressed until the green LED is lit for the first time and then release the button to enter diagnostic mode to check which peripherals are available on the UC-8100-LX. When the diagnostic program is executing, the red LED will be blinking. StatusRed LEDYellow LED Green LED Diagnostics program is executing BlinkingOffOnThe following two tables describe the diagnostics results related to hardware defects and system operation.Hardware DefectsIf you observe any of these hardware issues, contact Moxa for further instructions. StatusRed LED Yellow LED Green LED UART1 device issue On On Off UART2 device issue (except UC-8131) OnOnBlinkingLAN 1 device issue On Off Off LAN 2 device issue On Off Blinking Button device issue On Blinking Off TPM device issue On Blinking Blinking LED device issueOnOffOffSystem OperationIf you observe any of the following issues, check the item indicated by the LEDs. StatusRed LED Yellow LED Green LED CPU usage (over 90%) Blinking On Off RAM usage (over 90%) Off On Off Disk usage (over 90%) Off On Blinking File system corruptedBlinkingOnBlinking0 2478Release the button duringthis time to diagnose Time (s)Release the button during this Button pressedReset to Default ButtonPress and hold the Reset Button continuously for at least 5 seconds to load the factory defaultconfiguration . After the factory default configuration has been loaded, the system will reboot automatically. The Ready LED will blink on and off for the first 5 seconds, and then maintain a steady glow once the system has rebooted.We recommend that you only use this function if the software is not working properly and you want to load factory default settings. The Reset to Default functionality is not designed to hard reboot the UC-8100.Real Time ClockThe UC-8100’s real time clock is powered by a non-rechargeable battery. When the computer is not plugged into a power supply, the battery has an estimated life around 1 year. When the computer is plugged into powersupply, the standby current source will be switch to the power supply. We strongly recommend that you do not replace the battery without help from a qualified Moxa support engineer. If you need to change the battery, contact the Moxa RMA service team.Placement OptionsThere are two sliders on the back of the unit for DIN rail and wall mounting.DIN Rail MountingPull out the bottom slider, latch the unit onto the DIN rail, and push the slider back in.Wall or Cabinet MountingPull out both the top and bottom sliders and align the screws accordingly.Another method for wall mounting installation is to use the optional wall mounting kit. Attach two mounting brackets on the side panel of the computer, and fasten with screws. Install the computer on a wall or cabinet by fastening two screws for each bracket.NOTE Before tightening the screws into the wall, make sure the screw head and shank size are suitable by inserting the screw into one of the keyhole-shaped apertures of the wall mounting plates.3 Hardware Connection DescriptionThis section describes how to connect the UC-8100 to a network and various devices for first time testing purposes.The following topics are covered in this chapter:❒Wiring RequirementsC onnecting the PowerG rounding the Unit❒Connecting to the Console Port❒Connecting to the Network❒Connecting to a Serial Device❒Inserting the SD and SIM Card❒USB Port❒Installing the Cellular/Wi-Fi ModuleWiring RequirementsIn this section, we describe how to connect various devices to the embedded computer. You should heed the following common safety precautions before proceeding with the installation of any electronic device: • Use separate paths to route wiring for power and devices. If power wiring and device wiring paths mustcross, make sure the wires are perpendicular at the intersection point.NOTE: Do not run signal or communication wiring and power wiring in the same wire conduit. To avoid interference, wires with different signal characteristics should be routed separately.• You can use the type of signal transmitted through a wire to determine which wires should be kept separate.The rule of thumb is that wiring that shares similar electrical characteristics can be bundled together. • Keep input wiring and output wiring separate.• When necessary, it is strongly advised that you label wiring to all devices in the system.Connecting the PowerTerminal BlockThe UC-8100 has a 3-pin terminal block for a 12 to 24 VDC power input.The figure show how the power input interface connects to external power sources. If the power is properly supplied, the Power LED will light up. The Ready LED will glow a solid green color when the operating system is ready (it may take 30 to 60 seconds for the operating system to boot up).Grounding the UnitGrounding and wire routing help limit the effects of noise due to electromagnetic interference (EMI). Run the ground connection from the ground screw to the grounding surface prior to connecting devices.SG: The Shielded Ground (sometimes called Protected Ground) contact is the bottomcontact of the 3-pin power terminal block connector when viewed from the angle shownhere. Connect the SG wire to an appropriate grounded metal surface.Connecting to the Console PortThe UC-8100’s console port is a 4-pin pin-header RS-232 port located on the top panel of the case. It isdesigned for serial console terminals, which are useful for identifying the boot up message, or for debugging when the system cannot boot up.Serial Console Port & Pinouts Serial Console CablePin Signal1 TxD2 RxD3 NC4 GNDConnecting to the NetworkConnect one end of the Ethernet cable to one of the UC-8100’s 10/100M Ethernet ports (8-pin RJ45) and the other end of the cable to the Ethernet network. If the cable is properly connected, the UC-8100 will indicate a valid connection to the Ethernet in the following ways:The LED indicator in the lower right corner glows a solid green color when the cable is properly connected to a 100 Mbps Ethernet network. The LED will flash on and off when Ethernet packets are being transmitted or received. PinSignal1 ETx+2 ETx-3 ERx+4 –5 –6 ERx-7 –8 – The LED indicator in the upper right corner glows a solid orange colorwhen the cable is properly connected to a 10 Mbps Ethernetnetwork. The LED will flash on and off when Ethernet packets arebeing transmitted or received.Connecting to a Serial DeviceUse properly wired serial cables to connect the UC-8100 to serial devices. The serial ports of the UC-8100 use the 5-pin terminal block. The ports can be configured by software for RS-232, RS-422, or 2-wire RS-485. The precise pin assignments are shown in the following table:Terminal BlockRS-232/422/485 PinoutsPin RS-232 RS-422 RS-4851 TXD TXD+– 2RXDTXD-– 3 RTS RXD+ D+ 4CTS RXD- D- 5GNDGNDGNDInserting the SD and SIM CardThe UC-8100 comes with an SD socket for storage expansion, and a SIM card socket that can be installed with a SIM card for cellular communication. The SD card/SIM card sockets are located on the lower part of the front panel. To install them, remove the screw and the protection cover to access the socket, and then plug the SD card and the SIM card into the sockets directly. Remember to push in on the SD card or SIM card first if you want to remove them.USB PortThe UC-8100 provides 1 USB 2.0 full speed port (OHCI), type A connector, which supports a keyboard or mouse, as well as an external flash disk for storing large amounts of data.Installing the Cellular/Wi-Fi ModuleThe UC-8100 provides an mPCIe socket for installing a cellular/Wi-Fi socket. Follow these steps:1.Remove the screws on the side panel, and take off the cover.2.Find the location of the PCIe socket. Insert the cellular module into the socket, and then tighten the screwsto fasten the socket.3.Next, you need to install the antenna cable. There are two antenna connectors on the cellular module.Connect the cable to either connector.4. Plug the other end of the cable into the connector on the front panel of the UC-8100. Remove the blackplastic cover first.5. Install the connector; place the locking washer first, and then tighten the nut.6. Connect the antenna to the connector.ARegulatory Approval StatementsThis device complies with part 15 of the FCC Rules. Operation is subject to the following two conditions: (1) This device may not cause harmful interference, and (2) this device must accept any interference received, including interference that may cause undesired operation.Class A: FCC Warning! This equipment has been tested and found to comply with the limits for a Class A digital device, pursuant to part 15 of the FCC Rules. These limits are designed to provide reasonable protection against harmful interference when the equipment is operated in a commercial environment. This equipment generates, uses, and can radiate radio frequency energy and, if not installed and used in accordance with the instruction manual, may cause harmful interference to radio communications. Operation of this equipment in a residential area is likely to cause harmful interference in which case the users will be required to correct the interference at their own expense.European Community。
SuperEvac Vacuum Pump Operation and Maintenance Ma

SuperEvac® Vacuum PumpOperation and MaintenanceManualModels: 9354x, 9356x, 9358x, 9359xTable o f Contents PageImportant Notices to PurchaserWarningFeatures of Your New Pump....................................................................................3The Purpose of the SuperEvac ™ Design..................................................................4Important Steps of Initial Start-up...........................................................................5Vacuum Tips for Best Performance.........................................................................5-6Basic Troubleshooting............................................................................................7• Four Most Common Problems • Oil Leakage• The Steps to Solving 95% of All ProblemsDiagnostic Chart....................................................................................................8, 9Replacement Parts................................................................................................10, 11Warranty and Service.. (12)Check for damage immediately.Prior to shipment, all YELLOW JACKET ® SuperEvac ™ vacuum pumps are com-pletely tested and inspected to assure compliance with Ritchie Engineering factory specifications.If the pump carton is damaged, check contents immediately. Note damage on shipper’s Bill of Lading and have shipper sign your statement. Notify the carrier immediately of the damage to arrange inspection of the pump and packaging.The CARRIER ALONE is responsible forhandling and settling your claim. Ritchie Engineering will cooperate in assessing damage if the pump is returned to the factory prepaid.CARTON CONTENTS INCLUDE:• SuperEvac ™ Pump• Bottle of YELLOW JACKET ® SuperEvac ™ Pump Oil• Owner’s Manual• This unit generates a deep vacuum that can be harmful to human tissue. Do not expose any part of the human body to the vacuum.• Do not operate this unit with the exhaust blocked or restricted. Remove red shipping cap prior to use.• Keep unit a minimum of 4” (10 cm) from objects to provide adequate cooling of motor.• Continuous sound pressure level of this unit can exceed 70dB (A).• Wear goggles and protective clothing when using this product.1. Male flare pump intake. Tethered cap stays with unit. Large diameter hose suggested for maximum pull down.2. Additional intake ports.3. Vacuum gauge shows evacuation progress down to 30” range, so you will know when to turn on electronic gauge for more precise reading.4. Gas ballast valve (not shown) helps remove moisture and other con d ensable vapors that have been drawn into the pump as a result of evacuation.5. Opening the ballast allows fresh air to enter the cartridge and keep vapors from combining with the oil. Vapors escape harmlessly through the exhaust valve. If combined with oil, vapors can turn the oil milky white and lower pump performance below specifica t ions.6. To operate ballast, turn the valve counter-clockwise one full turn after evacuation starts. As the vacuum reading reaches 1000-2000 microns, close the ballast to achieve a higher vacuum range.Features of Your New PumpThe SuperEvac Pump is a 2-stage ro t ary vane design (at right) that increases efficiency and speeds pump down to 15 microns.The pump lowers the internal pressure of a refrigeration system until moisture boils into a vapor. As the moisture is vaporized, it is evacuated by the pump to help dehy-drate the system. Most technicians try to achieve between 250 and 1000 microns.A manometer or electronic vacuum gauge are the only ways to monitor evacua-tion progress. Manometer readings are approximate in inches of mercury. Only an electronic vacuum gauge (see page 8) isaccurate enough to show when you reach the desired mi c ron range.As the chart shows, only an electronic gauge reads fine differences to provide assurance that the vacuum is low enough to boil the greatest possible amount ofmoisture.The Purpose of the SuperEvac ™ DesignHow one small drop dampens your profits.A small drop of moisture can hurt yourprofits and reputation.During new system set-up, protective caps are removed admitting moisture and air into system components.First stage exhausts into the intake of the second stagesimilar to two single stage pumps connected together. If air – a non-condensible – remains in thesystem, it collects on the high side reduc-ing system efficiency. This causes a risein head pressure. The discharge valve gets hotter than normal and organic solids form causing compressor failure. Moisture in the system can form ice which closes off openings in expansion valves and cap tubes, and prevent adequate cooling. Ultimately moisture and air can produceacids and sludge which could cause in -warranty failures.During service and parts replacement, the same contaminants get in again, and you could be called back for repairs by a dissatisfied customer.Moisture and air can even enter through system leaks. And as the moisture in the air increases, so does the amount of contamination. The higher the humidity, the bigger your problem.A vacuum pump “pulls” air and mois-ture out of the system before the systemis damaged. The higher and more complete the vacuum, the more moisture is removed. That’s why your SuperEvacpump is specifically engineered for highvacuums of 15 microns and better.RECOMMENDED EXTENSIONCORD SIZESVacuum Tips for Best Performance1. Make sure motor is off and name plate voltage on motor bottom matches outlet voltage.2. Remove oil fill cap on pump cover. Fill with YELLOW JACKET ® SuperEvac ™ Pump Oil until oil level is even with oil level line.3. Make sure blank-off valve is in the open position (vertical). Stay clear of the oil fill/exhaust port! Remove intake cap to open intake to the atmosphere and then switch on the motor. When pump reaches running speed, replace cap. The vacuum indicator gauge should read 30 inches.4. To check the pump’s performance, attach a micron gauge to the 1/4” male flare fitting, making sure that the intake fitting is capped and the gas ballast valve is closed. Turn on the pump. The micron gauge will display the ultimate vacuum reached.5. Improve cold weather starting by opening intake and running your pump for 10-15 seconds.6. When turning pump off, open intake fitting until vacuum indicator gauge reads zero to break vacuum just prior to shut-off.7. Disconnect pump and put cap on intake to keep out contaminants.8. If an extension cord is needed, refer to the below chart for proper sizing.6. Use the 4-in-1 Vacuum/Charge Valve & Core Tool (Part #18975) to remove the Schradervalves from the system and evacuate through unrestricted lines for a faster and higher vacuum.Removing Schraders saves over 30% in time.7. Use two pumps on very large systemsto reduce vacuum time. Put one of the pumps on the low side of the systemand one pump on the high side of the system.1. F or the fastest vacuum, connect your pump directly to the system. Going through a manifold slows the job.2. Use as large a hose as possible, eventhough the system has 1/4” fittings. A1/2” or 3/8” hose allows a much fasterand more complete vacuum.3. Use as short a hose as practical to get maximum evacuation speed. Short hoses make evacuation faster thanlonger hoses. Long hoses slow the process.4. Metal hoses are the most impervious so will be most effective in evacuation.5. Evacuate through both high and low sides at the same time to speed evacu-ation.Quick Tips:Important Steps of Initial Start-UpSTEP 1Disconnect the motor from the power supply and remove.Remove the yellow “CAUTION” sticker from the back of the motor.STEP 2Pull up on the white plastic “arrow” switch using needle-nosed pliers until the switch is loose inside the motor housing (it will not come completely out of the motor).NOTE: Do not try to turn or rotate the switch until it hasbeen pulled up and is loose.If you think there is excessive mois-ture, blow out the AC&R system with dry nitrogen wherever possible. This reduces the amount of contaminants that must be “pulled” into the pump and increases evacuation e a nitrogen regulator valve with pressure limited to 150 psi and a frangible disc device set at 175 PSIG.When the indicator reaches the 29-30” range, turn on the electronic microngauge for more precise readings.Oil Changes: CHANGE OIL AFTER EACH USAGE to protect pump components from contaminants pulled into pump during service. Place used oil in a sealable container and dispose properly in accor-dance with local regulations.STEP 3Point the arrow toward the desired voltage setting and push the switch back down into the motor. The arrow on the switch should be sub-flush of themotor housing when correctly installed at the desired voltage.HI = 230 VAC / 50 Hz LO = 115 VAC / 60 Hz STEP 4Replace the yellow “CAUTION” sticker over the voltage selector switch.Ensure that the voltage setting correspondswith the power supply that the motor is plugged into.8. Use a SuperEvac System I, II or III to decrease vacuum time by over 50%. These systems include a 2-valve vacuum manifold and two 3/8”vacuum hoses which can evacuate three times faster than a 1/4” hose.9. Use a heat gun on the condenser and evaporator to speed the evacuation process.Built-in Vacuum Gauge: The built-in indicator gauge in your pump monitors evacuation progress down to the29-30” range. If thereading stays in the mid range, there is either high contamination or a large leakin the system.Gross LeakDual Voltage Motor Power Conversion (if applicable)Turn on Electronic Gauge *Warranty is void if the set vacuum pump voltage does not match the power supply. Dual voltageBasic Troubleshooting1. “Will not pump.” This usually means the pump will not pull a high enoughvacuum. This can be caused by valve being left open, missing O-rings under caps or contaminated oil.SUGGESTION: Change valve andO-rings change oil twice and recheck vacuum. 2. “Will not pull below 1000 microns.”SUGGESTION: Check for O-rings. Test pump to determine actual pull down. Remove all hoses and connect vacuum sensor directly to pump.3. “Noisy.” Pumps are noisy when theyhave not achieved a high vacuum. Inintermediate vacuum, there will be oil,vane and exhaust noises.SUGGESTION: Listen to the pump athigh vacuum. If relatively quiet, the pump is running properly. If still noisy,there may be a system leak.4. “Repair and return.” This is the most difficult return comment to handle, since we are unsure of what needs to be done to keep the customer satisfied.SUGGESTION: Be specific about the problem with your pump if returning it.Starting Pro bl ems• Be sure pump is plugged into live receptacle with line voltage plus or minus 10% of voltage on motor name-plate. Long extension cords can greatly reduce voltage and cause problems.• Pump/oil temp. must be 30°F (-1°C) or higher. Open intake to atmosphere and switch on pump; run up to speed before connecting to system.Four Most Common Comments on Pump Return Paperwork:• Your SuperEvac ™ pump features a heavy-duty high torque motor for cold weather starting, but dirty oil makesstarting more difficult, causing unnec-essary wear on your unit.• Dropping your pump can damage it. In a locked pump condition, motor will not run and the thermal overload will kickout.• Disconnect power cord and set pump with front cover face down on table.Reach into coupling area and try to rotate the coupling. Do not use pliers.if the pump does not rotate, it is "locked up."Oil Leakage• I f leak develops between front andrear half of oil case, tighten all screws.Replace gasket if necessary.• If shaft seal leaks, replace it.• Wipe pump dry and watch for source ofleak. Tighten screws and repair.The Steps to Solving 95% of All Problems1. Check oil level when pump is running. It should be between the indicated levels.2. Check vacuum pump. Connect micron gauge directly to the 1/4” port and cap intake port. Turn on pump, open the valve and check vacuum reading. If reading is good, check the system for leaks. OR, if testing a system, isolate pump with blank-off valve and get vacuum reading from the pump alone. If the pump does not pull and stay at a good vacuum level, run until hot and change oil.3. Check all flare connections. Make sure they are tight.SuperEvac ™ Digital Vacuum GaugesThe SuperEvac ™ LCD Vacuum Gauge is a portable, lightweight, solid state instrument that indicates the vacuum pressure in the system using thermocouple technology. This is important because you need to know the vacuum to confirm moisture removal. The battery powered gauge measures atmospheric pressures of 760,000 to 1 micron in easy to read 1/2” high numbers (Part #69075).Diagnostics ChartThe YELLOW JACKET ® Omni ™ Digital Vacuum Gauge is an easy-to-use, compact vacuum gauge that is loaded with features for the price. Easily set target vacuum level and the OMNI and will give audio and visual signals when that level is reached. The easy-to-clean vacuum sensor handles 450 psi positive pressure and reads several units of vacuum (microns, millibar, Torr, and Pascal) (Part #69020).Diagnostics Chart continuedReplacement Parts9354x9356x9358x9359x28.3 lbs. (12.8 kg)29.0 lbs. (13.1 kg)30.3 lbs. (13.7 kg)31.5 lbs. (14.3 kg)11WARRANTY INFORMATIONRitchie Engineering guarantees YELLOW JACKET® products to be free of defective material and workmanship which could affect the life of the product when used for the purpose for which it was designed. This warranty does not cover items that have been altered, abused (including failure to use the correct type of vacuum pump oil) or returned solely in need of field service maintenance.If found defective, we will either replace or repair at our option products within warranty period. Returns must be prepaid. Warranty does not cover use of lithium bromide, ammonia or leak stop type products.See to register your product or contact Customer Service for full warranty details.How to Obtain ServiceMost returned pumps are merely in need of normal field service maintenance, such as changing oil or making minor adjustments. In many instances, the troubleshoot-ing information in this manual can save you the time and effort of returning your pump. When the information contained in this manual, however, does not solve the problem, please call for service.Contact the Ritchie Engineering Customer Service Department:Phone: (952) 943-1333 or(800) 769-8370Fax: (952) 943-1605 or(800) 322-8684E-mail:************************* You will receive personal help to determine if the problem can be solved without sending your pump to the factory and taking it out of service.Ritchie Engineering Company, Inc. YELLOW JACKET® Products Division 10950 Hampshire Avenue South Bloomington, MN 55438-2623 USAE-mail:************************* Website: Phone: (800) 769-8370(952) 943-1333 INT’LFax: (800) 322-8684(952) 943-1605 INT’L©2019 Ritchie Engineering Company, Inc. Printed in the USA PART #142993_L (5/19)12。
自动变速箱型号速查表
Model(车型)Years(年款) 3.2CL01-033.2TL003.2TL01-033.5RL96-04CSX06-12EL00-02EL03-06ILX13-14ILX13-14 INTEGRA00-01 LEGEND90MDX01-02MDX03-04MDX05-06MDX07-09MDX10-14MDX10-13MDX14NSX91-05RDX07-13RDX10-13RDX13-14RL00-04RL05-13RLX14RLX13-14RLX14RSX02-06TL04-08TL14TL14TL TYPES07-08TL TYPES09-14TSX04-08TSX09-14TSX10-13TSX13TSX13ZDX09-13 15600-05 15906-10 15910-11 自动变速箱型号速查表AUCRA(讴歌/阿库拉)ALFA ROMEO(阿尔法·罗密欧)16603-07 16600-06 BRERA05-10 BRERA10-11 DALLARA13-14 GUILIA10-11 GUILIA/GIULIETTA10-14 MILANO(米兰)10-11 MITO09-14 SPIDER(蜘蛛)06-10 SPIDER(蜘蛛)11 ASTON MARTIN(阿斯顿·马丁)CYANET11-14 DB711 DB700-04 DB904-14 DBS08-12 RAPIDE10-14 VIRAGE11-12 AUDI(奥迪)A110-14 A300-06 A300-03 A303-14 A308-14 A314A314A314A4/A4 CABRIOLET(敞篷)00-01 A400-01 A4/A4 CABRIOLET(敞篷)96-07 A4/A4 CABRIOLET(敞篷)00-13 A4/A4 CABRIOLET(敞篷)12-13 A4/A4 CABRIOLET(敞篷)04-11 A407-13 A4/A4 CABRIOLET(敞篷)09-14 A411-14 A414A414A5/A5 CABRIOLET/A5 SPORTBACK(掀背轿跑车)06-13 A5 07-12 A513-14 A5/A5 CABRIOLET/A5 SPORTBACK(掀背轿跑车)08-14 A5/A5 CABRIOLET/A5 SPORTBACK(掀背轿跑车)11-14 A697-05 A600-05 A604-12A604-11 A608-11 A600-13 A613-14 A611-14 A611-14 A614A611-14 A614A710-13 A710-14 A714A710-14 A713-14 A897-03 A800-03 A802-10 A803-10 A813A809-11 A812-14 A814A803-10 ALLROAD02-05 Q313-14 Q312-14 Q508-14 Q511-14 Q509-12 Q705-09 Q710-11 Q705-13 Q708-13 Q709-14 Q714R811R812-14 S400-02 S4/RS404-09 S508-09 S6/RS603-06 S6 07-08 S807-08 TT03-06 TT03-14 TT12-14 TT12-14BAOJUN(宝骏)63012-14 63012 63013-14 B-SUV14 BMW(宝马)1 SERIES04-07 1 SERIES06-13 1 SERIES07-13 1 SERIES10-13 1 SERIES12-14 1 SERIES131 SERIES GT(大型旅行车)142 SERIES13-142 SERIES143 SERIES00-05 3 SERIES003 SERIES00-07 3 SERIES01-07 3 SERIES03-14 3 SERIES05-11 3 SERIES06-13 3 SERIES06-13 3 SERIES06-13 3 SERIES08-14 3 SERIES12-14 3 SERIES12-143 SERIES12-144 SERIES13-14 4 SERIES144 SERIES13-144 SERIES145 SERIES91-03 5 SERIES96-04 5 SERIES00-11 5 SERIES00-04 5 SERIES02-03 5 SERIES00-11 5 SERIES03-10 5 SERIES04-10 5 SERIES06-10 5 SERIES06-10 5 SERIES09-14 5 SERIES145 SERIES10-14 5 SERIES11-14 5 SERIES13-146 SERIES03-08 6 SERIES04-07 6 SERIES07-11 6 SERIES07-13 6 SERIES07-12 6 SERIES13-14 6 SERIES11-146 SERIES12-147 SERIES88-94 7 SERIES00-01 7 SERIES007 SERIES01-02 7 SERIES08-12 7 SERIES02-09 7 SERIES01-08 7 SERIES09-12 7 SERIES13-14 7 SERIES09-14 7 SERIES09-14 I814X111-14 X110-14 X112-14 X112-14 X304-07 X306-07 X308-11 X306-12 X306-11 X307-11 X310-11 X314X311-14 X311-14 X414X414X500-06 X500-03 X503-10 X506-09 X508-11 X509-13 X510-11 X513-14 X510-14 X514X607-10X609-14 X612-14 X614X610-14 BYD(比亚迪)F3/F3R07-14 F3/F3R09-13 F612-13 F6/G6/S6/T6/Y608-14 G3/L310-12 G3/L3/S313-14 G3/L3/M3/S3/S6/S809-14 G6/L3/M3/M6/S6/S8/T6/Y609-12 G612-14 G613-14 S612-14 S613-14 S714S714I311-12 I611-12 I611-12 QIN14 SIRUI(思锐)13-14 SIRUI(思锐)13-14 SIRUI(思锐)12-14 BEIJING(北京)C3011C5014C6014C6014C7012C7013-14 C7014 LUBA(路霸)05-13 E SERIES12-14 BENTLEY(宾利)ARNAGE(雅致)06-06 ARNAGE(雅致)07-09 AZURE(雅俊)06-10 AZURE 13-14 BROOKLANDS(布鲁克兰)08-09 E-SUV14 FLYING SPUR(飞刺)05-12 FLYING SPUR(飞刺)10-14 GT/GTC03-14 GT/GTC10-14MULSANNE(慕尚)10-14 BUGATTI(布加迪)VEYRON(威龙)05-14 BUICK(别克)ALPHEON(阿尔菲翁)君越10-14 AHTHEM14 CENTURY00-04 ENCLAVE(昂科雷)07-14 ENCORE(昂科拉)12-14 EXCELLE/EXCELLE HRV(凯越)03-12 EXCELLE (凯越)03-09 EXCELLE GT/XT(凯越)10-14 EXCELLE GT/XT(凯越)10-14 GL800-10 GL811-14 GL812-14 GL811-12 LACROSSE/ALLURE04-09 LACROSSE (君越)08-14 LACROSSE(君越)12-14 LACROSSE(君越)09-14 LESABRE(名使)98-05 LUCERNE05-11 LUCERNE05-11 PARK AVENUE/ULTRA(林荫大道)97-04 PARK AVENUE (林荫大道)07-09 PARK AVENUE (林荫大道)10-13 RAINIER03-07 REGAL(君威)03-11 REGAL(君威)97-04 REGAL(君威)08-14 REGAL(君威)12 REGAL(君威)12-14 RENDEZVOUS APV01-06 ROYAUM(荣御)05-06 SAIL(赛欧)03-05 TERRAZA05-07 VERANO12-14 VERANO12-14 CADILLAC(凯迪拉克)ATS12-14 ATS14 ATS14 BLS06-08 BLS06-09 CTS01-07 CTS07-14CTS07-09 CTS08-14 CTS13-14 CATERA98-01 DTC05-11 DEVILLE/SEVILLE/CONCOURS96-05 ELDORADO95-02 ELR14 ESCALADE/ESV/EXT99-06 ESCALADE/ESV/EXT05-14 ESCALADE HYBIRD07-13 LIVERY/HEARSE/LIMD97-01 SRX03-10 SRX04-09 SRX06-09 SRX09-11 SRX09-14 STS04-09 STS06-13 STS05-11 XLR03-06 XLR06-09 XLR/XLR-V05-09 XTS12-14 CHANG'AN(长安)B30110-11 BENBEN(奔奔)06-12 BENBEN(奔奔)14 CD10112 CS35/CX3012-14 CX3013-14 CS35/CX3014 CS612-13 CX2010-12 CX20/3011-14 CX3013-14 C-SUV14C-SUV14C-SUV14 EADO12-14 EADO13-14 EADO13-14 HEIJINGAN(黑金刚)13 JOICE07-12 MINI TRUCK12-13 RANTON13-14 RANTON13-14V80510-12 YUEXIANG(悦翔)10-14 Z-SHINE08-12 CHERY(奇瑞)A211-14 A309-11 A310-14 A506-10 A611-14 A613-14 APOLA10-14 CHANCE13 COWIN2 (旗云2)03-08 COWIN3 (旗云3)12-14 COWIN5 (旗云5)13-14 COWIN6 (旗云6)11-12 COWIN6 (旗云6)11-12 CROSS EASTER/EASTER06-14 DONGFANGZIHIZI(东方之子)13-14 DONGFANGZIHIZI(东方之子)12-13 DONGFANGZIHIZI(东方之子)12-13 EASTAR A609-10 E512-14 M1410-11 M1410-11 M1611-14 M1614M1613 NICHE13 TIGGO/TIGGO3(瑞虎)12-14 TIGGO/TIGGO3(瑞虎)05-13 TIGGO5 (瑞虎)13-14 TIGGO5 (瑞虎)14 TIGGO 5/TIGGO 6 (瑞虎)13-14 CHEVROLET/GMC/AM/GENERAL(雪佛兰)ACADIA(阿卡迪亚)07-14 ASTRO(星旅)95-05 AVEO(乐驰)04-14 AVEO(乐驰)06-14 AVEO(乐驰)06-14 AVEO(乐驰)09-14 BLAZER(开拓者)95-05 C/K PICK-UP 1500-250095-00 C/K PICK-UP 2500-350001-03 CAMARO(科迈罗)95-02 CAMARO(科迈罗)09-14 CAMARO(科迈罗)12-14CAMARO SS (科迈罗)09-14 CANYON03-13 CANYON14 CAPRICE SEDAN/WAGON95-96 CAPTIVA/SPORT(科帕奇运动版)08-10 CAPTIVA (科帕奇)06-14 CAPTIVA/SPORT(科帕奇运动版)07-14 CAPTIVA/SPORT(科帕奇运动版)08-13 CASSIA00-02 CAVALIER(骑士)95-01 CAVALIER(骑士)95-05 CAPRICE 12-13 CAPRICE12-14 CITY EXPRESS14 COBALT05-10 COBALT12-14 COLORADO(科罗拉多)03-12 COLORADO(科罗拉多)04-11 COLORADO(科罗拉多)12-14 COLORADO(科罗拉多)13-14 CLRVETTE(克尔维特)95-05 CLRVETTE(克尔维特)05-14 CRUZE(科鲁兹)01-14 CRUZE(科鲁兹)01-08 CRUZE(科鲁兹)09-14 CRUZE(科鲁兹)09-14 CRUZE(科鲁兹)13-14 ENVOY99-09 EPICA(景程)05-12 EPICA(景程)06-08 EPICA(景程)07-08 EPICA(景程)09-14 EQUINOX07-14 EQUINOX09-14 EVANDA05-07 EVANDA05-07 EXPRESS/SAVANA12-13 EXPRESS/SAVANA12-14 EXPRESS/SAVANA12-14 GRAND VITARA05-14 GRAND VITARA06-07 GRAND VITARA08-12 H1 UMMER(悍马H1)93-05 H1 UMMER(悍马H1)06-07 H2/H2 SUT HUMMER(悍马)02-07 H2/H2 SUT HUMMER(悍马)06-10 H3/H3T/HT HUMMER(悍马)06-11H3/H3T/HT HUMMER(悍马)08-11 IMPALA (英帕拉)13-14 IMPALA (英帕拉)00-10 IMPALA (英帕拉)95-96 IMPALA (英帕拉)11-14 LACETTI06-08 LANOS(蓝龙)05-09 LOVA(乐风)06-11 LOVA(乐风)09-12 MALIBU(迈锐宝)97 MALIBU(迈锐宝)07-12 MALIBU(迈锐宝)08-14 MALIBU(迈锐宝)13-14 MALIBU/MALIBU HYBIRD(迈锐宝)97-10 MONZA00-03 N-SERIES13-14 ONIX13-14 OPTRA03-07 OPTRA03-11 OPTRA03-12 OPTRA10-11 ORLANDO10-11 ORLANDO10-14 ORLANDO12-14 S-1013-14 S/T PICK UP/ SONOMA95-05 SAFARI(塔塔)95-05 SAIL (新赛欧)05-07 SIERRA DENALI08 SIVERADO SIERRA 150098-13 SIVERADO/XFE/ SIERRA 1500/SIERRA DENALI08-14 SIVERADO SIERRA 2500/2500HD/350001-07 SIVERADO SIERRA 2500HD/350000-14 SIVERADO SIERRA 2500/2500HD/350007-14 SILVERADO14 SIVERADO HYBRID/SIERRA HYBRID09-13 SONIC12-14 SPARK(斯帕可)03-13 SPARK(斯帕可)13-14 SPIN12-14 SSR03-06 SUBURBAN 150095-08 SUBURBAN 150095-08 SUBURBAN 150009-14 SUBURBAN 250096-07 SUBURBAN 250006-13 TAHOE95-03TAHOE95-13 TAHOE06-14 TAHOE HYBRID07-13 TAVERA02-05 TERRAIN09-14 TERRAIN09-14 VECTRA/VECTRA GT00-11 VIVA11 CHRYSLER(克莱斯勒)20012-14 20012-14 20012-14 20014 300M99-04 300 SERIES04-10 300 SERIES04-13 300 SERIES11-14 300 SERIES13-14 ASPEN07-09 ASPEN HYBRID09 CIRRUS95-00 CONCORDE95-04 CROSSFIRE(交叉火力)04-08 PACIFICA04-07 PACIFICA07-08 PROWLER(猎兽)01-02 PT CRUISER(漫步者)00 PT CRUISER(漫步者)01-09 SEBRING01-05 SEBRING00-10 SEBRING/SEBRING CONVERTIBLE06-12 SEBRING/SEBRING CONVERTIBLE07-10 SEBRING95-10 TOWN & COUNTRY07-14 TOWN & COUNTRY13-14 TOWN & COUNTRY01 CITROEN(雪铁龙)B-CUV14C207-13 C3/C3/PICASSO02-14 C3/C3/PICASSO09-13 C4/C4/PICASSO04-14 C4/C4/PICASSO10-14 C4/C4/PICASSO06-14 C4/C4/PICASSO13-14 C4 PICASSO13-14 C4L13-14C4L13-14 C4 AIRCROSS13-14 C5 00-05 C500-11 C504-14 C512-14 C602-12 C8 02-05 C8 02-11 C8 05-10 C-CRPSSER10-12 C-CROSS09-12 C-ELYSEE(爱丽舍)13-14 C-TRIOMPHE(凯旋)06-13 DS310-13 DS411 DS411 DS412-14 DS512-14 DS512-14 ELYSEE(爱丽舍)03-14 EVASION(遨游)00-01 FUKANG(富康)05-08 JUMPER00-06 PALLAS07-13 PALLAS13-14 RVR12 RVR12 RVR12 XSARA/XSARA PICASSO(塞纳、毕加索)00-01 DAEWOO(大宇)CENTRA05-13 CENTRA08-14 CENTRA08-14 KALOS(卡罗斯)02-08 LACETTI02-10 LACETTI02-11 LACETTI07-13 LACETTI08-11 LACETTI10-11 LANOS(蓝龙)00-06 LANOS(蓝龙)00-03 LEGANZA(典雅)00-03 MAGNUS00-03 MATIZ(马蒂兹)00-06 MATIZ(马蒂兹)05-13 MPV711NEXIA(尼克斯)00-03 NUBIRA(旅行家)00-03 NUBIRA-2(旅行家)00-04 REZZO(雷佐)00-08 TICO00-01 TOSCA06-09 TOSCA06-09 TOSCA07-12 DAIHATSU(大发)APPLAUSE00 ATRAI00-05 ATRAI00-14 ATRAI 700-05 AYLA12-14 AYLA13-14 BEGO05-14 BOON/BOON LUMINAS04-12 BOON/BOON LUMINAS10-14 BOON/BOON LUMINAS10-11 COO06-13 COPEN02-12 COPEN14 DELTA00-09 DELTA00-09 ESSE05-11 ESSE05-11 GRAN MAX07-14 HIJET/HIJET CARGO/HIJET TRUCK00-14 HIJET CARGO05-14 LUXIO09-14 MAX02-06 MAX02-06 MIDGETII00-01 MIRA00-12 MIRA/MIRA GINO01-08 MIRA/MIRA GINO01-12 MIRA01-05 MIRA/MIRA COCOA/MIRA ES06-14 MOVE00-03 MOVE/MOVE LATTE01-11 MOVE/MOVE CONTE/MOVE LATTE01-11 MOVE/MOVE CONTE/MOVE LATTE00-06 MOVE/MOVE CONTE 06-14 NAKED00-04 NAKED00-04 OPTI00-03 SONICA06-11STORIA00-05 STORIA00-05 TANTO03-07 TANTO03-11 TANTO/EXE07-14 TERIOS00 TERIOS00-14 TERIOS KID00-12 XENIA06-09 XENIA12-14 YRV01-06 DODGE(道奇)AVENGER(锋哲)08-14 AVENGER(锋哲)12-14 AVENGER(锋哲)08-14 BARRACUDA14 CALIBER(酷博)06-12 CARAVAN/GRAND CARAVAN(捷龙)95-11 CARAVAN/GRAND CARAVAN(捷龙)07-14 CARAVAN 14 CHALLENGER08-11 CHALLENGER08-14 CHARGER05-10 CHARGER05-13 CHARGE 12-14 CHARGE13-14 DART12-14 DART12-14 DURANGO(拓远者)00-01 DURANGO(拓远者)00-02 DURANGO(拓远者)04-08 DURANGO(拓远者)02-12 DURANGO(拓远者)10-12 DURANGO(拓远者)12-14 DURANGO(拓远者)12-14 DURANGO(拓远者)13-14 DURANGO HYBRID(拓远者)09 INTREPID(无畏)95-04 JOURNEY08-10 JOURNEY09-14 JOURNEY09-14 MAGNUM04-08 MAGNUM04-08 MONACO90-92 NEON(霓虹)01-06 NITRO07-11 NITRO07-11PICKUP/D50(达科塔)90-94 PICKUP/DAKOTA(达科塔)00-02 PICKUP/DAKOTA(达科塔)03-11 PICKUP/DAKOTA(达科塔)01-11 PICKUP/RAM(公羊皮卡/道奇)00-02 PICKUP/RAM 1500(公羊皮卡/道奇)95-02 PICKUP/RAM 1500(公羊皮卡/道奇)12-14 PICKUP/RAM 1500(公羊皮卡/道奇)13-14 PICKPU/RAM 1500(公羊皮卡/道奇)13-14 PICKUP/RAM 1500-3500(公羊皮卡/道奇)95-02 PICKUP/RAM 1500(公羊皮卡/道奇)02-05 PICKUP/RAM 1500(公羊皮卡/道奇)06-12 PICKPU/RAM 1500-3500(公羊皮卡/道奇)02-12 PICKUP/RAM 2500-3500(公羊皮卡/道奇)95-02 PICKUP/RAM 2500-3500(公羊皮卡/道奇)03-07 PICKUP/RAM 2500-3500(公羊皮卡/道奇)06-14 PICKPU/RAM 2500-3500(公羊皮卡/道奇)12-14 PICKUP/RAM 2500 3500 CAB AND CHASSIS07-14 RAM CARGO VAN/PRO MASTER11-14 SPRINTER03-10 SPRINTER07-10 STRATUS01-05 STRATUS01-05 DONGFENG(东风)A6012-14 A6012-13 A6013-14 A-HATCH14B2013-14 BFX11B-SEDAN13-14 C-SEDAN13C-SEDAN13C-SEDAN14C-SUV05-13 FUTURER(风行)10-14 H3011 JOYEAR(景逸)10-14 JOYEAR(景逸)08-14 OTING12-14 RUIOI11S30/S30 WAGON10-14 YUMSUN(御轩)08-14 YUMSUN(御轩)14 EMGRAND(吉利帝豪)EC7/EC7-RV10-14 EC7/EC7-RV12-14EC7-RV10-11 EC812-14 EC812 EC813 EV7/EX8/EV813-14 ENGLON(上海英伦)JINYING(金鹰)12-13 SC312-13 SC6-RV13-14 SC712-14 SV514 SX513-14 SX513-14 SX614 SX713-14 FAW(一汽奔腾)A114 BESRURN B30(奔腾B30)10-11 BESRURN B50(奔腾B50)09-14 BESRURN B50(奔腾B50)13-14 BESRURN B70(奔腾B70)07-12 BESRURN B70/B90 (奔腾B70/90)12-14 BESRURN B70/B90/SUV(奔腾B70/90/SUV)13-14 BESRURN MPV(奔腾MPV)14 BESRURN MPV(奔腾MPV)14 BESRURN MPV(奔腾MPV)14 BESRURN X80(奔腾X80)13-14 C-CUV14 OLEY(欧朗)12-14 OLEY(欧朗)12-14 OLEY(欧朗)13 VELA(威乐)04-11 VIZI(威姿)03-08 VIZI(威姿)03-09 XENIA(森雅)10-13 XIALI N5/N7(夏利N5/N7)13-14 FERRARI(法拉利)CALIFORNIA09-14 F1212-14 F45600-03 F45810-14 F1599 GTB09-11 F61210-11 FF/LaFERRARI(ENZO)12-14 FIAT(亚菲特)500 /500 CABRIO11-14 500L12-14500L12-13 500X14 500X14 ALBEA03-10 BRAVA00-02 BRAVO00-01 CROMA05-10 CROMA05-11 D-CUV11D-CUV11 DOBLO14 DUCATO01-07 FIORINO11 FIORINO13-14 FREMONT12-14 MAREA00-07 PALIO(派力奥)04-07 PALIO(派力奥)00-11 PANDA(熊猫)12 PUNTO00-10 SIENA04-08 SIENA02-06 STILO04-08 ULYSEE00-06 ULYSEE02-06 ULYSEE08-11 UNO00-04 VIAGGIO12-14 FORD(福特)B-MAX12-14 B-SEDAN14B-SEDAN14C-COUPE11C-COUPE11C-MAX10-14 C-MAX12-14 C-MAX14 CONTOUR95-00 CROWN VICTORIA95-11 ECOSPORT(翼博)07-12 ECOSPORT(翼博)12-14 EDGE(锐界)07-14 EDGE(锐界)11-14 EDGE(锐界)14 ENDEAVOUR12-14 ESCAPE(翼虎)01-08 ESCAPE(翼虎)12ESCAPE(翼虎)08-14 ESCAPE HYBRID04-06 ESCAPE HYBRID07-12 ESCAPE HYBRID11 ESCORT14 EVEREST04-14 EVEREST04-10 EVEREST11-14 EVEREST11 EXCURSION00-05 EXCURSION03-05 EXCURSION98-02 EXCURSION97-06 EXCURSION07-08 EXCURSION09-14 EXPLORER(探险者)02-03 EXPLORER(探险者)10-14 EXPLORER(探险者)10-14 EXPLORER/SPORT TRAC(探险者)97-08 EXPLORER/SPORT TRAC(探险者)00-10 EXPLORER/SPORT TRAC(探险者)05-10 F-150/F-25095-10 F-15008-09 F-15008-14 F-15012-14 F-250/F35095-96 F-250 SUPERDUTY/F-350 SUPERDUTY03-10 F-250 SUPERDUTY/F-350 SUPERDUTY10-14 F-450/550 SUPERDUTY03-08 FALCON00-02 FALCON00-02 FALCON02-10 FALCON02-10 FALCON04-14 FALCON08-10 FESTIVA00 FIESTA00-14 FIESTA08-13 FIESTA10-14 FIVE HUNDRED05-07 FIVE HUNDRED05-07 FLEX08-14 FOCUS(福克斯)08-14 FOCUS(福克斯)14 FOCUS(福克斯)13-14 FOCUS(福克斯)14 FOCUS/C-MAX(福克斯)00-14FOCUS/C-MAX(福克斯)10-14 FOCUS/C-MAX(福克斯)04-08 FREESTAR04-07 FREESTYLE05-07 FUSION06-12 FUSION06-08 FUSION06-09 FUSION09-14 FUSION09-12 FUSION10-11 FUSION09-12 FUSION12-14 GALAXY00-06 GALAXY00-06 GALAXY07-14 GALAXY10-14 I-MAX07-10 IXION04-05 KUGA09-12 KUGA(翼虎)10-14 KUGA(翼虎)12-14 LASER00-05 LASER00-06 LYNX00-05 MONDEO(蒙迪欧)00-01 MONDEO(蒙迪欧)00-07 MONDEO(蒙迪欧)03-07 MONDEO(蒙迪欧)07-14 MONDEO(蒙迪欧)10-14 MONDEO(蒙迪欧)13-14 MONDEO(蒙迪欧)13-14 MONDEO(蒙迪欧)14 MUSRANG(野马)96-04 MUSRANG(野马)05-10 MUSRANG(野马)10-14 PRONTO00-07 RANGER00-06 RANGER00-07 RANGER00-09 RANGER01-11 RANGER10-14 S-MAX07-14 S-MAX10-14 TAURUS95-02 TAURUS/TAURUS SHO95-04 TAURUS01-07 TAURUS04-07TAURUS13-14 TAURUS/TAURUS X07-14 TAURUS/TAURUS X04-07 TELSTAR00 TERRITORY SY04-05 TERRITORY SY05-11 TERRITORY SY05-14 THUNDERBRID95-97 THUNDERBRID02 THUNDERBRID03-05 TIERRA00-07 TRANSIT00 TRANSIT14 TRANSIT CONNECT13-14 TRANSIT CONNECT09-13 TRANSIT CONNECT14 WINDSTAR01-03 FORON(福田)D-SUV14 GEELY(吉利)BL(BEAUTY LEOP-ARD)07-08 CK(FREE CRUISER)07-12 CK(FREE CRUISER)07-12 CK(FREE CRUISER)07-09 DRAGON10-12 JINGYING(金鹰)08-11 JINGYING(金鹰)09-11 KING KONG(金刚)08-11 VISION(远景)07-12 FREE CRUISER(自由舰)12-13 GC513-14 GC712-14 GP514 GV514 GX213-14 GX712-14 PANDA(熊猫)12-14 GREAT WALL(长城)C-MPV13 HOVER H5/H712-13 HOVER H513-14 HOVER H612-13 M212-14 VOLEEX C10/C3012-14 VOLEEX C50/C7012-14 VOLEEX C7013-14 COLEEX V8012-14COLEEX V8013-14 HOVER H2(哈佛 H2 )13-14 HOVER H5(哈佛 H5)14 HOVER H5(哈佛 H5)14 HOVER H6(哈佛 H6)13-14 HOVER H8(哈佛 H8)13-14 GUANGZHOU AUTO(广州汽车)C SEDAN13-14 C SEDAN13-14 CHUANQI(传祺)12-14 CHUANQI(传祺)13-14 GS512-14 GS513-14 HAIMA(海马)313-14 313-14 FAMMILY(福美来)12-14 M813-14 M813-14 PREMACY(普力马)12-14 QISHI(骑士)12-14 QISHI(骑士)14 HAWTAI(华泰)BOLIGER(宝利格)12-14 C-CUV13-14 E7013-14 SANTA FE C9(圣达菲 C9)12-14 TERRACAN TA(格拉卡 T9)12-14 HINO(丰田日野)DUTRO13-14 DUTRO13-14 DUTRO13-14 HONDA(本田)A-BOX13 ACCORD (雅阁)13 ACCORD (雅阁)12-13 ACCORD (雅阁)00-07 ACCORD (雅阁)03-07 ACCORD (雅阁)03-07 ACCORD (雅阁)03-07 ACCORD (雅阁)08-12 ACCORD (雅阁)08-12 ACCORD (雅阁)08-12 ACCORD (雅阁)10 ACCORD HYBRID (雅阁混合动力车)05-07 ACTY TRUCK00-12 AIRWAVE(气浪)05-11AVANCIER00-03 AVANCIER00-03 B-CUV13 BRIO11-12 BRIO/BRIO AMAZE13 BRIO/BRIO AMAZE12-13 C-HATCH13C-NPV13C-SEDAN13 CAPA00-02 CAPA00-02 CITY(思迪)07-10 CITY(思迪)06-12 CITY(思迪)08-12 CITY(思迪)00-12 CITY(思迪)10-12 CIVIC(EXC.HX)(思域)01-05 CIVIC(HX/GX)(思域)01 CIVIC(HX/GX)(思域)02-05 CIVIC (思域)12-13 CIVIC (思域)13-14 CIVIC HYBRID(思域混合动力车)03-05 CIVIC HYBRID(思域混合动力车)06-07 CIVIC HYBRID(思域混合动力车)06-10 CIVIC/DX/EX/LX/GX(思域)06-10 CIVIC(思域)13 CIVIC(思域)14 CR-V97-04 CR-V98-04 CR-V05-06 CR-V05-06 CR-V07-10 CR-V07-10 CR-V08-10 CR-V08-10 CR-V12-13 CR-Z11-13 CROSSRODA(歌诗图)07-11 CROSSRODA(歌诗图)10-11 CROSSRODA(歌诗图)10-11 DEL SOL93-97 EDIX04-06 HONDA (本田)EDIX04-09 ELEMENT(元素)03-06 ELEMENT(元素)03-06 ELEMENT(元素)07-11ELEMENT(元素)08-11 ELEMENT(元素)07-11 ELEMENT(元素)08-11 ELEMENT(元素)12-13 ELEMENT(元素)06-12 FIT(飞度)07-08 FIT(飞度)09-10 FIT/FIT ARIA(飞度)02-12 FIT(飞度)03-08 FIT(飞度)09-12 FREED(新飞度多功能车)08-12 FREED(新飞度多功能车)08-12 HR-V00-05 JAZZ(飞度爵士)08-12 JAZZ(飞度爵士)03-08 JAZZ(飞度爵士)05-08 LIFE00-03 LIFE04-12 MOBILIO01-08 ODYSSEY(奥德赛)95-98 ODYSSEY(奥德赛)99-01 ODYSSEY(奥德赛)02-04 ODYSSEY(奥德赛)05-06 ODYSSEY(奥德赛)07-12 PASSPORT94-02 PILOT03-07 PILOT03-07 PILOT08 PILOT09-12 PRELUDE90-91 PRELUDE92-01 RIDGELINE06-04 RIDGELINE09-12 S-MX00-02 S-MX00-02 SPIRIOR(思铂睿)09-11 STREAM(时韵)00-12 STREAM(时韵)02-06 STREAM(时韵)02-12 THAT'S02-05 VAMOS00-07 VAMOS00-12 ZEST06-12 HONGQI(红旗)C13012H712-14 HQ307-12HQE10-11 L713L713-14 MINGSHI(明仕)06-18 TOWN CAR02-08 HYUNDAI(现代)1T PORTER00-03 ACCENT(雅绅特)00-14 ACCENT(雅绅特)00-14 ACCENT(雅绅特)12-14 ACCENT(雅绅特)14-14 ACCENT(雅绅特)14 ATOZ00-03 ATOZ01-12 AVANTE(朗动)00 AVANTE(朗动)05-10 AVANTE HD/MD(朗动)06-12 AVANTE HD/MD(朗动)09-14 AVANTE HD/MD(朗动)09-14 AVANTE MD (朗动)10-14 AVANTE XD (朗动)00-06 AVANTE XD (朗动)00-06 AVEGA07-10 AVEGA11-14 AZERA(雅尊)06-10 AZERA(雅尊)11 AZERA(雅尊)11B-SUV14B-SUV14 CLICK02-10 DYNASTY(王朝)00-05 ELANTRA(伊兰特)97-00 ELANTRA(伊兰特)01-14 ELANTRA(伊兰特)02-12 ELANTRA(伊兰特)03-07 ELANTRA(伊兰特)07-14 ELANTRA(伊兰特)12-14 ELANTRA(伊兰特)12 ELANTRA(伊兰特)12-14 ENTOURAGE07-10 EQUUS(雅科仕)00-08 EQUUS(雅科仕)00-08 EQUUS(雅科仕)06-08 EQUUS(雅科仕)09-10 EQUUS(雅科仕)09-11 EQUUS(雅科仕)11-14 EQUUS(雅科仕)11-14GALLOPER00-03 GALLOPER00-03 GENESIS09-11 GENESIS09-11 GENESIS09-11 GENESIS12-14 GENESIS12-14 GENESIS COUPE08-12 GENESIS COUPE08-11 GENESIS COUPE12-14 GRACE00-04 GRACE02-03 H102-07 H102-07 H102-14 H112-14 HB12-14 I1007-14 I1013-14 I1012-14 I2008-14 I2014I3007-14 I3011-14 I3011-14 I3014I3014I3013-14 I4012-14 I4014IX2012-14 IX3510-11 IX3510-14 IX3511-14 LAVITA01-07 LAVITA01-07 LIBERO00-07 MATRIX03-11 MAXCRUZ13-14 MISTRA(名图)14 MISTRA(名图)14 MOINCA(名驭)09-13 MOINCA(名驭)09-14 RORTER03-11 PORTER12-14 SANTA FE(圣达菲)01-06 SANTA FE(圣达菲)01-12SANTA FE(圣达菲)06-12 SANTA FE(圣达菲)00-06 SANTA FE(圣达菲)07-10 SANTA FE(圣达菲)12-13 SANTA FE(圣达菲)12-13 SANTA FE(圣达菲)13-14 SANTA FE(圣达菲)09-14 SANTA FE(圣达菲)09-14 SANTAMO00-02 SANTRO00-07 SOLARIS11-14 SONATA(索纳塔)99-11 SONATA(索纳塔)00-14 SONATA(索纳塔)01-05 SONATA(索纳塔)05-11 SONATA(索纳塔)06-09 SONATA(索纳塔)09-11 SONATA(索纳塔)09-14 SONATA(索纳塔)09-14 SONATA(索纳塔)01-14 SONATA(索纳塔)14 STAREX00-07 STAREX00-07 STAREX00-14 STAREX07-14 TERRACAN (特拉卡)01-06 TERRACAN(特拉卡)01-11 TIBURON03-08 TRAJER/XG(特杰)00-07 TRAGER/TRAGET XG00-09 TUCSON(途胜)04-09 TUCSON/TUCSON IX(途胜)01-14 TUCSON IX(途胜)09-14 TUCSON IX(途胜)09-14 VELOSTER (飞思)12-14 VELOSTER (飞思)12-14 VELOSTER (飞思)12-14 VELOSTER (飞思)14 VERACRUZ(维拉克斯)06-14 VERACRUZ(维拉克斯)11-14 VERNA(瑞纳)00-11 VERNA(瑞纳)05-14 VERNA(瑞纳)10-11 XG(君爵)01-05 XG(君爵)01-05 INFINITE(英菲尼迪)E-SEDAN12-14EX10-11 EX3011-11 EX3507-11 EX3511 FX/QX5012-14 FX/QX7009-14 FX3503-08 FX3509-12 FX4503-08 FX50/FX5609-12 G/Q6010-14 G2000-02 G2091-93 G2510-12 G3503-11 G3707-08 G3709-12 I3000-01 I3500-04 I3503-04 JX/QX6012-14 M/Q7009-14 M/Q7014M3504-09 M3509M3709-12 M4502-09 M5610-12 Q4590-01 Q4500-07 Q5013-14 Q5013-14 QX/QX8010-14 QX497-03 QX5604-09 QX5609-12 ISUZU(铃木)ADVENTURE MASTER03-07 AXIOM02-04 BIG HORN00-03 CROSSWIND01-14 D-MAX02-13 D-MAX05-14 ELF12-14 FASTER00-03 FUEGO00-02 GEMINI00GEMINI00 GRAND ADVENTURE00-03 HI-LANDER08-11 1 SERIES(290,370)06-08 KB00-04 MU-704-14 MU-714 PANTHER00-08 PICKUP13-14 RODEO91-04 SPACE CAB00-03 SPACE CAB00-05 TROOPER00-04 TROOPER00-04 TRUCK NPR99-07 TRUCK NPR08-12 TRUCK NPR ,W487-98 TRUCK NPR ,W487-08 VEGA00-03 JAGUAR(捷豹)F TYPE13-14 S TYEP00-02 S TYEP01-03 S TYEP02-07 S TYEP03-05 VANDEN PLAS98-02 X TYPE02-10 X TYPE08-10 XF07-12 XF11-14 XJ03-10 XJ11-14 XJ SERIES02-09 XJ SERIES03-11 XJ SERIES10-12 XK08-11 XK12-14 XK SERIES03-08 XK SERIES08-11 XK800-02 JEEP(吉普)CHEROKEE(切诺基)00-03 CHEROKEE(切诺基)00-13 CHEROKEE(切诺基)02-13 CHEROKEE(切诺基)13-14 COMMANDER(指挥官)05-10 COMMANDER(指挥官)06-10COMPASS/PATRIOT(指南者)07-14 COMPASS/PATRIOT(指南者)13-14 GRAND CHEROKEE(大切诺基)91-93 GRAND CHEROKEE(大切诺基)94-04 GRAND CHEROKEE(大切诺基)02-05 GRAND CHEROKEE(大切诺基)01-13 GRAND CHEROKEE(大切诺基)05-13 GRAND CHEROKEE(大切诺基)13-14 GRAND CHEROKEE(大切诺基)11-14 LIBERTY(自由人)02 LIBERTY(自由人)03-12 LIBERTY(自由人)03-07 LIBERTY(自由人)08-12 WRANGLER(牧马人)95-02 WRANGLER(牧马人)95-02 WRANGLER(牧马人)10-14 WRANGLER(牧马人)12-14 WRANGLER/WRANGLER UNLIMITED12-14 WRANGLER/WRANGLER UNLIMITED02-12 WRANGLER/WRANGLER UNLIMITED08-11 JIANGHUA(JAC)江淮B-SUV11-11 ENJOY10-11 CMPV11 HECHANG(和畅)14 HEYUE(和悦)10-14 HEYUE S30(和悦)14 REFINE(瑞风)02-05 REFINE(瑞风)05-14 REFINE S5 (瑞风)14 REIN(瑞鹰)10-11 JINBEI(金杯)GRANVIA(格兰维亚)04-14 KIA/NAZA(起亚)206 BESTARI06-09 AMANTI04-05 AMANTI06-09 AVELLA(阿维拉)00-02 BONGO(本格)00-03 BONGO(本格)04-12 BONGO(本格)12-14 BORREGO(霸锐)09-10 BORREGO(霸锐)09-10 CARENS(佳乐)04-14 CARENS(佳乐)06-11 CARENS(佳乐)06-12 CARENS(佳乐)09-12CARENS(佳乐)11-14 CARENS(佳乐)13-14 CARNIVAL(嘉华)00-05 CARNIVAL(嘉华)00-08 CARNIVAL(嘉华)00-05 CASTAR00-02 CEE'D/PRO_CEE'D07-11 CEE'D/PRO_CEE'D12-14 CEE'D/PRO_CEE'D12-14 CEE'D/PRO_CEE'D12-14 CERATO(赛拉图)03-10 CERATO(赛拉图)03-14 CERATO(赛拉图)05-10 CERATO(赛拉图)12-14 CERATO(赛拉图)12-14 CITRA/CITRA205-12 CLARUS(克拉鲁斯)00-02 CREDOS-200 ENTERPRISE00-02 FORTE(福瑞迪)09-14 FORTE(福瑞迪)13-14 FORTE(福瑞迪)09-10 FORTE(福瑞迪)10-11 FORTE(福瑞迪)11-13 FORTE(福瑞迪)11-13 FORTE(福瑞迪)09-12 FORTE(福瑞迪)12-13 GRAND CARNIVAL06-08 GRAND CARNIVAL06-14 GRAND CARNIVAL04-10 CITRA 2 RONDO12-13 CITRA 2 RONDO14K313K3 13 RIA12-13 K312-14 K5 10-11 K5,K710-14 K512-14 K712-14 K911-14 LOTZE05-10 LOTZE05-10 LOTZE05-10 LOTZE10 LOTZE10 LOTZE10MOHAVE07-14 MOHAVE07-14 MOHAVE11-14 MORING04-10 MORING11-14 MORING12-14 OPIRUS(欧菲莱斯)03-05 OPIRUS(欧菲莱斯)05-09 OPIRUS(欧菲莱斯)06-09 OPIRUS(欧菲莱斯)09-11 OPIRUS(欧菲莱斯)09-11 OPTIMA(欧迪玛)00-10 OPTIMA(欧迪玛)06-10 OPTIMA(欧迪玛)10-14 OPTIMA(欧迪玛)12-14 OPTIMA(欧迪玛)13-14 OPTIMA(欧迪玛)00-04 PICANTO06-09 PICANTO09-14 POTENTIA00-01 PREGIO(贝斯塔)00-03 PREGIO(贝斯塔)00-03 PRIDE(普莱特)00 PRIDE(普莱特)05-14 PRIDE(普莱特)05-14 PRIDE(普莱特)12-13 PRIDE(普莱特)11-14 PRIDE(普莱特)11 PRIDE(普莱特)14 PRIDE(普莱特)14 QUORIS(起亚K9)13-14 QIANLIMA(千里马)02-10 QIANLIMA(千里马)11-12 RAY12-14 RAY12-14 RETTONA00-03 RIA03-12 RIO/RIO500-14 RIO/RIO501-05 RIO 12-14 RONDO07-10 RONDO07-10 SEDONA02-05 SEDONA06-11 SHUMA(速迈)00-01 SORENTO(索兰托)03-09 SORENTO(索兰托)02-12SORENTO(索兰托)10-12 SORENTO(索兰托)09-14 SORENTO(索兰托)09-14 SORENTO(索兰托)12-14 SOUL(秀尔)08-14 SOUL(秀尔)12-13 SOUL(秀尔)11-14 SOUL(秀尔)11-14 SPECTRA00-04 SPECTRA00-04 SPECTRA/SPECRA504-09 SPECTRA/SPECRA506-09 SPORTAGE(狮跑)00-01 SPORTAGE(狮跑)04-10 SPORTAGE(狮跑)04-14 SPORTAGE(狮跑)10-14 SPORTAGE(狮跑)10-14 SPORTAGE(狮跑)12-14 SURIA06-11 VENGA10-14 VISTO00-03 LAMBORGHINI(兰博基尼)AVENTADOR14 CALLARDO13-14 LAND ROVER(路虎)DEFENDER(卫士)00 DISCOVERY(发现者)94-04 DISCOVERY(LR3)(发现者3)04-11 DISCOVERY(LR3)(发现者3)09-14 DISCOVERY(LR3)(发现者3)10-11 DISCOVERY(LR3)(发现者3)10-14 FREELANDER(神行者)00-06 FREELANDER(LR2)(神行者2)06-14 FREELANDER(LR2)(神行者2)10-11 FREELANDER(LR2)(神行者2)14 RANGE ROVER(揽胜)87-01 RANGE ROVER(揽胜)00-01 RANGE ROVER(揽胜)01-05 RANGE ROVER(揽胜)01-05 RANGE ROVER(揽胜)14 RANGE ROVER/RANGE ROVER SPORT13-14 RANGE ROVER/RANGE ROVER SPORT06-10 RANGE ROVER/RANGE ROVER SPORT09-13 RANGE ROVER/RANGE ROVER SPORT11-14 RANGE ROVER EVOQUE(揽胜极光)11 RANGE ROVER EVOQUE(揽胜极光)11-13 RANGE ROVER EVOQUE(揽胜极光)13-14RANGE ROVER EVOQUE(揽胜极光)14 LANDWIND(陆风)B102 HB/B103 NB11-12 B102 HB/B103 NB11-12 E10111-12 FENGSHANG(风尚)06-10 X513-14 LEXUS(雷克萨斯)CT10-14 ES90-01 ES01-02 ES01-12 ES06-14 ES12-14 ES12-14 ES14 GS00 GS00-04 GS98-05 GS05-11 GS05-11 GS05-12 GS12-13 GS12-13 GS08-12 GS06-14 GS06-14 GS13-14 GS14 GS450h HYBRID07-08 GX 46009-14 GS 47003-09 HS09-14 IS00-05 IS00-05 IS05-12 IS05-14 IS07-11 IS07-14 IS13-14 LS00LS03-06 LS460/LS460 L07-14 LS600h L HYBRID07-14 LX96-02 LX00-02 LX03-07LX11LX08-11 LX12-14 RX00-03 RX03-08 RX03-08 RX08-14 RX10-14 RX12-14 RX09-14 RX330 HYBRID 400 HYBRID05-08 SC00 SC98-05 SC05-10 LIEBAO(猎豹)FEITENG IO(飞腾)04-07 LEIBAO(猎豹)04-08 LIFAN(力帆)32012-14 62012-14 LINCOLN(林肯)AVIATOR03-06 BLACKWOOD02LS00-02 LS03-06 MKC12-14 MKS09-14 MKT09-14 MKT13-14 MKX10-14 MKX07-14 MKZ/ZEPHYR06-11 MKZ/ZEPHYR12-14 MKZ/ZEPHYR12-14 MKZ/ZEPHYR10-12 MKZ/ZEPHYR13-14 MAKR LT06-13 NAVIGATOR98-04 NAVIGATOR04-06 NAVIGATOR06-08 NAVIGATOR09-14 NAVIGATOR11 TOWN CAR95-11 TOWN CAR05-07 LUXGEN(纳智捷)5/SUV12-14 512-147/MPV12-14 MARUTI/SUZUKI(铃木)A/STAR12-14 SWIFT/DZIRE14 RITZ/SWIFT/DZIRE/SX412-14 MASERATI(玛莎拉蒂)CHIBLI13-14 GRANCABRIO10-14 GRANTURISMO12-14 GT COUPE00-05 GT COUPE07-11 LEVANTE14 QUATTRORORTE07-12 QUATTRORORTE13-14 MAZDA(马自达)207-14 212-14 212-14 214 304-14 310-14 312-14 314 32300-07 505-11 512-14 602-08 602-06 606-14 605-12 613-14 614 62686-93 62600-06 811-14 809-11 92988-91 92992-95 ATENZA(阿特兹)07-12 ATENZA(阿特兹)12-14 ATENZA(阿特兹)12-14 ATENZA(阿特兹)12-14 ATENZA WAGON02-05 ATENZA/5HB/WAGON02-05 ATENZA/5HB/WAGON06-12 AXELA(昂克赛拉)08-14 AXELA(昂克赛拉)13-14AXELA/WAGON(昂克赛拉)03-13 AXELA/WAGON(昂克赛拉)05-13 AXELA(昂克赛拉)12-14 AXELA(昂克赛拉)14 AXELA(昂克赛拉)13-14 BIANTE08-14 BIANTE08-14 BIANTE13-14 BONGO/VAN/AGON00-14 BT-5006-11 BT-5012-14 CAPELLA/WAGON00-02 CX314 CX314 CX512-14 CX512-14 CX512-14 CX711 CX709-12 CX707-12 CX713-14 CX907-14 DEMIO00-14 DEMIO07-14 DEMIO12-14 DEMIO14 FAMILIA00 FAMILIA00-05 FIGHTER00-08 FLAIRWAGON12-14 MIATA/MX506-12 MPV(VAN)00-02 MPV(VAN)00-02 MPV(VAN)01-07 MPV(VAN)02-06 MPV(VAN)08-14 MPV(VAN)06-14 MPV(VAN)10-11 PICKUP SERIES00-08 PICKUP SERIES97-10 PICKUP SERIES00-11 PICKUP BT5011 PREMACY(普力马)00-14 PREMACY(普力马)07-14 PREMACY(普力马)13-14 ROADSTER00-02 ROADSTER02-05ROADSTER 05-14RX804-06RX806-12SENTIA 00TRIBUTE 00-08TUIBUTE 03-08TRIBUTE 08-11TRIBUTE 07-11VERISA04-14MP4-12C 13-14P113-14METROCAB 11-01METROCAB02-07A CLASS00-05A CLASS/B CLASS 13-14A CLASS/B CLASS 12-14A CLASS/B CLASS 04-12CL 99-13CL 03-14CLA 13-14CLC 08-11CLC 08-11CLK 99-09CLK 04-09CLS 04-14CLS 14E CLASS 14G AGON 00-12G AGON 06-14GLA14GL CLASS 06-14GLK 08-14MB02-04ML CLASS 98-04ML CLASS 05-14ML CLASS10-11C CLASS C CLASS E CLASS E CLASS MCLAREN(迈凯伦)MCWMERCEDES(梅赛德斯-奔驰)97-1400-0499-1402-14R CLASS 09-11R CLASS 05-14S CLASS 14SL 00-11SL 04-11SL 05-14SLC 14SLK 00-11SLK 05-14SLK 14SLR 03-09SLS10-14SPRINTER(凌特)00-01SPRINTER(凌特)00-14SPRINTER(凌特)11-14V-CLASS 00-02V-CLASS 00-03VANEO01-05VIANO(唯雅诺)03-14VIANO(唯雅诺)14VITO(威霆)00-03VITO(威霆)03-14VITO(威霆)14GRAND MARQUIS(大侯爵)95-10MARAUDER(掠夺者)03-04MARINER 05-08MARINER09-10MARINER HYBRID 05-06MARINER HYBRID 07-10MILAN(米兰)05-08MILAN(米兰)06-09MILAN(米兰)09-10MILAN(米兰)09-10MONTEGO(蒙特哥)05-07MONTEGO(蒙特哥)05-07MONTEREY(蒙特雷)03-06MOUNTAINEER(登山家)01-10MOUNTAINEER(登山家)06-10Mercury Sable(黑貂)04-07Mercury Sable(黑貂)04-07Mercury Sable(黑貂)08-0996-1205-14S CLASS S CLASSMG(名爵)MERCURY(水星)308-11 3/3 CROSS14 512-14 513-14 610-14 613-14 707-12 713-14 714C-CUV14C-CUV14C-CUV14 MGTF08-11 MINI(迷你)CLUBMAN(花花公子)/COUPE(库柏)05-14 CLUBMAN(花花公子)/COUPE(库柏)06-14 CLUBMAN(花花公子)13-14 CLUBMAN(花花公子)12-14 COUNTRYMAN(乡下人)11-14 COUNTRYMAN(乡下人)12-14 MINI02-09 MINI13-14 PACEMAN13-14 PACEMAN13-14 ROADSTER(跑车)12-14 ROADSTER(跑车)12-14 MITSUBISHI(三菱)3000 GT91-99 38005-08 A-HATCH12A-HATCH12 ADVENTURE00-14 AIRTREK01-08 AIRTREK01-08 AIRTREK01-08 A-MPV14 ASX(劲炫)13-14 ASX(劲炫)14 ASX(劲炫)14 ATTRAGE(进口)13-14 B-SEDAN13 CARISMA00-03 CHALLENGER(挑战者)01-11 CHALLENGER(挑战者)00-01 CHARIOT GRANDIS(格蓝迪 )00-04 CHARIOT/CHARIOT GRANDIS00-04 COLT/COLT PLUS(小马)02-14CX10-11 CX10-11 CX10-11 DELICA D:5 (得利卡)07-13 DELICA D:5 (得利卡)14 DELICA D:5 (得利卡)13-14 DELICA SPACE GEAR00-06 DELICA/DELICA SAPCE GEAR00-04 DELICA/DELICA TRUCK/DELICA VAN00-14 DION00-05 DION00-05 ECLIPSE(伊柯丽斯)96-05 ECLIPSE/ECLIPSE SPYDER(伊柯丽斯)00-12 ECLIPSE/ECLIPSE SPYDER(伊柯丽斯)06-12 EK WAGON01-13 EK WAGON01-13 EK WAGON01-13 EK WAGON13-14 ENDEAVOUR03-10 ENDEAVOUR04-12 G WAGON01-05 GALANT(戈蓝)99-07 GALANT(戈蓝)99-12 GALANT(戈蓝)00-06 GALANT(戈蓝)00-06 GALANT(戈蓝)07-10 GALANT FORTIS07-14 GALANT FORTIS14 GALANT FORTIS08-14 GALANT FORTIS14 GRANDIS(格蓝迪)03-11 GRANDIS(格蓝迪)04-14 i06-11 i06-11 i12-13 KUDA00-05 L20000-08 L20000-11 L20000-14 L30013-14 LANCER(蓝瑟)09-13 LANCER(蓝瑟)12-13 LANCER(蓝瑟)05-12 LANCER(蓝瑟)08-14 LANCER(蓝瑟)08-14 LANCER(蓝瑟)08-14 LANCER(蓝瑟)13LANCER(蓝瑟)13 LANCER(蓝瑟)13 LANCER/LANCER WAGON(蓝瑟)00-14 LANCER/LANCER WAGON(蓝瑟)00-13 LEGNUM00-02 LEGNUM00-02 LIBERO VAN00 LIBERO VAN00-02 MAGNA00-05 MINICA(米尼卡)00-11 MINICA TRUCK/VAN14 MINICA TRUCK00-13 MINICA TRUCK/VAN00-13 MINICA VAN12-13 MINICA VAN14 MIRAGE00-03 MIRAGE12-14 MONTERO LIMITED01-06 MONTERO XLS/MONTERO SPORT01-04 MONTERO /MONTERO SPORT6/94-00 OUTLANDER(欧蓝德)03-06 OUTLANDER(欧蓝德)04-06 OUTLANDER(欧蓝德)07-13 OUTLANDER(欧蓝德)07-14 OUTLANDER(欧蓝德)08-14 OUTLANDER(欧蓝德)13-14 OUTLANDER(欧蓝德)14 OUTLANDER SPORT(欧蓝德运动版)13-14 PAJERO IO (帕杰罗)00-07 PAJERO MINI (帕杰罗)00-12 PAJERO MINI (帕杰罗)00-12 PAJERO TR4 (帕杰罗)03-13 PAJERO (帕杰罗)00-07 PAJERO (帕杰罗)00-14 PAJERO (帕杰罗)00-14 PAJERO (帕杰罗)00-14 PININ PAJERO (帕杰罗速跑)00 PININ PAJERO (帕杰罗速跑)00-05 PROUDIA00-01 RAIDER06-08 RAIDER06-08 RVR00-02 RVR10-14 RVR13-14 RVR/RVR SPORT00-02 SAVRIN(太空车)01-13 SPACE GEAR(司贝司吉)00-07。
变速箱车型对照——最全表格

GUILIA GUILIA GIULIA / GIULIAETTA MILANO MiTo SPIDER SPIDER 阿斯顿 马丁 CYGNET DB7 DB7 DB9 DB9 DBS RAPIDE VIRAGE VANTAGE Model 奥迪 80 80 80 80, Avant 90 90 90 100 100 100 100 1A3 A3 A3 A3 A3 A3 A3 A3 A3 CABRIOLET
TRANSOK变速箱车
档位/驱动
4 SP FWD 4 SP FWD 4 SP FWD 4 SP FWD 5 SP F / AWD 4 SP 4 SP 4 SP FWD 4 SP FWD 5 SP FWD 5 SP FWD 4 SP FWD 5 SP F / AWD 5 SP F / AWD 4 SP FWD 5 SP FWD 5 SP FWD CVT FWD 5 5 4 SP FWD 4 SP FWD 4 SP FWD 4 SP FWD 4 SP 4 SP FWD 4 SP FWD 4 SP 5 SP AWD 5 SP AWD 5 SP AWD 5 SP AWD 6 SP AWD 6 SP AWD 9 SP AWD 4 SP RAD 5 SP AWD 5 SP FWD 6 SP AWD 4 SP FWD 5 SP AWD 5 SP F / AWD
97-05 00-05 06-10 10-11 00-06 03-07 05-11 05-10 10-11 13-14
Mitsubishi Electric FX3U FX3UC系列用户操作手册-模拟控制版说明书
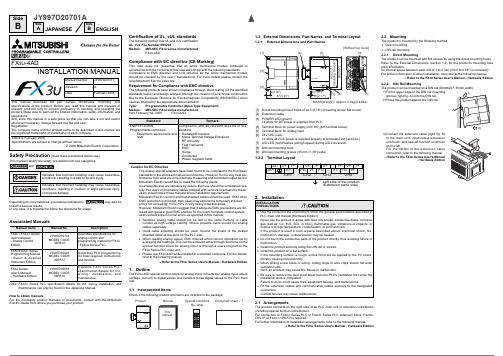
SideBSideASideBJAPANESEENGLISHJY997D20701ASafety Precaution (Read these precautions before use.)linked to serious results.In any case, it is important to follow the directions for usage.Associated ManualsNote:FX 3UC Series PLC specification details for I/O, wiring, installation, andmaintenance can only be found in the Japanese Manual.How to obtain manualsFor the necessary product manuals or documents, consult with the Mitsubishi Electric dealer from where you purchase your product.Manual name Manual No.DescriptionFX 3U / FX 3UC Series User's Manual - Analog Control EditionJY997D16701MODEL CODE:09R619Describes specifications for analog control andprogramming method for FX 3U / FX 3UC Series PLC.FX 3U /FX 3UC Series Programming Manual - B a s i c & A p p l i ed Instruction Edition JY997D16601MODEL CODE:09R517Describes PLC programming for basic/applied instructions and devices.FX 3U Series User’s Manual - Hardware EditionJY997D16501MODEL CODE:09R516Explains FX 3U Series PLC specification details for I/O,w i r i n g , i ns ta l l a t i o n , a n dmaintenance.Certification of UL, cUL standardsThe following product has UL and cUL certification.UL, cUL File Number:E95239Models:MELSEC FX 3U series manufacturedFX 3U -4ADCompliance with EC directive (CE Marking)This note does not guarantee that an entire mechanical module produced in accordance with the contents of this note will comply with the following standards.Compliance to EMC directive and LVD directive for the entire mechanical module should be checked by the user / manufacturer. For more details please contact the local Mitsubishi Electric sales site.Requirement for Compliance with EMC directiveThe following products have shown compliance through direct testing (of the identified standards below) and design analysis (through the creation of a technical construction file) to the European Directive for Electromagnetic Compatibility (89/336/EEC) when used as directed by the appropriate documentation.Type:Programmable Controller (Open Type Equipment)Models:MELSEC FX 3U series manufactured from February 1st, 2006FX 3U -4ADCaution for EC DirectiveThe analog special adapters have been found to be compliant to the European standards in the aforesaid manual and directive. However, for the very best per-formance from what are in fact delicate measuring and controlled output device Mitsubishi Electric would like to make the following points;As analog devices are sensitive by nature, their use should be considered care-fully. For users of proprietary cables (integral with sensors or actuators), these users should follow those manufacturers installation requirements.Mitsubishi Electric recommend that shielded cables should be used. If NO other EMC protection is provided, then users may experience temporary induced errors not exceeding +10%/-10% in very heavy industrial areas.However, Mitsubishi Electric suggest that if adequate EMC precautions are fol-lowed with general good EMC practice for the users complete control system, users should expect normal errors as specified in this manual.•Sensitive analog cable should not be laid in the same trunking or cable conduit as high voltage cabling. Where possible users should run analog cables separately.•Good cable shielding should be used. Ground the shield of the twisted shielded cable at one point on the PLC side.•When reading analog values, EMC induced errors can be smoothed out by averaging the readings. This can be achieved either through functions on the special function block for analog input or through a users program in the FX 3U Series PLC main unit.•Please use FX 3U -4AD while installed in a shielded enclosure. For the details,refer to the following manual.→ Refer to the FX 3U Series User's Manual - Hardware Edition1.OutlineThe FX 3U -4AD special function block for analog input converts four analog input values (voltage, current) to digital values and transfers those digital values to the PLC main unit.1.1Incorporated ItemsCheck if the following product and items are included in the package:StandardRemarkEN61131-2:2003Programmable controllers-Equipment requirements and testsCompliance with all relevant aspects of the standard.•Radiated Emissions•Mains Terminal Voltage Emissions •RF immunity •Fast Transients •ESD •Surge•Conducted•Power magnetic fields1.2External Dimensions, Part Names, and Terminal Layout1.2.1External Dimensions and Part Names1.2.2Terminal Layout2.Installation2.1ArrangementsThe product connects on the right side of an PLC main unit or extension units/blocks (including special function units/blocks).For connection to FX 3UC Series PLC or FX 2NC Series PLC extension block, FX 2NC -CNV-IF or FX 3UC -1PS-5V is required.For further information of installation arrangements, refer to the following manual.→ Refer to the FX 3U Series User's Manual - Hardware Edition[1]Direct mounting hole:2 holes of φ4.5 (0.18") (mounting screw: M4 screw)[2]Extension cable[3]POWER LED (green):Lit while 5V DC power is supplied from PLC.[4]Terminal block for power supply (24V DC) (M3 terminal screw)[5]Terminal block for analog input [6]24V LED (red):Lit while 24V DC power is supplied properly to terminals [24+] and [24-].[7]A/D LED (red):Flashes (at high speed) during A/D conversion. [8]DIN rail mounting hook[9]DIN rail mounting groove (35 mm (1.38") wide)INSTALLATION PRECAUTIONS•Use the product in the environment within the general specifications described in PLC main unit manual (Hardware Edition).Never use the product in areas with dust, oily smoke, conductive dusts, corrosive gas (salt air, Cl 2, H 2S, SO 2, or NO 2), flammable gas, vibrations or impacts, or expose it to high temperature, condensation, or wind and rain.If the product is used in such a place described above, electrical shock, fire,malfunction, damage, or deterioration may be caused.•Do not touch the conductive parts of the product directly, thus avoiding failure or malfunction.•Install the product securely using the DIN rail or screws.•Install the product on a flat surface.If the mounting surface is rough, undue force will be applied to the PC board,thereby causing nonconformity.•When drilling screw holes or wiring, cutting chips or wire chips should not enter ventilation slits.Such an accident may cause fire, failure or malfunction.•Be sure to remove the dust proof sheet from the PLC's ventilation port when the installation work is completed.Failure to do so could cause fires, equipment failures, and malfunctions.•Fit the extension cables and communication cables securely to the designated connectors.Contact failures may cause malfunctions.2.2MountingThe product is mounted by the following method. •Direct mounting •DIN rail mounting2.2.1Direct MountingThe product can be mounted with M4 screws by using the direct mounting holes.Refer to the External Dimensions (section 1.2) for the product’s mounting hole pitch information.An interval space between each unit of 1 to 2 mm (0.04" to 0.08") is necessary. For further information of direct installation, also refer to the following manual.→ Refer to the FX 3U Series User's Manual - Hardware Edition2.2.2DIN Rail MountingThe product can be mounted on a DIN rail (DIN46227, 35mm width).1)Fit the upper edge of the DIN rail mounting groove (right fig. A) onto the DIN rail. 2)Press the product against the DIN rail.3)on the left.→ Refer to the FX 3U FX 3U -4ADINSTALLATION MANUALThis manual describes the part names, dimensions, mounting, and specifications of the product. Before use, read this manual and manuals of relevant products fully to acquire proficiency in handling and operating the product. Make sure to learn all the product information, safety information, and precautions.And, store this manual in a safe place so that you can take it out and read it whenever necessary. Always forward it to the end user.RegistrationThe company name and the product name to be described in this manual are the registered trademarks or trademarks of each company.Effective February 2006Specifications are subject to change without notice.© 2006 Mitsubishi Electric CorporationManual Number JY997D20701Revision ADateFebruary 20063.Wiring*1For FX 3U Series PLC (AC power type), the 24V DC service power supply is also4.4Performance Specification4.5Input characteristicsThe input characteristics in each input mode are as follows.For the details of the input characteristics, refer to the following manual.→ Refer to the FX 3U / FX 3UC Series User’s Manual- Analog Control EditionSideBSideASideBJAPANESEENGLISHJY997D20701ASafety Precaution (Read these precautions before use.)This manual classify the safety precautions into two categories:linked to serious results.In any case, it is important to follow the directions for usage.Associated ManualsNote:FX 3UC Series PLC specification details for I/O, wiring, installation, andmaintenance can only be found in the Japanese Manual.How to obtain manualsFor the necessary product manuals or documents, consult with the Mitsubishi Electric dealer from where you purchase your product.Manual name Manual No.DescriptionFX 3U / FX 3UC Series User's Manual - Analog Control EditionJY997D16701MODEL CODE:09R619Describes specifications for analog control andprogramming method for FX 3U / FX 3UC Series PLC.FX 3U /FX 3UC Series Programming Manual - B a s i c & A p p l i ed Instruction Edition JY997D16601MODEL CODE:09R517Describes PLC programming for basic/applied instructions and devices.FX 3U Series User’s Manual - Hardware EditionJY997D16501MODEL CODE:09R516Explains FX 3U Series PLC specification details for I/O,w i r i n g , i ns ta l l a t i o n , a n dmaintenance.Certification of UL, cUL standardsThe following product has UL and cUL certification.UL, cUL File Number:E95239Models:MELSEC FX 3U series manufacturedFX 3U -4ADCompliance with EC directive (CE Marking)This note does not guarantee that an entire mechanical module produced in accordance with the contents of this note will comply with the following standards.Compliance to EMC directive and LVD directive for the entire mechanical module should be checked by the user / manufacturer. For more details please contact the local Mitsubishi Electric sales site.Requirement for Compliance with EMC directiveThe following products have shown compliance through direct testing (of the identified standards below) and design analysis (through the creation of a technical construction file) to the European Directive for Electromagnetic Compatibility (89/336/EEC) when used as directed by the appropriate documentation.Type:Programmable Controller (Open Type Equipment)Models:MELSEC FX 3U series manufactured from February 1st, 2006FX 3U -4ADCaution for EC DirectiveThe analog special adapters have been found to be compliant to the European standards in the aforesaid manual and directive. However, for the very best per-formance from what are in fact delicate measuring and controlled output device Mitsubishi Electric would like to make the following points;As analog devices are sensitive by nature, their use should be considered care-fully. For users of proprietary cables (integral with sensors or actuators), these users should follow those manufacturers installation requirements.Mitsubishi Electric recommend that shielded cables should be used. If NO other EMC protection is provided, then users may experience temporary induced errors not exceeding +10%/-10% in very heavy industrial areas.However, Mitsubishi Electric suggest that if adequate EMC precautions are fol-lowed with general good EMC practice for the users complete control system, users should expect normal errors as specified in this manual.•Sensitive analog cable should not be laid in the same trunking or cable conduit as high voltage cabling. Where possible users should run analog cables separately.•Good cable shielding should be used. Ground the shield of the twisted shielded cable at one point on the PLC side.•When reading analog values, EMC induced errors can be smoothed out by averaging the readings. This can be achieved either through functions on the special function block for analog input or through a users program in the FX 3U Series PLC main unit.•Please use FX 3U -4AD while installed in a shielded enclosure. For the details,refer to the following manual.→ Refer to the FX 3U Series User's Manual - Hardware Edition1.OutlineThe FX 3U -4AD special function block for analog input converts four analog input values (voltage, current) to digital values and transfers those digital values to the PLC main unit.1.1Incorporated ItemsCheck if the following product and items are included in the package:StandardRemarkEN61131-2:2003Programmable controllers-Equipment requirements and testsCompliance with all relevant aspects of the standard.•Radiated Emissions•Mains Terminal Voltage Emissions •RF immunity •Fast Transients •ESD •Surge•Conducted•Power magnetic fields1.2External Dimensions, Part Names, and Terminal Layout1.2.1External Dimensions and Part Names1.2.2Terminal Layout2.Installation2.1ArrangementsThe product connects on the right side of an PLC main unit or extension units/blocks (including special function units/blocks).For connection to FX 3UC Series PLC or FX 2NC Series PLC extension block, FX 2NC -CNV-IF or FX 3UC -1PS-5V is required.For further information of installation arrangements, refer to the following manual.→ Refer to the FX 3U Series User's Manual - Hardware Edition[1]Direct mounting hole:2 holes of φ4.5 (0.18") (mounting screw: M4 screw)[2]Extension cable[3]POWER LED (green):Lit while 5V DC power is supplied from PLC.[4]Terminal block for power supply (24V DC) (M3 terminal screw)[5]Terminal block for analog input [6]24V LED (red):Lit while 24V DC power is supplied properly to terminals [24+] and [24-].[7]A/D LED (red):Flashes (at high speed) during A/D conversion. [8]DIN rail mounting hook[9]DIN rail mounting groove (35 mm (1.38") wide)INSTALLATION PRECAUTIONS•Use the product in the environment within the general specifications described in PLC main unit manual (Hardware Edition).Never use the product in areas with dust, oily smoke, conductive dusts, corrosive gas (salt air, Cl 2, H 2S, SO 2, or NO 2), flammable gas, vibrations or impacts, or expose it to high temperature, condensation, or wind and rain.If the product is used in such a place described above, electrical shock, fire,malfunction, damage, or deterioration may be caused.•Do not touch the conductive parts of the product directly, thus avoiding failure or malfunction.•Install the product securely using the DIN rail or screws.•Install the product on a flat surface.If the mounting surface is rough, undue force will be applied to the PC board,thereby causing nonconformity.•When drilling screw holes or wiring, cutting chips or wire chips should not enter ventilation slits.Such an accident may cause fire, failure or malfunction.•Be sure to remove the dust proof sheet from the PLC's ventilation port when the installation work is completed.Failure to do so could cause fires, equipment failures, and malfunctions.•Fit the extension cables and communication cables securely to the designated connectors.Contact failures may cause malfunctions.2.2MountingThe product is mounted by the following method. •Direct mounting •DIN rail mounting2.2.1Direct MountingThe product can be mounted with M4 screws by using the direct mounting holes.Refer to the External Dimensions (section 1.2) for the product’s mounting hole pitch information.An interval space between each unit of 1 to 2 mm (0.04" to 0.08") is necessary. For further information of direct installation, also refer to the following manual.→ Refer to the FX 3U Series User's Manual - Hardware Edition2.2.2DIN Rail MountingThe product can be mounted on a DIN rail (DIN46227, 35mm width).1)Fit the upper edge of the DIN rail mounting groove (right fig. A) onto the DIN rail. 2)Press the product against the DIN rail.3)on the left.→ Refer to the FX 3U3.Wiring3.1Applicable Cable and Terminal Tightening TorqueThe size of the terminal screws is M3.The end disposal of the cable shows below.Tighten the terminal to a torque of 0.5N m to 0.8N m.•When one wire is connected to one terminal•When two wires are connected to one terminal3.2Power Supply WiringFor the power supply wiring, refer to the following manual.→ Refer to the FX 3U / FX 3UC Series User’s Manual- Analog Control Edition3.3Wiring of Analog Input→ For the terminal layout, refer to Subsection 1.2.2*1For FX 3U Series PLC (AC power type), the 24V DC service power supply is alsoavailable. *2terminal.*3Use a 2-core twisted shield wire for analog input line, and separate it from otherpower lines or inductive lines.*4For the current input, short-circuit the [V+] terminal and the [I+] terminal. *5If there is voltage ripple in the input voltage or there is noise in the externalwiring, connect a capacitor of approximately 0.1 to 0.47µF 25 V.3.4GroundingGrounding should be performed as stated below.•The grounding resistance should be 100Ω or less.•Independent grounding should be performed for best results.When independent grounding is not performed, perform "shared grounding"of the following figure.→ For details, refer to the FX 3U Series User's Manual- Hardware Edition.•The grounding wire size should be AWG 14 (2 mm 2).•The grounding point should be close to the PLC, and all grounding wire should be as short as possible.4.Specification4.1Applicable PLCThe version number can be checked by monitoring D8001 as the last three digits indicate it.4.2General SpecificationThe items other than the following are equivalent to those of the PLC main unit. For other general specifications, refer to the manual of the PLC main unit.→ For details, refer to the FX 3U Series User's Manual- Hardware Edition.4.3Power Supply SpecificationSTARTUP ANDMAINTENANCE PRECAUTIONS•Do not disassemble or modify the unit.Doing so may cause failure, malfunction or fire.* For repair, contact your local Mitsubishi Electric distributor.•Do not drop the product or do not exert strong impact, doing so may cause damage.DISPOSAL PRECAUTIONS•Please contact a company certified in the disposal of electronic waste forenvironmentally safe recycling and disposal of your device.TRANSPORT ANDSTORAGE PRECAUTIONS•During transportation avoid any impact as the product is a precision instrument.Check the operation of the product after transportation.Model name ApplicabilityFX 3U Series PLC Ver. 2.20 (from the first product) and laterFX 3UC Series PLCVer. 1.30 (from the product manufactured in August, 2004 with SER No. 48) and laterItemSpecificationDielectric withstandvoltage500V AC for one minuteConforming to JEM-1021Between all terminals and ground terminal of PLCmain unitInsulation resistance 5M Ω or more by 500V DC megger Item SpecificationA/D conversion circuit driving power 24V DC ±10%, 90mA for 24V DCConnect a 24V DC power supply to the terminal block.CPU driving power5V DC, 110mA5V DC power is supplied internally from the main unit.4.4Performance Specification*1Change the offset and gain values to change the input characteristics. However,the resolution doesn’t change even when the offset and gain values change.When the analog value direct indication is enabled in the input mode 2, 5, or 8,the offset value and the gain value don’t change. *2The offset and the gain should satisfy the following condition:1V ≤ (Gain - Offset)*3The offset and the gain should satisfy the following condition:3 mA ≤ (Gain - Offset) ≤ 30 mA*4The input characteristics vary depending on the input mode to be used.For the details of the input characteristics, refer to the following manual.→ Refer to the FX 3U / FX 3UC Series User’s Manual- Analog Control Edition4.5Input characteristicsThe input characteristics in each input mode are as follows.For the details of the input characteristics, refer to the following manual.→ Refer to the FX 3U / FX 3UC Series User’s Manual- Analog Control EditionInput mode Input modeAnalog inputrange Digital outputrange 0Voltage input mode -10 to +10V -32000 to +320001Voltage input mode-10 to +10V -4000 to +40002Voltage input modeAnalog value direct indication -10 to +10V -10000 to +100003Current input mode 4 to 20mA 0 to 160004Current input mode4 to 20mA 0 to 40005Current input modeAnalog value direct indication 4 to 20mA 4000 to 200006Current input mode -20 to +20mA -16000 to +160007Current input mode-20 to +20mA -4000 to +40008Current input modeAnalog value direct indication-20 to +20mA-20000 to +20000FX 3U -4ADINSTALLATION MANUALThis manual describes the part names, dimensions, mounting, and specifications of the product. Before use, read this manual and manuals of relevant products fully to acquire proficiency in handling and operating the product. Make sure to learn all the product information, safety information, and precautions.And, store this manual in a safe place so that you can take it out and read it whenever necessary. Always forward it to the end user.RegistrationThe company name and the product name to be described in this manual are the registered trademarks or trademarks of each company.Effective February 2006Specifications are subject to change without notice.© 2006 Mitsubishi Electric CorporationManual Number JY997D20701Revision ADateFebruary 2006。
BAV99,215;BAV99,235;BAV99W,115;BAV99W,135;BAV99S,135;中文规格书,Datasheet资料

IFRM
repetitive peak forward
-
current
IFSM
non-repetitive peak
forward current
Ptot Per device
total power dissipation BAV99 BAV99S BAV99W
square wave tp = 1 μs tp = 1 ms tp = 1 s
Simplified outline Graphic symbol
3
3
1
2
006aaa144
1
2
006aaa763
654
654
123
123 006aab101
3. Ordering information
Table 4. Ordering information
Type number Package
IF = 50 mA
IF = 150 mA
IR
reverse current
VR = 25 V
VR = 80 V
VR = 25 V; Tj = 150 °C
VR = 80 V; Tj = 150 °C
Cd
diode capacitance
f = 1 MHz; VR = 0 V
trr
reverse recovery time
Min Typ
-
-
-
-
[1] -
-
[1] When switched from IF = 10 mA to IR = 10 mA; RL = 100 Ω; measured at IR = 1 mA.
Max
0.5 100 4
化学标准参考手册说明书
3-772CHEM-LABNV-BELGIUM-Tel.+32(0)50288320-Fax+32(0)*****************************.chem-lab.be4CHEM-LABNV-BELGIUM-Tel.+32(0)50288320-Fax+32(0)*****************************.chem-lab.beICP Single Element Standards 10 000 mg/LI C P S TA N D A R D S 10.000 P P MElement HNO 3HCl H 2ONH 4OHHFHNO 3/HF HNO 3/tart.KOHNaOHOthersAl CL01.0103CL01.0104Sb CL01.0123CL01.0124As CL01.0134Ba CL01.0203CL01.0204Be CL01.0214Bi CL01.0223B CL01.0233Cd CL01.0303Ca CL01.0314Ce CL01.0323Cs CL01.0333Cr CL01.0364CL01.0363Co CL01.1123CL01.1128Cu CL01.1133CL01.1134Dy CL01.0433Er CL01.0503Eu CL01.0513Gd CL01.0703Ga CL01.0713Ge CL01.0743Au CL01.0733Hf CL01.0804CL01.0803Ho CL01.0823In CL01.0923Ir CL01.0933Fe CL01.0903CL01.0904La CL01.1203Pb CL01.1223Li CL01.1214Lu CL01.1233Mg CL01.1304CL01.1310Mn CL01.1313Hg CL01.1153Mo CL01.1334CL01.1333Nd CL01.1413Ni CL01.1423Nb CL01.1433Pd CL01.1603P CL01.0643CL01.0633CL01.0634Pt CL01.1613K CL01.1104Pr CL01.1623Re CL01.1804CL01.1803Rh CL01.1813Rb CL01.1824Ru CL01.1834Sm CL01.1903Sc CL01.1913Se CL01.1923Si CL01.1943CL01.1934CL01.1933Ag CL01.2603Na CL01.1404Sr CL01.1963S CL01.2644CL01.2643Ta CL01.2003CL01.2004Te CL01.2015CL01.2014Tb CL01.2023Tl CL01.2033Th CL01.2043Tm CL01.2053Sn CL01.2063Ti CL01.2073CL01.2074W CL01.2303CL01.2304CL01.2333V CL01.2203Yb CL01.2503Y CL01.2513Zn CL01.2613ZrCL01.2633I C P S T A N D A R D SCHEM-LAB NV - BELGIUM - Tel. +32 (0)50 28 83 20 - Fax +32 (0)50 78 26 54 - info@chem-lab.be - www.chem-lab.be6AntimonyArsenicumBariumBerylliumBismuthBoronCadmiumCalciumCalcium oxideCeriumCesiumI C P S I N G L E E L E M E N T S CHEM-LABNV-BELGIUM-Tel.+32(0)50288320-Fax+32(0)*****************************.chem-lab.be7CobaltCopperDysprosiumErbiumEuropiumGadoliniumGalliumGermaniumGoldHafniumHolmium8CHEM-LABNV-BELGIUM-Tel.+32(0)50288320-Fax+32(0)*****************************.chem-lab.beIridiumIronLanthanumLeadLithiumLutetiumMagnesiumNEWMagnesium oxideManganeseMercuryMolybdenumNeodymiumI C P S I N G L E E L E M E N T S CHEM-LABNV-BELGIUM-Tel.+32(0)50288320-Fax+32(0)*****************************.chem-lab.be9NiobiumPalladiumPhosphorusPhosphorus pentoxidePlatinumPotassiumPotassium oxidePraseodymiumRheniumRhodiumRubidiumCHEM-LABNV-BELGIUM-Tel.+32(0)50288320-Fax+32(0)*****************************.chem-lab.be10SamariumScandiumSeleniumSiliciumSilverSodiumSodium oxideStrontiumSulfurTantalumTelluriumI C P S I N G L E E L E M E N T S CHEM-LABNV-BELGIUM-Tel.+32(0)50288320-Fax+32(0)*****************************.chem-lab.be11ThalliumThoriumThuliumTinTitaniumTungstenVanadiumYtterbiumYttriumZincZirconiumCHEM-LABNV-BELGIUM-Tel.+32(0)50288320-Fax+32(0)*****************************.chem-lab.be12A Certificate of Analysis is provided with each ICP standard stating:- Actual certified concentration of the final solution- Traceability to NIST- Expiration date- Trace impurities detected I C P S I NCHEM-LABNV-BELGIUM-Tel.+32(0)50288320-Fax+32(0)*****************************.chem-lab.be13ICP Single Element Standards 1 000 mg/LI C P S TA N D A R D S 1.000 P P MElement HNO 3HCl H 2ONH 4OHHFHNO 3/HF HNO 3/tart.KOH NaOHOthersAl CL01.0101CL01.0102Sb CL01.0121CL01.0122CL01.0162As CL01.0133CL01.0132CL01.0131Ba CL01.0201CL01.0202Be CL01.0212CL01.0211Bi CL01.0221B CL01.0232CL01.0231Cd CL01.0301Ca CL01.0311CL01.0312Ce CL01.0321Cs CL01.0331Cr CL01.0362CL01.0361CL01.0352Co CL01.1121CL01.1122Cu CL01.1131CL01.1132Dy CL01.0431Er CL01.0501Eu CL01.0511Gd CL01.0701Ga CL01.0711Ge CL01.0741CL01.0721Au CL01.0731Hf CL01.0802CL01.0801Ho CL01.0821In CL01.0921Ir CL01.0931Fe CL01.0901CL01.0902La CL01.1201CL01.1202Pb CL01.1221Li CL01.1212CL01.1211Lu CL01.1231Mg CL01.1301CL01.1302Mn CL01.1311CL01.1312Hg CL01.1151Mo CL01.1332CL01.1331Nd CL01.1411Ni CL01.1421CL01.1422Nb CL01.1431Os CL01.1501Pd CL01.1601P CL01.0641CL01.0631Pt CL01.1611K CL01.1101CL01.1102Pr CL01.1621Re CL01.1802CL01.1801Rh CL01.1811Rb CL01.1822CL01.1821Ru CL01.1831Sm CL01.1901Sc CL01.1911Se CL01.1922CL01.1921Si CL01.1999CL01.1945CL01.1932CL01.1931CL01.1935Ag CL01.2601Na CL01.1401CL01.1402Sr CL01.1962CL01.1961S CL01.2641CL01.2642Ta CL01.2001CL01.2002Te CL01.2012CL01.2013CL01.2011Tb CL01.2022Tl Th CL01.2041Tm CL01.2051Sn CL01.2061CL01.2062Ti CL01.2072CL01.4601CL01.2071CL01.2075W CL01.2302CL01.2301CL01.2331V CL01.2201Yb CL01.2501Y CL01.2511Zn CL01.2611CL01.2612ZrCL01.2632CL01.2631CL01.2672I C P S I N G L E E L E M E N T S T A N D A R D SCHEM-LAB NV - BELGIUM - Tel. +32 (0)50 28 83 20 - Fax +32 (0)50 78 26 54 - info@chem-lab.be - www.chem-lab.be14Aluminium(III) oxideAntimonyArsenicumBariumBerylliumBismuthBoronCadmiumI C P S I N G L E E L E M E N T S CHEM-LABNV-BELGIUM-Tel.+32(0)50288320-Fax+32(0)*****************************.chem-lab.be15Calcium oxideCeriumCesiumChromiumCobaltCopperDysprosiumErbiumEuropiumGadoliniumGalliumCHEM-LABNV-BELGIUM-Tel.+32(0)50288320-Fax+32(0)*****************************.chem-lab.be16GoldHafniumHolmiumIndiumIridiumIronIron(III) oxideLanthanumLeadLithiumLutetiumI C P S I N G L E E L E M E N T S CHEM-LABNV-BELGIUM-Tel.+32(0)50288320-Fax+32(0)*****************************.chem-lab.be17Magnesium oxideManganeseManganese(III) oxideMercuryMolybdenumNeodymiumNickelNiobiumOsmiumPalladiumDon’t see the exact solution you need?E-mail us the Tailor Made Standard Quotation request form in the back of the catalog. 18CHEM-LABNV-BELGIUM-Tel.+32(0)50288320-Fax+32(0)*****************************.chem-lab.bePhosphorus pentoxidePlatinumPotassiumPotassium oxidePraseodymiumRheniumRhodiumRubidiumRutheniumSamariumScandiumI C P S I N G L E E L E M E N T S CHEM-LABNV-BELGIUM-Tel.+32(0)50288320-Fax+32(0)*****************************.chem-lab.be19SiliciumSilicium dioxideSilverSodiumSodium oxideStrontiumSulfurTantalumCHEM-LABNV-BELGIUM-Tel.+32(0)50288320-Fax+32(0)*****************************.chem-lab.be20TerbiumThalliumThoriumThuliumTinTitaniumTungstenVanadiumYtterbiumI C P S I N G L E E L E M E N T SZincZirconiumLuis BianchiISO/IEC 17025:2005 - General requirements for the competence of calibration laboratories ISO 9001:2008 - Quality ManagementISO Guide 34:2009 - General requirements for the competence of reference material producers A Certificate of Analysis is provided with each ICP standard stating:- Actual certified concentration of the final solution - Traceability to NISTAntimonyArsenicumBariumBerylliumBoronCadmiumCalciumCeriumCesiumChromiumCobaltCopperDysprosiumErbiumI C P S I N G L E E L E M E N T SGadoliniumGalliumGermaniumGoldHafniumHolmiumIndiumIridiumIronLanthanumLeadLithiumLutetiumManganeseMercuryMolybdenumNeodymiumNickelNiobiumOsmiumPalladiumPhosphorusPlatinumPotassiumPraseodymiumRheniumRhodiumI C P S I N G L E E L E M E N T SRutheniumSamariumScandiumSeleniumSiliciumSilverSodiumSulfurTantalumTelluriumTerbiumThalliumThoriumThuliumTinTitaniumTungstenVanadiumYtterbiumYttriumZincZirconium NEWDon’t see the exact solution you need?I C P S I N G L E E L E M E N T SAluminiumAntimonyBariumBerylliumBismuthBoronCadmiumCalciumCeriumCesiumChromiumCobaltCopperDysprosiumEuropiumGadoliniumGalliumGermaniumGoldHafniumHolmiumIndiumIridiumIronLanthanumLeadI C P S I N G L E E L E M E N T SLutetiumMagnesiumManganeseMercury NEWMolybdenumNeodymiumNickelNiobiumOsmiumPalladiumPhosphorusPlatinumPotassiumPraseodymiumRhodiumRubidiumRutheniumSamariumScandiumSeleniumSiliciumSilverSodiumSulfurTantalumTelluriumTerbiumThalliumI C P S I N G L E E L E M E N T SThuliumTinTitaniumTungstenVanadiumYtterbiumYttriumZincZirconium NEWChem-Lab’s certified “Custom Made Standards” will save you time and money.Multi Element ICP QC Standard sol. (QCS-23) (23E)CL01.13610Multi Element ICP QC Standard sol. (QCS-01) (23E)CL01.13601I C P M U L T I E L E MMulti Element ICP QC Standard sol. (QCS-04) (19E)NEW CL01.13604Multi Element ICP QC Standard sol. (QCS-19) (19E)CL01.13608Multi Element ICP QC Standard sol. (QCS-02) (7E)CL01.13602Multi Element ICP ASL QC Standard sol. (QCS-ASL-7) (7E)CL01.13607Multi Element ICP QC Standard sol. (QCS-06) (4E)CL01.13606I C P M U L T I E L E MA Certificate of Analysis is provided with each ICP standard stating:- Actual certified concentration of the final solution- Traceability to NIST- Expiration date- Trace impurities detectedMulti Element ICP SQS Standard sol. (SQS-01) (33E)CL01.13631I C P M U L T I E L E MReference Materials - Contents of certificates and labelsGeneral requirements for the competence of calibration laboratoriesPage 2 of 2Chem-Lab multi-element standards are compared against the following NIST SRMs Element Aq. SRMOil SRMElement Aq. SRMOil SRMAg 31511077a Nb 3137-Al 3101a 1075a Nd 3135a -As 3103a 3103a Ni 31361065b Au 3121-NO3-3185-B 31073107NO2-136e -Ba 3104a 1051b P 3139a 1071b Be 3105a 3105a Pb 31281059c Bi 31063106Pd 3138-Br-3184-PO4-33186-Ca 3109a 3109Pr 3142a -Cd 31081053a Pt 3140-Ce 3110-Rb 3145a -Cl-919b -Re 3143-Co 31133113Rh 3144-Cr 3112a 1078b S 31543154Cs 3111a -Sb 3102a 3102a Cu 31141080a Sc 3148a 3148a Dy 3115a -Se 31493149Er 3116a -Si 31501066a Eu 3117a -Sm 3147a -F-3183-Sn 3161a 1057b Fe 3126a 1079b SO4-23181-Ga 3119a -Sr 3153a 1070a Gd 3118a -Ta 3155-Ge 3120a -Tb 3157a -Hf 3122-Te 3156-Hg 31333133Th 3159-Ho 3123a -Ti 3162a 3162a In 3124a -Tl 31583158K 3141a 3141a Tm 3160a -La 3127a 3127a U 3164-Li 3129a 1060a V 31651052b Lu 3130a -W 3163-Mg 3131a 3131a Y 3167a 3167a Mn 31323132Tb 3166a -Mo 31343134Zn 3168a 1073b Na3152a1069bZr31693169*ICP-EPA Methods (Method 200.7 Version 3.3 & earlier) - Laboratory Performance Check Standard (LPCS) Contains 29 elements in 5% HNO3Multi Element ICP LFSS Standard sol. LFSS-01 (25E)CL01.13772*ICP-EPA Methods (Method 200.7 Version 3.3 & earlier) - Laboratory Fortifying Stock Solution (LFSS) Contains 25 elements in 5% HNO3 + traces HFMulti Element ICP SP Standard sol. SP-03 (12E)CL01.13743I C P M U L T I E L E*ICP-EPA Methods (Methods 6010A - 6010B - 200.7 Version 3.3 and earlier) - Mixed Calibration Standard 1 Contains 6 elements in 2% HNO3 (MCS-Multi Element ICP CAL Standard sol. MCS-04 (6E)CL01.13734Multi Element ICP SP Standard sol. SP-05 (5E)CL01.13745Multi Element ICP CAL Standard sol. MCS-02 (5E)CL01.13732 *ICP-EPA Methods (Methods 6010A - 6010B - 200.7 Version 3.3 and earlier) - Mixed Calibration Standard 2 Contains 5 elements in 2% HNO3 (MCS-Multi Element ICP SP Standard sol. SP-05R (5E)CL01.13754*ICP-EPA Methods (Method 200.7 Version 3.3 and earlier) - Spiking Standard for Drinking Water # 5R Contains 5 elements in 5% HNO3 (M-200.7-SP-Multi Element ICP SIC Standard sol. SICS-02 (5E)CL01.13762Multi Element ICP PLASOL Standard sol. M-200.7-PLASOL-1 (4E)CL01.13723*ICP-EPA Methods (Method 200.7 Version 4.4, May 1994) - Plasma Solution (PLASOL) - Determining optimum viewing height of the plasma analytical zone.I C P M U L T I E L E MMulti Element ICP SP Standard sol. SP-01R (4E)CL01.13751 *ICP-EPA Methods (Method 200.7 Version 3.3 and earlier) - Spiking Standard for Drinking Water # 1R Contains 4 elements in H2O + traces HF (M-Multi Element ICP SP Standard sol. SP-02R (4E)CL01.13752 *ICP-EPA Methods (Method 200.7 Version 3.3 and earlier) - Spiking Standard for Drinking Water # 2R Contains 4 elements in 2% HNO3 (M-200.7-SP-Multi Element ICP CAL Standard sol. MCS-03 (3E)CL01.13733Tailor Made Mixtures can be formulated to meet your special applications.Multi Element ICP SP Standard sol. SP-01 (3E)CL01.13741Multi Element ICP TUNSOL Standard sol. M-200.7-TUNSOL-1 (2E)CL01.13724*ICP-EPA Methods (Method 200.7 Version 4.4, May 1994) - Tuning Solution (TUNSOL) - Adjusting the aerosol argon gas flow prior to calibration and analysis.Mono Element ICP SP Standard sol. TCLP-02 (1E)CL01.13773*ICP-EPA Methods (Methods 6010B - 200.7 Version 3.3 and earlier) - Spiking & Mercury Standard - TCLP Standaard 2 Contains 1 elements in 5%I C P M U L T I E L E MMono Element ICP SP Standard sol. SP-04R (1E)CL01.13753 *ICP-EPA Methods (Method 200.7 Version 3.3 and earlier) - Spiking Standard for Drinking Water # 4R Contains 1 elements in 2% HNO3 (M-200.7-SP-Mono Element ICP SIC Standard sol. SICS-01 (1E)CL01.13761Mono Element ICP SP Standard sol. TCLP-02-10X (1E)CL01.13746*ICP-EPA Methods (Method 200.7 Version 4.4, May 1994) - Instrument Fortifying (Spiking) Standard # 1 Contains 26 elements in 5% HNO3 + tracesMulti Element ICP IPC Standard sol. M-200.7-IPC-01 (26E)CL01.13721 *ICP-EPA Methods (Method 200.7 Version 4.4, May 1994) - Instrument Performance Check (IPC) Contains 26 elements in 5% HNO3 (M-200.7-IPC-I C P M U L T I E L E*ICP-EPA Methods (Method 200.7 Version 4.4, May 1994) - Instrument Fortifying (Spiking) Standard for Solids # 1 Contains 24 elements in 5% HNO3Multi Element ICP LFSS Standard sol. M-200.7-LFSS-01W (22E)CL01.13712 *ICP-EPA Methods (Method 200.7 Version 4.4, May 1994) - Instrument Fortifying (Spiking) Standard for Water # 1 Contains 22 elements in 5% HNO3Multi Element ICP CAL Standard sol. M-200.7-01 (10E)CL01.13701Chem-Lab’s certified “Custom Made Standards” will save you time and money.Multi Element ICP CAL Standard sol. M-200.7-02R (6E)CL01.13702Multi Element ICP LFSS Standard sol. M-200.7-LFSS-02 (5E)CL01.13714*ICP-EPA Methods (Method 200.7 Version 4.4, May 1994) - Instrument Fortifying (Spiking) Standard # 2 Contains 5 elements in 5% HNO3 + traces HFMulti Element ICP IPC Standard sol. M-200.7-IPC-02 (5E)CL01.13722*ICP-EPA Methods (Method 200.7 Version 4.4, May 1994) - Instrument Performance Check (IPC) Contains 5 elements in 5% HNO3 + traces HF (M-I C P M U L T I E L E MMulti Element ICP PLASOL Standard sol. M-200.7-PLASOL-1 (4E)CL01.13723 *ICP-EPA Methods (Method 200.7 Version 4.4, May 1994) - Plasma Solution (PLASOL) - Determining optimum viewing height of the plasma analytical zone.Multi Element ICP CAL Standard sol. M-200.7-03R (4E)CL01.13703Multi Element ICP TUNSOL Standard sol. M-200.7-TUNSOL-1 (2E)CL01.13724 *ICP-EPA Methods (Method 200.7 Version 4.4, May 1994) - Tuning Solution (TUNSOL) - Adjusting the aerosol argon gas flow prior to calibration and analysis.Multi Element ICP QC Standard sol. (QCS-01) (23E)CL01.13601Multi Element ICP INT Standard sol. INT-B1 (12E)CL01.13682I C P M U L T I E L E MMulti Element ICP QC Standard sol. (QCS-02) (7E)CL01.13602Multi Element ICP CAL Standard sol. MCS-01 (6E)CL01.13731 *ICP-EPA Methods (Methods 6010A - 6010B - 200.7 Version 3.3 and earlier) - Mixed Calibration Standard 1 Contains 6 elements in 2% HNO3 (MCS-Multi Element ICP Standard sol. PLASOL-R (5E)CL01.13822A Certificate of Analysis is provided with each ICP standard stating:- Actual certified concentration of the final solution- Traceability to NIST- Expiration date- Trace impurities detected。
99墨泥白的使用方法是什么

99墨泥白的使用方法是什么99墨泥白所含成分均为纯天然火山泥,这种火山泥来自新西兰死火山温泉,有着1亿5千万年的历史。
那么,99墨泥白的使用方法是什么?名称:99墨泥白成分:济州岛火山泥、矿脂、洋甘菊...功效:促进皮肤微循环,美白全身肌肤,强化皮肤的天然防御能力,抵抗紫外线,延缓皮肤衰老适用人群:需要美白或改善肤质的人群使用方法:洗浴时,先淋浴全身,再取适量本品均匀涂抹于全身,双手交互揉搓全身,10分钟冲洗即可生产许可证:XK16-108 6979卫生许可证:GD FDA(2006)卫妆准字29-XK-2818号执行标准:QB/T1857保质期:二年韩国99墨泥白的美白效果非常好,主要源于韩国99墨泥白的泥浆中含有37种微量矿物质,洗澡时将韩国99墨泥白的泥浆敷于体表,泥浆中的矿物质便会进入肌肤,分解黑色素,排除毒素,并提供肌肤以营养,使肌肤如婴儿般光洁嫩滑。
一般使用1天,肌肤就会有明显的增白现象,5天后原本暗黄黝黑的皮肤就会消失,长期使用不仅可保持皮肤水润白嫩,而且还能改善肤质、预防各种皮肤疾病。
答:韩国飘宣99墨泥白的主要原料都是原生态进口的原料,生产工艺及生产周期都有特殊要求。
虽然减少了中间商环节,但生产成本依然高启。
相对于国际顶级化妆品牌,韩国飘宣99墨泥白性价比最高的产品。
韩国飘宣99墨泥白中国承诺:我们绝对不涨价!问:韩国飘宣99墨泥白除了美白以外,还有什么其他作用吗?答:韩国飘宣99墨泥白的原料取自恩加莫卡亚科温泉池底泥,这种原料富含多种矿物质不仅能用于美白,它还可以改善皮肤微循环,排出毛孔中的毒素,预防皮肤类疾病问:泥白要用多久,才会有效果?答:使用泥白洗澡,一般当天就可以看到变化,5天左右全身皮肤白皙度就有大幅度的提升。
不仅仅是脸部,平时关注不到的背部、手部、甚至是脚趾头都可以白来。
韩国飘宣99墨泥白富含37种丰富的矿物微量元素,它们都是全身皮肤保持年轻白净不可缺少的元素。
钙元素能使皮肤毛血管畅通坚韧,使皮肤更容易保持活力;镁元素能有效修复紫外线对皮肤的伤害,使皮肤重获新生;硒元素,能使皮肤不老;硅元素能使皮肤光洁如缎子;锌元素能抚平皮肤毛躁……长期使用泥白SPA泥不仅能保持白嫩肌肤,改善肤质,还能有效预防多种皮肤疾病。
- 1、下载文档前请自行甄别文档内容的完整性,平台不提供额外的编辑、内容补充、找答案等附加服务。
- 2、"仅部分预览"的文档,不可在线预览部分如存在完整性等问题,可反馈申请退款(可完整预览的文档不适用该条件!)。
- 3、如文档侵犯您的权益,请联系客服反馈,我们会尽快为您处理(人工客服工作时间:9:00-18:30)。
•
M.R.V. (微转筒粘度计) 利用这种粘度计可衡量发动机油的可泵性(参照 SAE J 300〕。此时剪切速率低。 其温度比进行 C.C.S.测量时低10℃。
布氏粘度计 这种方法用于测量手动变速 箱、自动变速箱和农业机械中的使用的润滑油的粘度( 参照 SAE J 306〕。这里测得的是在低温和低剪切速率下的粘度。 T.B.S. (锥形轴承模拟器) - RAVENFIELD粘度计 测量发动机油的 H.T.H.S. ( 高温高压) 粘度 (参照 SAE J 300)。剪切速率非常高,但 温度也很高 (150℃)。
最小
最大
0W 5W 10W 15W 20W 25W 20 30 40 40 50 60
注:
< 3 250 at - 30 < 3 500 at - 25 < 3 500 at - 20 < 3 500 at - 15 < 4 500 at - 10 < 6 000 at - 5
< < < < < <
A03-22.PPT
粘度 运动粘度
•
•
粘度通常通过测量一定体积的流体流过经刻度的毛细管的时间来度量。
采用这种测量方式的粘度计叫做“毛细管”型。
•
在这种情况下测得的粘度,叫做“运动粘度” ( m )
在一定温度下: ( 通常为 40℃或100 ℃ 〕
m = k t 式中
t: k:
流动所用时间 相对于毛细管直径的特定常数。
待测试的润滑油 负荷
3 个静止球
A03-12.PPT
四球测试 -极高压 图表
5 4
20 24
32
40
50
63
80
100 126
160 200
250
315
400 500
粘卡负荷
3
熔合负荷
平均冯痕直径 (mm)
2 1,8 1,6 1,4 1,2 1 0,9 0,8 0,7 0,6 0,5 0,4
0,3
60 000 at 60 000 at 60 000 at 60 000 at 60 000 at 60 000 at
-
40 35 30 25 20 15
> 3.8 > 3.8 > 4.1 > 5.6 > 5.6 > 9.3 > 5.6 > 9.3 > 12.5 > 12.5 > 16.3 > 21.9
各档的负荷
1234 5 6 7 8 9 10 11 12
120 mg 100
磨损曲线 (齿轮 + 小齿轮 )
磨损量的变化 ( mg )
80
60
齿轮 小齿轮
40
20
0 100 200 300 400
传递的能量 ( MJ )
A03-09.PPT
SAE 分类
A03-19.PPT
SAE J 300 Lubricants for engines
A03-23.PPT
“毛细管”型粘度计 工作原理
流动起始点
流动截止点
A03-30.PPT
粘度 运动粘度
• •
运动粘度是用 ASTM D 445, ISO 3104, DIN 51550 等方法测量的粘度,这 些方法是等同的。 运动粘度的单位是: – 在国际制单位体系中 ( I.S. 单位 ) : m2/s – 在石油公司中通常使用的单位是 : cSt (厘沱) 1 cSt = 1 mm2/s – 有时会用到的其他单位 :
最小
最大
0W 5W 10W 15W 20W 25W 20 30 40 40 50 60
注:
< 3 250 at - 30 < 3 500 at - 25 < 3 500 at - 20 < 3 500 at - 15 < 4 500 at - 10 < 6 000 at - 5
< < < < < <
F.Z.G.测试方法 基本情况
驱动电机 ( 1500 转/分 或 3000 转/分 )
驱动齿轮
轴 n? (转动轴)
轴 n? (负荷轴) 负荷离合器
测试齿轮
齿轮 待测试的润滑油
A03-07.PPT
小齿轮
F.Z.G.测试方法 工作原理
基本原理 不断增大齿轮的接触压 力,直到齿轮牙具发生粘 附性磨损(粘卡)为止 测量扭矩用离全装置 锁定销 驱动齿轮
0,2
粘卡极限 补偿线 赫兹线
20 24 32 40 50 63 80 100 126 160 200 2
四球测试 测量其他参数
摩擦系数的测量
( ASTM D 5183 )
转速:600分/转
测力计
待测试的润滑油
负荷
温度控制
A03-11.PPT
– – 斜率大, 粘度指数低 斜率小, 粘度指数高
•
•
A03-31.PPT
粘度指数
运动粘度 (mm2/s)
VI = 150 VI = 100
40
温度 (℃)
100
A03-32.PPT
粘度指数
怎样制造粘度指数高的润滑油 ?
•
选择粘度指数高的基础油
•
•
加入粘度改进剂
上述两种方法配合使用
A03-33.PPT
宾斯基-马丁闪点测定仪 开口杯
适用标准 : • ASTM D 93 • ISO 2719
标准温度计
石棉板
测量杯
金属板
MEKER 加热器 气体
A03-03.PPT
NOACK 挥发性测定装置
适用标准: • DIN 51581
通气口 空气 空气
测试条件 : • 在 250癈 条件下持 续1小时 润滑油
•
•
A03-28.PPT
转筒粘度计 工作原理
马达 减速装置
马达
减速装置
弹簧
间隙
间隙
润滑油
润滑油
布氏粘度计 测量反扭矩 非常低剪切速率 : < 10 1/秒
A03-05.PPT
CCS 粘度计
( 冷摇动模拟器 )
测量转速 高剪切速率 : 10
4
1/秒
粘度 动力粘度
• 动力粘度是用下列方法测量的粘度 :
倾点
•
倾点表明的是润滑油能够保持流动状态的最低温度。
•
倾点用 ASTM D 97, ISO 3016 方法测量,这两种方法是等同的。
A03-34.PPT
克利夫兰闪点测定仪 开口杯
适用标准 : • ASTM D 92 • ISO 2592
标准温度计
金属片
测量杯
石棉板
MEKER 加热器 气体
A03-04.PPT
特性
• 主要物理 - 化学性能
– – – – – – 粘度 倾点 闪点 挥发性 起泡性能 各种元素
• 主要机械性能: 防磨性能和抗极高压性能的测量
– – 四球试验 FZG
A03-18.PPT
粘度
• • •
物理性能: 润滑油抵制流动的能力 当温度升高时,粘度会下降 粘度的两种不同表达方式 : – 运动粘度 – 动力粘度
SAE J 300 (1993年3月) 发动机用润滑油
SAE 粘度分级 在低温 (℃) 下 的摇动粘度 (mPa•s) ASTM D 5293 CCS 在低温 (℃) 下 的泵送粘度 (mPa•s) ASTM D 4684 MRV 无屈服强度 在100℃时的运动 粘度(mm² /s) ASTM D 445 在高温(150℃)高 剪切(106s-1)条件下 的HTHS粘度 (mPa •s)
A03-06.PPT
各种元素
基础油 铝 钡 钙 铜 铁 铅 镁 氮 磷 硅 钠 硫 锌 √ √ √ √ √ √ √ √ √ √ √ √ √ √ √ 添加剂 使用过的机油 √
A03-38.PPT
四球测试-磨损 工作原理
负荷 : 一般为40 kg
持续时间: 1小时 卡头转速 : 1 200 转/分 ( ASTM D 4172 )
< 9.3 < 12.5 < 16.3 <16.3 <21.9 < 26.1
> 2.6 > 2.9 > 2.9 (1) > 3.7 (2) > 3.7 > 3.7
- 1 mPa.s = 1 cP ; 1 mm2/s = 1cSt - (1) : 0W-40, 5W-40 和 10W-40 级 - (2) : 15W-40, 20W-40, 25W-40 和 40 级
A03-27.PPT
粘度 运动粘度的局限性
•
运动粘度中没有考虑到剪切速率的因素。但是,一旦机械零件发生运动, 就会存在剪切速率 (发动机、变速箱等 ...).
•
当润滑油不易流动时,即在温度很低时,运动粘度的测量会更为准确。
A03-29.PPT
粘度 动力粘度
• •
动力粘度中考虑到了剪切速率的因素。
加热炉
A03-02.PPT
起泡性测量
适用标准 : • ASTM D 892 体积测量仪
测量条件 : • 起泡倾向:停止吹泡后立即测 量; • 泡沫稳定性:停止吹泡10分钟 后测量; • 在 24癈, 93癈 ,及从 93癈 转回 24癈 时进行测量。 浸没在24℃环境下
带孔眼 的圆球 浸没在93℃环境下
待测量的润滑油 卡头 转动球 静止球 球缸锁定系统 球缸
在室温或者调定的温度条件下 测量结果 : 测定静止球上疤痕 的平均直径大小
杠杆臂
负荷
A03-10.PPT
四球测试-极高压 工作原理