可编程触摸屏控制电脑技术手册
可编程触摸屏

◆ 产品在安装工作结束,需要保证通风面上没有 异物,包括防尘纸等包装物品,否则可能导致运行 时散热不畅,引起火灾、故障、误操作;
运行和保养时的注意事项 ◆ 请勿在通电时触摸端子,否则可能引起电击、 误操作;
◆ 请在关闭电源后进行清扫和端子的旋紧工作, 通电时这些操作可能引起触电;
◆ 请在关闭电源后进行通讯信号电缆的连接或 拆除、扩展模块或控制单元的电缆连接或拆除等操 作,否则可能引起设备损坏、误操作;
◆ 请勿拆卸设备,避免损坏内部电气元件;
◆ 务必熟读本手册,充分确认安全后,再进行程 序的变更、试运行、启动和停止操作;
■ 一般信息指示
列示了可能导致操作或设置不成功的内容及一些 需要注意的相关信息。
重要说明
警告
为确保设备可靠使用及人员的安全,请在安 装、使用和维护时,请遵守以下事项: 安装时的注意事项 ◆ 请勿在下列场所使用本产品:有灰尘、油烟、 导电性尘埃、腐蚀性气体、可燃性气体的场所;暴 露于高温、结露、风雨的场合;有振动、冲击的场 合。电击、火灾、误操作也会导致产品损坏和恶化;
手持无线可编程触摸屏用户手册
1
第一章、综述
手持无线可 编 程 触 摸 屏 是 一款可兼容新一代 PGMⅡ、PGMⅢ可编程主机的桌面式无线全彩触 屏,有易于使用、坚固耐用、反应速度快等优点, 无线传输距离达 50M(开阔)。具有以下几大优势:
产品报废时的注意事项 ◆ 电解电容的爆炸:电路板上的电解电容器焚烧 时可能发生爆炸;
◆ 请分类收集和处理,不能投入生活垃圾中。
布线时的注意事项 ◆ 必须将外部电源全部切断后,才能进行安装、 接线等操作,否则可能引起触电或设备损坏;
松下 可编程智能操作面板 GT 01 技术手册

与FP0进行连接 ·············································································· 4-3
一般规格······················································································· 1-2 显示部的规格 ··············································································· 1-2 功能规格······················································································· 1-2 触摸开关的规格 ··········································································· 1-3 存储器的规格 ··············································································· 1-3 串行接口的规格 ··········································································· 1-3
第1章 规格···································· P.1-1
可编程触摸屏
Smart_700_IE 触摸屏说明书
Smart_700_IE 触摸屏说明书一、产品概述采用 7 英寸 TFT LCD 显示屏,分辨率为 800x480 像素,支持16.7M 色采,显示效果清晰、明艳。
采用电容式触摸屏,支持多点触控,操作灵敏、方便。
支持以太网、RS232、RS485、USB、SD卡等多种通信接口,方便与外部设备连接和数据交换。
支持 Windows CE 6.0操作系统,提供丰富的软件资源和开辟工具,方便用户开辟和运行自定义的应用程序。
支持 OPC UA 协议,可以与 OPC UA服务器进行数据通信,实现跨平台、跨网络的数据集成和共享。
具有 IP65防护等级,可以防止灰尘、水滴等物质的侵入,适合在恶劣的工业环境中使用。
具有 CE、FCC、RoHS 等认证,符合国际标准和法规要求。
二、产品规格---参数名称 ---参数值 -------:------: ---:----: -------显示屏尺寸 ---7 英寸 -------显示屏类型 ---TFT LCD -------分辨率 ---800x480 像素 -------色采 ---16.7M -------触摸屏类型 ---电容式 -------触摸点数 ---10 点 -------处理器 ---ARM Cortex-A8 1GHz -------内存 ---DDR3 512MB -------存储 ---NAND Flash 4GB -------操作系统 ---Windows CE 6.0 -------以太网接口 ---RJ45 10/100Mbps -------RS232 接口 ---DB9 -------RS485 接口 ---DB9 -------USB 接口 ---USB-A x2, USB-B x1 -------SD 卡接口 ---Micro SD x1 -------音频接口 ---耳机孔 x1, 麦克风孔 x1 -------扬声器 ---内置 1W x2 -------电源输入 ---DC 12V/2A -------功耗 ---<24W -------工作温度----10℃ ~ +60℃ -------存储温度----20℃ ~ +70℃ -------相对湿度 ---10% ~ 90% (无凝露) -------防护等级 ---IP65 (前面板) -------外形尺寸 ---200x146x36 mm -------开孔尺寸 ---192x138 mm -------净重 ---0.8 kg ----三、产品安装1. 在安装位置上按照开孔尺寸切割一个矩形孔洞。
SVS触摸屏控制系统说明书
SVS(迅控)——触摸屏可编程控制系统——安装使用手册触摸屏可编程多媒体中控系统安装使用手册2003 [09]绪言感谢您购买和使用SVS(迅控)的产品在使用本机前请细阅这本用户手册以便能正确使用并且请妥善保存这本手册万一有不了解或故障时这本手册会带给您很大的帮助。
ST-6000/8000/9000可编程触摸屏控制系统(Touch Pannel Control System)是最新开发的高科技产品,是继面板控制和计算机控制之后的第三种控制方式既有简单面板所无法达到的灵活性又没有计算机维护成本过高的缺点是理想的升级换代产品。
ST-6000/8000/9000采用了LCD和触摸屏作为显示和控制接口所有界面全部是图形用户界面(GUI)用户只须用手指点选显示的按钮即可完成操作十分直观简便5.7"的可视面积和320X240的点阵解析度使图形显示得十分清晰再加上256 种颜色可以显示更多更细致的图片色彩亮丽由于有了高亮度的背光用户即使在明亮的地方也可以清楚地看到整个画面输入设备触摸屏具有良好的灵敏度使用户的操作流畅自如。
此触摸屏控制系统的一个显著特点是用户可编程随机提供了一套桌面电脑软件用于编ST-6000/8000/9000控制器的所有界面通过使用这套软件用户能够可视化地自由定义每一个操作界面设置界面中控件的外观和各种信息代码以及控制界面切换的顺序等这套软件具有即时下载功能即随时可以把编辑好的界面工程下载到ST-6000/8000/9000 控制器上真正实现了所见即所得。
此触摸屏控制系统具有红外学习功能可以学习各种遥控器的红外代码储存在闪存中用来替代遥控器控制各种电器ST-6000/8000/9000的红外学习具载波频率识别功能能够准确地识别各种复杂的红外代码。
ST-6000/8000/9000内置自主开发的实时操作系统运行稳定软件接口丰富。
ST-6000/8000/9000接口灵活适用于各种多媒体中央控制系统控制器上内置了标准RS-232 接口可选RS-485 接口和红外线接受发射端口无线接口能够方便地与计算机外接系统和各种电器进行通信实现实时控制。
TouchWin手册
TouchWin使用手册Human Machine InterfaceTouchWin使用手册●安全注意事项●在设计系统时,请仔细阅读相关手册,同时要非常注意安全。
此外,实习时请特别注意以下几点,正确操作设备。
◎实习注意事项◎注意●请遵照讲师或说明书上的展开实习。
●请不要随意安装实习机的模块,改装接线。
否则会引起故障、误动作、损失、火灾。
●实习机发出异臭/弄音时,请关闭电源开关。
危险●通电时请不要接触端子,以免引起触电。
●请不要打开盖板。
TouchWin使用手册前言PLC(Programmable Logical Controller)通常称为可编程逻辑控制器,是一种以微处理器为基础,综合现代计算机技术、自动控制技术和通信发展起来的一种通用的工业自动控制装置,由于它拥有体积小、功能强、程序设计简单、维护方便等优点,特别是它适应恶劣工业环境的能力和它的高可靠性,使它的应用越来越广泛,已经被称为现代工业的三大支柱(即PLC、机器人和CAD/CAM)之一。
人机界面是在操作人员与机器设备之间作双向沟通的桥梁,用户可以自由的组合文字、按钮、图形、数字等来处理或监控管理及应付随时可能变化信息的多功能显示屏幕。
随着机械设备的飞速发展,以往的操作界面需要熟练的操作员才可以操作,而且操作困难,无法提高工作效率。
但是使用人机界面能够明确指示并告知操作员机器设备目前的状态,使操作变得简单生动,并且减少操作上的失误,即使是新手也可以很轻松地操作整个机器设备。
使用人机界面还可以使机器的配线标准化、简单化,同时也能减少PLC监控器所需的I/O点数,降低生产成本,同时由于面板控制的小型化及高性能,相对地提高了整个设备的附加价值。
TouchWin使用手册目录前言------------------------------------------------------------------------------------------------------4目录-----------------------------------------------------------------------------------------------------5硬件篇--------------------------------------------------------------------------------------------------71 产品概述------------------------------------------------------------------------------------------------------------71-1 功能------------------------------------------------------------------------------------------------------------8 1-2 一般规格------------------------------------------------------------------------------------------------------9 1-3 各部分名称--------------------------------------------------------------------------------------------------112 外形尺寸----------------------------------------------------------------------------------------------------------132-1 TP460-L尺寸-----------------------------------------------------------------------------------------------13 2-2 TP560-L/TP560-T尺寸------------------------------------------------------------------------------------133 安装方法----------------------------------------------------------------------------------------------------------14软件篇-------------------------------------------------------------------------------------------------151 关于作图软件----------------------------------------------------------------------------------------------------151-1 软件的安装-------------------------------------------------------------------------------------------------15 1-2 软件画面的构成-------------------------------------------------------------------------------------------162 入门须知----------------------------------------------------------------------------------------------------------192-1 新建工程----------------------------------------------------------------------------------------------------192-1-1 新建画面或窗口--------------------------------------------------------------------------------------21 2-2 画面或窗口标题的设定----------------------------------------------------------------------------------23 2-3 图形的制作-------------------------------------------------------------------------------------------------262-3-1 画直线、长方形、圆-------------------------------------------------------------------------------262-3-2 画多边形、折线--------------------------------------------------------------------------------------272-3-3 画圆弧--------------------------------------------------------------------------------------------------282-3-4 尺寸的变更--------------------------------------------------------------------------------------------282-3-5 选中对象的移动--------------------------------------------------------------------------------------292-3-6 选中对象的剪切、复制和粘贴-------------------------------------------------------------------30 3部件----------------------------------------------------------------------------------------------------------------31 3-1 文字串设置-------------------------------------------------------------------------------------------------31 3-2 动态文字串-------------------------------------------------------------------------------------------------33 3-3 指示灯-------------------------------------------------------------------------------------------------------35 3-4 位操作按钮-------------------------------------------------------------------------------------------------37 3-5 指示灯按钮-------------------------------------------------------------------------------------------------39 3-6 画面跳转----------------------------------------------------------------------------------------------------41 3-7 数据显示----------------------------------------------------------------------------------------------------42 3-8 报警数据显示----------------------------------------------------------------------------------------------44 3-9 字符显示----------------------------------------------------------------------------------------------------45 3-10 数据输入---------------------------------------------------------------------------------------------------45 3-11 小键盘------------------------------------------------------------------------------------------------------46 3-12 用户输入---------------------------------------------------------------------------------------------------46 3-13 窗口调用---------------------------------------------------------------------------------------------------47 3-14 垂直棒图---------------------------------------------------------------------------------------------------48 3-15 水平棒图---------------------------------------------------------------------------------------------------50 3-16 动态图片---------------------------------------------------------------------------------------------------524 系统参数----------------------------------------------------------------------------------------------------------544-1 系统设置----------------------------------------------------------------------------------------------------54TouchWin使用手册4-1-1 启动画面和背景设定-------------------------------------------------------------------------------54 4-1-2 口令设置-----------------------------------------------------------------------------------------------54 4-1-3 屏幕保护-----------------------------------------------------------------------------------------------54 4-2 交互控制----------------------------------------------------------------------------------------------------55 4-3 PLC类型选择-----------------------------------------------------------------------------------------------55 5 保存与下载-------------------------------------------------------------------------------------------------------565-1 保存工程----------------------------------------------------------------------------------------------------56 5-2 下载----------------------------------------------------------------------------------------------------------57 6 特殊功能----------------------------------------------------------------------------------------------------------58应用篇-------------------------------------------------------------------------------------------------591 TP系列操作方法------------------------------------------------------------------------------------------------591-1 TP系列连机通讯-------------------------------------------------------------------------------------------59 1-2 TP系列触摸屏口令----------------------------------------------------------------------------------------59 附录----------------------------------------------------------------------------------------------------62 1 PLC连接方法--------------------------------------------------------------------------------------------------621-1 信捷FC系列-----------------------------------------------------------------------------------------------62 1-2 三菱FX系列-----------------------------------------------------------------------------------------------64 1-3 西门子S7-200系列---------------------------------------------------------------------------------------67 1-4 欧姆龙C系列----------------------------------------------------------------------------------------------68 1-5 光洋S系列-------------------------------------------------------------------------------------------------70 1-6 台达DVP系列---------------------------------------------------------------------------------------------73 1-7 LG Master-k系列PLC------------------------------------------------------------------------------------75 1-8 松下FP系列PLC-----------------------------------------------------------------------------------------77 1-9 施耐德PLC-------------------------------------------------------------------------------------------------80TouchWin 使用手册硬件篇1 产品概述TP 系列触摸屏工业显示器是代替控制面板和键盘的又一新突破,是机器的又一新面孔。
1 触摸屏用户手册目录说明书
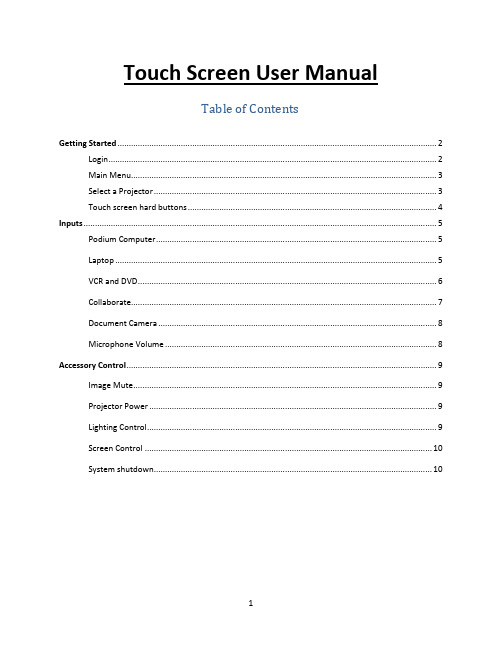
Touch Screen User ManualTable of ContentsGetting Started (2)Login (2)Main Menu (3)Select a Projector (3)Touch screen hard buttons (4)Inputs (5)Podium Computer (5)Laptop (5)VCR and DVD (6)Collaborate (7)Document Camera (8)Microphone Volume (8)Accessory Control (9)Image Mute (9)Projector Power (9)Lighting Control (9)Screen Control (10)System shutdown (10)Login:If you see a black screen, simply touch the touch screen to begin. Once the touch screen is ‘awake’ the following image will appear. Touch anywhere on the screen to begin.The next screen will prompt you to enter the podium login code.Once the code is entered, the podium door will unlock, the projector(s) will turn on and the screen(s) will come down automatically in rooms with powered screens.The touch screen will now be displaying the Main Menu:FIGURE 1.In order to select a device, simply push the button and you will be prompted to select the projector(s) to display the input.Selecting a projector(s):In a single projector room you will be brought to the following screen to select the projector to display the image.FIGURE 2.In a room with dual projectors there will be an option to send to either “Projector A”, “Projector B”, or “ALL” (image will be displayed on both projectors).Figure 3.Push the button for the desired projector(s) to display the selected input. The touch screen will return to the main menu after the projector(s) have been selected.Touch screen hard buttons:InputsPodium Computer:Select the PC option from the main menu (Fig 1.). You will then be prompted to select a projector(s) as shown in Fig 2, or Fig 3. The PC should be the default input when logging in to the system.Laptop:When selecting the laptop option from the main menu (Fig 1.) you now have the option to connect your laptop using the traditional VGA cable or by connecting your laptop via HDMI. Once you have selected Laptop from the main menu (Fig 1.) you will see the screen shown in Fig 4. You will need to select the appropriate connection type in order for your image to display from the projector. Once you select either VGA or HDMI refer to Fig. 2, or Fig. 3, to send the image to the projector.Figure 4.NOTE: When using the HDMI connection, you will not need to use the extra audio cable as both audio AND video are sent down the HDMI cable. When using the VGA connection, you will be required to connect the second cable for audio.VCR and DVDThe VCR and DVD controls are made available to you when you select the appropriate source from the Main Menu (Fig 1.). The preview will be displayed on the privacy monitor to allow for queuing of the video, but will not be sent to the projector until the appropriate output is selected. Once the media has been queued to the proper spot, select the appropriate projector(s). Once the source (VCR or DVD) has been assigned to a projector(s), the touchscreen will default back to the Main Menu screen (Fig. 1) and the privacy monitor will return to the PC. To access the controls again, you need to press the appropriate source (VCR or DVD).Note: You will need to assign the projector from the VCR/DVD controls screen as you are not taken to a separate screen to do so as above.VCR (FIGURE 5):DVD (FIGURE 6):CollaborateThe new wireless collaboration feature can be activated by selecting “Collaborate” from the Main Menu (Fig. 1). After selecting collaborate the Solstice home screen (Fig. 7) will display on the privacy monitor and the touch screen will show the projector assignment screen (Fig. 2). Before selecting the projector the user should then connect their device through the app, or web browser, using the device name, or address, shown on the privacy monitor. Once connected, the user will need to log in as the host using the password: York5065. The host can now control which students can connect and what is displayed. Once the Projector(s) has been selected the touch screen will return to the main menu, the privacy monitor will return to the PC and the input will be sent to the projector. Students will now be able to connect on the guest account (no password required) using the app, or a web browser.Figure 7.NOTE: The app is available for iOS, Mac OS, Windows, and Android. Once installed, the user will be able to join the session by typing in the room number listed under the “By app” section of the Mersive screen. Using this feature allows the user to wireless project PowerPoint presentations, desktops, videos, etc. from their own device which allows freedom and mobility to the user. The user can also join the session using a web browser.Document Camera:Select the Document camera option from the main menu (Fig 1.). You will then be prompted to select a projector(s) as shown in Fig 2, or Fig 3.Microphone VolumeMicrophone volume can be adjusted by selecting the microphone icon from the Main Menu (Fig.1). The user will see the following screen where the wireless (Lapel) microphone and the podium wired microphone (if applicable) volumes can be individually increased, decreased, or muted. The main system volume can be adjusted by using the up and down arrows located on the right hand side of the touch screen.Accessory ControlImage MuteMuting the image will blank the projector output while leaving the projector on. This can be accomplished by selecting the “Image Mute” button from the Main Menu (Fig. 1), the user can then select the output to mute (Fig. 2, or Fig 3).NOTE: In a single projector room, the only op tion will be to mute “Projector A”, however in a dual projector room there will be an option to mute either “Projector A”, “Projector B”, or “ALL” (image will be muted on both projectors).Projector PowerYou will also have the ability to turn projectors off completely from the Main Menu (Fig. 1) by selecting “Projector Power”. You will be prompted for the projector you wish to turn On or Off (Fig 2, or Fig 3). The above note also applies to turning projectors off.Lighting ControlIn rooms where lighting control is available, the “Lighting” button will be selectable from the Main Menu screen (Fig. 1). Lighting can be zone controlled (25%, 50%, 75%) or be completely turned on (100%) using the “ON” button or completely turned off (0%) using the “OFF” button.Some rooms are equipped with Chalk and/or Stage lights. These lights function independently of the main lights and can only be turned fully on or fully off.Screen ControlIn rooms that have a power screen(s), these can be controlled by selecting the “Screen Control” button. The text on the button indicates the direction to move the screen. (i.e. in this example the screen is currently down, when the button is pressed the text will change to “Screen DOWN” and the screen will start to go up)System ShutdownTo shut down the system at the end of class, press the “Power Button”located on the top right hand corner of the touch screen. This will bring up the below display on the touchscreen:From this screen, you are able to confirm that you want to shut down by hitting “System Off” or, if you have hit the button by accident, “Cancel” or “Go Back” to return to the Main Menu of the touch screen.。
TL-3000操作手册
TL-3000无线触摸屏操作手册版本1.1此说明书由本公司技术文档编写小组编写完成北京联合控创科技有限公司目 录1 概述.........................................................................................................................................................- 1 -1.1系统简介 (1)1.2硬件组成 (1)1.3特性与功能 (2)1.4技术参数 (2)1.5端口说明 (3)2 安装.........................................................................................................................................................- 5 -2.1外形尺寸 (5)2.2以太网网络 (5)2.3电源 (5)2.4开关 (5)3 编程.........................................................................................................................................................- 6 -3.1设备设置 (7)3.2编程过程 (7)3.3建立通讯 (8)3.4编译上传 (9)4 应用举例.................................................................................................................................................- 9 -4.1控制中心 (9)4.2会议室 (10)5 故障排除...............................................................................................................................................- 10 -5.1故障措施表 (10)5.2联络 (10)6 保修条款...............................................................................................................................................- 11 -1概述1.1系统简介TL-3000无线触摸屏是一款可编程多用途无线双向控制触摸屏,与TL-RFX无线收发机配套使用,可以作为各种人机系统的控制及显示终端。