Android下基于XML的Graphics shape使用方法
shape文件的操作
shape⽂件的操作⼀、maven依赖引⼊<dependency><groupId>org.geotools</groupId><artifactId>gt-api</artifactId><exclusions><exclusion><groupId>commons-pool</groupId><artifactId>commons-pool</artifactId></exclusion><exclusion><groupId>jgridshift</groupId><artifactId>jgridshift</artifactId></exclusion><exclusion><groupId>Javax.media</groupId><artifactId>jai_core</artifactId></exclusion></exclusions></dependency><dependency><groupId>commons-pool</groupId><artifactId>commons-pool</artifactId></dependency><dependency><groupId>jgridshift</groupId><artifactId>jgridshift</artifactId></dependency><dependency><groupId>Javax.media</groupId><artifactId>jai_core</artifactId></dependency><dependency><groupId>org.geotools</groupId><artifactId>gt-geojson</artifactId></dependency><dependency><groupId>org.geotools</groupId><artifactId>gt-epsg-hsql</artifactId><exclusions><exclusion><groupId>org.hsqldb</groupId><artifactId>hsqldb</artifactId></exclusion></exclusions></dependency><!-- https:///artifact/org.hsqldb/hsqldb --><dependency><groupId>org.hsqldb</groupId><artifactId>hsqldb</artifactId><scope>test</scope></dependency><dependency><groupId>org.geotools</groupId><artifactId>gt-shapefile</artifactId></dependency><dependency><groupId>com.googlecode.json-simple</groupId><artifactId>json-simple</artifactId></dependency>备注:需要配置下载org.geotools的私有仓库<repositories><repository><id>osgeo</id><name>OSGeo Release Repository</name><url>https:///repository/release/</url><snapshots><enabled>false</enabled></snapshots><releases><enabled>true</enabled></releases></repository></repositories>⼆、读取shape⽂件,并转换为对象Tpublic static List<T>readShape(URL url) throws IOException {ShapefileDataStore store = new ShapefileDataStore(url);//设置编码Charset charset = Charset.forName("GBK");store.setCharset(charset);SimpleFeatureSource sfSource = store.getFeatureSource();SimpleFeatureIterator sfIter = sfSource.getFeatures().features();// 从ShapeFile⽂件中遍历每⼀个Feature,然后将Feature转为GeoJSON字符串List<T> list = new ArrayList<>();while (sfIter.hasNext()) {SimpleFeature feature = sfIter.next();// Feature转GeoJSONFeatureJSON fjson = new FeatureJSON();StringWriter writer = new StringWriter();fjson.writeFeature(feature, writer);JSONObject jsonObject = new JSONObject(writer.toString());String type = jsonObject.getStr("type").toLowerCase();if (type.equals("multipolygon")){LOGGER.error("该数据不是图斑:【{}】",writer);continue;}String properties = jsonObject.remove("properties").toString();jsonObject.remove("id");//其他属性T t = JSONUtil.toBean(properties, T.class);if (JudgeUtil.isDBNull(t.getObjectid())){LOGGER.error("该图斑每页objectid:【{}】",writer.toString());continue;}//geojsont.setGeojson(jsonObject.toString());list.add(gisWarnQrstbhhx);}return list;}三、shape⽂件写⼊1、写⼊shape⽂件⼊⼝/*** 写shape⽂件* @param rootFile* @param shapeName shape⽂件名包含后缀名.shp* @param list*/public static void writeShape(File rootFile,String shapeName,List<T>list) throws IOException {if (JudgeUtil.isEmpty(list)){throw new WrongDataException("数据不能为空");}String type = new JSONObject(list.get(0).getGeojson()).getStr("type").toLowerCase();//将list转换为geoJson字符串String geoJson = getGsoJson(list);if (!rootFile.exists() || rootFile.isFile()){rootFile.mkdirs();}File file = new File(rootFile,shapeName);Map<String, Serializable> params = new HashMap<>();params.put(ShapefileDataStoreFactory.URLP.key,file.toURI().toURL());ShapefileDataStore ds = (ShapefileDataStore) new ShapefileDataStoreFactory().createNewDataStore(params);//定义图形信息和属性信息SimpleFeatureTypeBuilder tb = new SimpleFeatureTypeBuilder();tb.setCRS(DefaultGeographicCRS.WGS84);tb.setName("shapefile");tb.setDefaultGeometry("the_geom");//添加属性addProperties(type,tb);ds.createSchema(tb.buildFeatureType());//设置编码Charset charset = Charset.forName("GBK");ds.setCharset(charset);FeatureJSON featureJson = new FeatureJSON();SimpleFeatureCollection featureCollection = (SimpleFeatureCollection) featureJson.readFeatureCollection(geoJson);FeatureIterator<SimpleFeature> iterator = featureCollection.features();//设置WriterFeatureWriter<SimpleFeatureType, SimpleFeature> writer = ds.getFeatureWriter(ds.getTypeNames()[0], Transaction.AUTO_COMMIT);//写下⼀条SimpleFeature srcFeature;Iterator<Property> properties;while (iterator.hasNext()){srcFeature = iterator.next();properties = srcFeature.getProperties().iterator();SimpleFeature destFeature = writer.next();while (properties.hasNext()){Name name = properties.next().getName();Object attribute = srcFeature.getAttribute(name);if (!(attribute instanceof Geometry)){destFeature.setAttribute(name, attribute);}}destFeature.setDefaultGeometryProperty(srcFeature.getDefaultGeometryProperty());}writer.write();writer.close();ds.dispose();}2、将List<T>转换为geojson/*** T转geojson* @param list* @return*/private static String getGsoJson(List<T>list){JSONObject jsonObject = new JSONObject();jsonObject.putOnce("type","FeatureCollection");JSONArray jsonArray = new JSONArray();jsonObject.putOnce("features",jsonArray);for (T t : list) {JSONObject feature = new JSONObject();feature.putOnce("type","Feature");feature.putOnce("geometry",new JSONObject(t.getGeojson()));t.setGeojson(null);t.setGeom(null);t.setGid(null);feature.putOnce("properties",JSONUtil.parseObj(t));jsonArray.add(feature);}return jsonObject.toString();}3、通过反射添加properties/*** 通过反射添加properties* @param tb*/private static void addProperties(String type, SimpleFeatureTypeBuilder tb){Field[] declaredFields = T.class.getDeclaredFields();setType(tb,type.toLowerCase());for (Field declaredField : declaredFields) {String name = declaredField.getName();if (!name.equals("serialVersionUID") && !name.equals("geojson") && !name.equals("geom")){ tb.add(name,declaredField.getType());}}}4、设置类型private static void setType(SimpleFeatureTypeBuilder tb,String type){if (type.equals("point")) {tb.add("the_geom", Point.class);} else if (type.equals("line")) {tb.add("the_geom", LineString.class);} else if (type.equals("polygon")) {tb.add("the_geom", Polygon.class);} else if (type.equals("multipoint")) {tb.add("the_geom", MultiPoint.class);} else if (type.equals("multiline")) {tb.add("the_geom", MultiLineString.class);} else if (type.equals("multipolygon")) {tb.add("the_geom", MultiPolygon.class);}}。
androidshape的使用及渐变色、分割线、边框、半透明阴影

androidshape的使⽤及渐变⾊、分割线、边框、半透明阴影shape使⽤、渐变⾊、分割线、边框、半透明、半透明阴影效果。
⾸先简单了解⼀下shape中常见的属性。
(详细介绍参看)<?xml version="1.0" encoding="utf-8"?><shapexmlns:android="/apk/res/android"android:shape=["rectangle" | "oval" | "line" | "ring"] > --- 默认为rectangle<corners -- shape=“rectangle”时使⽤,android:radius="integer" -- 半径,会被下边的属性覆盖,默认为1dp,android:topLeftRadius="integer"android:topRightRadius="integer"android:bottomLeftRadius="integer"android:bottomRightRadius="integer" /><gradient -- 渐变android:angle="integer"android:centerX="integer"android:centerY="integer"android:centerColor="integer"android:endColor="color"android:gradientRadius="integer"android:startColor="color"android:type=["linear" | "radial" | "sweep"]android:useLevel=["true" | "false"] /><paddingandroid:left="integer"android:top="integer"android:right="integer"android:bottom="integer" /><size -- 指定⼤⼩,⼀般⽤在imageview配合scaleType属性使⽤。
android shape ring用法
android shape ring用法Android Shape Ring 是Android 平台上的一个可用于创建自定义环形形状的图形资源。
它可以用于各种控件或背景中,为用户提供更加个性化和独特的界面设计。
本文将详细介绍Android Shape Ring 的用法,包括创建、配置和应用环形形状资源的各个步骤,帮助开发者更好地使用这个功能来打造精美的用户界面。
第一步:了解Shape Drawable在开始之前,让我们先了解一下Shape Drawable。
Shape Drawable 是指由XML 文件定义的矢量图形资源,可以用于绘制各种形状,例如矩形、圆形、椭圆等。
通过在XML 中使用Shape Drawable,开发者可以轻松地创建独特的背景或前景形状,并将其应用于Android 应用的各个界面元素中。
第二步:创建shape_ring.xml 文件首先,我们需要创建一个名为shape_ring.xml 的XML 文件,用于定义环形的形状资源。
在res/drawable 文件夹中创建一个新的XML 文件,并将其命名为shape_ring.xml。
第三步:定义环形形状在shape_ring.xml 文件中,我们需要使用<shape> 元素来定义环形的形状。
下面是一个示例的shape_ring.xml 文件的代码:xml<shape xmlns:android="android:shape="ring"android:useLevel="false"><solid android:color="#FF0000" /><size android:width="50dp"android:height="50dp" /><gradient android:type="linear"android:startColor="#FFFF00"android:endColor="#00FF00" /><stroke android:color="#000000"android:width="1dp" /></shape>在上面的代码中,我们使用了`<shape>` 元素,并设置了`android:shape` 属性为"ring",以创建一个环形的形状资源。
androidshape使用总结电脑资料

android shape使用总结电脑资料今天使用到shape,这个里面有很多属性,在这里我记录一下各个属性的使用的情况以及所代表的意思复制代码xmlns:android="schemas.android./apk/res/android" android:shape=["rectangle" | "oval" | "line" | "ring"] > android:radius="integer"android:topLeftRadius="integer"android:topRightRadius="integer"android:bottomLeftRadius="integer"android:bottomRightRadius="integer" />android:angle="integer"android:centerX="integer"android:centerY="integer"android:centerColor="integer"android:endColor="color"android:gradientRadius="integer"android:startColor="color"android:type=["linear" | "radial" | "sweep"]android:useLevel=["true" | "false"] />android:left="integer"android:top="integer"android:right="integer"android:bottom="integer" />android:width="integer"android:height="integer" />android:color="color" />android:width="integer"android:color="color"android:dashWidth="integer"android:dashGap="integer" />复制代码上面这段就是shape使用的格式,来看一下如何使用:定义这是一个GradientDrawable,必须作为根元素,android:shape定义shape的值,必须是下面的之一:"rectangle" 矩阵,这也是默认的shape"oval" 椭圆"line" 一条水平的直线。
在Android中需要通过graphics类来显示2D图形

在Android中需要通过graphics类来显示2D图形。
graphics中包括了Canvas(画布)、Paint(画笔)、Color(颜色)、Bitmap(图像)等常用的类。
graphics具有绘制点、线、颜色、2D几何图形、图像处理等功能。
1.Color(颜色)类Android系统中颜色的常用表示方法有以下3种:(1)int color = Color.BLUE;(2)int color = Color.argb(150,200,0,100);(3)在xml文件中定义颜色;在实际应用当中,我们常用的颜色有以下一些,其颜色常量及其表示的颜色如下所示:Color.BLACK 黑色Color.GREEN 绿色Color.BLUE 蓝色Color.LTGRAY 浅灰色Color.CYAN 青绿色 Color.MAGENTA 红紫色Color.DKGRAY 灰黑色 Color.RED 红色Color.YELLOW 黄色 Color.TRANSPARENT 透明Color.GRAY 灰色Color.WHITE 白色2.Paint(画笔)类要绘制图形,首先得调整画笔,按照自己的开发需要设置画笔的相关属性。
Pain类的常用属性设置方法如下:setAntiAlias(); //设置画笔的锯齿效果setColor(); //设置画笔的颜色setARGB(); //设置画笔的A、R、G、B值setAlpha(); //设置画笔的Alpha值setTextSize(); //设置字体的尺寸setStyle(); //设置画笔的风格(空心或实心)setStrokeWidth(); //设置空心边框的宽度getColor(); //获取画笔的颜色3.Canvas(画布)类画笔属性设置好之后,还需要将图像绘制到画布上。
Canvas类可以用来实现各种图形的绘制工作,如绘制直线、矩形、圆等等。
Canvas绘制常用图形的方法如下:绘制直线:canvas.drawLine(float startX, float startY, float stopX, float stopY, Paint paint);绘制矩形:canvas.drawRect(float left, float top, float right, float bottom, Paint paint);绘制圆形:canvas.drawCircle(float cx, float cy, float radius, Paint paint);绘制字符:canvas.drawText(String text, float x, float y, Paint paint);绘制图形:canvas.drawBirmap(Bitmap bitmap, float left, float top, Paint paint);4.自定义View的基本实现方法首先,我们需要自定义一个类,比如MyView,继承于View类。
android通过shape设置圆形按钮
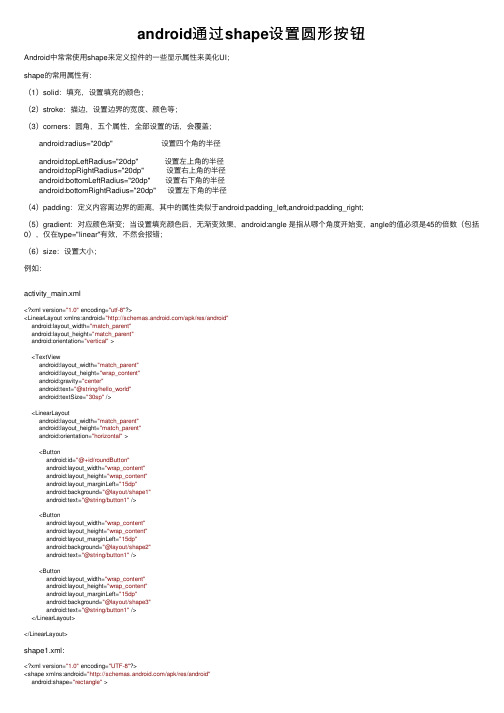
android通过shape设置圆形按钮Android中常常使⽤shape来定义控件的⼀些显⽰属性来美化UI;shape的常⽤属性有:(1)solid:填充,设置填充的颜⾊;(2)stroke:描边,设置边界的宽度、颜⾊等;(3)corners:圆⾓,五个属性,全部设置的话,会覆盖; android:radius="20dp" 设置四个⾓的半径 android:topLeftRadius="20dp" 设置左上⾓的半径 android:topRightRadius="20dp" 设置右上⾓的半径 android:bottomLeftRadius="20dp" 设置右下⾓的半径 android:bottomRightRadius="20dp" 设置左下⾓的半径(4)padding:定义内容离边界的距离,其中的属性类似于android:padding_left,android:padding_right;(5)gradient:对应颜⾊渐变;当设置填充颜⾊后,⽆渐变效果,android:angle 是指从哪个⾓度开始变,angle的值必须是45的倍数(包括0),仅在type="linear"有效,不然会报错;(6)size:设置⼤⼩;例如:activity_main.xml<?xml version="1.0" encoding="utf-8"?><LinearLayout xmlns:android="/apk/res/android"android:layout_width="match_parent"android:layout_height="match_parent"android:orientation="vertical" ><TextViewandroid:layout_width="match_parent"android:layout_height="wrap_content"android:gravity="center"android:text="@string/hello_world"android:textSize="30sp" /><LinearLayoutandroid:layout_width="match_parent"android:layout_height="match_parent"android:orientation="horizontal" ><Buttonandroid:id="@+id/roundButton"android:layout_width="wrap_content"android:layout_height="wrap_content"android:layout_marginLeft="15dp"android:background="@layout/shape1"android:text="@string/button1" /><Buttonandroid:layout_width="wrap_content"android:layout_height="wrap_content"android:layout_marginLeft="15dp"android:background="@layout/shape2"android:text="@string/button1" /><Buttonandroid:layout_width="wrap_content"android:layout_height="wrap_content"android:layout_marginLeft="15dp"android:background="@layout/shape3"android:text="@string/button1" /></LinearLayout></LinearLayout>shape1.xml:<?xml version="1.0" encoding="UTF-8"?><shape xmlns:android="/apk/res/android"android:shape="rectangle" ><!-- 填充的颜⾊ --><solid android:color="#99FFFF" /><!-- 设置按钮的四个⾓为弧形 --><corners android:radius="20dp" /><!-- padding:Button⾥⾯的⽂字与Button边界的间隔 --><paddingandroid:bottom="10dp"android:left="10dp"android:right="10dp"android:top="10dp" /></shape>shape2.xml<?xml version="1.0" encoding="UTF-8"?><shape xmlns:android="/apk/res/android" android:shape="rectangle" ><!-- 填充的颜⾊ --><solid android:color="#FFCC66" /><!-- 设置按钮的左下⾓和右下⾓是圆形边框 --><cornersandroid:bottomLeftRadius="20dp"android:bottomRightRadius="20dp" /><!-- 描边 --><strokeandroid:width="1dp"android:color="#000000" /><!-- padding:Button⾥⾯的⽂字与Button边界的间隔 --><paddingandroid:bottom="10dp"android:left="10dp"android:right="10dp"android:top="10dp" /></shape>shape3.xml<?xml version="1.0" encoding="UTF-8"?><shape xmlns:android="/apk/res/android" android:shape="rectangle" ><!-- 填充的颜⾊ --><solid android:color="#996600" /><!-- 设置按钮的左上⾓和右上⾓为圆形边框 --><cornersandroid:topLeftRadius="20dp"android:topRightRadius="20dp"/><!-- padding:Button⾥⾯的⽂字与Button边界的间隔 --><paddingandroid:bottom="10dp"android:left="10dp"android:right="10dp"android:top="10dp" /></shape>MainActivity.javapackage com.xiaozhang.listview2;import android.app.Activity;import android.os.Bundle;import android.view.View;import android.view.View.OnClickListener;import android.widget.Button;import android.widget.Toast;public class MainActivity extends Activity {Button roundButton;@Overrideprotected void onCreate(Bundle savedInstanceState) {super.onCreate(savedInstanceState);setContentView(yout.activity_main);roundButton = (Button) findViewById(R.id.roundButton);roundButton.setOnClickListener(new OnClickListener() {public void onClick(View v) {Toast.makeText(MainActivity.this, "你点击了圆⾓按钮", Toast.LENGTH_LONG) .show();}});}}。
android圆角矩形框xml的实现

android圆⾓矩形框xml的实现设置边框圆⾓可以在drawable-mdpi⽬录⾥定义⼀个xml:1. <?xml version="1.0" encoding="utf-8"?>2. <shape xmlns:android="/apk/res/android">3. <solid android:color="#000000" />4. <corners android:topLeftRadius="10dp"5. android:topRightRadius="10dp"6. android:bottomRightRadius="10dp"7. android:bottomLeftRadius="10dp"/>8. </shape>解释:solid的表⽰填充颜⾊,为了简单,这⾥⽤的是⿊⾊。
⽽corners则是表⽰圆⾓,注意的是这⾥bottomRightRadius是左下⾓⽽不是右下⾓,bottomLeftRadius右下⾓。
当然上⾯的效果也可以像下⾯⼀样设置,如下:1. <corners android:radius="5dp" />如果想引⽤这个xml,只需要@drawable/corners_bg.xml即可:1. android:background="@drawable/corners_bg"main.xml:1. <?xml version="1.0" encoding="utf-8"?>2. <LinearLayout xmlns:android="/apk/res/android"3. android:orientation="vertical" android:layout_width="fill_parent"4. android:layout_height="fill_parent" android:background="#FFFFFF">5. <RelativeLayout android:id="@+id/login_div"6. android:layout_width="fill_parent" android:layout_height="150dip"7. android:padding="15dip" android:layout_margin="15dip"8. android:background="@drawable/corners_bg">9. </RelativeLayout>10. </LinearLayout>11.。
Android中的动画(XML方式)实践(逐帧动画与补间动画)

Android中的动画(XML方式)实践(逐帧动画与补间动画)属性动画。
逐帧动画:基于单元格的动画,每一帧显示一个不同的drawable。
一帧一帧的顺序播放。
补间动画:补间动画应用于view,通过对其位置,大小,旋转和透明度的改变,让view动起来。
属性动画:属性动画几乎可以让应用程序中任何对象动起来。
所有补间动画的内容,都可以通过属性动画实现。
下面逐一介绍:注:这篇文章偏重于以xml方式实现相应动画效果。
逐帧动画逐帧动画(Frame-by-frame Animations)从字面上理解就是一帧一帧的播放图片,类似卡通动画。
目标:实现如下图效果:loading步骤:1.在res/drawable目录下新建loading_frame.xml文件:loading_frame.xml根节点是animation-list,内部由一到多个<item>节点组成oneshot属性表示是否只播放一次(true:一次;false:循环播放).item节点声明是一个动画帧,其中 android:drawable属性定义要显示的图像,android:druation代表此帧持续的时间,毫秒为单位。
注:在AndroidStudio中强制规定带animation-list节点xml文件必须放在res/drawable文件下(eclipse(ADT)貌似支持任意放res/drawable和res/anim)。
在androidStudio中若放在res/anim下会报错:错误提示:1错误提示:22.新建页面布局activity_frame.xml:如上图布局很简单上面一个imageview,下面两个button,都水平居中(相对于parent)。
3.新建FrameActivityframeActivity主要逻辑代码当然为了避免animationDrawable带来的内存泄露,建议在onDestroy方法中做如下操作:onDestroy注意:帧数比较多的动画不建议用逐帧动画实现,其一会显得卡顿,其二容易引起OOM。
- 1、下载文档前请自行甄别文档内容的完整性,平台不提供额外的编辑、内容补充、找答案等附加服务。
- 2、"仅部分预览"的文档,不可在线预览部分如存在完整性等问题,可反馈申请退款(可完整预览的文档不适用该条件!)。
- 3、如文档侵犯您的权益,请联系客服反馈,我们会尽快为您处理(人工客服工作时间:9:00-18:30)。
Android下基于XML的Graphics shape使用方法2011-05-30 10:47Android下基于XML的Graphics以前作图,一般有两种方式,首先是UI把图形设计好,我们直接贴,对于那些简单的图形,如矩形、扇形这样的图形,一般的系统的API会提供这样的接口,但是在Android下,有第三种画图方式,介于二者之间,结合二者的长处,如下的代码:Java 代码<item android:id="@android:id/secondaryProgress"><clip><shape><corners android:radius="5dip" /><gradientandroid:startColor="#0055ff88"android:centerColor="#0055ff00"android:centerY="0.75"android:endColor="#00320077"android:angle="270"/></shape></clip></item>这是一个Progress的style里面的代码,描述的是进度条的为达到的图形,原本以为这是一个图片,后来仔细的跟踪代码,发现居然是xml,像这种shape corners gradient等等这还是第一次碰到。
shape 表示是一个图形,corners表示是有半径为5像素的圆角,然后,gradient表示一个渐变。
这样作图简单明了,并且可以做出要求很好的图形,并且节省资源Java 代码<shapexmlns:android="/apk/res/andr oid" android:shape="rectangle"><gradient android:startColor="#FFFF0000" android:endColor="#80FF00FF"android:angle="270"/><padding android:left="50dp" android:top="20dp"android:right="7dp" android:bottom="7dp" /><corners android:radius="8dp" /></shape>gradient 产生颜色渐变android:angle从哪个角度开始变貌似只有90的整数倍可以android:shape="rectangle" 默认的也是长方形Java 代码<shapexmlns:android="/apk/res/andr oid" android:shape="oval"><solid android:color="#ff4100ff"/><stroke android:width="2dp" android:color="#ee31ff5e"android:dashWidth="3dp" android:dashGap="2dp" /> <padding android:left="7dp" android:top="7dp"android:right="7dp" android:bottom="7dp" /><corners android:radius="6dp" /></shape>#ff4100ff蓝色#ff4100ff绿色<solid android:color="#ff4100ff"/>实心的填充里面<stroke 描边采用那样的方式将外形轮廓线画出来android:dashWidth="3dp" android:dashGap="2dp" 默认值为0android:width="2dp" android:color="#FF00ff00"笔的粗细,android:dashWidth="5dp" android:dashGap="5dp" 实现- - -这样的效果,dashWidth指的是一条小横线的宽度dashGap指的是小横线与小横线的间距。
width="2dp" 不能太宽shape等特殊xml1.用shape 作为背景<shapexmlns:android="/apk/res/andr oid"><solid android:color="#f0600000"/><stroke android:width="3dp" color="#ffff8080"/><corners android:radius="3dp" /><padding android:left="10dp" android:top="10dp" android:right="10dp" android:bottom="10dp" /></shape>一定要注意solid android:color="#f0600000" 是背景色要用8位最好不要完全透明不然没有效果啊这句话本来就不是背景色的意思2.类似多选的效果:(1)listView.setChoiceMode(ListView.CHOICE_MODE_MULTI PLE);listView.setItemsCanFocus(false);(2)define list itemCheckedTextViewxmlns:android="http://schemas.android.c om/apk/res/android"android:orientation="vertical"android:layout_width="fill_parent"android:layout_height="?android:attr/listPreferredItem Height"android:textAppearance="?android:attr/textAppearance Large"android:gravity="center_vertical"android:paddingLeft="6dip"android:paddingRight="6dip"android:checkMark="?android:attr/listChoiceIndicatorM ultiple"android:background="@drawable/txt_view_bg"/> (3) define drawable txt_view_bg.xml <itemandroid:drawable="@drawable/selected"android:state_checked="true" /><itemandroid:drawable="@drawable/not_selected" />3.<LinearLayout android:layout_width="100dp" android:layout_height="wrap_content" /> LinearLayourll = newLinearLayout(this);parentView.addView(ll, new youtParams(100,LayoutParams.WRAP_CONTENT));4. 当设置TextViewsetEnabled(false)时背景颜色你如果用#ffff之类的话可能不会显示你最好使用android:textColor这个属性而不是使用color。
<TextView android:text="whatever text you want" android:layout_width="wrap_content" android:la yout_height="wrap_content" android:textColor="@color /example" />res/color/example.xml):<?xml version="1.0" encoding="utf-8"?><selector xmlns:android="/apk/res/andr oid"> <item android:state_enabled="false"android:color="@color/disabled_color" /> <item android:color="@color/normal_color"/></selector>/intl/zh-CN/reference/andro id/content/res/ColorStateList.html5./?p=9<layer-listxmlns:android="/apk/res/andr oid"><item><shape><solid android:color="#FFF8F8F8" /></shape></item><item android:top="23px"><shape><solid android:color="#FFE7E7E8" /></shape></item></layer-list>You can simple combine several drawables into one using <layer-list> tag.note: Unfortenately you cannot resize drawables in layer-list. You can only move it.<layer-listxmlns:android="/apk/res/andr oid"> <itemandroid:drawable="@drawable/shape_below"/> <itemandroid:top="10px" android:right="10px"android:drawable="@drawable/shape_cover"/></layer-list>includeYou can put similar layout elements into separate XML and use <include> tag to use it.<RelativeLayoutxmlns:android="http://schemas.android.co m/apk/res/android"android:layout_width="fill_parent"android:layout_height="64dip"android:gravity="center_vertical"android:ignoreGravity="@+id/icon"><include layout="@layout/track_list_item_common" />;</RelativeLayout>track_list_item_common.xml<mergexmlns:android="/apk/res/andr oid"><ImageViewandroid:id="@+id/icon"android:layout_alignParentLeft="true"android:layout_centerVertical="true"android:layout_marginLeft="4dip"android:layout_width="60px"android:layout_height="60px"/>...</merge><?xml version="1.0" encoding="utf-8"?><!-- 长方形--><shapexmlns:android="/apk /res/android" android:shape="rectangle"><!-- 填充颜色--><!-- solid android:color="#00000000" /--><!-- 边框android:dashWidth="10dp"虚线的每一条长度android:dashGap="20dp" 虚线的间隔--><stroke android:width="2dip"android:color="#FFFFFFFF"android:dashWidth="10dp"android:dashGap="20dp"/><padding android:left="10dp"android:top="10dp" android:right="10dp"android:bottom="10dp" /><!-- 半径==>弧度--><corners android:radius="10dp" /><!-- 不能和solid同时使用填充渐变色--><gradient android:startColor="#FFFF0000" android:endColor="#80FF00FF"android:angle="270"/></shape>。