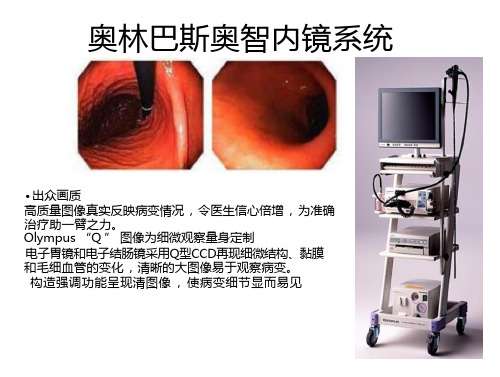
OLYMPUS(奥林巴斯)360度高清投影系统
更多的应用功能
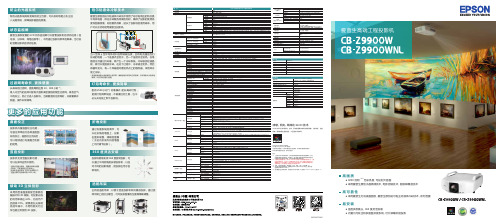
防尘的光路系统新的光路系统具有更高的防尘性能,可以很好地阻止灰尘进 入光路系统,保障投影画面的质量。
状态监视屏爱普生最新配置的 LCD 状态监视屏可以查看投影机的状态信息(信 号源、分辨率、网络信息等)。
不用通过投影机菜单及屏幕,也可实 时查看投影机的状态信息。
珀尔贴液体冷却技术爱普生原创的珀尔贴液体冷却技术使用了珀尔贴效应的热交换 半导体电路,保证冷却散热效果的同时,确保了投影的使用亮 度和图像质量。
好的散热效果,延长了投影机的使用寿命,用 户可以无忧地使用爱普生投影机。
过 滤 网 寿命长,更 换 便 捷长寿命的过滤网,更换周期达到 10,000 小时 *5。
吸入冷空气的进风口配有大面积高密度的褶皱型过滤网,吸收空气 中的灰尘,防止它进入投影机。
当需要更换过滤网时,只需要移开 侧盖,操作非常简单。
更多的应用功能曲面校正投影机内置曲面校正功能, 可通过菜单进行各种曲面图 形的校正,曲面校正完成后, 可以继续进行内置融合功能 的使用。
竖直投影投影机支持竖直投影功能, 可以在多种应用中使用。
* 投影机竖直投影时,需要使用单独销售 的吊架,不能直接直立在物体上;* 投影机竖直投影时,进风口面需要向下; * 竖直投影灯泡的寿命是 1000 小时。
当 n 型和 p 型半导体材料在两端被连接,会有电流通过他们 形成的电路,一个连接点会变冷,另一个连接点会发热。
在电 路的冷点通过冷却液,就产生一个冷却系统。
冷却液流经液晶 板,就可以使面板冷却。
在这个过程中,冷却液会变热,然后 再循环变冷。
有一个风扇面对着发热点上的散热器,采用风冷 使之冷却。
* 液晶面板配备水晶玻璃防尘保护罩,确保面板冷却的均匀和效果,冷却效果从外框传给 玻璃,从而冷却到整个面板。
灯 泡 寿命长,更 换 简 单配有 2500 小时 *1(标准模式)的长寿命灯泡, 更换灯泡简单快速,不需要任何工具,也不 必从天花板上卸下投影机。
折角投影通过内置系统的调节,可 以在折角的墙面上,投影 出图形规整、清晰的图像 (无论内折或外折的墙面 上均可调节投影)。
奥林巴斯BXiS金相显微镜系统: 数码成像无缝集成 正立金相显微镜BXiS 1 使用说明书

BXiS 金相显微镜系统:数码成像无缝集成正立金相显微镜BXiS今日,各种各样的检查应用,都要求光学检查系统能够以多种方式完成高效的图像处理工作。
无论您是需要使用白光成像进行基本的测量,还是需要使用具有色彩高保真度的偏振光进行严格的材料鉴定,奥林巴斯都能以其灵活的方案满足您的需求。
BXiS ——您的个性风格。
在奥林巴斯产品方案中,高级显微镜产品可搭载特定的数码显微照相装置,保证了图像的高分辨率和精确的色彩还原。
奥林巴斯全面解决方案还包括高级图像软件。
该软件融合了各种操作功能,包括基本的图像拍摄、图像处理、报表生成、数据导出以及数据、图像和报表的全球网络连接共享。
BXiS ——您的个性系统。
奥林巴斯允许用户自由创建工作方案以满足不同环境的工作流程和其它需要。
用户在专心工作的同时,奥林巴斯还给用户提供了各种便捷、省时的工具,让日常的例行工作也变得轻松容易。
BXiS ——您的个性方案。
BXiS 系统——不论是现在还是未来,都能满足您个性风格的任何操作应用拥有 BX iS , iS 代表您的个性风格(i ndividual S tyle )。
3多用途系统,满足您的个性风格奥林巴斯致力于创建可支持各种级别工作的显微镜系统方案5让工作流程精简高效OLYMPUS Stream 软件,满足您的每个需求BXiS 简化图像的拍摄流程BXiS 操作,不易疲劳9创建个人专属的奥林巴斯系统BXiS 按您的样本和方案设计完美的系统BXiS 拥有各种物镜各种奥林巴斯数码照相装置BXiS 拍摄您需要的图像从简单测量到复杂的图像分析16轻松扩展至未来的应用程序BXiS 的扩展功能可适应未来的需要奥林巴斯系统支持升级功能17系统图、规格BX51 / BX51M / BXFM 系统图BX61 系统图BX41M-LED 系统图BX51 IR 系统图规格外形尺寸让工作流程精简高效时间和工作环境同样重要,这正是BXiS的图像和控制软件可以个性化设置工作流程的原因。
奥林巴斯最新一代柔性支气管镜的用户视角说明书

THE LATEST GENERATION OF FLEXIBLE BRONCHOSCOPESA user’s perspectiveAbstractBronchoscopy involves the examination of different segmental and sub-segmental bronchi in order to obtain samples to make a diagnosis. The procedure requires the operator to manually manoeuvre the bronchoscope by rotating the scope, which can frequently lead the bronchoscopist to move into unnatural positions while flexing the hand.As a result, it can be challenging to enter some bronchi due to difficult angulation and potentially, increased fatigue for the operator. It also makes it challenging for an assistant to access the working channel to administer drugs and introduce endotherapy instruments. The latest Olympus bronchoscopes come with an insertion tube rotation function, which allows the operator to rotate the bronchoscopewithout having to twist their wrists. This enables the bronchoscopist to maintain the scope in a natural position that is convenient, allowing easy insertion of instruments whilst minimising fatigue. Additionally, it provides the assistant with easier access to theworking biopsy port to help introduce local anaesthesia, saline and accessories.The challengesWhile performing a bronchoscopy, the operator will explore different segmental bronchi to enablevisualisation and sampling. This involves rotating the scope and adjusting the angulation control along with back and forth movement of the hand and arm. Access to the sub-segmental level is sometimes necessary to obtain samples where the lesion lies peripherally. Using a conventional bronchoscope requires rotating and twisting multiple times to gain access to the distal bronchioles, which can often be arduous. Bronchoscopists are conditioned to having to twist their wrists and arms into awkward positions to maintain smooth entry of the bronchoscope into the distal airways (Fig 1). Alternatively, the bronchoscopist needs to change position to ensure their hand and arm is straight enough to continue advancing thebronchoscope into the airways.Figure 1. Example of when the bronchoscopist is required to rotate and twist their wrist in an awkward position, to access difficult to reach lung segments.During the procedure, it is also important to keep the working channel at an angle that is approachablefor the operator or the assistant. The position ofthe working channel alters along with the changing position of the bronchoscopist, meaning it can restat inconvenient positions, making it difficult to deliver drugs and instruments via the biopsy port. On the other hand, the continued flexing of the bronchoscopist’s hand and arm leads to increased strain if theposition is kept at an unnatural position for longer intervals, especially during prolonged procedures. These processes are more pronounced in accessing challenging areas such as the right upper lobe bronchi.Various new procedures, such as radial EBUS guided biopsy, navigational bronchoscopy, and bronchoscopic lung volume reduction using coils and valves, are becoming increasingly common, and require longer intubation periods. To facilitate the deploymentof these advanced technologies accurately, the bronchoscope needs to be maintained at a specific angle. This can be extremely challenging with a conventional bronchoscope as the user is required to maintain an unnatural position for prolonged periods.Understanding the product’s designThe new EVIS LUCERA ELITE generation of flexible video bronchoscopes includes various modifications, to improve on the EVIS LUCERA SPECTRUM bronchoscopes (see table). The latest Olympus range of bronchoscopes incorporates a rotation function that rotates the distal end of the scope left or right up to 120 degrees. Using this feature, the distalend of the scope can be maintained straight in the neutral position and the proximal control sectioncan be rotated. Located under the broader control section of the bronchoscope is a simple turning ring, which allows the bronchoscopist to manually rotate the flexible distal end of the scope left or right (Fig 2). The new generation of bronchoscopes also incorporates greater upward tip flexibility of 210 degrees, a 30 degree increase compared to previous Olympus bronchoscopes. This increased upward flexibility, combined with the rotation function, offers users greater manoeuvrability with the latest Olympus generation of bronchoscopes.Model BF-290 Series BF-260 SERIESBF-H290BF-1TQ290BF-Q290BF-P290BF-XP290BF-XP260F BF-P260F BF-260BF-F260BF-6C260BF-1T260 Type HDTV Hi-Res Hi-Res SD SD Hybrid Hybrid SD SD HDTV SDField of View (°)12012012011011090120120120120120 Depth of View(mm) 3.0-100 2.0-100 2.0-100 2.0-50 2.0-50 2.0-50 3.0-50 3.0-100 3.0-100 2.0-100 3.0-100 Insertion TubeOuter Diameter(mm)6 5.9 4.8 4.1 2.8 2.8 4.4 4.9 5.4 5.76Distal End OuterDiameter (mm) 5.76 4.9 4.23.12.9taperedpart2.84 4.9 5.5 5.9 5.9Channel InnerDiameter (mm)2322 1.2 1.22222 2.8 AngulationRange(°Up/°Down)210/130180/130210/130210/130210/130180/130180/130180/130180/130180/130180/130InsertionTube RotationFunction✓✓✓✓✓x x x x x xHigh FrequencyCompatibility✓✓✓✓x x x✓✓✓✓How the BF-290 series bronchoscopes ‘meet the challenge’The rotation function is a novel technology and is new for many bronchoscopists who are more familiar with the conventional bronchoscopes. The overwhelming majority of users are accustomed to manoeuvring the scope without using the rotation function and achieving the results with greater fatigue and discomfort. Thanks to this novel feature, manoeuvring the bronchoscope is possible with less wrist movement or twisting. The rotation function allows the bronchoscopist to hold the scope in a more comfortable position and at the same time, experience easier access to difficult toreach segments.To add more flexibility, the increased distal tip flexion of 210 degrees further enhances scope handling. It enables the user to comfortably enter the segments that usually require a large amount of angulation, such as apical segments of the upper lobe and superior basal segments of the lower lobe.The insertion tube can be rotated left or right up to 120 degrees, by simply turning the ring on the control section without holding the scope at an angle (Fig 2 & 3). The manipulation of the scope also allows the instrument biopsy port to face the assistant to conveniently insert endotherapy devices such as forceps and brushes.Figure 2. By simply turning the control ring, the distal end of the scope can be rotated left (A) or right up to 120° (C).A: Rotate Left 120°B: Rotate Straight C: Rotate Right 120°Figure 3. The insertion tube rotation function.120° to the left/rightdirectionRotation control ringExperiences as a new userIt takes a little time for the user to become accustomed to the new technique, as it is not unusual to follow the old reflexes and perform bronchoscopy procedures in the conventional way. It can also be slightly disorienting for the operator, as images on the screen would also rotate along with rotation of the scope. However, after a few procedures, it becomes second nature for an experienced bronchoscopist to become familiar with the new feature.Conversely, there might not be any issues for somebody who starts learning with the newer technique from the very beginning. The technique rewards instantly with less fatigue and better handling of the scope to support smoother access to the peripheral bronchi. The rotation function makes the biopsy port easily accessible for nurses when administering drugs or when assisting with inserting endotherapy devices.Written with kind thanks by:Dr Usman MaqsoodSenior Clinical Fellow in Interventional Pulmonology Royal Preston Hospital, Lancashire T eaching HospitalsDr Mohammed Munavvar, MD, DNB, FRCPConsultant Chest Physician & Interventional Pulmonologist Clinical Director in Respiratory MedicinePresident-Elect, European Association for Bronchology & Interventional PulmonologyRoyal Preston Hospital, Lancashire T eaching Hospitals“In my experience, it is very easy and rewarding to familiarise yourselves with the rotation function, as it does not require any further training and barely a few procedures to feel comfortable with using the feature.I would highly recommend the use of these latest Olympus bronchoscopes to my colleagues who would certainly benefit from its new rotation function allowing easier and smoother procedures without undergoing any trouble or training.”10605120° to the left/rightdirectionSpecifications, design, and accessories are subject to change without any notice or obligation on the part of the manufacturer.KeyMed House, Stock Road, Southend-on-Sea, Essex, SS2 5QH, UK Telephone: +44 (0)1702 616333e-mail:***************.ukwebsite:。
Olympus E-M10 mark II 数码照相机 说明书

使⽤说明书数码照相机本说明书中的常⽤指⽰符号本说明书中使⽤了下列符号。
2CHS⽬录快速任务索引7各部位名称 10使⽤前的准备⼯作 12查验包装内的物品 (12)电池充电和插⼊电池 (13)插⼊存储卡 (14)取出存储卡 (14)安装照相机镜头 (15)打开电源 (16)⽇期/时间设定 (17)拍摄 18拍摄时的信息显⽰ (18)拍摄时的显⽰屏显⽰内容 (18)在不同显⽰间切换 (20)在使⽤实时取景拍摄和取景器拍摄之间切换 (20)切换信息显⽰ (21)拍摄静⽌图像 (22)使⽤iAUTO模式 (24)在场景模式下拍摄 (26)使⽤创意拍摄 (28)使⽤PHOTO STORY (30)“即取即拍”摄影(P程序式模式) (32)选择光圈(A光圈优先模式) (33)选择快门速度(S快门优先模式) (34)选择光圈和快门速度(M⼿动模式) (35)长时曝光拍摄(BULB) ...........35实时合成摄影(暗光和亮光区域合成) (36)操作触摸屏来拍摄 (37)记录视频 (38)使⽤视频模式(n) (39)在视频记录过程中拍摄照⽚(影⽚+照⽚模式) (40)拍摄视频时使⽤静⾳功能 (40)拍摄“我的剪辑” (41)编辑“我的剪辑” (42)拍摄快慢镜头视频 (43)记录⾼速视频 (44)使⽤拍摄选项 (45)调⽤拍摄选项 (45)控制曝光(曝光补偿) (47)锁定曝光(AE锁定) (47)设置AF焦点(⾃动对焦区域) (48)使⽤⼩焦点和群组焦点(设定AF焦点) (48)脸部识别AF/瞳孔识别AF (49)缩放框AF/缩放AF(超级点AF) (50)选择对焦模式(AF模式) (51)更改⾼光显⽰和阴影显⽰的亮度 (52)控制颜⾊(⾊彩创造) (52)选择照相机测量亮度的⽅法(测光) (53)ISO感光度 (53)调整⾊彩(⽩平衡) (54)微调⽩平衡(⽩平衡补偿) (55)减轻照相机晃动(影像防抖) (56)连拍/使⽤⾃拍定时器 (57)拍摄时快门按钮操作不造成振动影响(快门减震z) (58)3CHS4CHS⽬录拍摄时不发出快门声⾳(静⾳[♥])..............................58设定图像宽⾼⽐.....................59选择画质(静⽌图像画质模式) ..............60选择画质(视频画质模式) ........61使⽤闪光灯(闪光摄影) ...........62调整闪光输出(闪光补正) ........64指定按钮功能(按钮功能) ........64处理选项(影像模式) ..............68微调清晰度(清晰度) ..............69微调对⽐度(对⽐度) ..............69微调彩度(饱和度) ..................69微调⾊调(灰阶).....................70设定颜⾊再现格式(⾊彩空间) ...........................71视频声⾳选项(记录有声视频).....................72将效果添加⾄视频 (72)74播放期间的信息显⽰ .................74播放图像信息 ........................74切换信息显⽰ ........................75查看照⽚和视频........................76索引显⽰/⽇历显⽰ ..............77查看静⽌图像 ........................77⾳量 .....................................78观看视频 ..............................79保护图像 ..............................79删除图像 ..............................79对图像设定传输预约([预约分享]) .........................80选择图像([预约分享选定]、[0]、[删除所选张]) .............80使⽤触摸屏 ..............................81选择和保护图像.....................8182基本菜单操作...........................82使⽤拍摄菜单1/拍摄菜单2 (83)格式化插卡(设定存储卡) ........83删除所有图像(设定存储卡).....83恢复到默认设定(重设) ...........84保存喜好设定(⾃定义设定).....84处理选项(影像风格) ..............85图像质量(K ) ......................85数码变焦(数码远摄转换器).....86设定⾃拍定时器(j /Y ) ........86以固定间隔⾃动拍摄(i 间隔拍摄).......................87更改⼀系列照⽚的设定(包围拍摄) ...........................88拍摄HDR (⾼动态范围)图像 .....................................91将多次曝光记录为单张图像(多重曝光) ...........................92梯形失真校正和透视控制(梯形失真补偿).....................93设定快门减震/静⾳拍摄(快门减震z /静⾳[♥]) ........94⽆线遥控闪光摄影 ..................94使⽤播放菜单...........................95显⽰旋转的图像(R ) .............95编辑静⽌图像 ........................95取消所有保护 ........................97使⽤设定菜单...........................98X (⽇期/时间设定) .............98W (更改显⽰语⾔) .............98i (显⽰屏亮度调节) ...........98照⽚⾃动回放 ........................98Wi-Fi 设定 ............................98c ⾼级菜单显⽰ ....................98固件 . (98)⽬录使⽤⾃定义菜单 (99)R AF/MF (99)S按键/拨盘 (100)T快门释放/连拍 (100)U显⽰/提⽰⾳/PC (101)V曝光/测光/ISO (103)W闪灯设定 (104)X画质/⾊彩/WB (104)Y记录/删除 (105)Z动画 (106)b内置 EVF (108)k相机设定 (108)AEL/AFL (109)⼿动辅助对焦 (110)在电视机上查看照相机图像 (110)选择控制⾯板显⽰(K相机操控设定) (112)添加信息显⽰ (113)⾃动闪光时的快门速度 (114)组合使⽤动态影像尺⼨和压缩率 (114)选择取景器的显⽰样式 (115)116连接智能⼿机 (117)将图像传输到智能⼿机 (118)使⽤智能⼿机遥控拍摄 (118)添加位置信息到图像 (119)改变连接⽅法 (120)更改密码 (120)取消预约分享 (121)初始化⽆线LAN设定 ..............121122将照相机连接到电脑 (122)将照⽚复制到电脑 (122)安装电脑软件 (123)直接打印(PictBridge) (125)简单打印 (125)⽤户⾃定义打印 (126)打印预约(DPOF) (127)创建打印预约 (127)从打印预约中删除所有或已选图像 (128)129电池与充电器 (129)在国外使⽤充电器 (129)⽀持的插卡 (130)记录模式和图像尺⼨/可存储静⽌图像数 (131)132133专⽤于本照相机的外部闪光灯 (133)⽆线遥控闪光摄影 (133)其它外接闪光灯 (134)主要附件 (135)系统图 (136)5CHS⽬录138拍摄提⽰与信息 (138)错误代码 (140)清洁和存放照相机 (142)清洁照相机 (142)存储 (142)清洁和检查摄像设备 (142)像素映射 -检查图像处理功能 (143)菜单索引 (144)默认的⾃定义设定选项 (151)规格 (153)156安全事项 (156)1636CHS速任务索引7 CHS快速任务索引8CHS快速任务索引9 CHS10CHS各部位名称1 模式拨盘 .................................第22页2 后拨盘*(o )第32 – 35、46 – 47、61、66 – 67、76页3 R (视频)/H 按钮...........................第38、64页/第80页4 Fn2按钮 ..................第52、64、66页5 快门按钮 .................................第23页6 背带安装环 ..............................第12页7 前拨盘*(r )第32 – 35、46 – 47、61、66 – 67、76页8 镜头连接标志 (15)9 镜头卡⼝(请在安装镜头前取下防尘护盖。
工业内窥镜 iplex-lx.zh-hant

雨水
陽光
灰塵
不受環境危害影響
IPLEX LX 與 IPLEX LT 符合國際公認的軍用 標準 (MIL-STD-810G/MIL-STD-461F)*,它們 已通過多項環境危害測試,包括噴雨測試、濕 度測試、鹽霧測試、沙塵測試、結冰/凍雨測試 及爆炸性氣體測試。 此外,它們還可承受一定 的粗暴對待,如震動及從最高 1.2 m 的地方墜 落。
*選項
IPLEX LX/LT 特性與規格*
IPLEX LX 僅重 2.7 kg,它將輕便性和可靠性與先進的功能完 美結合在一起,從而實現了便捷性與性能之間的最佳平衡。
以 IPLEX LX 小巧的機身為基礎,IPLEX LT 在設計上側重於能 滿足基本檢查要求,無需高級技能的標準功能上。
內視鏡變數 IPLEX LX 型號 IPLEX LT 型號 內視鏡直徑 內視鏡長度 外部結構
小尺寸、大監視器
儘管只有 227 mm 寬、189 mm 高,IPLEX LX 與 IPLEX LT 仍集成了超大的 6.5 英寸監視器,無論是僅臂長的距離還 是跨過工作臺,皆可獲得最佳可視效果。 它們的厚度不足 100 mm(包括轉向把手/臺座),既可隨身佩帶,亦可豎直站 立,或者固定在三腳架或安裝臂上,幾乎能在任何環境中使 用。
標題輸入功能
為了提高離開檢查現場後的工效及便於報告生成,IPLEX LX 與 IPLEX LT 允許於捕捉的影像中快速方便地輸入標題。 透過標 題可快速識別出檢查位置或結果,以便協助完成影像存檔。
經證實的立體測量功能
我們先進的立體測量技術可確保檢查的超強可靠性和精度。 IPLEX LX 透過兩個視差鏡頭捕捉影像資訊,可以從任意角度 精確測量幾乎所有物件。
1Hale Waihona Puke 9 mm64 mm易於使用,前所未有
360全息影像系统

币种:人民币;单位:元
序号
项目名称
内容/规格
数量
单价
合价
PART 1(软件)
万像360全息影像程序组开发
1、3D模型制作
2、视频制作
1套
15000
15000
2、基础互动模块组开发
3、摄像头控制程序
4、图像监控设备
5、远程控制系统
6、视频控制系统
7、开机播放程序
1套
1500
1500
小计
86100
项目集成费10%
8610
税点6%
5682
合计
100392
1套
20000
20000
PART 2(硬件)
专业显示设备
专业图形处理主机
专业模块图形处理器
全息处理基础模块
1套
5000
5000
动作捕
捉设备
专业监控摄像机
摄像机类型彩色摄像机CCD尺寸1/3英寸索尼高清CCD 1/4英寸索尼高清CCD 1/3英寸索尼高清CCD 1/3英寸夏普高清CCD 1/4英寸夏普高清CCD有效像素PAL:752(H) x582(V) 440K NTSC:768(H) x494(V) 380K镜头大小自选视角范围电视制式PAL (默认)/NTSC水平电视线420TVL 420TVL 480TVL 420TVL 420TVL最低照度Color(1 Lux), B/W(0 Lux,IR On)红外灯开关无信噪比More Than 48dB (AGC Off)电子快门1/50(1/60) ~ 1/10,000 Sec.白平衡自动增益补偿自动输入输出连接直流电源接头视频BNC接头视频输出1.0 Vp-p (75 Ohm, composite)电源要求DC12V电流要求最大1A包装尺寸95 x 70 x 60毫米包装重量0.35公斤
理光投影机 操作说明书

为了安全正确使用本设备,在使用之前,请务必阅读“安全信息”。
目录
介绍.....................................................................................................................5 图像版权................................................................................................................................................5 重要事项................................................................................................................................................5 观看 3D 图像的用户注意事项...........................................................................................................5
1
打开投影仪.........................................................................................................................................30 选择输入信号...................................................
奥林巴斯EVIS_LUCERA_SPECTRUM电子内镜系统-分析报告-
• 彩虹现象修正 先进的彩虹现象修正功能 ,减轻了动态图 像的闪烁干扰。
• 内镜ID功能 可以预设白平衡及操作参数. 内镜中装载的 记忆芯片能够存储内镜信息 , 当其连接到 图像处理装置时 , 内镜信息会自动送出到 系统中 , 并进行自动调整。
• 兼容性能可以继续使用目前已有的EVIS240 或260系列内镜,使您升级换代而又不浪费已 有资源。
• 激发光照射到黏膜下层后 ,会产生强荧光。 荧光如果遇到发育异常的病灶(例如浅表 血管的异常聚集或黏膜增厚),光线减少 , 荧光变弱 。AFI功能会将这些细微变化转换 成色彩信息 ,使正常黏膜和病灶之间的细 微区别得到强调。
高品质图像
• 先进的HDTV成像技术 ,有助于改善诊断准 确度
• 感知细微色彩 ,再现逼真图像
产品特征
• 出众画质 ,可配合NBI观察
• 优化的单气囊设计 ,插入顺畅 ,节省插入 时间
• 清洗、消毒和灭菌程序简便 • 气囊控制装置操作简便 • 精密多样专用附件 ,全面支持小肠诊疗
• 具有广泛兼容性,与EVIS240、EVIS LUCERA、 EVIS SPECTRUM系统均可配套使用
EVIS LUCERA 单气囊电子小肠镜
超声电子胃镜
• 环形扫描超声内镜: GF-UE260-AL5 • 采取360度电子环形扫描方式 ,能够充分获
取病变及血管等的详细信息。 操作性能良好 ,插入性能尤为出色, 为下一代超声电子内镜医疗拓宽了道路。
• 穿刺专用超声内镜:GF-UC240P-AL5 & GFUCT240-AL5
• 采用小型凸阵排列式换能器 , 图像清晰视 野宽广。 彩色多普勒和能量多普勒使吸引活检的同 时可观察血流动态。 大钳子管道适合进行多种治疗。