PTC07AB串口摄像头模块使用说明书
海球型球形摄像头产品说明书

FRQ¿JXUDEOHUHJLRQV Extreme WDR (130 dB); White balance: automatic, hold and manual; Brightness; Contrast; Sharpness (auto); Automatic gain control; 2D+3D digital noise reduction; Flied focus Board mount
190° Rotate: -175°-175°
+%DVHOLQH0DLQ+LJKSUR¿OH0-3(* Fisheye view; Dewarped view: 180° / 360° Panorama, ePTZ 18 fps at 4000 x 3000; 24 fps at 4096 x 2160; 24 fps at 3840 x 2160; 30 fps at 2048 x 2048; 30 fps at 1600 x 1200; 30 fps at 1920 x 1080; 30 fps at 1024 x 1024; 30 fps at 1280 x 960; 30 fps at 1280 x 720; 30 fps at 800 x 600; 30 fps 640 x 480 6LPXOWDQHRXVWKUHHVWUHDPVEDVHGRQYLGHRFRQ¿JXUDWLRQV
Weight Dimensions (Ø x H) Environmental Casing Mount Type Starting Temperature Operating Temperature Operating Humidity Approvals
超高清球形安全摄像头指南说明书
Security Made SmarterSuper HD BulletEN INSTRUCTION MANUALCongratulations on the purchase of your Swann Su-per HD Camera.• Enjoy day & night security & have a bird’s eye view of your premises in crystal clear super HDwith this impressive 5 Megapixel camera• See what’s happening in any light with infrared cut filter & powerful night vision up to 130ft/40m& a wide 70° viewing angle• With sleek bullet styling & sturdy aluminium construction, the camera suits indoor & out-door applications with an IP66 rating for anyweather conditions• This camera is the perfect addition if you al-ready have a recording solution (NVR) & needextra surveillance. It can only be used in combi-nation with Swann’s Platinum Digital HD NVRsincluding the 7450 series Important instructions1. Make sure the camera is fixed correctly and stable if fastened in place.2. Never place strain of any kind on the network ca-ble connection. It’s designed to clip into the Ethernet port, but it won’t support weight and can be broken.3. Do not operate if wires and terminals are exposed. Important note: All jurisdictions have specific laws and regulations relating to the use of cameras. Be-fore using any camera for any purpose, it is the buy-er’s responsibility to be aware of all applicable laws and regulations that limit the use of cameras.If you own a 8 or 16 channel 8000 series NVR, con-figuration is required for successful connection, go toSearch for - NHD 855 Connection Guide.To connect the camera to your NVR, simply connect the supplied Ethernet cable to the LAN connection on the camera then plug the other end of the cable into one of the IP camera inputs on the back of your NVR.Ethernet CablePlease note: The power connector is provided as an alternative power option if required. Your NVR will provide power over the Ethernet cable when connected and a separate power adapter is not required.The camera can be mounted onto a flat surface using the screws and wall plugs provided. The surface musthave sufficient strength to hold the camera.→Position the camera in the location you want to mount it, and mark the screw holes on the surface toposition the screws (a mounting template has been included). Then, using the appropriate screws for thesurface you’re fixing the camera to, secure the camera in place.→If you’re mounting to a wooden surface, then screw the camera directly to the surface.→If you’re mounting to a masonry surface (bricks, concrete or similar), then you’ll need to use wall plugs. Aiming the camera Array 1. Loosen both screws (use an Allen key) to adjust the camera’s orientation.This enables you to rotate the camera so no matter what direction it is facing,your images will be the right way up. Tighten each screw to secure in place.2. Loosen the screw to tilt the camera up or down. Tighten the screw tosecure in place.3. To pan the camera left or right, loosen the screw and position accordingly.Tighten the screw to secure in place.1. Take into consideration what you want to monitor and where you’ll get the best view of it.2. How you’re going to connect the camera to your monitoring system; remember that cables and connections should be kept out of the weather.3. How to keep the camera out of harm’s way. It’s recommended to mount your camera at an elevated position.4. Place your camera as close to the area of interest as practicable. The best position is from about 13ft/4m above looking slightly down, keeping in mind the details you are looking for.5. Although the sky looks nice when you look at the live view from your camera, it is an unlikely direction for an offender to approach. Make sure your camera has minimal sky in it as the light in daylight can make the foreground of the image darker.6. Think about the most likely way a potential offender may approach your home, use your camera to give you the best coverage of these areas.7. The camera’s casing is resistant to different weather conditions and tampering. It would take an overwhelming event to damage the housing.8. Even though the camera is weather and water-resistant, prolonged exposure to adverse weather conditions such as sunlight or excessive moisture, may eventually damage the internal components of the camera and adversely affect its performance. 9. Run cables inside a wall cavity or other protected enclosure, and ensure that all wiring and connectors are insulated and protected from moisture.10. Don’t put your cable near live electrical wiring. AC electricity generates radio “noise” which can interfere with the signal from your camera.Swann Communications warrants this product against defects in workmanship and material for a period of one (1) year from its original purchase date. You must present your receipt as proof of purchase for warranty validation. Any unit which proves defective during the stated period will be repaired without charge for parts or labour or replaced at the sole discretion of Swann. The end user is responsible for all freight charges incurred to send the product to Swann’s repair centres. The end user is responsible for all shipping costs incurred when shipping from and to any country other than the country of origin.The warranty does not cover any incidental, accidental or consequential damages arising from the use of or the inability to use this product. Any costs associated with the fitting or removal of this product by a tradesman or other person or any other costs associated with its use are the responsibility of the end user. This warranty applies to the original purchaser of the product only and is not transferable to any third party. Unauthorized end user or third party modifications to any component will render all warranties void. By law some countries do not allow limitations on certain exclusions in this warranty. Where applicable by local laws, regulations and legal rights will take precedence.For Australia: Our goods come with guarantees which cannot be excluded under Australian Consumer Law. You are entitled to a replacement or refund for a major failure and for compensation for any other reasonably foreseeable loss or damage. You are also entitled to have the goods repaired or replaced if the goods fail to be of acceptable quality.This equipment has been tested and found to comply with the limits for Class A digital device, pursuant to part 15 of the FCC Rules. These limits are designed to provide reasonable protection against harmful interference in a residential installation. This equipment generates, uses and can radiate radio frequency energy and, if not installed and used in accordance with the instructions, may cause harmful interference to radio or television reception, which can be determined by turning the equipment off and on, the user is encouraged to try to correct the interference by one or more of the following measures:• Reorient or relocate the receiving antenna• Increase the separation between the equipment and the receiver• Connect the equipment into an outlet on a circuit different from that to which the receiver is connected • Consult the dealer or an experienced radio/TV technician for helpThese devices comply with part 15 of the FCC Rules. Operation is subject to the following two conditions:(1) These devices may not cause harmful interference.(2) These devices must accept any interference received, including interference that may cause undesired op-eration.**************1800 788 2100800 479 266***********。
AVer PTC310UV2 PTZ Camera 说明书

Manuals+— User Manuals Simplified.AVer PTC310UV2 PTZ Camera Instruction Manual Home » AVer » AVer PTC310UV2 PTZ Camera Instruction ManualContents1 AVer PTC310UV2 PTZCamera2 Product Information3 Product Usage Instructions4 Product Introduction4.1 Overview5 OSD Tree5.1 Advanced Setting6 Visca Command7 Visca-over-IP Settings8 CGI Command9 Documents / Resources10 Related PostsAVer PTC310UV2 PTZ CameraRS232 Port Pin DefinitionFunction Mini DIN9 PIN #I/O Type Signal DescriptionVISCA IN 1Output DTR Data Terminal Ready 2Input DSR Data Set Ready3Output TXD Transmit Data6Input RXD Receiver DataVISCA OUT 7Output DTR Data Terminal Ready 4Input DSR Data Set Ready8Output TXD Transmit Data9Input RXD Receiver Data 5——Not connectRS232 mini DIN9 to mini DIN8 Cable Pin DefinitionMini DIN8 Cable Pin DefinitionDin8 to D-Sub9 Cable Pin DefinitionRS422[Note] Use cat5e splitter for multi-camera connection.RS422 PinNo.Pin No.Pin1TX-5TX+2TX+6RX+3RX-7RX-4TX-8RX+Cat5e splitter pin assignment:OSD TreeAdvanced SettingGo to Advanced Setting -> Control. Make sure the Camera Address and Baud Rate settings are correct.1 Layer2 Layer3 Layer4 LayerAdvanced Setting AudioInput TypeLine InMIC InAuto Gain Control Off/OnNoise Suppression Off/Low/NormalAudio Volume0-10ControlSerial Port RS-232/RS-422ProtocolVISCA/PELCO D/PELCOP/AWCamera Address1-7Baud Rate4800/9600/38400 Tracking Off/On–Tracking ModePresenter–Zone–Hybrid–Visca CommandRS232/422 Visca Command TableCommandSetCommand Command Packet CommentsCAM_Power On8x 01 04 00 02 FFPower ON/OFF Off8x 01 04 00 03 FFCAM_Zoom Stop8x 01 04 07 00 FFTele(Variable)8x 01 04 07 2p FFp=0 (Low) to 7 (High)Wide(Variable)8x 01 04 07 3p FFDirect8x 01 04 47 0p 0q 0r 0s FFpqrs: Zoom Position PTC310: 0x0000~0x6f20 PTC330: 0x0110~0x5490Stop8x 01 04 08 00 FFFar (Standard)8x 01 04 08 02 FFEach ‘Far/Near’ needs a ‘stop’Near (Standard)8x 01 04 08 03 FFst nd rd thCAM_Focus Auto Focus8x 01 04 38 02 FFManual Focus8x 01 04 38 03 FFOne Push8x 01 04 18 01 FFDirect8x 01 04 47 0p 0q 0r 0s FF pqrs: Zoom PositionCAM_WB Auto8x 01 04 35 00 FF Normal AutoATW8x 01 04 35 04 FFIndoor8x 01 04 35 01 FFOutdoor8x 01 04 35 02 FFOne Push WB8x 01 04 35 03 FF One Push WB mode Manual8x 01 04 35 05 FF Manual Control mode One Push8x 01 04 10 05 FF One Push WB TriggerCAM_RGainUp8x 01 04 03 02 FF Manual Control of R GainDown8x 01 04 03 03 FFCAM_BgainUp8x 01 04 04 02 FF Manual Control of B GainDown8x 01 04 04 03 FFCAM_AE Full Auto8x 01 04 39 00 FF Automatic Exposure modeManual8x 01 04 39 03 FF Manual Control modeShutter Priority8x 01 04 39 0A FF Shutter Priority Automatic Exposure mode Iris Priority8x 01 04 39 0B FF Iris Priority Automatic Exposure mode Bright8x 01 04 39 0D FF Bright Mode (Manual control)CAM_Shutte r Up8x 01 04 0A 02 FF Shutter Setting Down8x 01 04 0A 03 FFCAM_IrisUp8x 01 04 0B 02 FF Iris SettingDown8x 01 04 0B 03 FFCAM_GainUp8x 01 04 0C 02 FF Gain SettingDown8x 01 04 0C 03 FFCAM_BrightUp8x 01 04 0D 02 FF Bright SettingDown8x 01 04 0D 03 FFCAM_ExpC omp Up8x 01 04 0E 02 FF Exposure Compensation Amount Setting Down8x 01 04 0E 03 FFCAM_BackliOn8x 01 04 33 02 FF Back Light Compensation ON/OFFghtOff8x 01 04 33 03 FFCAM_Preset Reset8x 01 04 3F 00 pp FFpp: Preset Number 0x00~0xFF Set8x 01 04 3F 01 pp FFRecall8x 01 04 3F 02 pp FFCAM_Menu On/Off8x 01 06 06 10 FF Display ON/OFFPan-tilt Driv e Up8x 01 06 01 VV WW 03 01FFVV: Pan speed setting 0x01 (low speed) to 0x18 (high speed) WW: Tilt speed setting 0x01 (low speed)to 0x18 (high speed)Down8x 01 06 01 VV WW 03 02FFLeft8x 01 06 01 VV WW 01 03FFRight8x 01 06 01 VV WW 02 03FFUpLeft8x 01 06 01 VV WW 01 01FFUpRight8x 01 06 01 VV WW 02 01FFDownLeft8x 01 06 01 VV WW 01 02FFDownRight8x 01 06 01 VV WW 02 02FFStop8x 01 06 01 VV WW 03 03FFHome8x 01 06 04 FFReset8x 01 06 05 FFCAM_WDROn8x 01 04 3D 02 FF Wdr ON/OFFOff8x 01 04 3D 03 FFCAM_MenuEnter8x 01 7E 01 02 00 01 FF Enter SubmenuTally LampON8x 01 7E 01 0A 00 02 FFTally LampOFF8x 01 7E 01 0A 00 03 FFFreeze Freeze On81 01 04 62 02 FF Freeze On ImmediatelyFreeze Off81 01 04 62 03 FF Freeze Off ImmediatelyPreset Freeze On81 01 04 62 22 FF Freeze On When Running PresetPreset Freeze Off81 01 04 62 23 FF Freeze Off When Running PresetAuto Trackin g On8x 01 04 7D 02 FF Auto tracking ON/OFF Off8x 01 04 7D 03 FFCAM_Memo ry Special Set8x 01 04 3F 01 pp FFThese are changable depending on VISCA Customized Functions web setting: pp: 0x00 To 0xFF normal presetpp: 0x5F => Trun on OSD menu pp: 0xA0 => Full Bodypp: 0xA1 => Upper Body pp: 0xA2 => Tracking Point pp: 0xA3 => Switchpp: 0xA4 => Presenter mode (supported in FW v25or newer) pp: 0xA5 => Zone mode (supported in FW v25 or newer)pp: 0xA6 => Hybrid mode (supported in FW v35 ornewer)Absolute Po sition Set8x 01 06 02 VV WW 0Y 0Y0Y 0Y 0Z 0Z 0Z 0Z FFVV: Pan speed setting 0x01 (low speed) to 0x18 (high speed) WW: Tilt speed setting 0x01 (low speed)to 0x18 (high speed) YYYY: Pan Position ZZZZ: TiltPositionAuto zoom On8x 01 04 A0 02 FF Off8x 01 04 A0 03 FFEffective Tra cking area On8x 01 04 A1 02 FF Off8x 01 04 A1 03 FFRTMP On8x 01 04 A2 02 FF Off8x 01 04 A2 03 FFVideo mode IP+Stream8x 01 04 A3 00 FF USB only8x 01 04 A3 01 FF NDI only8x 01 04 A3 02 FF Streaming only8x 01 04 A3 03 FFReboot On8x 01 04 A4 FFPreset Affec ts PTZ & Fo cus On8x 01 04 A5 02 FF Off8x 01 04 A5 03 FF On8x 01 04 A6 02 FFRelativeZoom Ratio Off8x 01 04 A6 03 FFAuto Tilt On8x 01 04 A7 02 FF Off8x 01 04 A7 03 FFAuto Zoom/Tilt preset Set8x 01 04 A8 pp FF pp: 0x00 To 0xFF normal presetInquiry Co mmand CommandPacketReply Packet CommentsCAM_Power Inq 8x 09 04 00FFy0 50 02 FF Ony0 50 03 FF OffCAM_WBM odeInq 8x 09 04 35FFy0 50 00 FF Autoy0 50 01 FF In Doory0 50 02 FF Out Doory0 50 03 FF One Push WBy0 50 04 FF ATWy0 50 05 FF ManualCAM_RGain Inq 8x 09 04 43FFy0 50 00 00 0p 0q FF pq: R GainCAM_BGain Inq 8x 09 04 44FFy0 50 00 00 0p 0q FF pq: B GainCAM_AEMo deInq 8x 09 04 39FFy0 50 00 FF Full Autoy0 50 03 FF Manualy0 50 0A FF Shutter Priorityy0 50 0B FF Iris Priorityy0 50 0D FF BrightCAM_Shutte rPosInq 8x 09 04 4AFFy0 50 00 00 0p 0q FF pq: Shutter PositionCAM_IrisPo sInq 8x 09 04 4BFFy0 50 00 00 0p 0q FF pq: Iris PositionCAM_GainP osInq 8x 09 04 4CFFy0 50 00 00 0p 0q FF pq: Gain PositionCAM_Bright PosInq 8x 09 04 4DFFy0 50 00 00 0p 0q FF pq: Bright PositionCAM_ExpC ompPosInq 8x 09 04 4EFFy0 50 00 00 0p 0q FF pq: ExpComp PositionCAM_Focus ModeInq 8x 09 04 38FFy0 50 02 FF Auto Focusy0 50 03 FF Manual FocusCAM_Focus PosInq 8x 09 04 48FFy0 50 0p 0q 0r 0s FF pqrs: Focus Positionzoom_Pos_I nq 8x 09 04 47FFy0 50 0p 0q 0r 0s FF pqrs: Zoom PositionPT_Pos_Inq 8x 09 06 12FFy0 50 0Y 0Y 0Y 0Y 0Z 0Z 0Z 0Z FFYYYY: Pan PositionZZZZ: Tilt PositionCAM_Preset Inq 8x 09 04 3FFFy0 50 pp FFReturn the last preset number which has been operated pp:01-FFCAM_Tracki ng status 8x 09 36 6902 FFy0 50 01 FF Ony0 50 00 FF OffCAM_Tracki ng_mode 8x 09 36 6901 FFy0 50 01 FF Presentery0 50 02 FF Zoney0 50 03 FF HybridCAM_Tracki ng body size 8x 09 36 6903 FFy0 50 01 FF Full bodyy0 50 02 FF Upper bodyCAM_OSD MENU on/of 8x 09 7E 0476 01 FFy0 50 02 FF Ony0 50 03 FF OffCAM_Tally 8x 09 7E 010A FFy0 50 02 FF Ony0 50 03 FF OffCAM_WDR mode 8x 09 04 3DFFy0 50 02 FF Ony0 50 03 FF OffCAM_BLC mode 8x 09 04 33FFy0 50 02 FF Ony0 50 03 FF OffCAM_Live F reeze 8x 09 04 6201 FFy0 50 02 FF Freeze Ony0 50 03 FF Freeze OffCAM_Preset Freeze 8x 09 04 6202 FFy0 50 02 FF Preset Freeze Ony0 50 03 FF Preset Freeze OffFirmware ve rsion 8x 09 36 6904 FFy0 50 0p 0q 0r 0s 0t 0u 0v0w FFfw_ver: p.q.rstu.vwUSB Status 8x 09 36 6905 FFy0 50 00 FF USB cable plug outy0 50 01 FF USB cable plug inUVC Status 8x 09 36 69y0 50 00 FF UVC stream off06 FFy0 50 01 FF UVC stream on The x value = VISCA Camera ID: 1 to 7 for RS232/RS422 connection. Visca-over-IP SettingsVISCA over IPThe x value of 8x should be 1 for the Visca-over-IP string.Example for Pan-Left command via IP:01 00 00 09 00 00 00 01 81 01 06 01 07 07 01 03 FF.CGI CommandCGI Command TableCGI List for Video TransmissionCGI item name URL CommandParameter NameParameter valueDescriptionGet JPEG/snapshot 1280×720 j pgGet RTSP str eam rtsp://ip/live_st 1CGI List for Camera ControlCGI item name URL CommandParameter NameParameter valueDescriptionup start /cgi-bin?SetPtzf=1,0,1&(random)up end /cgi-bin?SetPtzf=1,0,2&(random)down star t /cgi-bin?SetPtzf=1,1,1&(random)down end /cgi-bin?SetPtzf=1,1,2&(random)left start /cgi-bin?SetPtzf=0,1,1&(random)left end /cgi-bin?SetPtzf=0,1,2&(random)right start /cgi-bin?SetPtzf=0,0,1&(random)right end /cgi-bin?SetPtzf=0,0,2&(random)zoom_in start /cgi-bin?SetPtzf=2,0,1&(random)zoom_in end /cgi-bin?SetPtzf=2,0,2&(random)zoom_out start /cgi-bin?SetPtzf=2,1,1&(random)zoom_out end /cgi-bin?SetPtzf=2,1,2&(random)set preset :/cgi-bin?ActPreset=1,N&(random)N : positionload pres et:/cgi-bin?ActPreset=0,N&(random)N : positionset preset speed /cgi-bin?Set=preset_speed,3,valval: {min: 1, max: 6}Absolute Position ( Pan)/cgi-bin?Set=ptz_p,3,valval: {min: 2048, mid: 962944, max: 1925888}Follows CGI preset speedAbsolute Position ( Tilt)/cgi-bin?Set=ptz_t,3,valval: {min: 2048, mid: 165696, max: 662784}Follows CGI preset speed(Zoom)/cgi-bin?Set=ptz_z,3,valval: {min: 2048, mid: 14224, max: 28448}Follows CGI preset speedCGI List for Various Settingsexposure value /cgi-bin?Set=img_expo_expo,3,N&(random)value 1 ~ 9N : valuesaturation/cgi-bin?Set=img_saturation,3,N&(random)value0 ~ 10N : valuecontrast/cgi-bin?Set=img_contrast,3,N&(random)value0 ~ 4N : valueTrackingon:/cgi-bin?Set=trk_tracking_on,3,1Trackingoff:/cgi-bin?Set=trk_tracking_on,3,0Reboot GET(Basic Authentication)/cgi-bin?OnePush=!Factory R eset GET(Basic Authentication)/cgi-bin?OnePush=dMode Pre senter /cgi-bin?Set=trk_mode,3,1&Xvalue random number X : valueMode Zon e /cgi-bin?Set=trk_mode,3,2&Xvalue random number X : valueMode Hybrid /cgi-bin?Set=trk_mode ,3,3&XMode Get GET(Basic Authentication)/cgi-bin?Get=trk_mode,3&_=X– ReplyPresentertrk_mode,3=1 Zone trk_mode,3=2 Hybrid trk_mode,3=3X : valueClick Trac k ON GET(Basic Authentication)/cgi-bin?Set=trk_update_detect,3,1Click Trac k OFF GET(Basic Authentication)/cgi-bin?Set=trk_update_detect,3,0Click Trac kGet detec t zone (H umanoid GET(Basic Authentication)/cgi-bin?Get=trk_detect_num,3Need to besent alongwithClick TrackON commandoutlines) number– Reply “trk_detect_num,3=X\r\n”X: The amountof humanoid outlines, maximum:50Click Trac kGet detec t zone (H umanoid outlines) i nfo GET(Basic Authentication)/cgi-bin?GetTrackingDetectZone=XX: The amountof humanoid outlines, maximum:50– Reply“focus:-1\nzone[00]:00,119,720,960\nzone[01]:- 1502615204,-1366225632,01,-1366223544”focus – The number ofhumanoid outline being tracked.zone[NN]:x,y,w,h – based on 1080P resolutionThe upper left corner ofthe screen is the coordinate reference (0,0), x-coordinate/y-coordinate/w width/h height, basedon the upper left cornerof the humanoid outline.The number following indicates the number of the tracked person, for example, -1 means that noone is being tracked. Ifone of the three is beingtracked,one of 0, 1 and 2 will appear after the ‘focus’.Click Trac k Set targ et zone GET(Basic Authentication)/cgi-bin?Set=trk_assign_zone,3,XX: The numberof the human outlines– Reply http response: okGET(Basic Authentication)/cgi-bin?SetString=TrackingFocusZone,[x,y,w,h]– Reply http response: okTracking On/Off G et GET(Basic Authentication)/cgi-bin?Get=trk_tracking_on,3&_=X– ReplyOn trk_tracking_on,3=1Offtrk_tracking_on,3=0″X : valueRTMP Startstreaming/cgi-bin?Set=vdo_rtmp_enable,3,1RTMP Stop streaming/cgi-bin?Set=vdo_rtmp_enable,3,0 .Documents / ResourcesAVer PTC310UV2 PTZ Camera [pdf] Instruction ManualPTC310UV2 PTZ Camera, PTC310UV2, PTZ Camera, Camera Manuals+,。
海视晨光网络速度球型摄像头说明书

DS-2DE7A232IW-AEB(T5)2 MP 32× IR Network Speed DomeHikvision DS-2DE7A232IW-AEB(T5) 2 MP 32× IR Network Speed Dome adopts 1/2.8" progressive scan CMOS chip. With the 32× optical zoom lens, the camera offers more details over expansive areas.This series of cameras can be widely used for wide ranges of high-definition, such as the rivers, roads, railways, airports, squares, parks, scenic spots, and venues, etc. Empowered by deep learning algorithms, Hikvision AcuSense technology brings human and vehicle targets classification alarms to front- and back-end devices. The system focuses on human and vehicle targets, vastly improving alarm efficiency and effectiveness.⏹1/2.8" progressive scan CMOS⏹High quality imaging with 2 MP resolution⏹Excellent low-light performance withpowered-by-DarkFighter technology⏹Audio visual alarm: The white flashing light and audible warning can be triggered by certain events⏹32× optical zoom and 16× digital zoom provide close up views over expansive areas⏹Expansive night view with up to 200 m IR distance⏹Focuses on human and vehicle targets classification based on deep learning⏹Face capture: Up to 5 faces captured at the same time⏹DORIThe DORI (detect, observe, recognize, identify) distance gives the general idea of the camera ability to distinguish persons or objects within its field of view. It is calculated based on the camera sensor specification and the criteria given by EN 62676-4: 2015.DORI Detect Observe Recognize IdentifyDefinition25 px/m63 px/m125 px/m250 px/m Distance (Tele)2200 m (7217.8 ft)873 m (2864.2 ft) 440 m (1443.6 ft)220 m (721.8 ft)⏹SpecificationCameraImage Sensor 1/2.8" progressive scan CMOSMax. Resolution 1920 × 1080Min. Illumination Color: 0.005 Lux @ (F1.6, AGC ON), B/W: 0.001 Lux@(F1.6, AGC ON), 0 Lux with IR Shutter Speed 1/1 s to 1/30000 sSlow Shutter YesDay & Night IR cut filterZoom 32x optical, 16x digitalLensFocal Length 4.8 mm to 153 mmZoom Speed Approx. 4.8 sFOV Horizontal field of view: 50.8° to 2.6° (wide-tele), Vertical field of view: 29.4° to 1.5° (wide-tele), Diagonal field of view:57.4° to 3° (wide-tele)Aperture Max. F1.6Focus Auto, semi-auto, manualIlluminatorSupplement Light Type IRSupplement Light Range IR Distance: up to 200 mPTZMovement Range (Pan) 360°Movement Range (Tilt) -15° to 90° (auto flip)Pan Speed Pan speed: configurable from 0.1° to 160°/s; preset speed: 240°/sTilt Speed Tilt speed: configurable from 0.1° to 120°/s, preset speed 200°/sProportional Pan YesPresets 300Patrol Scan 8 patrols, up to 32 presets for each patrolPattern Scan 4 pattern scansPower-off Memory YesPark Action Preset, pattern scan, auto scan, tilt scan, random scan, frame scan, panorama scan 3D Positioning YesPTZ Status Display YesPreset Freezing YesScheduled Task Preset, pattern scan, patrol scan, auto scan, tilt scan, random scan, frame scan, panorama scan, dome reboot, dome adjust, aux outputVideoMain Stream 50 Hz: 25 fps (1920 × 1080, 1280 × 960, 1280 × 720);60 Hz: 30 fps (1920 × 1080, 1280 × 960, 1280 × 720)Sub-Stream 50 Hz: 25 fps (704 × 576, 640 × 480, 352 × 288);60 Hz: 30 fps (704 × 480, 640 × 480, 352 × 240)Third Stream 50 Hz: 25 fps (1920 × 1080, 1280 × 960, 1280 × 720, 704 × 576, 640 × 480, 352 × 288);60 Hz: 30 fps (1920 × 1080, 1280 × 960, 1280 × 720, 704 × 480, 640 × 480, 352 × 240)Video Compression Main stream: H.265+/H.265/H.264+/H.264 Sub-stream: H.265/H.264/MJPEGThird stream: H.265/H.264/MJPEGVideo Bit Rate 32 kbps to 16384 kbpsH.264 Type Baseline Profile/Main Profile/High ProfileH.265 Type Main ProfileScalable Video Coding (SVC) H.264 and H.265 encodingRegion of Interest (ROI) 8 fixed regions for each streamAudioAudio Compression G.711alaw, G.711ulaw, G.722.1, G.726, MP2L2, AAC, PCMAudio Bit Rate 64 Kbps (G.711)/16 Kbps (G.722.1)/16 Kbps (G.726)/32-192 Kbps (MP2L2)/16-64 Kbps (AAC)Audio Sampling Rate 8 kHz/16 kHz/32 kHz/48 kHzEnvironment Noise Filtering YesNetworkNetwork Storage NAS (NFS, SMB/CIFS), auto network replenishment (ANR)Protocols IPv4/IPv6, HTTP, HTTPS, 802.1x, QoS, FTP, SMTP, UPnP, SNMP, DNS, DDNS, NTP, RTSP, RTCP, RTP, TCP/IP, UDP, IGMP, ICMP, DHCP, PPPoE, Bonjour, Websocket, WebsocketsAPI Open Network Video Interface (Version 19.12, Profile S, Profile G, Profile T), ISAPI, SDK, ISUPSimultaneous Live View Up to 20 channelsUser/Host Up to 32 users, 3 user levels: administrator, operator, and userSecurity Password protection, complicated password, HTTPS encryption, 802.1X authentication (EAP-TLS, EAP-LEAP, EAP-MD5), watermark, IP address filter, basic and digest authentication for HTTP/HTTPS, RTP/RTSP over HTTPS, control timeout settings, security audit log, TLS 1.2, TLS 1.3, host authentication (MAC address)Client iVMS-4200, HikCentral Pro, Hik-Connect Web Browser IE11, Chrome 57+, Firefox 52+, Safari 11+ ImageDay/Night Switch Day, Night, Auto, ScheduleImage Enhancement BLC, HLC, 3D DNRWide Dynamic Range (WDR) 120 dBDefog Digital defogImage Stabilization EISRegional Exposure YesRegional Focus YesImage Settings Saturation, brightness, contrast, sharpness, gain, and white balance adjustable by client software or web browserPrivacy Mask 24 programmable polygon privacy masks, mask color or mosaic configurable SNR > 52 dBInterfaceEthernet Interface 1 RJ45 10M/100M self-adaptive Ethernet portOn-board Storage Built-in memory card slot, support microSD/SDHC/SDXC card, up to 256 GB Alarm 2 inputs, 1 outputAudio 1 input (line in), max. input amplitude: 2-2.4 vpp, input impedance: 1 kΩ ± 10%;1 output (line out), line level, output impedance: 600 ΩReset YesBuilt-in Speaker 1 built-in speaker with effective distance reaching max. 30 metersEventBasic Event Motion detection, video tampering alarm, exception, alarm input and outputSmart Event Line crossing detection, intrusion detection, region entrance detection, region exiting detection, unattended baggage detection, object removal detection, audio exception detectionSmart Tracking Manual tracking, auto-trackingAlarm Linkage Upload to FTP/NAS/memory card, notify surveillance center, send email, trigger alarm output, trigger recording, audible warning, white light flashing, and PTZ actions (such as preset, patrol scan, pattern scan)Deep Learning FunctionFace Capture Detects up to 5 faces simultaneously.Supports detecting, capturing, grading, selecting of face in motion, and output the best face picture of the facePerimeter Protection Line crossing, intrusion, region entrance, region exitingSupport alarm triggering by specified target types (human and vehicle)GeneralPower 24 VAC, max. 42 W (including max. 18 W for IR and max. 10 W for heater); Hi-PoEOperating Condition -30 °C to 65 °C (-22 °F to 149 °F). Humidity 90% or less (non-condensing) Demist YesMaterial ADC12Dimension Ø 220 mm × 363.3 mm (Ø 8.66" × 13.91")Weight Approx. 5 kg (11.03 lb.)ApprovalProtection IP66 (IEC 60529-2013), IK10 (excluding glass window), TVS 6000V lightning protection, surge protection and voltage transient protectionEMC FCC SDoC (47 CFR Part 15, Subpart B);CE-EMC (EN 55032: 2015, EN 61000-3-2: 2019, EN 61000-3-3: 2013, EN 50130-4: 2011 +A1: 2014);RCM (AS/NZS CISPR 32: 2015);IC VoC (ICES-003: Issue 6, 2019);KC (KN 32: 2015, KN 35: 2015)SafetyUL (UL 62368-1);CB (IEC 60950-1:2005 + Am 1:2009 + Am 2:2013, IEC 62368-1:2014);CE-LVD (EN 62368-1:2014+A11:2017); BIS (IS 13252(Part 1):2010+A1:2013+A2:2015); LOA (SANS IEC60950-1)EnvironmentCE-RoHS (2011/65/EU); WEEE (2012/19/EU); Reach (Regulation (EC) No 1907/2006)⏹Typical ApplicationHikvision products are classified into three levels according to their anti-corrosion performance. Refer to the following description to choose for your using environment.This model has NO SPECIFIC PROTECTION.LevelDescriptionTop-level protectionHikvision products at this level are equipped for use in areas where professional anti-corrosion protection is a must. Typical application scenarios include coastlines, docks, chemical plants, and more.Moderate protectionHikvision products at this level are equipped for use in areas with moderate anti-corrosion demands. Typical application scenarios include coastal areas about 2 kilometers (1.24 miles) away from coastlines, as well as areas affected by acid rain.No specific protectionHikvision products at this level are equipped for use in areas where no specific anti-corrosion protection is needed.⏹Available Model DS-2DE7A232IW-AEB(T5)⏹Dimension⏹Accessory⏹IncludedDS-1602ZJ ⏹OptionalDS-1681ZJ DS-1667ZJ DS-1660ZJ DS-1604ZJ-BOX-POLEDS-1661ZJDS-1663ZJ DS-1673ZJ DS-1619ZJ DS-1682ZJ DS-1604ZJDS-1662ZJ DS-1604ZJ-BOX-CORNERDS-1604ZJ-box*DS-1673ZJ should be used with DS-1661ZJ or DS-1662ZJ.。
海康威视网络摄像机快速操作手册

网络摄像机快速操作手册V4.0.5 UD.6L0101C0130A01杭州海康威视数字技术股份有限公司技术热线:400-700-5998非常感谢您购买我公司的产品,如果您有什么疑问或需要请随时联系我们。
本手册适用于以下型号的的网络摄像机:枪型Ⅰ:DS-2CD886BF-E、DS-2CD886MF-E、DS-2CD877BF、DS-2CD876BF、DS-2CD876MF枪型Ⅱ:DS-2CD883F-E(W)、DS-2CD855F-E、DS-2CD854F-E(W)、DS-2CD854FWD-E(W)、DS-2CD853F-E(W)、DS-2CD864FWD-E(W)、DS-2CD864F-E(W)、iDS-2CD864FWD-E(W)/F、iDS-2CD864FWD-E(W)/B、DS-2CD863PF(NF)-E(W)、iDS-2CD893PF-E(W)、DS-2CD893PF-E(W)、DS-2CD893PFWD-E(W)、DS-2CD833F-E(W)半球型Ⅰ:DS-2CD783F-E(I)(Z)、DS-2CD764FWD-E(I)(Z)、DS-2CD764F-E(I) (Z)、DS-2CD755F-E(I) (Z)、DS-2CD754F-E(I) (Z)、DS-2CD754FWD-E(I)(Z)、DS-2CD753F-E(I)(Z)、DS-2CD763PF(NF)-E(I)(Z)、DS-2CD793PF-E(I) (Z)、DS-2CD793PFWD-E(I)(Z)、DS-2CD733F-E(I)(Z)半球型Ⅱ:DS-2CD7233F-E(I)Z(H)(S)、DS-2CD7253F-E(I)Z(H)(S)、DS-2CD7254F-E(I)Z(H)(S)、DS-2CD7254FWD-E(I)Z(H)(S)、DS-2CD7255F-E(I)Z(H)(S)、DS-2CD7263PF(NF)-E(I)Z(H)(S)、DS-2CD7264FWD-E(I)Z(H)(S)、DS-2CD7264F-E(I)Z(H)(S)、DS-2CD7283F-E(I)Z(H)(S)、DS-2CD7293PF(NF)-E(I)Z(H)(S)、DS-2CD7293PFWD(NFWD)-E(I)Z(H)(S)筒型Ⅰ:DS-2CD8283F-E(I) (Z)(S)、DS-2CD8264F-E(I)(Z)(S)、DS-2CD8264FWD-E(I)(Z)(S)、DS-2CD8254FWD-E(I)(Z)(S)、DS-2CD8254F-E(I) (Z)(S)、DS-2CD8255F-E(I) (Z)(S)、DS-2CD8253F-E(I)(Z)(S)、DS-2CD8233F-E(I)(Z)(S)筒型Ⅱ:DS-2CD864-EI3、DS-2CD855-EI3筒型Ⅲ:DS-2CD2012-I卡片型Ⅰ:DS-2CD8153F-E(I)(W)、DS-2CD8133F-E(I)(W)卡片型Ⅱ:DS-2CD8433F-E(I)、DS-2CD8464F-E(I)迷你半球型:DS-2CD7164-E、DS-2CD7153-E、DS-2CD7133-E本手册可能包含技术上不准确的地方、或与产品功能及操作不相符的地方、或印刷错误。
长虹红外金属小半球摄像机说明书

警告请用户看到带有dangerous V oltage(高压危险)的附件时小心,因为该附件可能会导致严重的电击事故。
为了防止火灾或电击事故,请勿将本产品置于潮湿或易被雨淋的地方,请按说明书操作或维护。
警告:本产品已通过测试并成为限制A级数码产品,根据FCC第15章规定,这个限制是针对本产品在商业社会中可能受到的恶性侵犯提供合理的保护而专门设计的,本产品生产,使用并可以反射无线电波,如果不按说明书安装和使用而导致出现有害干扰,责任由用户自负。
注意:任何没经本公司申明的关于本产品的任何变化或调整都可能会影响用户的操作权利。
简介非常感谢您选购本公司的此项产品.此红外彩色摄像机采用1/3″Sony CCD图像传感器和先进的数字处理技术,采用低发热红外光源,可实现零照度环境下的监控;及先进电路设计,具有高画质、低失真、低噪讯等特性。
加上特有的散热、防水设计,有效延长了LED 的寿命,实现24小时监控。
采用高品质元器件及自动生产制程并进行严格的测试,提高了产品的稳定性,保证了产品的使用寿命,此外还具有自动白平衡,自动电子快门、CDS自动切换等功能。
广泛应用于大厅、走廊、仓库、厂房车间、地下停车场等室内外监控场所。
产品特性◆采用1/3〞Sony CCD◆先进的数字信号处理技术◆内置低发热红外光源◆最低照度:0Lux(红外灯开)◆感应红外光源真正实现零照度监控◆自动切换技术◆红外照射距离可达10米◆自动白平衡◆自动增益控制◆简易安装、调整方便,可手动上下左右调整监视方向◆采用优质铝材,精细加工工艺,良好散热设计注意事项(1)请严格按“电源”部分的要求使用电源。
错误连接可能引起故障并损坏摄像机。
(2)请勿直接碰触到CCD光学元件,若有必要清洁,请将干净布用酒精稍微湿润,轻轻拭去尘污。
(3)当发现异常状况时,请不要试图分解或修改摄像机,应尝试断电重启摄像机,如有损坏,请送指定的授权维修点处理。
(4)避免将镜头长时间对准阳光或其他强光工作,否则会导致永久性损坏CCD。
业贤科技 简化版温控模块 数据手册说明书

简化版温控模块数据手册产品综述●简化版温控模块,可用于驱动半导体制冷片TEC或者电阻发热式元件(比如陶瓷加热片/棒、PTC加热片),性能稳定,基本功能齐全,性价比更高。
●使用NTC热敏电阻;<0.01℃分辨率;传感器开路保护。
●±0.01℃的稳定性;PID系数可调节;PID系数自动整定功能。
●致冷、加热和双向三种输出模式可选。
●直流电压源输出,纹波小,延长半导体制冷片的寿命,提高制冷效率,提高稳定性。
●过压、过温保护、过热保护,可选的故障后自动恢复功能。
●可独立运行,也可用手持用户接口模块或计算机进行实时控制、记录数据和实时曲线。
●支持1个串口控制多个温控模块。
●高性能:精心设计的测温和控制系统,实现高分辨率、高稳定性。
●自动整定功能:易使用的自动整定功能,简化PID系数设置难度;自动整定完成后会生成优化的PID系数,获得速度快、过冲小、振荡少的温控性能。
●开放式平台:提供完整串口控制命令,用户可自己编程通过计算机或单片机控制温控模块;免费提供上位机软件,可实现参数观测、设置、数据记录和曲线显示等功能。
●强大灵活性:各种参数都可以在用户软件中调节、设置、保存,方便用户在不同的温控系统中使用该温控模块。
1.传感器参数可灵活设置,支持不同规格参数的热敏电阻。
2.输出模式、最大输出电压等输出参数可灵活设置,可适应不同型号TEC需求。
3.各种保护的阈值可软件灵活设置。
1. 计算机:可计算机控制,附送的连接线可连接模块至计算机的RS232串口;如计算机没串口,可使用USB转DB9公口串口线;上位机软件免费,中文界面,功能丰富,操作简单。
2. 显示模块UIMx:如果不方便使用计算机控制,可以使用显示模块UIMx(需要另外选购)实现参数显示设置。
有三种可选:可自定义数码管显示模块UIME,通用显示模块UIM,可自定义彩屏显示模块UIMP。
3. 单片机:可使用单片机的串口(需转换为RS232电平)与模块的串口通讯,并控制模块。
PTC2M0 A B 串口摄像头模块 使用说明书
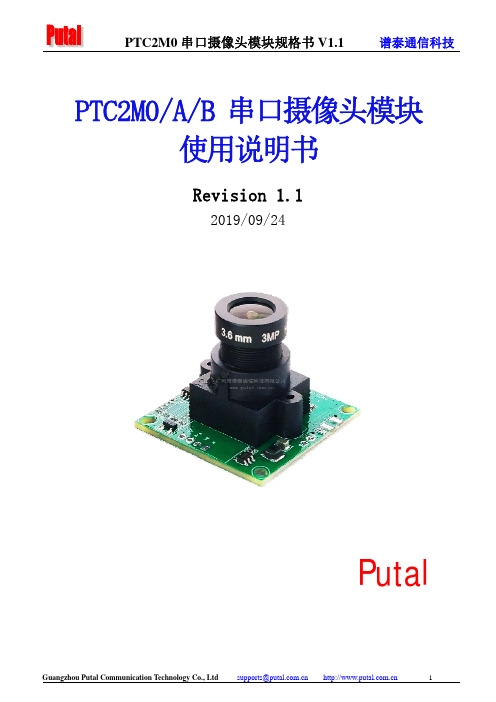
PTC2M0/A/B串口摄像头模块使用说明书Revision 1.12019/09/24Putal目录1、PTC2M0串口摄像头模块简介 (3)2、主要性能指标 (4)2.1、镜头选配说明 (5)3、摄像头接口及尺寸说明 (6)3.1、PTC2M0摄像头接口介绍及尺寸说明 (6)3.2、PTC2M0(RS232)接口说明 (7)3.3、PTC2M0A(RS485)接口说明 (7)3.4、PTC2M0B(TTL)接口说明 (7)4、RS485通讯多个摄像头组网 (8)5、适用领域 (9)1、PTC2M0串口摄像头模块简介PTC2M0是广州市谱泰通信科技有限公司设计生产的一款200万像素串口摄像头模块。
图像输出采用标准JPEG格式,其最大分辨率可达1920x1080,高速串口最高波特率可达921600bps。
通讯接口有TTL电平,RS232,RS485三种可选,可方便地实现跟电脑或各种MCU,控制器的连接。
模块的核心DSP芯片集成全新一代ISP算法,图像更清晰,码流更小。
星光级图像传感器具备超高感光度,进光率更好,夜视噪点更低,色彩还原度高,动态范围高等特点,可达到星光级的拍照效果。
系统软件采用全新轻量级操作系统,启动快速。
模块预留了贴片型补光灯功能,可指令控制,也可外接自动感光灯板,在各种条件下均可清晰成像。
默认波特率为115200。
可选波特率有:9600,19200,38400,57600,230400,460800,921600。
默认分辨率为1920x1080。
可选分辨率有:1280x960,1280x720,1024x768,640x480,320x240,160x120。
根据通讯接口不同,PTC2M0系列分为如下几个子型号:PTC2M0---RS232电平接口;(因RS232协议限制,波特率最高只能达到230400)PTC2M0A---RS485电平接口;(因RS485协议限制,波特率最高只能达到115200)PTC2M0B---TTL电平接口。
- 1、下载文档前请自行甄别文档内容的完整性,平台不提供额外的编辑、内容补充、找答案等附加服务。
- 2、"仅部分预览"的文档,不可在线预览部分如存在完整性等问题,可反馈申请退款(可完整预览的文档不适用该条件!)。
- 3、如文档侵犯您的权益,请联系客服反馈,我们会尽快为您处理(人工客服工作时间:9:00-18:30)。
PTC07/A/B串口摄像头模块使用说明书Revision1.002019/01/22Putal目录1.PTC07串口摄像头模块简介 (3)2.主要性能指标: (4)2.1镜头选配说明 (5)3.摄像头尺寸及接口说明 (6)4.摄像头通讯协议 (10)4.1复位指令 (10)4.2拍照指令 (10)4.3读取所拍图片长度指令 (10)4.4读取所拍图片数据指令 (11)4.5清空图片缓存指令 (11)4.6设置拍照图片压缩率指令 (11)4.7设置拍照图片大小指令 (11)4.8修改串口临时波特率指令 (11)4.9修改串口初始波特率指令 (11)4.10修改摄像头序号 (12)4.11移动侦测功能 (13)4.12移动侦测灵敏度设置 (13)4.13移动侦测状态查询 (13)4.14上电初始化及拍照流程 (14)5.快速测试方法 (14)6.RS485通讯多个摄像头组网 (17)7.适用领域 (18)1.PTC07串口摄像头模块简介PTC07是广州市谱泰通信科技有限公司设计生产的一款集图像采集、拍摄控制、数据压缩、串口传输于一体的工业级图像采集处理模块。
其内置的高性能数字信号处理芯片实现了对原始图像的高比例压缩。
产品图像输出采用标准JPEG格式,可方便地兼容各种图像处理软件;有TTL电平,标准的三线式RS232通信和标准的两线式RS485通信,简单的图像传输协议可以方便地实现与电脑以及各种嵌入式系统的连接;模块带有贴片型白光灯且预留了红外补光,在低照度条件下也能清晰成像。
本产品默认波特率为38400,其它可选波特率有9600,,19200,57600和115200。
根据通讯接口不同,PTC07系列分为如下几个子型号:PTC07---RS232电平接口PTC07A---RS485电平接口PTC07B---TTL电平接口*PTC07的特点:(1)增加补光功能,白光或者红外可选,使用者可根据自己需求进行选购。
同时引出了控制管脚进行开关,低电平有效。
(2)增加模块电源开关控制接口,低电平有效,摄像头不使用时,把控制管脚拉低进入省电模式。
(3)拍摄距离范围广,可远可近。
最低能控制在1cm下拍摄,带有实时、快速、操作简单、抗干扰性强等特点,适用于各种场合。
PTC07-1.5cm距离-55mm x60mm电流表拍摄效果图2.主要性能指标:2.1镜头选配说明3.摄像头尺寸及接口说明PTC07正面实物图PTC07背面实物图PTC07侧面视图:PTC07尺寸图如下(单位:mm)PTC07串口摄像头模块提供2种不同封装的连接接口。
分别是7pin1.0mm和7pin 2.0mm间距的标准插座,两者之间可任意选用一种,方便用户调试外接。
如下图:PTC07摄像头模块的接口排孔封装,定义描述如下,如何取镜头盖:如何调焦:如果镜头出现模糊不清需要重新调节镜头,先拧松摄像头旁边的螺钉,然后左右旋转镜头,并拍照,直到拍到清晰的照片为止,最后别忘了重新打紧螺钉。
接口接口信号接口定义(出厂配置)RS232接口VCC5V 电源输入GND电源的负极,DB9串口第5pin RXDB9串口第2pin (RXD )TXDB9串口第3pin (TXD )TTL 电平VCC5V 电源输入GND接地RX-BUART 接收数据TX-AUART 发送数据注意:TX 和RX 是3.3v 的TTL 电平信号RS485接口VCC5V 电源输入GND接地BRS485B ARS485A LED补光灯控制端。
低电平时灯亮;3.3V 高电平或悬空时灯灭P_DN整个模块电源控制端。
低电平时模块断电;高电平或悬空时,模块通电CVBS CVBS 模拟视频输出4.摄像头通讯协议PTC07的串口通讯协议格式如下所示:命令格式:协议标志(1字节)+序列号(1字节)+命令字(1字节)+数据长度(1字节)+数据(0~16字节)回复格式:协议标志(1字节)+序列号(1字节)+命令字(1字节)+状态字节(1字节)+数据长度(1字节)+数据(0~16字节)其中:协议标志:命令的协议标志固定为:0x56回复的协议标志固定为:0x76序列号:用于在多个设备连接时485总线时,区分各个PTC07A设备,只有串口命令的序列号与本设备的序列号相同,设备才会接受这些命令,序列号的取值范围为0~255。
PTC07A 出厂时,默认序列号均为0x00,用户可以用命令修改PTC07A的序列号。
命令字:用于标识具体的串口通讯命令。
数据长度:表示后面的数据的长度,不包含协议标志,序列号,命令字和数据长度。
取值范围为0~16。
数据:命令使用到的数据,不同的命令,数据的长度和格式有所不同,最大为16字节。
下面以序号为0x00为例,逐一介绍各指令(指令中数字均为16进制数):4.1复位指令:56002600返回:76002600+DSP版本信息(只需判断返回的前4个字节正确即可,版本信息不用理会)4.2拍照指令:5600360100返回:76003600004.3读取所拍图片长度指令:5600340100返回:76003400040000SS TTSS TT-------图片数据长度,SS为高位字节,TT为低位字节4.4读取所拍图片数据指令:5600320C000A0000XX XX0000YY YY00FF返回:7600320000FF D8。
FF D976003200000000XX XX---起始地址(先高位字节,后低位字节。
必须是8的倍数)0000YY YY---本次读的数据长度(先高位字节,后低位字节)注意:完整的JPEG图片文件一定是以FF D8开始,FF D9结束。
如果是一次性读出整张图片数据,则起始地址是:00000000,本次读的数据长度是4.3指令读出的整张图片的字节长度。
读出的数据就是以FF D8开头,FF D9结尾。
如果要分多次读取图片数据,则第一次读的起始地址是:00000000,后几次读的起始地址就是上一次读取数据的末尾地址。
4.5清空图片缓存指令:5600360103返回:76003600004.6设置拍照图片压缩率指令:5600310501011204XX返回:7600310000XX一般选36(范围:00----FF)4.7设置拍照图片大小指令:(默认大小为:320*240)560031050401001911(320*240)返回:7600310000560031050401001900(640*480)560031050401001922(160*120)注意:设置图片大小指令后,需要复位一次,新的设置值才会生效!4.8修改串口临时波特率指令:5600240301XX YY返回:7600240000XX YY速率AE C8960056E4192002A F2384001C4C576000D A6115200注意:1.默认波特率为:384002.用该指令修改波特率后,重新上电时,又会恢复为38400。
4.9修改串口初始波特率指令:5600310604020008XX YY返回:76003100XX YY速率AE C8960056E4192002A F2384001C4C576000D A6115200注意:修改串口初始波特率后,需要复位一次,新的设置值才会生效!4.10修改摄像头序号56YY310504010006ZZ返回:76YY310000其中:YY---目前的序号ZZ---将要改到的目标序号,范围00—FF举例:目前摄像头为00序号(出厂设置),需要更改成02序号的,则有发送:560031050401000602返回:7600310000//当发送这个指令修改成功后,发送的指令的第2个字节就必须是02//如复位指令就必须是:56022600为方便用户修改,谱泰通信公司专门设计了一个小工具:谱泰RS485串口摄像头序号修改工具.exe,用户可直接用这个工具查询或修改当前的序号。
修改串号后,若需要使用串口摄像头测试工具.exe进行测试,务必在此工具下的处,填入修改后的串号,方可通信。
4.11移动侦测功能56003701XX返回:7600370000其中XX--00,关闭移动侦测功能。
每次上电后,移动侦测功能处于关闭状态。
01,打开移动侦测功能。
若打开移动侦测功能,则在摄像头视角范围内,若景物有变化,则会从串口输出提示信息(7600390000),通知外部处理器,实现报警的功能!当检测到图像有变化时,则串口会输出:7600390000,外部处理器接收到该字符串后,先关闭移动侦测功能(防止在拍照时,侦测信息干扰图片数据),然后立刻执行拍照,实现抓拍功能,处理完毕可再次打开移动侦测功能,以便下一次抓拍!4.12移动侦测灵敏度设置5600310501011A6E XX返回:7600310000其中:XX为移动感应灵敏度,范围00~FF。
00--最灵敏,容易误触发FF--最迟钝,很难有效触发建议取值:03。
在实际应用中,若要启用移动侦测功能,建议依次执行如下两条指令:第1条:5600310501011A6E03------将移动侦测灵敏度设为03第2条:5600370101------打开移动侦测功能处理器向摄像头发指令时,强烈建议采用一问一答的交互方式,以确保指令执行成功!否则可能会导致应用系统操作的不稳定!4.13移动侦测状态查询56003800返回:760038000100----表示移动侦测功能已关闭760038000101----表示移动侦测功能已打开该指令用于查询移动侦测功能是打开还是关闭状态.4.14上电初始化及拍照流程(1)上电(2)延时2.5s(3)设置拍照图片大小指令(可选,如更改后需要复位一下才会生效)(4)设置拍照图片压缩率指令(可选)拍照流程(1)发送拍照指令(2)发送读取所拍图片长度指令(3)发送读取所拍图片数据指令(4)发送清空图片缓存指令5.快速测试方法(1)安装测试软件本产品配备有相应的测试软件串口摄像头测试工具.exe,文件下载解压后即可直接使用。
(软件可在本公司网站/上进行下载)(2)连接摄像头并上电¾使用连接线将PTC07与PC机连接起来,并给PTC07供电。
注意电平必须一致,比如,摄像头是RS232接口的,PC机接口必须是RS232接口才能对接,否则通讯不上。
个别PC机只有USB口,可以购买一条USB转串口的数据线进行对接。
¾打开本产品提供的测试软件;软件打开后,先选择好对应的COM口,然后按打开,这时软件提示栏上将提示打开成功这里的COM端口是你摄像头所连接PC机上的端口,点击后,提示栏将提示:(时间)+打开COM*成功,波特率为**¾打开COM口,且摄像头上电之后,点击测试软件下方的提示栏上将显示:打开正确com口摄像头上电点击复位复位成功代表摄像头通讯是正常的!可以正常使用(请务必检查速率,初始化是38400)此时可直接点击按钮拍照,左边的显示框就会显示所拍的图片!也可以修改如下相关参数后再拍照!(3)设置好参数,然后拍照设置成像参数:摄像头上电后,设置好参数,点击,然后保存即可完成拍照。