806-3508-12 Sun Fire 15K_12K Systems Unpacking Guide
SUNSTAR商斯达实业集团 产品说明书

SUNSTAR商斯达实业集团是集研发、生产、工程、销售、代理经销、技术咨询、信息服务等为一体的高科技企业,是专业高科技电子产品生产厂家,是具有10多年历史的专业电子元器件供应商,是中国最早和最大的仓储式连锁规模经营大型综合电子零部件代理分销商之一,是一家专业代理和分銷世界各大品牌IC 芯片和電子元器件的连锁经营綜合性国际公司。
在香港、北京、深圳、上海、西安、成都等全国主要电子市场设有直属分公司和产品展示展销窗口门市部专卖店及代理分销商,已在全国范围内建成强大统一的供货和代理分销网络。
我们专业代理经销、开发生产电子元器件、集成电路、传感器、微波光电元器件、工控机/DOC/DOM电子盘、专用电路、单片机开发、MCU/DSP/ARM/FPGA软件硬件、二极管、三极管、模块等,是您可靠的一站式现货配套供应商、方案提供商、部件功能模块开发配套商。
专业以现代信息产业(计算机、通讯及传感器)三大支柱之一的传感器为主营业务,专业经营各类传感器的代理、销售生产、网络信息、科技图书资料及配套产品设计、工程开发。
我们的专业网站——中国传感器科技信息网(全球传感器数据库) 服务于全球高科技生产商及贸易商,为企业科技产品开发提供技术交流平台。
欢迎各厂商互通有无、交换信息、交换链接、发布寻求代理信息。
欢迎国外高科技传感器、变送器、执行器、自动控制产品厂商介绍产品到 中国,共同开拓市场。
本网站是关于各种传感器-变送器-仪器仪表及工业自动化大型专业网站,深入到工业控制、系统工程计 测计量、自动化、安防报警、消费电子等众多领域,把最新的传感器-变送器-仪器仪表买卖信息,最新技术供求,最新采购商,行业动态,发展方向,最新的技术应用和市场资讯及时的传递给广大科技开发、科学研究、产品设计人员。
本网站已成功为石油、化工、电力、医药、生物、航空、航天、国防、能源、冶金、电子、工业、农业、交通、汽车、矿山、煤炭、纺织、信息、通信、IT、安防、环保、印刷、科研、气象、仪器仪表等领域从事科学研究、产品设计、开发、生产制造的科技人员、管理人员 、和采购人员提供满意服务。
深圳市科特翎科技有限公司产品规格书说明书

产品规格书SPECIFICATION产品名称N ame.NO:0805白光White产品型号Model.NO:KTR-0805CWD文件编号Document.NO:MQ8032版次REV.NO:K3.0描述Description:■ 2.0×1.25mm贴片发光二极管2.0×1.25mm Chip SMD ■胶体颜色Colloid Color:黄色Yellow■发光颜色Emission Color:白色White■半功率角度Viewing Angle:120°深圳市科特翎科技有限公司SHENZHEN KETERINE TECHNOLOGY CO.,LTD.编制Prepared by审核Checked by核准Approved by市场部Market Dept.客户确认CUSTOMER CONFIRMATION确认Confirmed by审核Checked by核准Approved by确认Confirmed by1.外形尺寸Dimensions单位(Units):毫米(mm)注意:所有尺寸单位为mm,如无特殊说明误差范围为±0.1mmAll dimensions area in mm tolerance is±0.1mm unless otherwise noted.2.光电特性Electrical/Optical characteristics (1)最大限度值Absolute Maximum Ratings(TA=25±5ºC)项目Item符号Symbol最大额定值Absolute Maximum Rating单位Unit正向电流Forward Current IF20mA正向峰值电流Pulse Forward Current IFP100mA反向电压Reverse Voltage VR5V功率消耗Power Dissipation PD70mW工作温度Operating Temperature Topr-40ºC To+85ºC°C贮藏温度Storage Temperature Tstg-40ºC To+85ºC°C焊接温度Soldering Temperature Tsld ReflowSoldering:260ºC For10sec. 1/10周期,0.1msec脉宽IFP Conditions:1/10Duty Cycle,0.1msec Pulse Width.(2)样品光电参数Initial Electrical/Optical Characteristics(TA=25±5ºC)符号Symbol 项目Item单位Units最小值Min.规格值Typ.最大值Max.测试条件TestConditionsVF正向电压Forward Voltage V 2.6 3.2IF=10mAIR反向电流Reverse Current uA10VR=7V2θ½发光角度Viewing Angleº120ºIF=10mAø发光强度Luminous Intensitymcd6001080IF=10mATC色温Colour Temperature k700011000IF=10mARA显色指数Color Rendering Index Ra7080IF=10mA 正向电压允许误差±0.05V Tolerance of measurement of Vf is±0.05V.亮度允许误差±10%Luminous Intensity Measurement allowance is±10%.3.特性曲线Characteristic curve4.可靠性RELIABILITY (1)测试项目及结果Test Items and Results实验项目Test Items 参考标准Reference实验条件Test Conditions时间Time样品数Quantity判据Criterion冷热冲击Thermal Shock MIL-STD-202G-40℃(30min)←→100℃(30min)循环200次200cycles220/22湿热循环Temperature And Humidity Cyclic JEITA ED-4701200203-10℃——+65℃,0%-90%RH24hrs./1cycle循环10次10cycles220/22高温储存High Temperature Storage JEITA ED-4701200201Ta=100℃1000h220/22低温储存Low Temperature Storage JEITA ED-4701200202Ta=-40℃1000h220/22高温高湿储存High Temperature High Humidity Storage JEITA ED-4701100103Ta=60℃,RH=90%1000h220/22常温寿命试验Life Test JESD22-A108D Ta=25℃IF=20mA1000h220/22高温寿命High Temperature Life Test JESD22-A108D Ta=80℃IF=20mA1000h220/22低温寿命Low Temperature Life Test JESD22-A108D Ta=-40℃IF=20mA1000h220/22耐焊接热Resistance to Soldering Heat GB/T4937,Ⅱ,2.2&2.3Tsol*=260℃10secs.2次2times220/225.注意事项Cautions(1)焊接条件Soldering Conditions本产品最多只可回焊两次,且在首次回焊后须冷却至室温之后方可进行第二次回焊。
ASUS M80CJ桌面电脑用户手册说明书

TEC BASETEC MEMORY TEC GRAPHIC TEC dGfx_add TEC STORAGE TEC TVTEC AUDIOETEC_MAX15040000154Measured Required ResultMeasured Required Result P LOWEST 0.300.50PASS 0.300.50PASS P Off 0.30 1.00PASS 0.30 1.70PASS P Idle 16.71----16.71---P Sleep 0.88 5.00PASS 0.92 5.70PASS E TEC 60.38154.00PASS60.39154.00PASSWResultW Result PASSG7NA Discrete audio cardsProduct Category M80CJCategory D M80CJ0.90Power FactorEfficiencyGraphics Type# of Additional dGfx Internal Power SupplyNameplate Power Memory (GB)Discrete TV tuners Issue date 25-Jan-172017Model Name Product type Year of Manufacture Model family list Desktop ComputerM80CJ Representative modelBrandCompany name Contact information Internet site Address LogoASUSASUSTeK COMPUTER INC.******************15, Li-Te Rd., Peitou, Taipei 112, Taiwan Discrete NA 8NoPower demand E TEC value (kWh) and capability adjustmentsAverage Efficiency 92.0%87.0%External Power SupplyAt 50% of Rated Output 85%At 100% of Rated Output 82%1NodGfx Category Add dGfx Category # of StorageWoL Disable WoL Enable (if applicable)Measured RequiredAt 20% of Rated Output 82%Can the battery[ies] in this notebook computer be easily replaced by users themselvesNANameplate Power 230Measured Required the minimum number of loading cycles that the batteries can withstand 34.66NA noise levels (the declared A-weighted sound power level)the total content of mercury as X,X mg of integrated displayNA4. The power management feature is enabled by default.The measurement methodologyECMA-383, Measuring the Energy Consumption of Personal Computing ProductsThe instrumentation, set-up and circuits used for electrical testing are accordance with ECMA-383Test voltage in V and frequency in Hz Total harmonic distortion of the electricity supply system 230V, 50Hz <21. Power management is a process that allows displays and computers (CPU, hard drive, etc.) to enter low-power states when sitting idle.12. Users can adjust how long your computer waits before sleeping or hibernating. Please refer to the user manual or website of O.S. provider for further information.13. Lowest power state means the state with the lowest power demand found in a computer. This mode may be entered or left by either a mechanical means or via automatic means14. Idle state means a state of a computer in which the operating system and other software havecompleted loading, a user profile has been created, the computer is not in sleep mode, and activity is limited to those basic applications that the operating system starts by default9. The computer is automatically set to sleep after 30 minutes of user inactivity.2. Inactive displays with enabled power management enter low-power modes by turning off monitor output,which can save $10 to $30(USD) per monitor annually3. The low power modes of inactive computers can involve reducing power consumption or spinning down the hard disk, which can save $15 to $45(USD) per desktop computer annually.10. To wake your computer, click the mouse, press power button, or press any key on the keyboard.11. For windows system, Notebook Computers will enter into hibernation after 360 minutes5. Sleep is a power-saving state that allows a computer to quickly resume full-power operation (typically within several seconds) when users want to start working again.6. Hibernation is a power-saving state designed primarily for laptops. Of all the power-saving states in Windows, hibernation uses the least amount of power.7. Hybrid sleep is designed primarily for desktop computers. Hybrid sleep is a combination of sleep and hibernate. When hybrid sleep is turned on, putting your computer into sleep automatically puts your computer into hybrid sleep. Hybrid sleep is typically turned on by default on desktop computers.8. The display is automatically set to sleep after 10 minutes of user inactivity.。
AU680报警列表_翻译

西门子(Siemens)测试套装用户说明书

sTest Kit, Communication Adapter, Power SupplyDispositivo de prueba Pocket de test pour11323Installation Instructions / Instructivo de InstalaciónUse only with Siemens certified Components.Utilizar únicamente con componentes certificados de Siemens.A utiliser uniquement avec les composants certifiés Siemens.Turn off and lock out all power supplying this device before Couper Tensión Tension dangereuse.Hazardous Voltage.working on this device.Replace all covers before power supplying this device is turned on.l'alimentation de l'appareil et barrer avant de travailler.Remplacez touts les couverts avant que l'approvisionnement de pouvoir soit alimenté.peligrosa.Puede causar la muerte o lesiones graves.Danger de mort ou risque de blessures graves.Will cause death or serious injury.Desenergice totalmente antes de instalar o darle servicio. Reemplace todas las barreras y cubiertas antes de energizar el interruptor.For Use With Frame DG, FG, JG, LG, MG, NG & PG Para Usar Con Caja Base DG, FG, JG, LG, MG, NG & PGU.S. Cat. No.Euro Order No.9 lb.in.[ 1.0 Nm ]UPAPELTK 3VL9000-8AL01Accessory [ Accesorio ]ELTPHB3VL9000-8AK013 x 9VItem:ELTPHB 3VL9000-8AK01Cal. ISO 67892NOTE -These instructions do not purport to cover all details or variations in equipment, or to provide for every possible contingency to be met in connection with installation, operation or maintenance. Should further information be desired or should particular problems arise, which are not covered sufficiently for the purchaser’s purposes, the matter should be referred to the local Siemens sales office. The contents of this instruction manual shall not become part of or modify any prior or existing agreement, commitment or relationship. The sales contract contains the entire obligation of Siemens. The warranty contained in the contract between the parties is the sole warranty of Siemens. Any statements contained herein do not create new warranties or modify the existing warranty.Trademarks -Unless otherwise noted, all names identified by ®are registered trademarks of Siemens AG or Siemens Industry, Inc. The remaining trademarks in this publication may be trademarks whose use by third parties for their own purposes could violate the rights of the owner.ON / I4CT Test:[ CT Prueba: ]567Option [ Opción ]ok ok2ON / I35Trip Test:[ Interrumpir Prueba ]CT Test:[ CT Prueba: ]6UPAPELTK \3VL9000-8AL01Call Technical Support [ Lamar a Soporte Técnico ]1O / OFF74I / ON12okokBattery Low Step -2POWER okokStep -289Trip Test:[ Interrumpir Prueba ]Trip Unit -545 –Only[ Disparador -545 ] -SolamenteTurn off and lock out all power supplying this device before Couper Tensión Tension dangereuse.Hazardous Voltage.working on this device.Replace all covers before power supplying this device is turned on.l'alimentation de l'appareil et barrer avant de travailler.Remplacez touts les couverts avant que l'approvisionnement de pouvoir soit alimenté.peligrosa.Puede causar la muerte o lesiones graves.Danger de mort ou risque de blessures graves.Will cause death or serious injury.Desenergice totalmente antes de instalar o darle servicio. Reemplace todas las barreras y cubiertas antes de energizar el interruptor.MINMIN1ON / I4ELTPHB 3VL9000-8AP01ON / I56Test:[ Prueba: ]7Trip [ Interrumpir ]OK 82ON / I3O / OFF9OKCall Technical Support [ Lamar a Soporte Técnico ]10Ground Fault Test:[Prueba: Falla a Tierra]Trip Unit -545 with Ground Fault –Only [ Disparador –545 con Falla a Tierra ] -Solamente11MAXMAXMAX1ON / I4ELTPHB3VL9000-8AP01ON / I56Test:[ Prueba: ]7Trip[ Interrumpir]OK82ON / I3O / OFF9OKCall Technical Support[ Lamar a Soporte Técnico ]Test Settings [ Ajuste de prueba ]Value [ Valor ]Screen [ Pantalla ]I i = 1.25 X I n AmpsI i IOC AMPS –[ AMPS SOBREC INST ]806932Setting Menus [ Menus de Ajuste ]Trip Test:[ Interrumpir Prueba ]12131ON / I4ELTPHB 3VL9000-8AP01ON / I56Test:[ Prueba: ]7Trip [ Interrumpir ]OK 82ON / I3O / OFF9OKCall Technical Support [ Lamar a Soporte Técnico ]Trip Unit -576 –Only[ Disparador -576 ] -SolamenteFor Support in Europe refer to :Bestell-Nr. / Order No.: 3ZX1012-0VL68-1AA0 Internet: www.siemens.de/lowvoltage/technical-assistance GWA 4NEB 179 6819-10 DS04Ground Fault Test:[Prueba: Falla a Tierra ]141621806932Setting Menus [ Menus de Ajuste ]3 lb. in.[ 0.3 Nm ]Option : [ Opción ]:315Test Settings [ Ajuste de prueba ]Value [ Valor ]Screen [ Pantalla ]I r = 1.0 X I n Amps I r CONTINUOUS AMPS –[ AMPERIOS CONT ]= GND RESIDUAL [ = RESIDUAL ]I iGROUND FAULT TYPE –[ TIPO FALLA TIERR-]t sd = 0.5 sec.t sd SHORT TIME DELAY –[ RETARDO CORTO ]I sd = 6 X I r Amps I sd SHORT TIME PICK UP –[ TIEMPO CORTO INICIO ]t r = 30 st r LONG TIME DELAY –[ RETARDO LARGO ]IOC AMPS –[ AMPS SOBREC INST ]I i = 6 X I n AmpsTrip Unit -576 with Ground Fault –Only [ Disparador –576 con Falla a Tierra ] -Solamente1ON / I4ELTPHB 3VL9000-8AP01ON / I56Test:[ Prueba: ]7Trip [ Interrumpir ]OK 82ON / I3O / OFF9OKCall Technical Support [ Lamar a Soporte Técnico ]1.5”[ 38 mm ]MAX.Technical Support:Toll Free: 1-800-241-4453Internet: /powerdistribution。
Endress+Hauser ToF 适配器 FXA291 说明书

Products Solutions Services BA01236F/00/EN/01.1471240651ToF AdapterFXA291Contents ToF Adapter FXA2912Endress+HauserContents1 Safety instructions . . . . . . . . . . . . . . . . . . . . . . . . . . . . . . . . . . . . . . . . . . . . . . . . . . . . . . . . . . . . .31.1 Designated use . . . . . . . . . . . . . . . . . . . . . . . . . . . . . . . . . . . . . . . . . . . . . . . . . . . . . . . . . . . . . . . . . . . . . . . . . . . . . . . . . . . . . . 31.2 Installation, commissioning and operation . . . . . . . . . . . . . . . . . . . . . . . . . . . . . . . . . . . . . . . . . . . . . . . . . . . . . . . . . . . . . . 31.3 Operational and process safety . . . . . . . . . . . . . . . . . . . . . . . . . . . . . . . . . . . . . . . . . . . . . . . . . . . . . . . . . . . . . . . . . . . . . . . . 31.4 Return . . . . . . . . . . . . . . . . . . . . . . . . . . . . . . . . . . . . . . . . . . . . . . . . . . . . . . . . . . . . . . . . . . . . . . . . . . . . . . . . . . . . . . . . . . . . . 31.5Symbols used . . . . . . . . . . . . . . . . . . . . . . . . . . . . . . . . . . . . . . . . . . . . . . . . . . . . . . . . . . . . . . . . . . . . . . . . . . . . . . . . . . . . . . . 42 Product description. . . . . . . . . . . . . . . . . . . . . . . . . . . . . . . . . . . . . . . . . . . . . . . . . . . . . . . . . . . . .63 Incoming acceptance and product identification . . . . . . . . . . . . . . . . . . . . . . . . . . . . . . . . . . . .73.1 Incoming acceptance . . . . . . . . . . . . . . . . . . . . . . . . . . . . . . . . . . . . . . . . . . . . . . . . . . . . . . . . . . . . . . . . . . . . . . . . . . . . . . . . . 73.2 Product identification . . . . . . . . . . . . . . . . . . . . . . . . . . . . . . . . . . . . . . . . . . . . . . . . . . . . . . . . . . . . . . . . . . . . . . . . . . . . . . . . 73.3 Scope of delivery . . . . . . . . . . . . . . . . . . . . . . . . . . . . . . . . . . . . . . . . . . . . . . . . . . . . . . . . . . . . . . . . . . . . . . . . . . . . . . . . . . . . 83.4 Documentation supplied: . . . . . . . . . . . . . . . . . . . . . . . . . . . . . . . . . . . . . . . . . . . . . . . . . . . . . . . . . . . . . . . . . . . . . . . . . . . . . 83.5 Certificates and approvals . . . . . . . . . . . . . . . . . . . . . . . . . . . . . . . . . . . . . . . . . . . . . . . . . . . . . . . . . . . . . . . . . . . . . . . . . . . . 83.6Registered trademarks . . . . . . . . . . . . . . . . . . . . . . . . . . . . . . . . . . . . . . . . . . . . . . . . . . . . . . . . . . . . . . . . . . . . . . . . . . . . . . . 84 Electrical connection . . . . . . . . . . . . . . . . . . . . . . . . . . . . . . . . . . . . . . . . . . . . . . . . . . . . . . . . . . .94.1 Connection data . . . . . . . . . . . . . . . . . . . . . . . . . . . . . . . . . . . . . . . . . . . . . . . . . . . . . . . . . . . . . . . . . . . . . . . . . . . . . . . . . . . . . 94.2 Connecting to devices of device group 1 . . . . . . . . . . . . . . . . . . . . . . . . . . . . . . . . . . . . . . . . . . . . . . . . . . . . . . . . . . . . . . . . . 94.3 Connection with devices of devices group 2 . . . . . . . . . . . . . . . . . . . . . . . . . . . . . . . . . . . . . . . . . . . . . . . . . . . . . . . . . . . . . 105 Operation. . . . . . . . . . . . . . . . . . . . . . . . . . . . . . . . . . . . . . . . . . . . . . . . . . . . . . . . . . . . . . . . . . . .115.1 Overview of operating options . . . . . . . . . . . . . . . . . . . . . . . . . . . . . . . . . . . . . . . . . . . . . . . . . . . . . . . . . . . . . . . . . . . . . . . . 116 Commissioning. . . . . . . . . . . . . . . . . . . . . . . . . . . . . . . . . . . . . . . . . . . . . . . . . . . . . . . . . . . . . . .137 Maintenance and repair . . . . . . . . . . . . . . . . . . . . . . . . . . . . . . . . . . . . . . . . . . . . . . . . . . . . . . .137.1 Cleaning . . . . . . . . . . . . . . . . . . . . . . . . . . . . . . . . . . . . . . . . . . . . . . . . . . . . . . . . . . . . . . . . . . . . . . . . . . . . . . . . . . . . . . . . . . 137.2 Repair . . . . . . . . . . . . . . . . . . . . . . . . . . . . . . . . . . . . . . . . . . . . . . . . . . . . . . . . . . . . . . . . . . . . . . . . . . . . . . . . . . . . . . . . . . . . 137.3 Return . . . . . . . . . . . . . . . . . . . . . . . . . . . . . . . . . . . . . . . . . . . . . . . . . . . . . . . . . . . . . . . . . . . . . . . . . . . . . . . . . . . . . . . . . . . . 137.4 Disposal . . . . . . . . . . . . . . . . . . . . . . . . . . . . . . . . . . . . . . . . . . . . . . . . . . . . . . . . . . . . . . . . . . . . . . . . . . . . . . . . . . . . . . . . . . . 137.5Contact addresses for Endress+Hauser . . . . . . . . . . . . . . . . . . . . . . . . . . . . . . . . . . . . . . . . . . . . . . . . . . . . . . . . . . . . . . . . . 138 Technical data. . . . . . . . . . . . . . . . . . . . . . . . . . . . . . . . . . . . . . . . . . . . . . . . . . . . . . . . . . . . . . . .148.1 Permitted ambient temperature range . . . . . . . . . . . . . . . . . . . . . . . . . . . . . . . . . . . . . . . . . . . . . . . . . . . . . . . . . . . . . . . . . 148.2 Degree of protection . . . . . . . . . . . . . . . . . . . . . . . . . . . . . . . . . . . . . . . . . . . . . . . . . . . . . . . . . . . . . . . . . . . . . . . . . . . . . . . . 148.3 Supplementary Documentation . . . . . . . . . . . . . . . . . . . . . . . . . . . . . . . . . . . . . . . . . . . . . . . . . . . . . . . . . . . . . . . . . . . . . . . 14Index . . . . . . . . . . . . . . . . . . . . . . . . . . . . . . . . . . . . . . . . . . . . . . . . . . . . . . . . . . . . . . .15ToF Adapter FXA291Safety instructionsEndress+Hauser 31Safety instructions1.1Designated useThe ToF Adapter is an adapter set for connecting the Commubox FXA291 to ToF devices, pressure transmitters and the Gammapilot M.The manufacturer does not accept liability for damages resulting from incorrect use or use other than that designated.1.2Installation, commissioning and operation•The device must be installed, connected, commissioned and serviced only byqualified and authorized specialist personnel (e.g. electrical technician) and in strict compliance with these instructions, the applicable standards, legal regulations and, if necessary, certificates.•The specialist personnel must have read and understood these instructions and must follow the instructions contained therein.•Changes and repairs to the device may be carried out only if expressly permitted in the Operating Instructions.•If faults cannot be rectified, the device must be taken out of service and secured against unintentional commissioning.•Damaged devices must not be commissioned and must be labeled as defective.1.3Operational and process safety•To guarantee operational and process safety, alternative monitoring measures must be taken while configuring, testing or servicing the device.•The device is designed to meet state-of-the-art safety requirements, has been tested, and has left the factory in a condition in which it is safe to operate. The relevant regulations and European standards have been observed.•Take note of information on nameplate.•Devices for use in hazardous areas are fitted with an additional nameplate. When using in hazardous areas, compliance with the relevant national standards ismandatory. The device is accompanied by separate Ex documentation, which forms an integral part of these Operating Instructions. The installation regulations,connection data and safety instructions in the Ex documentation must be observed. The documentation number of these instructions is also indicated on the additional nameplate.1.4ReturnFollow the instructions in the Operating Instructions.Safety instructions ToF Adapter FXA2914Endress+Hauser1.5Symbols used1.5.1Safety symbols1.5.2Electrical symbolsSymbolMeaningA0018338Ground connectionA grounded terminal which, from the operator's point of view, is grounded via a grounding system.A0018339Protective ground connectionA terminal that must be connected to ground before other connections are established.ToF Adapter FXA291Safety instructionsEndress+Hauser 51.5.3Symbols for types of information1.5.4Symbols in graphicsSymbolMeaningA0011182AllowedIndicates procedures, processes or actions that are allowed.A0011183PreferredIndicates procedures, processes or actions that are preferred.A0011184ForbiddenIndicates procedures, processes or actions that are forbidden.A0011193TipIndicates additional information.A0015484Reference to pageRefers to the relevant page number., , ...Series of stepsSymbolMeaning1, 2, 3, 4, ...Numbering for main positions ,, ...Series of steps A , B , C , D , ...ViewsA0011187Hazardous areaIndicates a hazardous area.A0011188Safe area (non-hazardous area)Indicates a non-hazardous area.-.Product description ToF Adapter FXA2916Endress+Hauser2Product descriptionA Cable for device group 1B Cable for device group 2ToF Adapter FXA291Incoming acceptance and product identificationEndress+Hauser 73Incoming acceptance and product identification3.1Incoming acceptanceCheck the packaging and the contents for damage.Check that the goods supplied are complete and compare the scope of delivery with your order details.3.2Product identificationThe following options are available for measuring device identification:•Nameplate data•Order code with breakdown of the device features on the delivery note •Enter serial numbers from nameplates in W@M Device Viewer(/deviceviewer): All information on the measuring device is displayed.For an overview of the technical documentation supplied, enter the serial number from the nameplates in the W@M Device Viewer (/deviceviewer)3.2.1Nameplate1 Order code2 Serial number3 Approval-specific dataIncoming acceptance and product identification ToF Adapter FXA2918Endress+Hauser3.3Scope of delivery•1 x ToF Adapter FXA291 (order number: 71007843)•one cable for each device group 1 and 2Not included:•Commubox FXA291 (order number: 51516983)•Cable for Tank Side Monitor NRF590 (order number: 71027289)3.4Documentation supplied:3.4.1Safety instructionsAdditional Safety Instructions (XA01181F) are supplied with certified device versions. The nameplate indicates which safety information applies to your device version.3.5Certificates and approvalsCE mark, Declaration of ConformityThe device is designed to meet state-of-the-art safety requirements, has been tested, and has left the factory in a condition in which it is safe to operate. The device complies with the applicable standards and regulations as listed in the EC declaration ofconformity and thus complies with the statutory requirements of the EC directives. By applying the CE mark, Endress+Hauser confirms that the device has passed the necessary tests.3.6Registered trademarksToF ®Registered trademark of Endress+Hauser GmbH+Co.KG, Maulburg, GermanyToF Adapter FXA291Electrical connectionEndress+Hauser 94Electrical connectionDestruction of the device possibleUse only cables pre-terminated by Endress+Hauser. The device is suitable only for connection to certified, intrinsically safe equipment with Ex ia type of protection.4.1Connection data4.2Connecting to devices of device group 14.2.1Connecting to the Prosonic FMU860/861/862Connect the Commubox FXA291 to the service interface in the Prosonic FMU860/861/862.Intrinsically safe power circuit (e.g. Commubox FXA291)U i ≤ 7.5 V I i ≤ 1 A P i ≤ 2 W C i = 0 nF L i = 0 μHIntrinsically safe output circuit U o ≤ 3.75 V I o ≤ 9.4 mA P o ≤ 8.7 mW C o = 100 μF L o = 340 mHU i ≤ 7.5 V I i ≤ 1 A P i ≤ 2 W C i = 0 nF L i = 0 μHElectrical connection ToF Adapter FXA291 4.3Connection with devices of devices group 24.3.1Connecting to ToF deviceConnect the ToF Adapter FXA291 to the device's display connector.4.3.2Connecting to pressure transmitterConnect the ToF Adapter FXA291 to the device's display connector.10Endress+HauserToF Adapter FXA291Operation Endress+Hauser 115Operation 5.1Overview of operating options5.1.1Local operation1ToF device (e.g. Micropilot M)2ToF Adapter FXA2913Commubox FXA2914USB connectionOperation is performed using a Personal Computer, a Commubox FXA291 with ToF Adapter FXA291 (USB) and the operating software "FieldCare". FieldCare is a graphical operating program for measuring devices from Endress+Hauser. It assists with commissioning, data back-up, signal analysis and documentation of the measuring point.5.1.2Operation with FieldCareFieldCare is Endress+Hauser's plant asset management tool based on FDT technology. With FieldCare, you can configure all Endress+Hauser devices as well as devices from other manufacturers that support the FDT standard. Hardware and software requirements can be found on the Internet: ▸ Search: FieldCare ▸ FieldCare ▸ Technical data.Operation ToF Adapter FXA29112Endress+Hauser FieldCare supports the following functions:•Configuration of transmitters in online operation •Loading and saving device data (upload/download)•Documentation of the measuring pointConnection options:•Commubox FXA291 with ToF Adapter FXA291 via service interfaceToF Adapter FXA291Commissioning Endress+Hauser 136CommissioningIf using the ToF Adapter FXA291 with FDT/DTM software (e.g. FieldCare), the special IPC devices DTMs (according to the communication protocol) and …Level Pressure FXA193 CommDTM“ must be used. The DTMs are supplied on the FieldCare-CD-ROM.7Maintenance and repair 7.1CleaningWhen cleaning the device externally, ensure that the cleaning agent used does not attack the housing surface and seals.7.2RepairThe Endress+Hauser repair concept does not envisage any repairs: For further information, please contact Endress+Hauser Service.7.3ReturnThe device may be returned in the event of an incorrect delivery or order. As an ISO-certified company, Endress+Hauser is required by law to follow certain procedures when handling returned products that are in contact with the medium.To ensure that your device is returned swiftly, safely and in a professional manner, please read the procedures and conditions on the Endress+Hauser website at /return-material7.4DisposalWhen disposing of the device, the device components must be separated and recycled based on the materials involved.7.5Contact addresses for Endress+HauserContact addresses can be found on our homepage: /worldwide. If you have any questions, please contact your Endress+Hauser subsidiary.Technical data ToF Adapter FXA29114Endress+Hauser8Technical data 8.1Permitted ambient temperature range-20 °C ≤ T a ≤ 70 °C8.2Degree of protectionIP308.3Supplementary DocumentationThis documentation can be found on our product pages at "".8.3.1Certificates and approvalsEx approvalThe Ex certificates available can be found in the ordering information.Observe the relevant safety instructions (XA01181F).ToF Adapter FXA291IndexCCE mark . . . . . . . . . . . . . . . . . . . . . . . . . . . . . . . . . 8DDeclaration of Conformity . . . . . . . . . . . . . . . . . . 8Designated use . . . . . . . . . . . . . . . . . . . . . . . . . . . 3Disposal . . . . . . . . . . . . . . . . . . . . . . . . . . . . . . . . 13Documentation . . . . . . . . . . . . . . . . . . . . . . . . . . . 8EElectrical connection. . . . . . . . . . . . . . . . . . . . . . . 9External cleaning . . . . . . . . . . . . . . . . . . . . . . . . 13IIncoming acceptance . . . . . . . . . . . . . . . . . . . . . . 7NNameplate . . . . . . . . . . . . . . . . . . . . . . . . . . . . . . . 7RRepair. . . . . . . . . . . . . . . . . . . . . . . . . . . . . . . . . . 13Return. . . . . . . . . . . . . . . . . . . . . . . . . . . . . . . . . . 13SScope of delivery. . . . . . . . . . . . . . . . . . . . . . . . . . 8TTrademarks . . . . . . . . . . . . . . . . . . . . . . . . . . . . . . 8UUse . . . . . . . . . . . . . . . . . . . . . . . . . . . . . . . . . . . . . 3Endress+Hauser1571240651。
REED R8080 Sound Level Meter Data Logger Instructi

Sound Level Meter/ Data LoggerInstruction Manual R8080Table of ContentsIntroduction (2)Product Quality (3)Safety (3)Features (3)Specifications .............................................................................................4-5 Included (5)Instrument Description (5)Display Description (6)Software Installation (6)Operating Instructions ..............................................................................7-10 MIN/MAX .. (7)Auto Power OFF (8)Backlight (8)Setting the Date and Time (8)Setting the Datalogging Recording Interval (9)Datalogging (9)Clearing Stored Data (9)Calibration Procedure .......................................................................9-10 Battery Replacement .. (10)AC/DC Signal Output Jack (11)Applications (11)Accessories and Replacement Parts (12)Product Care (12)Product Warranty (12)Product Disposal and Recycling (13)Product Support (13)IntroductionThank you for purchasing your REED R8080 Sound Level Meter/Data Logger. Please read the following instructions carefully before using your instrument. By following the steps outlined in this manual your meter will provide years of reliable service.Product QualityThis product has been manufactured in an ISO9001 facility and has been calibrated during the manufacturing process to meet stated product specifications. If a certificate of calibration is required please contact the nearest authorized REED distributor or authorized Service Center. Please note an additional fee for this service will apply.SafetyNever attempt to repair or modify your instrument. Dismantling your product, other than for the purpose of replacing batteries, may cause damage that will not be covered under the manufacturer's warranty. Servicing should only be provided by an authorized service center. Features• High accuracy of ±1.4 dB meets Type 2 standards• Triple range measurement (60dB dynamic range)• A & C frequency weighting• Fast & Slow time weighting• Record up to 64,000 datapoints and keep track with internal time and date stamp• User selectable sampling rate from 1 to 60 seconds• Large, easy-to-read backlit LCD display• Digital analog bargraph• Min/Max hold and auto shut off• Tripod mount for long-term monitoring• Low battery indicatorSpecificationsMeasuring Ranges: Low: 30 to 90 dBMed: 50 to 110 dBHigh: 70 to 130 dBFull: 30 to 130 dBDynamic Range: 60 dB (in each range)Accuracy: ±1.4 dBResolution: Digital: 0.1 dBAnalog: 2dBResponse Time: Digital: 500msAnalog: 50msFrequency Range: 20 Hz to 8 kHzFrequency Weighting: A, CTime Weighting: Fast/Slow (125ms and 1s)Microphone: 0.5" (12.7mm) electret condenserDigital Analog Bargraph: Yes (30 segment)Display: 4-digit LCDBacklit Display: YesMin: YesMax: YesAlarm Indicators: Under and Over (visual on-screen) Datalogging Capabilities: YesReal-Time Clock andDate Stamp: YesSelectable Sampling Rate: Yes (between 1s and 60s)Internal Memory 1mb (64,000 datapoints)Auto Shut-off: Yes (after 30 mins/off)Tripod Mountable: YesLow Battery Indicator: YesPower Supply: 4 x AAA batteriesOutput: Yes (AC/DC)Battery Life: Approx 50 hoursPC Connectivity: USBcontinued...Software OS Compatibility: Windows XP/Vista/7/8/10/11Product Certifications: CE, IEC 61672-1 Class 2, ANSI S1.4 Type 2 Operating Temperature: 32 to 104°F (0 to 40°C)Storage Temperature: 14 to 140°F (-10 to 60°C)Operating Humidity Range: 10 to 90%Dimensions: 10.4 x 2.5 x 1" (264 x 63 x 29mm) Weight: 8.8oz (245g)Included• Windshield Ball• USB Cable• PC Software• Hard Carrying Case• BatteriesInstrument Description1. Windscreen2. Display3. Power/Backlight Button4. MIN/MAX/Clock Button5. Record Button/Up6. Frequency Weighting/Setup Button7. Time Weighting/Interval Button8. Level Range Button/Down9. Microphone10. AC/DC Output Terminal11. USB Terminal12. Tripod Mounting Screw13. Battery CoverDisplay Description1. Over Range Indicator2. Time Weighting Indicator3. Under Range Indicator4. Bar Graph Indicator5. MIN/MAX Indicator6. Battery Capacity Indicator7. Auto Power Off Indicator8. Recording Indicator9. Full Memory Indicator10. Measured Value11. Frequency Weighting Indicator12. Date/TimeSoftware InstallationInstall the included software by placing the supplied program disc in the PC's CD-ROM drive. If the installation program does not automatically start, open and browse the CD-ROM drive from your computer. Double click on the setup file and follow the on-screen prompts to install the software.If your computer does not have a CD drive please visit/software to download the latest R8080 software. Full specifications and Operating System compatibility can be found on the product page at .If you have specific questions related to your application and/or questions related to software setup and functionality please contact the nearest**************************************************************** or 1-877-849-2127.Operating Instructions1. Turn the meter on by pressing the Power Button. To turn the meteroff, press and hold the Power Button.2. Press the Time Weighting Button to select the desired ResponseTime. If the sound source consists of short bursts, set theresponse to FAST. To measure average sound level, select SLOW 3. Press the Frequency Weighting Button to select the Frequency.Select "A" Weighting for a general noise sound level, or "C"Weighting for measuring high level noise. "C" Weighting is astandard weighting of the audible frequencies commonly used forthe measurement of Peak Sound Pressure Level. If the "C" Weighted Level is much higher than the "A" Weighted Level then there will be a large amount of low-frequency noise.4. Press the Level Range Button to select the desired dB range.Choose a dB range in which the measured level is registeringapproximately in the middle of the bar graph. If the over rangeindicator appears during your measurement, the upper limit of theselected dB range has been exceeded. Adjust the selected dBrange until the over range indicator disappears from the screen.Furthermore, if the under range indicator appears during yourmeasurement, the lower limit of the selected dB range is too high to register your measurement. Adjust the selected dB range until theunder range indicator disappears.5. Hold the instrument comfortably in one hand (away from yourbody) or position it on a tripod for long-term monitoring. Point themicrophone in the direction of the noise to take a measurement. NOTE: Direct contact with strong winds or blowing air on the microphone may cause measurement errors. These effects can be reduced by using the included windscreen.MIN/MAXPress the MIN/MAX button to display the Maximum and Minimum sound level values recorded during the measurement process.continued...1. Press the MIN/MAX Button once to display the maximum value.2. Press the button again to display the minimum value.3. Press and hold the button once more to resume normal operation. Auto Power OFFTo preserve battery life, the meter is programmed to turn itself off after 30 minutes of inactivity. To turn this function off, while the meter is off, press and hold the FAST/SLOW Button while turning the meter on. When the meter turns on release both the FAST/SLOW Button and Power button. The Auto Power Off indicator will not appear on the display, confirming this feature is now disabled. If the meter is turned off then back on, the "Auto Power Off" feature will be enabled again.NOTE: The Auto Power Off is disabled during data logging or when the meter is connected to a PC.BacklightPress the Backlight Button to turn the LCD Backlight on and off. The backlight will automatically turn off after 30 seconds.Setting the Date and TimeIn order to set the time and date on the meter, follow steps 1 through 5. 1. While the meter is off, enter the Setup mode by pressing and holdingthe Power Button and A/C buttons simultaneously. "Set" will flash on the display indicating you are in the Setup mode.2. Press the MIN/MAX (Clock) button to enter the time and datesetup screen.3. Press the Up and Down arrows to adjust the year.4. Press the MIN/MAX (Clock) button again to toggle through Month,Day, Hour (24-hours), Minutes and Seconds. During each selection the Up and Down arrows can be used to adjust the selected value. 5. Press the MIN/MAX (Clock) button after seconds to save and exitthe Setup mode.NOTE: Press the Power button to exit Setup mode at any time.Setting the Datalogging Recording IntervalIn order to set the sampling rate on the meter, follow steps 1 through 4. 1. While the meter is off, enter the Setup mode by pressing and holdingthe Power Button and A/C buttons simultaneously. "Set" will flash on the display indicating you are in the Setup mode.2. Press the FAST/SLOW (INTV) button to enter Recording Intervalsetup screen as indicated by "Int".3. Press the Up and Down arrows to adjust the recording interval. Amaximum value of 1 minute and minimum value of 1 second canbe set.4. Press the FAST/SLOW (INTV) button to save the desired samplingrate and resume normal operation.NOTE: Press the Power button to exit Setup mode at any time. Datalogging1. Turn the meter on and select your desired sampling rate(See "Setting the Datalogging Recording Interval" above).2. Press the REC button to begin datalogging.3. Press the REC button again to stop datalogging.Clearing Stored DataTo delete internal memory press and hold the REC button and Power button simultaneously for 5 seconds when the meter is off. The display will show a 5 second countdown. Once the countdown is completed "Clear" will display confirming the memory has been erased. Calibration Procedurecontinued...In order to calibrate the R8080 an external calibrator that can provide a 94.0dB signal is required (REED R8090). If the meter has been exposed to extreme conditions or it has not been used in a long period of time the meter should be calibrated by following steps 1 through 6 below.1. Remove windshield ball.2. While the meter is off, press and hold the MIN/MAX button whileturning the meter on.3. When the meter turns on release both the MIN/MAX and Powerbutton to enter calibration mode as indicated on-screen by"CAL 94dB".4. Insert the microphone into the calibrator.5. Press the Up and Down arrow buttons to increase or decrease thedB level to match the Sound Calibrator output.6. Once the desired dB level has been attained press the MIN/MAXbutton to save the setting and exit calibration mode.NOTE: Press the Power button to exit the calibration mode at any time. Battery ReplacementPeriodically check the Battery Indicator on the display. When there are no more bars on the Battery Indicator you will need to replace the batteries. Remove the battery cover on the back and insert four new AAA(1.5V) Batteries.AC/DC Signal Output JackThe meter is equipped with an AC/DC output jack to connect and integrate with external systems. For example, the AC output can be used with a frequency analyzer or oscilloscope to identify the frequency level during a measurement. The DC output is used to identify the dB level during a measurement.Applications• Preventative Maintenance• Industrial Machinery/Equipment• Construction Sites• Ensuring Safe Working Conditions• Public Venues / Concerts• Code Enforcement• Traffic• Appliance Noise Testing• Long-term Measurement• Recording of Acoustic Levels for Environmental Impact StudiesAccessories and Replacement PartsSB-01 Replacement Windshield BallCA-05A Soft Carrying CaseR8888 Deluxe Hard Carrying CaseR8090 Sound Level CalibratorR1500 TripodDon't see your part listed here? For a complete list of all accessories and replacement parts visit your product page on . Product CareTo keep your instrument in good working order we recommend the following:• Store your product in a clean, dry place.• Change the battery as needed.• If your instrument isn't being used for a period of one month or longer please remove the battery.• Clean your product and accessories with biodegradable cleaner. Do not spray the cleaner directly on the instrument. Use on external parts only. Product WarrantyREED Instruments guarantees this instrument to be free of defectsin material or workmanship for a period of one (1) year from date of shipment. During the warranty period, REED Instruments will repair or replace, at no charge, products or parts of a product that proves to be defective because of improper material or workmanship, under normal use and maintenance. REED Instruments total liability is limited to repair or replacement of the product. REED Instruments shall not be liable for damages to goods, property, or persons due to improper use or through attempts to utilize the instrument under conditions which exceed the designed capabilities. In order to begin the warranty service process, please contact us by phone at 1-877-849-2127 or by email at******************************************************** appropriate steps to process the warranty.Product Disposal and RecyclingProduct SupportIf you have any questions on your product, please contact your authorized REED distributor or REED Instruments Customer Service by phone at*************************************************.Please visit for the mostup-to-date manuals, datasheets, product guides and software.Product specifications subject to change without notice.All rights reserved. Any unauthorized copying or reproduction ofthis manual is strictly prohibited without prior written permission from REED Instruments.。
克勒S-350 CD DVD玩家指南说明书
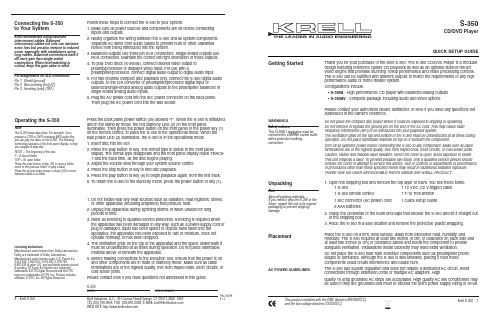
NoteSave all packing materials.If you need to ship the S-350 in the future, repack the unit in its original packaging to prevent shipping damage.S-350CD/DVD PlayerQUICK SETUP GUIDEGetting StartedThank you for your purchase of the Krell S-350. The S-350 CD/DVD Player is a modular design featuring reference caliber CD playback as well as an optional state-of-the-art video engine that provides stunning 1080p performance and video processing controls.The S-350 can be outfitted with different outputs to match the requirements of any high performance audio or home theater system.Configurations include:• S-350a - High performance CD player with balanced analog outputs • S-350av - Complete package including audio and video optionsPlease contact your authorized dealer, distributor, or Krell if you have any questions not addressed in the owner’s reference.Do not place the compact disc player where it could be exposed to dripping or splashing. Do not remove or bypass the ground pin on the end of the AC cord. This may cause radio frequency interference (RFI) to be introduced into your playback system.The ventilation grids on the top and bottom of the S-350 must be unobstructed at all times during operation. Do not place flammable material on top of or beneath the component.Turn off all systems' power before connecting the S-350 to any component. Make sure all cable terminations are of the highest quality, free from frayed ends, short circuits, or cold solder joints. Caution: Visible and invisible laser radiation. When the cover is open, avoid exposure to beam. This unit employs a laser. To prevent possible eye injury, only a qualified service person should remove the cover or attempt to service this device. Use of controls or adjustments or performance of procedures other than those specified herein may result in hazardous radiation exposure.THERE ARE NO USER-SERVICEABLE PARTS INSIDE ANY KRELL PRODUCT.1.Open the shipping box and remove the top layer of foam. You see these items:2.Grasp the underside of the foam end-caps that encase the S-350 and lift it straight out of the shipping box.3.Place the S-350 in a safe location and remove the protective plastic wrapping.Place the S-350 on a firm, level surface, away from excessive heat, humidity, andmoisture. The S-350 requires at least two inches (5 cm) of clearance on each side and at least two inches (5 cm) of clearance above and below the component to provide adequate ventilation. Installations inside cabinetry may need extra ventilation. Do not place the S-350 near hum sensitive components such as preamplifier phono stages or turntables. Although the S-350 is well shielded, placing it near these components could create interference and cause hum.The S-350 has superb regulation and does not require a dedicated AC circuit. Avoid connections through extension cords or multiple AC adapters. Highquality 15 amp grounded AC strips are acceptable. High quality AC line conditioners may be used if they are grounded and meet or exceed the unit's power supply rating of 50V A.WARNINGSKrell S-350 1UnpackingKrell Industries, LLC., 45 Connair Road,Orange, CT 06477-3650 USA TEL 203-799-9954, FAX 203-891-2028, E-MAIL *********************WEB SITE Connecting the S-350 to Your SystemFollow these steps to connect the S-350 to your system.1.Make sure all power sources and components are off before connecting inputs and outputs.2.Neatly organize the wiring between the S-350 and all system components.Separate AC wires from audio cables to prevent hum or other unwanted noises from being introduced into the system.3.Balanced outputs use three-pin XLR connectors. Single-ended outputs use RCA connectors. Maintain the correct left/right orientation of these outputs.4.T o play DVD discs (S-350av), connect desired video output to preamp/processor or display's video input. For use with apreamplifier/processor, connect digital audio output to digital audio input. 5.For two-channel compact disc playback only, connect the S-350 digital audio outputs to the D/A convertor or preamplifier/processor digital input orbalanced/single-ended analog audio outputs to the preamplifier balanced or single-ended analog audio inputs.6.Plug the AC power cord into the IEC power connector on the back panel.Then plug the AC power cord into the wall socket.Press the back panel power switch (35) labeled “1”. When the S-350 is initialized and in the stand-by mode, the red stand-by LED (2) on the front panelilluminates. Then press the power button on the front panel or the power key (1)on the remote control, to place the S-350 in the operational mode. When the blue power LED (2) illuminates, the S-350 is in the operational mode. 1. Insert disc into the slot2. Press the play button or key. The format type is visible in the front paneldisplay. The format type disappears and the front panel display reads TRACK 1 and the track time, as the disc begins playing.3.Adjust the volume level through your system volume control.4.Press the stop button or key to end disc playback.5.Press the play button or key (6) to begin playback again, from the first track.6.T o return the S-350 to the stand-by mode, press the power button or key (1).1. Do not install near any heat sources such as radiators, heat registers, stoves,or other apparatus (including amplifiers) that produce heat.2. Unplug this apparatus during lightning storms or when unused for long periods of time.3. Refer all servicing to qualified service personnel. Servicing is required when the apparatus has been damaged in any way, such as a power-supply cord or plug is damaged, liquid has been spilled or objects have fallen into the apparatus, the apparatus has been exposed to rain or moisture, does not operate normally, or has been dropped.4. The ventilation grids on the top of the apparatus and the space underneath it must be unobstructed at all times during operation. Do not place flammable material above or beneath the apparatus.5. Before making connections to the Evolution 505, ensure that the power is off and other components are in mute or stand-by mode. Make sure all cable terminations are of the highest quality, free from frayed ends, short circuits, or cold solder joints.Please contact Krell if you have questions not addressed in this guide.4 Krell S-350Licensing attributions:Manufactured under license from Dolby Laboratories.Dolby is a trademark of Dolby Laboratories.Manufactured under license under U.S. Patent #'s:5,451,942; 5,956,674; 5,974,380; 5,978,762;6,487,535 & other U.S. and worldwide patents issued & pending. DTS and the Symbol are registered trademarks & DTS Digital Surround and the DTS logos are trademarks of DTS, Inc. Product includes software. ©DTS, Inc. All Rights Reserved.Safety notices:This CLASS I apparatus must be connected to a MAINS socket outlet with a protective earthing connection.Operating the S-350This product complies with the EMC directive (89/336/EEC)and the low-voltage directive (73/23/EEC).1 S-350 1 S-350 remote control1 IEC connector (AC power) cord2 AAA batteries1 12 VDC (12 V trigger) cable1 T-10 T orx wrench 1 Quick Setup GuidePlacementAC POWER GUIDELINESP/N 310784v 1.0Krell recommends using balanced interconnect cables. Balancedinterconnect cables not only can minimize sonic loss but are also immune to induced noise, especially with installations using long cables. Balanced connections have 6dB more gain than single-endedconnections. When level matching is critical, keep this gain value in mind. Pin assignments for XLR connectors:Pin 1Shield (ground)Pin 2Non-inverting (hot) (0°)Pin 3Inverting (cold) (180°)NoteThe S-350 reads data discs. For example, if you prepare a CDR or DVR containing MP3 audio files,you can play the discs on the S-350. The following terminology appears in the front panel display, to help you navigate a data disc:ROOT = The beginning of the disc. F = A closed folder. TOP = An open folder.Press the enter button or key (11) to open a folder,move to the previous folder, or play a track.Press the up and down arrows or keys (10) to move between tracks in a folder.S-350MODELSERIALNUMBERFigure 1 The S-350 Front PanelFigure 3 The S-350 RemoteFigure 2 The S-350 Back PanelKrell ®is a registered trademark of Krell Industries, LLC, and is restricted for use by Krell Industries, LLC. its subsidiaries, and authorized agents. T osLink ®is a trademark of T oshiba Corporation. All other trademarks and trade names are registered to their respective companies.©2006 by Krell Industries, LLC, All rights reservedBack Panel2 Krell S-350Krell S-350 3。
- 1、下载文档前请自行甄别文档内容的完整性,平台不提供额外的编辑、内容补充、找答案等附加服务。
- 2、"仅部分预览"的文档,不可在线预览部分如存在完整性等问题,可反馈申请退款(可完整预览的文档不适用该条件!)。
- 3、如文档侵犯您的权益,请联系客服反馈,我们会尽快为您处理(人工客服工作时间:9:00-18:30)。
Sun Fire™ 15K/12K Systems Unpacking Guide1.Verify the container was not damaged during shipment.Reviewthe TIP N TELL device and all packaging components forindications of rough treatment.If damage is evident,note on airbill or bill of lading.Failure to note damage may invalidate future claims.Noting possible damage allows the claimant time to file a claim with the shipping carrier.Caution –Use a 60-inch pallet jack (suggested)to transport the container.2.Prepare cutting pliers,or equivalent,to removeplastic banding on outside of shippingcontainer.A minimum of 18ft [5.49meters]of floor space is required to unload the cabinet.The cabinet may be unloaded from either end of the pallet.Ramps are attach to either end of the pallet.Note the “RAMPS ATTACH THIS END”markings and image on the outside of the shipping carton when considering itspermanent location.The shipping label on the carton indicates the front of the unit.3.Position the shipping container as close aspossible to the final installation site.Access to all sides of the cabinet is needed with aminimum of 18ft (5.49m)to move the cabinet from the pallet,down the ramp,and onto the floor.4.Cut the outer banding and remove the cartontop cap.Remove the eight plastic locking clips (four per side)by squeezing the center flanges together while pulling outward.5.Remove outer cartons.Remove the hardware box located at the front or rear of the system and the twoshipping kit boxes located on the sides of the pallet deck.Take out the 9/16-inch open-end wrench from the hardware box,and retain the remaining items for later use asneeded.!BandingCarton top capLocking clipsFront48 inches (1219.2 mm)Side75.5 inches (1917.7 mm)80.75inches (2051.1mm)Height:6.Remove internal top cap.Remove the two ramps from each side of the pallet deck and set aside forlater use.7.Remove the customer service documentation from the shipping kit box.Customer servicedocumentation consists of the system overview,site planning guide,hardware installation and de-installation guide,service manual,and additional configuration information.Caution –To prevent damage during installation,remove the four doors from the cabinet beforeyou remove the unit from the e the edges of the cabinet frame to maneuver the cabinet.Do not use the internal system board handles to move the cabinet .8.Remove the front and rear chocks.Remove the outer plastic bag.Remove the doors from the front andrear of the cabinet by pulling down on the top spring-loaded hinge pins,and then lift the doors upward to remove from the pins on the bottom hinge brackets of the cabinet.Set the four doors aside.Caution –To prevent damage to the kick plate mounting bracket assembly,remove the kick platefrom both ends of the cabinet prior to unloading.The cabinet cannot be moved at an angle of more than 10degrees maximum.9.Remove the kick plate assemblies at the front and rear of the e a pull-turn motion to releasethe spring-loaded captive locking pin and pull the kick plate and mounting tube outward from the mounting bracket and set aside.Loosen the two captive panel fasteners of the kick plate mounting bracket assembly.Remove by pulling forward and tipping downward to release the support tabs from their mounting holes.RampsExternal Outer cartonsShipping kit boxescarton top Plastic Hardware boxbag Internal top cap!!10.Return a chock to the pallet end used forunloading.11.At the end of the pallet not used for unloading,use the 9/16-inch open-end wrench to remove the four bolts from the two zinc-platedshipping brackets.Retain the parts for later use.12.Return the remaining chock to its originalposition on the pallet deck.Caution –Ensure Step 12is completed before proceeding .Both chocks should be installed atthis time.13.Align the tines of the ramps with corresponding holes at the unloading side of the pallet.Verify theramps are firmly in position by pressing or standing on the back side of the tines.14.At the unloading side of the pallet where the ramps are attached,remove the ing the 9/16inchopen-end wrench,remove the four bolts from the two zinc-plated shipping brackets.Retain the parts for later use.15.Move the cabinet off the pallet.One ortwo persons should push while twoothers slowly guide the cabinet down the ramps.Maneuver the cabinet using the edges of the cabinet frame.Do not use the internal handles to move the cabinet.Caution –Refer to the Sun Fire 15K/12K Systems Site Planning Guide for air-cooling requirements forraised-floor computer room environments.Shipping bolts and bracketsChockKick plate assembly!!16.Move the cabinet to the position where it willbe installed.Fully extend the four leveling feetat the base of each corner of the cabinet.Makean additional1/4turn of the leveling feet toensure stability.17.After the cabinet has been positioned in itspermanent location,re-install the two kick plateassemblies.Insert the inner support tabs of thekick plate mounting bracket.Align the twoouter tabs at the front mounting holes of thecabinet frame and slide the bracket inward toalign the inner support tabs into the twomounting holes of the horizontal supportstructure under the cabinet.Secure with the twocaptive panel fasteners.Re-insert the squaremounting tube of the kick plate mountingbracket assembly until it is flush with thecabinet.Secure with the spring-loaded captive-locking pin.e a Phillips No.2screwdriver to loosen thefour captive screws on the front handle bar andthe four captive screws on the rear handle bar.Remove and retain these parts for later use.19.Reinstall the front and rear cabinet doors byinserting each door onto the bottom peg foreach bottom-hinge bracket of the cabinet.At thetop of each door,pull down the spring-loadedpin and insert the peg of the door into the top-hinge bracket of the cabinet.Note–Shipping materials cannot be reused due to foam compression.These materials can be disposed of per the customer’s instructions.Reduce and recycle whenever possible.20.Refer to the Sun Fire15K/12K Systems Hardware Installation and De-Installation Guide and the othercustomer service documentation that was removed in Step7.Accessing Sun DocumentationYou can view,print,or purchase a broad selection of Sun documentation,including localized versions,at: /documentationContacting Sun Technical SupportIf you have technical questions about this product that are not answered in this document,go to:/service/contactingSun Welcomes Your CommentsSun is interested in improving its documentation and welcomes your comments and suggestions.You can submit your comments by going to:/hwdocs/feedbackPlease include the title and part number of your document with your feedback:Sun Fire15K/12K Systems Unpacking Guide,part number806-3508-12Copyright2003Sun Microsystems,Inc.All rights e is subject to license terms.Third-party software,including font technology,is copyrighted and licensed from Sun suppliers.Portions may be derived from Berkeley BSD systems,licensed from U.of CA.Sun,Sun Microsystems,the Sun logo,Sun Fire,and Solaris are trademarks or registered trademarks of Sun Microsystems,Inc.in the U.S.and in other countries.All SPARC trademarks are used under license and are trademarks or registered trademarks of SPARC International,Inc.in the U.S.and in other ernment users are subject to the Sun Microsystems,Inc.standard license agreement and applicable provisions of the FAR and its supplements.Copyright2003Sun Microsystems,Inc.Tous droits réservés.Distribuépar des licences qui en restreignent l’utilisation.Le logiciel détenu par des tiers,et qui comprend la technologie relative aux polices de caractères,est protégépar un copyright et licenciépar des fournisseurs de Sun.Des parties de ce produit pourrontêtre dérivées des systèmes Berkeley BSD licenciés par l’Universitéde Californie.Sun,Sun Microsystems,le logo Sun,Sun Fire,et Solaris sont des marques de fabrique ou des marques déposées de Sun Microsystems,Inc.aux Etats-Unis et dans d’autres pays.Toutes les marques SPARC sont utilisées sous licence et sont des marques de fabrique ou des marques déposées de SPARC International,Inc.aux Etats-Unis et dans d’autres pays.Sun Microsystems, Inc.4150 Network CircleSanta Clara, CA 95054 USAPart No. 806-3508-12, Rev.AJune 2003。