最新COMPASS使用手册,兰德马克说明书
德马格中文操作说明书

液压顶出 后退 / 前进
气阀 1-4 打开
中子 抽芯 / 进芯
自动安全门 打开 / 关闭
Rotary table index bolt move in / move out
模厚调整 增加 / 减小
旋转模板 逆时针 /顺时针
提示 “模厚调整”按钮只针对曲轴式机床。“自动安全门”和“气阀 1-4”按钮只有当这些功 能配置以后才起作用。“Rotary table latches”, Rotary table index bolt” and “旋转模板”应 用于带转转模板的多色注塑 。
Sfu服EnRc务tVio页InC面Egr功oup 能组
Afu报LnAc警tRio功Mn能Sgr组oup
Fig. 2: 功能选择键
1.2 手动功能键
在手动和点动模式下可通过下面的按钮(见Fig. 3 和 Fig. 4)进行相应的操作。 Fig. 3: 手动模具装置功能
模具 打开 / 闭合
Rotary table latches move in / move out
4.4
帮助功能键和专家系统 .......................................................................................................19
5
频幕 ..........................................................................................................20
Pfu程RnOc序tGio功Rn能AgrM组oSup
Process 过Pfu程RnOc控tCio制EnS功gSr能oCu组pONTROL
COMPASS使用手册,兰德马克说明书

COMPASS for Windows for Windows of Landmark Graphics Co.简明使用手册目录一、COMPASS WELLPLAN FOR WINDOWS能简介二、COMPA NY SETUP - CREATE NEW COMP:公司设置-建立新的公司三、FIELD SETUP- CREATE NEW Fl:曲气田设置-建立新的油气田四、SITE SETUP- CREATE NEW SITE块设置-建立新的区块五、TEMPLATE EDITOR槽口模板编辑器六、WELLSETUP-CREATE NEW W E单井设置-建立新井七、WELLPATH SETUP-CREATE NEW WELLPAT迹设置-建立新的轨迹八、TARGET EDITOR?巴点编辑器九、NEW PLAN & OPEN PLAN井眼轨迹设计十、NEW SERVE Y& OPEN SERVE实测数据建立与编辑ANTICOLLISIO N防碰计算十WALL PLOT COMPOSERS 图制作十三、常用功能简介COMPASS WELLPLAN FOR WINDO功S B简介COMPAS(S 指南针)有三个核心功能:PLANNING (设计)按计划井眼形状设计井眼轨迹SURVEY(实测计算)已钻井眼实测数据的计算及轨迹预测ANTICOLLISION:防碰计算)井眼轨迹之间的距离计算除此之外,COMPAS还有以下功能:COMPANY SETUP 允许你为不同的公司设置COMPASSFIELD SETUP 为同一油田的所有平台定义通用的水平或垂直参考系统TARGET EDITOR 靶点编辑器,设置靶点位置及靶区形状TEMPLATE EDITOR 槽口编辑器,用于丛式井井口坐标计算REFERENCE DATUM ELEVATIONS^不同的海拔高度参照基准MAGNETIC CALCULATO R算不同磁场模型的磁场值GEODETIC CALCULATORS同地质坐标系之间的数值转换计算SURVEY TOOLS 定义不同测量工具的测量误差COMPANY SETUP - CREATE NEW COMPANY公司设置-建立新的公司建立一个新的公司,实际上就是为你建立的这个新公司对 COMPASS 件进行 一些基础参数设置,也就是 COMPANY SETUP 公司设置)。
COMPASS软件教程(SRH12)-注释修订版

COMPASS软件教程(SRH12)-注释修订版横交曲线计算(SRH12)CROSS-CURVE CALCULATION⽬录1 简介 (2)1.1 概要 (2)1.2 计算原理 (2)1.3 说明 (2)2 界⾯概况 (4)3 输⼊数据 (6)3.1 输⼊数据1 (6)3.1.1 选择计算⽅式 (6)3.1.2 选择参考点 (6)3.1.3 输⼊吃⽔数据 (7)3.2 输⼊数据2 (9)3.2.1 输⼊纵倾 (9)3.2.2 输⼊横倾 (10)3.2.3 输⼊进⽔点 (11)3.3 单元体选择 (11)3.4 横交曲线数据表中线性插值 (12)3.5 横交曲线数据表中样条插值 (13)4 图形区 (14)4.1 图形区⼯具栏 (14)4.1.1 缩放 (14)4.1.2 旋转 (14)4.1.3 结构树 (14)4.1.4 局部图 (15)4.1.5 计算 (15)4.1.6 还原 (15)4.1.7 图形交互/停⽌图形交互 (15)4.2 数据的图形显⽰ (15)4.2.1 肋⾻ (15)4.2.2 剖⾯ (15)4.2.3 甲板 (16)4.2.4 单元体 (16)5 计算 (18)6 显⽰数据 (18)7 数据⽂件保存 (19)8 语⾔环境 (19)9 退出 (19)10 帮助 (19)第1页共 19 页1简介1.1概要SRH12SAS享数据库,运⾏本程序所必须的船舶⼏何数据,取⾃于SRH10(船体⼏何数据输⼊、邦⾦曲线计算)产⽣的数据库,计算所得到的横交曲线数据也被储存在数据库中,同时本程序还对已储存在数据库中的横交曲线数据进⾏插值计算。
1.2计算原理本程序通过读取SRH10所⽣成的数据库,按照输出参考点定义、排⽔量或吃⽔定义、纵倾值及横倾⾓定义,分别采⽤⾃由纵倾或固定纵倾⽅式进⾏计算,求得不同排⽔体积或不同吃⽔及不同横倾⾓时浮⼒作⽤线⾄假定重⼼的距离,即横交曲线数据,并对指定进⽔点计算其进⽔⾓及甲板⼊⽔⾓。
蓝耀 compass 前缀舒适舒适液管板杆快速入门指南(版本A)说明书

©2017 Blue Microphones. All rights reserved. Blue Logo Oval are registered trademarks of Blue Microphones, LLC. compassPREMIUM TUBE-STYLE BROADCAST BOOM ARM QUICK START GUIDEREV ACompass is a premium, tube-style desktop boom arm with internal springs and built-in cablemanagement, making it ideal for broadcast applications including game streaming, podcasting,voice-over and more. With smooth, quiet operation and a sophisticated on-camera look,Compass is the perfect boom arm for broadcast mics weighing up to 2.4 pounds,including Yeti, Yeti Pro and Blackout Spark SL.CONNECTING A MICROPHONEMicrophones can be connected to Compass via a shock mount, microphone clip or internal threads (if available on the mic). Compass supports shock mounts and mic clips with 3/8” threading,or 5/8” via the included adapter. Microphones can be connected facing up,or suspended upside down from Compass. To connect your microphone:142536Screw your microphone’sshockmount or mic cliponto Compass so thatit is firm and secure.Connect your microphonecable to the mic, open thesnaps along the top sideof the boom arm tubesand tuck the microphonecable into thehidden channelConnect the microphoneto the shockmountor mic clip.Close the snaps overthe cable inside thehidden cable channel.Insert Compass into the desktop C-Clamp from step 3 above. Adjust Compass so that it makes a90-degree angle at the middle pivot point. Confirm that the microphone balances in the 90-degree position and you can smoothly move it into the desired position as necessary. If you have the boom arm fully extended, you may need to tighten the thumbscrew at the base of the boom arm near the C-Clamp.90º.WARRANTYBlue Microphones warrants its hardware product against defects in materials and workmanship for a period of TWO (2) YEARS from the date of original retail purchase, provided the purchase was made from an authorized Blue Microphones dealer. This warranty is void if the equipment is altered, misused, mishandled, disassembled, maladjusted, suffers excessive wear, or is serviced by any parties not authorized by Blue Microphones. The warranty does not include transportation costs incurred because of the need for service unless arranged for in advance. Blue Microphones reserves the right to make changes in design and improve upon its products without obligation to install these improvements in any of its products previously manufactured. For warranty service or for a copy of Blue’s Warranty Policy including a complete list of exclusions and limitations, contact Blue at 818-879-5200. In keeping with our policy of continued product improvement, Baltic Latvian Universal Electronics (BLUE) reserves the right to alter specifications without prior notice.Designed in USA. Made in China.。
Landmark钻井软件的使用(技术员课件)
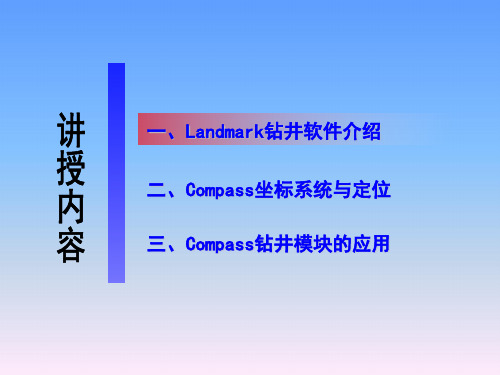
二、Compass坐标系统与定位
㈠ 坐标系—地理坐标
过 P 点的子午面与通过英国格林尼治天文台的子午面所夹的二面角, 叫做 P 点的地理经度(简称经度),用字母λ表示。国际规定通过英 国格林尼治天文台的子午线为本初子午线(或叫首子午线),作为计算 经度的起点,该线的经度为 0 度,向东 0-180 度叫东经,向西 0-180 度叫西经。
防碰方法选择—水平面扫描法
水平面扫描是指在扫描井轨迹上任 一井段按需要的精度间距,截取许多水 平截面,求相关邻井与此水平面的截点 坐标。然后在各个水平截面上以扫描点 为圆心,作极坐标图,在图上对扫描点 与邻井同一垂深点的相互距离和方位进 行分析的方法。
相比于本文前述的两种扫描方法, 平面距离扫描方法最为简单,但由于误 差较大,因此常用于直井段以及井斜较 小情况下的扫描计算。
二、Compass坐标系统与定位
㈡ 地图投影方法—UTM投影
UTM 投影全称为“通用横轴墨卡托投影”,美国于 1948 年完成这种 通用投影系统的计算。与高斯-克吕格投影相似,该投影角度没有变形, 中央经线为直线,且为投影的对称轴,在 6 度带内最大长度变形不超过 0.04%。
投影分带
UTM 投影分带方法与高斯-克吕格投影相似,不过是自西经 180°起 每隔经差6 度自西向东分带,将地球划分为 60 个投影带。高斯-克吕格 投影的第 1 带是 UTM 的第 31 带。
㈢ 方位参考 方位修正
二、Compass坐标系统与定位
根据磁偏角的定义,相对于真北,磁北东偏,磁 偏角为“+”,西偏为“-”;
根据子午线收敛角的定义,相对于真北,坐标北 东偏,子午线收敛角为“+”,西偏为“-”。 坐标方位与磁方位角之间的转换:α= Am +δ-γ 坐标方位与真方位角之间的转换:α= A -γ 真方位与磁方位角之间的转换: A = Am+ δ
landmark---COMPASS中文使用手册

COMPASS for Windows 5.3.1 COMPASS for Windows of Landmark Graphics Co.简明使用手册目录一、COMPASS WELLPLAN FOR WINDOWS 功能简介二、COMPANY SETUP - CREATE NEW COMPANY:公司设置-建立新的公司三、FIELD SETUP- CREATE NEW FIELD:油气田设置-建立新的油气田四、SITE SETUP- CREATE NEW SITE:区块设置-建立新的区块五、TEMPLATE EDITOR:槽口模板编辑器六、WELLSETUP-CREATE NEW WELL:单井设置-建立新井七、WELLPATH SETUP-CREATE NEW WELLPATH:轨迹设置-建立新的轨迹八、TARGET EDITOR:靶点编辑器九、NEW PLAN & OPEN PLAN:井眼轨迹设计十、NEW SERVEY& OPEN SERVEY:实测数据建立与编辑十一、ANTICOLLISION:防碰计算十二、WALL PLOT COMPOSER:挂图制作十三、常用功能简介COMPASS WELLPLAN FOR WINDOWS 功能简介COMPASS(指南针)有三个核心功能:PLANNING(设计)按计划井眼形状设计井眼轨迹SURVEY(实测计算)已钻井眼实测数据的计算及轨迹预测ANTICOLLISION(防碰计算)井眼轨迹之间的距离计算除此之外,COMPASS还有以下功能:COMPANY SETUP 允许你为不同的公司设置COMPASSFIELD SETUP 为同一油田的所有平台定义通用的水平或垂直参考系统TARGET EDITOR 靶点编辑器,设置靶点位置及靶区形状TEMPLATE EDITOR 槽口编辑器,用于丛式井井口坐标计算REFERENCE DATUM ELEVATIONS 定义不同的海拔高度参照基准MAGNETIC CALCULATOR 计算不同磁场模型的磁场值GEODETIC CALCULATOR 不同地质坐标系之间的数值转换计算SURVEY TOOLS 定义不同测量工具的测量误差COMPANY SETUP - CREATE NEW COMPANY公司设置-建立新的公司建立一个新的公司,实际上就是为你建立的这个新公司对COMPASS软件进行一些基础参数设置,也就是COMPANY SETUP(公司设置)。
Compass 90° 转角硬件说明书
Quick Release Fixed4-PointSIDE VIEW(Quick Release Toggle not shown)Compass® is width adjustable to 1” (2.5 cm) narrower or 2” (5.1 cm) wider than the ordered backrest width.(Ex. An 18” wide backrest will t a 17” to 20” wide wheelchair frame when both sides of backrest hardware are adjusted as shown.)TOP VIEW(Quick Release Toggle not shown)Width AdjustmentStandard Hardware Con guration ShownCompass® hardware provides 30˚ total anterior to posterior tilt.NOTE: Flipping the hardware to the con guration seen in Section 3 will reduce the amount of possible posterior tilt to 12° and increase anterior tilt to 18°.NOTE: Flipping the 90° Bracket and Cane Clamp may reduce the possibility of the backrest tting on a narrower chair thanthe ordered backrest width.Angle AdjustmentStandard Hardware Con guration Shown1.0Using Figure A as a guide, determine approximately how much distance you desire from the front surface of the back cushion and the center of the cane tube. Measure from the dot ( ) level with the center of the cane tube to the square ( ) on the front of the cushion. If the cushion ( ) is in front of the cane ( ), use a positive value. If the cushion ( ) is behind the cane ( ), use a negative value.Back CushionBack ShellFront of ChairRear of ChairCane TubeSECTION 1: INITIAL DEPTH MEASUREMENT-10+1+212˚18˚FIGURE A (TOP VIEW OF BACKREST)In front of cane - use positive (+) value Behind cane - use negative (-) valueSECTION 2Find the range listed below that your measurement fits into. If it does not fall within a range listed, choose the one closest to your measurement. Adjustments to the 90° Bracket position or rotating the Cane Clamp may still allow you to reach your desired depth.For 0.0” to +1.6” (0.0 cm to +4.0 cm), continue with Section 2 For +2.0” to +3.6“ (+5.1 cm to +9.1 cm), skip to Page 5, Section 3 For +5.1” to +6.7” (+12.9 cm to +16.9 cm), skip to Page 8, Section 4 For -1.6” to -3.2” (-4.0 cm to -8.0 cm), skip to Page 10, Section 51.1You will need to use the following hardware configuration (Figure B) to achieve your desired back position. This is the standard configuration for 90° Compass ® Hardware (how it was shipped).Quick Release Toggle not shownFIGURE B2.0Cane ClampCam Latch Bracket90° BracketStart by determining that the left and right 90º Brackets are located at the same height on the back shell(Figure C). The 90º Brackets should always be at equal height on the back shell and level for best results. The 90º Bracket and Cane Clamp angle allow for width adjustments to be made if using a chair that is different from the ordered backrest width.To make adjustments to the bracket position, loosen (do not remove) the 2 bolts on the 90º Bracket along the back shell using a 5mm hex key.2.1FIGURE C90° Bracket BoltCane Clamp & BoltsSet Screw90° BracketB a c k S h e l l H e i g h tNOTE: Measurements are based on commonly used 1.5” (3.8 cm) thick cushion. Cushion thickness could vary depending on the size and specifications of ordered backrest. Adjust dimensions accordingly for your backrest.Cane Tube Center LineFIGURE FCam Latch Bracket BoltsTop bolt adjusts reclineSet ScrewOnce the seat depth is adjusted accordingly,tighten the Cam Latch Bracket Bolts on both sides of the backrest. Alternate between bolts multiple times while tightening to ensure even pressure.Secure the recline position using the Set Screw at the back of the Cam Latch Bracket. Figure FSKIP TO SECTION 6 FOR 4-POINT HARDWARE INSTRUCTIONS IF NEEDEDIMPORTANT: When installation and adjustments are complete, all bolts* should be tightened to a minimum of 85 in-lbs.*This does not include set screws.You will need to use the following hardware configuration (Figure G) to achieve your desired back position. This flips only the Cane Clamps around to the opposite side of the chair.3.0Quick Release Toggle not shownFIGURE GCane ClampCam Latch Bracket90° Bracket1To switch the Cane Clamp around, release the Cam Latching system.Quick Release Compass ® hardware uses a toggle lever. Pull the lever up and the Cam Latch Bracket will slide apart from the Cane Clamp easily. (Figure H)3.2Backrest not shown90° BracketCane ClampFIGURE HT oggle22Front of ChairRear of ChairSECTION 3Fixed Compass ® hardware uses a 5mm bolt to secure the Cane Clamp. To release the bolt, first unscrew the 2 mm Set Screw one full turn (Figure J). Then use an 11mm open-end wrench around the cam latch Cone and a 5mm hex key to loosen the bolt. Once loosened, the Cam Latch Bracket will slide apart from the Cane Clamp easily.Backrest not shownFIGURE JNow, move the Cane Clamps to the opposite sides of the backrest and reattach them to the Cam Latch Bracket by sliding the Cane Clamp over the Cam Latch Pin. Figure KBackrest and Quick-ReleaseToggle not shownFIGURE KClamp Set ScrewQuick Release Compass ® hardware; Engage the Cam Latching System by moving the toggle to the down position.Fixed Compass ® hardware; Engage the Cam Latching System using a 5mm hex key and 11mm open-end wrench. Tighten the 2mm set screws to finish.Front of ChairFront of ChairRear of ChairNext, loosen the 2 bolts on the Cane Clamp. Fit the clamp around the cane at equal height and tighten bolts to secure. Alternate between bolts multiple times while tightening to ensure even pressure and a square fit. Complete this step for each side of the backrest. Finish by tightening the Set Screw on each clamp. Figure L3.3IMPORTANT: When installation and adjustments are complete, all bolts* should be tightened to a minimum of 85 in-lbs.*This does not include set screws.SKIP TO SECTION 6 FOR 4-POINT HARDWARE INSTRUCTIONS IF NEEDED3.4Quick Release Toggle not shownFIGURE MOnce loose, slide the Cam Latch Bracket forward or backwards on the 90º Bracket as seen in Figure M. Sliding it forward will achieve up to 2.0” (5.1 cm) of depth in front of the cane tube and backwards will reach up to 3.6” (9.1 cm) of depth in front of the cane tube.+ 2.0”+ 3.6”Cane Tube Center LineThe top Cam Latch Bracket Bolt controls the backrest recline. Fasten the bottom bolt first but do not tighten it completely before setting the recline. Posterior tilt may cause some loss in seat depth so the bottom bolt may have to be loosened and readjusted before final tightening can occur. Once the seat depth is adjusted accordingly,tighten the Cam Latch Bracket Bolts on both sides of the backrest. Alternate between bolts multiple times while tightening to ensure even pressure.Secure the recline position using the Set Screw at the back of the Cam Latch Bracket. Figure N3.5FIGURE NCam Latch Bracket BoltsTop bolt adjusts reclineSet ScrewYou will need to use the following hardware configuration (Figure P) to achieve your desired back position. This flips the Cane Clamps and Cam Latch Bracket around to the opposite side of the chair.4.0Quick Release Toggle not shownFIGURE PCane ClampCam Latch Bracket90° BracketBackrest not shown*Opposite side Double Nut not visibleBackrest not shownSide View- Looking towards center of backrestSide View- Looking out from center of backrestMove the Cane Clamp and Cam Latch Bracket assembly to the opposite side of the backrest and lightly screw the Cam Latch Bracket Bolts into the Double Nuts on each side of the assembly (Figure S).4.1FIGURE RFIGURE SCam Latch BracketClamp Set ScrewCane Clamp2Front of ChairRear of ChairTo switch the Cane Clamp and Cam Latch Bracket around, unscrew the 5mm bolts from the Double Nuts on each side of the hardware connecting the Cam Latch Bracket and the 90º Bracket. (Figure R)90° Bracket90° BracketDouble Nuts* & 5mm BoltsDouble Nut & 5mm Bolts2Cam Latch BracketDouble NutLoosen the 2 bolts on the Cane Clamp. Fit the clamp around the cane at equal height and tighten bolts to secure. Alternate between bolts multiple times while tightening to ensure even pressure and a square fit. Complete this step for each side of the backrest. Finish by tightening the Set Screw on each clamp. Figure S4.2SECTION 4Cane Clamp4.3FIGURE UOnce loose, slide the Cam Latch Bracket forward or backwards on the 90º Bracket as seen in Figure T. Sliding it forward will achieve up to 5.1” (12.9 cm) of depth in front of the cane tube and backwards will reach up 6.7” (16.9 cm) of depth in front of the cane tube.+ 5.1”+ 6.7”The top Cam Latch Bracket Bolt controls the backrest recline. Fasten the bottom bolt first but do not tighten it completely before setting the recline. Posterior tilt may cause some loss in seat depth so the bottom bolt may have to be loosened and readjusted before final tightening can occur.Once the seat depth is adjusted accordingly, tighten the 5mm bolts on both sides of the backrest. Alternate between bolts multiple times while tightening to ensure even pressure. (Figure U)4.4Secure the recline position using the Set Screw at the back of the Cam Latch Bracket.IMPORTANT: When installation and adjustments are complete, all bolts* should be tightened to a minimum of 85 in-lbs.*This does not include set screws.SKIP TO SECTION 6 FOR 4-POINT HARDWARE INSTRUCTIONS IF NEEDEDYou will need to use the following hardware configuration (Figure V) to achieve your desired back position. This flips the 90° Bracket with Cane Clamp and Cam Latch assembly to the opposite side of the chair.5.0Cane Clamp90° Bracket5.1To switch the 90º Bracket around, unscrew the 5mm bolts attaching the 90º Bracket to the Double Nut on the front side of the backrest shell. (Figure W)FIGURE WWingBackrest not shownORIGINAL ORIENTATIONNEW ORIENTATIONMove the 90° Bracket to the opposite side of the backrest while leaving the Cane Clamp and Cam Latch Bracket assembly with the original side of the backrest. Reattach the 90° Bracket to the shell in the new orientation using the 5mm Bolts and Double Nuts.Reassemble the hardware with the Cane Clamp facing the front of the backrest. Lightly screw the Cam Latch Bracket Bolts into the Double Nuts on each side of the assembly and 90° Bracket. (Figure X)5.2FIGURE XCam Latch BracketNow, unscrew the 5mm bolts from the Double Nuts on each side of the hardware connecting the Cam Latch Bracket and the 90º Bracket. (Figure X)FIGURE Y- 1.6”- 3.2”Cane Tube Center Line5.4With the bolts loose, slide the Cam Latch Bracket forward or backwards on the 90º Bracket as seen inFigure Y. Sliding it forward will achieve up to 3.2” (8.0 cm) of depth behind the cane tube and backwards will reach up 1.6” (4.0 cm) of depth behind the cane tube.Cane ClampFIGURE ZThe top Cam Latch Bracket Bolt controls the backrest recline. Fasten the bottom bolt first but do not tighten itcompletely before setting the recline. Posterior tilt may cause some loss in seat depth so the bottom bolt may have to be loosened and readjusted before final tightening can occur.Once the seat depth is adjusted accordingly, tighten the 5mm bolts on both sides of the backrest. Alternate between bolts multiple times while tightening to ensure even pressure. Figure Z5.5Secure the recline position using the Set Screw at the back of the Cam Latch Bracket.IMPORTANT: When installation and adjustments are complete, all bolts* should be tightened to a minimum of 85 in-lbs. *This does not include set screws.Loosen the 2 bolts on the Cane Clamp. Fit the clamp around the cane at equal height and tighten bolts to secure.Alternate between bolts multiple times while tightening to ensure even pressure and a square fit. Complete this step for each side of the backrest. Finish by tightening the Set Screw on each clamp.5.3Backrest not shown6.0Start with all bolts loose in the assembly. This allows for adjusting to the backrest position with the 2-PointCompass hardware already attached and in place.Completely unscrew the outside 1/8” Hex Bolt on the Cane Clamp (Figure AA). Wrap the band around the chair cane with the L Bracket oriented to the front of the cane. Replace the washer and bolt. Tighten the band around the cane using the 1/8” Bolt on the front of the L Bracket. Repeat for the opposite side of the wheelchair with the Cane Clamps at equal height on the canes.Shift the Angled Bracket and Post brackets around until the Post can reach and rest on the L Bracket attached tothe wheelchair canes (Figure BB). Once both sides of the backrest are positioned, tighten all bolts to secure.6.11/8” Hex BoltsFIGURE BBFront of Chair Width Adjustment Depth AdjustmentNOTE: Depth Adjustment shows additional configurations for 90° 4-Point Hardware achieved by flipping the Angled Bracket or Post Bracket.。
COMPASS使用手册,兰德马克说明书
COMPASS for Windows 5.3.1 COMPASS for Windows of Landmark Graphics Co.简明使用手册目录一、COMPASS WELLPLAN FOR WINDOWS 功能简介二、COMPANY SETUP - CREATE NEW COMPANY:公司设置-建立新的公司三、FIELD SETUP- CREATE NEW FIELD:油气田设置-建立新的油气田四、SITE SETUP- CREATE NEW SITE:区块设置-建立新的区块五、TEMPLATE EDITOR:槽口模板编辑器六、WELLSETUP-CREATE NEW WELL:单井设置-建立新井七、WELLPATH SETUP-CREATE NEW WELLPATH:轨迹设置-建立新的轨迹八、TARGET EDITOR:靶点编辑器九、NEW PLAN & OPEN PLAN:井眼轨迹设计十、NEW SERVEY& OPEN SERVEY:实测数据建立与编辑十一、ANTICOLLISION:防碰计算十二、WALL PLOT COMPOSER:挂图制作十三、常用功能简介COMPASS WELLPLAN FOR WINDOWS 功能简介COMPASS(指南针)有三个核心功能:PLANNING(设计)按计划井眼形状设计井眼轨迹SURVEY(实测计算)已钻井眼实测数据的计算及轨迹预测ANTICOLLISION(防碰计算)井眼轨迹之间的距离计算除此之外,COMPASS还有以下功能:COMPANY SETUP 允许你为不同的公司设置COMPASSFIELD SETUP 为同一油田的所有平台定义通用的水平或垂直参考系统TARGET EDITOR 靶点编辑器,设置靶点位置及靶区形状TEMPLATE EDITOR 槽口编辑器,用于丛式井井口坐标计算REFERENCE DATUM ELEVATIONS 定义不同的海拔高度参照基准MAGNETIC CALCULATOR 计算不同磁场模型的磁场值GEODETIC CALCULATOR 不同地质坐标系之间的数值转换计算SURVEY TOOLS 定义不同测量工具的测量误差COMPANY SETUP - CREATE NEW COMPANY公司设置-建立新的公司建立一个新的公司,实际上就是为你建立的这个新公司对COMPASS软件进行一些基础参数设置,也就是COMPANY SETUP(公司设置)。
Landmark钻井软件的使用(技术员课件)
二、Compass坐标系统与定位
㈢ 方位参考 方位修正
根据磁偏角的定义,相对于真北,磁北东偏,磁 偏角为“+”,西偏为“-”; 根据子午线收敛角的定义,相对于真北,坐标北 东偏,子午线收敛角为“+”,西偏为“-”。
坐标方位与磁方位角之间的转换:α= Am +δ-γ
坐标方位与真方位角之间的转换:α= A -γ 真方位与磁方位角之间的转换: A = Am+ δ
6 度带,是从 0 度子午线起,自西向东每隔经差 6 为一投影带,全 球分为 60 带,各带的带号用自然序数 1,2,3,…60 表示。即以东经 0-6 为第 1 带,其中央经线为 3E,东经6-12 为第 2 带,其中央经线为 9E,其余类推; 3 度带,是从东经 1 度 3Profile、Openwells、WellCat、WellCost、3D DrillVeiw等,
是各外资技术服务公司如Halliburton、 Schlumberger和Baker Hughes等最为常用的一款钻井软件。 为满足油田水平井公司未来发展需要,加强与国际钻井的接 轨力度,进一步提升专业化公司的钻井及设计水平,今年下半年 引进了Landmark R5000版-Compass、Wellplan钻井模块。
算为不同的投影带,全球就有 120 个 UTM 投影带。
二、Compass坐标系统与定位
二、Compass坐标系统与定位
㈢ 方位参考
“方位角”在定向井设计中是个基本概念,“在以井眼轨迹上任一点为 原点的平面坐标系中,以通过该点的正北方向线为始边,按顺时针方向旋转 至该点处井眼方向线在水平面上的投影线为终边,其所转过的角度称为该点 的方位角 根据定义,方位角表示的应是如图所 示的角度,很明显,当采用不同的“北” 的时候,方位角是不同的。因此,如果要 唯一确定某一点的方位角的值,必须要指 明所采用的“北”是哪个“北”
COMPASS使用指导书
浙江海洋学院
六 SRH12 横交曲线计算
SRH12 可用于计算船舶的稳性横交曲线。 标识:同 SRH10; 参考点:供参阅,用户不要修改; 吃水:输入方法同 SRH11,初算时为加快计算速度,步长可以大一点; 纵倾:单位 m,自由,纵倾值输入方法同 SRH11,初算时范围可大一点,尾倾为正; 横倾角:供参阅,用户不要修改; 进水点:将每一进水点(可能有多个)的横坐标、纵坐标、垂坐标一一输入便可。 注意: 输入进水点时,要考虑甲板室门槛高度,后面装载计算中如果进水角不满足要求,
三 普通船舶完整稳性计算流程
1) SRH10 船舶几何形体输入、邦金曲线计算; 2) SRH11 静水力计算; 3) SRH12 横交曲线计算; 4) SRH30 舱容及液体倾侧矩计算; 5) SRH14 装载计算; 下面的内容按以上五个流程作具体说明。
第 2 页,共 10 页
浙江海洋学院
四 SRH10 船舶几何形体输入、邦金曲线计算
¾ 主纵倾通常为 0,输入的纵倾范围必须包含装载计算(SRH14)中各工况的实际纵倾。
因此第一次的时候附加纵倾的范围要大一些。
静水力参数解读:
¾ 常用参数
1 DRAUGHT EXTREME..:最大吃水 ,m
2 DRAUGHT RFP......: 相对于参考点的吃水,即型吃水。m
3 DISPL TOTAL SW...: 海水中的排水量,t
第 8 站 S8:在第二列中直接输入“8”
第 8 站向前 0.25m 处:在第二列中输入“S8+0.25”
注意:
1)在每个甲板台阶处均须定义一个横剖面,若有首楼和尾楼,首楼后端壁和尾楼
的前端壁截面要输入(这里往往要在型线图中作横剖线),
- 1、下载文档前请自行甄别文档内容的完整性,平台不提供额外的编辑、内容补充、找答案等附加服务。
- 2、"仅部分预览"的文档,不可在线预览部分如存在完整性等问题,可反馈申请退款(可完整预览的文档不适用该条件!)。
- 3、如文档侵犯您的权益,请联系客服反馈,我们会尽快为您处理(人工客服工作时间:9:00-18:30)。
1COMPASS for Windows 5.3.1 2COMPASS for Windows of Landmark Graphics Co. 3简明使用手册456789101112131415161718192021222324252627282930313233343536目录3738一、COMPASS WELLPLAN FOR WINDOWS 功能简介39二、COMPANY SETUP - CREATE NEW COMPANY:公司设置-建立新的公司40三、FIELD SETUP- CREATE NEW FIELD:油气田设置-建立新的油气田41四、SITE SETUP- CREATE NEW SITE:区块设置-建立新的区块42五、TEMPLATE EDITOR:槽口模板编辑器43六、WELLSETUP-CREATE NEW WELL:单井设置-建立新井44七、WELLPATH SETUP-CREATE NEW WELLPATH:轨迹设置-建立新的轨迹45八、TARGET EDITOR:靶点编辑器46九、NEW PLAN & OPEN PLAN:井眼轨迹设计47十、NEW SERVEY& OPEN SERVEY:实测数据建立与编辑48十一、A NTICOLLISION:防碰计算49十二、W ALL PLOT COMPOSER:挂图制作50十三、常用功能简介51525354COMPASS WELLPLAN FOR WINDOWS 功能简介5556COMPASS(指南针)有三个核心功能:57PLANNING(设计)按计划井眼形状设计井眼轨迹58SURVEY(实测计算)已钻井眼实测数据的计算及轨迹预测59ANTICOLLISION(防碰计算)井眼轨迹之间的距离计算6061除此之外,COMPASS还有以下功能:62COMPANY SETUP 允许你为不同的公司设置COMPASS63FIELD SETUP 为同一油田的所有平台定义通用的水平或垂直参考系统64TARGET EDITOR 靶点编辑器,设置靶点位置及靶区形状65TEMPLATE EDITOR 槽口编辑器,用于丛式井井口坐标计算66REFERENCE DATUM ELEVATIONS 定义不同的海拔高度参照基准67MAGNETIC CALCULATOR 计算不同磁场模型的磁场值68GEODETIC CALCULATOR 不同地质坐标系之间的数值转换计算69SURVEY TOOLS 定义不同测量工具的测量误差707172737475767778COMPANY SETUP - CREATE NEW COMPANY79公司设置-建立新的公司8081建立一个新的公司,实际上就是为你建立的这个新公司对COMPASS软件进82行一些基础参数设置,也就是COMPANY SETUP(公司设置)。
下面按步骤说明:831、在菜单栏上单击File 菜单,选取New Company选项或单击工具栏中84图标(编辑当前已打开公司),将会出现以下对话框:852、对话框中:在Company栏填入所在公司的名称,Division栏中填入子公司86或专业公司的名称,Group栏中填作业组的名称。
后二栏没有具体作用。
Logo下87拉栏中可以选择已制作好的公司标志,用在图形或报告中。
883、选中Locked复选框后,在COMPASS中的一些缺省值将不能被改动。
可以89配合密码使用,单击Company Level Password和Locked Data Password旁边的90按钮,在出现的对话框中可输入密码。
第一次输入密码,需输二次,如果是修改91旧密码,必需先输入旧的密码。
密码设定后,每次解锁时就需先输入密码。
924、Anticollision Preferences防碰参数设定:Error System下拉栏中可以93选择所需的系统误差模型,一般选择Systematic Ellipse(椭圆系统);Scan Method 94下拉栏中可以选择扫描模式,一般选择Closest Approach 3D(3D渐近);Error 95Surface下拉栏中选择表面误差,一般为Elliptical Conic(椭圆锥体)。
96Separation Factor Warning Levels对话框中可以设定1~3级的防碰警告距离。
975、在Defaults(缺省值)对话栏中,可以在Survey Calculation Method下98拉栏中选择实测计算方法(包括最小曲率、曲率半径、平均角、平衡切线等方法),99一般为Minimum Curvature(最小曲率)。
而在下面的起始点设定中,可以设定100V.Section Origin(垂直剖面原点)在Slot(槽口)或Site(区块中心),一般101选Slot;Co-ordinate Origin(坐标中心)在Slot(槽口)或Site(区块中心),102一般选Site;在Walk/Turn Rate中设定比率基准,一般以MD(斜深)为基准。
103104105106FIELD SETUP- CREATE NEW FIELD107油气田设置-建立新的油气田108109新油气田的建立,是对一个将要开发的油气田进行包括地质系统、海拔基110准等在内的基础参数设定(FIELD SETUP)。
每个公司下可以建立多个油气田。
下111面按步骤说明:1121、在菜单栏上单击File 菜单,选取New Field选项或单击工具栏中图113标(编辑当前已打开油气田),将会出现以下对话框:1142、对话框中,Field栏中填入油气田的名称;Location栏填入油气田所在地115区的描述或其他相关信息(可不填);选中Locked复选框,可设置锁,避免被他116人或无意中修改。
1173、在Geodetic system、Ellipsoid、Zone这三个下拉栏中,可以选择不同118的大地坐标系及其所在区域,以备计算大地坐标之用(坐标系不同时,需选择Flat 119Earth)。
1204、Vertical System Datum下拉栏中选择系统垂直基准面(一般以海平面为121基准)。
下面Vertical Depths to选择栏中,可选择垂深计算到Local Datum(钻122盘面为准)还是System Datum(海平面为准)。
有关垂直高度基准,见下面二图:1235、Local Coordinate System(本地坐标系)选项栏中,North Ref选择True 124(真北)还是Grid(地理坐标北);Centred on选择本地是以Site(区块)还是125Field(油气田)为中心,如选择Field,需选择此油气田中一个Site为中心,见126下面二图:选择Site 选择Field127128129130SITE SETUP- CREATE NEW SITE131区块设置-建立新的区块132133这里讲的区块是指,在一个将要开发的油气田中,可能分为一个或多个小134区建一个或多个平台进行开发。
一个区块就是一个平台。
建立新区块,需输入这135个区块的基本参数,包括中心坐标、水深等,下面按步骤说明:1361、在菜单栏上单击File 菜单,选取New Site选项或单击工具栏中图137标(编辑当前已打开区块),将会出现以下对话框:1382、Site栏中填入区块或平台名称,Location栏中填入区块或平台的区域信139息或其他描述(可不填),选中Locked复选框可设置锁。
1403、在Centre Location选项栏中,选None-Use Co-ordinates Only将以本141地为中心;选Map Co-ordinates需输入区块或平台中心的大地坐标;选Global 142Co-ordinates需输入区块或平台中心的经、纬度(必须在Field Setup中已选大143地坐标系);选From Lease Lines需输入方位基线位移。
1444、Water Depth栏中输入水深,Position Uncertainly栏中输入不确定性高145度(用于浮式平台BR中输晃动范围),Magnetic Declination为磁偏角按Cacl按146钮计算,Convergence-Azimuth of Grid North为地理坐标北偏角按Cacl按钮计147算,Default Site Datum下拉栏选择平台海拔基准,Elevation中输入钻盘面海148拔高度。
149150151TEMPLATE EDITOR 槽口模板编辑器152153Template Editor(槽口编辑器)是用来编辑区块或平台上丛式井槽口分154布形状并根据区块或平台中心坐标计算出各槽口的坐标,以备轨迹设计之用。
下155面按操作步骤做具体介绍:1561、在菜单栏上单击Edit 菜单,选取Site下拉栏,单击Template选项或单157击工具栏中图标,将会出现左下对话框:1582、规则形状的槽口模板编辑:在Slot Name中输入槽口名(如S,槽口将以159S1、S2...表示)并输入模板中心坐标,在Long Name中输入描述(可不输),选160择Rectangle矩形或Circle圆形,然后单击EDIT按钮,将出现右上的对话框。
161在此对话框中,可输入起始槽口号码(Start Number,以左顶部1#槽口为起点及162其相对平台中心的坐标),由行(By Row)还是由列(By Column)开始,定义行163列的数目及其间距,并可输入相对平台中心的旋转角度(正为顺时针,负为逆时164针)。
165单击OK按钮返回到上一级对话框中,单击ADD按钮,编辑好的槽口模板166被储存并显示在模板列表中。
如想对某一槽口模板进行修改,只需在模板列表中167点击想要修改的模板名,按步骤修改后,单击UPDATE按钮,修改后的信息将被储168存。
169在Template Editor对话框中,单击Convert To Single Slots按钮后,170你已编辑好的槽口模板,将被转换为单独的槽口并以单独槽口的形式显示在模板171列表中,此时单击EDIT按钮,可以对每个槽口单独进行名称、坐标的改动。
见下172面图示的二个对话框:1733、Single Slot单独槽口的编辑:在Short Name栏中输入槽口名,旁边输入174槽口坐标,在Long Name中输入描述(可不输),然后选择Single Slot项,最后175单击ADD按钮,此槽口将被储存并显示在模板列表中。
如需修改,在模板列表中176单击此槽口,修改后单击UPDATE按钮,以便储存修改。