Windows下配置nginx+php(wnmp)
Windows下Nginx的安装与配置

Windows下Nginx的安装与配置Windows下Nginx的安装与配置Nginx ("engine x") 是一款高性能的,轻量级的HTTP Web服务器和反向代理服务器及电子邮件IMAP/POP3/SMTP代理服务器。
Nginx是由俄罗斯的程序设计师Igor Sysoev 所开发,为俄罗斯访问量第二的Rambler.ru 站点开发的,它已经在该站点运行超过四年多时间了,Igor 将源代码以类BSD许可证的形式发布。
自Nginx 发布四年来,Nginx 已经因它的稳定性、丰富的功能集、示例配置文件和低系统资源的消耗而闻名了。
Nginx 超越Apache的高性能和稳定性,使得国内使用Nginx 作为Web 服务器的网站也越来越多。
目前国内各大门户网站已经部署了Nginx,如新浪、网易、腾讯等;新近发现Nginx 技术在国内日趋火热,越来越多的网站开始应用部署Nginx。
一、首先去官网下载nginx1.0.11的Windows版本,官网下载:/download/nginx-1.0.11.zip下载到软件包后,解压nginx-nginx1.0.11.zip 包到你喜欢的根目录,并将目录名改为nginx。
然后,执行下列操作:cd nginxstart nginx这样,nginx 服务就启动了。
打开任务管理器,查看nginx.exe 进程,有二个进程会显示,占用系统资源,那是相当的少。
然后再打开浏览器,输入http://127.0.0.1/就可以看到nginx的欢迎页面了,非常友好nginx -s stop // 停止nginxnginx -s reload // 重新加载配置文件nginx -s quit // 退出nginx二、接下来就是配置nginx的conf文件了。
下面是我的配置:#user nobody;worker_processes 1;#error_log logs/error.log;#error_log logs/error.log notice;#error_log logs/error.log info;#pid logs/nginx.pid;events {worker_connections 1024;}http {include mime.types;default_type application/octet-stream;log_format main '$remote_addr - $remote_user [$time_local] "$request" ' '$status $body_bytes_sent "$http_referer" ''"$http_user_agent" "$http_x_forwarded_for"';access_log logs/access.log main;sendfile on;#tcp_nopush on;#keepalive_timeout 0;keepalive_timeout 65;#gzip on;server {listen 80;server_name localhost;#charset koi8-r;#access_log logs/host.access.log main;location ~* software/(.*).*\.(jpg|rar){expires 21d;root d:/temp/;access_log d:/temp/_nginx_s3gd-205.log;proxy_store on;proxy_store_access user:rw group:rw all:rw;proxy_temp_path d:/temp/;proxy_redirect off;proxy_set_header Host 112.25.10.140;proxy_set_header X-Real-IP $remote_addr;proxy_set_header X-Forwarded-For $proxy_add_x_forwarded_for; client_max_body_size 10m;client_body_buffer_size 1280k;proxy_connect_timeout 900;proxy_send_timeout 900;proxy_read_timeout 900;proxy_buffer_size 40k;proxy_buffers 40 320k;proxy_busy_buffers_size 640k;proxy_temp_file_write_size 640k;if ( !-e $request_filename){proxy_pass http://112.25.10.140:80;}}location / {root html;index index.html index.htm;}#error_page 404 /404.html;# redirect server error pages to the static page /50x.html#error_page 500 502 503 504 /50x.html;location = /50x.html {root html;}# proxy the PHP scripts to Apache listening on 127.0.0.1:80##location ~ \.php$ {# proxy_pass http://127.0.0.1;#}# pass the PHP scripts to FastCGI server listening on 127.0.0.1:9000 ##location ~ \.php$ {# root html;# fastcgi_pass 127.0.0.1:9000;# fastcgi_index index.php;# fastcgi_param SCRIPT_FILENAME /scripts$fastcgi_script_name;# include fastcgi_params;#}# deny access to .htaccess files, if Apache's document root# concurs with nginx's one##location ~ /\.ht {# deny all;#}}# another virtual host using mix of IP-, name-, and port-based configuration ##server {# listen 8000;# listen somename:8080;# server_name somename alias another.alias;# location / {# root html;# index index.html index.htm;# }#}# HTTPS server##server {# listen 443;# server_name localhost;# ssl on;# ssl_certificate cert.pem;# ssl_certificate_key cert.key;# ssl_session_timeout 5m;# ssl_protocols SSLv2 SSLv3 TLSv1;# ssl_ciphers HIGH:!aNULL:!MD5;# ssl_prefer_server_ciphers on;# location / {# root html;# index index.html index.htm; # }#}}Windows下Nginx+PHP5的安装与配置方法Nginx 是一个轻量级的高性能Http WebServer,以事件驱动方式编写,因此相比Apache 而言,Nginx 更加稳定、性能更好,而且配置简单,资源占用较低。
windows7配置Nginx+php+mysql的详细教程

windows7配置Nginx+php+mysql的详细教程最近在学习php,想把⾃⼰的学习经历记录下来,并写⼀些经验,仅供参考交流。
此⽂适合那些刚刚接触php,想要学习并想要⾃⼰搭建Nginx+php+mysql环境的同学。
当然,你也可以选择集成好的安装包,⽐如 wamp等,不过我推荐⼤家还是⾃⼰⼿动搭建⼀下环境⽐较好,这样能够更好的了解php及其运⾏流程。
下⾯直接进⼊正题。
步骤:1.准备安装包等2.安装mysql服务 (如果以前安装过mysql则可以不必下载安装,在操作的时候启动mysql服务即可。
) 双击mysql-install-------.msi安装包进⼊安装环境界⾯,选择默认选项进⾏安装,采⽤Typical(典型安装),并启动MySQL配置向导,选择默认选项配置,此处编码选择UTF-8,设置数据库密码后(⼀般为root),“Execute ”执⾏,点击“Finish”完成安装。
要确保打开mysql服务,检查是否打开服务的⽅法为: win+R 输⼊services.msc 回车,查看是否如下图所⽰有mysql服务并为开始状态。
3.安装nginx-1.10.1 (1)解压nginx-1.10.1.zip⽂件⾄C:\wnmp\nginx,并进⼊该⽂件夹内,找到nginx.exe,⿏标双击nginx.exe,启动nginx。
进⼊任务管理器进程选项卡,如找到nginx.exe进程,即确认nginx已启动。
(2)进⼊C:\wnmp\nginx\conf⽂件夹内,记事本或写字板打开nginx的配置⽂件nginx.conf 找到如下两处进⾏修改,修改内容如下server {listen 80;server_name localhost;#modify by lee 20160902 for php -slocation / {root C:/wnmp/www;index index.html index.htm index.php;}# pass the PHP scripts to FastCGI server listening on 127.0.0.1:9000location ~ \.php$ {root C:/wnmp/www;fastcgi_pass 127.0.0.1:9001;fastcgi_index index.php;fastcgi_param SCRIPT_FILENAME $document_root$fastcgi_script_name;include fastcgi_params;}#modify by lee 20160902 for php -e}4.安装php-5.6.25-nts-Win32-VC11-x64/x86 (1)解压php-5.6.25-nts-Win32-VC11-x64/x86.zip⽂件到C:\wnmp\php。
windows10系统配置nginx文件服务器的图文教程

windows10系统配置nginx⽂件服务器的图⽂教程Nginx官⽹下载Windows版本的Nginx:将下载的软件包进⾏解压:注意:解压包的路径不能包含中⽂字符,否则Nginx服务启动不了启动Nginx服务:“Windows键+R键"打开运⾏,输⼊"cmd"进⼊"Dos终端”C:\Users\Administrator>f:F:\>cd GX\nginx-1.16.1# 启动命令F:\GX\nginx-1.16.1>start nginxF:\GX\nginx-1.16.1>服务启动成功后,在任务管理器中会有两个"nginx"进程修改配置⽂件,重启Nginx在"nginx.conf"⽂件"HTTPS server块"上⽅新增以下⼏⾏# 添加⽂件管理器# 显⽰⽬录autoindex on;# 显⽰⽂件⼤⼩autoindex_exact_size on;# 显⽰⽂件时间autoindex_localtime on;server {listen 8888;server_name localhost ;# 本地⽂件路径# 注意不能直接以整个逻辑磁盘F:\ 为⽬录路径,要F:\英⽂⽬录名root F:\GX\Chiron ;}重新加载Nginx服务# 重新加载Nginx服务命令F:\GX\nginx-1.16.1>nginx.exe -s reloadF:\GX\nginx-1.16.1>注意:1. ⽬录名与⽂件名要求使⽤英⽂字符才能正常下载;2. 带有中⽂字符的⽂件可能会显⽰乱码,并且下载时,可能会报"500 Internal Server Error"错误Windows 版本的Nginx相关命令:nginx -s stop //停⽌nginxnginx -s reload //重新加载nginxnginx -s quit //退出nginxstart nginx //启动nginx设置PC机开机⾃启动C:\Users\Administrator\AppData\Roaming\Microsoft\Windows\Start Menu\Programs\Startup将“nginx.exe”⽣成快捷⽅式到上⾯⽬录下即可总结以上所述是⼩编给⼤家介绍的windows10 系统配置nginx⽂件服务器,希望对⼤家有所帮助,如果⼤家有任何疑问请给我留⾔,⼩编会及时回复⼤家的。
windows平台中配置nginx+php环境

windows平台中配置nginx+php环境刚看到nginx这个词,我很好奇它的读法(engine x),我的直译是"引擎x",⼀般引"擎代"表了性能,⽽"x"⼤多出现是表⽰"xtras(额外的效果)",那么整个词的意思就是类似"极致效果","额外性能"。
当然这⾥不是要来唠嗑,以上是题外话。
nginx相较于我们熟悉的apache,IIS的优势,就我浅⼊浅出的了解,在于"反向代理"和"负载均衡"。
因此考虑到能够为Web 服务器节省资源,它可以代替apache来提供Web服务。
那么上正题了,nginx有这么多优势,那在windows下如何来配置nginx+php环境?⽹上看到还是那么多转载来转载去的⽂章。
这⾥就我配置的过程,来介绍⼀下:1、⾸先需要准备的应⽤程序包。
nginx:nginx/Windows-1.0.4php:php-5.2.16-nts-Win32-VC6-x86.zipRunHiddenConsole:RunHiddenConsole.zipnginx下php是以FastCGI的⽅式运⾏,所以我们下载⾮线程安全也就是nts的php包。
2、安装与配置。
1)php的安装与配置。
直接解压下载好的php包,到D盘wnmp⽬录(D:\wnmp),这⾥把解压出来的⽂件夹重命名成php5。
进⼊⽂件夹修改php.ini-recommended⽂件为php.ini,并⽤Editplus或者Notepad++打开来。
找到extension_dir = "./ext"更改为extension_dir = "D:/wnmp/php5/ext"往下看,再找到;extension=php_mysql.dll;extension=php_mysqli.dll实际中,可能还要开启extension=php_bz2.dllextension=php_curl.dllextension=php_gd2.dllextension=php_mbstring.dllextension=php_exif.dllextension=php_mcrypt.dllextension=php_mhash.dllextension=php_msql.dllextension=php_mssql.dllextension=php_mysql.dllextension=php_mysqli.dllextension=php_openssl.dllextension=php_pdo.dllextension=php_pdo_mssql.dllextension=php_pdo_mysql.dllextension=php_pdo_pgsql.dllextension=php_pdo_sqlite.dllextension=php_snmp.dllextension=php_sockets.dllextension=php_sqlite.dllextension=php_xsl.dllextension=php_zip.dll前⾯指定了php的ext路径后,只要把需要的扩展包前⾯所对应的“;”去掉,就可以了。
Windows下Nginx的配置及配置文件部分介绍

Windows下Nginx的配置及配置⽂件部分介绍选择你⾃⼰想要的版本下载,解压 nginx(例如nginx-1.6.3)包到你的window盘⾥的⽬录上。
执⾏下列操作:(需要记住的,会经常⽤到)nginx -s stop // 停⽌nginxnginx -s reload // 重新加载配置⽂件nginx -s quit // 退出nginx⼆、接下来就是配置nginx的conf⽂件了。
nginx需要配置的东西也就是在conf⽂件中,现在介绍下了解下conf⽂件的配置:#user nobody;worker_processes 2; #进程数,初始可设置为cpu总核数#error_log logs/error.log;#error_log logs/error.log notice;#error_log logs/error.log info;#pid logs/nginx.pid; #⽤于管理nginx进程events {worker_connections 1024; #单个worker进程最⼤连接数}http {include mime.types; #⽂件扩展名与⽂件类型映射表default_type application/octet-stream; #默认⽂件类型#log_format main '$remote_addr - $remote_user [$time_local] "$request" '# '$status $body_bytes_sent "$http_referer" '# '"$http_user_agent" "$http_x_forwarded_for"';#access_log logs/access.log main;sendfile on; #开启⾼效⽂件传输模式,实现内核零拷贝#tcp_nopush on;#keepalive_timeout 0;keepalive_timeout 65; #连接超时时间,单位是秒#gzip on;server {listen 8089; #连接的端⼝号server_name localhost;autoindex on;#charset koi8-r;#access_log logs/host.access.log main;location / {root html;index index.html index.htm;}#error_page 404 /404.html;# redirect server error pages to the static page /50x.html#error_page 500 502 503 504 /50x.html;location = /50x.html {root html;}# pass the PHP scripts to FastCGI server listening on 127.0.0.1:9000##location ~ \.php$ {# root html;# fastcgi_pass 127.0.0.1:9000;# fastcgi_index index.php;# fastcgi_param SCRIPT_FILENAME /scripts$fastcgi_script_name;# include fastcgi_params;#}# deny access to .htaccess files, if Apache's document root# concurs with nginx's one##location ~ /\.ht {# deny all;#}}# another virtual host using mix of IP-, name-, and port-based configuration ##server {# listen 8000;# listen somename:8080;# server_name somename alias another.alias;# location / {# root html;# index index.html index.htm;# }#}#下⾯是配置https# HTTPS server##server {# listen 443 ssl;# server_name localhost;# ssl_certificate cert.pem;# ssl_certificate_key cert.key;# ssl_session_cache shared:SSL:1m;# ssl_session_timeout 5m;# ssl_ciphers HIGH:!aNULL:!MD5;# ssl_prefer_server_ciphers on;# location / {# root html;# index index.html index.htm;# }#}}3.注意事项会遇到的问题:1.配置完conf后,你启动nginx启动不了,说明是你conf⽂件配置有错误,你需要回去检查下。
window下nginx配置
原来一直以为nginx只能在Linux下搭建,最近查了些资料才恍然大悟,Windows下其实也可以跑nginx。
当你的网站访问量越来越高的时候,一台服务器已经没有办法承受流量压力,后果可想而知,怎么办呢?那就增加几台服务器来做负载吧。
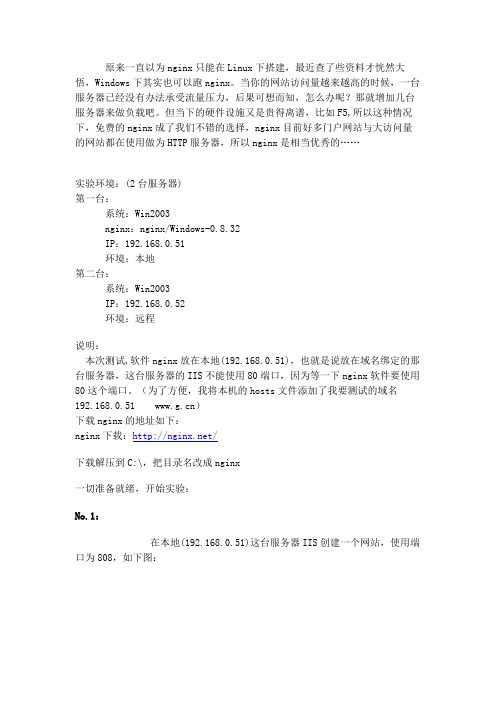
但当下的硬件设施又是贵得离谱,比如F5,所以这种情况下,免费的nginx成了我们不错的选择,nginx目前好多门户网站与大访问量的网站都在使用做为HTTP服务器,所以nginx是相当优秀的……实验环境:(2台服务器)第一台:系统:Win2003nginx:nginx/Windows-0.8.32IP:192.168.0.51环境:本地第二台:系统:Win2003IP:192.168.0.52环境:远程说明:本次测试,软件nginx放在本地(192.168.0.51),也就是说放在域名绑定的那台服务器,这台服务器的IIS不能使用80端口,因为等一下nginx软件要使用80这个端口。
(为了方便,我将本机的hosts文件添加了我要测试的域名192.168.0.51 )下载nginx的地址如下:nginx下载:/下载解压到C:\,把目录名改成nginx一切准备就绪,开始实验:No.1:在本地(192.168.0.51)这台服务器IIS创建一个网站,使用端口为808,如下图:IIS 网站绑定设置图No.2:在远程192.168.0.52的IIS创建一个网站,使用端口为80,如下图:No.3:好了,以上已经设置好两台服务器的IIS了,下面配置nginx软件来实现网站负载均衡,打开如下文件:C:\nginx\conf\nginx.conf1、找到内容server {在它的上面加入如下内容:upstream {server 192.168.0.51:808;server 192.168.0.52:80;}(这是负载切换使用的服务器网站IP)2、找到location / {root html;index index.html index.htm;}把内容更改如下:location / {proxy_pass ;proxy_redirect default;}3、找到server {listen 80;server_name localhost;把内容改成如下:server {listen 80;server_name 192.168.0.51;(这是监听访问域名绑定那台服务器80端口的请求)好,在这里就这么简单配置好了,下面看下以上3步配置的图:负载配置图No.4:都配置好了,下面启动nginx这软件进入命令提示符CMD,进入c:\nginx>,输入nginx命令,如下图:启动nginx这时候,系统进程有两个nginx.exe进程,如下图:系统nginx进程(停止nginx运行输入nginx -s stop 即可)No.5:经过以上的配置,现在我们看下负载效果:在本地(192.168.0.51)这服务器打开IE,输入:http://192.168.0.51第一次打开网站的结果:第一次访问网站图刷新一下网页,出现的结果:再次访问网站图OK,测试成功o(∩_∩)o经过这次测试,可见网站的负载平衡并不是难事。
windows下nginx安装、配置与使用

windows下nginx安装、配置与使⽤ ⽬前国内各⼤门户⽹站已经部署了Nginx,如新浪、⽹易、腾讯等;国内⼏个重要的视频分享⽹站也部署了Nginx,如六房间、酷6等。
新近发现Nginx 技术在国内⽇趋⽕热,越来越多的⽹站开始部署Nginx。
相⽐apeach、iis,nginx以轻量级、⾼性能、稳定、配置简单、资源占⽤少等优势⼴受欢迎。
1)下载地址:2)启动 解压⾄c:\nginx,运⾏nginx.exe(即nginx -c conf\nginx.conf),默认使⽤80端⼝,⽇志见⽂件夹C:\nginx\logs3)使⽤4)关闭 nginx -s stop 或taskkill /F /IM nginx.exe > nul5)常⽤配置 C:\nginx\conf\nginx.conf,使⽤⾃⼰定义的conf⽂件如my.conf,命令为nginx -c conf\my.conf 常⽤配置如下: Nginx.conf代码 http { server { #1.侦听80端⼝ listen 80; location / { # 2. 默认主页⽬录在nginx安装⽬录的html⼦⽬录。
root html; index index.html index.htm; # 3. 没有索引页时,罗列⽂件和⼦⽬录 autoindex on; autoindex_exact_size on; autoindex_localtime on; } # 4.指定虚拟⽬录 location /tshirt { alias D:\programs\Apache2\htdocs\tshirt; index index.html index.htm; } } # 5.虚拟主机配置 server { listen 80; server_name ; access_log /logs/access.log; location / { index index.html; root /htdocs; } } } http { server { #1.侦听80端⼝ listen 80; location / { # 2. 默认主页⽬录在nginx安装⽬录的html⼦⽬录。
windows下php+nginx+MySQL配置

Windows下PHP+Nginx+MySQL配置详解一、Nginx简介:Nginx 是一个很强大的高性能Web和反向代理服务器,它具有很多非常优越的特性:在高连接并发的情况下,Nginx是Apache服务器不错的替代品。
Nginx作为负载均衡服务器:Nginx 既可以在内部直接支持Rails 和PHP 程序对外进行服务,也可以支持作为HTTP代理服务器对外进行服务。
Nginx采用C进行编写,不论是系统资源开销还是CPU使用效率都比Perlbal 要好很多。
二、资源准备:PHP:php-5.4.20-nts-Win32-VC9-x86(附下载地址:/s/1oVFui)(之前下载的是php5.5的未配置成功,和nginx配置后,php-cgi.exe启动不了)Ngnix:nginx-1.4.2(附下载地址:/s/1gilVg,这个是稳定版) MySQL:MySQL-5.5.19-win32(附下载地址:/s/1Bqt01)三、配置步骤:1、PHP配置1)、将下载的PHP包解压至C:\php2)、将C:\php\php.ini-development文件备份一份,然后将原文件改名为php.ini3)、更改扩展存放目录为真实拓展存放目录查找:; extension_dir = "./" 将前面的“ ; ”去掉,然后改成:extension_dir = "C:/php/ext"4)、因为nginx需要的是cgi方式的php,所以如下几个地方是重点,否则nginx无法打开php文件:○1: enable_dl = On○2: cgi.force_redirect = 0○3: cgi.fix_pathinfo=1○4: fastcgi.impersonate = 1○5: cgi.rfc2616_headers = 15)、为了支持MySQL,还需修改以前文件:○1查找定位至:;extension=php_gd2.dll,去掉前面分号○2查找定位至:;extension=php_mbstring.dll,去掉前面分号○3查找定位至:;extension=php_mysql.dll,去掉前面分号○4查找定位至:;extension=php_mysqli.dll,去掉前面分号○5查找定位至:;extension=php_pdo_mysql.dll,去掉前面分号2、Nginx配置1)、将下载的Nginx包解压到C:\nginx2)、将C:\nginx\nginx.conf文件打开,进行如下修改○1查找定位charset改为charset gbk;○2下面贴出比较重要的片段location / {root html;//这里如果需要修改站点目录的话,将html更换成你的目标文件夹(绝对路径,比如我要修改为C:/www)index index.php index.html index.htm; //这里添加了index.php}○3下面这段是nginx支持php配置location ~ \.php$ {root C:/www;fastcgi_pass 127.0.0.1:9000;fastcgi_index index.php;fastcgi_param SCRIPT_FILENAME C:/www$fastcgi_script_name;include fastcgi_params;}将前面的”#”都去掉,然后把/scripts换成你的php项目根目录就可以。
- 1、下载文档前请自行甄别文档内容的完整性,平台不提供额外的编辑、内容补充、找答案等附加服务。
- 2、"仅部分预览"的文档,不可在线预览部分如存在完整性等问题,可反馈申请退款(可完整预览的文档不适用该条件!)。
- 3、如文档侵犯您的权益,请联系客服反馈,我们会尽快为您处理(人工客服工作时间:9:00-18:30)。
第一部分:准备工作。
(系统:Windows 7 64)
1.首先是下载软件。
NGINX-1.8.1官网下载:/download/nginx-1.8.1.zip
PHP5.6.15版本下载地址:
https:///projects/xampp/files/latest/download
Mysql版本(XAMPP集成包)
2.安装mysql软件。
3.解压缩xampp到自己目录(D:/xampp)。
4.解压NGINX你自己安装位置(D:/nginx-1.8.1)。
第二部分:安装nginx
1.打开D:/nginx-1.8.1目录,运行该文件夹下的nginx.exe
2.测试是否启动nginx。
打开浏览器访问http://localhost或 http://127.0.0.1,看看是否出现“Welcome to nginx!”,出现的证明已经启动成功了。
没有启动的话,看看80端口有占用没。
注意:该网站的默认目录在“D:/nginx-1.8.1/nginx/htm”l下
第三部分:安装php(这里主要讲nginx配置启动php,以cgi运行php)
nginx配置文件是conf文件夹里的nginx.conf
1.修改大概第43~45行之间的
location /{
root html;
index index.html index.htm;}
修改网站文件的路径,以及添加index.php的默认页。
location / {
root D:/nginx-1.8.1/basic/web;
index index.html index.htm inde.php;
}
2.支持php的设置
修改大概在第63-71行的
# pass the PHP scripts to FastCGI server listening on 127.0.0.1:9000 #
#location ~ \.php$ {
# root html;
# fastcgi_pass 127.0.0.1:9000;
# fastcgi_index index.php;
# fastcgi_param SCRIPT_FILENAME /scripts$fastcgi_script_name;
# include fastcgi_params;
#}
先将前面的“#”去掉,同样将root html;改为root C:/wnmp/nginx-1.5.8/html;。
再把“/scripts”改为“$document_root”,这里的“$document_root”就是指前面“root”所指的站点路径,这是改完后的:
# pass the PHP scripts to FastCGI server listening on 127.0.0.1:9000
#
#location ~ \.php$ {
# root D:/nginx-1.8.1/basic/web;
# fastcgi_pass 127.0.0.1:9000;
# fastcgi_index index.php;
# fastcgi_param SCRIPT_FILENAME
$document_root$fastcgi_script_name;
# include fastcgi_params;
#}
3.C:\wnmp\php\ext下修改php.ini-development文件,将文件名修改为php.ini,打开php配置文件php.ini,保存即可。
搜索“extension_dir”,找到: e;xtension_dir = "ext" 先去前面的分号再改为extension_dir = "C:\wnmp\php\ext"
搜索“date.timezone”,找到:;date.timezone = 先去前面的分号再改为
date.timezone = Asia/Shanghai
搜索“enable_dl”,找到:enable_dl = Off 改为enable_dl = On
搜索“cgi.force_redirect” ;cgi.force_redirect = 1 先去前面的分号再改为cgi.force_redirect = 0
搜索“fastcgi.impersonate”,找到: ;fastcgi.impersonate = 1 去掉前面的分号搜索“cgi.rfc2616_headers”,找到:;cgi.rfc2616_headers = 0 先去前面的分号再改为 cgi.rfc2616_headers = 1
搜索“php_mysql”,找到:”extension=php_mysql.dll和extension=php_mysqli.dll 去掉前面的“;”extension=php_mysql.dll和extension=php_mysqli.dll (支持MYSQL
数据库)
其他的配置请按照自己的需求更改。
第三部分试运行以及编辑运行配置文件
D:/xampp/php>php-cgi.exe -b 127.0.0.1:9000 -c php.ini
重新运行nginx.exe。
D:\nginx-1.8.1\basic\we此处的basic是yii框架的测试项目,
访问http://localhost/index.php
或者http://127.0.0.1/index.php
出现如下的信息就说明php已经成功安装:
开启php-cgi和nginx.exe,保存为start.bat
@echo off
echo Starting PHP FastCGI...
C:\wnmp\nginx\RunHiddenConsole.exe C:\wnmp\PHP\php-cgi.exe -b 127.0.0.1:9000-c D:\PHP\php.ini
echo Starting nginx...
C:\wnmp\nginx\RunHiddenConsole.exe D:/nginx/nginx.exe -p D:/nginx 停止php-cgi和nginx.exe,保存为stop.bat
@echo off
echo Stopping nginx...
taskkill /F /IM nginx.exe > nul echo Stopping PHP FastCGI... taskkill /F /IM php-cgi.exe > nul exit。