DELL服务器系统管理工具下载地址
戴尔服务器管理工具包用户指南说明书

######################################################################DELL(TM) OPENMANAGE(TM) DEPLOYMENT TOOLKIT FOR MICROSOFT(R) WINDOWS(R) PREINSTALLATION ENVIRONMENT (WINDOWS PE)######################################################################Version 3.2.1Release Date: February 2010This file contains updated information for your "Dell OpenManageDeployment Toolkit User's Guide" and any other technicaldocumentation included with the Deployment Toolkit (DTK) for WindowsPE.The Deployment Toolkit documentation includes the "Command LineInterface Reference Guide" and the "User's Guide." See the DellSupport website at "" for the most currentinformation.###################################################################### CONTENTS######################################################################* Criticality* Compatibility/Minimum Requirements* Release Highlights* Installation* Upgrading* User Notes* Known Issues###################################################################### CRITICALITY######################################################################3 - OptionalDell recommends that you review the specifics about the update todetermine if it applies to your system. The update contains changesthat may impact only certain configurations, or provides new featuresthat may or may not apply to your environment.###################################################################### COMPATIBILITY/MINIMUM REQUIREMENTS######################################################################The following subsections lists supported systems that arecompatible with the Deployment Toolkit version 3.2.1====================================================================== Supported Systems======================================================================The Deployment Toolkit version 3.2.1 supports the following DellPowerEdge(TM) systems:800, 830, 840, 850, 860, 1800, 1850, 1855, 2800, 2850, 6800,6850, 1900, 1950, 1955, 2900, 2970, 6950, 2950, T105, R200,R900, R805, M600, M605, T605, R300, T300, R805, R905, M805, M905,R610, R710, T610, M610, M710, T310, T410 and R410.NOTE: Other systems may be supported with this release. See the DellSupport website at "" to verify the supportedsystems and to download the latest version of the toolkit.* The sample scripts included with Deployment Toolkit have beentested with the deployment of the following operating systems:- Microsoft Windows Server (R) 2003 with SP1 (32-bit and 64-bit)- Windows Server 2003 with SP2 (32-bit and 64-bit)- Windows Server 2008 (32-bit and 64-bit)- Windows Server 2008 R2====================================================================== Installation Prerequisites====================================================================== Before installing Deployment Toolkit components, ensure that you have:* The Deployment Toolkit self-extracting installation file("dtk-3.Xwinpe-AXX.exe"), which contains the utilities, samplescripts, sample configuration files, and documentation you need todeploy your Dell system.* A Windows workstation that has at least 500 MB of free hard-drivespace.====================================================================== Deployment Prerequisites====================================================================== Before beginning the deployment process, ensure that you have thefollowing tools, software, and information ready to use or consult:* Advanced knowledge of Windows.* OEM Preinstallation kit (OPK) and Windows Server2003 (SP1) to build Windows PE 2005.* Windows Automated Installation Kit (AIK) to build Windows PE 2.0and Windows PE 3.0.* An unzip utility.* Working knowledge to build Windows PE 2005 (See the Microsoftdocumentation for customizing Windows PE 2005).* Working knowledge of Microsoft Remote Installation Services (RIS)and Automated Deployment Services (ADS) (including setting up ofRIS and ADS environments), or any other third party deploymentsystem or tool.* Working knowledge of Windows Deployment Services (WDS) or anyother third party deployment system or tool for Windows PE 2.0* A workstation with the following capabilities:-- A writable CD drive and CD writing software-- Network access* A target system with a CD drive if you are performing a localdeployment or network access if you are performing a networkdeployment.* All Deployment Toolkit utilities, sample scripts, and sampleconfiguration files.* All required Windows PE drivers, operating system drivers, and theDell utility partition image file.* A minimum BIOS version is recommended on some of the platforms forall the DTK options to work correctly. In general, it is goodpractice to use the latest ("n") version of BIOS firmware or the"n-1" version that is available on "."###################################################################### RELEASE HIGHLIGHTS###################################################################### Deployment Toolkit version 3.2.1 has the following new feature:* Support for Windows PE 3.0 (32-bit and 64-bit)###################################################################### INSTALLATION###################################################################### For complete installation instructions, see the "Dell OpenManageDeployment Toolkit User's Guide."###################################################################### UPGRADING###################################################################### When upgrading from a previous release (1.x) of the DTK, ensure thatyou create the new DTK version 3.x environment separately from yourprevious version of DTK. This step is necessary because theenvironments and requirements for DTK version 3.x are completelydifferent.######################################################################USER NOTES######################################################################This section provides information that can help enhance yourexperience with the Deployment Toolkit.====================================================================== SCRIPT NOTES====================================================================== * The sample scripts are provided as examples for customers who wantto develop their own deployment process. Some customers may findthat the scripts work well in their environment, while somecustomers may need to develop their own scripts entirely fromscratch. Customers deploying multiple systems need to provideunique information for each server when appropriate. For example,system host names, IP addresses, and BIOS asset tags need to beunique for each system. The batch scripts and configuration filesneed to be modified to reflect the unique information for eachsystem being deployed. Many options are available to optimize thisprocess.* In the previous releases, you could use a system profilegenerated on a specific Dell system to deploy only that same systemmodel. Beginning this release, you can use a system BIOSconfiguration profile generated for all systems belonging to thesame generation.For example, "syscfg_x8xx.ini" for x8xx systems, "syscfg_x9xx.ini"for x9xx systems, and so on.* It is recommended that you use Windows PE 2.0 during Windows Server2008 installation.* Windows PE 2.0 does not support installation of Dell utilitypartition.====================================================================== TOOLS NOTES====================================================================== * SYSCFG:- Some options may not be present on all systems, which maybe due to the BIOS version or hardware feature set. The usageinformation generated by running SYSCFG without arguments showsonly those options that are valid for your system.- The "--devseq" option is present only if you have anavailable, bootable hard-disk partition. If this option ispresent in the configuration file, but not present on yoursystem, you will receive a usage error.- Some options need warm reboot for requested settings, therecommended method is "exit" command on command prompt.- If you perform operations that change the "--redmem"option, reboot your system immediately. This is applicableto both command-line and "--infile" usage.NOTE: Additionally, the "--redmem" option should not be issued with any other command and should be immediately followed by a system reboot. This note is important when youdevelop scripts that can alter the "--redmem" setting.- For options that use text strings such as username,password, hostname, and community string, using characterssuch as <space>, "<," ">," "|," "=" on the command line can bemisinterpreted by the command line parser and may cause errors. Use only alphanumeric characters to avoid these errors.- If you set the username using the syscfg "username" option,SOL access for the corresponding user will be enabled bydefault. You can disable SOL access for a user using the"syscfg solaction --userid=<userid> --action=disable" command.- The maximum reliably supported baud rates (--solbitrate) are:- 19200 for PowerEdge x8xx systems.- 57600 for PowerEdge x9xx systems without Dell RemoteAccess Controller 5 (DRAC 5).- 115200 for PowerEdge x9xx systems with DRAC 5.If you enter an unsupported baud rate, you may receive an error, "Parameter out of range."* RAIDCFG:- When creating virtual disks, the chunk (stripe) size is alwaysin KBs. Do not specify any units of measure for the chunk size.- When providing multiple physical disks for the "createvirtual disk" command, do not separate the disks with spaces.For example, "-ad=1:4, 1:5" causes an error. The correct wayto display multiple physical disks is "-ad=1:4,1:5,1:6."- If you change the controller mode from SCSI mode to RAID mode, data loss may occur. Back up any data you requirebefore changing the modes.###################################################################### KNOWN ISSUES###################################################################### RAIDCFG Issues:* If you delete a virtual disk on PERC 4I/M on Windows PE, you needto reboot the system for the changes to take effect.* You cannot delete a virtual disk on CERC SATA 2S when RAID 1 iscreated with the "--clear" option. The virtual disk can be clearedfrom the controller BIOS.* Perform copy operations using the "XCOPY" command, because theDOS "COPY" command may fail when copying across a network share.The message "invalid file handle" may be displayed. This issueis specific to R805 and R900 systems and is an intermittenterror that is usually caused by the network connection.If the problem persists, check your network settings.* You can assign upto 10 Global Hotspares using Raidcfg. UseThe Dell(TM) OpenManage(TM) Server Administrator Storage Managementfor assigning more than 10 Global Hot spares.* SW RAID controllers S100 and S300 will not be detected in the MicrosoftWindows Server 2003 with SP1 (32-bit).* DTK does not support Non RAID (Volume) mode on s100/s300controller.* S300 controller Cachepolicy setting is "Not Applicable". HenceVD created with different cachepolicy settings from OROM utilitywill be displayed as "Not Applicable".SYSCFG Issues:* On Windows PE 3.0, when you run the syscfg command to list allavailable options, if you press CTR + C before the command fullyexecutes, an error message is displayed. Click OK.You can ignore the message.* The Demand-based Power Management (DBPM) option does not work onPowerEdge 1855 systems with BIOS versions earlier than A05.* The option for "powerctl," which is "softshutdown," does notwork in Windows PE.* The "--solbitrate" option in "solcfgparams" and the"--mgscommbitrate" option in "serialcfgparams" accept a baud rateof 57600, but tools such as "ipmish" and "solproxy" do notfunction at that baud rate for PowerEdge systems.* On PowerEdge 1950, 2950 and PowerVault NX 1950 systems withinternal USB, BIOS setting configuration for internal USB Port ispossible only if User Accessible/external (UA) USB ports are set to"All Ports On." If UA USB ports are not set to "All Ports On"and you try to configure the BIOS setting for the internal USB portusing SYSCFG, the configuration will appear to be successfulbut the changes will not take effect after the next reboot. IfUA USB ports settings are changed from "All Ports On" to"All Ports Off" or "Only Back Ports On," the USB port willbe automatically Set to "Off" during the next reboot.RACADM Issues:* If you use virtual media to boot into Windows PE, executingcertain RACADM commands may cause Windows PE to crash.* After generating the rac configuration file using the"racadm getconfig -f <file_name>" command, comment out the followingproperties in the configuration file before you update aconfiguration using the "racadm config -f <file_name>" command:#cfgRacTuneCtrlEConfigDisable=0#cfgRacTuneLocalConfigDisable=0* VLAN objects (cfgNicVLanEnable, cfgNicVLanId, and cfgNicVLanPriority) displayed using the local RACADM command"racadm getconfig -g cfgLanNetworking"or VLAN objects generated in the configuration file using thelocal RACADM command"racadm getconfig -f <file name>" do not contain the leading "#" symbolwhich indicates that they are read-only.Windows PE Installation Issues:* If virtual flash is enabled and does not contain a valid image(for example, if the virtual flash contains a corrupt orrandom image), you may not be able to install Windows 2000 orWindows 2003, locally or remotely. To fix this issue, installa valid image on virtual flash or disable virtual flash if itwill not be used during the installation procedure.* Running partcfg.bat may fail when virtual media is enabled.For the hard disk, partcfg.bat uses the driver letter "c:".When virtual media is enabled, sometimes, the virtual devicegets assigned with the drive letter "c:" And, partcfg.batexecution fails. To run partcfg.bat successfully, either disablethe virtual media or use the diskpart command to assign a freedriver letter for partcfg.bat.Windows PE Issues:* When using the H200 driver provided in Windows PE 3.0 (x64),the diskpart command does not list the first virtual diskcreated. Download the latest driver from the support siteat .###################################################################### Information in this document is subject to change without notice.(C) 2010 Dell Inc. All rights reserved.Reproduction of these materials in any manner whatsoever withoutthe written permission of Dell is strictly forbidden.Trademarks used in this text: "Dell," "PowerEdge," and"OpenManage" are trademarks of Dell Inc.; "Microsoft," "Windows," and "Windows Server" are either trademarks or registered trademarksof Microsoft Corporation in the United States and/or other countries.Other trademarks and trade names may be used in this document to referto either the entities claiming the marks and names or their products.Dell Inc. disclaims any proprietary interest in trademarks and tradenames other than its own.The sample scripts provided with the Dell OpenManage DeploymentToolkit are provided "as is." Dell disclaims any and all warranties,express, implied or statutory, with respect to the sample scripts,including, but not limited to, the implied warranties ofmerchantability, fitness for a particular purpose, title and anywarranty of non-infringement. Use the sample scripts at your own risk.Dell shall not be liable for any direct or indirect damages incurredin using the sample scripts. In no event shall Dell or its suppliersbe responsible for any direct or indirect damages whatsoever(including, without limitation, damages for loss of profits, loss ofuse, loss of data, business interruption, or other pecuniary loss, norfor punitive, incidental, consequential, or special damages of anykind, under any part of this agreement, even if advised or aware ofthe possibility of such damage.February 2010。
Dell EMC 服务器管理员存储管理 9.4 用户指南说明书
Dell EMC Server Administrator 存储管理 9.4用户指南注意、小心和警告:“注意”表示帮助您更好地使用该产品的重要信息。
:“小心”表示可能会损坏硬件或导致数据丢失,并告诉您如何避免此类问题。
:“警告”表示可能会导致财产损失、人身伤害甚至死亡。
© 2020 Dell Inc. 或其子公司。
保留所有权利。
Dell、EMC 和其他商标是 Dell Inc. 或其附属机构的商标。
其他商标可能是其各自所有者的商标。
章 1: 概览 (11)本发行版中的新增功能 (11)安装 Storage Management 之前 (11)控制器固件和驱动程序的版本要求 (11)支持的控制器 (12)对磁盘和卷管理的支持 (12)章 2: 使用入门 (13)启动 Storage Management (13)在运行 Microsoft Windows 的系统上 (13)在运行 Linux 和任何远程系统的系统上 (13)用户权限 (14)使用图形用户界面 (14)存储对象 (14)运行状况 (14)信息或配置 (14)使用 Storage Management 命令行界面 (14)显示联机帮助 (14)常用存储任务 (14)章 3: 理解 RAID 概念 (16)RAID (16)硬件和软件 RAID (16)RAID 概念 (16)RAID 级别 (17)为了可用性和性能组织数据存储 (17)选择 RAID 级别和连锁 (17)连锁 (17)RAID 级别 0 - 分条 (18)RAID 级别 1 - 镜像 (19)RAID 级别 5 - 带有分布式奇偶校验的分条 (19)RAID 级别 6 - 带有额外分布式奇偶校验的分条 (20)RAID 级别 50 - 在 RAID 5 组上分条 (20)RAID 级别 60 - 在 RAID 6 组上分条 (21)RAID 级别 10 - 分条的镜像 (22)RAID 级别 1 - 连锁镜像 (23)比较 RAID 级别和连锁性能 (24)非 RAID (25)章 4: 快速访问存储状况和任务 (26)存储设备运行状况 (26)热备份保护策略 (26)存储组件严重性 (26)存储属性和当前活动 (27)目录3监测 RAID 控制器上的磁盘可靠性 (27)使用警报检测故障 (27)显示配置更改的时间延迟 (27)章 5: PCI Express 固态设备支持 (29)PCIe SSD (29)PCIe SSD 功能特性 (29)PCIe SSD 子系统属性 (29)PCIe 扩展卡 (30)物理设备属性 (31)物理设备任务 (32)闪烁和取消闪烁 PCIe SSD (33)在 Micron PCIe SSD 上启用完全初始化 (33)准备卸下 PCIe SSD (33)导出日志 (34)在 NVMe PCIe SSD 上执行加密擦除 (34)插槽卡中的 PCIe SSD 任务 (34)要在 Storage Management 中找到插槽卡中的 PCIe SSD 的“加密擦除” (35)插槽卡中的 PCIe SSD 属性 (35)插槽卡中的 PCIe SSD 任务 (36)导出插槽卡中的 PCIe SSD 的日志 (36)在适于 NVMe PCIe SSD 的 Storage Management 中找到导出日志 (37)PCIe SSD 子系统运行状况 (37)背板 (37)背板固件版本 (37)章 6: 存储信息和全局任务 (38)存储属性 (38)全局任务 (38)设置剩余额定写入寿命阈值 (38)设置可用的备用阈值 (39)存储控制器属性 (40)存储组件 (40)章 7: 控制器 (41)控制器 (41)RAID 控制器技术 - SATA 和 SAS (41)SAS RAID 控制器 (41)RAID 控制器功能 (42)控制器—支持的 RAID 级别 (42)控制器 - 支持的条带大小 (42)RAID 控制器读、写和磁盘高速缓存策略 (42)读取策略 (42)写入策略 (43)磁盘高速缓存策略 (43)PERC 控制器上的后台初始化 (44)非 RAID 控制器说明 (44)非 RAID SAS 控制器 (44)4目录固件或驱动程序属性 (45)控制器运行状况 (45)控制器组件 (45)控制器属性和任务 (45)控制器任务 (48)创建虚拟磁盘 (49)启用控制器警报 (49)禁用控制器警报 (49)关闭控制器警报 (49)测试控制器警报 (49)设置重建率 (49)重设控制器配置 (50)导出控制器日志文件 (51)外部配置操作 (51)导入外部配置 (53)导入或恢复外部配置 (53)清除外部配置 (53)外部虚拟磁盘中的物理磁盘 (54)设置后台初始化率 (56)设置检查一致性率 (56)设置重新构建率 (57)设置巡检读取模式 (57)启动和停止巡检读取 (58)更改控制器属性 (58)管理物理磁盘电源 (59)管理保留的高速缓存 (61)加密密钥 (61)转换为非 RAID 磁盘 (63)转换为 RAID 型磁盘 (63)更改控制器模式 (64)自动配置 RAID0 操作 (64)系统配置锁定模式 (65)系统配置锁定模式开启时支持的全局任务 (65)系统配置锁定模式开启时支持的控制器任务 (66)系统配置锁定模式开启时支持的控制器报告 (66)系统配置锁定模式开启时支持的物理磁盘任务 (67)系统配置锁定模式开启时支持的虚拟磁盘任务 (68)查看可用报告 (68)可用报告 (68)查看巡检读取报告 (68)查看检查一致性报告 (68)设置冗余路径配置 (69)查看插槽占用报告 (70)查看物理磁盘固件版本报告 (70)物理磁盘固件版本报告属性 (71)章 8: 支持 PERC 9 和 PERC 10 硬件控制器 (72)PERC 9 和 PERC 10 硬件控制器上的 RAID 级别 10 虚拟磁盘支持 (72)目录5带奇数跨度的 RAID 级别 10 虚拟磁盘的创建 (72)支持高级格式化 4KB 扇区硬盘驱动器 (73)热备用注意事项— 4KB 扇区硬盘驱动器 (73)重新配置注意事项 - 4KB 扇区硬盘驱动器 (73)章 9: BOSS-S1 RAID 控制器的支持 (74)章 10: 机柜和背板 (75)背板 (75)机柜 (75)MX5016s (76)机柜物理磁盘 (76)机柜风扇 (76)风扇属性 (76)机柜电源设备 (77)电源设备属性 (77)机柜温度探测器 (78)机柜管理模块 (79)机柜和背板运行状况 (80)机柜和背板属性与任务 (80)机柜和背板属性与任务 (84)机柜管理 (85)识别机柜上的空置连接器 (85)机柜组件 (85)章 11: 连接器 (86)信道冗余 (86)创建信道冗余虚拟磁盘 (86)在 PERC 控制器上创建信道冗余虚拟磁盘的物理磁盘 (86)使用 RAID 10 创建信道冗余虚拟磁盘 (86)使用 RAID 50 创建信道冗余虚拟磁盘 (87)连接器运行状况 (87)控制器信息 (87)连接器组件 (87)连接器属性和任务 (87)逻辑连接器属性和任务 (88)路径运行状况 (88)清除连接器冗余路径视图 (88)连接器组件 (89)章 12: 磁带驱动器 (90)磁带驱动器属性 (90)章 13: RAID 控制器电池 (91)电池属性和任务 (91)电池任务 (92)要在 Storage Management 中找到“延迟记忆周期” (92)6目录章 14: 物理磁盘或物理设备 (93)物理磁盘或物理设备更换指南 (93)为系统添加新磁盘 (93)对于 SAS 控制器 (93)更换收到 SMART 警报的物理磁盘 (94)磁盘是冗余虚拟磁盘的一部分 (94)磁盘不是冗余虚拟磁盘的一部分 (94)其他磁盘过程 (94)物理磁盘或物理设备属性 (94)物理磁盘或物理设备任务 (97)物理磁盘任务 (98)闪烁和取消闪烁物理磁盘 (98)移除死段 (98)准备移除 (98)重建数据 (99)Canceling A Rebuild (99)分配和取消分配全局热备用 (99)将物理磁盘设为联机或脱机 (99)执行清除物理磁盘和取消清除 (100)启用可恢复热备份 (100)执行加密擦除 (101)转换为 RAID 型磁盘 (102)转换为非 RAID 磁盘 (102)章 15: 虚拟磁盘 (103)创建虚拟磁盘前的注意事项 (103)控制器的虚拟磁盘注意事项 (104)PERC S100 和 PERC S300 控制器上热备份的注意事项 (105)运行 Linux 的系统上虚拟磁盘注意事项 (105)每个虚拟磁盘的物理磁盘数 (105)每个控制器的最大虚拟磁盘数 (105)计算最大虚拟磁盘大小 (105)信道冗余虚拟磁盘 (106)创建虚拟磁盘 (106)重新配置或迁移虚拟磁盘 (106)虚拟磁盘重新配置和容量扩展的起始和目标 RAID 级别 (106)保持冗余虚拟磁盘的完整性 (107)重建冗余信息 (107)管理虚拟磁盘坏块管理 (108)清除坏块的建议 (108)虚拟磁盘属性和任务 (109)虚拟磁盘属性 (109)虚拟磁盘任务 (110)虚拟磁盘—可用任务 (111)重新配置虚拟磁盘 (111)格式化、初始化、慢速初始化和快速初始化 (111)取消后台初始化 (111)恢复死段 (111)目录7删除虚拟磁盘上的数据 (112)执行检查一致性 (112)取消检查一致性 (112)暂停检查一致性 (112)恢复检查一致性 (112)闪烁和取消闪烁虚拟磁盘 (112)重命名虚拟磁盘 (112)Canceling A Rebuild (112)更改虚拟磁盘策略 (113)更换成员磁盘 (113)清除虚拟磁盘坏块 (113)加密虚拟磁盘 (113)创建虚拟磁盘快速向导 (113)创建虚拟磁盘快速向导步骤 2 (114)创建虚拟磁盘高级向导 (115)创建虚拟磁盘高级向导步骤 2 (116)创建虚拟磁盘高级向导步骤 3 (117)跨接编辑 (118)重新配置虚拟磁盘 - 步骤 1/3 (118)要在 Storage Management 中找到“重新配置” (119)虚拟磁盘任务 - 重新配置步骤 2/3 (119)重新配置虚拟磁盘扩展虚拟磁盘容量 - 步骤 2 / 3 (120)虚拟磁盘任务 - 重新配置步骤 3 / 3 (120)慢速和快速初始化 (120)慢速初始化注意事项 (120)格式化或初始化磁盘 (120)要在 Storage Management 中找到虚拟磁盘任务 (121)删除虚拟磁盘 (121)删除虚拟磁盘 (121)在 Storage Management 中找到“删除” (121)重命名虚拟磁盘 (121)要重命名虚拟磁盘 (122)要在 Storage Management 中找到“重命名” (122)更改虚拟磁盘的策略 (122)更改虚拟磁盘的读、写或磁盘高速缓存策略 (122)要在 Storage Management 中找到“更改策略” (122)分割镜像 (122)分割镜像 (123)要在 Storage Management 中找到分割镜像 (123)取消镜像 (123)要取消镜像 (123)要在 Storage Management 中找到“取消镜像” (123)分配和取消分配专用热备用 (123)分配专用热备用 (123)取消分配专用热备份 (124)要在 Storage Management 中找到“分配或取消分配专用热备份” (124)虚拟磁盘任务 - 更换成员磁盘步骤 1 / 2 (124)更换成员磁盘步骤 1 / 2 (124)要在 Storage Management 中找到“更换成员磁盘” (125)8目录虚拟磁盘任务 - 更换成员磁盘步骤 2 / 2 (125)章 16: 将物理磁盘和虚拟磁盘从一个系统移到另一个系统 (126)需要的条件 (126)SAS 控制器 (126)SAS 控制器 (126)迁移 SAS 虚拟磁盘到另一个系统 (126)章 17: 使用热备份来保护虚拟磁盘 (127)理解热备用 (127)设置热备份保护策略 (127)专用热备用保护策略 (127)全局热备用保护策略 (128)热备用保护策略的注意事项 (128)OMSS_机柜仿射性注意事项 (128)章 18: 故障排除 (129)常见故障排除步骤 (129)电缆连接正确 (129)系统要求 (129)驱动程序和固件 (129)隔离硬件问题 (129)更换故障磁盘 (130)在所选控制器上使用物理磁盘联机命令 (130)从移除错误物理磁盘中恢复 (131)解决 Microsoft Windows 升级问题 (131)虚拟磁盘故障排除 (131)无法重建 (131)重建完成但出现错误 (132)不能创建虚拟磁盘 (132)最小容量虚拟磁盘在 Windows 磁盘管理中不可见 (132)运行 Linux 的系统上虚拟磁盘错误 (132)为冗余和非冗余虚拟磁盘使用相同物理磁盘的相关问题 (132)具体的问题情况和解决方案 (133)物理磁盘脱机或显示错误状态 (133)接收到一个带有更换、检测或介质错误的坏块警报 (133)在执行重建或在虚拟磁盘处于降级状态期间收到从 2146 到 2150 的警报 (133)在执行输入/输出、一致性检查、格式化或其他操作期间收到从 2146 到 2150 的警报 (134)读写操作遇到问题 (134)没有显示任务菜单选项 (134)重新引导期间“损坏的磁盘或驱动器”信息建议运行自动检查 (134)Windows 休眠后的错误状况和错误信息 (134)更新温度探测器状态前 Storage Management 可能会延迟 (134)重新引导后,Storage Management 可能会延迟显示存储设备 (134)无法登录到远程系统 (134)无法连接到运行 Microsoft Windows Server 2003 的远程系统 (134)在 Mozilla 浏览器中重新配置虚拟磁盘显示故障 (135)物理磁盘显示在连接器对象下,而不是机柜对象下。
DELL服务器引导光盘图片及下载链接
6.2.0下载链接:“Dell Systems Management Tools and Documentation”:(这个ISO 是包括Dell Systems Build and Update Utility, the IT Assistant console, the OpenManage Server Ad ministrator agent, Systems Documentation. )ftp:///secure/sysman/OM_6.2.0_SMTD_A00.iso.001ftp:///secure/sysman/OM_6.2.0_SMTD_A00.iso.002将上面两个文件下载到一个空的目录,然后用下面的命令合并成一个DVD iso文件:Windows: copy /b OM* OM_620_SMTD_A00.isoLinux: cat OM* > OM_620_SMTD_A00.iso(注意:6.2光盘没有Systems Service 这个驱动包功能,如果需要现在还可以单独下载对应的设备驱动,或者下载驱动包ISO刻录:ftp:///sysman/OM_6.2.0_SSDT_A00.iso)(从6.2版本开始,之前的6.1版本暂时没有变化)“Dell Systems Build and Update Utility: ”/sysman/cdu_1.3_core_144 _A00.iso功能:“Dell Systems Build and Update Utility”是一张可引导的工具光盘,用于单个服务器的操作系统安装向导,firmware升级,系统配置。
注意事项:如果用这张工具盘向导安装Windows 2008, 还需要使用“Windows OS install support pack”光盘:ftp://ppfnal4219:ppfnal@/securedownloads/sysman/cdu_winpe_6.2.0_3 5_A00.iso ;这张工具盘不包括OpenManage Server Administrator,如果要在安装操作系统的时候同时安装SA,需要在提示的时候放入“Systems Management Tools and Documentation”光盘。
戴尔 OpenManage 软件快速安装指南
Dell™ OpenManage™可用性IT Assistant状况和报告Dell Systems Management Tools and Documentation DVD位于<DVD_drive>\SYSMGMT\ManagementStation\windows\ManagementStation目录一系统管理控制台程序,通常是安装在一个管理站上,用来收集信息和提供所有管理型系统的视图。
IT Assistant 执行以下功能:资源清册和资产报告,包括服务标签号码、物主成本信息和 BIOS、微处理器和内存的特定信息通过电子邮件或控制台报警等通知方式执行故障监控,使管理员可以了解到磁盘、内存、电压、风扇和热状态中报告的事件设备特定工具的上下文启动,例如 ServerAdministrator、远程访问控制台、Dell PowerConnect™交换机控制台、数字化KVM 控制台以及打印机控制台RAC 公用程序远程管理Dell Systems Management Tools and Documentation DVD对于 Windows 系统,位置为<DVD_drive>\SYSMGMT\ManagementStation\windows\ManagementStation。
对于 Linux 系统,位置为<DVD_drive>/SYSMGMT/ManagementStation/linux/rac 这种软件解决方案执行以下功能:提供对不可操作系统的远程访问,可以让您获得本地控制台的完全控制远程管理受监测系统,其中包括 BIOS 设置、关机、启动和 RAC 安全性BMC 管理公用程序 (BMU)远程管理(续)Dell Systems Management Tools and Documentation DVD对于 Windows 系统,位置为<DVD_drive>\SYSMGMT\ManagementStation\windows\ManagementStation。
dell racadm windows 用法
dell racadm windows 用法在Windows操作系统中使用Dell RACADMDell Remote Access Controller (RAC)是一种管理工具,可用于在远程或本地管理Dell服务器。
RACADM是一种命令行工具,可在Windows操作系统中使用,以便轻松地执行对Dell服务器的管理操作。
以下是使用Dell RACADM的一些常见用法:1. 安装Dell RACADM:要在Windows操作系统中使用Dell RACADM,您需要首先下载和安装Dell OpenManage Server Administrator(OMSA)软件包。
此软件包包含了RACADM工具。
您可以在Dell官方网站上找到OMSA软件包,并按照安装向导进行安装。
2. 连接到服务器:一旦安装了Dell OMSA软件包,您可以打开命令提示符或PowerShell,并使用以下命令连接到要管理的Dell服务器:racadm -r <IP地址> -u <用户名> -p <密码>在此命令中,<IP地址>是Dell服务器的IP地址,<用户名>和<密码>是用于RAC登录的凭据。
3. 寻找系统信息:通过使用以下命令,您可以获取有关Dell服务器的一些基本信息:racadm getsysinfo这将显示服务器模型、固件版本、安装的操作系统等。
4. 修改服务器BIOS设置:您可以使用Dell RACADM修改服务器的BIOS设置。
例如,要启用或禁用Intel Hyper-Threading Technology,可以使用以下命令: racadm set BIOS.SysProfileSettings.ProcessorHyperThread enable这将启用Hyper-Threading技术。
5. 监控硬件健康状态:使用以下命令,您可以监控Dell服务器的硬件健康状况:racadm getsensorinfo这将提供有关服务器温度、电源状态、风扇速度等的信息。
Dell EMC Systems Management Tools And Documentatio

Dell EMC Systems Management Tools And Documentation 9.0.1 版安装指南注意、小心和警告:“注意”表示帮助您更好地使用该产品的重要信息。
:“小心”表示可能会损坏硬件或导致数据丢失,并告诉您如何避免此类问题。
:“警告”表示可能会导致财产损失、人身伤害甚至死亡。
版权所有 © 2017 Dell Inc. 或其子公司。
保留所有权利。
Dell、EMC 和其他商标均为 Dell Inc. 或其附属公司的商标。
其他商标均为其各自所有者的商标。
Rev. A001 关于 (4)受管系统和管理站 (4)Systems Management Tools and Documentation 软件 (4)DTK 弃用消息 (6)2 在 Microsoft Windows 上安装管理站软件 (7)在 Microsoft Windows Server 和 Hyper-V Server 上安装管理站软件 (7)使用 CLI 模式安装管理站软件 (7)使用 CLI 模式卸载管理站软件 (8)3 在支持的 Red Hat Enterprise Linux、Novell SUSE Linux Enterprise Server 和 VMware ESXi Server上安装管理站软件 (9)目录31关于Systems Management Tools and Documentation 安装指南提供了管理站软件概览及其安装说明。
有关安装 Server Administrator 的信息,请参阅Systems Management Tools and Documentation软件中的Dell EMC Server Administrator 安装指南。
系统管理软件系统管理映像包括以下所述三种软件:•Systems Management Tools and Documentation•服务器更新•管理控制台您可以从/support下载软件的可用 ISO 映像。
Dell服务器操作系统安装教程
Dell服务器操作系统安装教程Dell服务器操作系统安装教程1、准备工作1.1 确认服务器型号和操作系统要求1.2 操作系统安装镜像文件1.3 准备安装媒介(如USB驱动器或DVD光盘)1.4 确保服务器连接到稳定的电源和网络2、安装前的操作系统设置2.1 进入服务器的BIOS设置界面2.2 确保服务器的启动顺序设置为从准备的安装媒介启动2.3 确定是否需要其他特殊的BIOS设置,如RD配置3、操作系统安装过程3.1 启动服务器并让其从安装媒介引导3.2 根据操作系统的安装向导,选择合适的语言和地区设置 3.3 确认许可协议并接受3.4 选择安装类型(如全新安装、升级或自定义)3.5 根据需要,进行磁盘分区和格式化3.6 选择要安装的目标位置3.7 安装操作系统并等待安装过程完成4、安装后的操作系统设置4.1 完成操作系统安装后重新启动服务器4.2 根据操作系统的向导,进行一些基本配置,如设置计算机名称、网络连接等4.3 安装和更新设备驱动程序4.4 安装所需的更新补丁和安全补丁4.5 安装所需的应用程序和工具4.6 配置服务器的安全设置和网络设置4.7 进行必要的系统优化和性能调整4.8配置备份和恢复策略附件:1、操作系统安装镜像文件2、Dell服务器型号和操作系统要求列表3、操作系统安装和配置常见问题及解决方法法律名词及注释:1、许可协议 - 操作系统的使用许可协议,规定了使用操作系统的条件和限制。
2、更新补丁 - 操作系统或软件发布的修复程序,用于解决已知的安全漏洞或其他问题。
3、安全补丁 - 专门用于修复和加强操作系统安全性的更新。
4、设备驱动程序 - 用于操作系统与硬件设备之间通信的软件。
5、应用程序 - 在操作系统上运行的软件程序,用于完成特定的任务或提供特定的功能。
6、工具 - 用于辅助操作系统管理和维护的实用程序。
DELL服务器引导光盘图片
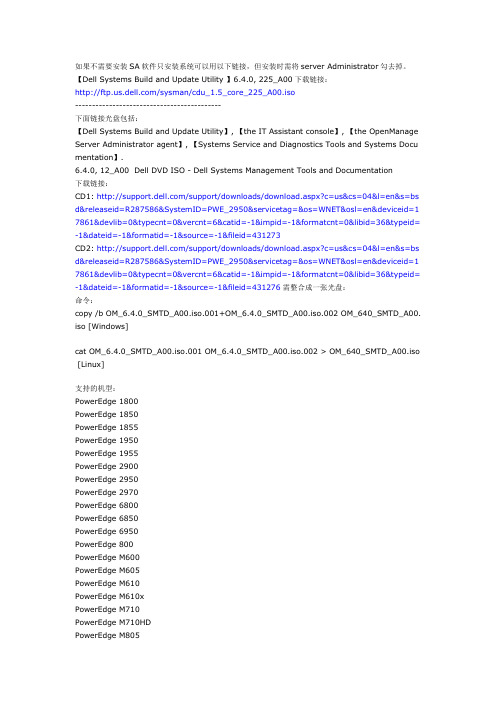
如果不需要安装SA软件只安装系统可以用以下链接,但安装时需将server Administrator勾去掉。
【Dell Systems Build and Update Utility 】6.4.0, 225_A00下载链接:/sysman/cdu_1.5_core_225_A00.iso-------------------------------------------下面链接光盘包括:【Dell Systems Build and Update Utility】, 【the IT Assistant console】, 【the OpenManage Server Administrator agent】, 【System s Service and Diagnostics Tools and System s Docu mentation】.6.4.0, 12_A00 Dell DVD ISO - Dell Systems Management Tools and Documentation下载链接:CD1: /support/downloads/download.aspx?c=us&cs=04&l=en&s=bs d&releaseid=R287586&SystemID=PWE_2950&servicetag=&os=WNET&osl=en&deviceid=1 7861&devlib=0&typecnt=0&vercnt=6&catid=-1&impid=-1&formatcnt=0&libid=36&typeid= -1&dateid=-1&formatid=-1&source=-1&fileid=431273CD2: /support/downloads/download.aspx?c=us&cs=04&l=en&s=bs d&releaseid=R287586&SystemID=PWE_2950&servicetag=&os=WNET&osl=en&deviceid=1 7861&devlib=0&typecnt=0&vercnt=6&catid=-1&impid=-1&formatcnt=0&libid=36&typeid= -1&dateid=-1&formatid=-1&source=-1&fileid=431276需整合成一张光盘:命令:copy /b OM_6.4.0_SMTD_A00.iso.001+OM_6.4.0_SMTD_A00.iso.002 OM_640_SMTD_A00. iso [Windows]cat OM_6.4.0_SMTD_A00.iso.001 OM_6.4.0_SMTD_A00.iso.002 > OM_640_SMTD_A00.iso [Linux]支持的机型:PowerEdge 1800PowerEdge 1850PowerEdge 1855PowerEdge 1950PowerEdge 1955PowerEdge 2900PowerEdge 2950PowerEdge 2970PowerEdge 6800PowerEdge 6850PowerEdge 6950PowerEdge 800PowerEdge M600PowerEdge M605PowerEdge M610PowerEdge M610xPowerEdge M710PowerEdge M710HDPowerEdge M805PowerEdge M910 PowerEdge 1900 PowerEdge 830 PowerEdge 840 PowerEdge 850 PowerEdge 860 PowerEdge 2800 PowerEdge 2850 PowerEdge R200 PowerEdge R210 PowerEdge R300 PowerEdge R310 PowerEdge R410 PowerEdge R510 PowerEdge R610 PowerEdge R710 PowerEdge R715 PowerEdge R805 PowerEdge R810 PowerEdge R815 PowerEdge R900 PowerEdge R905 PowerEdge R910 PowerEdge T100 PowerEdge T105 PowerEdge T110 PowerEdge T300 PowerEdge T310 PowerEdge T410 PowerEdge T605 PowerEdge T610 PowerEdge T710 PowerVault DL2000 PowerVault DL2100 PowerVault DP100/NF100 PowerVault DP500/NF500 PowerVault DP600/NF600 PowerVault MD1000 PowerVault MD1120 PowerVault MD1200 PowerVault MD1220 PowerVault MD3000 PowerVault MD3000iPowerVault NX3000支持的操作系统:Novell SuSE Linux ES 11VMWare ESX 4.0Microsoft Windows Server 2008 x64Red Hat Red Hat Enterprise Linux 4Red Hat Red Hat Enterprise Linux 4.7Red Hat Red Hat Enterprise Linux 5.2Red Hat Red Hat Enterprise Linux 5Novell SuSE Linux ES 10 SP2 x86_64Microsoft Windows Server 2008 x86Microsoft Windows Server 2003Microsoft Windows Server 2008 R2Microsoft Windows Server 2003 x64======================================================6.3.0, A00 Dell DVD ISO - Dell Systems Management Tools and Documentation下载链接:CD1:ftp:///secure/sysman/OM_6.3.0_SMTD_A00.iso.001CD2:ftp:///secure/sysman/OM_6.3.0_SMTD_A00.iso.002需整合成一张光盘:命令:copy /b OM_6.3.0_SMTD_A00.iso.001+OM_6.3.0_SMTD_A00.iso.002 OM_630_SMTD_A00. iso [Windows]--------如果不需要安装SA软件只安装系统可以用以下链接,但安装时需将server Administrator勾去掉。
- 1、下载文档前请自行甄别文档内容的完整性,平台不提供额外的编辑、内容补充、找答案等附加服务。
- 2、"仅部分预览"的文档,不可在线预览部分如存在完整性等问题,可反馈申请退款(可完整预览的文档不适用该条件!)。
- 3、如文档侵犯您的权益,请联系客服反馈,我们会尽快为您处理(人工客服工作时间:9:00-18:30)。
DELL服务器系统管理工具下载地址:
Windows:下载地址:
/dell/dset/Dell_DSET_1.3.1.exe
这个工具可以用来收集windows 驱动,服务,网络设置等等,同时又包括CPU,memory, ESM log, BIOS/firmware versions and system health (fan/voltage levels). ,它也收集系统存储信息,比如:RAID卡,硬盘等。
使用这个软件,不需要重新启动机器,不必安装,对您的系统不会有任何影响。
软件说明:
1、可以获取系统日志,硬件日志等一系列机器信息。
2、可以清除ESM/BMC日志,消除系统指示灯琥珀色的情况。
3、软件是独立的,不依赖与其他软件。
4、安装非常简单
5、在Linux下使用也非常的简单,以root身份直接运行文件名:delldset_v1.1.bin
6、支持几乎戴尔所有的机型。
需要注意的几点:
1、尽量使用最新版本的DSET软件。
2、运行时候必须要有管理员权限,Administrator 或者root.
3、不支持NT4。
使用方法:
运行后,您可以看到如下的这个界面,选择第一项,可以创建日志信息文件,将这个文件发给我们,或者您自行分析,可以帮助了解机器的运行状态。
在某些时候,机器状态灯亮琥珀色,并且机器使用正常,使用第二个选项获取日志并且清除原有记录,可以解决状态灯不正常的情况。
选择next
运行后会看到如下界面,大约几分钟至十几分钟的时间,
获得机器的日志压缩文件,解压密码为“dell”
将此文件解压后,可以看到详细的硬件、系统信息。