Honeywell手持终端
神舟链威C4000手持终端用户手册说明书
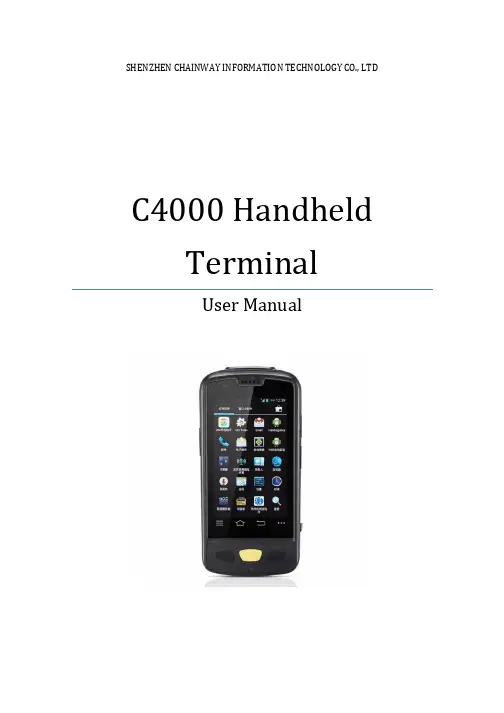
SHENZHEN CHAINWAY INFORMATION TECHNOLOGY CO., LTDC4000 Handheld TerminalUser Manual1ContentsStatement (4)1.Getting Started (6)1.1 Brief Instruction (6)1.2Precaution before Using Battery (7)2.About The Device (8)2.1 Structure (8)2.2 SD Card Installation (10)2.3 SIM Card Installation (11)2.4 Battery Installation (12)2.5 Battery Charging (13)2.5.1 Direct Charging (13)2.5.2 Cradle Charging (13)2.6 Device Power on/off (13)3.Call Function (14)3.1 Phone (14)3.2 Contacts (15)3.3 Messaging (16)4. Barcode Reader (17)4.1 1D Barcode (17)4.2 2D Barcode (18)4.3 2D(S) Barcode (19)5.RFID Reader (20)5.1 Low Frequency (20)25.2 High Frequency (22)5.2.1 14443A (22)5.2.215693 (23)5.3 Ultra High Frequency (24)6.Fingerprint Reader (26)7.Other Functions (27)7.1 PING (27)7.2Bluetooth (28)7.3 GPS (30)7.4 Volume Settings (31)7.5 Sensor (32)7.6 Keyboard (33)7.7 Network (34)7.8 Keyboardemulator (35)8. Device Specifications (36)3Statement2013 by Shenzhen Chainway Information Technology Co., Limited. All rights reserved.No part of this publication may be reproduced or used in any form, or by any electrical or mechanical means, without permission written from Shenzhen Chainway. This includes electronic or mechanical means, such as photocopying, recording, or information storage and retrieval systems. The material in this manual is subject to change without notice.The software is provided strictly on an “as is” basis. All software, including firmware, furnished to the user is on a licensed basis. Shenzhen Chainway grants to the user a non-transferable and non-exclusive license to use each software or firmware program delivered hereunder (licensed program). Except as noted below, such license may not be assigned, sublicensed, or otherwise transferred by the user without prior written consent of Shenzhen Chainway. No right to copy a licensed program in whole or in part is granted, except as permitted under copyright law. The user shall not modify, merge, or incorporate any form or portion of a licensed program with other program material, create a derivative work from a licensed program, or use a licensed program in a network without written permission from Shenzhen Chainway.Shenzhen Chainway reserves the right to make changes to any software or product to improve reliability, function, or design.Shenzhen Chainway does not assume any product liability arising out of, or in connection with, the application or use of any product, circuit, or application described herein.No license is granted, either expressly or by implication, estoppel, or otherwise under any Shenzhen Chainway intellectual property rights. An implied license only exists for equipment, circuits, and subsystems contained in Shenzhen Chainway products.Shenzhen Chainway Information Technology Co., LtdAddress: 9/F, Building 2, Phase 2, Gaoxinqi Industrial Park, Liuxian 1st Rd, District 67, Bao’an, Shenzhen, Guangdong, ChinaTelephone:+0086-755-23223300 Fax: +0086-755-23223310Web Site: Email:*******************451. G etting Started1.1 Brief InstructionChainway C4000 is a series of Android powered smart terminals, with data capture, data processing, wireless communication. It is with high-reliability &high-expansibility. Auto & Accurate data collection is achieved in various business fields via a complete solution of premium options, the flexible solution among options and operators is suited-up. You will find out with C4000, much easier deployment, reduced complexity, decreased maintenance, are the benefits for enterprises.C4000 meets industrial level IP64 (IEC sealing), is sufficient to routine applications, eg, railway inspection, road parking toll, vehicle inspection, logistics express, power inspection, warehousing management, chain retail, etc. Whether the mobile operators are working indoor or outdoor, with Chainway C4000, your business is always &highly efficient on-line.Meeting industrial standards, designed to support a various of mobile solutions. With the build-in high performance Cortex-A7 1.3GHZ quad core processor technology, the operators need only one device to enjoy a convenient and easy job, C4000 will be the ideal choice for key-fact business in mobile solutions, for simplified task flow, enhanced work efficiency, for shortened time to customer response, more satisfied customer care service.Chainway C4000 comes with world wide band WCDMA technology. Multi channels data and voice communication guarantees the real-time communication and data efficiency, C4000 brings you the best ROI.61.2 Precaution before Using Battery•Do not leave batteries unused for extended periods of time, either in the product or in storage. When the battery has been unused for 6 months, check the charge status and charge or dispose of the battery as appropriate. •The typical estimated life of a Lithium-Ion battery is about two to three years or 300 to 500 charge cycles, whichever occurs first. One charge cycle is a period of use from fully charged, to fully discharged, and fully recharged again. Use a two to three year life expectancy for batteries that do not run through complete charge cycles.•Rechargeable Lithium-Ion batteries have a limited life and will gradually lose their capacity to hold a charge. This loss of capacity (aging) is irreversible. As the battery loses capacity, the length of time it will power the product (run time) decreases.•Lithium-Ion batteries continue to slowly discharge (self-discharge) when not in use or while in storage. Routinely check the battery’s charge status. The user manual typically includes information on how to check battery status, as well as battery charging instructions.•Observe and note the run time that a new fully-charged battery provides for powering your product. Use the new battery run time as a basis to compare run times for older batteries. The run time of your battery will vary depending on the product’s configuration and the applications that you run. •Routinely check the battery’s charge status. Carefully monitor batteries that are approaching the end of their estimated life.Consider replacing the battery with a new one if you note either of thefollowing conditions:The battery run time drops below about 80% of the original run time.•The battery charge time increases significantly.•If a battery is stored or otherwise unused for an extended period, be sure to follow the storage instructions in this document. If you do not follow theinstructions, and the battery has no charge remaining when you check it,consider it to be damaged. Do not attempt to recharge it or to use it. Replace it with a new battery.•Always follow the charging instructions provided with your product. Refer to your product’s user manual and/or online help for detailed information about charging its battery.•Charge or discharge the battery to approximately 50% of capacity before storage. Charge the battery to approximately 50% of capacity at least once every six months.•Remove the battery and store it separately from the product.•Store the battery at temperatures between 5 °C and 20 °C (41 °F and 68 °F).72. A bout The Device2.1 Structure<Front>89<Back>Buttons:ButtonFunctionPower ButtonPress and hold to turn the device on or off App List View Button View a list of apps running Home ButtonPress to return to the home screen Cancel ButtonTap to return to the previous screenDetailed installation steps are as follows:•Open the SIM slot as the direction of ‘Open/Lock’ labeled.•Open the SD slot as the direction of ‘Open/Lock’ labeled.•Install the SD card properly.•Lock the SD slot and SIM slot properly.101. Open the SIM slot as the direction of ‘Open/Lock’ labeled.2. Install the SIM card correctly.3. Lock the SIM slot properly.2 3112.4 Battery Installation1. Push the battery down into the bottom of the battery.2. Push the battery to the direction of the array.3. Turn the battery lock.122.5 Battery Charging2.5.1 Direct ChargingUse the adapter to charge the battery via the USB connector of the snap-on. 2.5.2 Cradle ChargingConnect the adapter with the power cable to charge the device.2.6 Device Power on/offPress the ‘Power’ button on the side shortly due to turn on/off.13143. C all Function3.1 Phone1. Click this icon.2. Click the number button to input the numbers.3. Click the button to confirm and dial.4. Click theto end the calling.Contacts LogsVoice CallingEmulated Numeric Keypad3.2 Contacts1. Click ‘Contacts’ to open the contacts list.2. Click ‘’ to add the new contact.3. Click ‘’ to import/export or delete the contact list.FavoritesContact List Group153.3 Messaging1. Click ‘’ to open the message list.2. Click ‘’ to input the content.3. Click ‘’ to send the message.4. Click ‘’ to add photos, videos.164. Barcode Reader4.1 1D Barcode1. Open the 1D Barcode Demo in Appcenter.2. Press the ‘Scan’ button to start scanning, then the auto interval parameterscan also be set.174.2 2D Barcode1. Open the 2D Barcode Demo in Appcenter.2. Press the ‘Scan’ button to start scanning, then the auto interval parameterscan also be set.184.3 2D(S) Barcode1. Open the 2D(S) Barcode Demo in Appcenter.2. Press the ‘Scan’ button to start scanning, then the auto interval parameterscan also be set.3. Also, the barcode types enabling/disabling can also be set.Note: Please scan the barcode in a correct way, otherwise the scanningmight be failed.19205. R FID Reader5.1 Low Frequency1. Open the RFID_LF Demo within Appcenter and then press the ‘Scan’ button tostart reading.2. Tag types including ID Card/Animal Tag/Hitag/HDX Tag/EM4450 can be alsoselected, and Hitag-S and EM4305 reading/writing are already supported by the device.Please ensure that the LF module is embedded in the device, also please select the tag type correctly, otherwise the operation might not work. Meanwhile, please pay attention to the HDX and FDX-B since they are using different hardware due to the different working principles.215.2 High Frequency5.2.1 14443A1. Open the 14443A demo within Appcenter, and press the ‘Scan’ button to startreading.2. Mifare and Ultra Light reading/writing are also supported.225.2.2 156931. Open the RFID_15693 demo within Appcenter, and press the ‘Scan’ button tostart scanning.2. 15693 writing are also supported.235.3 Ultra High Frequency1. Open the UHF demo within Appcenter, and press the ‘Start’ button to startscanning.2. Multiple tags reading and single tag reading/writing are also supported.2425266. F ingerprint Reader1. Open the Fingerprint Demo in Appcenter.2. Put the finger to the fingerprint module and set the ID/name of the templateunder ‘ACQUISITION’.3. Put the finger to the fingerprint module properly and identify by ID/Name/Scoreunder ‘IDENTIFICATION’.4. The local templates can also be checked under ‘Data’.Please be aware that ISO standards are only supported by devices with ISO fingerprint hardware modules.7. O ther Functions7.1 PING1. Open the Ping in Appcenter.2. Set the Ping parameters and select the internal/external addresses.277.2 Bluetooth1. Open the Bluetooth demo in Appcenter and turn on the Bluetooth.2. Input the content or select the file, then scan the nearby Bluetooth printer andpair them.3. Select the printer and click ‘Print’ to print the content.2829307.3 GPS1. Open the GPS demo in Appcenter and turn on GPS module.2. Set the GPS parameters and get the GPS data information.7.4 Volume Settings1. Open the Volume Setting demo in Appcenter.2. Set the volumes based on the requirements.317.5 Sensor1. Open the Sensor demo in Appcenter.2. Test the sensor based on the requirements.321. Open the Keyboard demo in Handset Appcenter.2. Set and test the key values of the device.331. Open the Network demo in Appcenter.2. Test the WIFI/Mobile signal based on the requirements.34357.8 KeyboardemulatorKeyboard Emulator can be used directly for multiple using environments and the output formats can include prefix/suffix/enter/tap can also be defined, please define the options properly based on the features of the device.1. Open the Keyboardemulator which is preinstalled in the device.2. Click the options correctly based on the features of the device hardware,please also press the physical button to define the scan button, then please define the output formats based on the requirements, finally click ‘Open’ to save and enable it.8. Device SpecificationsPhysical CharacteristicsDimensions 153mm*75mm*29mm/6.02*2.95*1.14in.Weight 286g/10.09oz. (includes main battery)Screen 4in.WVGA (480*800) TFT-LCD, capacitive dual touchKeyboard 3 function keys, 3 side buttonsBattery Main bat. (rechargeable li-ion polymer, 3.7V, 3200 mAh)Pistol bat. (rechargeable li-ion polymer, 3.7V, 5200 mAh)Expansion Slot MicroSD/TF, maximum capacity of 32GSIM Slot 1 PSAM, 1 SIM, 1 MicroSDAudio 0.5WCamera OV 8M pixels, auto focus with LED flashPerformance CharacteristicsCPU Cortex-A7 1.3GHz quad coreOS Android 4.4.2Memory 1GB RAM, Build-in 4GB FlashInterface USB Micro-B, serial port RS-232(TTL)Storage Card Type MicroSD cardMaximum Expansion Storage 32GBUser Environmental CharacteristicsOperating Temperature -10℃to 50℃Storage Temperature -40℃to 70℃Humidity 5%RH-95%RH(non-condensing)Dropping Survive 1.2m/3.9ft. drop, 6 sides (concrete floor under operating temp.)Sealing IP64, IEC complianceWireless CommunicationWAN WCDMA/HSDPA/HSPA+ (850/1900/2100MHz)GSM/GPRS/EDGE (850/900/1800/1900MHz)WLAN IEEE802.11b/g/n, internal antenna36WPAN Bluetooth v4.0 Low EnergyBluetooth 3.0+HSBluetooth v4.0 Low Energy (LE)Data CollectionBarcode Scan Engine 1D barcode(Symbol SE955, laser)(optional)2D CMOS laser scanner: Symbol SE4750(optional) Sensor resolution: 750 * 480Roll tolerance: 360ºRFID LF 125KHz/134.2KHz, HDX/FDX-B(optional)HF 13.56MHz, ISO14443A/ISO15693(optional)UHF 860-960MHz, EPC C1 GEN2/ISO18000-6C(optional) Developing EnvironmentSDK Chainway SDKProgramming Language JavaDeveloping Tool Eclipse37。
SFC操作手册

SFC操作手册(STS103型)目录第一章SFC概述1.1说明1.2STS103物理性能及功能描述1.3导线连接1.4STS103/SFI通讯方式第二章STS103的安装1.5STS103总貌1.6键盘功能1.7显示功能1.8提示字符定义1.9功能键数据输入1.10组态键数据输入第三章STS103的操作1.11总貌1.12上电1.13诊断及SFC信息1.14命令键序列及显示1.15用变送器作电流源1.16变送器导线拆除第四章ST3000压力变送器1.17总貌1.18导线连接1.19启动1.20组态1.21输出校验1.22操作1.23自诊断及SFC提示信息1.24故障清除第一章SFC 概述1.1 说明手持终端SFC 是一个电流驱动装置,它提供了操作者与HONEYWELL 智能仪表之间对话的两种通讯方式(ANANLOG&DE )操作者可通过它输入数据到SFC (智能仪表)的微处理器,也可以就收从SFC 来的数据。
● ST3000压力变送器、 ● STT3000温度变送器 ● MangeW3000磁性流量计 ●SCM3000你可以用STS103来1. 选择通信方式——ANALOG 或DE (模拟或数字方式)2. 组态——输入所需操作参数(如LRV 、URV 等)3. 自诊断——诊断错误并显示错误信息4. 校验——对SFC 进行校验5. 显示——对组态数据及操作参数等6. 检测——检测输出回路操作校验及清除故障1.2 STS103物理性能及功能设计STS103显示有两行,每行16个字符,为液晶显示,有一个键盘,各键功能如下: 1) 白色NUM/ALPHA 是STS103的数字/字母输入选择器2) 黑色此键允许某些键执行第二功能其右上方插入字符在字母输入方式下使用3) 此键可以取消现行功能并返回初始状态,ON 显示或否定回答的功能是在LCD 上显示问题或结果4) NOV -VOL 用于写入/设定或是执行指令,而NON-VOL 第二功能是用来用SFC 永久性存储器输入数据5)----- 用于字符方式下输入字符6)------输入字符或数字7)DE READID键显示仪表编号,有模拟仪表中也可读出基本数据,第二功能读出DE方式SFC数据库信息8)SCR PAD数字方式时输入小数字,字母方式时输入空格第二功能用于显示SFC高速缓冲器中数据9)当输标志名ID或在高速缓冲器状态使用时,字符方式时输入“/”,数字方式时“-”,组态时可输入“+”或“负”10)组态SFC参数及特性11)显示SFC阻尼时间12)选择工程单位13SFI的量程下限14SFI的量程上限15从多个测量值中选择当前PV值。
honeywell+PRO22R2 Instal
跳线设置:
跳线 J1
J2
J3
位置 OFF ON
5 12 5 12
缺省值 *
* *
表示 端口1 RS-485未使用终端电阻 端口1 RS-232使用终端电阻 读卡器1 5V供电 读卡器1 12V供电 读卡器2 5V供电 读卡器2 12V供电
版权所有©霍尼韦尔国际公司 3
霍尼韦尔安防
DIP开关设置:
S8 S7 S6 S5 S4 S3 S2 S1
霍尼韦尔安防
(RMA)后才能返回厂家。从出厂之日起,Engineered Systems产品有两年的保修期,保修期内,更换故障零件及人工 费全免。但终端设备、打印机、通信产品、升级产品的保质期为90天。保修期内的免费维修只限于产品正常使用。若 由于错误使用、不当贮藏、不当安装、操作或修理、更改、替换、事故、异常损坏或其他物理环境造成产品损坏,则 不在保修之列。
运行模式
LED D79
LED D80
说明
上电时
亮
灭
上电启动,硬件设置
灭
亮
测试RAM
亮
亮
测试ROM,完成初始化
闪
亮
启动完成,D79闪四次
正常运行
闪烁
系统被激活后每秒闪一次。 若亮的时间长一点(0.8秒亮,0.2秒 灭),表示模块处于离线状态,与主控 模块的通信中断;若灭的时间长一点, 表示模块在线,与主控模块的通信正 常。
双读卡器模块的I/O端子只为控制两个门而配置的。插在插板式安装箱中,从下往上端口依次是电源、与主控模块 (PRO22IC)的通信接口、读卡器2接口、与读卡器2相关的I/O接口(称为门磁和开门按钮的输入点,和控制电锁的继 电器输出)、读卡器1接口、与读卡器1相关的I/O接口,最上面的端子是两个额外的可自由使用的通用报警输入端子。
Honeywell 8670 无线rings扫描仪配件指南说明书

DESCRIPTION Scanner Ring Head without Bluetooth® Module
Scanner Bluetooth Module
8670A276BTBOHMOD
Bluetooth Module without Scanner Ring Head and without battery
Ring finger straps – Elastic strap with snap-on mount (20-pack)
8670 Wireless Ring Scanner Accessories Guide |
4
ACCESSORIES GUIDE
Ring Scanner Trigger Assembly
8600505RINGTRGR
Ring Scanner Trigger Assembly
batteries & chargers
PRODUCT NAME Battery
SKU 50129434-001FRE
DESCRIPTION
Li-Ion spare battery for 8670, 8650 and 1602g scanners
power cables
PRODUCT NAME Power Cable - Europe
SKU 9000090CABLE
DESCRIPTION C14 type power cable, Schuko (Europe)
Power Cable - Denmark
9000091CABLE
C14 type power cable, Denmark 3-pin
8670 Wireless Ring Scanner Accessories Guide |
SFC操作手册

SFC操作⼿册SFC操作⼿册(STS103型)⽬录第⼀章SFC概述1.1说明1.2STS103物理性能及功能描述1.3导线连接1.4STS103/SFI通讯⽅式第⼆章STS103的安装1.5STS103总貌1.6键盘功能1.7显⽰功能1.8提⽰字符定义1.9功能键数据输⼊1.10组态键数据输⼊第三章STS103的操作1.11总貌1.12上电1.13诊断及SFC信息1.14命令键序列及显⽰1.15⽤变送器作电流源1.16变送器导线拆除第四章ST3000压⼒变送器1.17总貌1.18导线连接1.19启动1.20组态1.21输出校验1.22操作1.23⾃诊断及SFC提⽰信息1.24故障清除第⼀章SFC 概述1.1 说明⼿持终端SFC 是⼀个电流驱动装置,它提供了操作者与HONEYWELL 智能仪表之间对话的两种通讯⽅式(ANANLOG&DE )操作者可通过它输⼊数据到SFC (智能仪表)的微处理器,也可以就收从SFC 来的数据。
● ST3000压⼒变送器、● STT3000温度变送器● MangeW3000磁性流量计●SCM3000你可以⽤STS103来1. 选择通信⽅式——ANALOG 或DE (模拟或数字⽅式)2. 组态——输⼊所需操作参数(如LRV 、URV 等)3. ⾃诊断——诊断错误并显⽰错误信息4. 校验——对SFC 进⾏校验5. 显⽰——对组态数据及操作参数等6. 检测——检测输出回路操作校验及清除故障1.2 STS103物理性能及功能设计STS103显⽰有两⾏,每⾏16个字符,为液晶显⽰,有⼀个键盘,各键功能如下: 1)⽩⾊NUM/ALPHA 是STS103的数字/字母输⼊选择器2)⿊⾊此键允许某些键执⾏第⼆功能其右上⽅插⼊字符在字母输⼊⽅式下使⽤3) 此键可以取消现⾏功能并返回初始状态,ON 显⽰或否定回答的功能是在LCD 上显⽰问题或结果4) NOV -VOL ⽤于写⼊/设定或是执⾏指令,⽽NON-VOL 第⼆功能是⽤来⽤SFC 永久性存储器输⼊数据5)----- ⽤于字符⽅式下输⼊字符6)------输⼊字符或数字7)DE READID键显⽰仪表编号,有模拟仪表中也可读出基本数据,第⼆功能读出DE⽅式SFC数据库信息8)SCR PAD数字⽅式时输⼊⼩数字,字母⽅式时输⼊空格第⼆功能⽤于显⽰SFC⾼速缓冲器中数据9)当输标志名ID或在⾼速缓冲器状态使⽤时,字符⽅式时输⼊“/”,数字⽅式时“-”,组态时可输⼊“+”或“负”10)组态SFC参数及特性11)显⽰SFC阻尼时间12)选择⼯程单位13SFI的量程下限14SFI的量程上限15从多个测量值中选择当前PV值。
Honeywell RE616 无线警报器说明
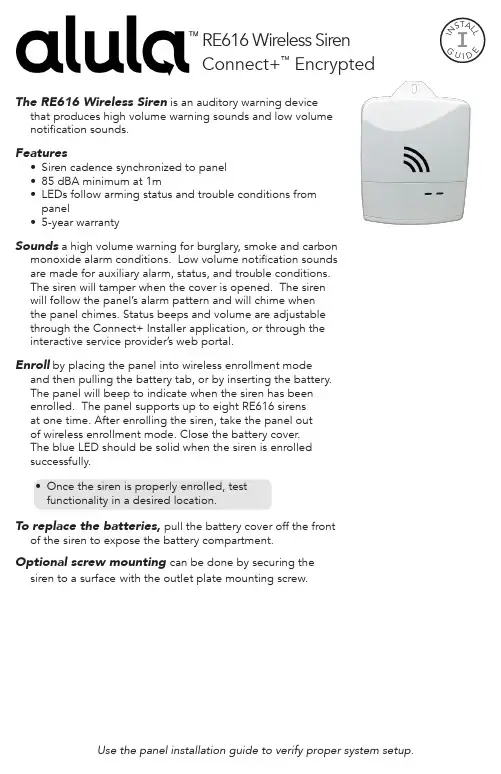
The RE616 Wireless Siren is an auditory warning device that produces high volume warning sounds and low volume notification sounds.Features• Siren cadence synchronized to panel • 85 dBA minimum at 1m• LEDs follow arming status and trouble conditions from panel• 5-year warrantySounds a high volume warning for burglary, smoke and carbonmonoxide alarm conditions. Low volume notification sounds are made for auxiliary alarm, status, and trouble conditions. The siren will tamper when the cover is opened. The siren will follow the panel’s alarm pattern and will chime when the panel chimes. Status beeps and volume are adjustable through the Connect+ Installer application, or through the interactive service provider’s web portal.Enroll by placing the panel into wireless enrollment modeand then pulling the battery tab, or by inserting the battery. The panel will beep to indicate when the siren has been enrolled. The panel supports up to eight RE616 sirens at one time. After enrolling the siren, take the panel out of wireless enrollment mode. Close the battery cover. The blue LED should be solid when the siren is enrolled successfully.• Once the siren is properly enrolled, test functionality in a desired location.To replace the batteries, pull the battery cover off the frontof the siren to expose the battery compartment.Optional screw mounting can be done by securing the siren to a surface with the outlet plate mounting screw.Use the panel installation guide to verify proper system setup.RE616 Wireless Siren Connect+™ EncryptedI N S T AL LGU I DETroubleshootingHardware LayoutTamper SwitchGreen/Red LEDTHIS PAGE INTENTIONALLY LEFT BLANKWARRANTYAlula will replace all non-portable products that are defective in their first five (5) years, and all portable products that are defective in their first two (2) years.TRADEMARKSAlula and Connect+ are trademarks owned by Alula Holdings, LLC. IC NOTICEThis device complies with Industry Canada license-exempt RSS standard(s). Operation is subject to the following two conditions:(1) This device may not cause interference, and(2) This device must accept any interference, including interferencethat may cause undesired operation of the device.Le présent appareil est conforme aux cnr d’Industrie Canada applicables aux appareils radio exempts de licence. L’exploitation est autorisée aux deux conditions suivantes:(1) L’appareil ne doit pas produire de brouillage, et(2) L’utilisateur de l’appareil doit accepter tout brouillageradioélectrique subi, même si le brouillage est susceptible d’en compromettre le fonctionnement.IC: 8310A-RE116FCC NOTICEThis device complies with Part 15 of the FCC rules. Operation is subject to the following two conditions:(1) This device may not cause harmful interference.(2) This device must accept any interference that may be received,including interference that may cause undesired operation. Changes or modifications not expressly approved by Alula could void the user’s authority to operate this equipment.FCC ID: U5X-RE11647-0051-08 • REV A • 2018-05-11Tech Support Line • (888) 88-ALULA • (888) 882-5852。
Honeywell Dolphin 6100移动数据终端 快速说明书
Dolphin®6100 移动数据终端随机系统 Windows CE® 5.0快速入门指南™1Dolphin 6100 移动数据终端快速入门指南打开装箱验证装箱中是否包含以下物品:•Dolphin 6100 移动数据终端(终端机)•主电池组(7.4 v 锂离子电池)•AC 交流主电源•当地适用的电源转换插头注:请确保保管好原包装,以便在 Dolphin 终端需要返修时提供;有关详细信息,请参见第 6 页。
Dolphin 6100 前面板LED28 键数字键盘)导航键扫描键2Dolphin 6100 后面板Dolphin 6100右侧面板和左侧面板扬声器已装入电池手指形槽手带(随附触控笔)图像引擎窗口记忆卡盖耳机插孔右侧左侧3Dolphin 6100 底部连接器步骤 1:安装主电池6100 移动数据终端产品随附了一个与设备分开包装的电池。
要安装电池,松开手带,把螺栓向上转动拆下电池盖,将电池标签面朝上插入电池,然后放回电池盖。
建议您使用 Honeywell 锂离子电池组。
使用任何非 Honeywell 电池可能导致超出保修范围的损坏。
DC!4步骤 2:将电池充电Dolphin 终端随附的主电池组和内部备用电池的电量均已充分释放(完全没电)。
在第一次使用前,请使用 Dolphin 充电电缆给主电池组充电,取决于您的电池,充电时间至少为 4 或 6 个小时。
建议您使用 Honeywell 外围设备、电源线和电源适配器。
使用任何非 Honeywell 外围设备、电源线或电源适配器可能导致超出保修范围的损坏。
步骤 3:启动终端终端一通电便开始启动并自动运行。
不要按任何键或中断启动过程。
启动过程完成后,“桌面”屏幕会出现且终端可供随时使用。
重置设备软重置:用触控笔按下后放开 Reset (重置)按钮。
这会重置 RAM 内存并重新加载操作系统。
硬重置:用触控笔按住 Reset (重置)按钮,然后按下后放开Power (电源)。
霍尼韦尔 CT40 XP 手持终端用户指南说明书
免责声明霍尼韦尔公司(简称HII)有权对本手册的规格和其他信息作出更改,并不另行通知。
任何情况下,用户应向HII 确认是否进行了任何更改。
本刊物内容并不代表H II 方的承诺。
HII 不会对此手册的技术或编辑错误或遗漏承担责任;也不会对因提供、执行或使用此材料所造成的意外或间接损害承担责任。
HII 对为达到产品预期效果而选择或使用的软件或硬件不承担责任。
此文档包含受版权保护的专有信息。
保留所有权利。
未经HII 提前书面许可,不可复印、复制此文档、或将其翻译为其他语言。
商标权Android、Google 及其他标记为Google 公司的商标。
此手册所提及的其他产品名称可能是其他各相应公司的商标或注册商标,其所有权归这些公司所拥有。
专利权专利权信息,请参考网址:www.hsmpats.com.Copyright © 2019 Honeywell International Inc.All rights reserved.技术支持如果您需要安装或故障排除,请通过以下途径联系我们:知识库:www.hsmknowledgebase.com霍尼韦尔知识库提供上千种即可解决方案,如果知识库不能帮助您解决问题,则可登录霍尼韦尔技术支持网站提交您的问题或询问问题。
技术支持网站:www.hsmsupportportal.com登录霍尼韦尔技术支持网站搜寻知识库,提交您的困难或问题,请求回电服务,或提供反馈。
填写表格时,请提供尽量详细的信息。
您也可以上传附件进行说明。
联系电话:www.honeywellaidc.com/locations最新联系信息,请访问我们的网站。
产品服务与维修霍尼韦尔国际公司通过服务中心为公司所有产品向全世界提供服务。
服务中心站点信息请访问:www.honeywellaidc.com,选择中文语言(Chinese),然后选择支持>联系支持> 服务与维修。
用户在把产品寄到维修中心之前,请联系服务中心并拿到RMA(Return Material Authorization)号码。
Honeywell Dolphin 6110 移动计算机说明书
Mobile Computers F E AT U R E S&B E NE F I T SUltra-lightweight device provides intuitive data entry and comfortable single-handed use ina stylish form factor.Advanced integrated802.11 a/b/g/ntechnology deliversreal-time networkaccess to criticalinformation andsupports advancedwireless securitystandards.Supports both Microsoft®Windows® CE 6.0 andWindows EmbeddedHandheld 6.5 platforms.Adaptus 6.0 imagingtechnology readslinear and 2D barcodesand captures digitalimages and electronicsignatures — enablingworkers to do morewith a single device.Constructedfor use in lightindustrial in-premiseenvironments.The Dolphin 6110 mobile computerprovides advanced data capture andreal-time wireless communication forin-premise applications including pricelookup/audits, inventory management,customer assistance and merchandising.Dolphin 6110Mobile ComputerThe stylish and reliable Honeywell Dolphin™ 6110 mobile computer provides advanced data collection and real-time wireless communication for in-premise applications including price lookup/audits, inventory management, customer assistance and merchandising. Designed with ergonomics in mind, this pocket-sized mobile computer features an angled imager that allows users to view the screen while scanning a barcode.Despite its stylish exterior, the Dolphin 6110 mobile computer wasbuilt to withstand harsh conditions. This IP54-rated device can endure exposure to dust, dirt and splashing water, as well as accidental drops from distances as high as 1.2 meters (4 feet). The high-performing Dolphin 6110 mobile computer can sustain up to 500 tumblesfrom 1 meter (3.3 feet), providing reliability for years to come.Integrated 802.11 a/b/g/n wireless connectivity providesusers with access to critical data throughout the enterprise.A long-lasting battery minimizes the need to change the batteryduring an eight-hour shift, even in wireless, scan-intensive environments. Advanced protocols enhance data security. Userscan also make phone calls using Voice over Internet Protocol (VoIP) technology, eliminating the need to carry additional devices.Powered by Adaptus™ 6.0 imaging technology, the Dolphin 6110mobile computer delivers the broadest suite of advanced datacapture capabilities, including linear and 2D barcode scanning,digital image capture and intelligent signature capture, allowingusers to increase efficiency and improve customer service.Purpose-built for in-premise applications, the Dolphin 6110 mobile computer provides mobile workers with the tools needed to streamline tasks, improve productivity and maximize investment protection.Dolphin 6110 Technical Specifications.Dolphin 6110-DS | Rev D | 08/16© 2016 Honeywell International Inc.For more informationHoneywell Sensing and Productivity Solutions9680 Old Bailes Road Fort Mill, SC 29707800-582-4263For a complete listing of all compliance approvals and certifications, please visit / compliance .For a complete listing of all supported barcode symbologies, please visit / symbologies .Dolphin and Adaptus are registered trademarks or trademarks of Honeywell International Inc. in the U.S. and/or other countries.Microsoft and Windows are either registeredtrademarks or trademarks of Microsoft Corporation in the U.S. and/or other countries.MECHANICALDimensions (L x W x H):With Standard Battery: 175 mm x 69 mm x 39 mm (6.9 in x 2.7 in x 1.5 in)With Extended Battery: 175 mm x 69 mm x 43 mm (6.9 in x 2.7 in x 1.7 in) – includes handstrap At Grip: 58 mm (2.3 in)Weight:Imager: Standard Battery: 247 g (8.7 oz); Extended Battery: 270 g (9.5 oz)Laser: Standard Battery: 252 g (8.9 oz); Extended Battery: 275 g (9.7 oz) – includes handstrapENVIRONMENTALOperating Temperature:Imager: -10°C to 50°C (14°F to 122°F)Laser: -10°C to 40°C (14°F to 104°F)Storage Temperature: -20°C to 70°C (-4°F to 158°F)Humidity: 95% humidity, non-condensing Drop: Withstands multiple 1.2 m (4 ft) drops to concrete, all axis and across operating temperature rangeTumble: 500 1 m (3.3 ft) tumbles (1,000 impacts)ESD: Air: ±15kV; Contact: ±8kVEnvironmental Sealing: Independently certified to meet IP54 standards for moisture and particle resistanceSYSTEM ARCHITECTUREProcessor: Texas Instruments OMAP3715 800 MHzOperating System: Microsoft Windows CE 6.0; Windows Embedded Handheld 6.5.3Memory: 512 MB RAM; 512 MB FlashDisplay: 7.1 cm (2.8 in) transmissive active matrix 65,000-color LCD with backlight, QVGA (240 x 320)Keypad: 28-key shifted alphanumeric with backlit keysAudio: Built-in microphone and speaker, stereo headset jackI/O Ports: High-speed USB v2.0 (480 Mbps)Voice Communication: Voice-over-IP and Push-to-Talk readyApplication Software: Honeywell Power Tools and DemosStorage Expansion: User-accessible Micro SDHC memory card slot. Please check current price guide for available qualified card optionsBattery: Standard: Li-Ion, 3.7V, 2200mAh; Extended: Li-Ion, 3.7V, 3300mAh (includes extended battery door)Expected Hours of Operation: 8+ hours (with scan and continuously transmitting)Expected Charge Time: Standard Battery: 4 hours Extended Battery: 6 hoursImager: Imager: 5603 (Laser Aimer), Standard Range (SR), High Density (HD); Adaptus 6.0imaging technology; Laser: N4313 (only for WEH 6.5 version)Decode Capabilities: Imager: Reads standard 1D and 2D symbologies; Laser: Reads standard 1D symbologiesWarranty: One-year for terminals and peripheralsWIRELESS CONNECTIVITYWLAN: 802.11a/b/g/n, Wi-Fi™ certified WLAN Security:Wi-Fi Alliance Certification, Wireless Security Supplicant (DeviceScape), 802.1x, WPA2, EAP, WEP, LEAP, TKIP, MD5, EAP-TLS, EAP-TTLS, WPA-PSK, PEAP, CCXv4WPAN:Bluetooth® Class II (10 m) v2.1 Enhanced Data Rate(EDR) with on-board antenna. BQB certified。
华利波·CT40手持设备配件指南说明书
CT40 AND CT40 HC MOBILE COMPUTERAccessories Guide1 3 45Chargers Mobile Power Supplies Scan Handles Soft Goods Accessories AC Line CordsTABLE OF CONTENTSCHARGERSCT40-CB-CNV-0CT40-CB-CNV-1CT40-CB-CNV-2CT40-CB-CNV-3CT40-NB-CNV-0Charge Base, StandardFor recharging up to fourcomputers. Kit includesdock and power supply.Power cord must be orderedseparately.Charge BaseFor recharging up to fourcomputers. Kit includes dock,power supply, and U.S. powercord.Charge BaseFor recharging up to fourcomputers. Kit includes dock,power supply, and EU powercord.Charge BaseFor recharging up to fourcomputers. Kit includes dock,power supply, and UK powercord.Net Base, StandardFor Ethernetcommunications andrecharging up to fourcomputers. Kit includesdock and power supply.Power cord must be orderedseparately.CT40-NB-CNV-1CT40-NB-CNV-2CT40-NB-CNV-3CT40-CB-PB-0CT40-NB-PB-0Net BaseFor Ethernetcommunications andrecharging up tofour computers. Kit includesdock, power supply,and U.S. power cable.Net BaseFor Ethernetcommunications andrecharging up tofour computers. Kit includesdock, power supply,and EU power cable.Net BaseFor Ethernetcommunications andrecharging up tofour computers. Kit includesdock, power supply,and UK power cable.Charge Base (use with TPUBoot)For recharging up to fourcomputers. Kit includes dockand power supply. Excludespower cord. Compatible withCT40 with TPU boot only.Net Base (use with TPUBoot)For Ethernetcommunications andrecharging up to fourcomputers. Kit includes dockand power supply. Excludespower cord. Compatible withCT40 with TPU boot only.CT40-CB-PB-1CT40-NB-PB-1CT40-CB-PB-2CT40-NB-PB-2CT40-CB-PB-3Charge Base (use with TPUBoot)For recharging up to fourcomputers. Kit includes dock,power supply, and U.S. powercord. Compatible with CT40with TPU boot only.Net Base (use with TPUBoot)For Ethernetcommunications andrecharging up to fourcomputers. Kit includes dock,power supply, and U.S. powercable. Compatible with CT40with TPU boot only.Charge Base (use with TPUBoot)For recharging up to fourcomputers. Kit includes dock,power supply, and EU powercord. Compatible with CT40with TPU boot only.Net Base (use with TPUBoot)For Ethernetcommunications andrecharging up to fourcomputers. Kit includes dock,power supply, and EU powercable. Compatible with CT40with TPU boot only.Charge Base (use with TPUBoot)For recharging up to fourcomputers. Kit includes dock,power supply, and UK powercord. Compatible with CT40with TPU boot only.CT40-NB-PB-3CT40-QBC-0CT40-QBC-1CT40-QBC-2CT40-QBC-3Net Base (use with TPUBoot)For Ethernetcommunications andrecharging up to fourcomputers. Kit includes dock,power supply, and UK powercable. Compatible with CT40with TPU boot only.QBC, StandardFor recharging up to fourbatteries. Kit includes dockand power supply. Powercord must be orderedseparately.QBCFor recharging up to fourbatteries. Kit includes dock,power supply, and U.S. powercord.QBCFor recharging up to fourbatteries. Kit includes dock,power supply, and EU powercord.QBCFor recharging up to fourbatteries. Kit includes dock,power supply, and UK powercord.CT40-HB-0CT40-HB-1CT40-HB-2CT40-HB-3CT40-EB-0Home Base, StandardKit includes dock and powersupply. Power cord mustbe ordered separately. Forrecharging computer andbattery. Supports USB clientvia USB Type B connector.Home BaseKit includes dock, powersupply, and U.S. power cord.For recharging computerand battery. SupportsUSB client via USB Type Bconnector.Home BaseKit includes dock, powersupply, and EU power cord.For recharging computerand battery. SupportsUSB client via USB Type Bconnector.Home BaseKit includes dock, powersupply, and UK power cord.For recharging computerand battery. SupportsUSB client via USB Type Bconnector.Ethernet Home Base,StandardKit includes dock andpower supply. Power cordmust be ordered separately.For recharging computer,battery, and Ethernetcommunications. SupportsUSB client via USB Type Bconnector.CT40-EB-1CT40-EB-2CT40-EB-3Ethernet Home BaseKit includes dock, powersupply, and U.S. power cord.For recharging computer,battery, and Ethernetcommunications. SupportsUSB client via USB Type Bconnector.Ethernet Home BaseKit includes dock, powersupply, and EU power cord.For recharging computer,battery, and Ethernetcommunications. SupportsUSB client via USB Type Bconnector.Kit includes dock, powersupply, and UK power cord.For recharging computer,battery, and Ethernetcommunications. SupportsUSB client via USB Type Bconnector.CT40-DB-0CT40-DB-1CT40-DB-2CT40-DB-3Display Dock, StandardFor connection with anexternal display, and extendsI/O for HDMI, Ethernetcommunications, and threeUSB ports. Kit includesdisplay base and powersupply. Must order powercord separately.Display DockFor connection with anexternal display, and extendsI/O for HDMI, Ethernetcommunications, and threeUSB ports. Kit includesdisplay base, power supply,and U.S. power cord.Display DockFor connection with anexternal display, and extendsI/O for HDMI, Ethernetcommunications, and threeUSB ports. Kit includesdisplay base, power supply,and EU power cord.Display DockFor connection with anexternal display, and extendsI/O for HDMI, Ethernetcommunications, and threeUSB ports. Kit includesdisplay base, power supply,and UK power cord.MOBILECT40-SN-USB-0CT40-VD-0CT40-CIGR-050138169-001805-638-001Snap-On Adapter withTethered USB Cable toSupport USB ClientProvides tethered USB clientconnectivity. Compatiblewith hand strap, battery pack,and scan handle. Chargesmobile computer batteryin four hours or less. Kitincludes snap-on adapter.Optional 50130570-001(5 V/2 A) USB power walladapter sold separately.Vehicle DockVehicle dock with hard-wired3-pin power cable.Cigarette Snap-On AdapterCigarette lighter adapterwith USB SKT.Cigarette LighterPower Adapter CableCigarette lighter poweradapter, 1.8 mm (0.07 in).RAM MountRequired for vehicle dockor vehicle holder. Consistsof one 12.07 cm (4.75 in)adjustable pivot arm with two3.8 cm (1.5 in) stainless steelballs and assembly hardware.Requires customer-suppliedhardware to secure mount tovehicle.CT40-HDST-35MM CT40-CVT-25MMPTT HeadsetEnterprise headset with PTTfunction, 3.5 mm (0.14 in), 1.8m (5.9 ft) length.Audio Cable3.5 mm (0.14 in) plug to2.5 mm socket adapter wire.POWER SUPPLIES318-055-011318-055-01550121666-00150121667-00150130570-001Spare Battery Pack CT40 Battery Pack, 4040 mAh, for use with CT40 configurations with plastic battery latch button (last two digits in part number begin with 0: CT40-L*N-xxxxx 0x).Spare Battery Pack CT40 Battery Pack, 4040 mAh, for use with CT40 configurations with metal battery latch button (last two digits in part number begin with A or B :CT40-L0N-xxxxx A x or CT40-L1N-xxxxx B x).Desktop Power Supply A 36 W power supply for use with Ethernet home base, charge-only home base, and quad battery charger. Requires country-specific line cord to be ordered separately.Quad Base Power Supply A 84 W power supply for use with four-bay charging base and four-bay net base. Requires country-specific line cord to be ordered separately.Power Plug Adapter Kit USB power adapter (5 V, 2 A) kit for snap-on adapter. Includes EU, UK, U.S., and IN plugs.SCAN HANDLESCT40-SH-DCCT40-SH-PBScan Handle, Compatible with Charging Dock Snaps easily on or off the mobile computer. Compatible with charging docks, hand strap, and snap-on adapter.Scan Handle and TPU Boot Kit, CT40 scan handle, and TPU boot, compatible with charge base CT40-CB-PB-0/1/2/3 and net base CT40-NB-PB-0/1/2/3.SOFT GOODS825-238-001CT40-PB-00CT40-RB-00825-237-001HolsterHolster suitable for use with CT40, CT50, and CT60.TPU BootCT40 TPU boot, compatible with charge base CT40-CB-PB-0/1/2/3 and net base CT40-NB-PB-0/1/2/3.Rubber BootBlack rubber protective boot for CT40.PouchPouch suitable for use with CT40, CT50, and CT60.ACCESSORIESCT40-HS-3PK CT40-HS-HCCT40-SP-1PK CT40-QL-00Kit, Hand Strap (3/pk)Kit of three replacement hand straps for CT40.Health Care Hand Strap (3/pk)Built with disinfectant-ready material. Can be cleaned by approved disinfectant agents.Screen Protector (1/pk)One self-adhesive screen protector.Quad Lock Case CT40 quad lock case to mount CT40 on Zebra RFD8500 RFID sled with quad lock.856-065-004856-065-005856-065-006856-065-007Industrial-Grade Micro-SD Card*Micro-SD card, 1 GB, AF1GUDI, RoHSIndustrial-Grade Micro-SD Card*Micro-SD card, 2 GB, AF2GUDI, RoHSIndustrial-Grade Micro-SD Card*Micro-SD card, 4 GB, AF4GUDI, RoHSIndustrial-Grade Micro-SD Card*Micro-SD card, 8 GB, AF8GUDI, RoHS* Micro-SD cards are required when databases are stored on the device. The database should be stored on the SD card.AC LINE CORDS50127245-00150117501-00150117503-00177900506E 77900507E Power Cord – India Power cord, India, 1.5 m (4.9 ft)Power Cord – Australia Power cord, Australia, 2.5 m (8.2 ft)Power Cord – CB Power cord, Argentina, Isled CBPower Cord – U.S.Power cord, U.S., IEC320-C13, 1.85 m (6.07 ft)Power Cord – UK Power cord, UK, IEC320-C13, 2.5 m (8.2 ft)77900508E 19-1980719-19726Power Cord – EU Power cord, Europe, IEC320-C13, 2.5 m (8.2 ft)Power Cord – China Cable, China cord set (CCC), 2.5 m (8.2 ft)Power Cord – U.S.Cable, power cord/IEC, U.S., 2.5 m (8.2 ft)For more informationHoneywell Safety and Productivity Solutions 9680 Old Bailes RoadFort Mill, SC 29707 CT40 and CT40 HC Accessories Guide | Rev F | 10/19© 2019 Honeywell International Inc.。
- 1、下载文档前请自行甄别文档内容的完整性,平台不提供额外的编辑、内容补充、找答案等附加服务。
- 2、"仅部分预览"的文档,不可在线预览部分如存在完整性等问题,可反馈申请退款(可完整预览的文档不适用该条件!)。
- 3、如文档侵犯您的权益,请联系客服反馈,我们会尽快为您处理(人工客服工作时间:9:00-18:30)。
HONEYWELL - CONFIDENTIAL
5
WLAN – 基本设计
•通过局域网接入点通信(AP) •客户端使用的无线网卡 •所有无线设备具有同一个的地址(BSSID)
HONEYWELL - CONFIDENTIAL
6
WLAN - Mobility
无缝漫游
随着用户移动,设备自动连接到不同AP
• 测量轮(水平距离) • 高度测量
HONEYWELL - CONFIDENTIAL Nhomakorabea21
天线衰减器
• 不可能携带各种长度的电缆 • 衰减器模拟衰减
HONEYWELL - CONFIDENTIAL
22
• 便携箱包 • 足够容积 • 可以托运 • 快速部署
HONEYWELL - CONFIDENTIAL
• 同信道单元距离小于 一个单元 • 受到同信道单元干扰 • 影响整体网络性能
HONEYWELL - CONFIDENTIAL
3
802.11a
• 23个不重叠的信道
HONEYWELL - CONFIDENTIAL
4
802.11 a 蜂巢布置
• 同信道单元距离至少2个单 元 • 来自同信道干扰比较小 • 充分发挥每个单元的无线 性能
HONEYWELL - CONFIDENTIAL
7
WLAN – Rate Scaling
Fastest
Fast
Medium
为了保持连接不断,随着用户远离AP,数据通讯率自动下降。
HONEYWELL - CONFIDENTIAL 8
WLAN – Load Balancing
动态负载平衡,共享或分段带宽 无线网络有很好的扩展性。这个例子展示 了一个负载均衡的网络中,用户4自动连接 到另一个AP。由于远处的AP负荷是非常低 的,即使它是位于远处,也会自动把用户 分派过去。
HONEYWELL - CONFIDENTIAL
19
Site Survey Kit
• 标识AP的位置 • 耐用但容易去除 • 色彩鲜艳的标志让你不仅标记一个AP 的位置,还可以记录一些配置和安装信 息说明。
AP #1
HONEYWELL - CONFIDENTIAL
20
Site Survey Kit
• 无线网桥连接相同局域网的不同网段 - 无需昂贵的线路租用费或固定连接线路 - 远距离的点对点或点对多点的连接 - 在视线内采用一对定向无线天线
HONEYWELL - CONFIDENTIAL
11
Deploy for both Voice and Data
• Design for Capacity – Not Just Coverage - Over provision for wireless (same as for wired) - Use all available 802.11a/b/g channels simultaneously - Reuse channels as often as possible - Deploy for 54Mbps everywhere - Keep cell sizes small - Minimize simultaneous users per cell • Optimize for Voice - Fewer users at higher data rates = less contention/latency - Small cells & higher rates = lower Tx power & faster Tx time = longer battery life - Insist on standards-based QoS (802.11e / WMM)Use VLANs and SSIDs to map wired VoIP to VoWLAN - Minimize roaming domains through WLAN switching • Build a Wi-Fi Network to do more than ONE THING!
23
Practice
• 配置一个无线接入点 • 运行ispywifi并且 ping AP 和服务器 • 步行并观察RSSI和ping的状态
IMPORTANT: 总是使用实际部署AP,天线,计算 机,打印机来做现场测试
HONEYWELL - CONFIDENTIAL
24
HONEYWELL - CONFIDENTIAL
5 volts @ 1.6 amps
HONEYWELL - CONFIDENTIAL
16
Site Survey Kit
• 没有一个天线,能够完美应对所有的应用场景。天线的最 小集合应包括(但不限于): •2.2 dBi “Rubber Duckies” 5.2 dBi Ceiling Mount •5.2 dBi Mast Mount 5.2 dBi Ground Plane •6.0 dBi Patch 8.5 dBi Patch •13.5 dBi Yagi 5.2 dBi Diversity Pillar Mount
HONEYWELL - CONFIDENTIAL
17
Antennas 定向
• Yagi, Patch, Panel • 推荐网桥应用
全向
• Plane, Dipole • Rubber duck • 普通应用
HONEYWELL - CONFIDENTIAL
18
Site Survey Kit
• 设备安装支架 • 管道胶带,线,夹子,扎带 • 确保你的AP安全!
25
HCE Training - Mobility WIFI Site Survey
802.11b/g/n
802.11b FCC和ETSI标准 有3个不重叠的 信道,1,6,11 Japan有4个,多 个14
802.11a 有23个不重叠的 信道
HONEYWELL - CONFIDENTIAL
2
802.11 b/g 蜂巢布置
HONEYWELL - CONFIDENTIAL 9
无线中继器
• 中继器再生信号并扩展允许距离内的无线局域网。 • 应对难以布线的区域 • 大多数协议对中继器的数量实现严格限制,通常是 两个或三个中继器跳跃是可以接受的。
HONEYWELL - CONFIDENTIAL 10
无线网桥
Point-to-Point Bridge
HONEYWELL - CONFIDENTIAL 12
Wireless site survey tool with ISpyWifi
• 以ISpyEWIFI为例说明 • 在手持计算机上运行ispywifi • 选择 Status > Wireless. • 点击Advanced 弹出 ISpyWifi.
HONEYWELL - CONFIDENTIAL
13
Wireless site survey tool with ISpyWifi • 点击RSSI tab 查看接收信号强度. • 包含信号强度,SSID, MAC 地址, 数据传输率, 和发射功率.
HONEYWELL - CONFIDENTIAL
14
Site Survey Kit
IMPORTANT:
• Access Points
总是使用实际部署AP, 天线,计算机,打印机 来做现场测试
HONEYWELL - CONFIDENTIAL
15
Site Survey Kit
• 电池和充电器 • 测试用AP需要电力供应。测试现场可不会总是有电源。推 荐电池组将拥有至少8小时的电量,让工程师可以做一天的 测试无需再次充电。