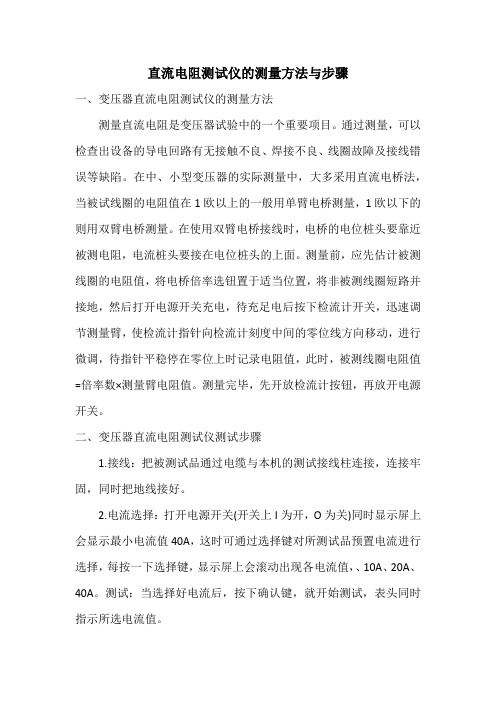
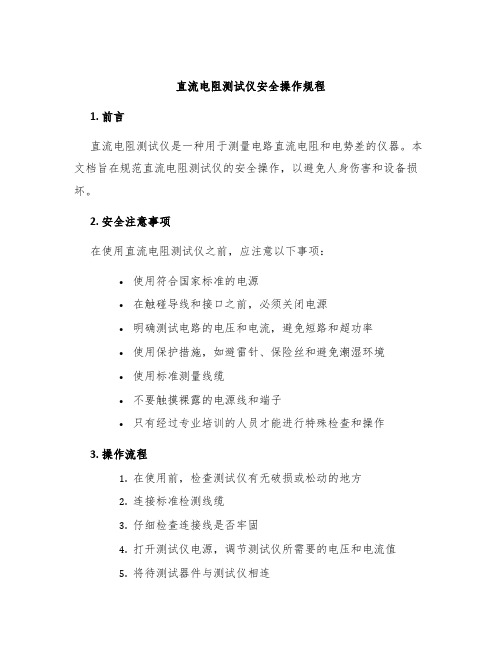
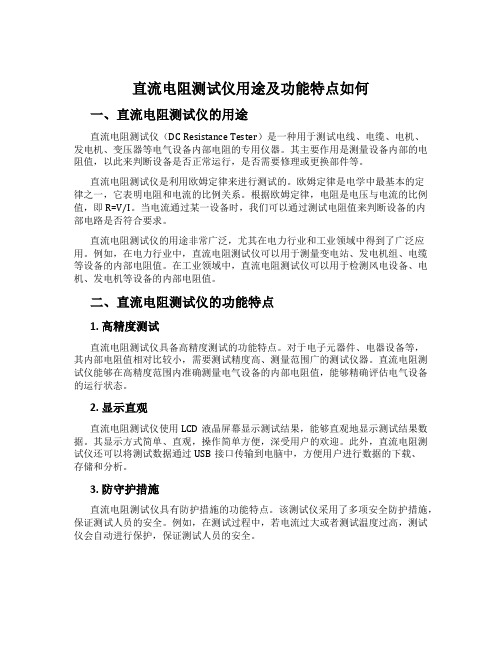
PC36C直流电阻测试仪.doc
直流电阻测试仪的测量方法与步骤

直流电阻测试仪的测量方法与步骤一、变压器直流电阻测试仪的测量方法测量直流电阻是变压器试验中的一个重要项目。
通过测量,可以检查出设备的导电回路有无接触不良、焊接不良、线圈故障及接线错误等缺陷。
在中、小型变压器的实际测量中,大多采用直流电桥法,当被试线圈的电阻值在1欧以上的一般用单臂电桥测量,1欧以下的则用双臂电桥测量。
在使用双臂电桥接线时,电桥的电位桩头要靠近被测电阻,电流桩头要接在电位桩头的上面。
测量前,应先估计被测线圈的电阻值,将电桥倍率选钮置于适当位置,将非被测线圈短路并接地,然后打开电源开关充电,待充足电后按下检流计开关,迅速调节测量臂,使检流计指针向检流计刻度中间的零位线方向移动,进行微调,待指针平稳停在零位上时记录电阻值,此时,被测线圈电阻值=倍率数×测量臂电阻值。
测量完毕,先开放检流计按钮,再放开电源开关。
二、变压器直流电阻测试仪测试步骤1.接线:把被测试品通过电缆与本机的测试接线柱连接,连接牢固,同时把地线接好。
2.电流选择:打开电源开关(开关上I为开,O为关)同时显示屏上会显示最小电流值40A,这时可通过选择键对所测试品预置电流进行选择,每按一下选择键,显示屏上会滚动出现各电流值,、10A、20A、40A。
测试:当选择好电流后,按下确认键,就开始测试,表头同时指示所选电流值。
3.当按下确认键后,显示屏上显示“正在充电”,过几秒钟之后,显示“正在测试”,这时说明已充电完毕。
进入测试状态,几秒后,就会显示所测阻值。
测试完毕后,按“复位”键,变压器直流电阻测试仪电源将与绕组断开,同时放电,音响报警,电流表回到零位,这时显示屏回到初始状态,放电音响结束后,可重新接线,进行下次测量或拆下测试线与电源线结束测量。
PC36c直流电阻测试仪 英文说明书

PC36 Series D.C. Resistance Meters Operation InstructionsShanghai Taiou Electronic CO.,Ltd.1.Basic ParametersThe basic parameters are shown as table 1Table 12Technique Requirements2.1environmental conditions2.1.1 environmental temperature 15—25℃2.1.2 relative humidity ≤85%RH2.1.3 power 220V±10%, 48-62Hz2.1.4 Outside of the earth magnetic field, there is no electric field or magnetic field of electric pulse and electric spark in the measurement environment.12.2basic toleranceThe basic tolerance of the measurement is shown as table 2R X:reading of the measurement R m:maximum value of the range2.3Accurate class and maximum toleranceshown as table 3.The accurate class and maximum tolerance isThe rated output currents of the measurement are shown as table 4.22.5Two way current measurementOnce the thermoelectric voltage of the circuit is removed the difference of the result between the positive current measurement and negative current measurement is less than the half of the basic tolerance.2.6 Temperature conversion of the copper wire and aluminum wire2.6.1 temperature conversion rangeenvironmental temperature input ringing from15℃to26℃with the step of 0.1℃.2.6.2 properties of temperature conversionK t = 1/ [1+0.004( t-20 )] = 250 / (230 + t )t: environmental temperature ℃.2.6.3 readout of the meter: R X= R20 = K t*R tR20:resistance at 20℃; R t:resistance at t℃2.7Insulation resistanceInsulation resistance is more than 20 MΩbetween power input leads and outside sell of the meter.2.8Insulation strengthInsulation strength is 50Hz at 1500V (1 minute) between power input leads and outside sell of the meter.3Operation methods3.1 Introduction of panel functionOf which:(1)liquid crystal display (8) measurement state choice switch(2)range choice switch (9) current output terminal “C1”(3)function choice switch (10) voltage input terminal “P1,P2”(4)power switch (11) current output terminal “C2”(5)zero check and balance knob (12) environmental temperature input switch(6)reading hold switch (15-26℃,step 1℃)(7) current direction choice switch (13) environmental temperature input switch(0.0-1.1℃,step 0.1℃)(14)temperature conversion switchNote: The meter has 12 ranges, but the range choice switch (2) has only 6 positions for turning. When the measurement state choice switch (8) is turned to the “normal current” (normal current measurement) position, the screen displays“ THI”, the 6 ranges witch on the upper position of the panel (printed in blue) is effective; and when the switch (8) is turned to the “low current” (low current measurement) position, the screen displays“ TLO”, the 6 ranges witch on the lower position of the panel (printed in black) is effective. The screen displays the maximum value of range ( 2、20 、200 or 2000 ) and the unit of the resistance (Ω、mΩ、μΩ)when measuring3.2 the measuring steps of resistance3.2.1 meter preheat and zero checkTurn the function switch (3) to “zero check”, measurement state choice switch (8) to “ low current”, range choice switch (2) to “200μΩ” to make the meter in the highest sensitivity condition. Turn the power switch (4) to preheat the meter, after 3 minutes, turn zero check knob (5) to make meter value at “00.00”.3.2.2 Connect the meter and the resistor witch is to be measured in the sequence of “C1, P1, P2, C2”with the current junctions outside and the voltage junctions inside, red wires are “C1,P1” and black wires are “ C2, P2 ”. Reduce the possibility of touching the “P1, P2” junctions because the human body will heat the voltage junction, and the effect of thermocouple will influence the result of low resistance measurement.3.2.3 Select suitable range and measurement condition according to the resistor to be measured. The “normal current” measurement state is more accurate in measurement and stronger in the ability against interference. The “low current” measurement state is higher sensitivity and better resolution. If the user can’t estimate the value of the resistor to be measured, please select the higher range and lower current to prevent the resistor from damaging by the high current shock.3.2.4 voltage balance of the measuring circuitTurn function switch (3) from “zero check” to “balance”, The screen will probably display a value which indicates that there exists a no balanced voltage in the measuring circuit. Pay attention, the no balanced voltage is caused by the effect of thermocouple. It is not stable and will reduce in a few minutes, please wait till the value of no balanced voltage is less than 5. Then turn knob (5) again to make meter value between “ –0000 ” to “0000”.3.2.5 resistance measurementTurn function switch (3) to “1.00I ”, the screen displays the resistance value of the resistor to be measured. If it shows “1—”, it means the measurement is under range, please turn range choice switch (2) at clockwise to make measurement value appear. If the value less than 1800, it means the measurement is over range, so turn switch (2) at counter-clockwise to make value in high resolution. If the range issuitable for measurement, readout of the meter is between 1800 to 19999.3.3 reading holdTurn the reading hold switch (6) to “ hold ”, the meter will get into reading hold state, the screen displays “H”, user can record the measurement value conveniently. Normally, the switch (6) is turned to “ run ”, so that the measurement is continuous.3.4 Two-way current measurementIf the resistance of the measurement is less than 0.1Ω, the operation of two-way current measurement should be taken to offset the thermoelectric voltage caused by the effect of thermocouple in the measuring circuit. First, turn the current direction choice switch (7) to “I+”(positive current measurement), t ake down the value of measurement as R I+, and then turn switch (7) to “I-” (negative current measurement), the negative sign appears in front of the resistance value, it indicates the meter has got into the negative current measurement state, take down this value as R I-(omit the negative sign), the result R = (R I++ R I-) / 2 , is more accurate than one-way current measurement.3.5multiple current measurementBecause the temperature resistance coefficient of the copper wire and aluminum wire is rather big, if the measurement current is too big, the wire will be heated so that serious error will be caused. It can be checked by the method of multiple current measurement, to prevent the measurement from too big current.Turn the “function” switch (3) to “ 1.41I ” position (1.41 times of the rated current), to compare with the result under the “ 1.00I ” (rated current). If the difference is within the value required by the national standard, it means the measurement result is valid. Otherwise it means the outcome is not valid because the measurement current is too big. In order to reduce the measurement current please turn switch (3) to “0.707I” position (0.707 times of the rated current). Again, compare it with the result under the “ 1.00I ” (rated current). If the difference is within the value required by the national standard, it means the measurement result under “0.707I” is valid. Otherwise the measurement current is still too big, please select the higher range or turn switch (8) to “ low current ” posit ion, to further reduce the current.3.5 Temperature conversion of the copper wire and aluminum wireWhen measuring the conductor resistance of the copper wire and aluminum wire, set the switch (12) and switch (13) to environmental temperature, and then the readout of the meter will automatically convert to the resistance under the standard temperature—20℃.In this way ,the users don’t need to conversion by the formula themselves. Pay attention to make the measurement of the environmental temperature accurately ( the error less then 0.1℃) .The wires which to be measured must stay in the environment for enough time, so that wire’s temperature totally equals the environmental temperature.Pay more attention, the operation of the automatic temperature conversion is only suitable for the measurements of the resistors which are made of pure copper or pure aluminum (electrolytic copper or electrolytic aluminum). Except this two, neither the standard resistor、the touching resistance and the other substantial resistors;nor the resistors which are made of copper alloy、aluminum alloy、iron alloy and other alloys can be measured with the function of the automatic temperature conversion. The temperature conversion switch (14) should be turned to “OFF ” position, when measuring these resistors. In this state, the function of the temperature conversion is not effective and the readout of the meter is the real resistance of the resistor under the environmental temperature. Because the temperature resistance coefficients of these resistors are rather different from the temperature resistance coefficient of pure copper, it will cause serious errors when the function of temperature conversion is wrongly used.4. Points of attention4.1 The meter is the specialized equipment of measuring the conductor resistance of wires and cables. In order to use the meter correctly and safely, the user must read the operation instructions carefully and completely before using it, because there are many new techniques and special functions in the meter, and it is rather different from other low resistance meters.4.2 When the terminal of “P1, P2, C1, C2” are not connected to the resistor to be measured, the function switch (3) must be turned to “zero check” position. After measurement, the user must turn switch (3) to “zero check” first, and then cut off theconnector. Especially avoid cutting off the measuring circuit when the measurement current is big. When the meter is out of use, please turn switch (3) to “zero check” position too.4.3 Don’t cover the vent of the meter when the meter is being used in order to make heat dissipated well.4.4 The meter should be put in a dry, ventilated place when out of use, avoid severe cold and extremely hot.5 The quality standard and the guarantee of repair5.1 The meter is made on the basis of the standard No. Q/AEXJ3 Shanghai China. 5.2 The manufacturer guarantees to keep the meter in good repair all it’s life, and the repair is free in 12 months expect the trouble of the meter is caused by the wrong use of the user.6 Complete set of the meterProvide following technique files and attachments with every meter:a) product qualified certificate oneb) operation introductions onec) power line oned) measuring cable one pairThe patent has been entitled to this meter. No imitator is allowed.Shanghai Taiou Electronic Co.,LtdAddress: 1, lane74, GuangLing No.1 Road, Shanghai ChinaPost code: 200083Tel: 008621-65607047 65604787 65420430Fax:008621-65607047http:。
22-PC36C直流数字双臂电桥(有温度补偿)

PC36C直流低电阻测试仪使用说明书一、用途PC36 c直流低电阻测试仪是一种由高稳定精密恒流源、带自校的高精度数字电压表和CPU 微处理器组成的5位半台式数字式直流电阻测试仪,其测量结果用6位VFD荧光显示。
该仪器具有价格低廉、测量精度高、性能稳、使用方便等特点,它适用于测量各种电线、电缆的电阻值、各类线圈、电动机、变压器绕组的电阻,特别是具有自校功能(用户备用BZ3标准2.2 量程、测量范围、分辨力及基本误差产品在标准条件(20±1℃)下符合表 1规定表 1(温度补偿开关置断)2.6 极性、量程过载指示2.6.1在电阻测量时不显示极性2.6.2当输入电阻值超过仪表测量范围时仪表显示 <LCE> 2.7 采样速度:2~3次/s2.8 消耗功率:≤30W2.9 重量:≤7kg三、工作原理和特点本仪器是由5 1/2位,具有0.1μV 灵敏度的数字电压表和一个精密恒流源组成,如图 1所示:4(输入插座的C 1和C 2为恒流源的输出端;输入插座的P 1和P 2为数字表的输入端)。
4.2 使用方法 4.2.1 接通电源之前,先按下测试/暂停按键。
再打开电源开关,电阻测试仪预热10min 即可进行测量。
如电阻测试仪有读数时,按置零按键。
使读数为零。
4.2.2仪器经过剧烈的环境条件变化或长期不使用,在首次使用时应通电3~4小时。
4.2.3在测量过程中应注意量程范围4.2.3.1测量夹子的用法如图3,P1是电压高端,P2是电压低端,C1是电流高端,C2是电流低端。
按图3接好,然后接通仪器的电源,待面板上读数稳定后,显示的数据值就③开电源,面板上数字闪烁,约几秒钟(时间根据电感大小)后,待面板上读数稳定后读取数值;④测试结束,先关电源等待几秒钟(时间根据电感大小)后,取下夹子:4.2.4仪器作恒流源的用法将电位端P1、P2短路。
分别按下200μΩ、2mΩ、20mΩ、200mΩ、2Ω、20Ω、200Ω档时:200μΩ档,电流端C1 、C2端可输出 10A电流2mΩ档,电流端C1 、C2端可输出 10A电流20mΩ档,电流端C1 、C2端可输出 1A电流200mΩ档,电流端C1 、C2端可输出 0.1A电流2Ω档,电流端C1 、C2端可输出 0.01A电流20Ω档,电流端C1 、C2端可输出 1mA电流200Ω档,电流端C1 、C2端可输出 0.1mA电流4.2.5 正反向测试电流的用法在测量微欧姆电阻时,建议正向电流测量一次,记录测试结果。
直流电阻测试仪安全操作规程

直流电阻测试仪安全操作规程
1. 前言
直流电阻测试仪是一种用于测量电路直流电阻和电势差的仪器。
本文档旨在规范直流电阻测试仪的安全操作,以避免人身伤害和设备损坏。
2. 安全注意事项
在使用直流电阻测试仪之前,应注意以下事项:
•使用符合国家标准的电源
•在触碰导线和接口之前,必须关闭电源
•明确测试电路的电压和电流,避免短路和超功率
•使用保护措施,如避雷针、保险丝和避免潮湿环境
•使用标准测量线缆
•不要触摸裸露的电源线和端子
•只有经过专业培训的人员才能进行特殊检查和操作
3. 操作流程
1.在使用前,检查测试仪有无破损或松动的地方
2.连接标准检测线缆
3.仔细检查连接线是否牢固
4.打开测试仪电源,调节测试仪所需要的电压和电流值
5.将待测试器件与测试仪相连
6.待测试器件应断开电源,并防止短路
7.在极性规定的情况下,连接测试仪
8.记录测试仪显示的结果
4. 维护与检修
在使用直流电阻测试仪时,我们也需要维护和检修测试仪,如下:
1.定期检查测试仪电源
2.定期检查测试仪是否能正常工作
3.定期检查测量线缆
4.定期检查电源线和接线端子
5.定期校准测试仪指示值
5. 总结
直流电阻测试仪的安全操作需要依照本文档所规定的操作流程进行操作。
同时,监测电源电压和电流,避免短路和超功率。
正确的维护和检修对于测试仪的使用寿命和测试结果的准确性也至关重要。
直流数字电阻测试仪操作规程

直流数字电阻测试仪操作规程直流数字电阻测试仪操作规程一、设备概述直流数字电阻测试仪是一种用于测试电路或电子元件的电阻值的仪器。
它采用直流电流进行测试,同时具备数字显示和自动测量功能。
二、操作前准备1.确保测试仪处于合适的工作环境下,无明显的灰尘、湿气等干扰因素。
2.根据需要选择合适的测试电压和测试电流范围。
3.确保仪器与待测电路或元件之间的连接正确可靠。
4.检查测试仪的电源是否正常,并确保仪器接地可靠。
三、测试步骤1.打开仪器电源,并确保仪器处于待机状态。
2.将待测电路或元件与测试仪正确连接,确保电路连接稳定可靠。
3.根据需要设定测试的电压和电流范围。
如测试特定元件,需参考元件的额定值设定测试范围。
4.在测试仪上选择相应的测试模式,如手动模式或自动模式。
5.若选择手动模式,按下“测试”按钮开始测试,并在仪表上观察测试数值。
同时根据需要,可以选择保持、峰值显示等功能。
6.若选择自动模式,仪器将自动进行测试并显示数值。
7.根据测试结果判断被测电路或元件的电阻值,确保测试信号范围内的准确性。
8.测试完成后,关闭仪器电源,并拆除与被测电路或元件的连接。
四、注意事项1.在进行测试前,确保被测电路或元件处于断电状态,以免产生损坏或危险。
2.在测试过程中,仪器可能存在一定的热量,注意避免触碰测试仪表。
3.测试仪的电源应接在可靠接地的插座上,确保使用环境的安全性。
4.测试仪器的使用人员应具备基本的电路知识,以便正确判断测试结果和操作仪器。
5.对于高精度测试要求,应使用更为专业的测试仪器,并按照仪器说明进行相关操作。
6.定期对测试仪器进行维护和校准,以确保测试结果的精确性和可靠性。
五、常见故障及排除方法1.仪器无法正常启动:检查电源是否接通,电源是否正常,仪器是否连接正确。
2.测试结果异常或不稳定:检查测试环境是否受到干扰,测试连接是否牢固,测试参数是否设定正确。
3.数字显示不清晰或无显示:检查仪器是否出现故障,如有必要及时联系售后人员进行维修。
直流电阻测试仪用途及功能特点如何

直流电阻测试仪用途及功能特点如何一、直流电阻测试仪的用途直流电阻测试仪(DC Resistance Tester)是一种用于测试电线、电缆、电机、发电机、变压器等电气设备内部电阻的专用仪器。
其主要作用是测量设备内部的电阻值,以此来判断设备是否正常运行,是否需要修理或更换部件等。
直流电阻测试仪是利用欧姆定律来进行测试的。
欧姆定律是电学中最基本的定律之一,它表明电阻和电流的比例关系。
根据欧姆定律,电阻是电压与电流的比例值,即 R=V/I。
当电流通过某一设备时,我们可以通过测试电阻值来判断设备的内部电路是否符合要求。
直流电阻测试仪的用途非常广泛,尤其在电力行业和工业领域中得到了广泛应用。
例如,在电力行业中,直流电阻测试仪可以用于测量变电站、发电机组、电缆等设备的内部电阻值。
在工业领域中,直流电阻测试仪可以用于检测风电设备、电机、发电机等设备的内部电阻值。
二、直流电阻测试仪的功能特点1. 高精度测试直流电阻测试仪具备高精度测试的功能特点。
对于电子元器件、电器设备等,其内部电阻值相对比较小,需要测试精度高、测量范围广的测试仪器。
直流电阻测试仪能够在高精度范围内准确测量电气设备的内部电阻值,能够精确评估电气设备的运行状态。
2. 显示直观直流电阻测试仪使用LCD液晶屏幕显示测试结果,能够直观地显示测试结果数据。
其显示方式简单、直观,操作简单方便,深受用户的欢迎。
此外,直流电阻测试仪还可以将测试数据通过USB接口传输到电脑中,方便用户进行数据的下载、存储和分析。
3. 防守护措施直流电阻测试仪具有防护措施的功能特点。
该测试仪采用了多项安全防护措施,保证测试人员的安全。
例如,在测试过程中,若电流过大或者测试温度过高,测试仪会自动进行保护,保证测试人员的安全。
4. 多种测试模式直流电阻测试仪还具有多种测试模式的功能特点。
该测试仪可以设置多种测试模式,包括手动模式、自动模式、比较模式等多种测试模式。
测试人员可以根据不同的测试需求进行选择,对测试效果进行优化。
直流电阻测试仪的使用介绍
直流电阻测试仪的使用介绍直流电阻测试仪是一种用来测试电路或电子元器件电阻值的仪器。
简单来说,它的作用就是检测电路或电子元器件的通断和异常,以及各部分之间的电阻大小。
这篇文档将在使用者视角下介绍直流电阻测试仪的使用方法,以及常见问题的处理。
使用前准备在使用直流电阻测试仪之前,我们需要准备以下工具和材料:•直流电阻测试仪本体•测试引线•待测电子元器件首先,确保直流电阻测试仪的使用环境干燥、温度适宜,并满足安装要求。
然后,将测试引线分别与测试仪的正负极接口相连,并将另一端分别与待测电子元器件的正负极相连。
测量步骤接下来,我们就可以开始进行直流电阻测试了。
具体步骤如下:1.打开直流电阻测试仪的电源开关,并等待测试仪进入正常工作状态。
2.将测试引线与待测电子元器件相连,保证引线不发生短路或接反。
3.按下测试仪的测量按钮,等待测试仪对电子元器件进行测试并显示测试结果。
4.将测试引线从待测电子元器件上取下,并将测试仪电源开关关闭,结束测试。
需要注意的是,不同的待测电子元器件需要选择不同的测试范围,以避免测试结果失真。
此外,在测试过程中要严格按照仪器的操作说明进行操作,避免误操作导致仪器损坏或测试结果失准。
常见问题处理在直流电阻测试过程中,可能会出现如下问题:测量结果误差较大出现这种情况一般是由于测试引线接触不良导致的。
此时,需要检查测试引线的连接是否严密,及时更换磨损严重或损坏的测试引线。
测试结果不稳定测试结果不稳定可能是由于测试引线存在干扰或外部环境因素影响所致。
这时,可以选择更好质量的测试引线,或者在更好的环境下进行测试。
不能测量大功率电子元器件大功率电子元器件的测试需求超出了测试仪的额定测试范围,为了安全考虑,应该使用特殊定制的测试仪器进行测试。
结语通过本文档的介绍,我们对直流电阻测试仪的使用方法有了更为全面的了解。
这种仪器在电路或电子元器件检测中具有重要的作用,能够帮助用户有效地检测和排除电子元器件的各种故障问题,提高设备的稳定性和可靠性。
直流电阻测试仪使用方法
直流电阻测试仪使用方法
直流电阻测试仪是一种经常用来测试电阻的仪器,用来检测电路
连接的完整性以及元件等的阻值。
它的使用也非常简单。
首先,在使用测试仪之前,该仪器应该做一次检查和调试,确保
测量的精度。
这样可以避免计量中的误差和不确定性,同时还可以为
测量结果提供可靠的依据及参考。
其次,应将直流电阻测试仪与电源连接,调节电源电压等,使其
能够输出额定电压。
此外,还应调节测试仪阻值表格,使其正确显示
阻值单位,如千欧、毫欧等。
接着,根据实际需要,调节好测试仪上的电压调整旋钮,将测试
电路中的元素安装在测试仪的输入和输出端。
最后,读取仪器的检测数据,根据实际测试情况来比较和解释,
从而诊断和判断测试电路的正常情况。
总而言之,直流电阻测试仪的使用要先进行检查和调试,然后与
电源连接,调节电源电压,调节测试仪阻值表格,调节电压调整旋钮,
将测试电路元素安装于测试仪的输入和输出端,最后读取仪器的检测数据,进行分析和判断。
直流电阻测试仪使用方法
直流电阻测试仪使用方法一、准备工作1.检查测试仪的电池电量是否充足,以免影响测试结果。
2.选择正确的测试范围。
根据待测电阻的预估值,选择合适的量程,以确保测试结果的精确性。
如果电阻值较小,可以选择较小的量程,如果电阻值较大,则需要选择较大的量程。
二、连接测试仪1.将测试仪的电线或测试夹具连接到待测电路中。
一般情况下,将一根电线连接到电路的一端,而另一根电线则连接到电路的另一端。
如果待测电路中存在连接器,可以直接将测试夹具连接到连接器上。
2.确保连接的稳定和牢固,以防止测试过程中出现松动和接触不良的情况。
三、测试操作1.打开测试仪的电源开关,使其处于工作状态。
2.根据测试仪的使用说明书,设置测试仪的量程和测试模式。
如果测试仪具有多种测试模式,需要选择直流电阻测试模式。
3.调节测试仪的电流值。
根据待测电路的特性和测试要求,逐步调整电流值,直到达到合适的测试条件。
一般情况下,可以选择适中的电流值来进行测试。
4.开始测试。
在设定合适数值后,按下测试按钮开始测试。
测试仪将自动施加电流,并测量电阻值。
5.等待测试结果。
一般情况下,测试仪会在显示屏上显示电阻值。
等待一段时间,直到测试结果稳定后,记录下测试结果。
四、结束测试1.关闭测试仪的电源开关,断开测试仪与待测电路的连接。
2.将测试仪恢复到待机状态,以便下次测试使用。
3.记录测试结果。
将测试结果记录在相关的测试记录表格或文件中,以备日后查阅。
需要注意的是,使用直流电阻测试仪时应遵循以下几点:1.在测试之前,仔细检查测试仪的工作状态和测试条件,以确保测试结果的准确性。
2.在进行一些特殊电路的测试时,需要特别注意测试仪的带宽、保护功能等特性,以保证测试的准确性和安全性。
3.在测试过程中,尽量保持稳定的工作环境,避免强烈的磁场或电磁干扰对测试结果产生影响。
总结起来,使用直流电阻测试仪时需要进行准备工作、连接测试仪、进行测试操作、结束测试并记录结果等步骤。
遵循正确的使用方法和注意事项,可以确保测试的准确性和可靠性。
直流电阻测试仪使用说明及注意事项
直流电阻测试仪使用说明及注意事项使用说明:1.准备工作:将测试仪插入电路中需要测试的位置,并确保电路处于关闭状态。
2.选择合适的测试档位:根据测试电阻的阻值大小,选择合适的测试档位。
通常直流电阻测试仪会提供多个测试档位,用户可以根据需要选择合适的档位。
3.连接电源:将电阻测试仪与电源连接,并确保连接牢固。
4.打开电路:打开电阻测试仪的电源,同时打开需要测试的电路。
此时,测试仪会开始工作并显示电路中的电流和电压值。
5.进行测试:等待电阻测试仪稳定后,可以开始进行测试。
通常情况下,测试仪会提供一个测试按钮,用户只需要按下测试按钮,就可以读取电阻值。
注意事项:1.安全操作:在测试过程中,应当注意安全操作。
确保电路处于关闭状态,并遵循正确的操作步骤,以避免电击或其他意外事故的发生。
2.确保电路稳定:在进行测试之前,应当确保电路处于稳定状态,以避免测试结果受到干扰。
可以等待一段时间,使电路稳定后再进行测试。
3.正确选择测试档位:在选择测试档位时,应当根据测试电阻的阻值大小选择合适的档位。
选择过小的档位可能造成仪器过载,选择过大的档位可能导致测试结果不准确。
如果不确定测试电阻的阻值范围,可以选择一个较小的档位进行初步测试,然后根据测试结果选择合适的档位进行精确测试。
4.避免干扰源:在进行测试时,应当尽量避免干扰源的存在,如其他电路电流的变化、强磁场等。
这些干扰源可能会对测试结果产生干扰,导致测试结果不准确。
综上所述,正确使用直流电阻测试仪需要注意安全操作、选择合适的测试档位、确保电路稳定、避免干扰源的存在,并定期对仪器进行校准。
只有在正确使用仪器的前提下,测试结果才能准确可靠。
- 1、下载文档前请自行甄别文档内容的完整性,平台不提供额外的编辑、内容补充、找答案等附加服务。
- 2、"仅部分预览"的文档,不可在线预览部分如存在完整性等问题,可反馈申请退款(可完整预览的文档不适用该条件!)。
- 3、如文档侵犯您的权益,请联系客服反馈,我们会尽快为您处理(人工客服工作时间:9:00-18:30)。
PC36C 直流电阻测试仪使用说明书邢台龙嘉电子设备科技有限公司一、用途PC36C直流低电阻测试仪是一种由高稳定精密恒流源、带自校的高精度数字电压表和CPU 微处理器组成的 5 位半台式数字式直流电阻测试仪,其测量结果用 6 位 VFD荧光显示。
该仪器具有价格低廉、测量精度高、性能稳、使用方便等特点,它适用于测量各种电线、电缆的电阻值、各类线圈、电动机、变压器绕组的电阻,特别是具有自校功能(用户备用BZ3 标准电阻,就可以校准),提高仪器的精度,省去了操作人员的送检时间。
因此该仪器广泛应用工厂、科研单位的工作场地和实验室。
二、技术指标2.1使用条件:2.1.1 环境温度: 20±15℃(校准温度: 20±1℃)2.1.2 相对湿度:不大于75%RH2.1.3 供电电源: 220V±10%, 50Hz± 1Hz2.1.4 无剧烈震动和机械冲击2.1.5 环境周围无强电磁场干扰2.1.6 空气中不含腐蚀气体、灰尘和有害杂质2.1.7 通风条件良好2.1.8 总技术指标型号PC36c直流低电阻测试仪测量范围μ Ω-200Ω七档量程最小分辨力μ Ω量程测量范围分辨力测试电流(可换向)准确度等级电流倍率200 μΩμ Ωμ Ω± 10A % 1/2 mΩΩμ Ω± 10A % 1/20 mΩΩ0. 1 μΩ±1A % 1/200 mΩΩ1μΩ±% 1/2ΩΩ10μΩ±% 1/20ΩΩ100μΩ± 1 mA % 1/200ΩΩ1mΩ±% 1/显示5? 荧光显示电源220V 供电功耗 25W尺寸(W)450 mm×(H) 150 mm×(D) 400mm温度补偿℃~℃重量7kg2.2 量程、测量范围、分辨力及基本误差产品在标准条件 (20 ±1℃) 下符合表 1 规定表 1 (温度补偿开关置断)量程测量范围分辨力测试电流基本误差200μΩμΩμΩ10A ±( %读数值 +3 字)2mΩΩμΩ10A ±( %读数值 +3 字)20mΩΩμΩ1A±( %读数值 +3 字)200mΩΩ1μΩ2ΩΩ10μΩ10mA±( %读数值 +3 字)20ΩΩ100μΩ1mA200ΩΩ 1 mΩmA ±( %读数值 +3 字)2.3 温度的影响产品在 (20 ± 5℃) 条件下,误差如表 2 所示表 2 (温度补偿开关置断)量程测量范围分辨力测试电流基本误差200μΩμΩμΩ10A ±( %读数值 +3 字)2mΩΩμΩ10A ±( %读数值 +3 字)20mΩΩμΩ1A ±( %读数值 +3 字)2mΩΩ1μΩ2ΩΩ10μΩ±( %读数值 +3 字)20ΩΩ100μΩ1mA200ΩΩ 1 mΩ如用 BZ3标准电阻进行现场标定,PC36c的精度可以大大提高2. 4温度附加误差产品在偏离 20±1℃的情况下工作,环境温度每变化多端 10℃所引起的附加误差应不超出基本误差值。
2. 5 倍功率的影响(×、×)产品在 (20 ± 5℃) 条件下,误差如表 2 所示表 2 (温度补偿开关置断)量程测量范围分辨力测试电流基本误差200μΩμΩμΩ10A ±( %读数值 +10 字)2mΩΩμΩ10A ±( %读数值 +10 字)20mΩΩμΩ1A ±( %读数值 +10 字)2mΩΩ1μΩ2ΩΩ10μΩ±( %读数值 +10 字)20ΩΩ100μΩ1mA200ΩΩ 1 mΩ2. 6极性、量程过载指示2. 6.1 在电阻测量时不显示极性2. 6.2 当输入电阻值超过仪表测量范围时仪表显示<LCE>2. 7 采样速度: 2~3 次 /s2. 8 消耗功率:≤ 30W2. 9 重量:≤ 7kg三、工作原理和特点本仪器是由 5 1/2 位,具有μ V 灵敏度的数字电压表和一个精密恒流源组成,如图1所示:I 0Hi~ 10A5 1/2 位数字电压表Rx (μ V 灵敏度)P L图 1由精密恒流源流出的电流I 0在被测电阻 R X产生一电压降,同时用 5 1/2 位数字电压表去测试这个电压降,其测量结果用电阻值反应出来。
因此该表可测试μΩ~200Ω的电阻。
四、使用说明4. 1产品外形本产品外形和前视图如图2,① --- 电阻测试仪置零按键②---VFD 荧光显示屏③--- 电阻测试仪测试量程选择④ --- 电流正反向开关⑤ --- 电阻测试仪测试和暂停按键⑥ --- 测试仪测试电流端、电桥电位端⑦ --- 倍功率选择开关⑧ --- 温度补偿开关图 2⑨---校验区⑩ ---电源开关(输入插座的 C1和 C2为恒流源的输出端;输入插座的P1和 P2为数字表的输入端)。
4.2使用方法4.2.1 接通电源之前,先按下测试 / 暂停按键。
再打开电源开关,电阻测试仪预热 10min 即可进行测量。
如电阻测试仪有读数时,按置零按键。
使读数为零。
4.2.2 仪器经过剧烈的环境条件变化或长期不使用,在首次使用时应通电3~4 小时。
4.2.3 在测量过程中应注意量程范围4.2.3.1 测量夹子的用法如图3,P1是电压高端, P2是电压低端, C1是电流高端,C2是电流低端。
按图 3 接好,然后接通仪器的电源,待面板上读数稳定后,显示的数据值就是 A、B 间被测电阻。
C1(电流端)P1(电位端)ABP2(电位端)C2(电流端)图 34.2.3.2 导线和导体的测法,建议用专用导线测试设备与PC36c配合在一起使用,基本原理如图 4,如测导线 A、B两点之间的电阻,恒流电源 I 0的方向是从 R的 C → A → B → D → C1 → P1 → P2 → C2,A、B 之间的压降即用电阻值来表示。
C1(电流端)P1(电位端)P2(电位端)C2(电流端)导线C A B D图 4从图中可看出电压段接触点要小,尤其在测试低阻值导线时更要注意,如图中的A、B 之间两点,电流段接触面要大、要紧,如图中的C、D 之间两点。
4.2.3.3 带电感的电阻测量(小电感,不宜测电力变压器、发电机、电动机等)。
接通仪器电源之前,将仪器测试导线与被测对象相连,如图 5 所示:带被电测感电图 5电阻(带电感)测试时注意事项① 选择相对应的量程;②按图 5 示意夹上夹子;③ 开电源,面板上数字闪烁,约几秒钟(时间根据电感大小)后,待面板上读数稳定后读取数值;④ 测试结束,先关电源等待几秒钟(时间根据电感大小)后,取下夹子:4.2.4 仪器作恒流源的用法将电位端P1、 P2 短路。
分别按下200μΩ、 2mΩ、 20mΩ、 200mΩ、 2Ω、 20Ω、 200Ω档时:200μΩ档,电流端 C1 、C2端可输出10A 电流2mΩ档,电流端 C1 、C2端可输出10A 电流20mΩ档,电流端 C1 、C2端可输出1A 电流200mΩ档,电流端 C1 、C2端可输出电流2Ω档,电流端 C1 、C2端可输出电流20Ω档,电流端 C1 、C2端可输出1mA 电流200Ω档,电流端 C1 、C2端可输出电流4.2.5正反向测试电流的用法在测量微欧姆电阻时,建议正向电流测量一次,记录测试结果。
再进行反向测试电流测量一次,记录测试结果。
两次数值的平均就是被测物的电阻值。
4.2.6倍功率测试电流的用法按照电线电缆国家标准,其中有一项倍功率对被测物的影响,众所周知P=I2 R半倍功率; I b=一倍功率; I p=使用倍功率时,本仪器的精度:%4.2.7温度补偿的用法按照电线电缆国家标准,其中有电阻率的数据是要折算到20℃这一点上。
一般用PC36c 对电线电缆测试的环境温度不再这一点上,本仪器为了方便使用特增加温度补偿开关,使用者可根据环境温度值,设置到PC36c的温度补偿开关温度值上,此时PC36c上的读数已经是转换到 20℃时的电阻值。
省去使用者计算。
使用温度补偿时,本仪器的精度:%五、维护和复核为了保证仪表的使用正确性,必须定期对它进行复核,维护和调节。
5.1复核所需设备:⑴%精度直流标准电阻一套(Ω、Ω、Ω、 1Ω、 10Ω、 100Ω)⑵ %精度直流电阻箱一台( 0~200Ω)C1( 电流端 )标P1( 电位端 )准电P2 (电位端)C2( 电流端 )图 6①按图 6 接法,依次在各档量程接上相应的标准电阻测量,如2mΩ档接Ω、 20mΩ档接Ω、 200mΩ档接Ω、 2Ω档接 1Ω、 20Ω档接 10Ω、 200Ω档接 100Ω。
要用直流电阻箱,测量范围是 10Ω、 20Ω依次到 200Ω。
标定方法:(按图 6 接法,接标准电阻 1Ω为例,依次类推)步骤量程按键测试/ 停止按键显示屏1 标定无2 888888 8888883 按下输入CAL4 输入内码5 2Ω档按下输入6 (左右)输入7弹出8 输入电阻实际值 , 如 0029 输入(完成,显示实测值)② 用微欧计专用电阻箱进行标定。
5.2维护和调节在用户不具备复核校对或用户复核值超出基本误差,生产厂家可免费为用户对产品进行复校维护和调节。
六、成套性6.1随同产品一起供应的技术文件有:6.1. 1产品合格证1份6.1. 2使用说明书1份6.2随同产品一起供应的附件有6.2.1 输入线 1 付6.2.2 电源线 1 根七、保用期仪器存放在环境温度为 0~ 40℃,相对湿度不大于 80%,空气不应含有腐蚀仪器的气体和有害杂质。
仪器和附件自制造厂发货日起12 个月内,当用户完遵守保管和使用规则的条件下,且原出厂封印仍完整,出现仪器不能正常工作现象,制造厂负责免费为用户修理乃至更换产品。
如属人为或自行拆机,均由用户负责,本公司酌情收取材料费和人工费。
注:在使用本产品前,请您仔细阅读该使用说明书,并请妥善保管,以备将来查阅。
仪器箱体变动恕不另行通知,本公司对使用说明书有最终解释权。
