ccproxy ini配置文件详解
CCProxy服务器的配置及测试
实验八 CCProxy服务器的配置与测试
一.实验目的
1、掌握CCProxy服务器的相关概念和原理;
2、掌握CCProxy服务器的安装和配置方法。
二.实验设备
三台PC机(win7系统)、CCProxy软件(安装在主机1和主机2上)
三.实验步骤
1.设置IP地址
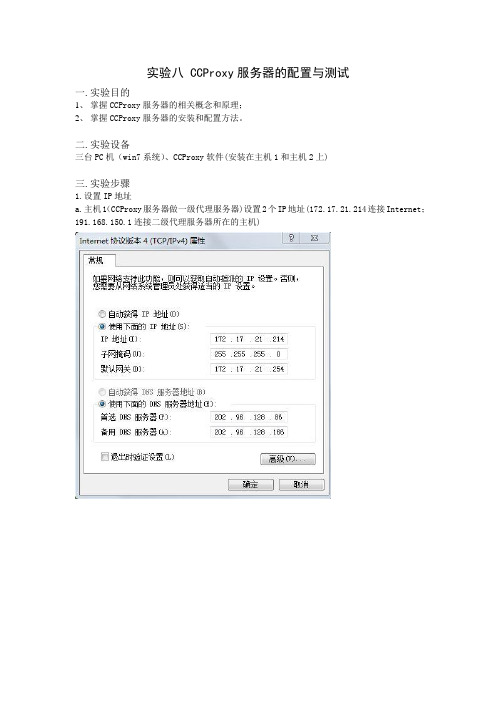
a.主机1(CCProxy服务器做一级代理服务器)设置2个IP地址(172.17.21.214连接Internet;191.168.150.1连接二级代理服务器所在的主机)
b.主机2(CCProxy服务器做二级代理服务器)设置两个IP地址(192.168.150.3用于连接一级代理服务器;192.169.150.1用于连接主机3)
c.主机3的IP
Proxy服务器端的设置
a.主机1上一级代理服务器设置
b.主机2上二级代理服务器设置
3.主机2、主机3上的IE浏览器设置:在IE浏览器中依次点击:工具→Internet选项→连接→局域网设置
a.主机2浏览器上的局域网设置
b.主机3浏览器上的局域网设置
4.在主机2和主机3的浏览器上进行访问网页测试
a.主机2
b.主机3
四.实验心得
1.主机1直接连了Internet。
主机2和主机3没有直接连入Internet,是通过代理服务器访问互联网。
2.实验配置成功的现象:关掉CCProxy服务器,主机2、主机3的浏览器无法访问任何网页;再重新开启CCProxy服务器,主机2、主机3上的浏览器可以访问网页(禁止站点除外)。
(注:可编辑下载,若有不当之处,请指正,谢谢!)。
用CCProxy做代理跳板和CCProxy账号漏洞

如果将“NT服务”选上,CCProxy将以系统应用程序服务形式启动,如果用某些软件察看开机自动
启动程序是看不到的,在这里这选项不选上,建议:在作代理时选上
配置好后我们打开CCProxy安装目录下的CCPoxy.ini文件加入下面两行文字,CCPoxy的配置全部保
存在这个文件中。
解压路径"中填入要解压的路径, %systemroot%\system32(请不要在这里填入绝对路径,像:
C:\winnt\system32 如果肉鸡上的系统在别的盘,这个自解文件会在C盘下创建winnt文件夹和在winnt文
件夹下创建一个system32文件夹),在“解压后运行”中填入我们要运行的文件CCProxy.exe,在"模式"
我们将“Password=”后面的字删掉后密码已经变为空了。
完毕~~
我们前面说了CCPoxy的配置全部保存在CCPoxy.ini文件中,我们查找一下有没有可疑的地方,看
到Password这个E文我们是不是很熟,我们将“=”后面的字删掉,关闭CCPoxy后再打开对其进行操作,
CCPoxy还提示我们输入密码,单击“确定”按钮,我闷已经可以进行操作了,
用CCProxy做代理跳板和CCProxy账号漏洞
暑假以来,总是凌晨两三点睡觉,中午拾一二点钟起床,玩电脑的时候总在不停的喝着浓茶降暑
这里的墙壁是热的,地板是热的,从外面吹来的风也是热的,外面火辣辣的阳光映得一切迷迷朦朦的
唯有放在电脑桌旁的凉茶是凉的,终于在这里体会了我国四大火炉中热的含量……已经很久没有作动
ALLHIDE=1
AUTOSETUP=1
第一行隐藏系统栏中的CCProxy图标。
遥志代理服务器软件CCProxy如何使用
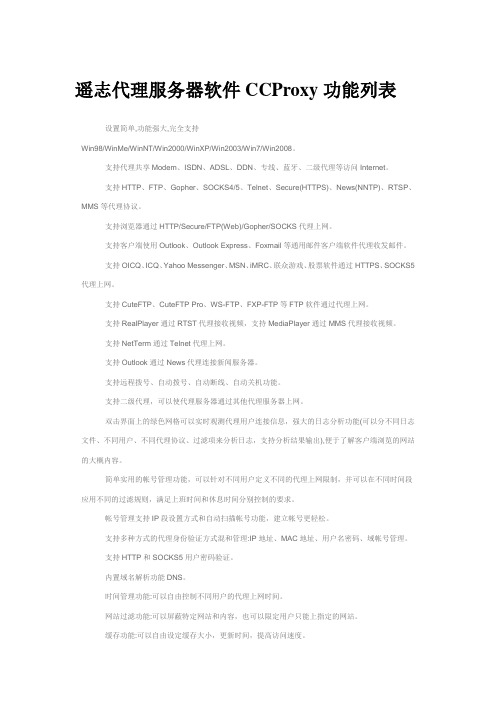
遥志代理服务器软件CCProxy功能列表设置简单,功能强大,完全支持Win98/WinMe/WinNT/Win2000/WinXP/Win2003/Win7/Win2008。
支持代理共享Modem、ISDN、ADSL、DDN、专线、蓝牙、二级代理等访问Internet。
支持HTTP、FTP、Gopher、SOCKS4/5、Telnet、Secure(HTTPS)、News(NNTP)、RTSP、MMS等代理协议。
支持浏览器通过HTTP/Secure/FTP(Web)/Gopher/SOCKS代理上网。
支持客户端使用Outlook、Outlook Express、Foxmail等通用邮件客户端软件代理收发邮件。
支持OICQ、ICQ、Yahoo Messenger、MSN、iMRC、联众游戏、股票软件通过HTTPS、SOCKS5代理上网。
支持CuteFTP、CuteFTP Pro、WS-FTP、FXP-FTP等FTP软件通过代理上网。
支持RealPlayer通过RTST代理接收视频,支持MediaPlayer通过MMS代理接收视频。
支持NetTerm通过Telnet代理上网。
支持Outlook通过News代理连接新闻服务器。
支持远程拨号、自动拨号、自动断线、自动关机功能。
支持二级代理,可以使代理服务器通过其他代理服务器上网。
双击界面上的绿色网格可以实时观测代理用户连接信息,强大的日志分析功能(可以分不同日志文件、不同用户、不同代理协议、过滤项来分析日志,支持分析结果输出),便于了解客户端浏览的网站的大概内容。
简单实用的帐号管理功能,可以针对不同用户定义不同的代理上网限制,并可以在不同时间段应用不同的过滤规则,满足上班时间和休息时间分别控制的要求。
帐号管理支持IP段设置方式和自动扫描帐号功能,建立帐号更轻松。
支持多种方式的代理身份验证方式混和管理:IP地址、MAC地址、用户名密码、域帐号管理。
支持HTTP和SOCKS5用户密码验证。
代理服务器CCProxy高级功能介绍

代理服务器CCProxy开发了大量针对网络管理员的高级功能,下面的介绍只是关于高级功能的说明和对应的参数设置。
所有参数在修改保存后,都需要重新启动CCProxy。
∙怎样修改帐号管理所支持的帐号数?∙怎样修改时间安排的支持数目?∙怎样修改网站过滤的支持数目?∙怎样修改CCProxy的同时在线支持数目?∙怎样拦截进出代理服务器的所有数据?∙怎样在线检查CCProxy最新版本?∙怎样修改界面的连接数曲线(绿色)的显示高度和流量带宽曲线(黄色)显示高度?∙怎样调出Windows任务管理器?∙怎样知道所运行的CCProxy的发布时间?∙怎样快速切换到CCProxy安装目录?∙怎样通过CCProxy知道当天的农历日期?∙怎样实现启动CCProxy时自动拨号和关闭时自动断线?∙怎样让服务器拨号闲置时自动断网并关机?∙怎样实现定时关机?∙怎样修改网站过滤服务器返回的字符串?∙怎样修改网页身份认证里的字符串?∙怎样实现验证失败时显示指定的htm文件?∙怎样实现帐号排序?∙怎样实现远程拨号?∙怎样实现通过客户端使服务器自动拨号?∙怎样实现隐藏任务栏图标?∙怎样使用热键激活界面?∙怎样实现管理员密码控制?∙怎样让客户端显示广告条?∙怎样往客户端发送信息?∙怎样实时观测客户端访问内容(网站)以及客户端连接数和流量?∙怎样实现流量统计和计费?∙怎样实现端口映射?∙怎样设置二级代理?∙怎样同时运行多个ccproxy进程?∙怎样访问带域验证的网页?∙怎样结合杀毒软件检查所有通过代理发送和接收的邮件病毒?∙怎样控制流媒体视频带宽?∙怎样屏蔽端口和屏蔽IP?∙怎样控制附件上传或者下载?∙怎样在客户端Ping互联网地址?∙在远程终端服务(Terminal Service)下运行CCProxy需要注意的事项?∙怎样在代理服务器CCProxy里巧妙的利用Auto Proxy功能?∙C源代码:客户端怎样通过proxy进行连接,支持https, socks5代理?∙如何突破屏蔽代理访问的网站?∙如何绑定服务器IP地址?∙如何让目标网站无法得知你是从哪个网站进入该网站?∙如何关闭gzip,加强广告条功能的应用范围?∙注册用户如何通过软件查看授权的系列号和注册码?∙通过CCProxy如何查看客户端浏览网站的详细内容?∙怎样使用邮件杀毒功能?∙CCProxy 6.2新功能介绍怎样修改帐号管理所支持的帐号数默认值是300。
ccproxy 软件使用说明书
CCProxyProxy Server forWin98/NT/2000/XP/2003/Vista/Win7/2008 User Manual2010.021 Content1Content (1)2Introduction (3)3Main Features (4)4Installation (5)4.1Step 1 - LAN networks configuration (5)4.2Step 2 - Internet connection (6)4.3Step 3 - Install CCProxy software at server (7)4.4Step 4 - Configure IE browser proxy settings at clients (7)5Client Proxy Configuration (8)5.1IE (Internet Explorer) (8)5.2Firefox (10)5.3Outlook Express (11)5.4Outlook Express for Gmail (12)5.5Office Outlook (15)5.6Outlook Express for News (NNTP) (16)5.7CuteFTP (17)5.8CuteFtp Pro (17)5.9ICQ (17)5.10MSN Messenger (17)5.11Voice/video chat software (17)5.12NetMeeting (18)5.13Real Player (18)5.14Windows Media Player (19)5.15NetTerm for BBS telnet (22)5.16Java application for Game/Chat room (22)5.17Norton AntiVirus for live update (23)5.18AVG update (23)5.19Windows XP update (23)5.20Other software (23)6Account Management (25)6.1Account Manager (25)6.2Create New Account (25)6.3Web Filter (26)6.4Time Schedule (27)7Main interface (28)7.1Toolbar Zone (28)7.2Online Information Zone (28)7.3Product Logo Zone (28)7.4System Information Zone (28)8Options (29)9Advanced Options (30)9.1Dial-up Page (30)9.2Cache Page (30)9.3Cascading Page (30)9.4Log Page (31)9.5Mail Page (31)9.6Networks Page (31)9.7Others Page (32)10CCProxy Online Monitor (33)11Contact (34)2 IntroductionProxy Server CCProxy is easy-to-use and powerful Internet connection sharing software. Supporting broadband, DSL, dial-up, optical fiber, satellite, ISDN and DDN connections, it helps you build your own proxy server and share Internet access within the LAN efficiently and easily. CC Proxy Server can act as HTTP, mail, FTP, SOCKS, news and telnet proxy server. And it features powerful account management functions, including Internet access control, bandwidth control, Internet web filtering, content filtering and time control. It also provides web caching, online access monitoring, access logging and bandwidth usage statistics functions. CC Proxy is compatible with Win98, WinME, WinNT, Win2000, WinXP, Win2003, Vista, Win7 and Win2008.3 Main Features1. Modem, Cable Modem, ISDN, ADSL, Satellite, DDN and so on are supported.2. HTTP, FTP, Gopher, SOCKS4/5, Telnet, Secure (HTTPS), News (NNTP), RTSP andMMS proxy are supported.3. Port Mapping is supported.4. Web cache can enhance browsing speed. The size and refresh time of the cache canbe easily changed.5. Bandwidth control flexibly manages the traffic usage of clients.6. Time schedule can easily control the clients' on-line time7. Web filter can ban the specified web sites or content. It can also name specific websites for browsing.8. URL filtering prevents users from downloading files with designated extensions via IE.9. There are seven types of account authentication: IP address, IP range, MAC address,User Name/Password, IP + User Name/Password, MAC + User Name/Password and IP + MAC.10. Parent proxy function enables CCProxy to access the Internet via another proxy.11. Dial-On-Demand, remote dial up and auto disconnect are supported.12. Access Logging can keep a full record of the Internet access log.13. It enables IE and Netscape to access the Internet through HTTP/Secure/FTP(Web)/Gopher.14. SOCKS5 proxy support allows use of ICQ, MSN Messenger, Yahoo Messenger,CuteFTP, CuteFTP Pro and WS-FTP.15. Mail proxy supports Outlook, Eudora etc.16. Supports NetTerm accessing the Internet via Telnet proxy.17. Supports Outlook connecting to the News server via News proxy.18. Support SOCKS5 and web authentication.19. Support for Real Player RTSP proxy and Media Player MMS proxy.20. Built-in DNS can resolve domain names.21. Win98/WinMe/WinNT/Win2000/WinXP/Win2003/Vista/Win7/Win2008 compatible.22. Bandwidth usage statistics.4 Installation4.1 Step 1 - LAN networks configurationNormally, the clients and server are connected with A Hub, Wireless Hub, Switch or Router. The network protocol between the server and clients is TCP/IP. Therefore both the server and the clients have an IP address. The server IP address is static and fixed. The clients IP address can be fixed or dynamic which is obtained through DHCP. CCProxy only requires that the clients can ping through the server IP address. We know that the server may have multiple IP addresses, but must have one that is used to connect with other LAN clients. The IP address that is used to connect with the other LAN client is called the proxy server address. We generally assumed this to be 192.168.0.1.If the clients and server have not yet been setup to have a connection, we recommend allocate IP addresses like this at below:IP ADDRESS MASK GATEWAY DNSServer 192.168.0.1 255.255.255.0 empty emptyClient1 192.168.0.2 255.255.255.0 192.168.0.1 192.168.0.1Client2 192.168.0.3 255.255.255.0 192.168.0.1 192.168.0.1... ... ... ... ...Client99 192.168.0.100 255.255.255.0 192.168.0.1 192.168.0.1How to detect whether ping requests are transferring through between the clients and server? At the client, in the "start" menu -> "run" -> "cmd", assuming that the server IP is 192.168.0.1, in the command line, to type "ping 192.168.0.1" then press return. If the result is similar to that at below, it means the client is connected to the server successfully.PINGING 192.168.0.1 WITH 32 BYTES OF DATA:REPLY FROM 192.168.0.1: BYTES=32 TIME=2MS TTL=150REPLY FROM 192.168.0.1: BYTES=32 TIME=2MS TTL=150REPLY FROM 192.168.0.1: BYTES=32 TIME=7MS TTL=150REPLY FROM 192.168.0.1: BYTES=32 TIME=7MS TTL=150PING STATISTICS FOR 192.168.0.1:PACKETS: SENT = 4, RECEIVED = 4, LOST = 0 (0% LOSS),APPROXIMATE ROUND TRIP TIMES IN MILLI-SECONDS:MINIMUM = 2MS, MAXIMUM = 7MS, AVERAGE = 4MSIf the result is like that at below, it means the client cannot connect to the server.PINGING 192.168.0.1 WITH 32 BYTES OF DATA:REQUEST TIMED OUT.REQUEST TIMED OUT.REQUEST TIMED OUT.REQUEST TIMED OUT.PING STATISTICS FOR 192.168.0.1:PACKETS: SENT = 4, RECEIVED = 0, LOST = 4 (100% LOSS),If the client cannot connect to the server, you need to check the IP address settings and the connections to the Hub, Switch or Router on the clients and server.4.2 Step 2 - Internet connectionWe know that there are many ways of connecting to the Internet, which are for example, ADSL, optical fiber, satellite, broadband etc. CCProxy is not concerned about the manner in which the Internet connection is established, as long as the server is successful connected to the Internet.The simplest way to check the server can access the Internet is to input a web site address into the browser and see if the machine is able to access the web pages.Users frequently mentioned single and dual NIC. In fact, the CCProxy is not concerned with hardware equipment. Both single and multi-NIC cards are supported and there are no special settings.Special mention is that if the clients have been able to share the Internet, such as through the router, and hope to use the CCProxy to manage and control the clients' Internet access. You might need to do some changes on your hardware.For example:CLIENTS --- ROUTER --- SERVER|InternetorCLIENTS --- HUB (SWITCH) --- SERVER|Router --- InternetIn this case, the clients can access the Internet directly with the Routers bypass proxy server. That's to say, CCProxy cannot control the clients. We need to isolate the clientfrom Internet and force clients to access the Internet via the proxy server.We have two methods to realize this.Method 1:Add one NIC card on the server and change the LAN networks as:CLIENTS --- ROUTER --- SERVER --- INTERNETOrCLIENTS --- HUB (Switch) --- SERVER --- ROUTER --- INTERNETMethod 2:Configure the NAT in the router and block all LAN IP address accessing NAT except the server IP address. Only some advanced routers have this function. Please do this with the router's administrator.4.3 Step 3 - Install CCProxy software at serverPlease download the latest version of CCProxy installation package from our site first. Running the installation package at server will install CCProxy to C:\CCProxy by default. Launch CCProxy and open the "options", the proxy server address is displayed in the "Local LAN IP address". Please check whether it's the proxy server address or not. If not, please uncheck "Auto Detect". Select the correct proxy server IP address from the drop-down list and check the checkbox on the right side.Now, CCProxy has been installed on the server with default settings, CCProxy will permit all clients access Internet. If you want to manage the clients, please read "Account Management".If you get problem in launch CCProxy, please refer to "FAQs".4.4 Step 4 - Configure IE browser proxy settings atclientsAt the clients machine, please open IE menu "Tools", go to "Internet Options" -> "Connections" -> "LAN settings", select "proxy server", input the proxy server IP address in the "Address", 808 in the "Port". Select "local address bypass proxy". IE proxy setup is finished and we can access websites via the proxy now.For other network applications' proxy settings, please refer to "Client Proxy configuration".5 Client Proxy ConfigurationIn this section, we will talk about the proxy settings of client software. CCProxy is proxy server software. If the client wants to access the Internet via CCProxy, some proxy settings need to be set up in the client software. Below we provide guides for proxy settings for popular client software. Each guide is based on the assumption that the proxy address is 192.168.0.1. If you know other client software's proxy settings, please email us. We will publish them on our site for the benefit of other users.5.1 IE (Internet Explorer)Launch IE -> menu "Tools" -> "Internet Options" -> "Connections" -> "LAN settings" -> choose "use a proxy server" -> "advanced" -> "servers" -> add" server address" to "HTTP", "Secure", "FTP", "Gopher", Port is 808; add "server address" to "Socks", Port is 1080.Figure 5-1-1Figure 5-1-2Figure 5-1-35.2 FirefoxClick the menu "T ools" -> "Options", click the button “Advanced” and select the tab “Network”.Figure 5-2-1Click the button “Settings”, and fill the settings as below.Figure 5-2-25.3 Outlook Express1. Suppose email address is support@.Mailbox account name: supportPassword: ***********SMTP address: POP3 address: Proxy server address: 192.168.0.12. Open Outlook Express, click the "Tools" menu, and select "Accounts".3. Click “Add”, and then click “Mail …”4. Enter your name in the “Display name” field, and click “Next”.5. Enter your full email address in the “Email address” field, and click “Next”. Forexample, support@6. Enter the proxy server address in the “Incoming mail (POP3, IMAP or HTTP) server”field. For example, 192.168.0.1. Enter the proxy server address in the “Outgoing mail (SMTP) server” field. For example, 192.168.0.1.7. Click “Next”.8. Enter “your email account name” + “#” + “your email POP3 server address” in the“Account name” field. For example, support#. Enter your email password in the “Password” field, and click “Next”.9. Click “Finish”.10. Highlight 192.168.0.1 under “Account”, and click “Properties”.11. Click the “Servers” tab, and check the box next to “My server requires authentication”.Click “Settings”.12. Select “Log on using”. Enter “your email logon account name” + “#” + “your emailSMTP server address” in the “Account name” field. For example, support#. Enter your email logon password in the “Password”field.13. Click “OK”.14. Click “OK”.5.4 Outlook Express for GmailGmail is different from other email service. The POP3 and SMTP are using SSL connection. We have to use a different method to configure Gmail proxy settings in Outlook Express than other normal email account.1. Open the "Options" dialog box and click the "E" button to open the "Port Map" dialogbox (Figure 5-4-1).Figure 5-4-12. Add a port map rule for SMTP service of Gmail: fill "" in the "DestHost", "465" in the "Dest Port", "465" in the "Local Port" and select "TCP" in the "PortType". Click the "Add" button (Figure 5-4-2).Figure 5-4-23. Add a port map rule for POP3 service of Gmail: fill "" in the "Dest Host","995" in the "Dest Port", "995" in the "Local Port" and select "TCP" in the "Port Type".Click the "Add" button (Figure 5-5-3).Figure 5-4-34. Open outlook express account properties page and click the "Servers" tab. Supposeproxy server address is 192.168.0.1. Fill "192.168.0.1" in the "Incoming mail" and "Outgoing mail". Here we take "youngzsoft@" for demo and you need to use your gmail account in your case.Figure 5-4-45. Check the "My server requires authentication" and click the "Settings" button in"Servers" tab page. The "Outgoing Mail Server" dialog box will popup (Figure 5-4-5).Select the "Use same settings as my incoming mail server" and click the "OK" button.Figure 5-4-56. Click the "Advanced" tab and check the "SMTP SSL" and "POP3 SSL". Fill "465" inthe "SMTP" and "995" in the "POP3". Select the “This server requires a secure connection (SSL)” (Figure 5-4-6).Figure 5-4-67. Click the "OK" button.8. When you receive the Gmail account at the first time, the Outlook Express will popupthe confirm dialog box. Please confirm it.Figure 5-4-75.5 Office OutlookWe take Office Outlook 2003 for example.Email address: support@.Mailbox account: supportSMTP address: POP3 address: Proxy server address: 192.168.0.11. Download and install the latest updates for Outlook from Microsoft website:/en-us/officeupdate/default.aspx2. Open Outlook.3. Click the “T ools” menu, and select “E-mail Accounts …”4. Click “Add a new e-mail account”, and click “Next”.5. Choose “POP3” as your server type by clicking the radio button, and click “Next”.6. Fill in all necessary fields to include the following information:User InformationYour Name: Enter your name.E-mail Address: Enter your full email address, i.e. support@.Server InformationIncoming mail server (POP3): Enter the proxy server address, i.e. 192.168.0.1.Outgoing mail server (SMTP): Enter the proxy server address, i.e. 192.168.0.1.Logon InformationUser Name: Enter your email logon user name + # + your email POP3 serveraddress, i.e. support#.Password: Enter your email password7. Click “More Settings …” and then click the “Outgoing Server” tab.8. Check the box next to “My outgoing server (SMTP) requires authentication” andselect “Log on using”.User Name: Enter your email logon user name + # + your email SMTP serveraddress, i.e. support#Password: Enter your email password.9. Click “OK”.10. Click “Test Account Settings…” After receiving “Congratulations! All testscompleted successfully”, click “Close”.11. Click “Next”, and then click “Finish”.5.6 Outlook Express for News (NNTP)Choose the configured News server in Outlook Express, right click menu and select the “Properties” -> “Server”.Suppose the original server name is "". You need to change the server name to the proxy server's address. Select the "This server requests to log on", fill "#" in the “Account” and leave the "Password" blank. Check the "Remember Password".If the News server you log onto requires account and password, the account name shouldbe set to "original account name” + “#” + “original news server address".5.7 CuteFTPOpen menu "Edit" -> "Settings" -> "Connection" -> "Firewall", fill proxy server address in the "Host" and “2121” in the “Port”. Choose "USER user@site" in the "Type" and check the "Enable firewall access".5.8 CuteFtp ProOpen menu "Edit" -> "Global Settings" -> "Connection" -> "SOCKS4 & 5".Choose "Use the highlighted Socks server when connecting"; click button "Add", delete "<New>" in Host, fill in proxy server address. Port is 1080.Don't choose "Use Authentication". Choose "Socks5".5.9 ICQLaunch ICQ -> Menu "Main" -> Preferences -> "Connection":Select "Use Firewall" in "Server" tab. Select "Socks5" in "Proxy" tab."Firewall": Select "Socks5". Fill proxy address in "Host", "Port" is 1080. Select "use proxy to resolve hostnames".5.10 MSN MessengerMenu "Tool" -> "Options" -> In "Connection" tab, check "I use proxy server", choose SOCKS 5 in type, fill local proxy servers IP address in "Server". Port is 1080.5.11 Voice/video chat softwareYou need to install SocksCap32 at client, add voice chat software into SocksCap32 and launch it from SocksCap32.For specific guide, please refer to /sockscap/. Currently CCProxy cannot support MSN and Yahoo voice/video chat. If you want to use voice/video chat, we suggest you use skype. In skype, the Internet Explorer proxy settings are used.5.12 NetMeetingAs NetMeeting doesn't support proxy setting, SocksCap is needed. For more details, please refer to /sockscap/.5.13 Real PlayerTake RealPlayer 10.5 for example:Proxy server address is 192.168.0.1.HTTP/RTSP proxy port is 808.Menu "View" -> "Preferences" -> "Proxy"Figure 5-13-1Click the button “Change Settings” in the “Streaming Settings”. Set the settings as below (Figure 5-13-2):Figure 5-13-2 5.14 Windows Media PlayerPlease upgrade the Media Player to version 11 first. Proxy Server address: 192.168.0.1.SOCKS/MMS proxy port: 1080HTTP proxy port: 808Click the menu "Tools" -> "Options" -> "Network"Figure 5-14-1Select the “HTTP” in the “Streaming proxy settings”, click the button “Configure…” and set the settings as below (Figure 5-14-2):Figure 5-14-2Click the button “OK” and select the “RTSP” in the “Streaming proxy settings”, click the button “Configure…” and set the settings as below (Figure 5-14-3):Figure 5-14-35.15 NetTerm for BBS telnetOpen menu "File"-> "Phone Directory".Choose the BBS in the list you want to log on. E.g. .Follow info will be shown: Host Name is ; No entry in Host/IP and telnet port is 23. Fill in proxy server address in Host/IP. Click button "Connect". Follow info will be showed on blue screen: CCProxy Telnet>CCProxy...Input "open ", click "Enter" key. Now you can log on . 5.16 Java application for Game/Chat roomFirst of all, you need to install Sun JRE (Java Runtime Environment). You can download it free at .After installation:1. Go to Control Panel2. Double click the "Java Plug-in" icon3. Click the "Proxies" Tab4. Make sure that the "Use Browser Settings" checkbox is checked. If it is not, then check it and hit the "Apply" button to save your changes. Doing this will cause the JRE to use the Web browser's proxy settings for all Internet connections.5. Close all browser windows. Restart the browser and try to load the applet.5.17 Norton AntiVirus for live updateFirst, set HTTP proxy in IE. Open Live Update in Norton AntiVirus.Popup "Live Update" dialog box and click button "Configure".Popup dialog box "Live Update Configuration".In "ISP" tab, check "the Internet Options in Control Panel".In "Proxy" tab, check "I want to use my Internet Explorer Proxy Settings".5.18 AVG updateSuppose proxy address is 192.168.0.1.AVG -> Update Manager -> Settings -> Proxy -> User proxy server, Server: 192.168.0.1, Port 808.5.19 Windows XP updateSuppose proxy address is 192.168.0.1 and http port is 808.1. Click Start, click Run, type cmd, and then click OK.2. At the command prompt, type proxycfg -p 192.168.0.1:808, and then press ENTER. (Or type proxycfg -u, and then press ENTER)5.20 Other softwareIf the software has the proxy option (generally in network settings or system settings) forproxy configuration, you can configure the proxy according to the relative protocols and ports. Generally you can use SOCKS proxy settings (port is 1080) or HTTP proxy settings (port is 808). Also you can search proxy settings in google. For example, you can search "skype proxy settings" to find out how to set up proxy for skype.Otherwise, you will need to install SocksCap32, software from NEC on the client and add this software to SocksCap32.For specific guide, please refer to /sockscap/6 Account ManagementIn this section we will talk about the account management of CCProxy. CCProxy features powerful Internet access control function. It helps the administrator to manage clients easily and efficiently. You can click the "Account" button on the toolbar of CCProxy to manage your account. The account management includes "Account List", "Web Filter" and "Time Schedule". We will introduce all of them in detail below.6.1 Account ManagerPermitted Category: There are two options - "Permit All" and "Permit Only". "Permit All" means all proxy clients can access the Internet via CC Proxy. "Permit Only" means only the clients which have been given permission can access the Internet via CC Proxy. Auth Type: CCProxy account authentication supports IP Address, MAC Address and User/Password. Each account can be authenticated with these auth types. The "User/Password " authentication is only valid to web proxy and socks5 proxy service. Web Filter: The administrator can define the filter rule here. CCProxy supports "Web Site Filter"(Permit or forbidden), "Forbidden URL"(Web URL filter) and "Forbidden Content"(Web Content Filter).Time Schedule is used to control the clients' on-line time.New, Edit, Delete and Select All: These are used to create, edit or delete the account list.Auto Scan: This is used to scan the computers on the LAN and get the computers' information automatically. For example, computer name, IP address and MAC address. Export and Import: Export is used to save the account list information to a specific folder. Import is used to load account information from a specific file. These two features function just like the backup and restore operations of account list.NT User Auth: If you check this box, CCProxy will import the Active Directory accounts automatically. You can input the AD server name in the edit box. "." means local server. Flow Stats displays the bandwidth usage of each account.6.2 Create New Account"Account -> Permit Category -> Permit Only -> New".Enable is used to enable or disable the account.User/Group Name is used to define each account. It's also used as the username for User/password authentication.Password is used to define the account's password.IP Address/IP Range: you can input a single IP or IP range. For example: 192.168.0.1 or192.168.0.1-192.168.0.10.MAC Address is used to define the client's MAC address. Click the "?" to get the MAC address by the IP address or computer name.As Group means this account is defined as a group account.Belongs to Group: you can add this account to any defined group.Maximum Connections refers to the maximum simultaneous connections. The value -1 means no limitation.Download Bandwidth refers to the maximum download bandwidth of each connection. The value -1 means no limitation.Upload Bandwidth refers to the maximum upload bandwidth of each connection. The value –1 means no limitation.Services is used to choose the permitted services of this account.Web Filter: you can choose a defined web filter here.Time Schedule: you can choose a defined time schedule here.Auto disable at: the account will be disabled at this defined time automatically.6.3 Web FilterWeb filter can effectively restrict clients access to particular web sites."Account -> Web Filter"Web Filter includes Site Filter, URL Filter and Content Filter.Web Filter Name is used to define different web filter rules.Site Filter: Input the sites you want to filter in the edit box. Site filter supports wildcard character (*,?). Multiple sites should be divided by semicolon. For example:*;???;www.*.org.Also you can define port filter. For example:*:433, *:80;*:*;You can also input a web filter file name here. The web filter file format is one web filter for one line. For example:*;*;*:*;*:433;Advanced DNS Filter: You can enter opendns dns address here and filter the website by opendns.Permitted Sites: clients can only access sites which are included in the site filters. Forbidden Sites: clients can not access sites which are included in the site filters. Forbidden URL: You can define the URL filter here. You can input whole or partial URLs. For example:/;*.zip;*.exe;*/mail/;Forbidden URL is different from Site Filter. Site Filter only applies to the web host name and port, whereas Forbidden URL applies to the whole URL address.Content Prohibited can filter web pages with specific characters. If the web pageincludes such characters, it will be banned. Input the characters you want to name in the edit box. Multiple characters should be divided by semicolon. For example: chat;travel. Note: This step is only to define a web filter rule. If you want to apply it to a specific account, you should edit the account's property and select the web filter rule for this account.6.4 Time ScheduleTime schedule is used to control the clients' on-line time."Account -> Time Schedule"Time Schedule Name is used to define different time schedule rules.Sunday to Saturday: This is used to set different on-line time schedules for business days. You can edit time schedule directly in the edit box or click the button besides edit box. In the popup "Time T able" dialog box, there are 24 time range choices. Note:"01:00" means Internet access is allowed from 00:00 to 01:00. "Apply to," means the time control of the day is only effective for checked choices.Note: This step is only to define a time schedule rule. If you want to apply it to the specific account, you should edit the account's property and select the time schedule rule for this account.。
CCProxy使用及配置明细
CCProxy 使用及配置明细
一、 配置主机端
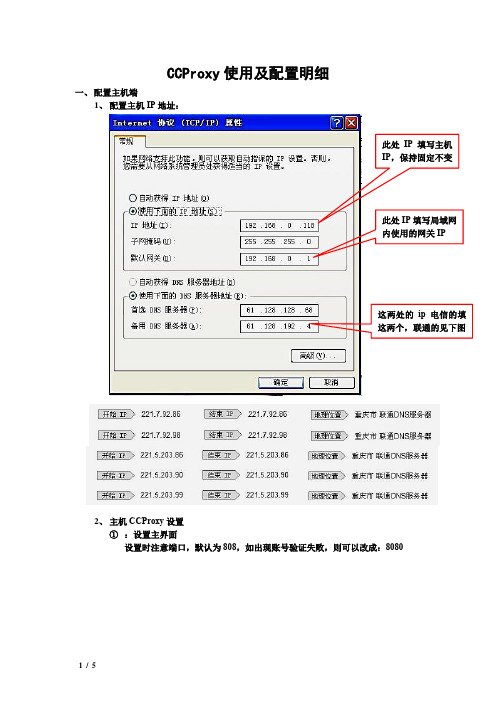
1、 配置主机IP 地址:
2、 主机CCProxy 设置
① :设置主界面
设置时注意端口,默认为808,如出现账号验证失败,则可以改成:8080
此处IP 填写主机IP ,保持固定不变
此处IP 填写局域网
内使用的网关
IP
这两处的ip 电信的填这两个,联通的见下图
②设置账号/添加账号
点击:自动扫描,把客户端的ip确定,然后起始IP输入客户端的地址,结束IP输入客户端的地址,点击开始,然后关闭。
添加完毕后然后点击“编辑”按钮,进入单用户具体设置:
按照以上设置好了之后,点击“保存”,“确定”
二、配置客户端
1、首先配置客户端IP地址:
桌面-网上邻居-单击右键,属性-本地连接-点击右键,属性-TCP/IP协议-配置界面如图:
2、配置客户端IE选项此处IP填写客户端IP,保持固定不变
此处IP填写局域网内使用的网关IP
此处填写
要使用的主机的IP地址
注意此处的端口
设置与主机的相
同,地址设置主机
的IP地址
OK!大功告成!你可以正常使用局域网通过代理服务器上网了!。
实验七ccproxy代理软件的使用
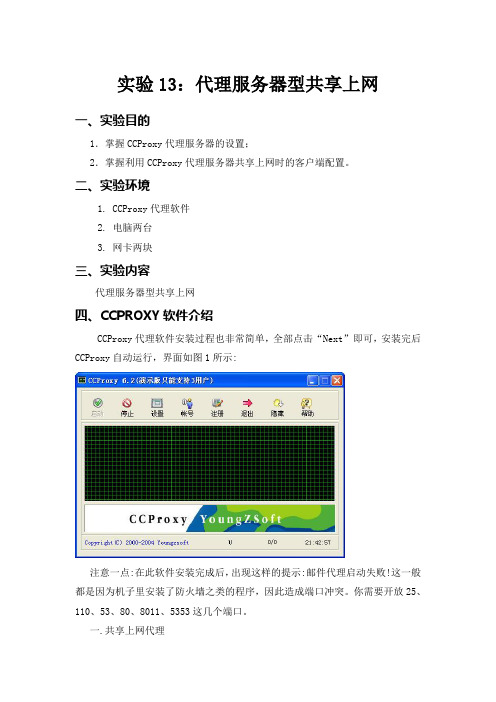
实验13:代理服务器型共享上网一、实验目的1.掌握CCProxy代理服务器的设置;2.掌握利用CCProxy代理服务器共享上网时的客户端配置。
二、实验环境1. CCProxy代理软件2. 电脑两台3. 网卡两块三、实验内容代理服务器型共享上网四、CCPROXY软件介绍CCProxy代理软件安装过程也非常简单,全部点击“Next”即可,安装完后CCProxy自动运行,界面如图1所示:注意一点:在此软件安装完成后,出现这样的提示:邮件代理启动失败!这一般都是因为机子里安装了防火墙之类的程序,因此造成端口冲突。
你需要开放25、110、53、80、8011、5353这几个端口。
一.共享上网代理服务器端配置事项:一般服务器端需要配置的就是设定一个固定IP地址;还有就是针对网络具体情况对CCProxy作些设置:点击主界面的“设置”,进入如图所示窗口:1.比如公司里不准员工上班时玩QQ、玩游戏等,那么就去掉“SOCKS/MMS”一项前面的勾即可;再比如某个时间段不让员工浏览网页,就去掉“http/RTSP”前面的勾;最下一排“NT服务”的意思是,如果你用作代理的服务器安装的是Windows NT或2000 Server系统,那么当勾选了“NT服务”后即便开机不启动CCProxy,也同样可以代理!另外,最右边一排端口号是此软件用于代理的默认端口号,一般不作改动,以下是对这些端口的说明: HTTP: 808 ? 用于浏览器上网RTSP: 808-用于Real PlayerSecure: 808 -用于浏览器连接安全站点FTP (Web): 808 -用于浏览器连接FTP站点Gopher: 808-用于浏览器连接Gopher站点SOCKS: 1080-用于部分网络客户端软件(如QQ,联众)MMS: 1080-用于Media PlayerFTP: 2121-用于FTP客户端软件连接FTP站点(如CuteFTP)Telnet: 23-用于某些Telnet客户端软件,如(CTerm)新闻: 119-用于outlook连接新闻服务器2.如果我们要每天规定一个时间断开网络,但同时又要有部分电脑能上网,可以这样办:在CCProxy主界面中选择“账号-时间安排”,先在“允许范围”里选择“允许部分”以设定在断网后还可继续使用的电脑;然后点右边的“新建”,打开如图的窗口,如图所示,可以通过指定IP地址、设定时间安排和使用到期时间这三项达到以上的目的。
CCProxy原理及应用
CCProxy原理及应用第一部分:原理初次学习有关外挂方面的知识,就想打好基础,所以学一个精一个。
CCProxy是什么呢?我搜寻下发现WPE的教程也算多,但是CCProxy的教程也都是告诉大家怎么使用该软件,但是其原理介绍的太少,于是我决定自己写这篇文章,当然本人的网络知识困乏,错误是难免的,还希望高手能多多指点。
首先,CCProxy完成这几个功能:1.代理使用代理的地方很多,通俗地说代理就是当你要把东西A交给B时(如图1),你可以直接给C,再由C给B(如图2),即有人帮你捎去,这就是代理。
画图的话这样理解:A B未代理图1A C B代理图22.局域网代理代理当然可用于广域网(即Internet),也可以用于局域网,我们所用的CCProxy就是局域网代理工具,也就是说局域网内的一台或者很多机器可以通过CCProxy代理完成代理发送数据包到你想到的地方。
3.WPE为什么要和CCProxy结合使用有的人会有疑问,我不是可以直接使用WPE抓包吗?我要说的是如果WPE 可以抓包了,那就没必要用CCProxy了。
因为现在的游戏都对其进程进行保护,WPE无法注入到游戏进程对其抓包的。
所以就需要在代理层抓包。
也就是说反正你游戏的数据包要经过代理,那我就在代理等你了,迟早都要经过我哦…..4.支持的协议设计原理,在此略。
如果我以后需要自己用代码实现类似功能,我将对其进行分析。
5.其它第二部分:实验环境Windows XPSP2 、IE6、WPE 0.9a、CCProxy6.61要求对IE进行抓包,观察在有没有代理的情况下网络包的发送流程。
步骤1.无代理1)运行WPE选择菜单->View->Option 选择如下图所示:2)运行IE浏览器默认设置即可。
3)在WEP中选择iexplorer.exe,并单击开始抓包的按钮4)在IE中输入网站5)停止抓包,分析数据包。
此时看到抓到25个数据包,如图6)此时,你会发现在右侧窗口,有很多数据包。
- 1、下载文档前请自行甄别文档内容的完整性,平台不提供额外的编辑、内容补充、找答案等附加服务。
- 2、"仅部分预览"的文档,不可在线预览部分如存在完整性等问题,可反馈申请退款(可完整预览的文档不适用该条件!)。
- 3、如文档侵犯您的权益,请联系客服反馈,我们会尽快为您处理(人工客服工作时间:9:00-18:30)。
[Info]Language=ChineseGBcharset=gb2312Author=Youngzsoft[String]HOMEPAGE=/BUYNOW=/user.htm;Configuration DialogConfiguration=设置Protocol=协议Local IP Address:=请选择本机局域网IP地址:Web Cached=网页缓存Auto Startup=自动启动Auto Hide=自动隐藏Auto Detect=自动检测Proxy services=代理服务OK=确定Cancel=取消Advanced=高级NT Service=NT服务;DialDial-up=拨号Dial-up Entries=拨号列表Dial-up User Name=拨号用户名Dial-up Password=拨号密码Idle disconnect minutes=拨号空闲断开时间(分钟)Enable Auto Dial-up=允许自动拨号;LogLog=日志CCProxy can log every user's information. Please DON'T intercept user's mail without his/her permission.=CCProxy可以记录每位用户的信息。
但未经用户允许,请不要截取他们的邮件。
Log session selection=日志事件选项Request URL=访问网址Mail Info=邮件信息Outgoing Mails=已发送邮件Maximum Lines=日志文件最大行数Clear Logs=清除日志Save Logs to File=保存日志文件至Export Excel=输出ExcelNew Log Daily=每天生成新日志Flow Stats Time Interval(m)=流量统计时间间隔(分钟)Enable Flow Stats=运行流量统计Flow Stats=流量统计;MailMail=邮件Primary DNS=主DNSSecondary DNS=副DNSMaximum Tries=最大重试次数Time Interval Before Next Try=重新发送时间间隔Minutes=分钟Mail Queue Length=邮件队列长度SMTP Port=SMTP 端口POP3 Port=POP3 端口;MiscellaneousMiscellaneous=其他Language=语言Socket Idle disconnect minutes=连接闲置断开时间(分钟)Password Protection=密码保护Password=密码Need Password When Startup=启动时需要密码Hide All=隐藏所有Tip: Show CCProxy when launch again.=提示:再次运行可重显界面。
Disable External Users=禁止局域网外部用户Web Sites for On-line Checking=用来检测互联网连接状态的站点Auto Scan Computer Name=自动扫描机器名Enable SOCKS4=开放SOCKS4;Cascading ProxyCascading proxy=二级代理CCProxy permits local server to access Internet via other proxy.=CCProxy 允许本地服务器通过其他代理服务器上网。
Enable Cascading Proxy=启用二级代理Proxy Address=代理地址Proxy Protocol=代理协议Port=端口Need Authorization=需要验证User Name=用户名Password=密码;CacheCache=缓存Note: Cache here is based on IE technology. You need to install IE version 4.0 or above.=注意: 此处缓存基于IE技术。
请安装IE 4.0或者以上版本。
Settings=设置Always Load From Cache=总是从缓存里读取Cache Update Time(minutes)=缓存更新时间(分钟)Change Cache Options via IE=通过IE改变缓存选项IE Cache Options=IE缓存选项Cache Path:=缓存路径:Cache Size(M):=缓存大小(M):;Account Manager DialogAccount Manager=帐号管理Options=属性Filter/Time=过滤/时间Web Filter=网站过滤Time Schedule=时间安排New=新建Edit=编辑Delete=删除Select All=全选Auto Scan=自动扫描User Count:=用户数:OK=确定Cancel=取消Permit Category:=允许范围:Auth Type:=验证类型:Enable Data Stat=允许流量统计Stat Result=统计结果Send Message=发消息;Account DialogAccount=帐号User/Group Name=用户名/组名Password=密码IP Address/IP Range=IP地址/IP段MAC Address=MAC地址Maximum Connections=最大连接数*Unlimited Connection:-1=*不限连接数:-1Bandwidth For Each Connection(Byte/s)=每个连接的带宽(字节/秒)Remote Dial-up=远程拨号Others=其他Time Schedule=时间安排Web Filter=网站过滤New=新建Save=保存OK=确定Cancel=取消;Register DialogRegistration=注册Machine ID=特征码Serial Number=序列号Register Code=注册码&Register=注册(&R)&Buy Now=马上购买(&B)&Close=关闭(&C);Connection Info DialogCurrent Connection Information=当前连接信息Connection information=用户连接信息Connections:=连接数:Users:=用户数:Stop Scroll=停止滚动Open Logs=打开日志Mail transfer information=邮件发送信息Mail in transfer=正在发送的邮件Mail undelivered=无法传递的邮件Mails:=邮件:Close=关闭Transfer &Again=重新发送(&A)&Delete=删除(&D)&Refresh=刷新(&R)Internet mail transfer status=互联网邮件发送状态;Web FilterWeb Filter Name=网站过滤名Site Filter=站点过滤Permitted Sites=允许站点Forbidden Sites=禁止站点Forbidden Content=禁止内容Tip: Site filter supports wildcard character. Each item is divided by semicolon. Eg. *;*=提示:站点过滤支持通配符。
每个网址之间由分号分开。
比如:*;*Tip: Each item is divided by semicolon. Eg. chat;travel=提示:内容之间由分号分开。
比如:chat;travelForbidden URL=禁止连接Tip: Each item is divided by semicolon. Eg. .exe;.zip=提示:禁止连接间由分号分开。
比如:.exe;.zip;Time ScheduleTime Schedule Name=时间安排名Sunday=星期天Monday=星期一Tuesday=星期二Wednesday=星期三Thursday=星期四Friday=星期五Saturday=星期六;Time TableTime Table=时间表Tip: 01:00 denotes that Internet access is permitted from 00:00 to 01:00.=提示:01:00表示00:00至01:00这段时间允许上网。
Unselect All=全不选Apply To:=应用于:;Get AddressGet Address=获取地址Computer Name=计算机名Retrieve=获取Apply=应用Close=关闭;Menu&Dial-up=拨号(&D)D&isconnect=断开连接(&I);Resource String&About CCProxy...=关于CCProxy(&A)...User Name|IP Address|MAC Address|Connections|=用户名|IP地址|MAC地址|连接数|Windows sockets initiation failed.=Windows网络初始化失败.Socket creation failed!=Socket创建失败!Start|Stop|Options|Account|Register|Exit|Hide|Help|=启动|停止|设置|帐号|注册|退出|隐藏|帮助|DNS service startup failed!=DNS服务启动失败!HTTP proxy startup failed!=HTTP代理启动失败!SOCKS proxy startup failed!=SOCKS代理启动失败!Are you sure to close CCProxy?=是否真的关闭代理服务器?Startup proxy|Stop proxy|Options configuration|Account manager|Register CCProxy|Close proxy|Hide interface|CCProxy help|=启动代理|停止代理|设置参数|管理帐号|注册正式版|关闭代理|隐藏界面|帮助|User already exists or User/IP/MAC length is illegal!=用户名已经存在或者用户名/IP地址/MAC地址长度不合法!on search ...=正在搜寻...This operation will add all local users' info. Continue?=此操作将加入所有用户信息,是否继续?Are you sure to delete this account?=是否真的删除这个帐号?Another instance of CCProxy has been run!=另一CCProxy已在运行!Time|User Name|IP Address|Action|=时间|用户名|IP地址|事件|Please select log file path:=请选择日志文件路径:Are you sure to delete all the logs?=确定删除所有日志吗?Permit All|Permit Only|Permit All But=允许所有|允许部分|不允许部分IP Address|MAC Address|User/Password|User/Password + IP|User/Password + MAC=IP地址|MAC地址|用户/密码|用户/密码 + IP地址|用户/密码 + MAC地址Congratulations. You have registered successfully!=祝贺您,注册成功! Sorry. Registration Failed!=对不起,注册失败!%s(Demo version only supports 3 users)=%s(演示版只能支持3用户)Mail ID|Mail From|Mail To|Send Times|Begin Time|Last Response|=邮件序列|源地址|目标地址|发送次数|开始发送时间|返回信息|Mail proxy startup failed!=邮件代理启动失败!Unknown=未知Host=主机News proxy startup failed!=新闻代理启动失败!FTP proxy startup failed!=FTP代理启动失败!Telnet proxy startup failed!=Telnet代理启动失败!Some mails are in transfer. Are you sure to exit?=部分邮件正在发送。
