Simplify3D快速使用指南 Fprinter S2+
Simplify3D快速使用指南

B. Smart 300
? Smart300h dual(right extruder) ? smart300( 双喷头 ,带加热板 )右喷头打印实体 ? Smart300h dual(left extruder) ? smart300( 双喷头 ,带加热板 )左喷头打印实体 ? Smart300h dual(both extruder) ? smart300 双头打印,左喷头打可溶性支撑 HIPS ,右喷头打印实体材料 PLA ? Smart300 dual(right extruder) ? smart300( 双喷头,但底板没有加热功能 ),右喷头打印实体 ? Smart300 dual(left extruder) ? smart300( 双喷头,但底板没有加热功能 ),左喷头打印实体
安装过程: Step 1:
Step 2:
Step 3:选择安装目录
Step 4:
Step 5:完成安装
(3)启动软件:双击Simplify3D软件图标
(4)激活软件
直接输入验证码 (在simplify3D 官网购买软件后会收到软件激活码 )
2. 文件配置
(1)选择打印机类型:选择 “other”
C. Super 300
? Super300h dual(right extruder) ? Super300( 双喷头 ,带加热板 )右喷头打印实体 ? Super300h dual(left extruder) ? Super300( 双喷头 ,带加热板 )左喷头打印实体 ? Super300h dual(both extruder) ? Super300 双头打印,左喷头打可溶性支撑 HIPS,右喷头打印实体材料 PLA ? Super300 dual(right extruder) ? super300( 双喷头,但底板没有加热功能 ),右喷头打印实体 ? Super300 dual(left extruder) ? super300( 双喷头,但底板没有加热功能 ),左喷头打印实体
3d打印机的一般使用流程

3D打印机的一般使用流程1. 准备工作在使用3D打印机之前,需要进行一系列的准备工作来确保正常的操作和成功的打印结果。
1.1 选择适当的3D打印机在市场上有各种不同类型和规格的3D打印机可供选择。
根据打印需求和预算来选择适合的3D打印机。
1.2 安装和配置3D打印机根据3D打印机的用户手册,进行正确的安装和配置。
包括将打印机连接至电源和计算机,安装打印机驱动程序和相关软件等。
1.3 准备3D模型文件选择或设计合适的3D模型文件。
可以使用计算机辅助设计(CAD)软件创建自定义模型,也可以从在线3D模型库下载现有模型。
2. 开始打印一旦准备工作完成,即可开始进行3D打印。
以下是一般的打印流程:2.1 导入模型文件使用3D打印软件(例如Cura、Slicer等)打开或导入准备好的3D模型文件。
在软件中可以对模型进行缩放、旋转和调整。
2.2 设置打印参数在3D打印软件中,用户可以设置一些重要的参数,包括打印质量、填充密度、打印速度等。
这些参数会影响打印结果的质量和时间。
2.3 确定打印材料根据打印需求选择适当的打印材料。
常见的材料包括PLA、ABS、PETG等。
确保使用正确的打印材料类型和参数设置。
2.4 加载打印材料将选择的打印材料加载到3D打印机的打印材料槽中。
根据打印机型号,可能需要先将打印材料加热至合适的温度。
2.5 打印预览和调整在3D打印软件中,可以进行打印预览,查看模型的图层和路径。
如果需要,可以对模型进行调整,以确保最佳的打印效果。
2.6 开始打印确认所有设置都已完成后,可以通过软件或打印机界面启动打印。
打印过程中,需要确保打印机的正常运行,并且遵循相关安全规则。
3. 后续处理在3D打印完成后,仍然需要进行一些后续处理工作,以获得最终的打印结果。
3.1 取出打印模型当打印完成后,小心地将打印模型从打印床上取出。
根据需要,可以使用工具(例如镊子)来帮助取出模型。
3.2 去除支撑结构大部分情况下,3D打印模型都需要附加支撑结构来确保打印质量。
Form 2 桌面SLA 3D 打印机简介说明书
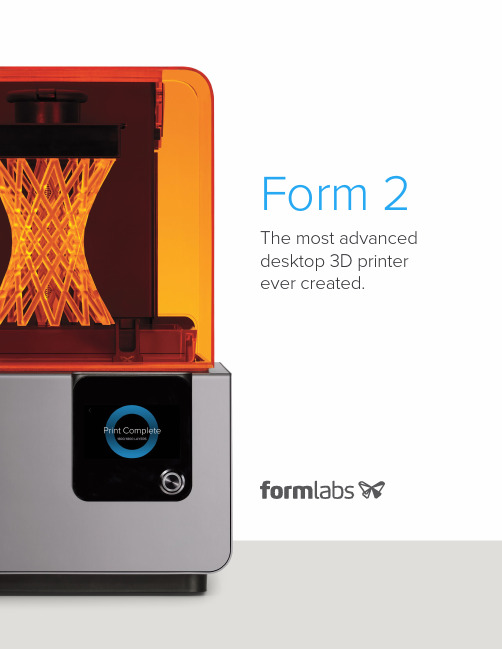
Form 2 The most advanced desktop 3D printer ever created.Powerful Printer. Amazing Ecosystem.The Form 2 comes standard with one liter of resin, Preform Software, finishing tools,and a one-year warranty. Set up is so simple, you’ll be printing in 15 minutes.Easy FinishingOur redesigned Finish Kit simplifies the post-print process, makingfinishing your parts quick and easy.Advanced MaterialsOur library of Standard and Functional Resins has been designed to work with the Form 2 to deliver beautiful results.Desktop StereolithographyThe Form 2 delivers professional quality parts right from your desktop.Intuitive SoftwarePreform makes printing simple. With one click, you can prepare your model and upload your project over Wi-Fi.What’s New?See what makes the Form 2 the most advanced desktop 3D printer ever created.Redesigned Print ProcessA new peel mechanism and heated resin tank create a reliable print process.Touch Screen + Wi-FiEasily send prints over Wi-Fi, reprint previous jobs, and manage your print queue.Materials LibraryOur resin cartridges are easy to store and swap out, giving you more flexibility and less mess.Bigger, Better PrintsWith a 40% bigger build volume, and a 50% more powerful laser, the Form 2 is capable of large prints with spectacular detail.Automated Resin SystemThe Form 2 automatically dispenses material from the resin cartridge based on the size of your prints. Print big parts without pausing for refills.Expect very high-quality 3D prints with excellent detail from the Form 2."— Richard Baguley, T om’s Guide"The Desktop AdvantageAchieve excellent results faster by harnessing the power of desktop printing.SERVICE BUREAU FORM 2INDUSTRIAL SLA TURNAROUND TIME 1 – 2 weeks Hours < 24hrs UPFRONT COST$0$3499$60K – $300K ROOK PRINT COST$75.00$1.67$6.00PRINT COST VS. FORM 245x1x 3.5xLONG TERM COSTS N/A free one-year warranty mandatory service contract (~$15K)ACCESSIBILITY external, third party internal, desktop,anyone can use internal, workshop, run by a technician,often projects will be billed for useROOKSAMPLEPART[The Form 2 is] the best prosumer 3D printer I’ve used."— John Biggs, Editor at TechCrunch "Exceptional Print QualityThe Form 2 delivers professional-quality printed parts at a fraction of the price.HOBBYIST FDM 1Part cost: $0.41Machine cost: $2,500DESKTOP SLA (FORM 2)1,2Part cost: $1.67Machine cost: $3,499INDUSTRIAL SLA 1Part cost: $6.00 Machine cost: $300,0001All parts printed at 100 micron layer height.2Printed in Formlabs ‘Grey Resin’ — one of our Standard prototyping resins.When viewed side-by-side, complex models printed by the Form 2 looked like finished products that you could buy in a store — the same models printed by a FDM printer feel like cheap toys in comparison."— Devindra Hardawar, Senior Editor at Engadget"HIGH-RESOLUTIONFor demanding applications, our carefully-engineered resins capture the finest features in your model.STRENGTH AND PRECISIONOur resins create accurate and robust parts, ideal for rapid prototyping and product development.SURFACE FINISHPerfectly smooth right out of the printer, parts created on the Form 2 have the polish and finish of a final product.Materials LibraryStandard ResinsCustom designed in-house to deliver the highest-quality output, our printmaterials capture astonishing detail without sacrificing durability or toughness.Materials LibraryFunctional ResinsOur growing library of high-performance resins adds new capabilitiesto the Form 2, offering a range of material properties to explore.TOUGH RESINTough is durable, adaptive, and impact-resistant.Developed to withstand high stress or strain, it isideal for snap-fit joints and rugged prototypes.CASTABLE RESINCastable burns out cleanly, without ash orresidue, perfect for capturing your high-resolutionprints through investment casting.FLEXIBLE RESINFlexible is versatile, tactile, and impact-resistant.It is excellent for making parts that arebendable and compressible.Material SpecificationsSTANDARD RESINSCLEARWHITEGREYBLACKPrice $149 /1L$149 /1L$149 /1L$149 /1L200 Microns ✓100 Microns ✓✓✓✓50 Microns ✓✓✓✓25 Microns ✓✓Application• Transparent polish • Internal Channels • Working with light• Neutral T one • Slightly Opaque • Base for Painting• Neutral T one • Slightly Opaque • Smooth surface • Great for photography• Highly pigmented • Most opaque • Small details •Delicate featuresPowerful SoftwarePreform is our powerful print preparation software. Its intuitive interface makes printing easy while also offering powerful features for advanced users.SIMPLE PROCESSAutomatic tools for orientation and support generation make print setup fast and effective.ADVANCED FEATURESOur advanced mode reveals complexity when you need it, allowing you to fine tune details like individual support placement, density, and geometry.PRINT MANAGEMENT TOOLSPrint time and volume estimateshelp you calculate costs."PREFORM SOFTWARE System Requirements Windows 7 and up Mac OS X 10.7 and up OpenGL 2.1 support 2GB RAM FeaturesSimple print setup One-Click-PrintAuto-orient for optimal print position Auto-mesh repairAuto-generation of supportsRotation, scaling, and duplication Layer slicer for path inspection .STL and .OBJ file input Download today at/products/preformT echnical SpecificationsPRINTERPrice$3499Dimensions35 × 33 × 52 cm13.5 × 13 × 20.5 in Weight13 kg / 28.5 lbs Operating Temperature Autoheats to 35° C or 95° FSelf-heating Resin Tank Power Requirements100–240 V1.5 A 50/60 Hz65 WLaser Specifications EN 60825-1:2007 certifiedClass 1 Laser Product405nm violet laser250mW laser Connectivity Wi-Fi, Ethernet and USB Printer Control Interactive T ouch-screenwith Push-button PREFORM SOFTWARESystem Requirements Windows 7 and upMac OS X 10.7 and upFile Type.STL or .OBJ PRINTING PROPERTIESTechnology Stereolithography (SLA)Peel Mechanism Sliding Peel Process with Wiper Resin Fill System Automated Cartridge System Build Volume145 × 145 × 175 mm5.7 × 5.7 ×6.9 inLayer Thickness(Axis Resolution)25, 50, 100, 200 microns0.001, 0.002, 0.004, 0.008 in. Laser Spot Size(FWHM)140 microns0.0055 inchesSupports Auto-GeneratedEasily Removable FINISHING KITIncludes• Finishing Tray • Scraper• Pre and Post-Rinse T ubs• Rinse Basket• Squeeze Bottle • Flush Cutters• Tweezers• Disposable Nitrile Gloves • Removal T ool• Removal JigExpert Customer SupportFormlabs is an established leader in desktop 3D printing, with service centers in North America and the EU.ONE YEAR WARRANTY The Form 2 ships with an industry-leading one-year standard warranty. No expensive contracts. Just service you can trust.CUSTOMER SUPPORTYour Form 2 comes withaccess to our experiencedCustomer Support engineers.Get the help and adviceyou need, fast.SERVICINGIf you run into problems,we’ll make sure your printeris fixed quickly. We coverreturn shipping within ourservice regions too.EDUCATIONAL RESOURCESOur extensive online supportsite is filled with articles,videos, webinars and forumsto provide help from ourgrowing community.Additional ResourcesHelpful linksOrder the Form 2 today Order a sample part Form 2 Quick Start GuideMaterial Data Sheets ContactContact the sales teamContact the support teamORDER TODAY/storeQUESTIONS?******************。
家用3D打印机的使用方法

家用3D打印机的使用方法随着科技的迅猛发展,3D打印技术已经逐渐进入家庭。
家用3D打印机的出现为普通家庭提供了一种全新的创作和制造方式。
本文将介绍家用3D打印机的基本使用方法,让您能够轻松上手使用。
首先,作为家庭用户,选择合适的家用3D打印机非常重要。
市场上有很多不同品牌和型号的3D打印机,您可以根据您的需求和预算进行选择。
同时,了解一些基本的打印技术和特性也是必要的,比如FDM(熔融沉积建模)和SLA(光固化)等。
在购买之前,建议您先阅读一些产品评论和比较,以确保您选择的打印机适合您的家庭使用。
接下来,了解和学习3D建模软件是非常必要的。
与3D打印机配套的软件通常提供了一些基本的建模功能,可以用于创建您想要打印的物体。
例如,Autodesk Fusion 360、Tinkercad等软件都是非常适合初学者的。
这些软件通常具有友好的用户界面和指导性教程,可以帮助您快速上手。
同时,互联网上也有许多免费的3D 模型资源可以使用,这些资源可以大大提高您的创造力和效率。
一旦您掌握了基本的建模技巧,就可以开始进行3D打印准备工作了。
首先,您需要选择合适的打印材料。
常见的打印材料有PLA、ABS、PETG等。
这些材料具有不同的特点和适用范围,您可以根据您的需求进行选择。
此外,您还需要了解打印机的工作原理和参数设置。
每台打印机都有不同的要求和设置选项,您需要根据您使用的打印机型号进行相应的调整。
通常,您需要设置打印温度、层厚度、打印速度等参数。
在进行打印之前,您需要先进行切片操作。
切片是指将3D模型切割为一层一层的薄片,以便打印机理解和执行。
切片软件通常由打印机制造商提供,可以将建模软件输出的3D模型转换为打印机可以识别的文件格式。
切片过程中,您可以选择不同的切割选项,如打印速度、外壳厚度、填充密度等。
这些选项将直接影响到打印质量和打印时间。
因此,您可以根据实际需求进行调整。
一旦完成切片,就可以将文件传输到打印机上进行打印了。
3D打印技术的工作流程和使用方法

3D打印技术的工作流程和使用方法近年来,3D打印技术正逐渐崭露头角并广泛应用于各个领域。
3D打印技术以特有的“增材制造”方式,能够快速、精确地将数字模型转化为实体物体。
本文将详细介绍3D打印技术的工作流程和使用方法,以帮助读者更好地理解和应用这一前沿技术。
一、3D打印技术的工作流程1. 建模设计:3D打印的第一步是进行建模设计。
设计师使用计算机辅助设计(CAD)软件创建一个数字模型,包括物体的形状、大小和细节等信息。
这个数字模型将作为3D打印的输入。
2. 切片处理:一旦设计师完成建模设计,数字模型将被导入切片软件进行处理。
在这一步骤中,软件将数字模型分割成一层一层的薄片,然后生成每一层的切片数据。
这些切片数据将确定3D打印机每一层打印时的运动路径。
3. 打印设置:在进行3D打印之前,操作者需要进行打印设置。
这包括选择适当的打印材料、打印机参数和打印质量等。
不同的材料和参数设置将对打印效果产生显著影响。
4. 打印操作:一旦设置完成,3D打印机就可以开始工作了。
打印机通过加热和挤压打印材料,逐层堆叠并固化每一层,直到最终构建出整个物体。
这一过程通常需要较长的时间,取决于物体的大小、复杂度和选定的打印质量。
5. 后处理:一旦打印完成,打印出来的物体还需要进行一些后处理工作。
例如,去除支撑结构、进行砂磨、喷涂或者其他装饰处理,以提高打印物体的外观和功能。
二、3D打印技术的使用方法1. 制造原型:3D打印技术最早应用于制造原型。
传统上,制造原型需要经历繁琐的加工过程,但借助3D打印技术,只需将设计好的数字模型输入到3D打印机中,即可直接打印出逼真的原型。
这种快速、精确的制造原型方法极大地缩短了开发周期,并降低了制造成本。
2. 定制产品:3D打印技术为定制产品的生产提供了可能。
通过3D打印技术,消费者可以按照自身需求和喜好,定制出独一无二的产品。
这种个性化生产的模式,为消费者带来了更多选择,并改变了传统供应链的运作方式。
创意力3D打印机用户手册说明书
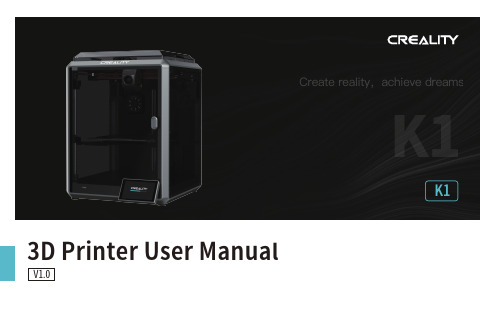
K13D Printer User ManualV1.0Thank you for choosing our products. For the best experience, please read this User Manual carefully and strictly follow the instructions to operate the printer. Ourteams will always be ready to provide you with the best services. Please contact us via the phone number or e-mail address provided at the end of this User Manual when you encounter any problem with the printer. For a better experience in using our products, you can also learn how to use the printer in the following ways:Accompanied instructions: you can find the relevant instructions and videos in the USB flash disk.You can also visit our official website (https://) to find information regarding software, hardware, contact information, device instructions, device warranty information, and more.1. About the Device 1.1 About the Printer 1.2 Device Specifications 1.3 Packing List2. Unboxing 2.1 Unpacking Steps 2.2 Install the Product 2.3 Power-on guide3. About the User Interface 3.1 Main、Prepare 3.2 Files 3.3 Tune、Support4. First Printing 4.1 USB flash disk Printing 4.2 LAN Printing5. Functional Specification 5.1 Extrude、Filament Retreat6. Tips and Routine Maintenance 6.1 Maintenance Items 6.2 Error Code Instructions 6.3 Precautions for printing ...................................................................................................................................................................................................................................................................................................................................................................................................................................................................................................................................................................................................................................................................................................................................................................................................................................................................................................................................................................................................................................................................................................................................................................................................................................................................................................................................................................................................................................................................................................................................................................................................................................................................................................................................................................................................................................................................................................................................................................................................................................................................................................................................................................................................................................................................................................................................................................................................................................................................................................................................................................................................................................................................................................................................................................................................................................................................................................................................................................................................................................................................................................................................................................................................................................................................................................................................................................................................................................................................................................................................................................................................................................................................................................................................................................................................................................................................................................................................................................................................................................................................................................................................................................................................................................................................................................................................................................................................................................................................................................................................................................................................................................................................................................................................................................................................................................................................................................................................................................................................................................................................................................................................................................................................................................................................................................................................................................................................................................................................................................................................................................................................................................................................................................................01-0301-0102-0203-0309-0911-1112-1216-1617-1718-1819-2017-2013-1509-1110-1012-1516-1604-0804-0506-0708-081.1 About the Printer1.3 Packing ListWrench and Screwdriver ×14Touch screen 2Filament3Blade ×15M6 socketspanner ×112After-sales ServicesCard ×115Power Cable ×111Material barrel ×161.2mm nozzle cleaner ×1813Tool Box ListCutting plier ×17USB flash disk ×19LubricatingGrease ×1Quick Guide ×1* Tips: the above accessories are for reference only. Please refer to the physical accessories!2.1 Unpacking StepsKeep the blue cube in the figure clean of debris and then click "OK".① Network Settings② Time Zone Settings③ Creality Cloud binding④ Self-inspection⑤Self-testing2.3 Power-on guide⑥ Self-test completedNote: The current interface is for reference only. Due to the continuous upgrading of functions, it shall be subject to the latest firmware UI published on the official website.Prepare3.1 Tune、Prepare① Local model② Press and hold on the model to multi-selectand copy it to a USB flash drive③ USB flash drive model ④ HistoryTips: Choosing print calibration can improve print quality 3.2 FilesNote: The current interface is for reference only. Due to the continuous upgrading of functions, it shall be subject to the latest firmware UI published on the official website.SupportSystemSystem HelpNetworkError historyUpload LogNote: The current interface is for reference only. Due to the continuous upgrading of functions, it shall be subject to the latest firmware UI published on the official website.4.1 USB flash disk Printing④ Printing③ Select to print② USB flash drive modelNote: The current interface is for reference only. Due to the continuous② Choose a language and region;③ Choose a Printer;⑤ Select to download the model;④ Click on "Model Library" and select the model file;4.2 LAN Printing Creality Print①Download at()or find the software on a USB flash driveand install it.Note: The current interface is for reference only. Due to the continuous upgrading of functions,it shall be subject to the latest firmware UI published on the official website.4.2 LAN Printing⑥ Log into a Creality Cloud account;⑦Start slicing;⑧Selection of LAN printing;⑩ Device List;Add a device: a. Add by scanning;→Select a device;⑪ Device Details 。
Fprinter3D打印机自动调平功能使用说明

调平打印机初次使用前或者剧烈震动后,请调平后再打印。
调平过程如下:1、用“10mm”档位将打印头降低至距离平台10mm左右,然后用“1mm”档位继续降低至1mm左右,最后用“0.1mm”档位将打印头降低至刚好接触平台。
2、此时,返回上一层。
点击“设Z为零”,然后将补偿的“√”点击成“×”。
3、返回上一层,点击“调平”,打印机进入自动调平程序。
4、调平结束后,将“×”点成“√”。
调平过程结束。
软件安装及参数设置1、将Slicer文件夹存放于英文路径下。
打开Slicer文件夹,软件为免安装版,双击“Slic3r.exe”打开软件。
点击“文件”,加载打印参数设置文件。
参数配置文件位于“config”文件夹下。
点击“加载配置”,加载config1.ini点击“加载全部配置”,加载Slic3r_config_bundle1.ini2、将图示配置都选择为“S2+”打印一、进料1、将料盘托架安置于打印机顶部:把轴承和托架的槽对准,卡入。
2、将打印机预热点击液晶屏右侧按钮,进入主菜单,点击“预热”,选择对喷头进行预热。
3、将料盘放在托架上,把料丝的头剪成尖头,从顶部的进料口引入,待预热完成后,经挤出齿轮插入进料管,从喷头挤出。
1、打开Slicer软件,点击“增加模型”将模型导入,并可通过图示功能对模型进行调整。
2、通过“切片配置”可对“层高”、“填充”等参数进行设置。
3、确定好层厚、填充密度、是否允许支撑等参数后,点击“导出G代码”,将切片文件保存在SD卡中。
三、开始打印1、用打印机固体胶均匀涂抹于平台,将SD卡插入打印机,点击屏幕上的“打印”,选择刚才保存的文件进行打印。
2、打印机自行预热,片刻后,打印机便开始工作。
打印完成后,打印机喷头将自动归位。
用小铲子将模型取下,把平台上的残料清理干净。
3、待打印头冷却后再关机,刚打印完成后勿立即关闭打印机。
断电续打如遇打印中途意外断电,再次通电时无须重新打印,S2+具备断电续打功能。
FDM (simplify)3D打印切片说明书

simplifysimplify说明书目录第一章.软件页面介绍一.主页介绍 (2)二.界面基本操作 (2)三.常用菜单栏介绍 (3)第二章.参数设置说明一.挤出机页面设置 (5)二.层的选项页面 (6)三.附加选项页面 (7)四.填充页面设置 (8)五.支撑页面设置 (9)六.温度页面设置 (10)七.冷却页面设置 (11)八.G代码页面设置 (11)九.脚本页面设置 (12)十.速度页面设置 (12)十一.其他选项页面设置 (13)十二.高级选项页面设置 (14)第三章.整个切片的流程一.整个切片的流程 (15)第一章.软件页面介绍一.主页介绍图A(1)菜单栏:Simplify3D切片软件主要功能里面有模型导入/导出、工作场景保存、模型修复、固件配置等。
(2)导入模型:显示你已经导入的模型名称,你可以再次导入也可直接删除你不需要的模型。
(3)打印参数设置:设置切片参数,如温度、打印速度、支撑、回抽速度等。
(4)成型平台:显示你已经导入的三维模型,双击模型可以移动模型、对模型进行缩放、旋转模型等。
(5)工具栏:工具栏主要有以下功能:• 视图的切换;• 模型/坐标是否显示设置;• 机器控制面板;• 手动设置模型支持。
二.界面基本操作(1)鼠标右键:点击(不放)成型平台,可以拖动成型平台。
(2)鼠标滚轮:放大/缩小视图;(3)鼠标左键:点击(不放)成型平台,可以旋转成型平台,切换不同视图观看模型.找到菜单栏•找到菜单栏找到菜单栏•找到菜单栏三.常用菜单栏介绍工厂文件:为方便下一次使用FFF 配置文件:功能和工厂文件次打开时为修改过的模样,已保存/(1) 工厂文件(2) FFF 配置文件点击文件选项•点击文件选项保存工厂文件•打开工厂文件点击文件选项•点击文件选项导出FFF 配置文件•导入FFF 配置文件图B次使用时不需要重新设置参数,可以保存配置参数。
厂文件一样,但是FFF 配置文件如果上一次使用时修样,已经不是第一次保存时的模样。
- 1、下载文档前请自行甄别文档内容的完整性,平台不提供额外的编辑、内容补充、找答案等附加服务。
- 2、"仅部分预览"的文档,不可在线预览部分如存在完整性等问题,可反馈申请退款(可完整预览的文档不适用该条件!)。
- 3、如文档侵犯您的权益,请联系客服反馈,我们会尽快为您处理(人工客服工作时间:9:00-18:30)。
打印输出
打印输出流程
打印输出
1. 导入三维模型
直接将三维模型拖入即可,或者选择选择Import功能导入模型,如下图。
打印输出
2.选择切片参数
点击edit process setting 选择切片参数默认文件,微调参数(如加底、加支撑、层厚、 填充率等,具体参数位置及调整方法见simplify 3d 操作说明文件),确认后点击OK。
导入切片参数
2、导入配置文件
在file菜单下点击import fff profile ,然后选择预制好的参数模板,选择导入。
导入切片参数
3、导入参数确认
导入参数后可以在配置栏内点击edit process setting进入参数设置对话框,选择参数为s2+的导
入文件。ห้องสมุดไป่ตู้
注意:一般软件安装后会有默认参数,在第一次切片前务必确认好参数配置为导入的参数 (Fprinter S2+),切片后关闭软件,下次开始时软件会默认上次的切片参数。
Step 8:请参照右图进行选择,喷嘴直径是0.4mm,打印耗材直径为1.75mm
软件安装
Step 9:完成软件初始配置
导入切片参数
1、界面布局
(1)菜单栏 Simplify3D切片软 件主要功能去,里 面有模型导入/导出、 工作场景保存、模 型修复、固件配置 等。 (2) 模型 显示你已经导入的 模型名称,你可以 再次导入(Import) 也可直接删除 (Remove)你不需要 的模型。 (3) 参数设置 设置切片参数,如 温度、打印速度、 支撑、回抽速度等。
软件安装
Step 2:
软件安装
Step 3:选择安装目录
软件安装 Step 4:
软件安装
Step 5:完成安装后将loader64复制到文件安装目录
软件安装
Step 6 :双击loader64文件进入软件
软件安装
Step7:进入软件后,设置初始参数
选择打印机类型:选择 “other”
软件安装
(4)打印平台 显示你已经导入 的三维模型,双 击模型可以移动 模型(Absolute position)、对模 型 进行缩放(Object Scaling)、旋转 模型(Rotational Offsets)。 (5)工具栏 工具条功能区主 要有以下功能: • 视图的切换; • 模型/坐标 是否显示设 置; • 机器控制面 板; • 手动设置模 型支持
Simplify3D 快速使用指南
乐创3D打印
Simplify 3D使用流程
一、软件安装 二、导入切片参数
三、打印输出
软件安装
首先根据电脑型号选择32位或64位系统软件进行安装安装,建议用WIN7 64位 电脑是win 7 64位系统,如图1-2所示,直接双击.exe文件即可。
安装过程: Step 1:
返回初始界面后点击prepare to print,生成预览文件。
打印输出
3.预览及输出
切片完成后生成预览文件,可在左上角查看打印时间、耗材用量 等信息、下方 可以通过拖拽预览打印过程,预览没问题后左下角点击SD卡输出,指定好文件路径,
生成gcode打印文件。
打印输出
4.打印 将切好gcode文件考入sd卡,将SD卡插入打印机,在打印界面,选择文件, 点击即开始打印。